本教程演示如何使用 Rule Engine 向客户发送邮件。
- Use case
- 前置条件
- 创建客户并分配设备
- Message flow
- Configure Rule Chains
- Modify Create & Clear Alarms with details:
- Post telemetry and verify
- 另请参阅
- 下一步
说明: 本教程基于 send email on alarm 教程及其使用场景。我们将复用前述教程的 rule chains,并添加若干 rule 节点以向所分配设备的客户发送邮件。
Use case
假设你的设备使用 DHT22 传感器采集并上报温度到 ThingsBoard。 DHT22 适用于 -40 到 80°C 的温度范围。我们希望当温度超出该范围时生成 Alarm,并在 Alarm 创建时发送邮件。
在本教程中,我们将配置 ThingsBoard Rule Engine 以实现:
-
当温度越界(低于 -40 或高于 80)时,向设备所属客户发送邮件。
-
将消息 originator 的属性补充到消息中。
-
使用 Script Transform 节点从入站消息提取额外数据并写入邮件正文。
前置条件
请确保已完成以下指南并阅读所列文章:
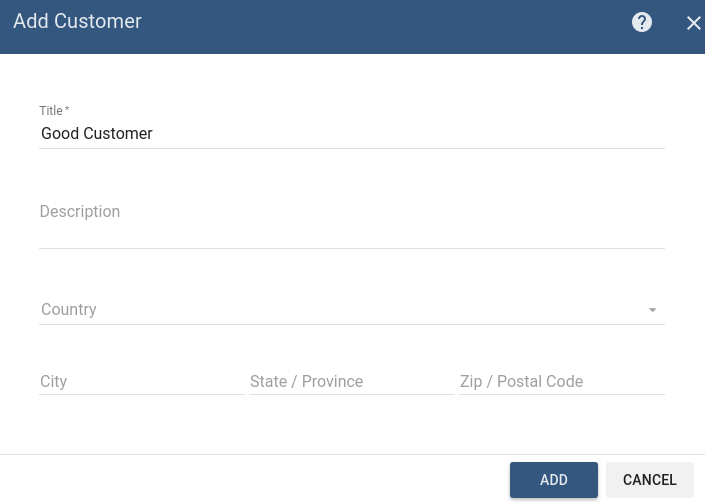
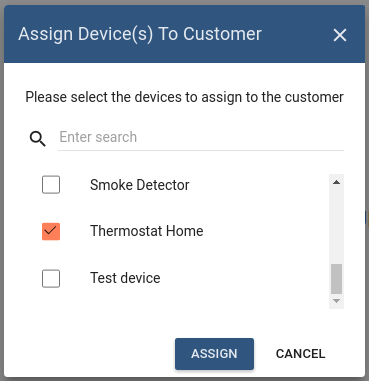
创建客户并分配设备
首先需要创建 Customer,并将设备分配给该客户。下图展示了操作步骤:
Customer 创建完成后,需要将设备 Thermostat Home(其创建过程见 Create & clear alarms)分配给该客户。
进入 Customer 页面中的 Manage devices 并选择对应设备。

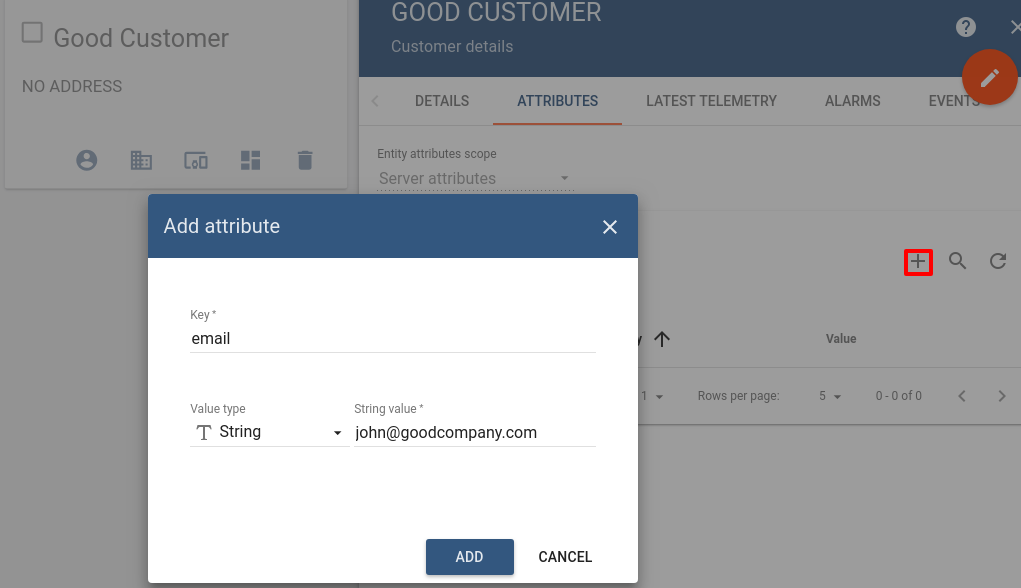
接下来,需要为该 customer 添加 server scope 属性 email。注意:告警邮件将发送到这个邮箱,建议填写可用于测试的邮箱地址。
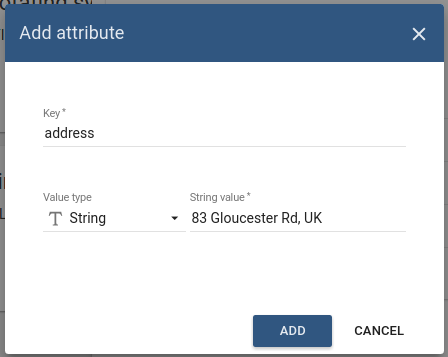
还需要为设备 Thermostat Home 添加 server scope 属性 address:
Go to Devices -> Thermostat Home -> Attributes -> Server attributes and press + button to add address
Message flow
本节说明本教程中在初始 rule chain 里新增或修改节点的作用:
- Node A: Customer attributes node.
- 该节点用于读取 customer 的 email 属性,并保存到 Message Metadata 的 customerEmail 字段。
- Node B: Originator attributes node.
- 该节点用于读取 originator(即入站消息来源设备)的 address server scope 属性,并写入 Message Metadata。
- Node C: To Email node.
- 该节点根据配置模板构建实际邮件内容。
- Node D: Rule Chain node.
- 将入站消息转发到指定 Rule Chain Create/Clear Alarm & Send Email to Customer。
Configure Rule Chains
本教程复用了 send email on alarm 中的 Rule Chains。
我们在 Rule Chain Create/Clear Alarm & Send Email 中新增了 Message flow 小节描述的节点,
并将该 rule chain 重命名为 Create/Clear Alarm & Send Email to Customer。
下图展示了上述 Rule Chains 的结构:
- Create/Clear Alarm & Send Email to Customer:
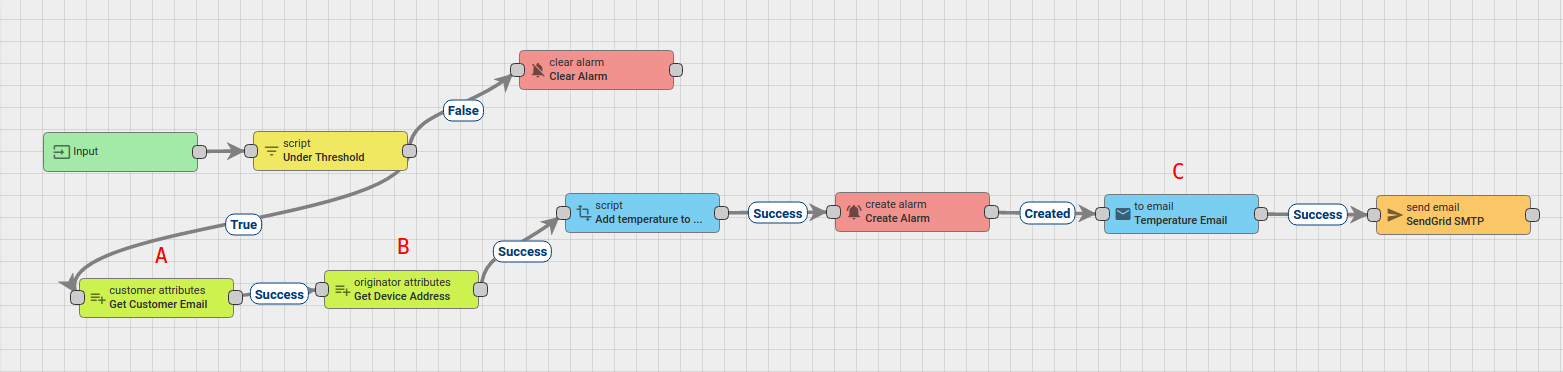
- Root Rule Chain:

下载并导入用于 Create/Clear Alarm & Send Email to Customer: 的 json file。 在 root rule chain 中按上图创建 Node D,将 telemetry 转发到导入后的 rule chain。
下文将说明如何修改该 rule chain,重点是新增节点 A、B,并修改节点 C。
Modify Create & Clear Alarms with details:
修改所需节点
在该 rule chain 中,你需要新增 2 个节点并修改 1 个节点,具体如下:
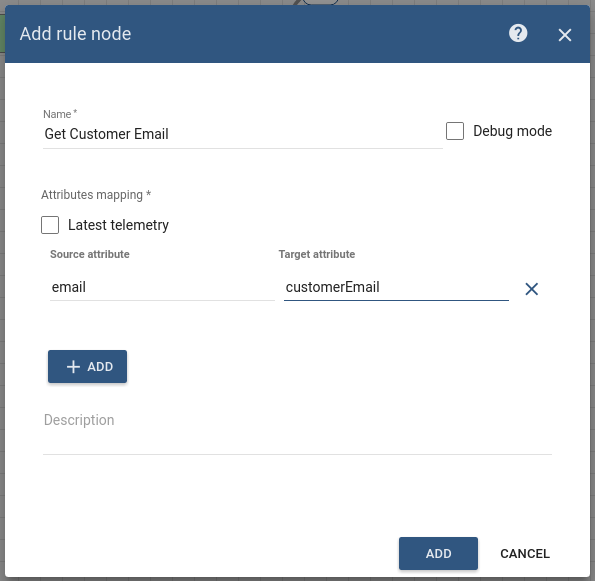
Node A: Customer attributes
-
Add the Customer attributes node and connect it to the Filter Script node with a relation type True.
该节点用于读取 customer 的 email 属性,并写入 Message Metadata 的 customerEmail 字段。 -
按下表填写字段:
| Field | Input Data |
| Name | Get Customer Email |
| Source attribute | |
| Target attribute | customerEmail |
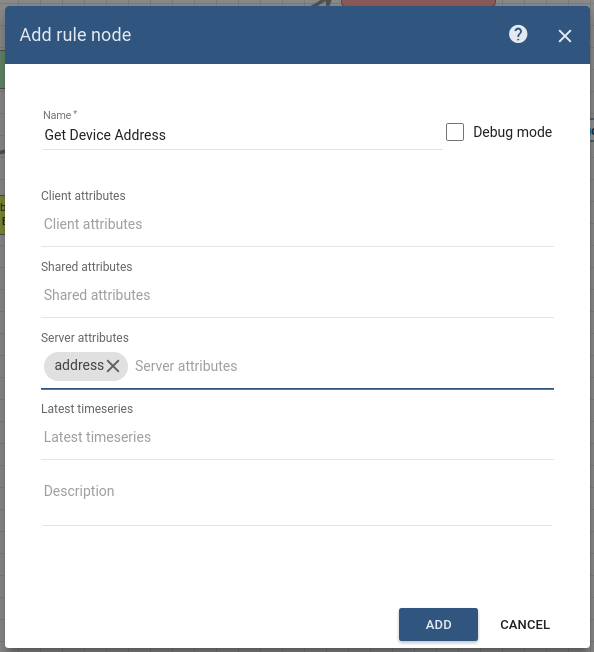
Node B: Originator attributes
-
Add the Originator attributes node and pastes it between the nodes: Customer attributes and Create alarm with a relation type Success.
该节点用于读取 originator (Thermostat Home) 的 address server scope 属性,并保存到 Message Metadata 的 ss_address 字段。 -
按下表填写字段:
| Field | Input Data |
| Name | Get Device Address |
| Server attributes | address |
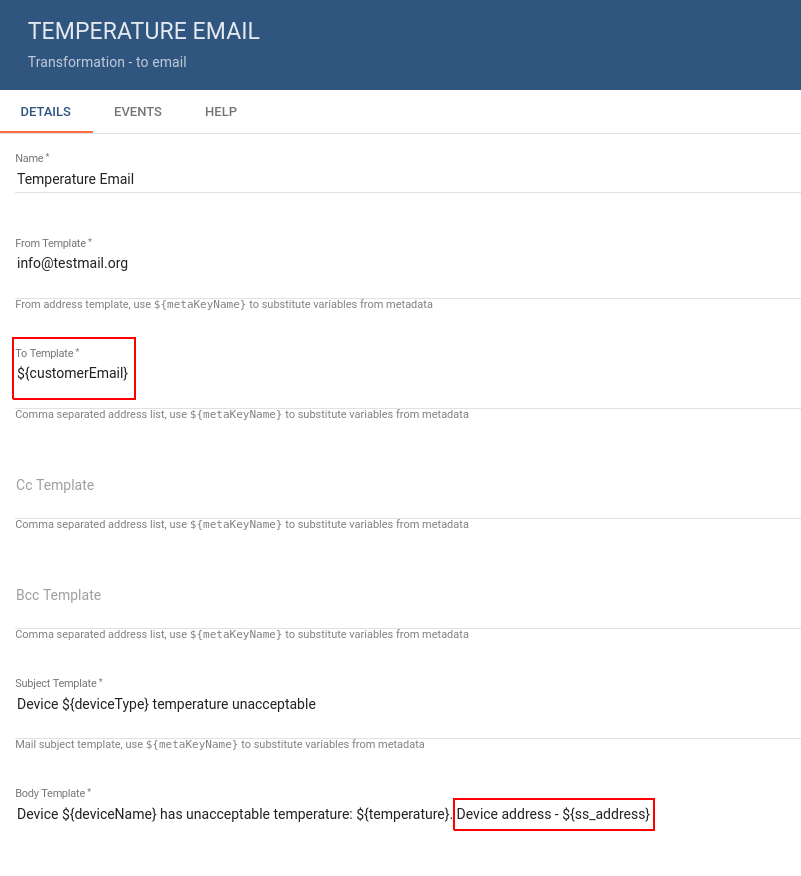
Node C: To Email
-
Modify the To Email node. For this, we need change some fields in details of this node, namely: 需要修改 To Email 节点,主要调整以下字段:
-
To template.
-
Body tempalte。
-
-
按下表填写字段:
| Field | Input Data |
| To template | ${customerEmail} |
| Body tempalte | Device ${deviceName} has unacceptable temperature: ${temperature}. Device address - ${ss_address} |
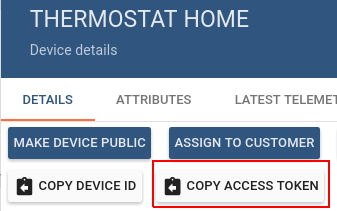
Post telemetry and verify
设备 telemetry 上报将使用 Rest APIs 的 Telemetry upload APIs。 在此之前,需要从设备 Thermostat Home 复制 access token。
发送 temperature = 99,邮件应发送成功:
1
2
3
curl -v -X POST -d '{"temperature":99}' http://localhost:8080/api/v1/$ACCESS_TOKEN/telemetry --header "Content-Type:application/json"

**you need to replace$ACCESS_TOKENwith actual device token**
请注意:当 alarm 只是更新时不会发送邮件,只有在 alarm 被创建时才会发送。
最后应能看到邮件已收到且字段值正确。(若未收到,请检查垃圾邮件箱)

此外,你还可以了解如何:
-
定义其他告警处理逻辑,例如通过 Telegram Bot 向 Telegram App 发送通知。
-
在 Create Alarm 与 Clear Alarm 节点中配置 Alarm Details 功能,并通过添加 alarm widget 在 Dashboard 中可视化告警。
-
在设备离线时创建 alarm。
具体可参考 另请参阅 小节中的链接。