仅专业版支持Platform Integrations功能。
请使用ThingsBoard Cloud或自行安装平台实例。
本教程演示如何通过旋钮控制部件向外部MQTT broker发送数据。
用例
假设您的设备用于控制温度,希望借助ThingsBoard将其用作外部MQTT broker。
本教程将配置ThingsBoard规则引擎,使其通过MQTT协议自动发送消息。您可将本教程作为更复杂任务的基础。
MQTT集成可将现有协议和负载格式转换为ThingsBoard消息格式,适用于多种部署场景:
- 从外部系统、IoT平台或连接提供商后端流式传输设备和/或资产数据。
- 从云上运行的自定义应用流式传输设备和/或资产数据。
- 将采用自定义基于MQTT协议的现有设备连接至ThingsBoard。
请参阅集成示意图了解更多。

前置条件
我们假设您已完成以下指南并阅读了以下文章:
模型定义
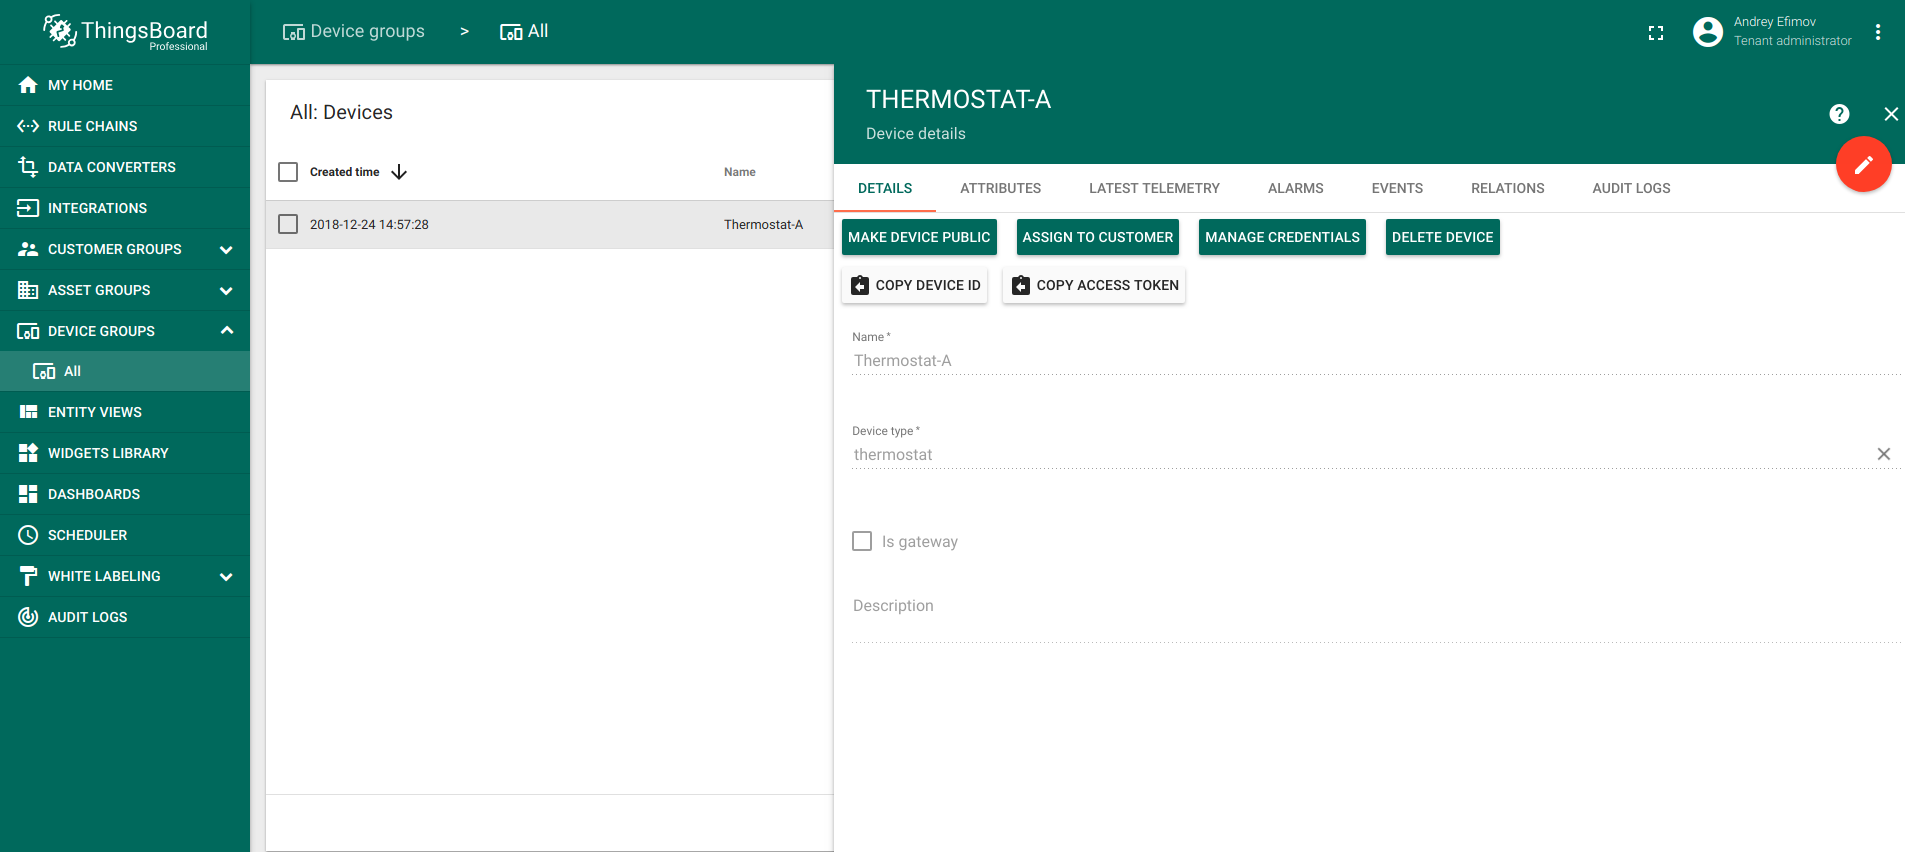
我们将操作名为“Thermostat-A”、类型为“thermostat”的温度传感器设备,该设备将在集成运行过程中自动创建。
入门
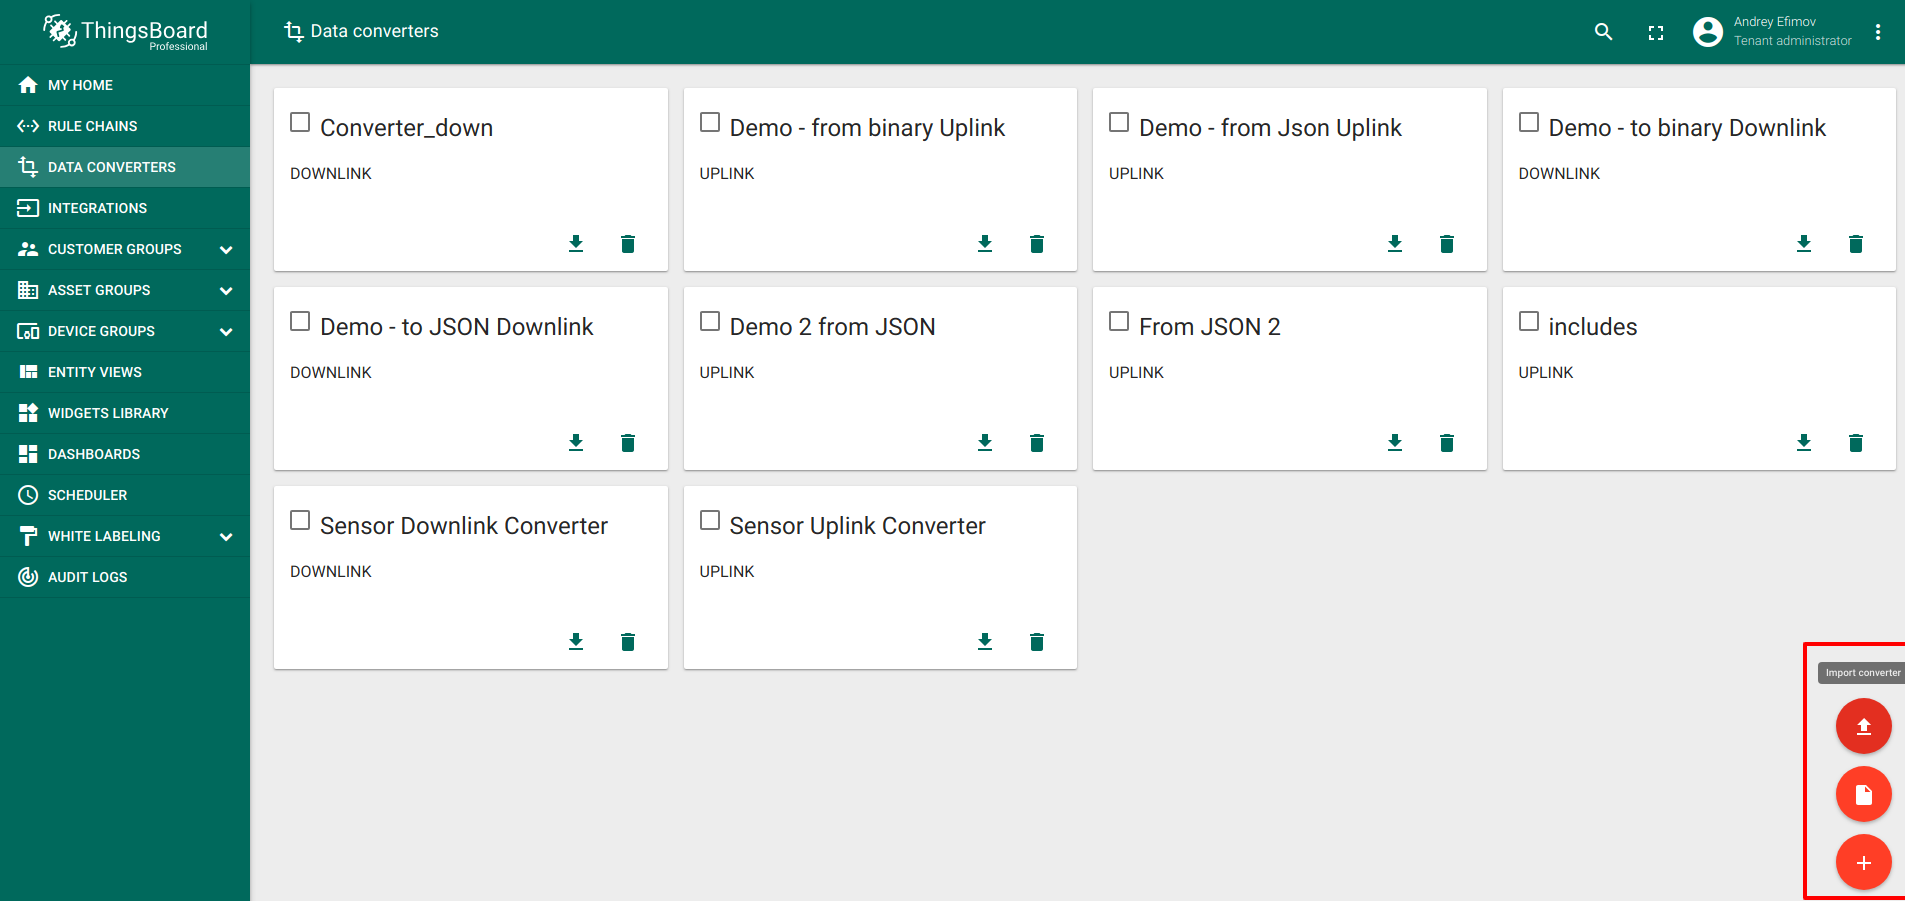
创建转换器
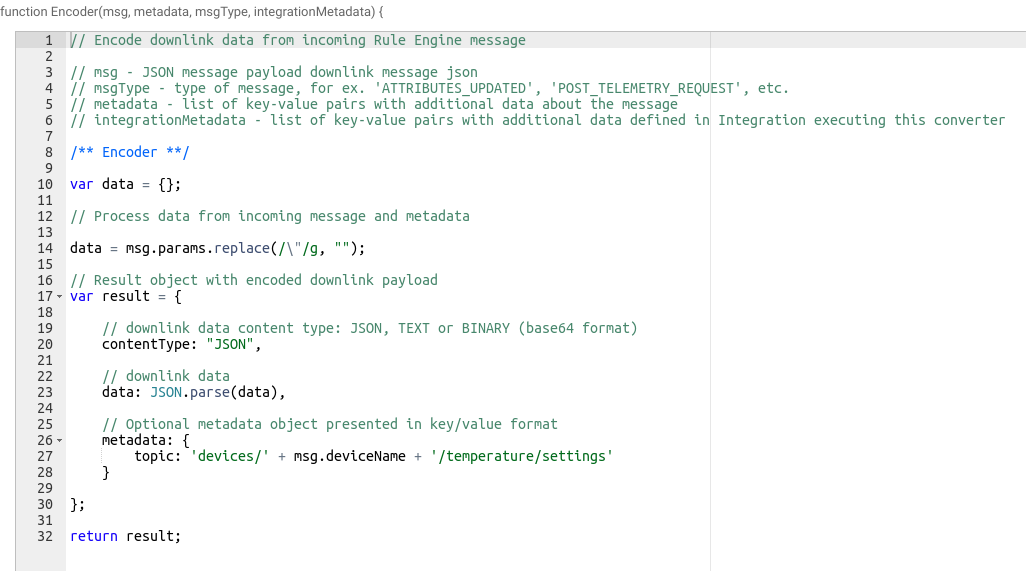
为使集成正常工作,需创建下行和上行转换器。
- 进入Data Converters -> Add new Data Converter -> Import Converter
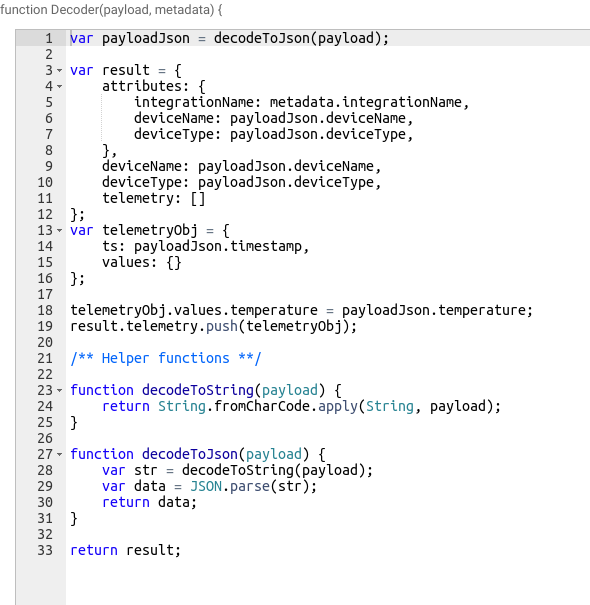
可以如下核实:
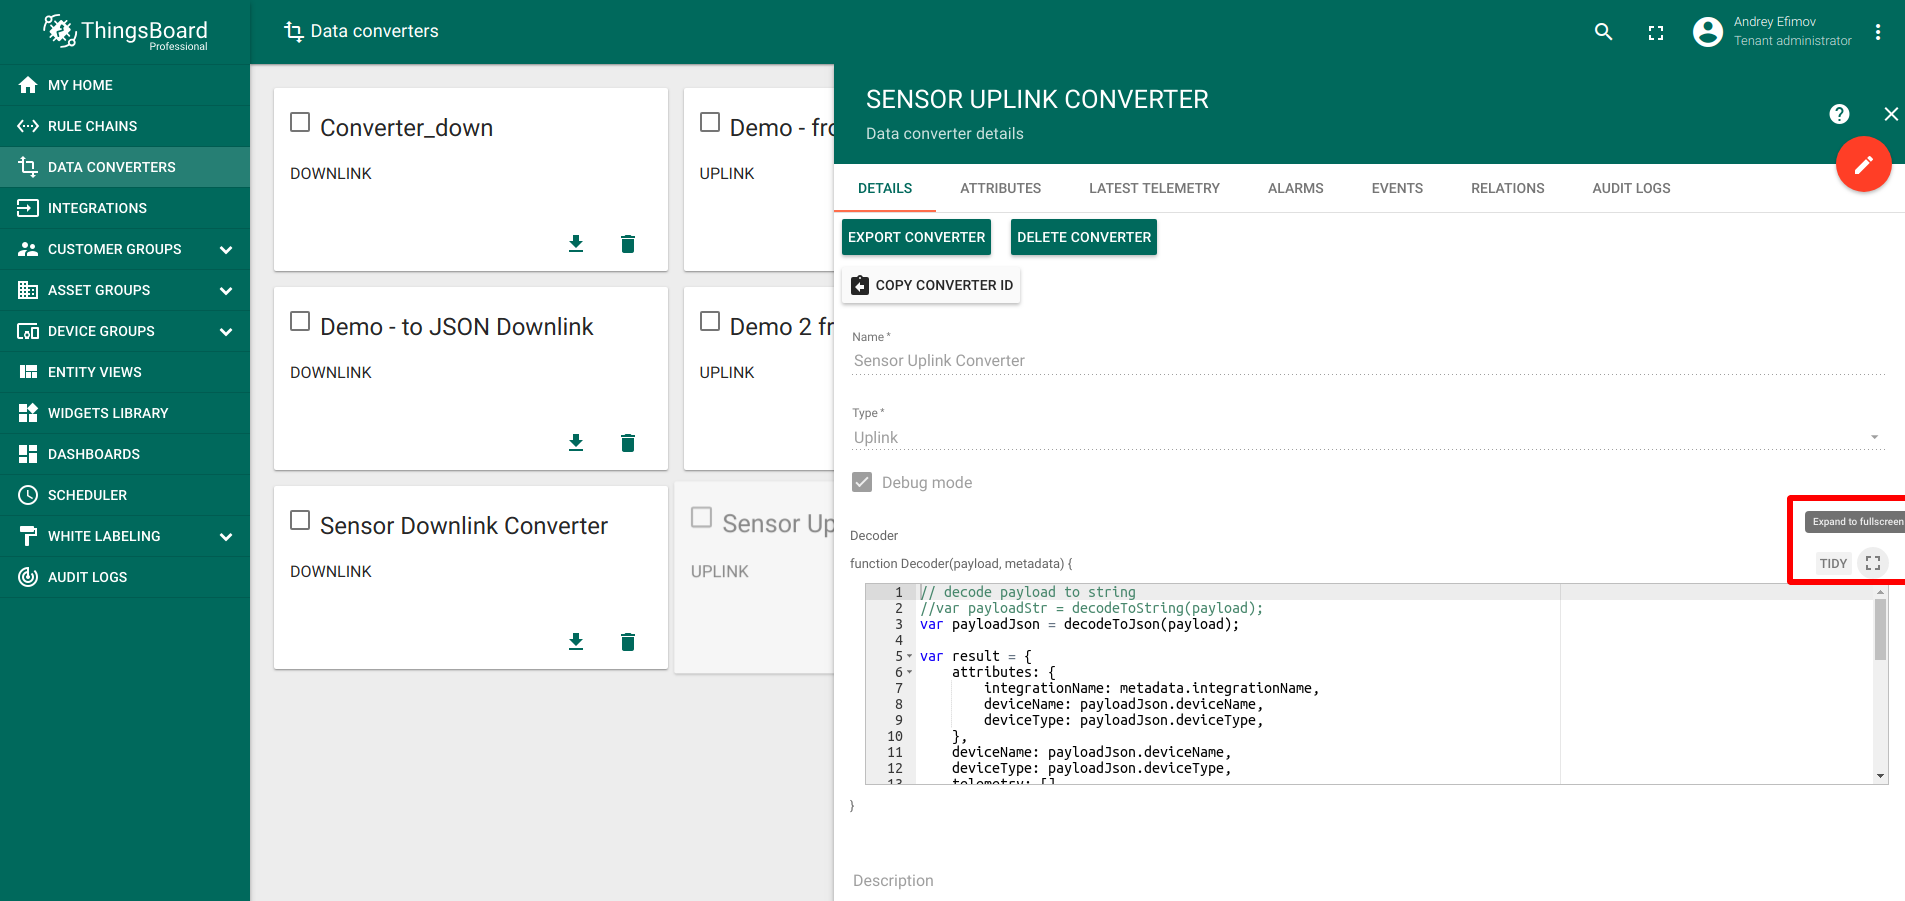
上行转换器应如下所示:
下行转换器应如下所示:
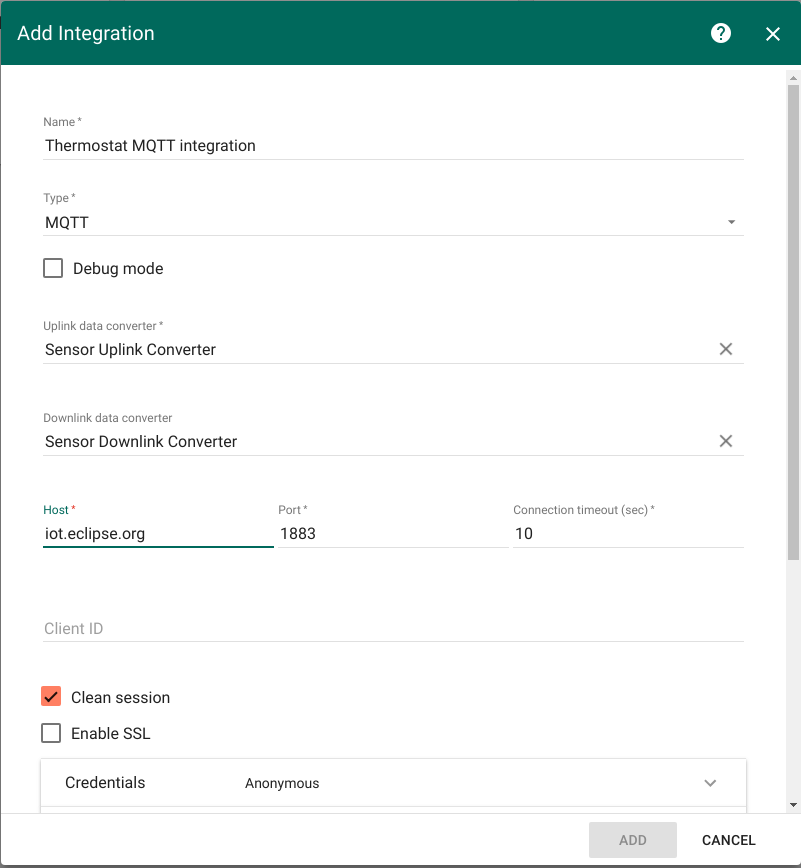
创建集成
集成需使用远程服务器。本例可使用iot.eclipse.org作为MQTT数据源。 集成配置如下:
- 进入Integrations -> Add new Integration

- 按下表填写各字段:
| 字段 | 输入数据 |
| Name | Thermostat MQTT integration |
| Type | MQTT |
| Debug mode | False |
| Uplink data converter | Sensor Uplink Converter |
| Downlink data converter | Sensor Downlink Converter |
| Host | iot.eclipse.org |
| Port | 1883 |
| Connection timeout(sec) | 10 |
| Client ID | (空) |
| Clean session | True |
| Enable SSL | False |
| Credentials | Anonymous |
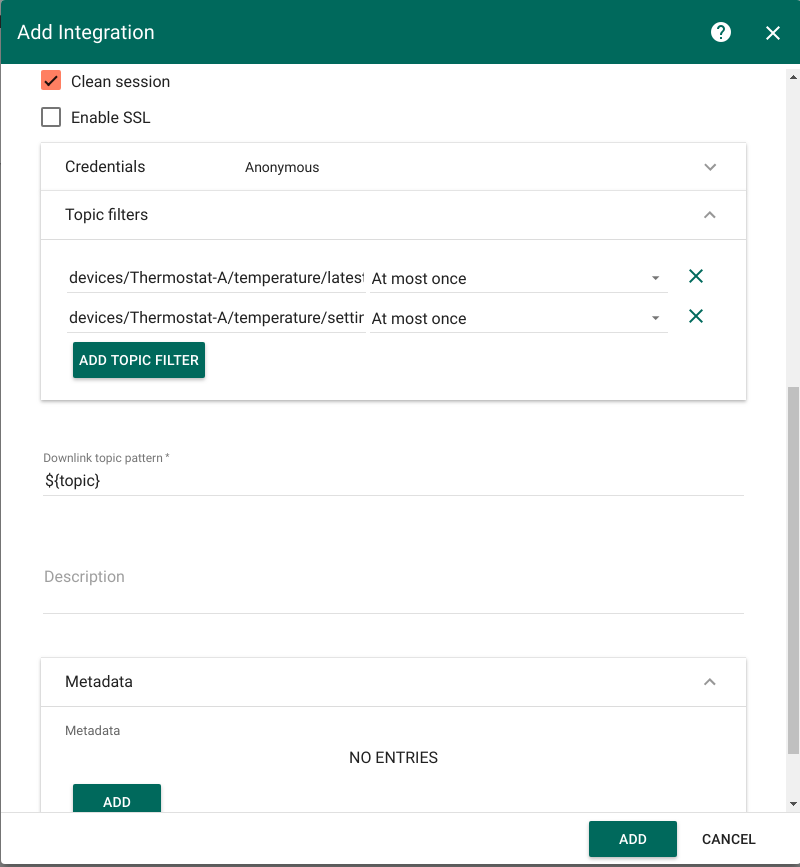
| Topic filters | devices/Thermostat-A/temperature/latest |
| QOS | At most once |
| Topic filters | devices/Thermostat-A/temperature/settings/ |
| QOS | At most once |
| Downlink topic pattern | ${topic} |
| Description | (空) |
| Metadata | (空) |
- 填写完所有字段后,点击ADD按钮。
配置仪表板
启动设备模拟器
为使部件在没有真实设备的情况下工作,需启动模拟器。
首先,检查node、npm和npm的mqtt模块是否已安装,使用以下命令:
1
2
3
4
5
6
#to display node version
node -v
#to display npm version
npm -v
#to display npm mqtt module version
npm list mqtt
若未安装npm,可从npm官网安装, 并使用以下命令安装npm MQTT模块:
1
sudo npm install mqtt --save
以及从Node.js官网安装node。
下载文件并使用以下 命令启动设备模拟器:
1
node mqtt-downlink-virtual-device.js
注意:设备模拟器应放置在node-modules所在的文件夹中。
效果演示
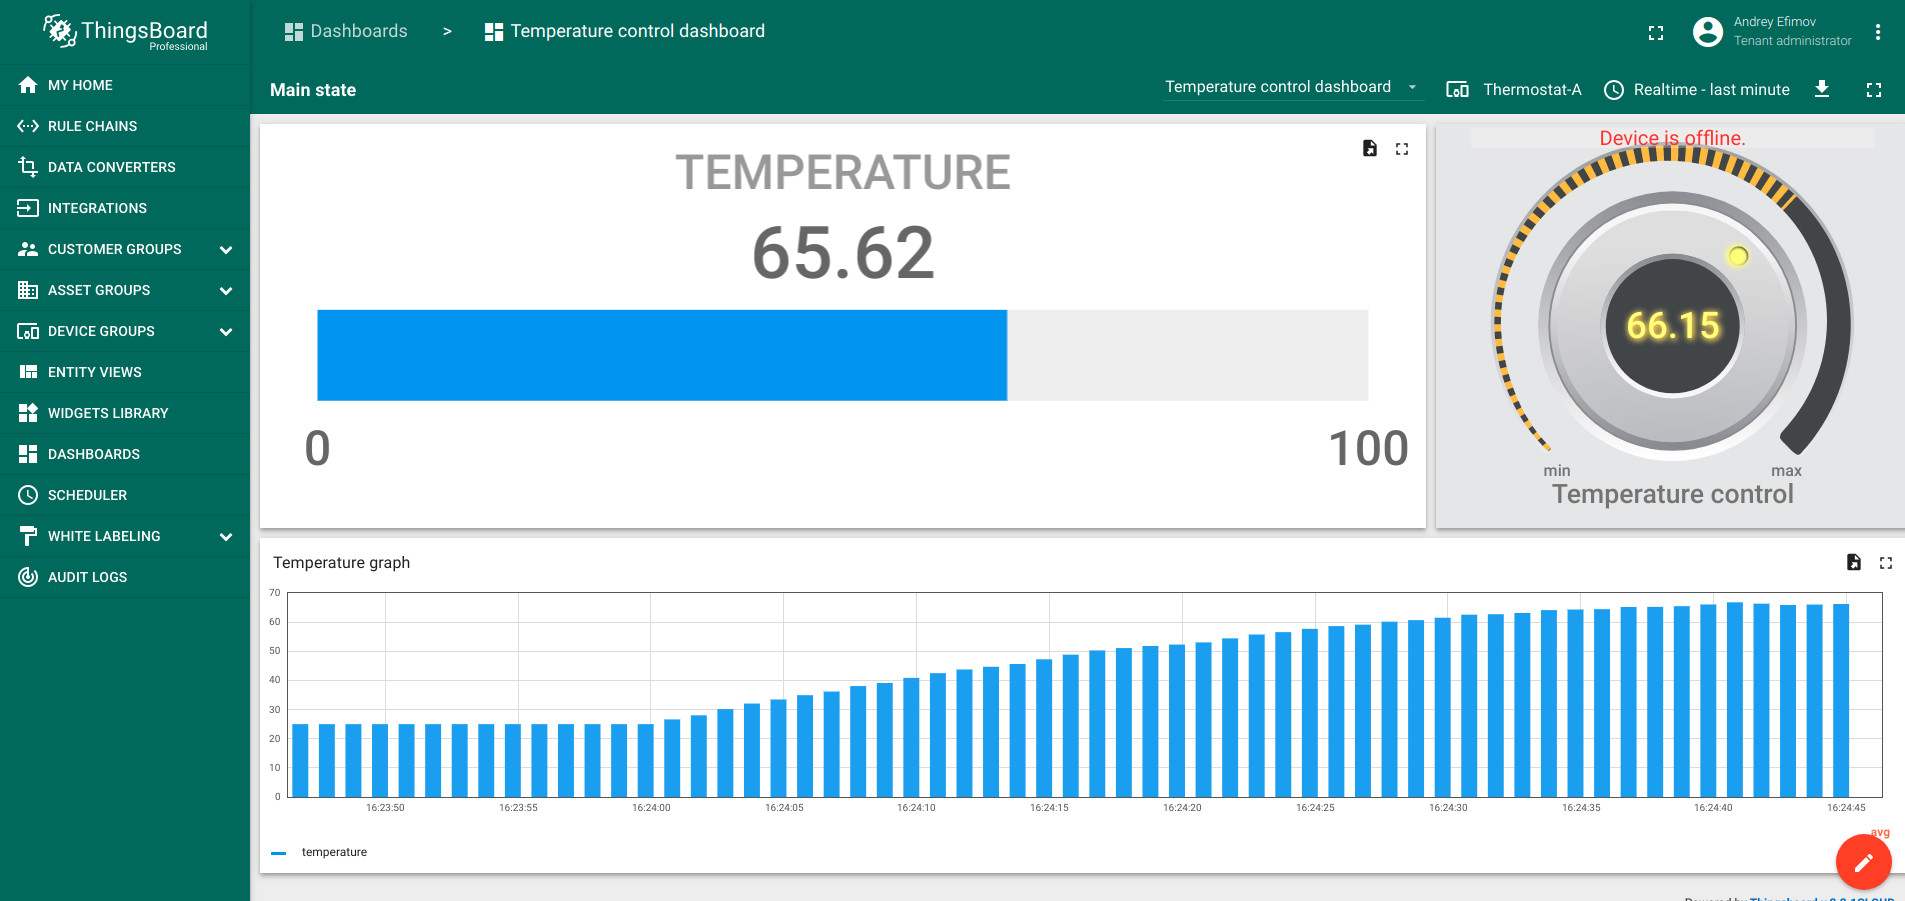
使用控制部件(本例为旋钮)会导致仪表板上的值发生变化。
消息流
本节说明本教程中每个节点的作用。
修改rule chain
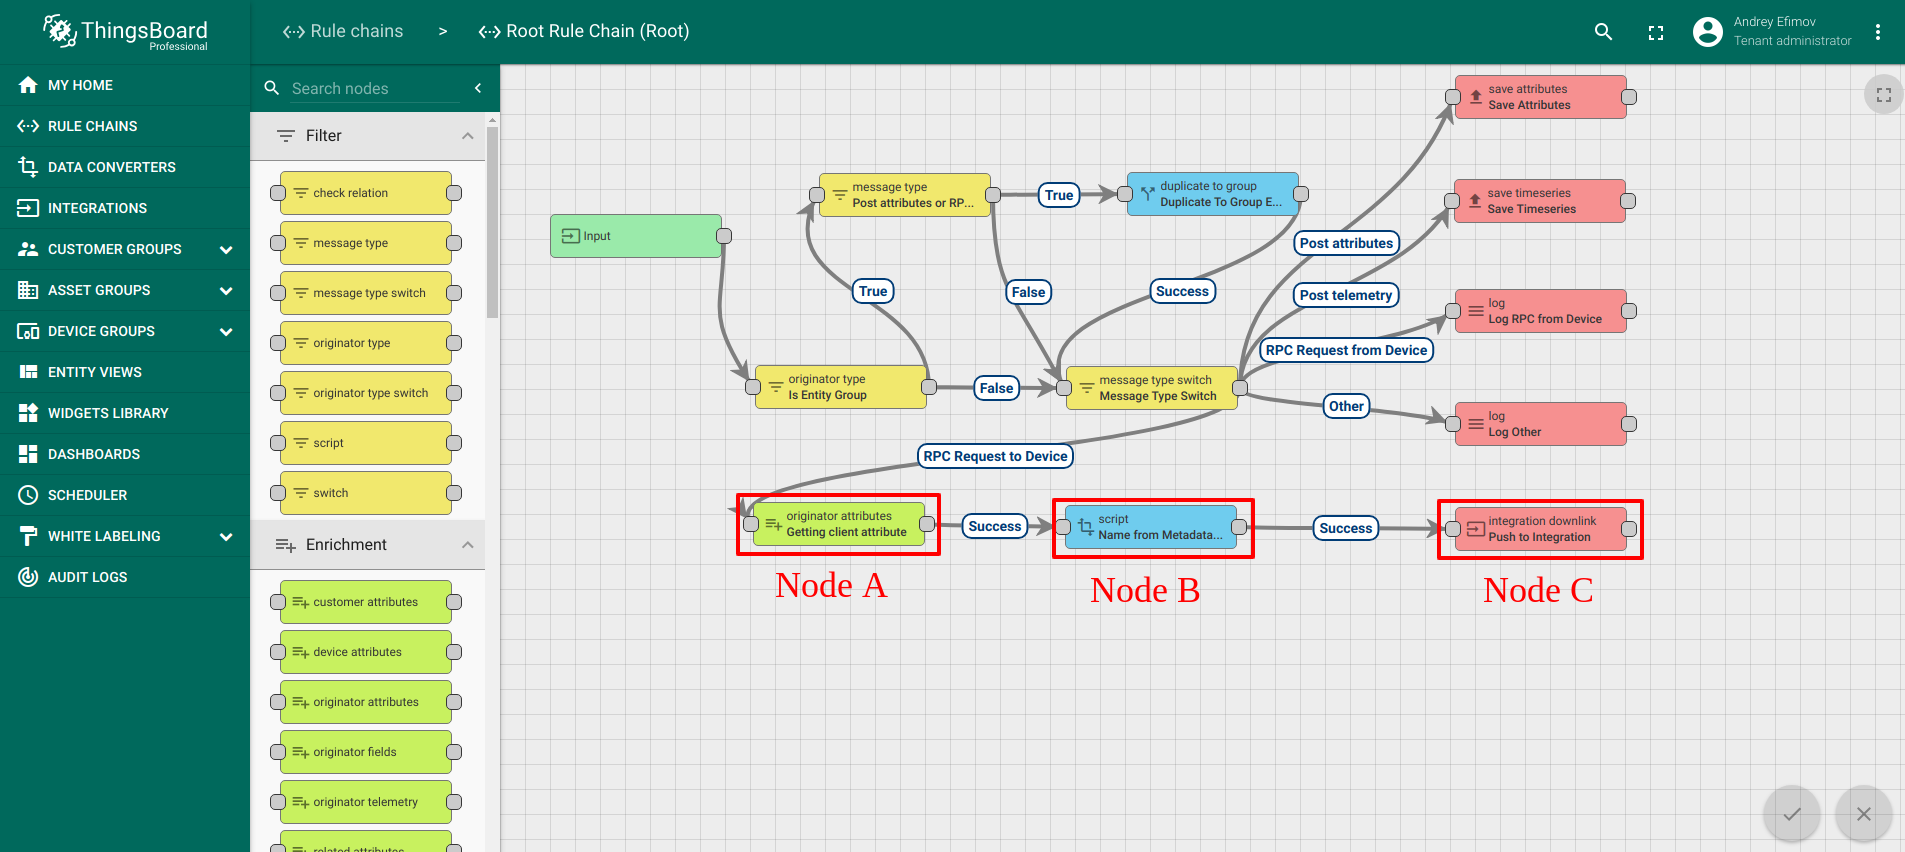
-
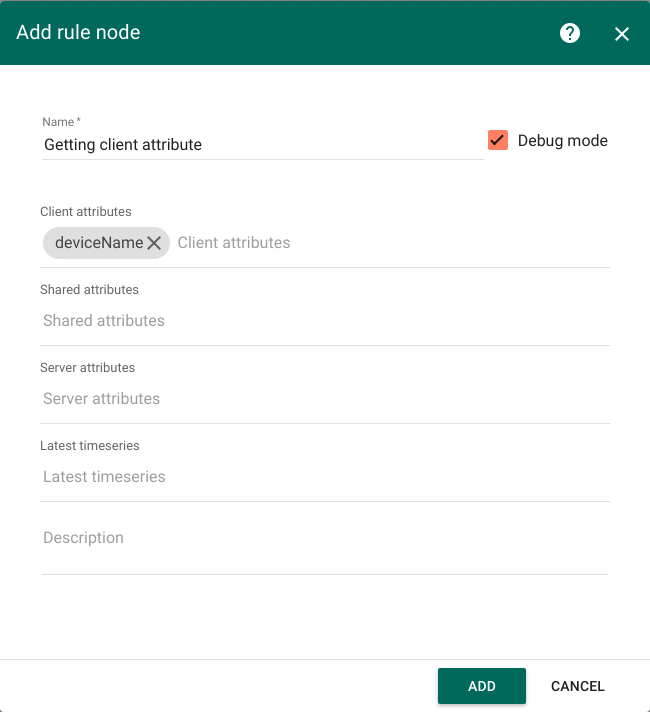
节点A:Originator attributes enrichment节点
*将客户端属性deviceName写入metadata
-
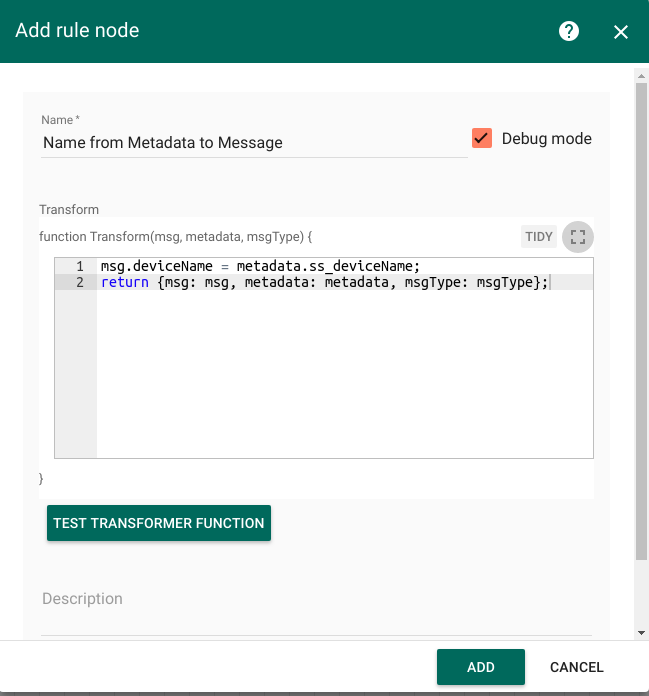
节点B:Script Transformation节点
*将metadata中的deviceName写入消息参数
-
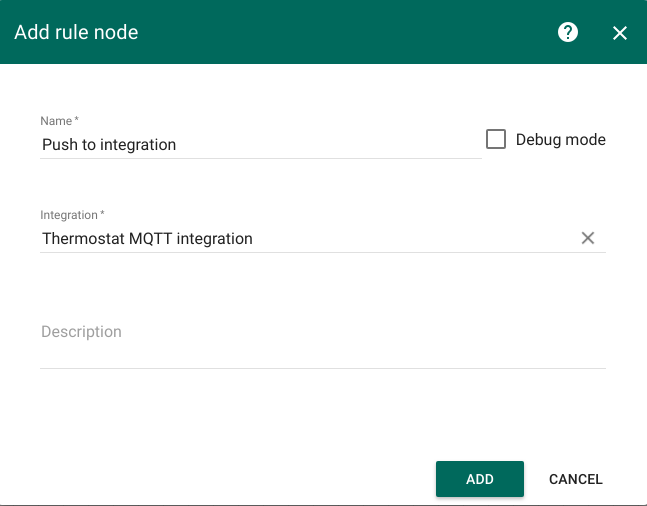
节点C:Integration Downlink节点
*将消息发送至集成
可下载并导入本教程的规则链JSON文件。 该规则链需标记为root。