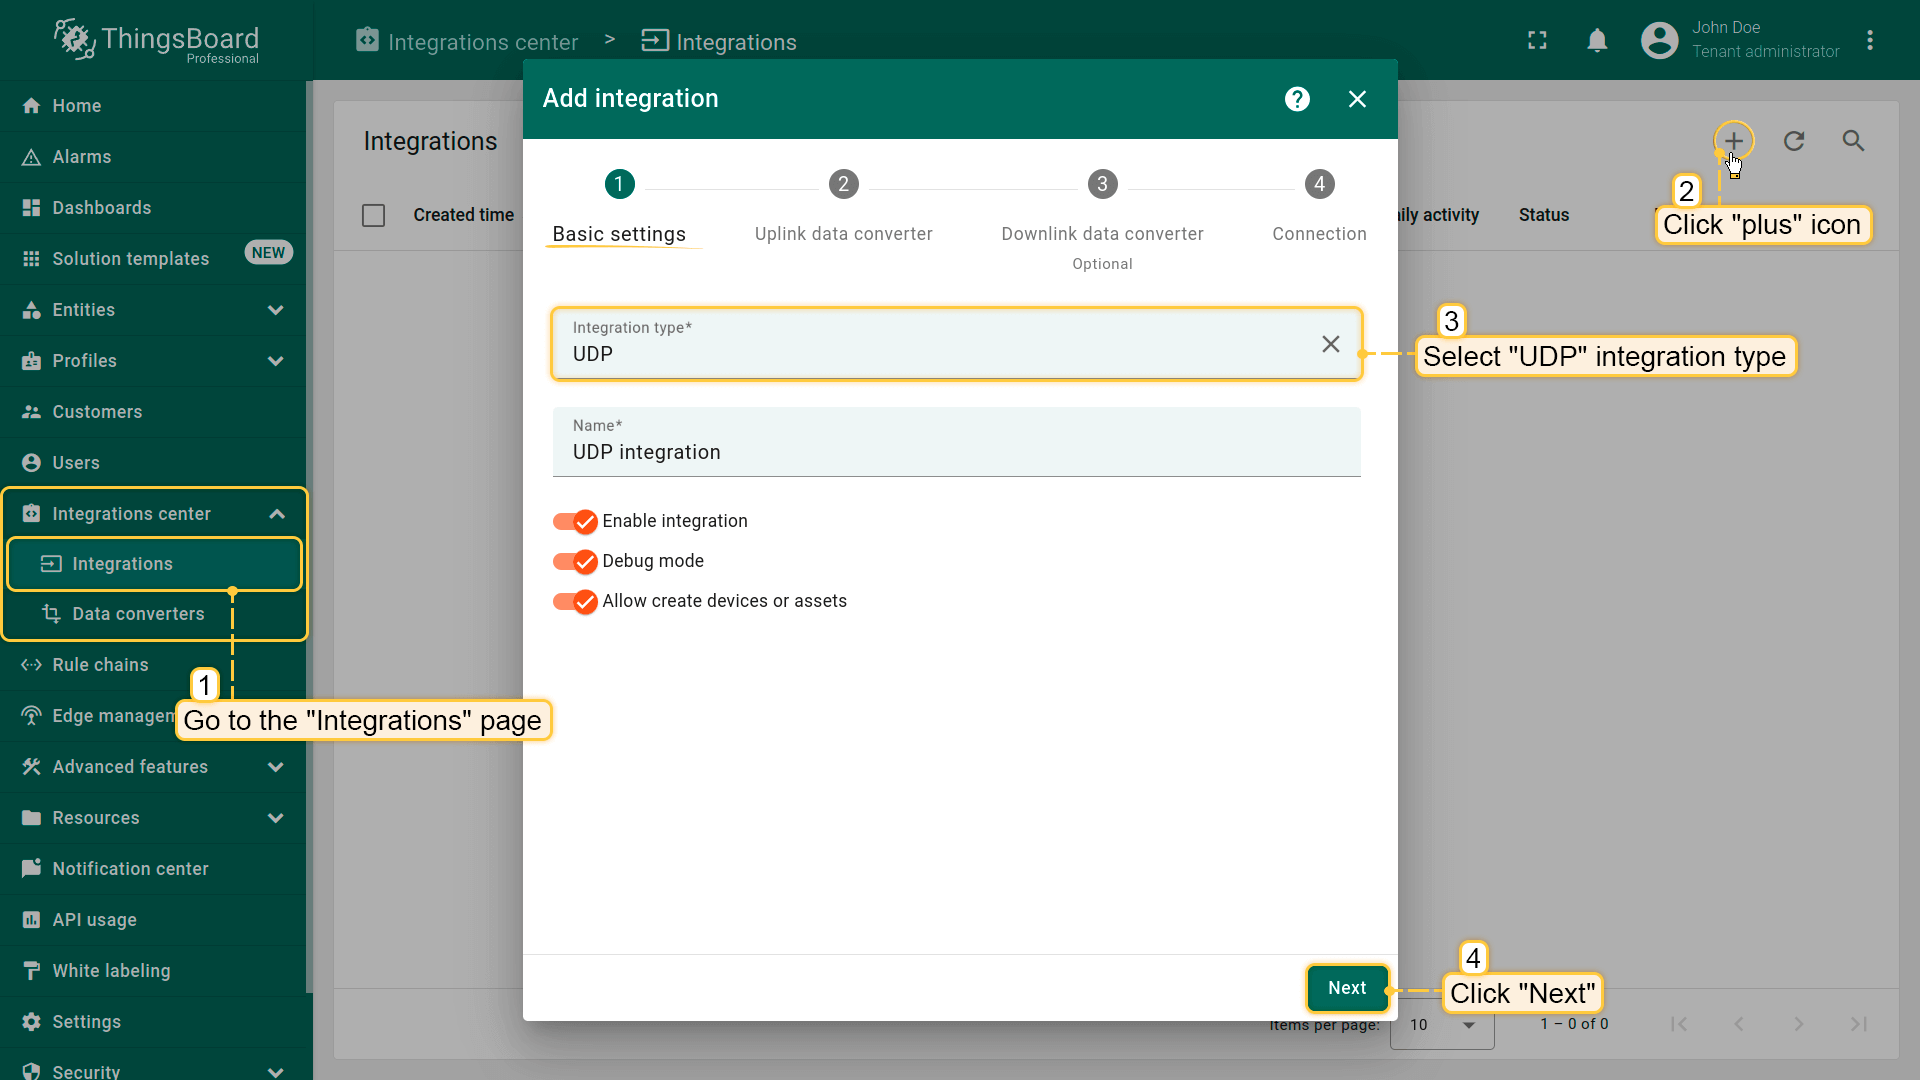
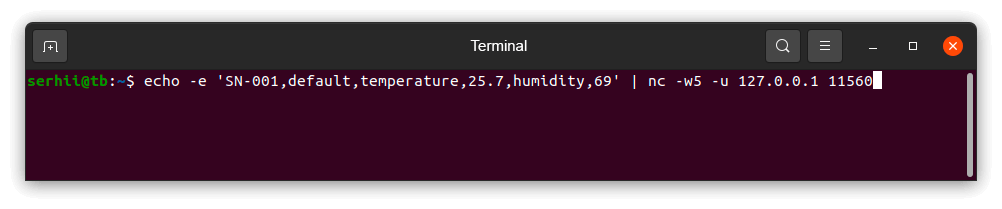
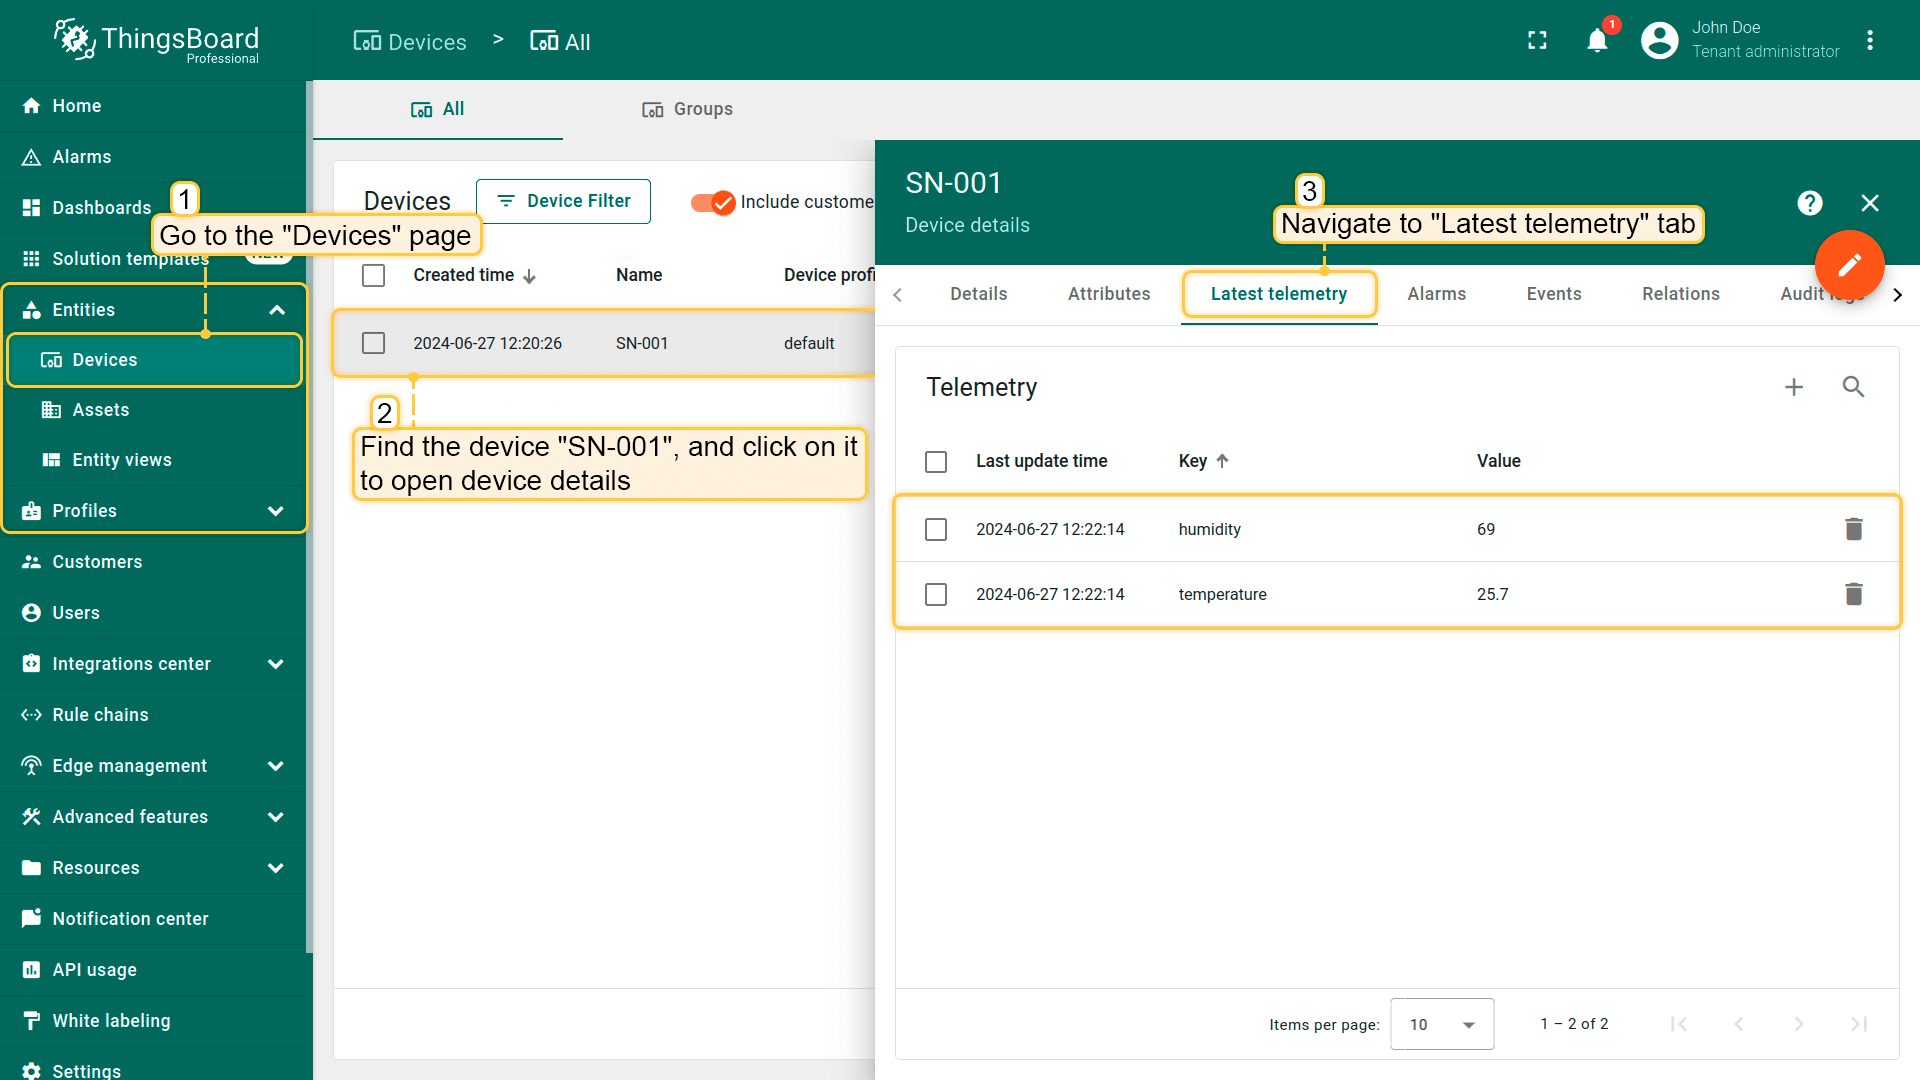
/** Decoder **/// decode payload to stringvarstrArray=decodeToString(payload);varpayloadArray=strArray.replaceAll("\"","").replaceAll("\\\\n","").split(',');vartelemetryPayload={};for(vari=2;i<payloadArray.length;i=i+2){vartelemetryKey=payloadArray[i];vartelemetryValue=parseFloat(payloadArray[i+1]);telemetryPayload[telemetryKey]=telemetryValue;}// Result object with device attributes/telemetry datavarresult={deviceName:payloadArray[0],deviceType:payloadArray[1],telemetry:telemetryPayload,attributes:{}};/** Helper functions 'decodeToString' and 'decodeToJson' are already built-in **/returnresult;
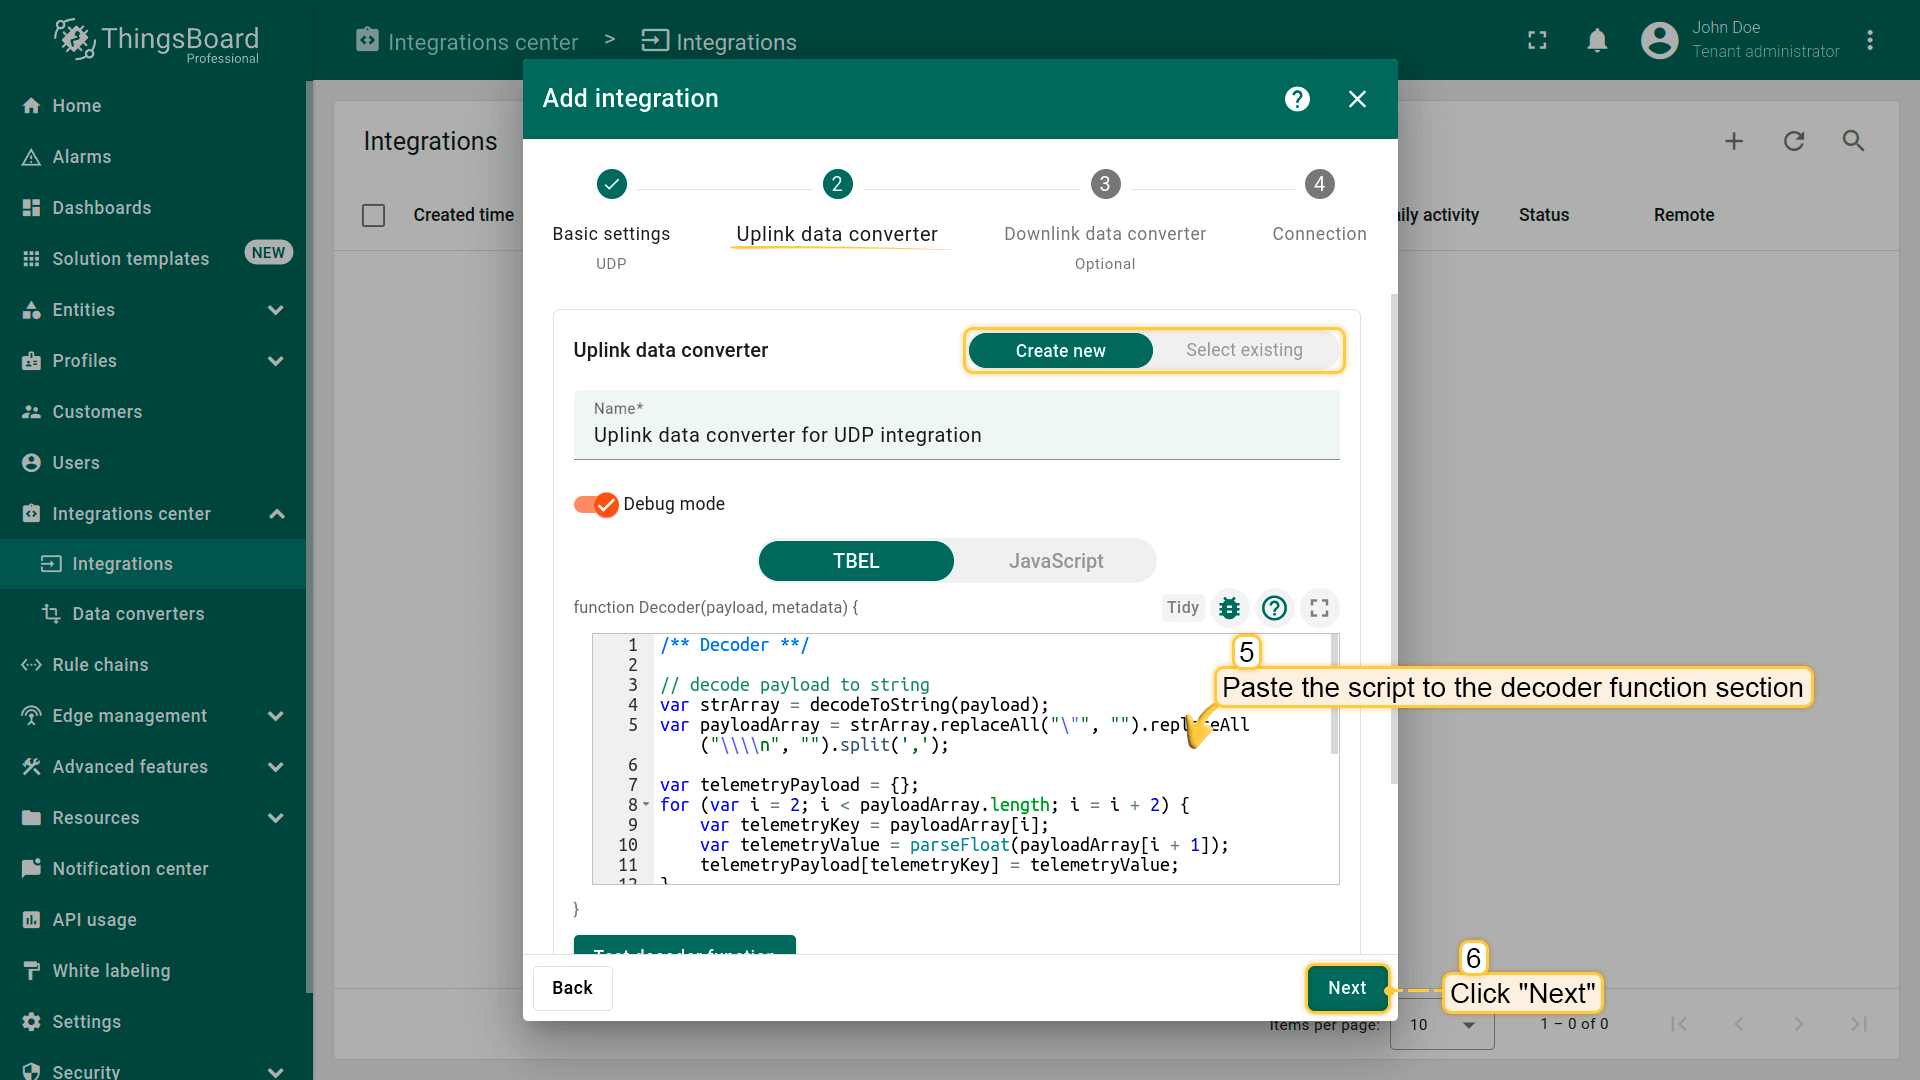
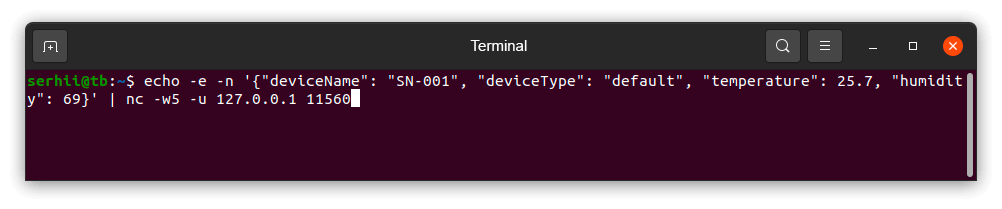
/** Decoder **/// decode payload to JSONvardata=decodeToJson(payload);// Result object with device/asset attributes/telemetry datavardeviceName=data.deviceName;vardeviceType=data.deviceType;varresult={deviceName:deviceName,deviceType:deviceType,attributes:{},telemetry:{temperature:data.temperature,humidity:data.humidity}};/** Helper functions 'decodeToString' and 'decodeToJson' are already built-in **/returnresult;
/** Decoder **/// decode payload to JSONvardata=decodeToJson(payload);// Result object with device/asset attributes/telemetry datavardeviceName=data.deviceName;vardeviceType=data.deviceType;varresult={deviceName:deviceName,deviceType:deviceType,attributes:{},telemetry:{temperature:data.temperature,humidity:data.humidity}};/** Helper functions **/functiondecodeToString(payload){returnString.fromCharCode.apply(String,payload);}functiondecodeToJson(payload){// covert payload to string.varstr=decodeToString(payload);// parse string to JSONvardata=JSON.parse(str);returndata;}returnresult;
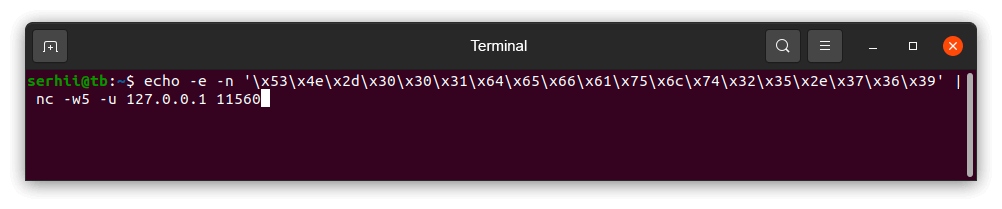
/** Decoder **/// decode payload to stringvarpayloadStr=decodeToString(payload);// decode payload to JSON// var data = decodeToJson(payload);vardeviceName=payloadStr.substring(0,6);vardeviceType=payloadStr.substring(6,13);// Result object with device/asset attributes/telemetry datavarresult={deviceName:deviceName,deviceType:deviceType,attributes:{},telemetry:{temperature:parseFloat(payloadStr.substring(13,17)),humidity:parseFloat(payloadStr.substring(17,19))}};/** Helper functions 'decodeToString' and 'decodeToJson' are already built-in **/returnresult;
/** Decoder **/// decode payload to stringvarpayloadStr=decodeToString(payload);// decode payload to JSON// var data = decodeToJson(payload);vardeviceName=payloadStr.substring(0,6);vardeviceType=payloadStr.substring(6,13);// Result object with device/asset attributes/telemetry datavarresult={deviceName:deviceName,deviceType:deviceType,attributes:{},telemetry:{temperature:parseFloat(payloadStr.substring(13,17)),humidity:parseFloat(payloadStr.substring(17,19))}};/** Helper functions **/functiondecodeToString(payload){returnString.fromCharCode.apply(String,payload);}functiondecodeToJson(payload){// covert payload to string.varstr=decodeToString(payload);// parse string to JSONvardata=JSON.parse(str);returndata;}returnresult;
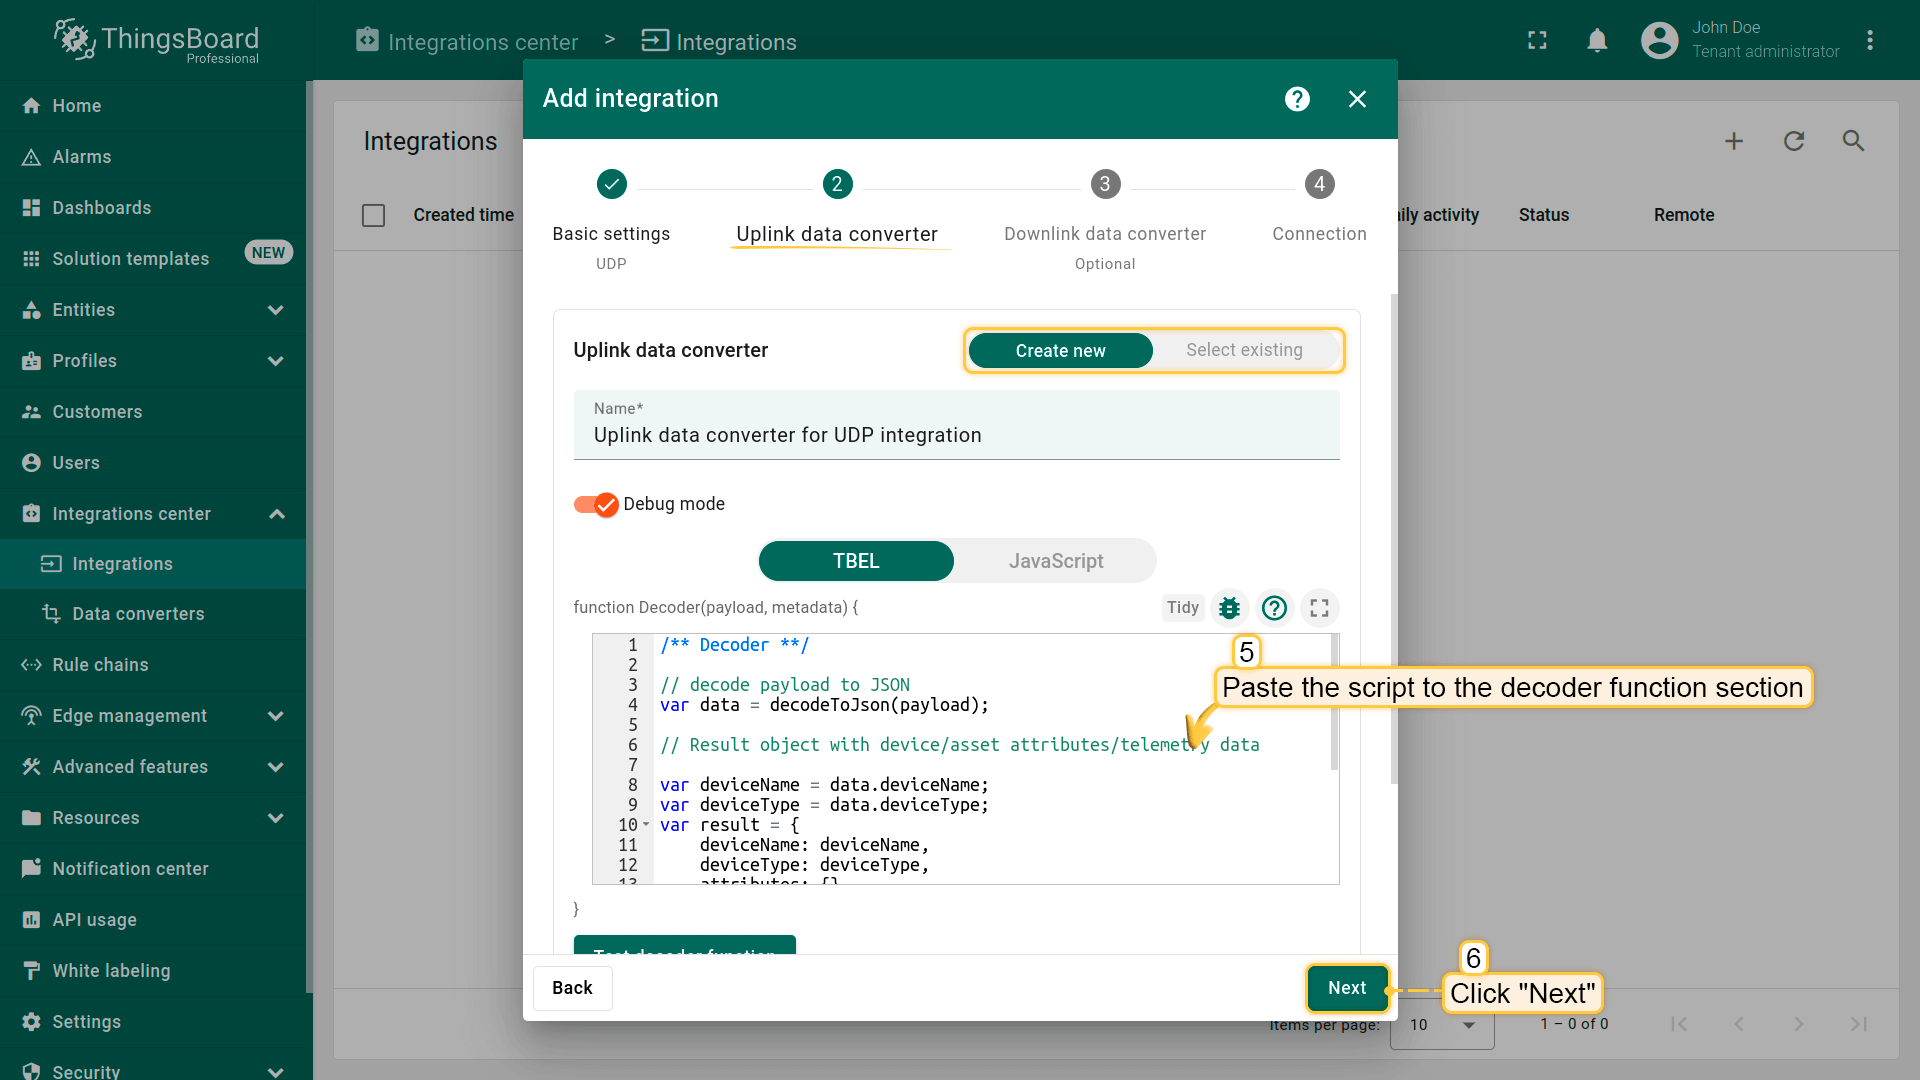
/** Decoder **/// decode payload to JSONvardata=decodeToJson(payload).reports[0].value;// Result object with device telemetry datavarresult={deviceName:hexToString(data.substring(0,12)),deviceType:hexToString(data.substring(12,26)),telemetry:{temperature:parseFloat(hexToString(data.substring(26,34))),humidity:parseFloat(hexToString(data.substring(34,38))),}};/** Helper functions **/// Hexadecimal string to stringfunctionhexToString(hex){returnbytesToString(hexToBytes(hex));}returnresult;
/** Decoder **/// decode payload to JSONvardata=decodeToJson(payload).reports[0].value;// Result object with device telemetry datavarresult={deviceName:hexToString(data.substring(0,12)),deviceType:hexToString(data.substring(12,26)),telemetry:{temperature:parseFloat(hexToString(data.substring(26,34))),humidity:parseFloat(hexToString(data.substring(34,38))),}};/** Helper functions **/functiondecodeToString(payload){returnString.fromCharCode.apply(String,payload);}// Hexadecimal string to stringfunctionhexToString(hex){varstr='';for(vari=0;i<hex.length;i+=2){varnotNullValue=parseInt(hex.substr(i,2),16);if(notNullValue){str+=String.fromCharCode(notNullValue);}}returnstr;}functiondecodeToJson(payload){// convert payload to string.varstr=decodeToString(payload);// parse string to JSONvardata=JSON.parse(str);returndata;}returnresult;
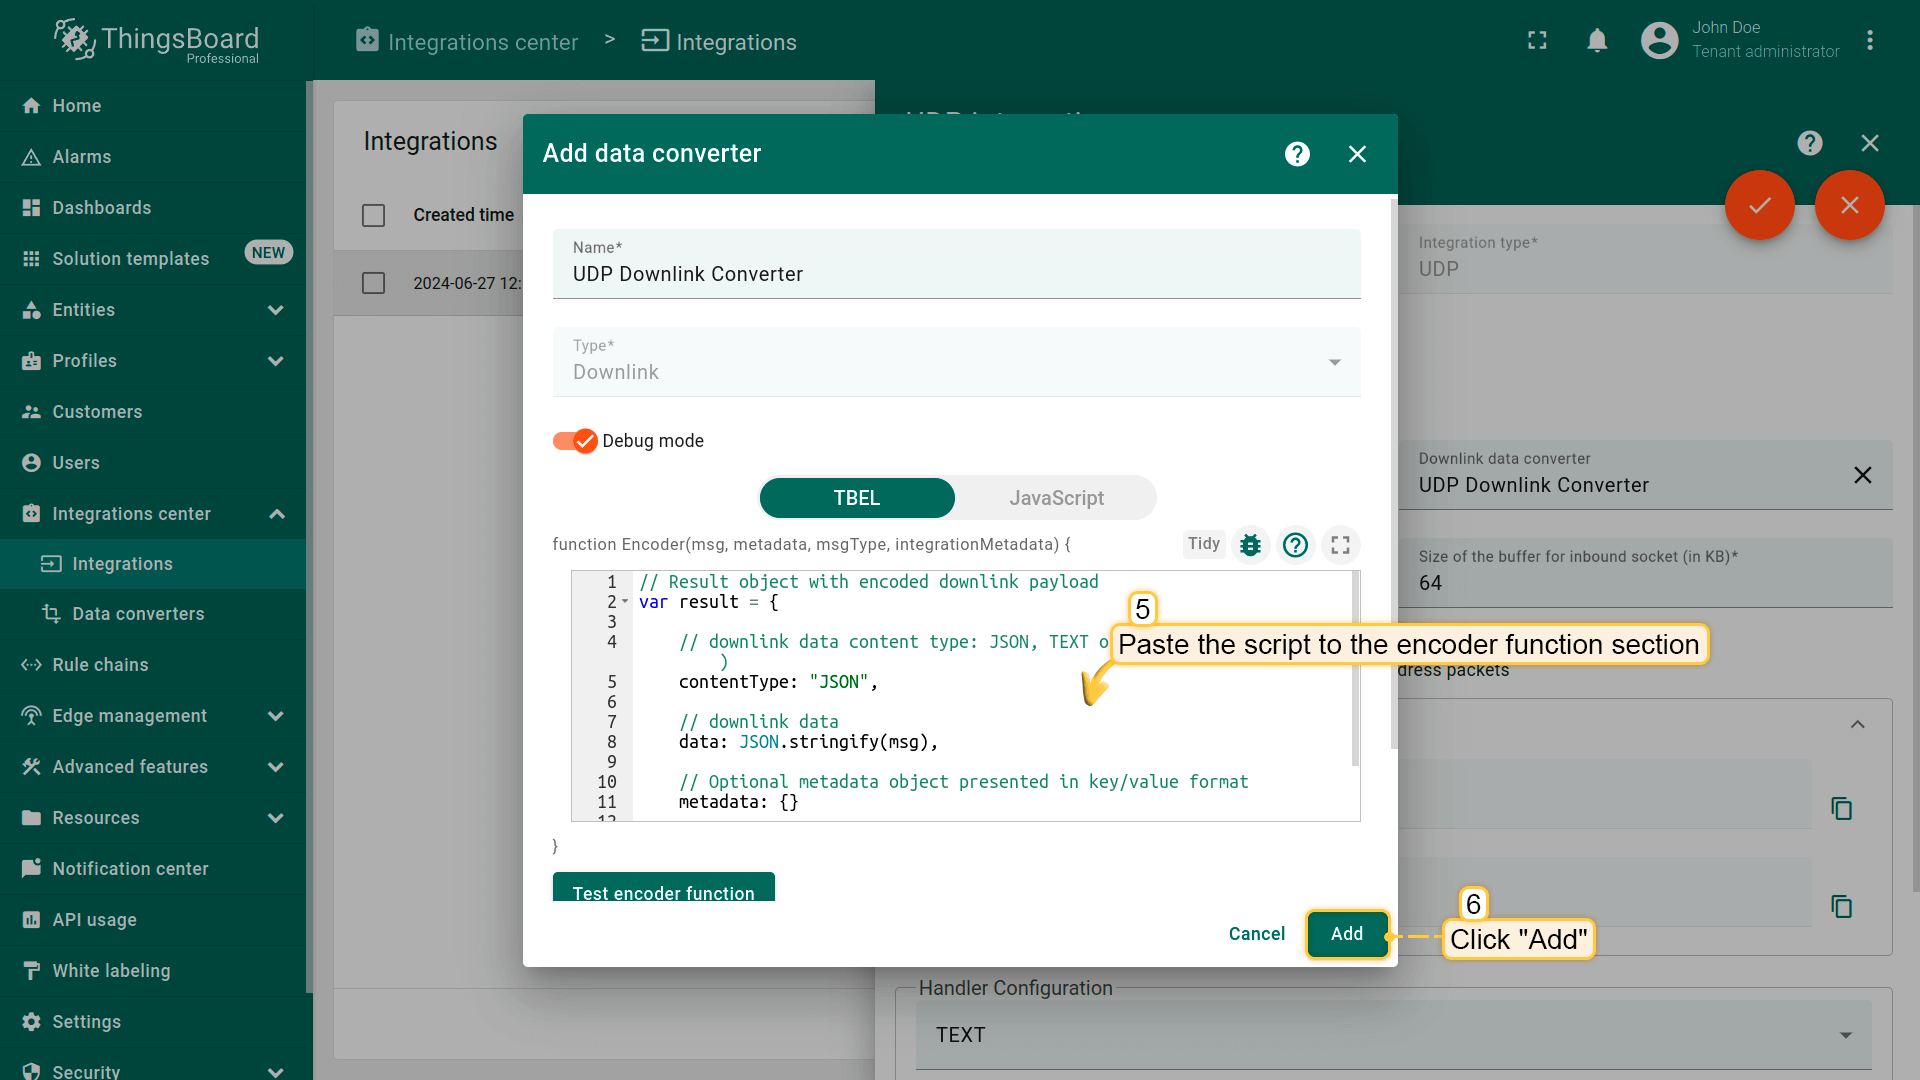
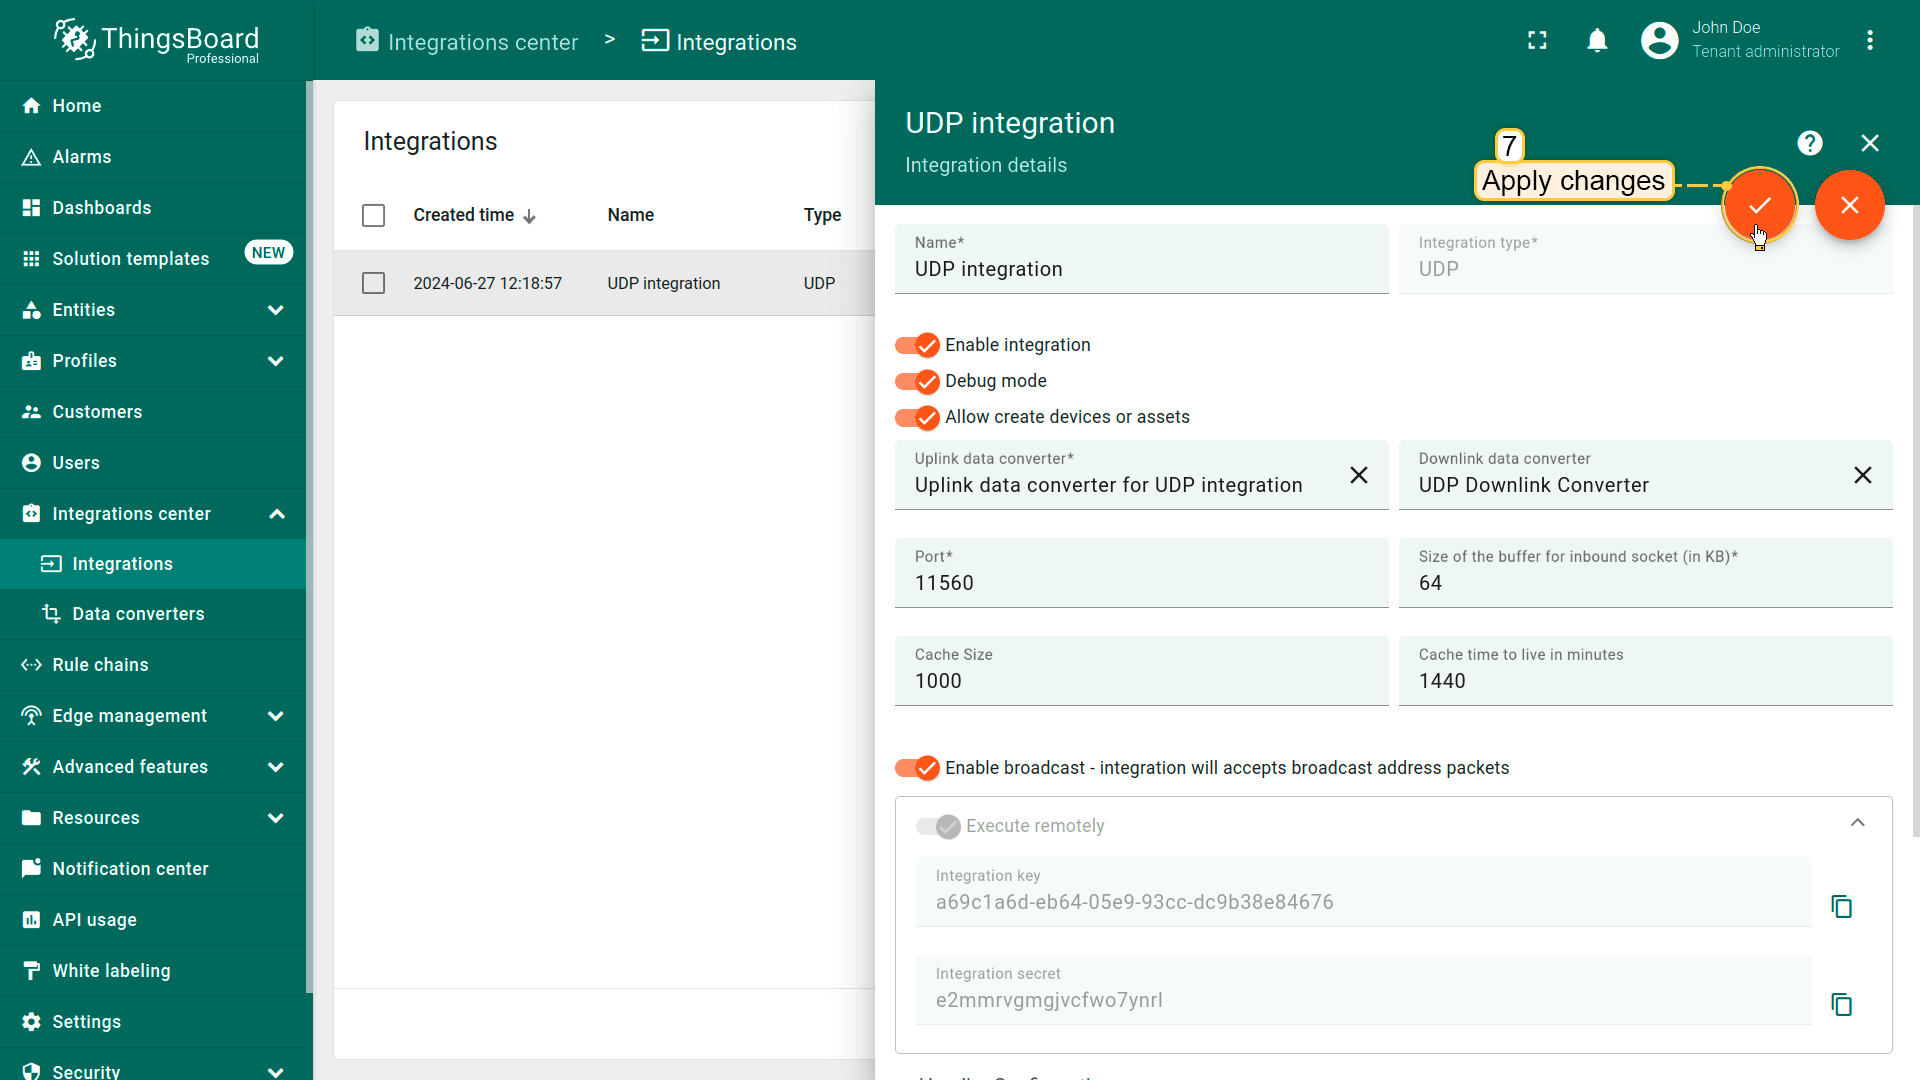
// Result object with encoded downlink payloadvarresult={// downlink data content type: JSON, TEXT or BINARY (base64 format)contentType:"JSON",// downlink datadata:JSON.stringify(msg),// Optional metadata object presented in key/value formatmetadata:{}};returnresult;
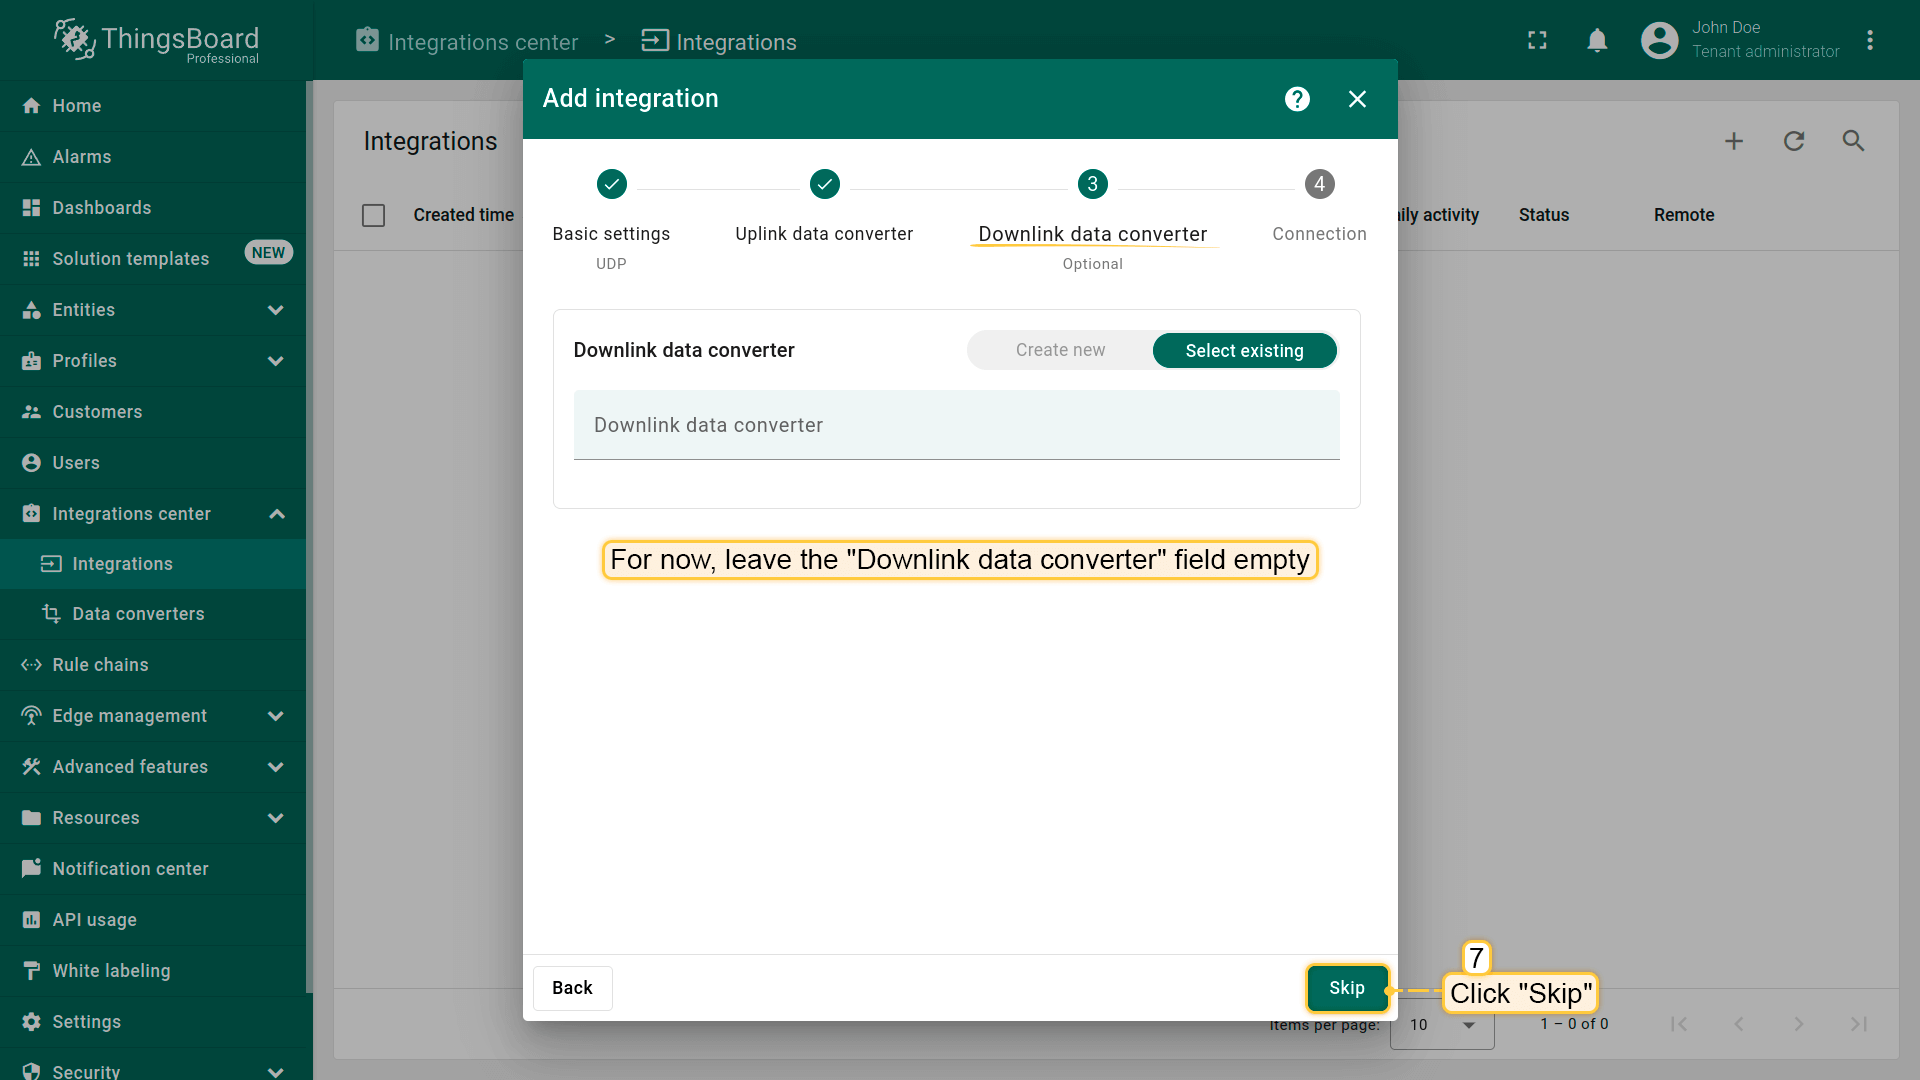
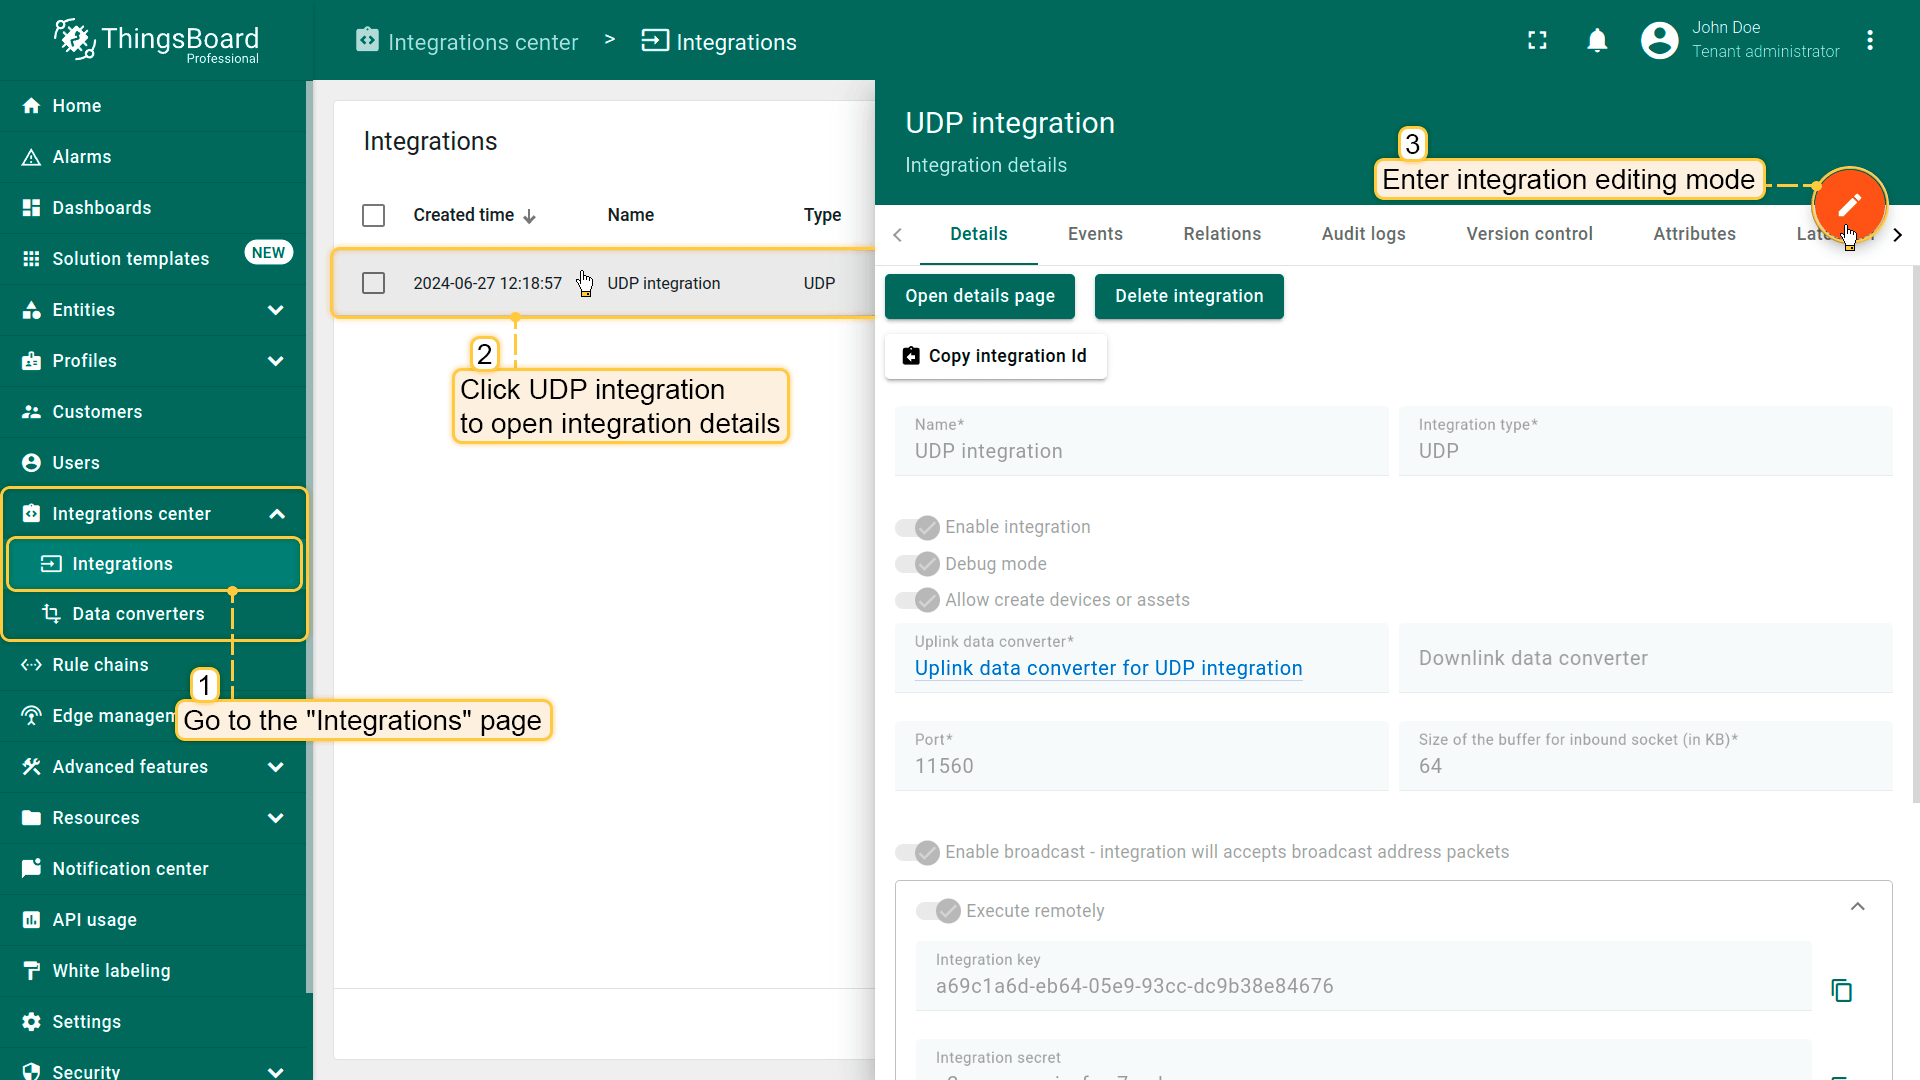
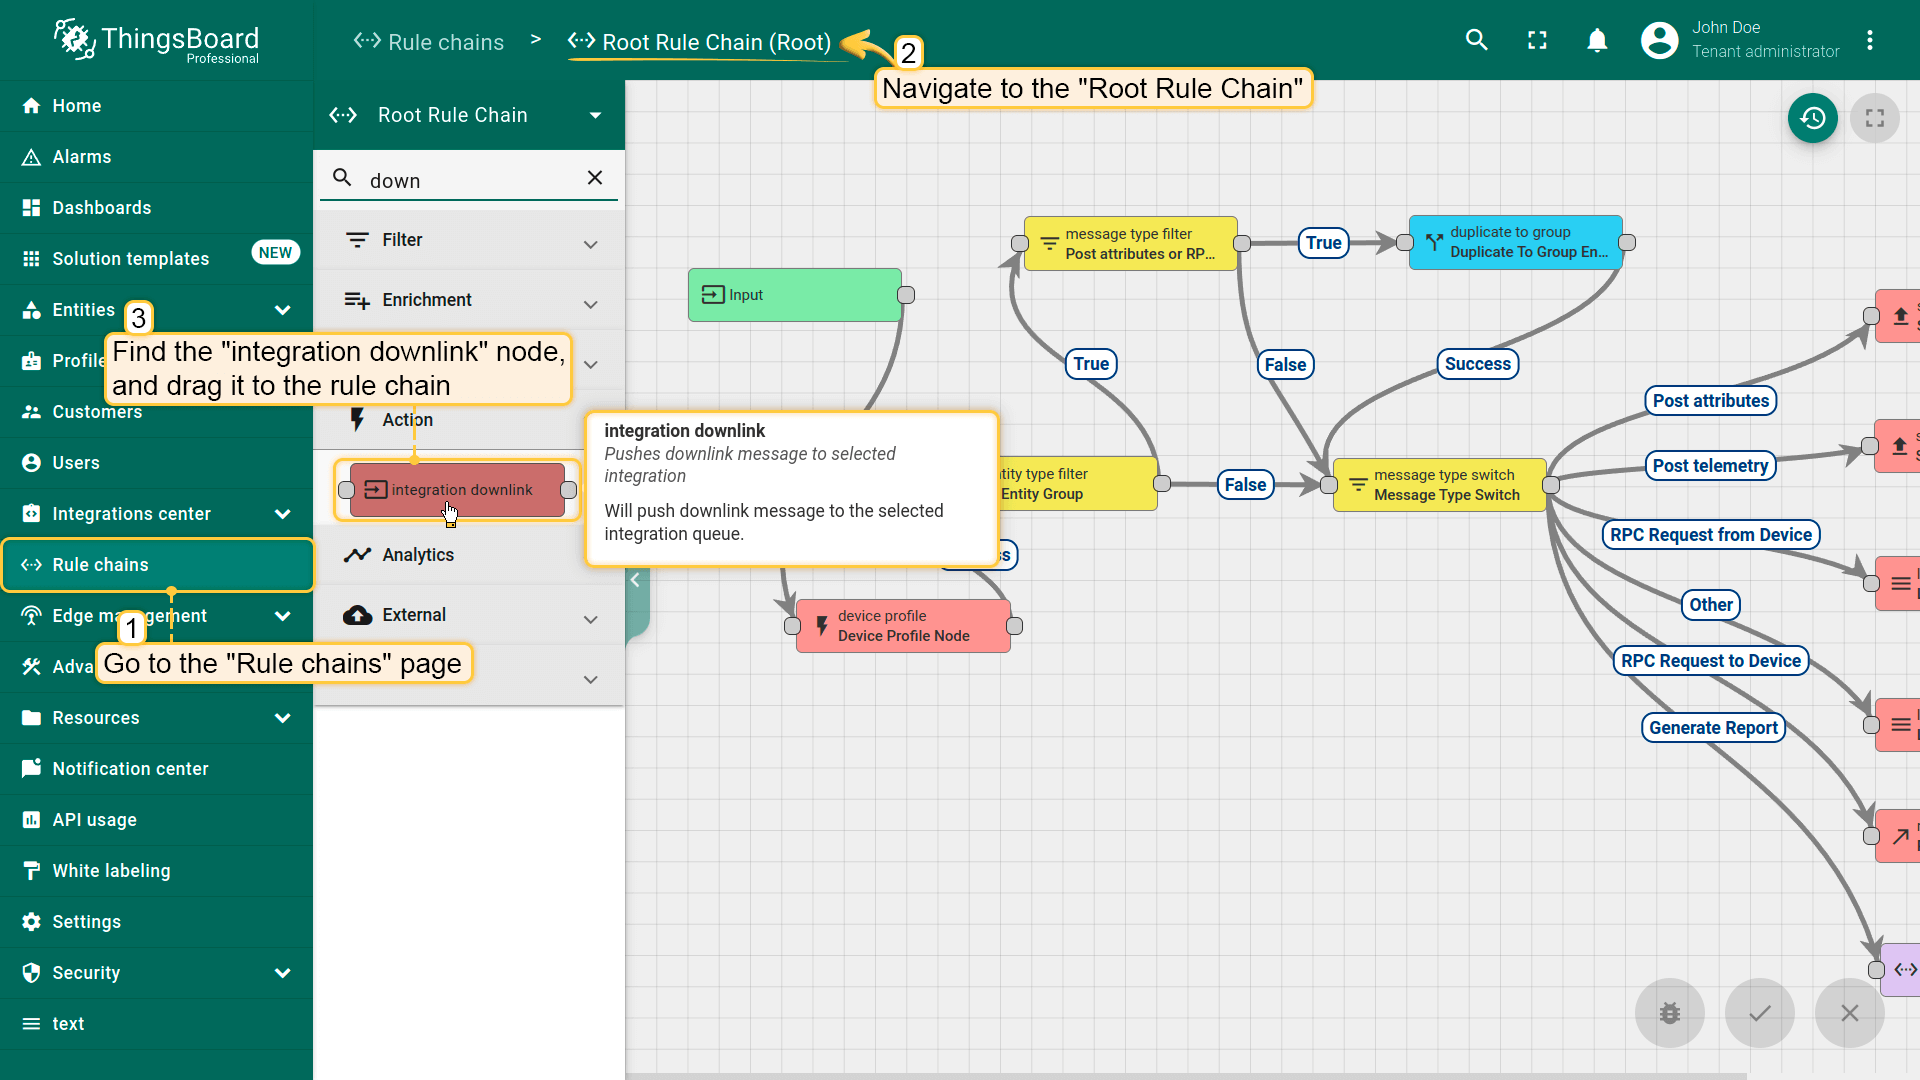
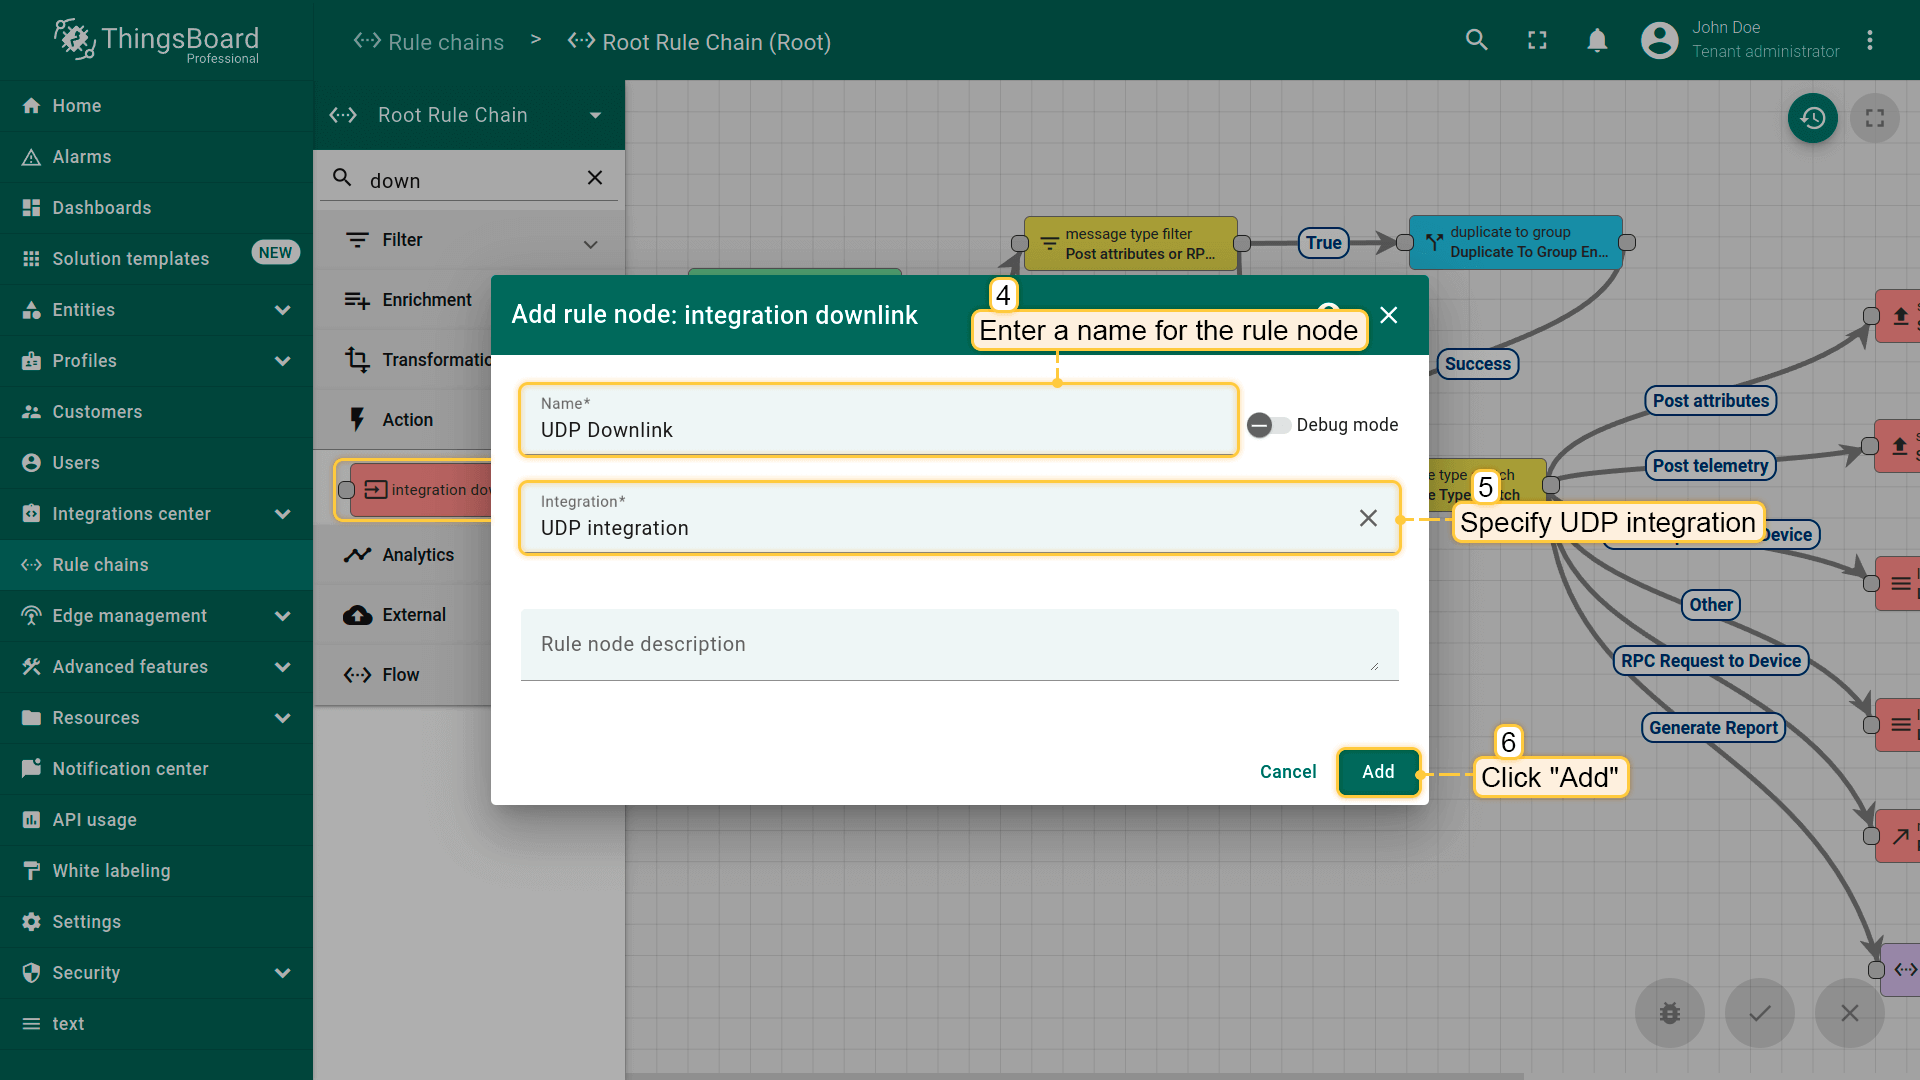
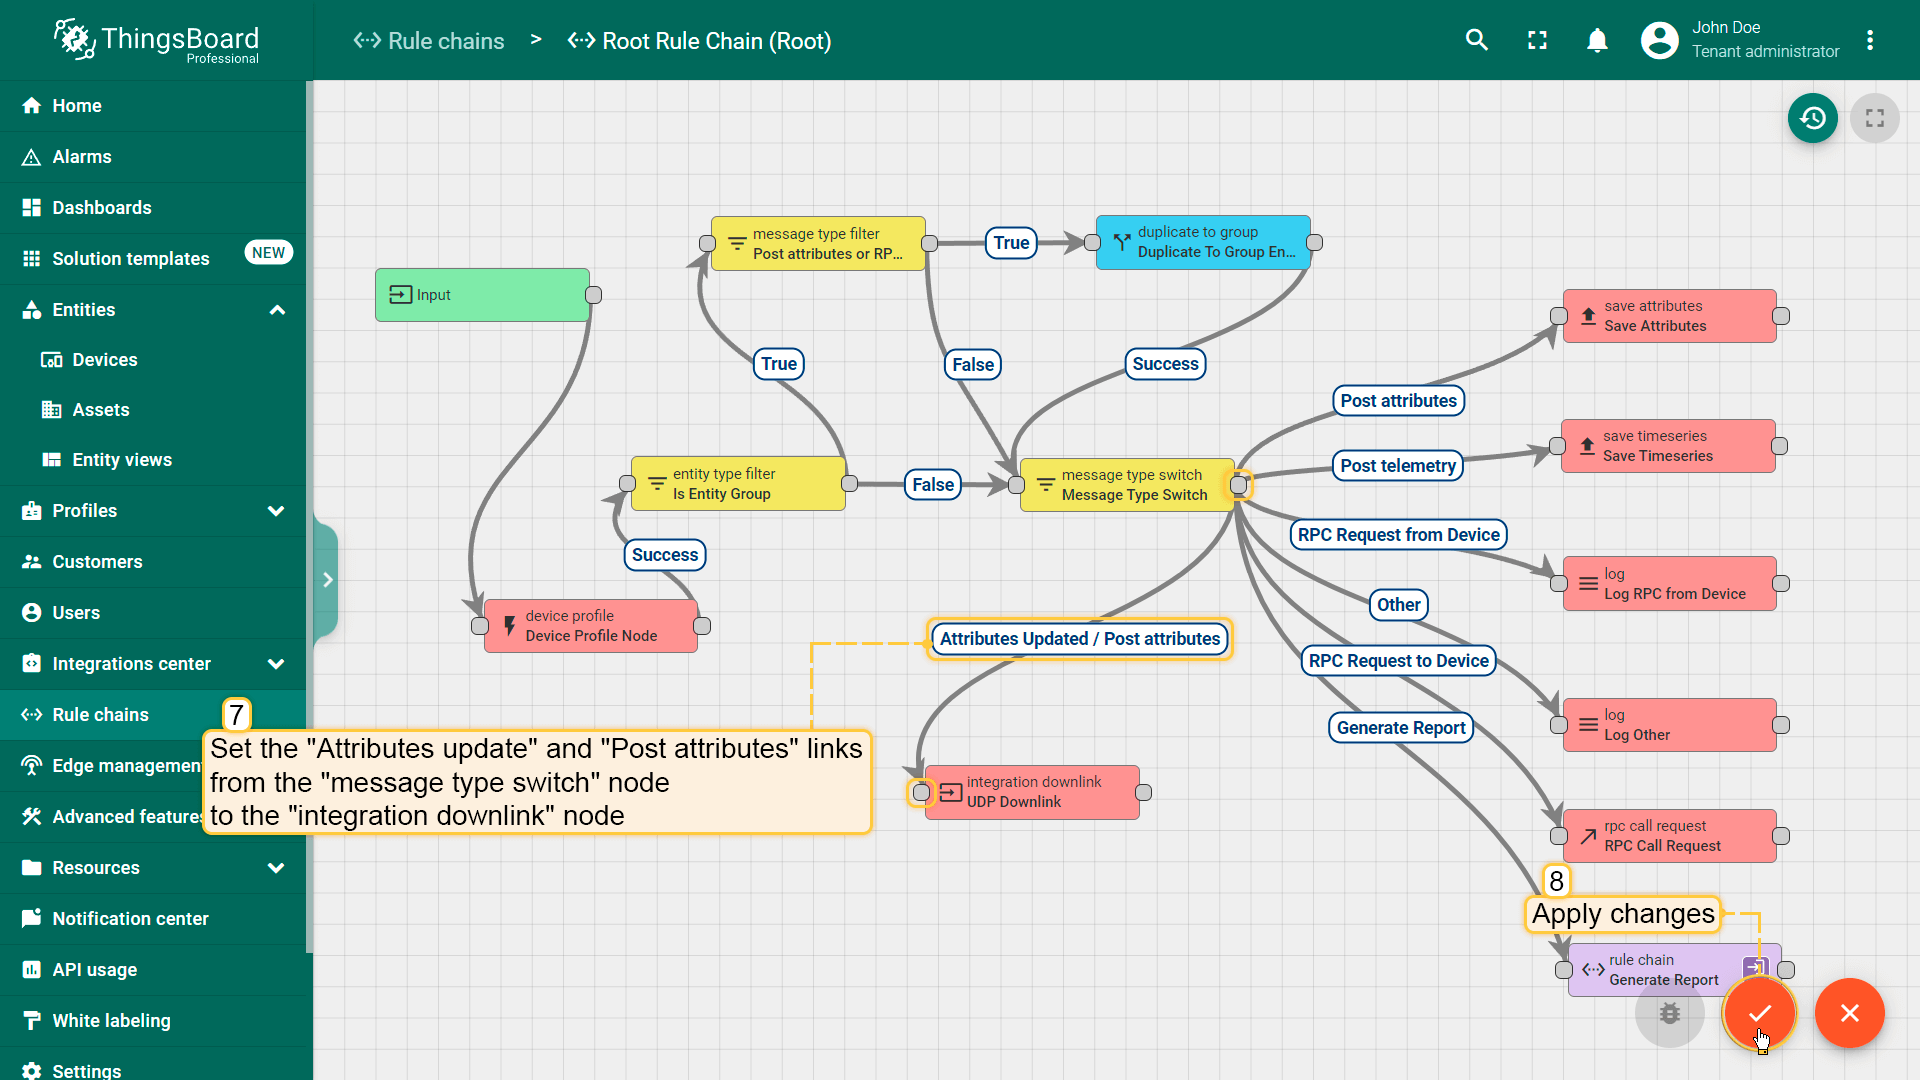
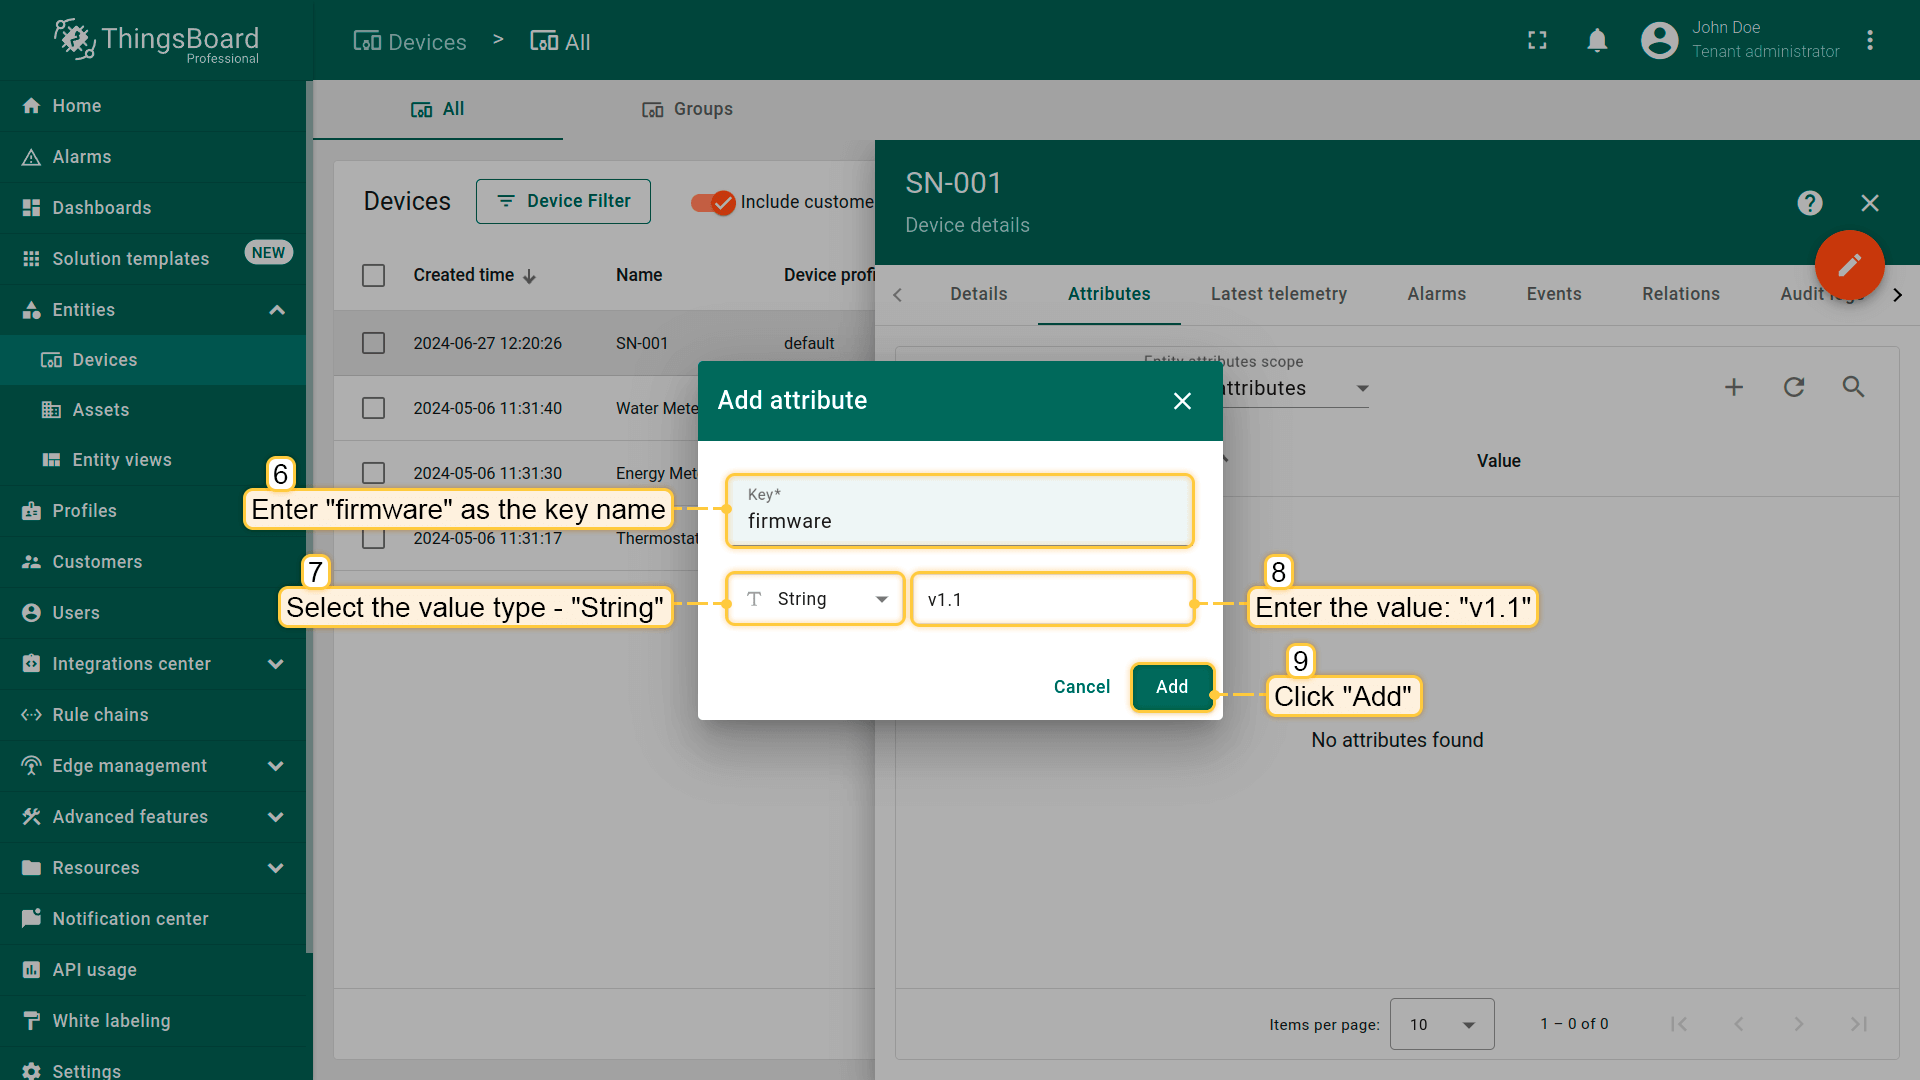
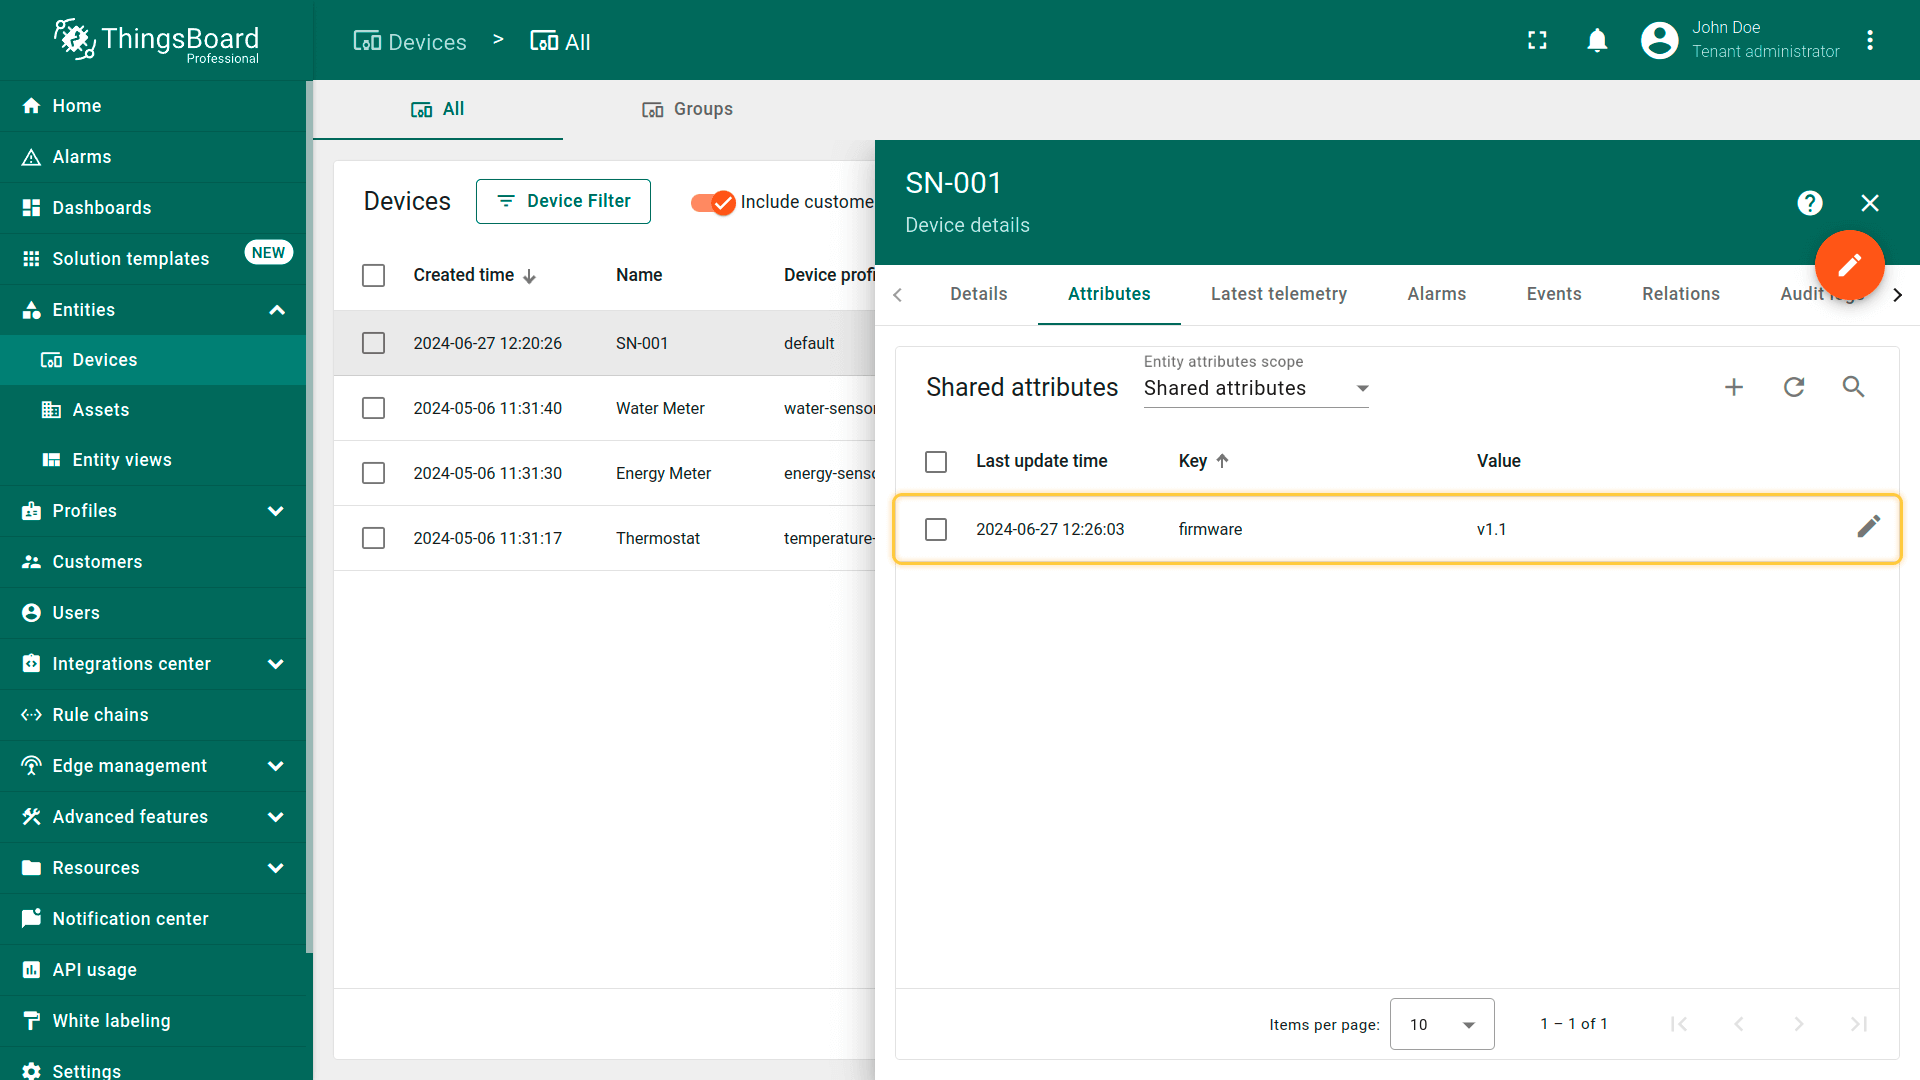
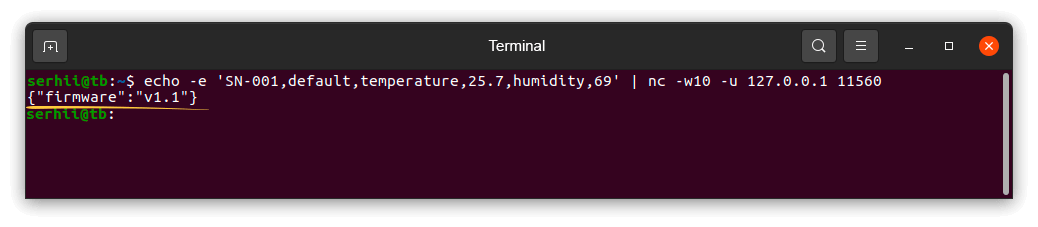
可使用我们的 downlink converter 示例,或根据您的配置自行编写:
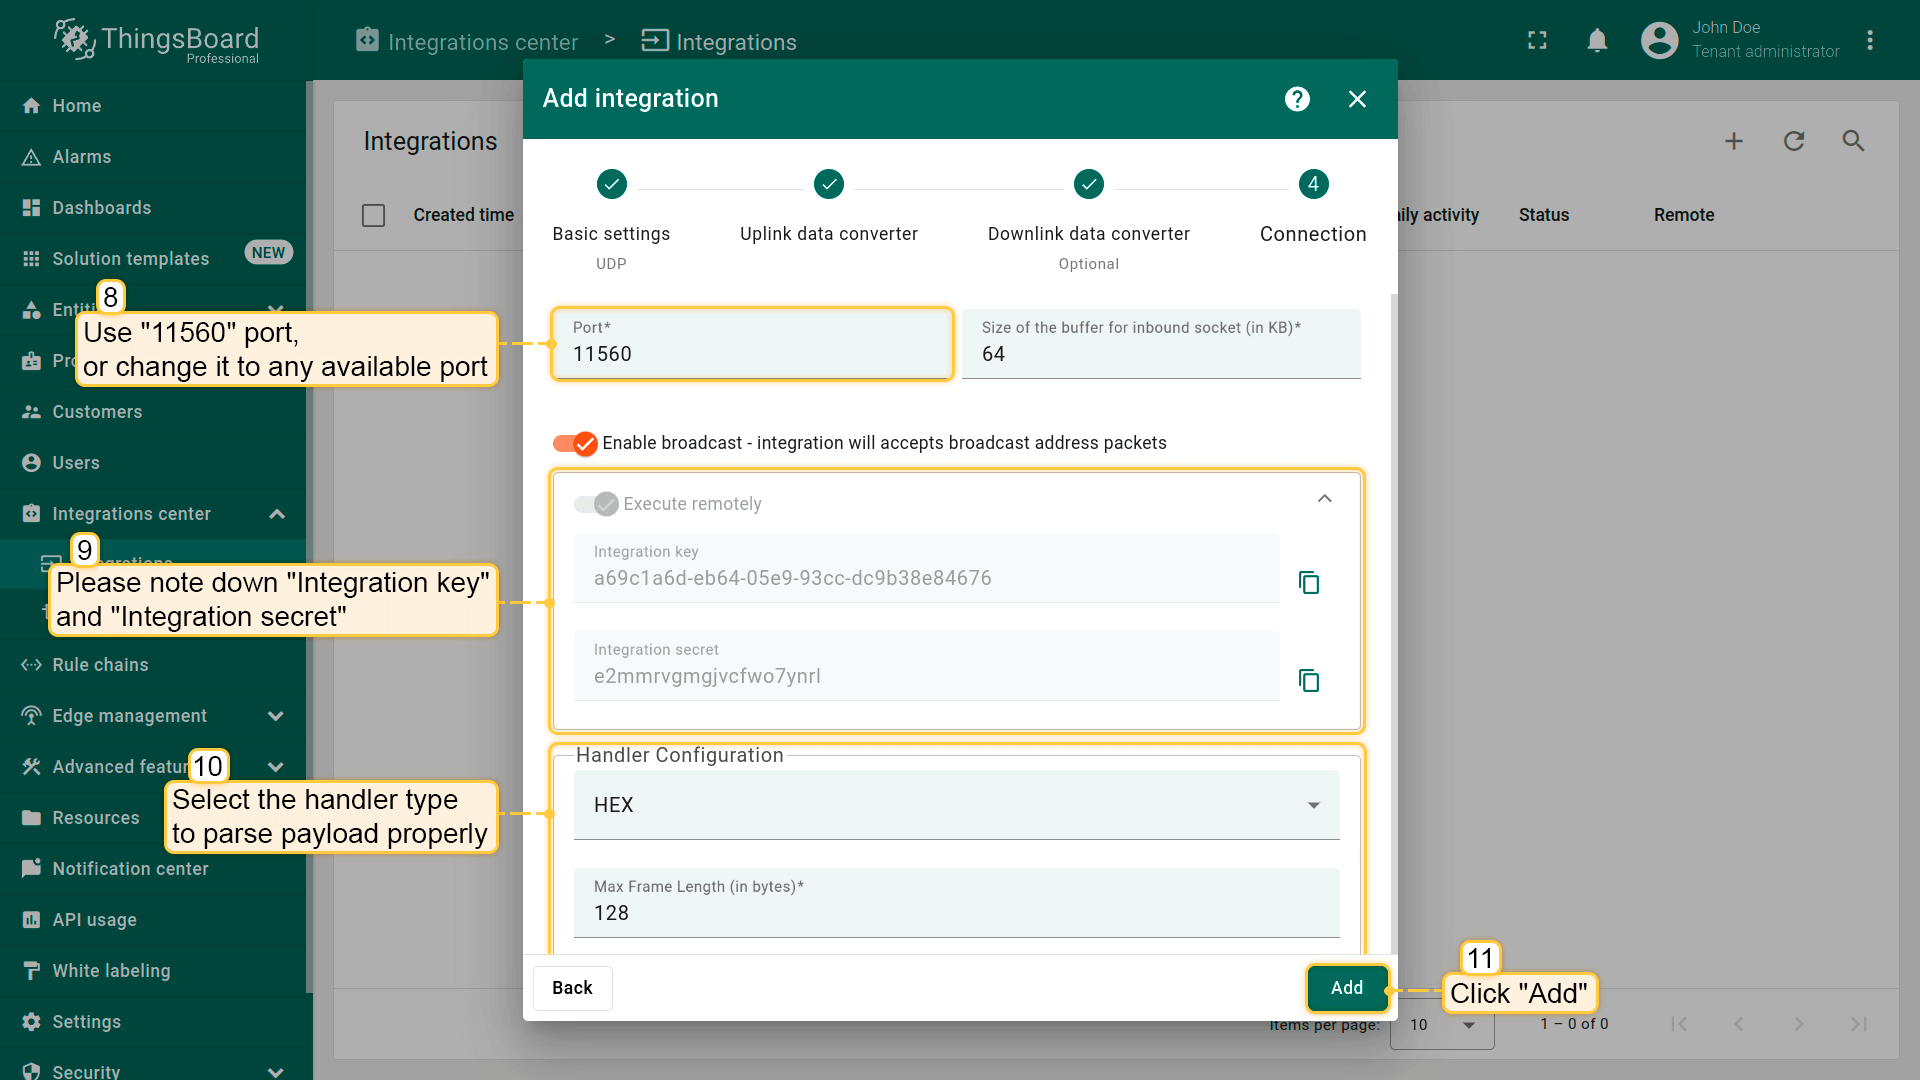
1
2
3
4
5
6
7
8
9
10
11
12
13
14
15
// Result object with encoded downlink payloadvarresult={// downlink data content type: JSON, TEXT or BINARY (base64 format)contentType:"JSON",// downlink datadata:JSON.stringify(msg),// Optional metadata object presented in key/value formatmetadata:{}};returnresult;