仅专业版支持Platform Integrations功能。
请使用ThingsBoard Cloud或自行安装平台实例。
概述
HTTP集成可将现有协议和负载格式转换为ThingsBoard消息格式,适用于多种部署场景:
- 从外部系统、IoT平台或连接提供商后端流式传输设备和/或资产数据。
- 从云上运行的自定义应用流式传输设备和/或资产数据。
- 将采用自定义基于HTTP协议的现有设备连接至ThingsBoard。
创建上行转换器
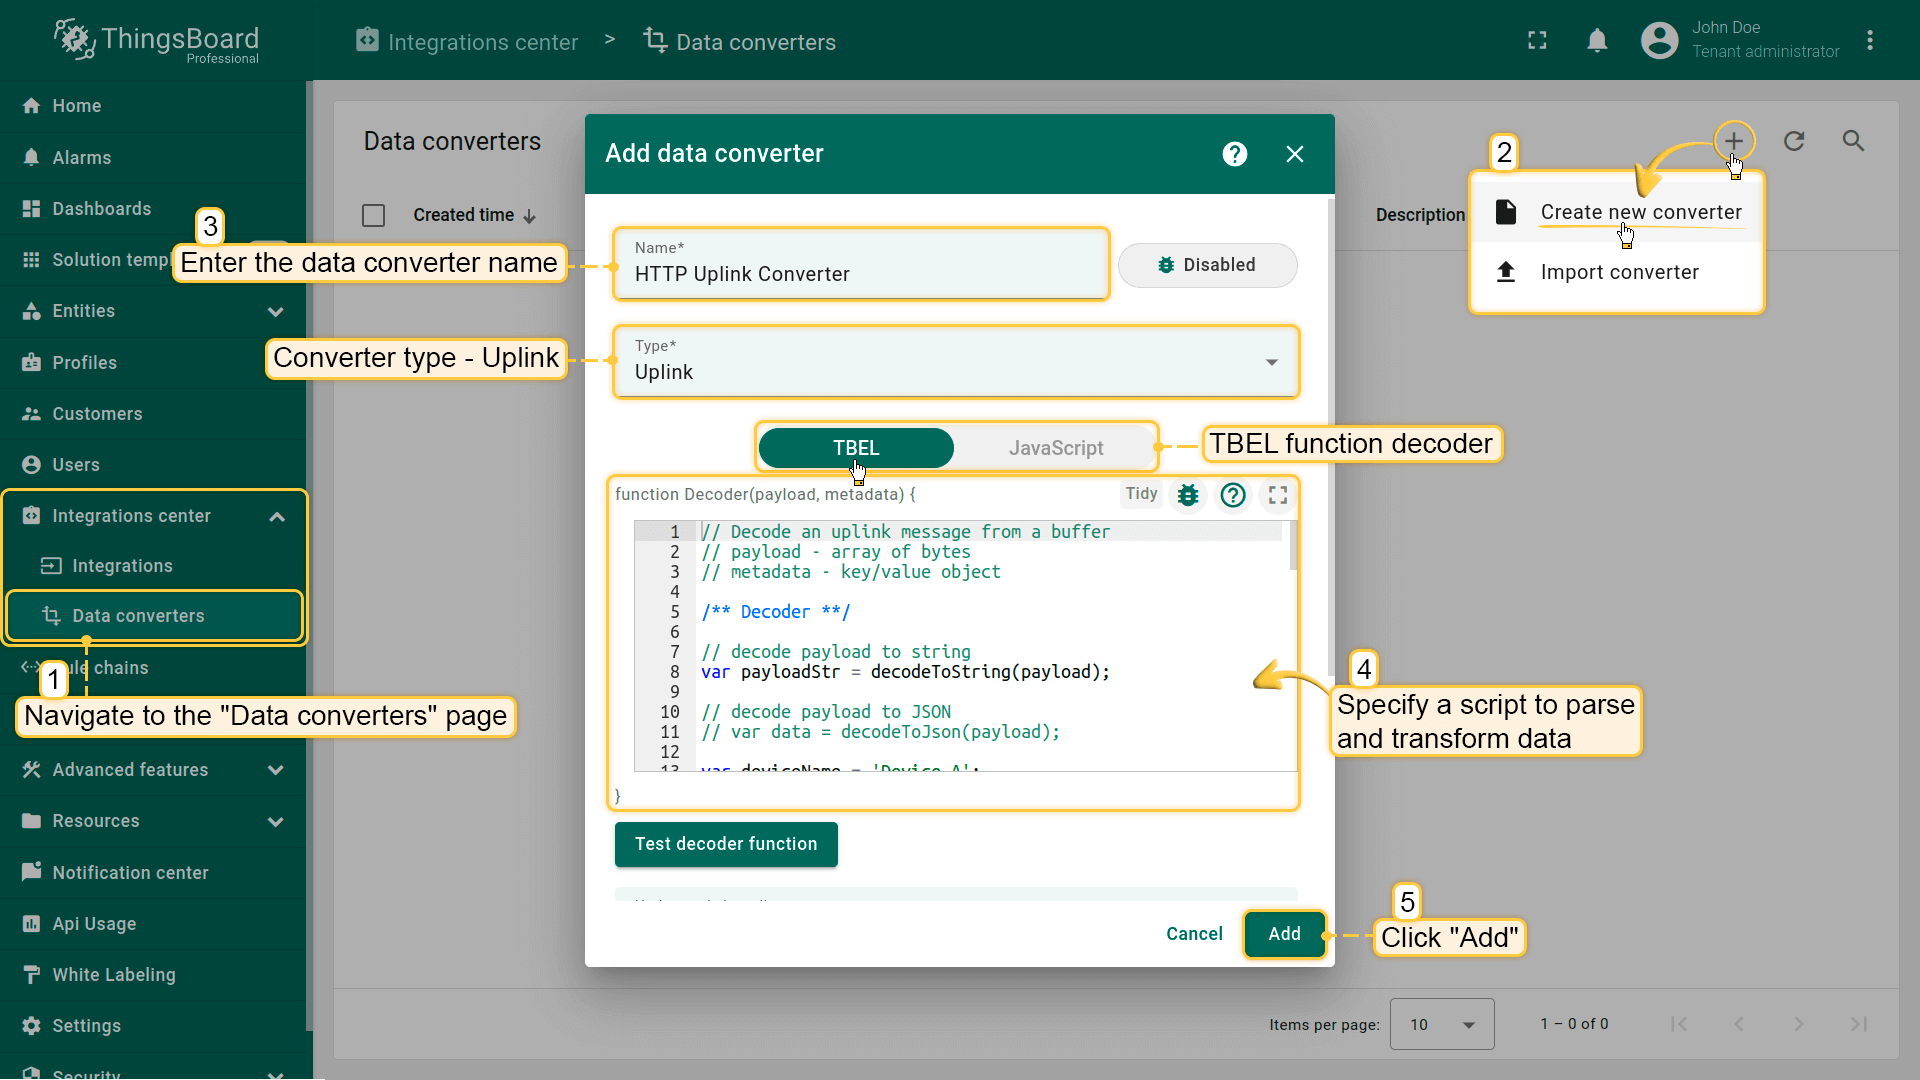
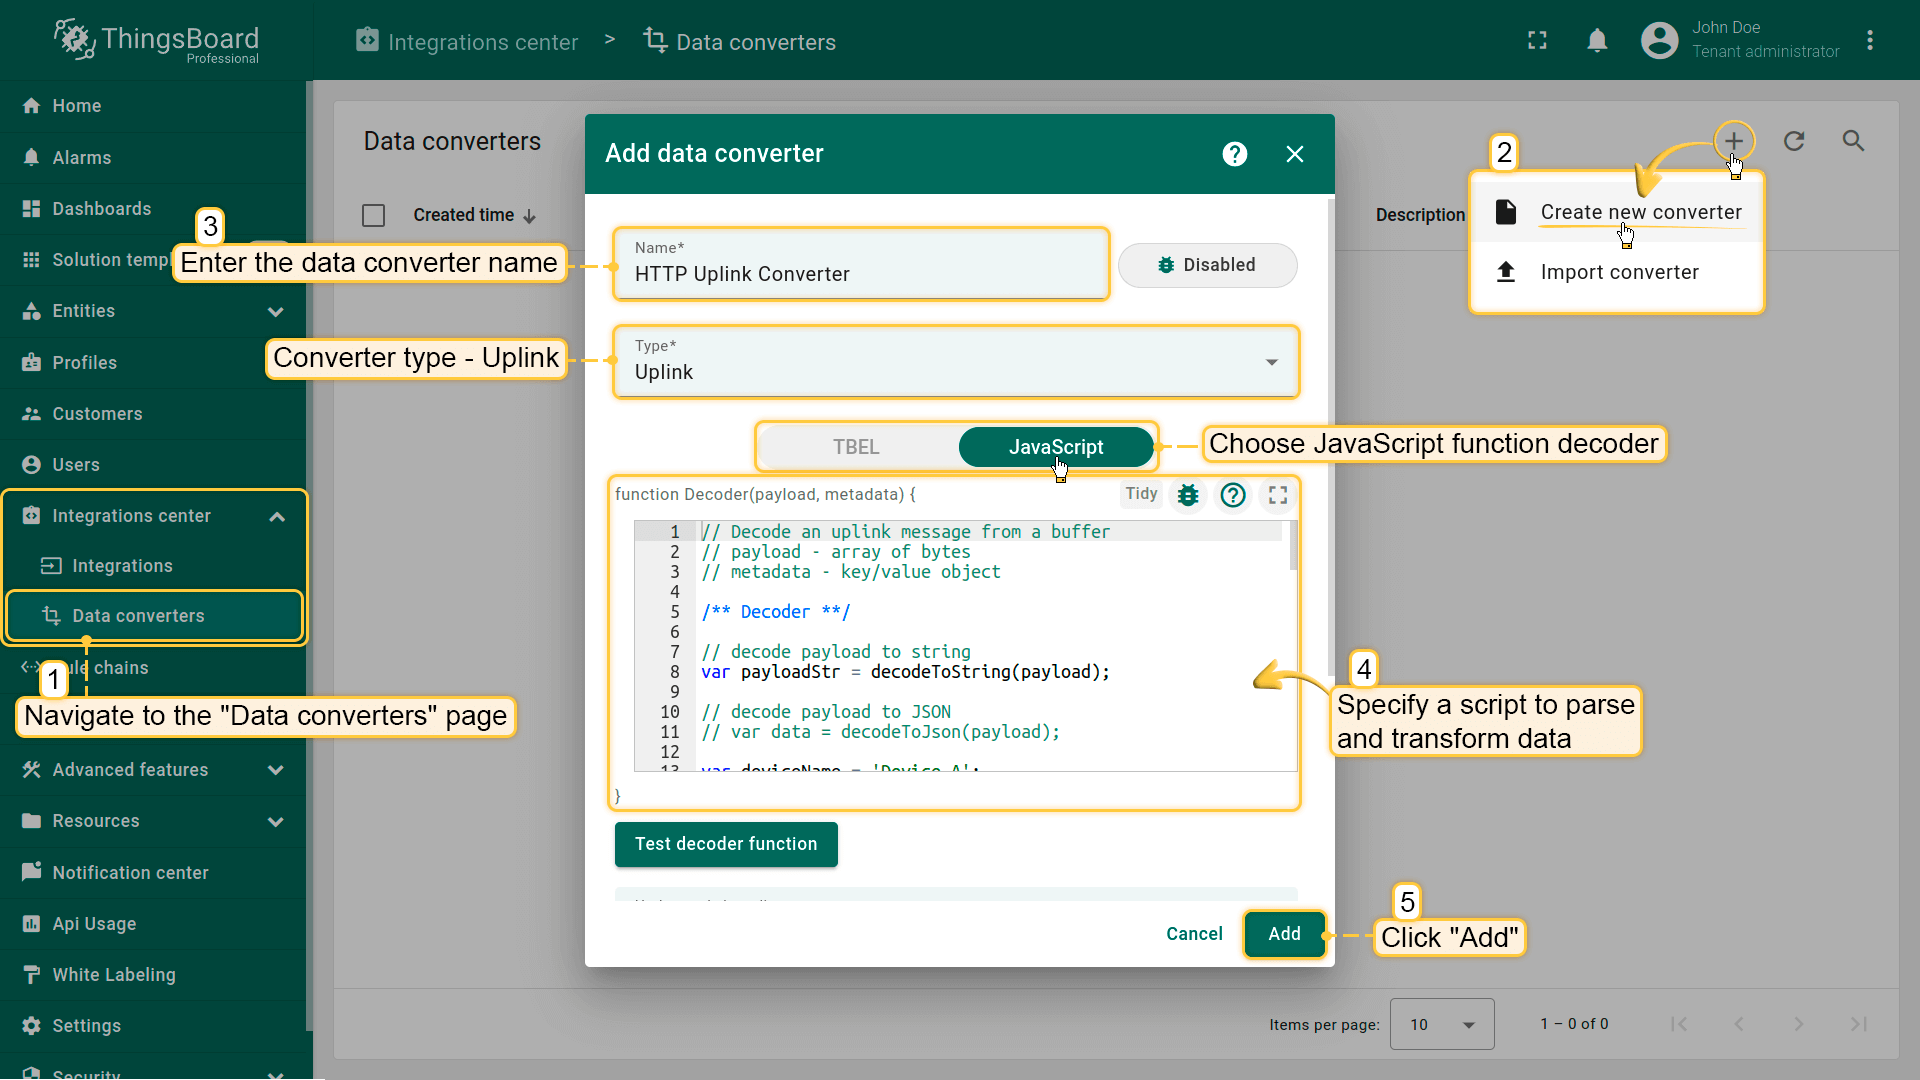
创建集成前,需在Data converters中创建上行转换器。上行转换器用于将设备入站数据转换为ThingsBoard展示所需的格式。 点击”plus”按钮并选择”Create new converter”。要查看事件,请启用Debug。 在decoder函数字段中,指定用于解析和转换数据的脚本。
调试模式
启用调试模式可追踪与integrations执行相关的事件、状态及潜在错误,便于开发和排障。
注意:调试模式可能迅速增加磁盘占用,因为所有调试事件都会存入数据库。 自ThingsBoard 3.9起,平台仅在integrations创建后的前15分钟内存储完整调试事件,之后仅保留错误事件。
调试模式设置可组合使用或完全关闭。
可使用 TBEL(TBEL)或 JavaScript 开发用户自定义函数。 建议使用 TBEL,其在ThingsBoard 中的执行效率远高于 JS。
|
Uplink converter 示例: 可在创建 converter 时或创建后修改 decoder function。若 converter 已存在,点击「铅笔」图标进行编辑。 复制 converter 的配置示例(或您自己的配置)并插入到 decoder function 中。点击「勾选」图标保存更改。 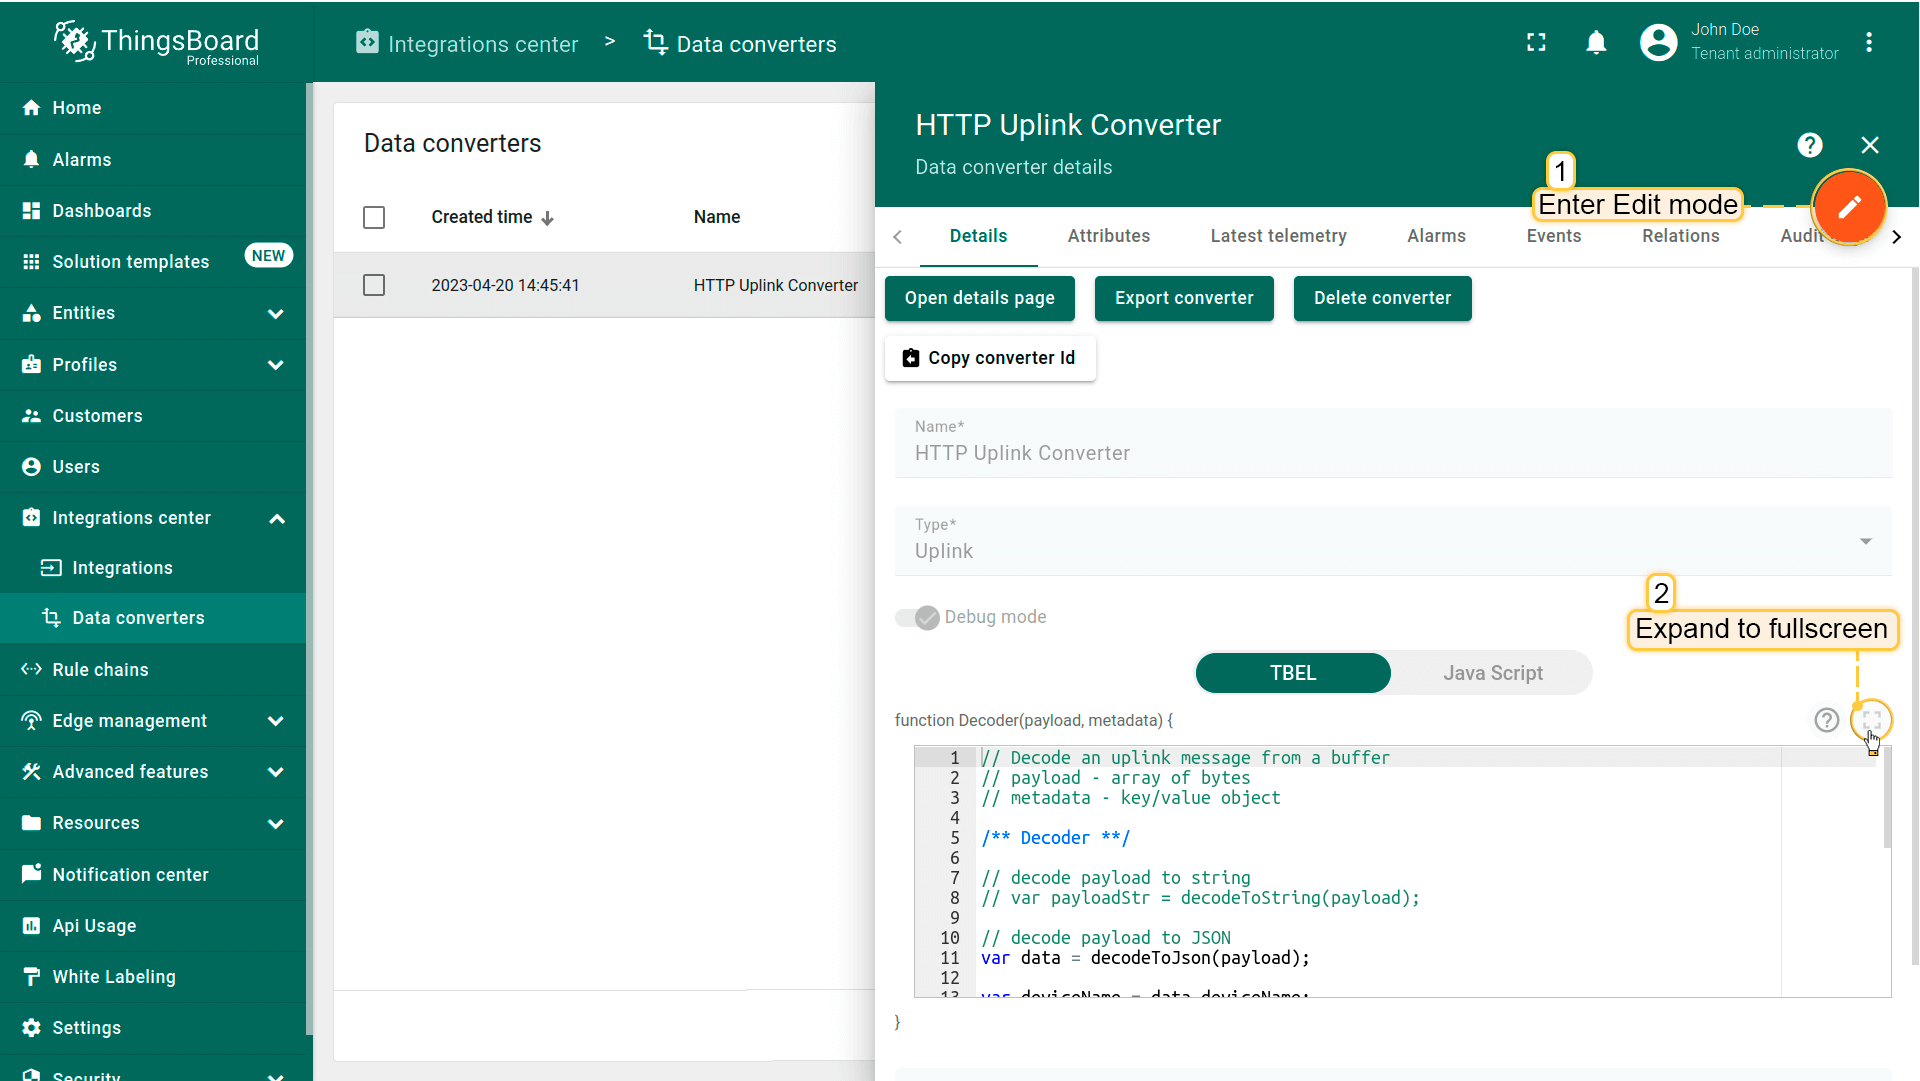 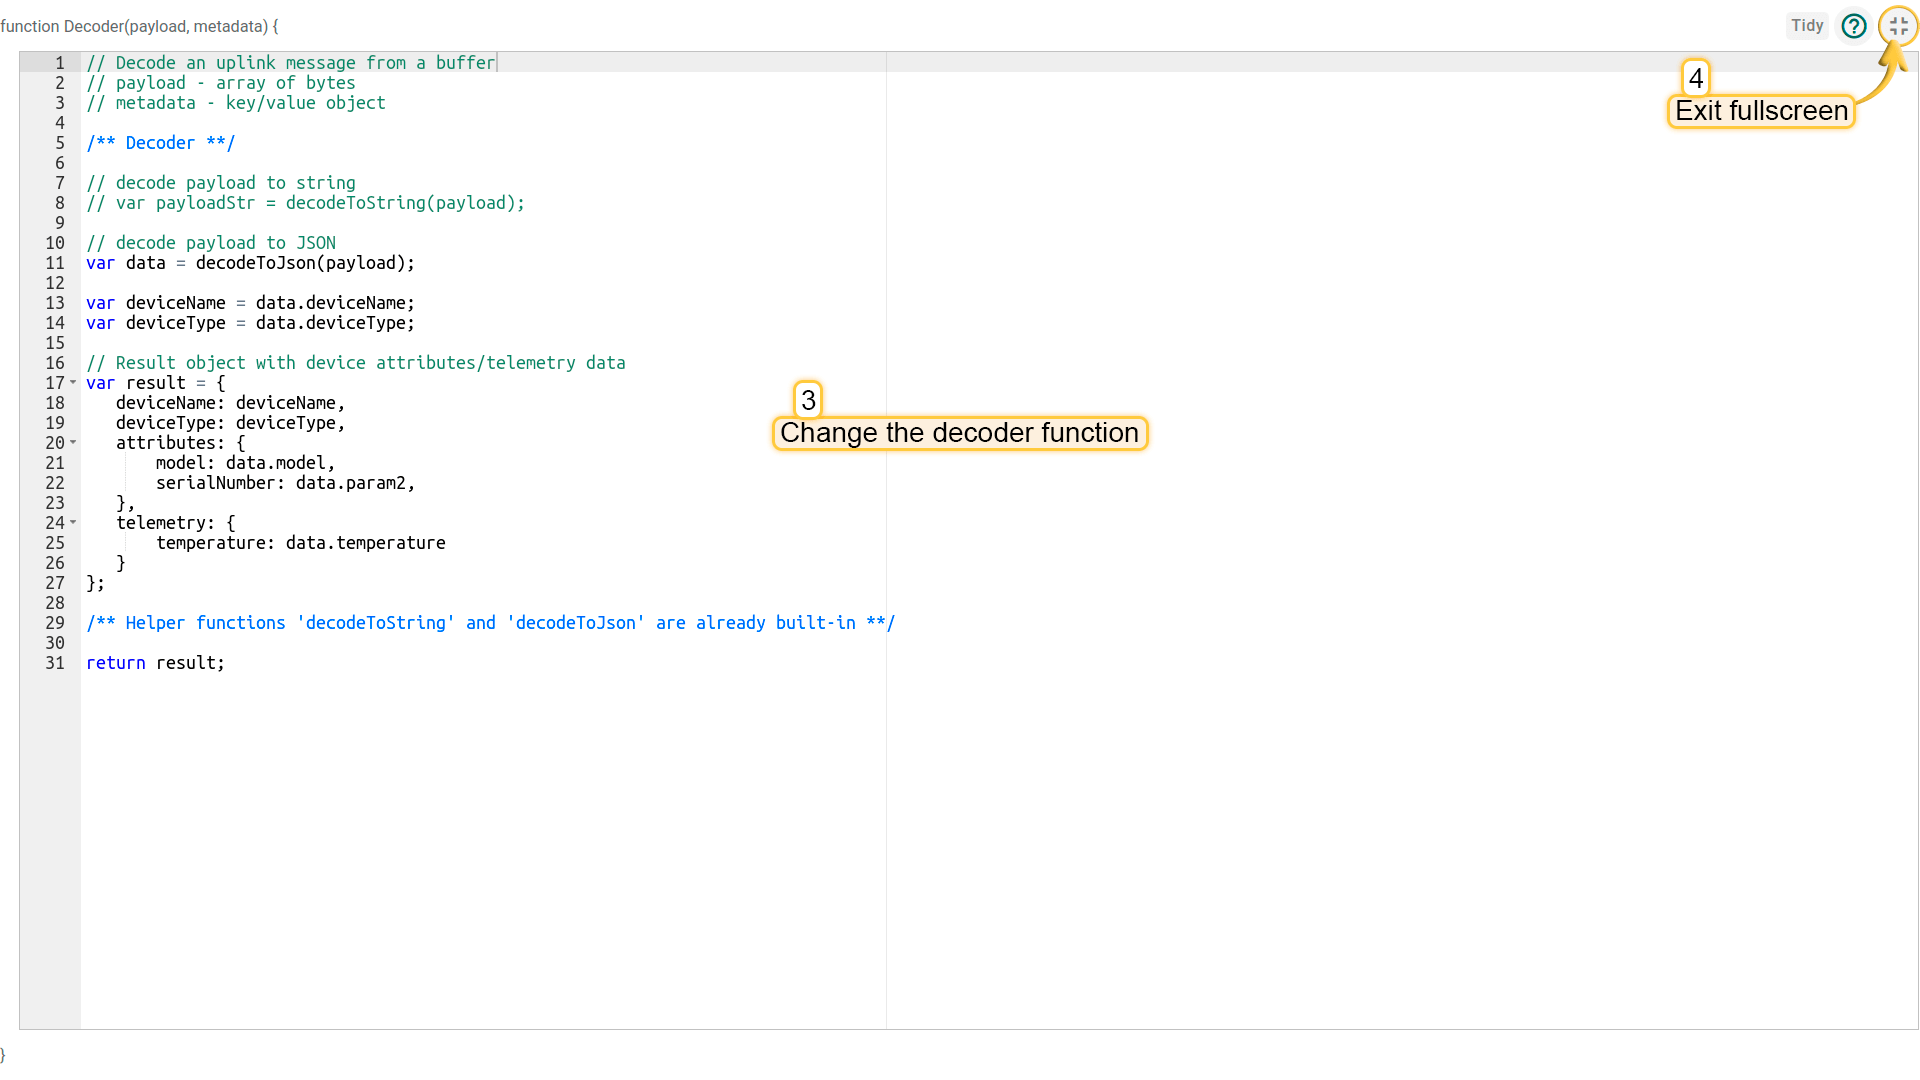 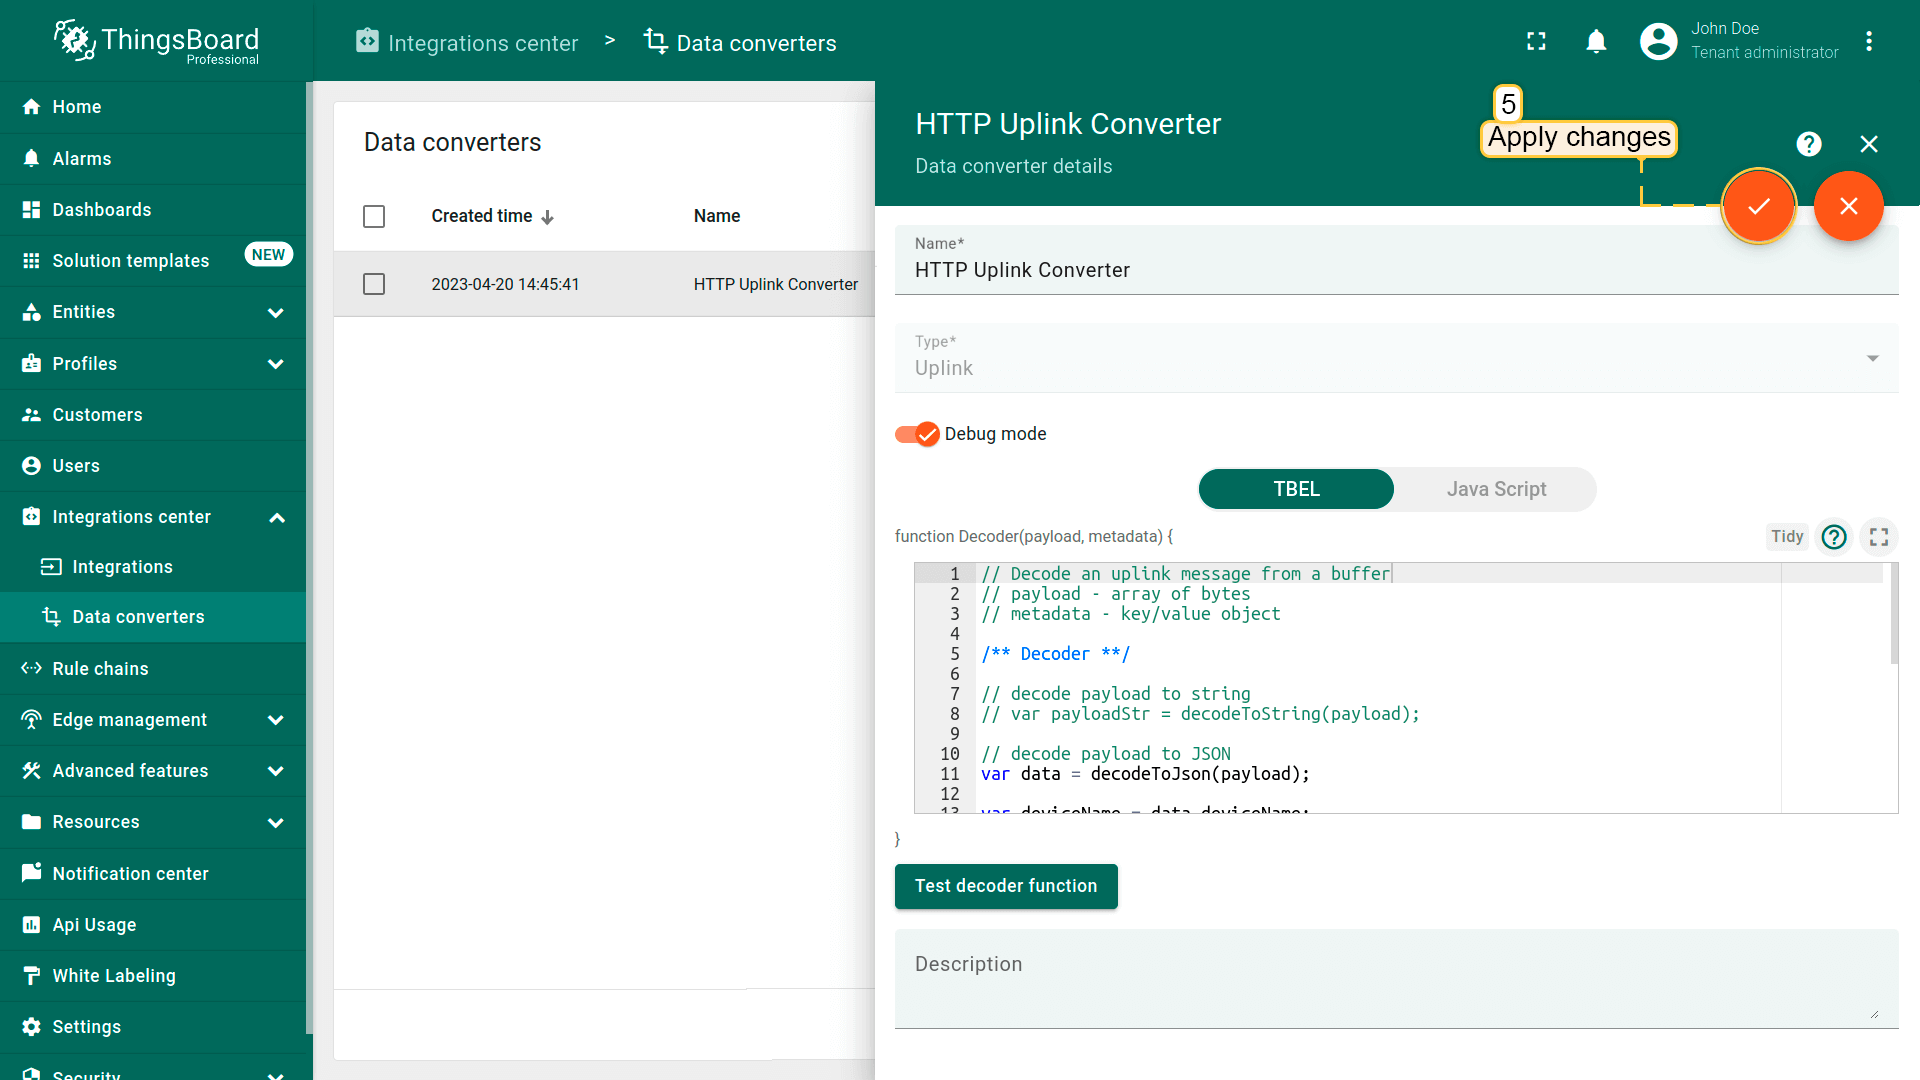 |
|
Uplink converter 示例: 可在创建 converter 时或创建后修改 decoder function。若 converter 已存在,点击「铅笔」图标进行编辑。 复制 converter 的配置示例(或您自己的配置)并插入到 decoder function 中。点击「勾选」图标保存更改。 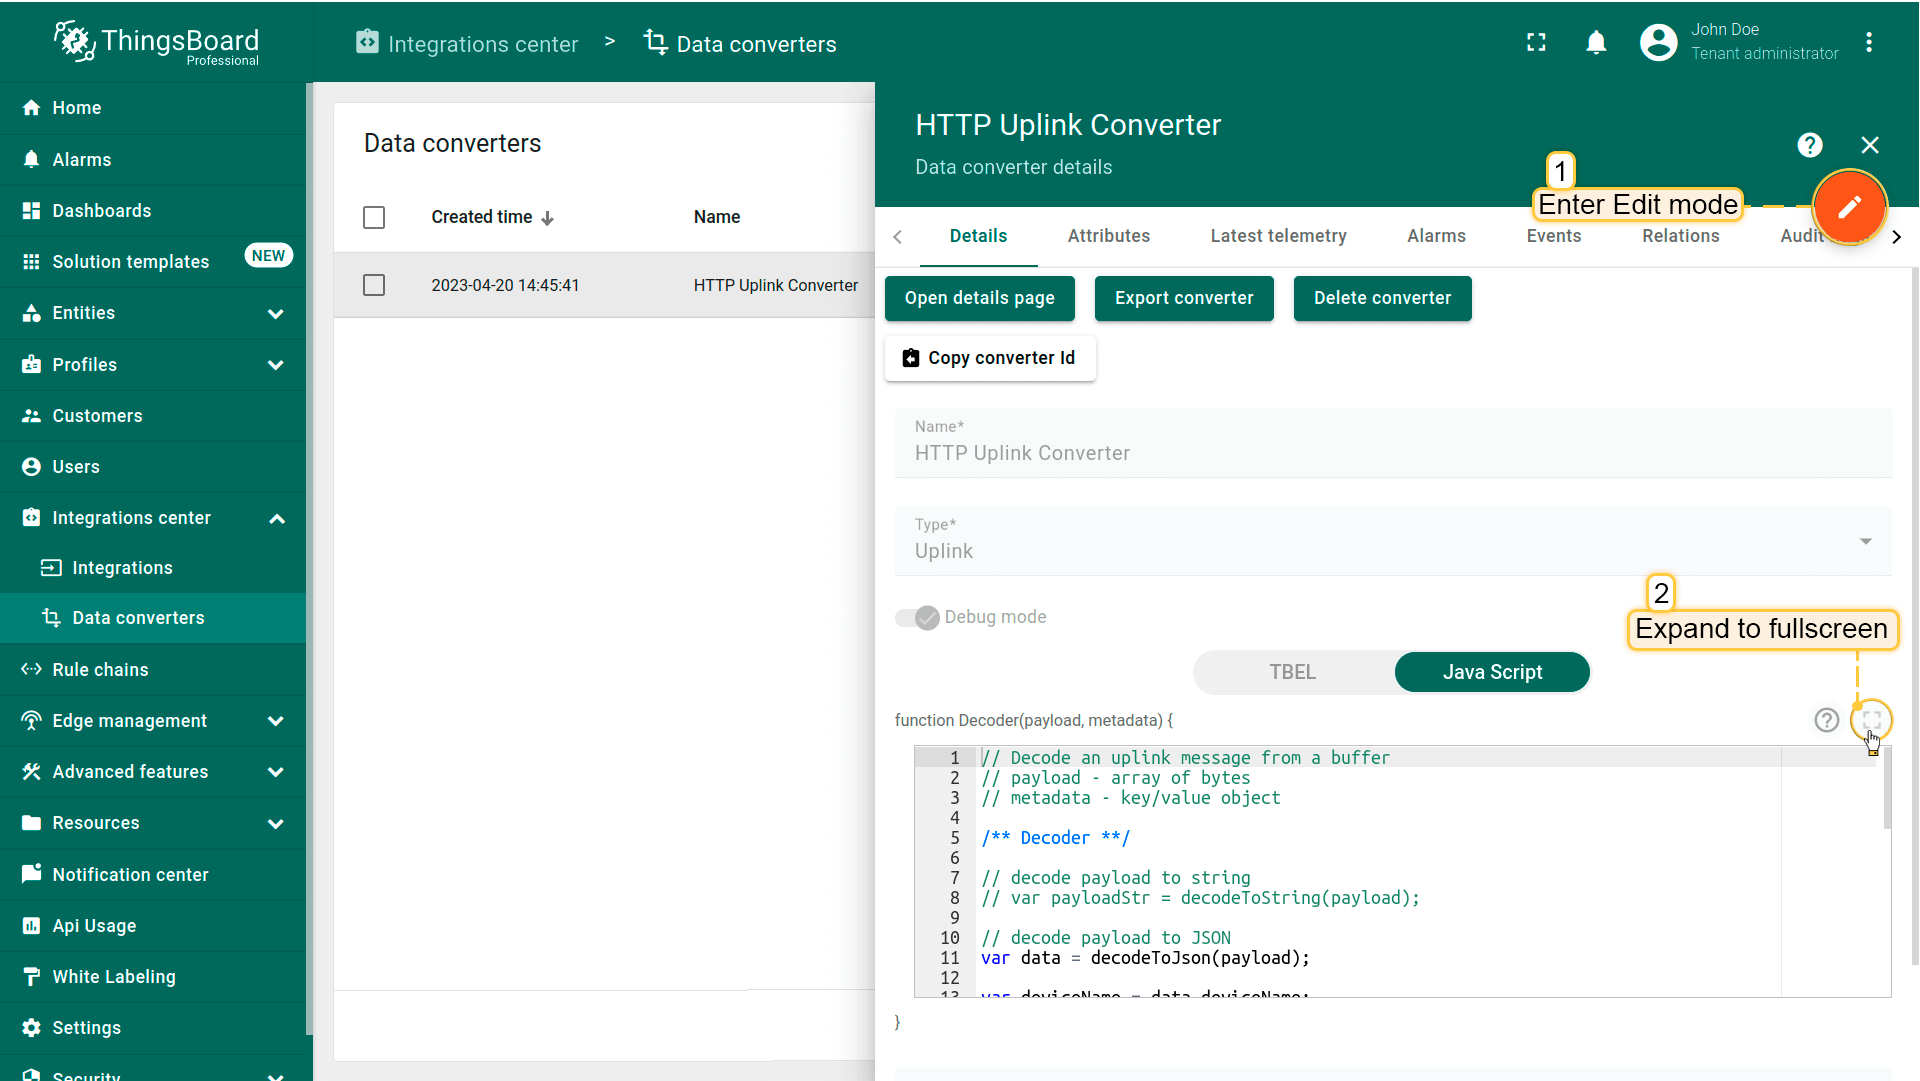 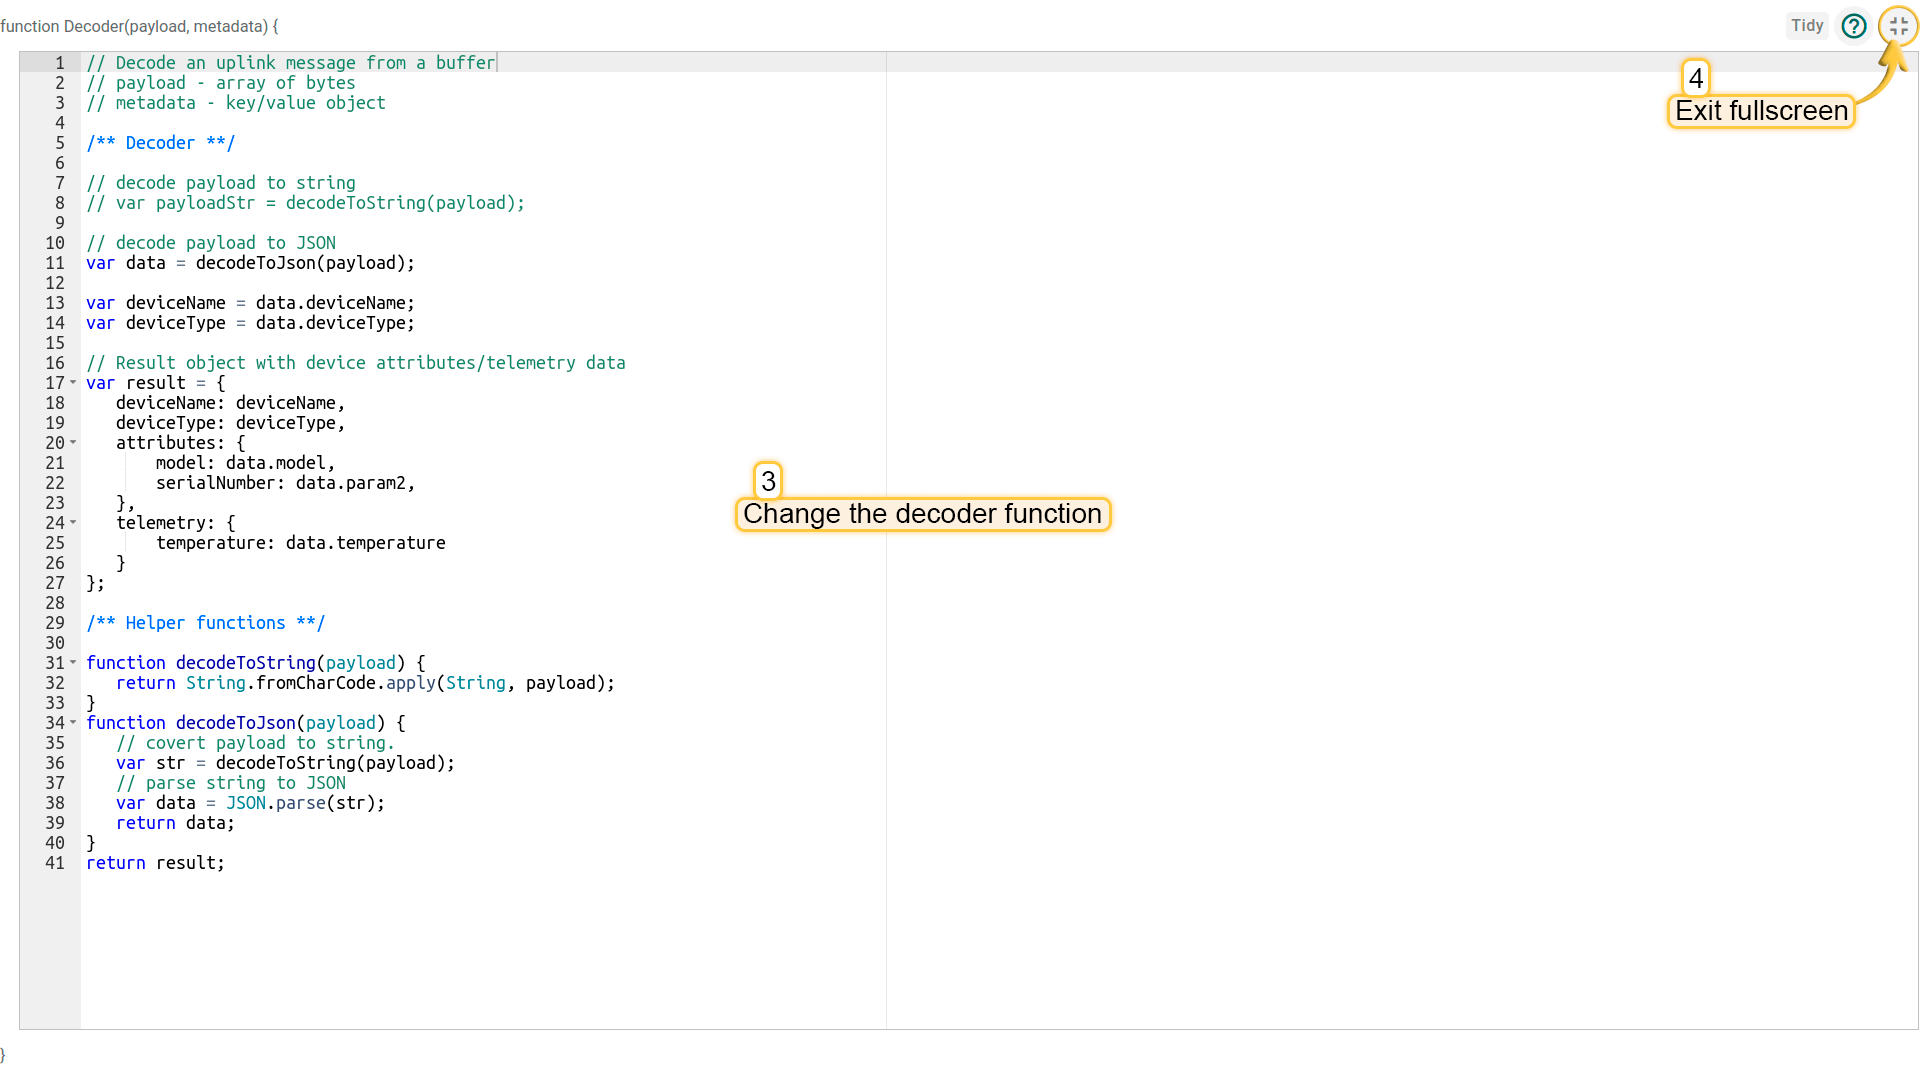 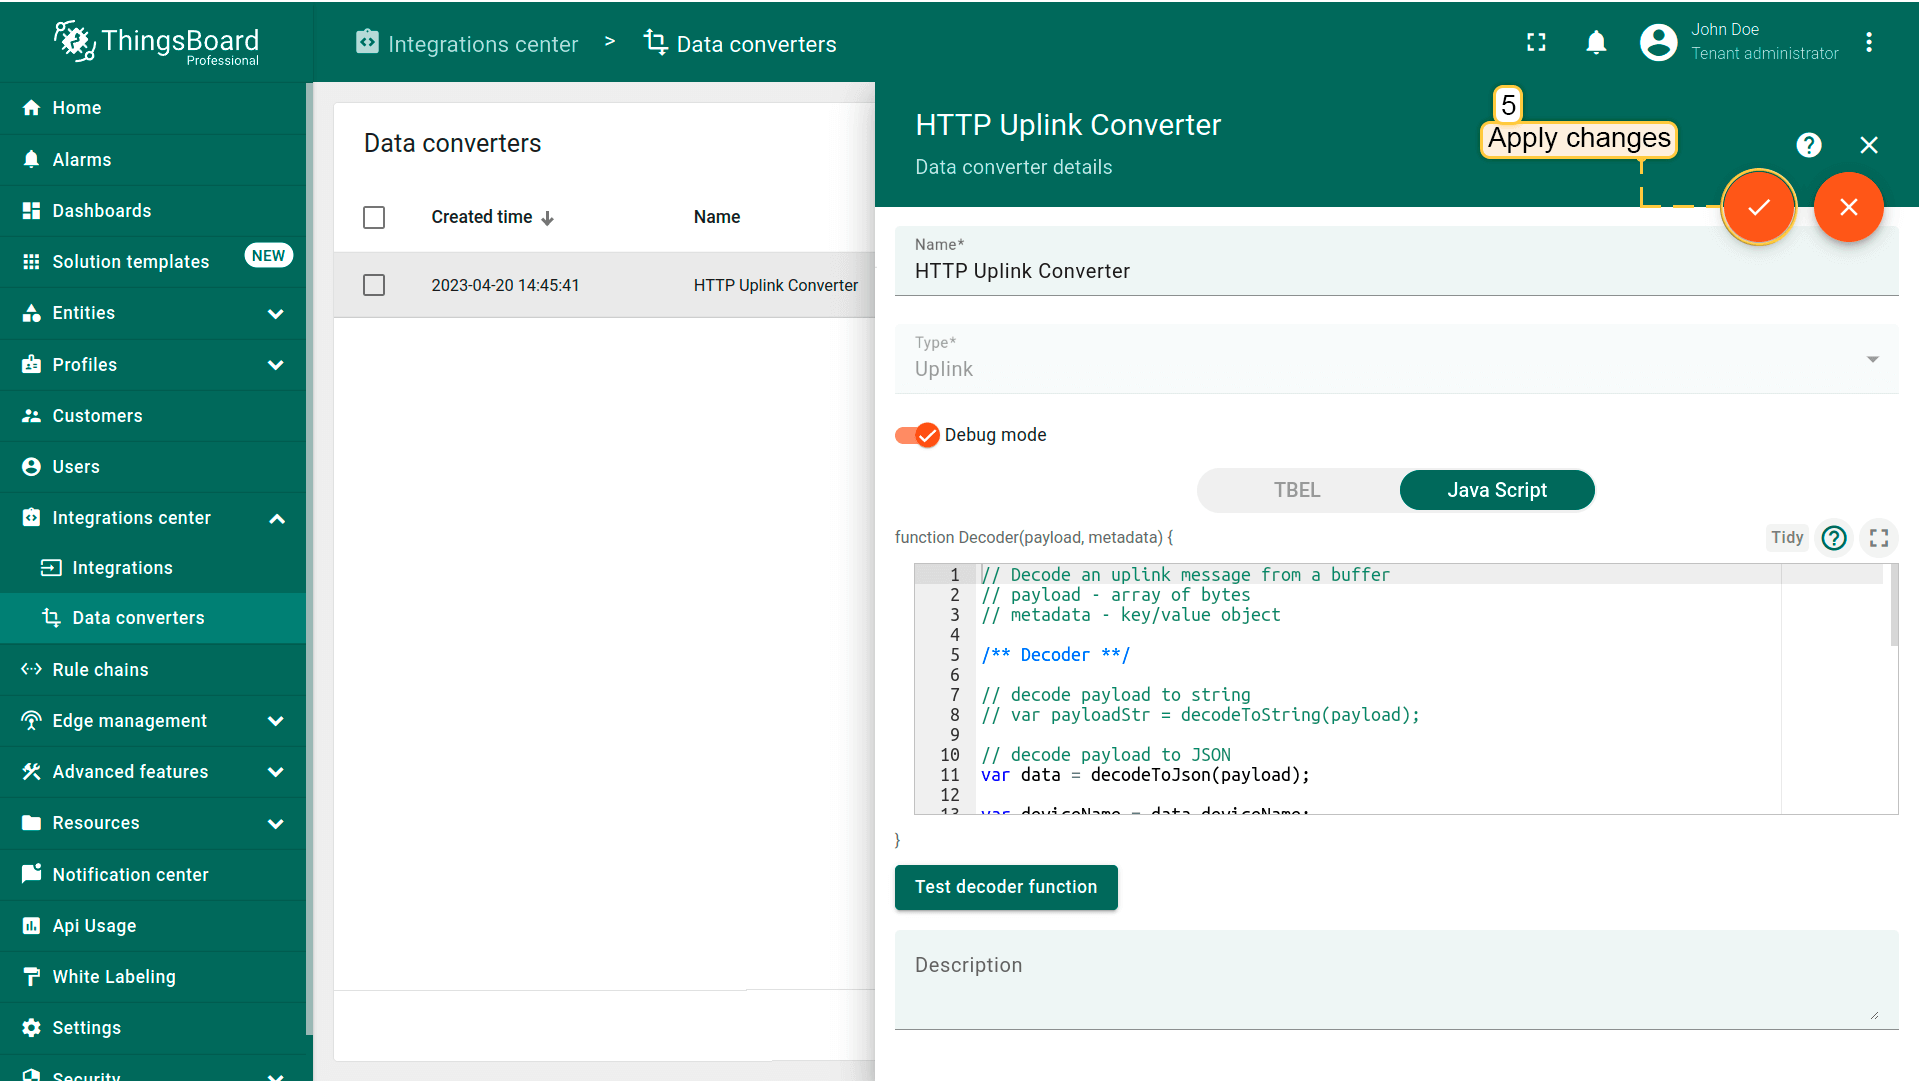 |
上行转换器创建完成后即可创建集成。
创建集成
- 进入“Integrations center”->“Integrations”页面,点击“plus”创建新集成。命名为“HTTP Integration”,选择类型“HTTP”。点击“Next”;

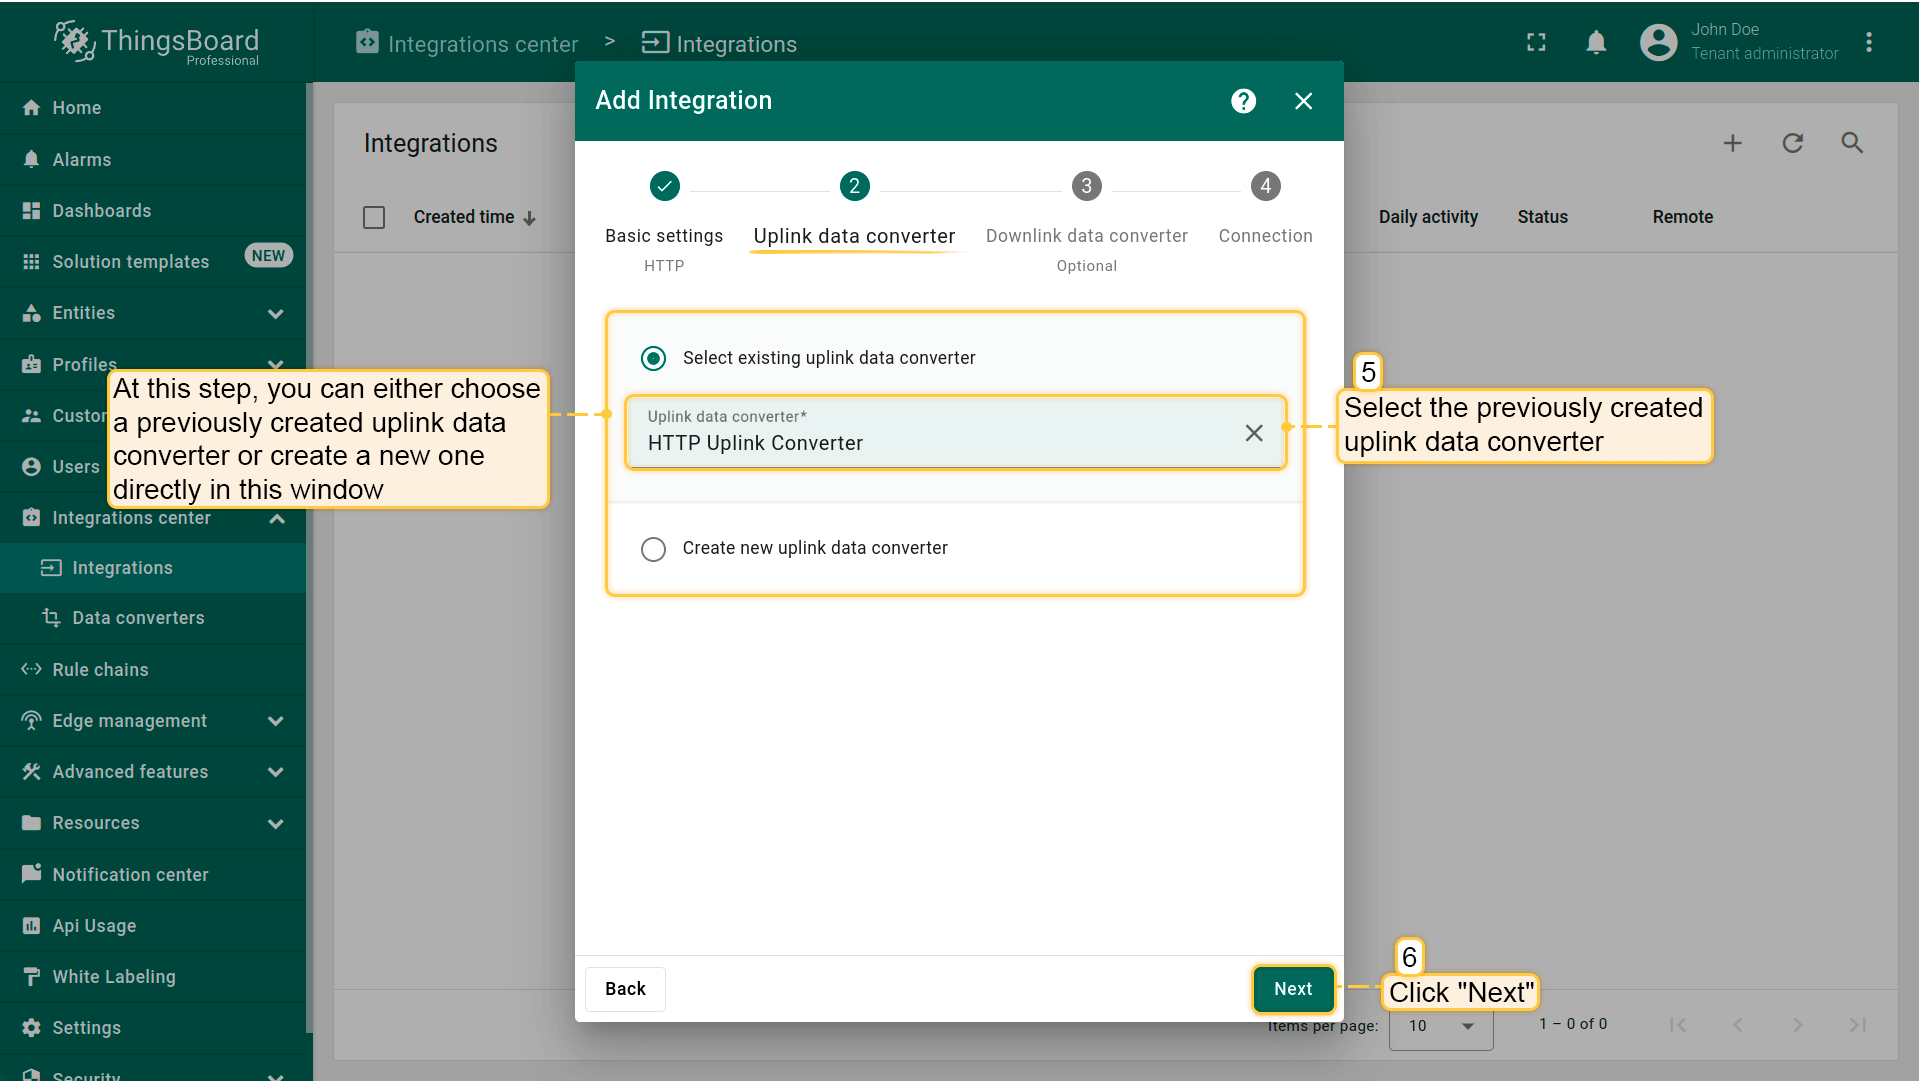
- 在此步骤可选择已有或新建上行转换器。选择刚创建的“HTTP Uplink Converter”。点击“Next”;
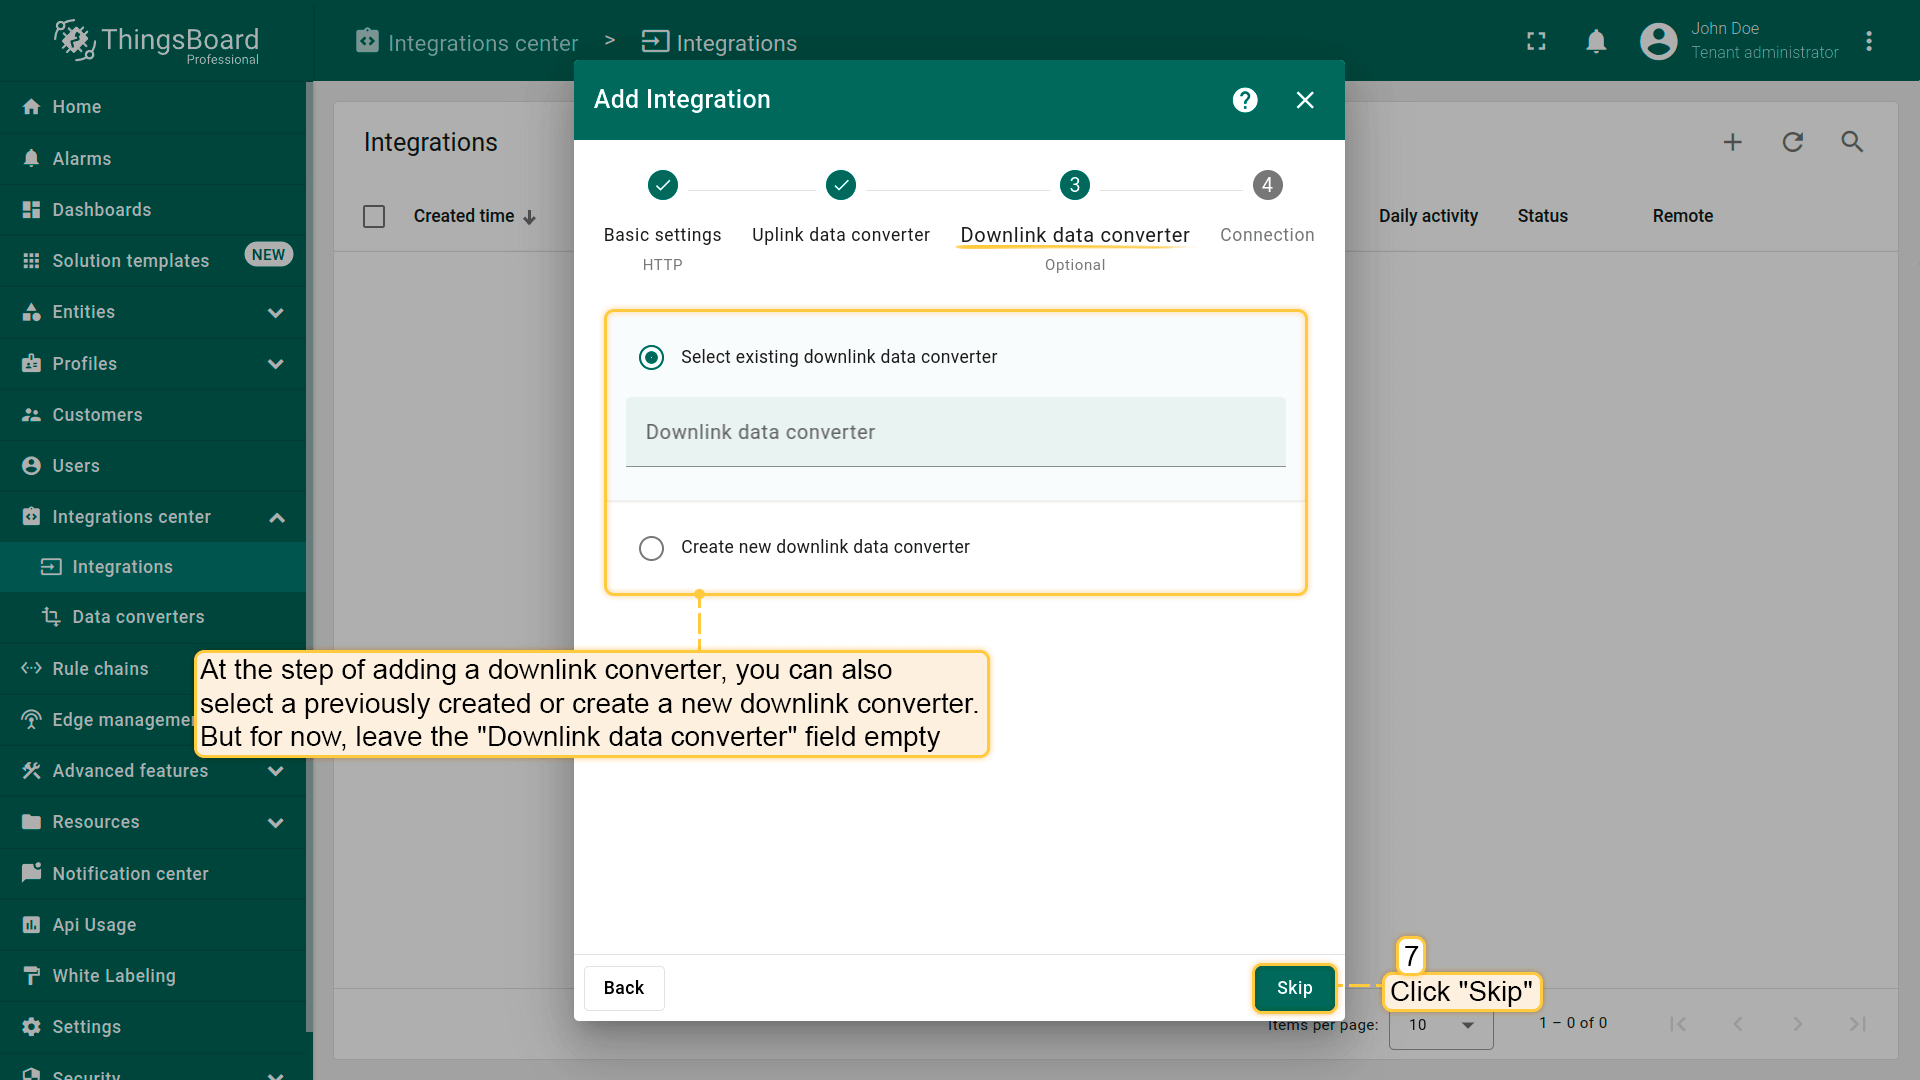
- 在添加下行转换器步骤中,也可选择已有或新建下行转换器。此处保持“Downlink data converter”为空。点击“Skip”;
-
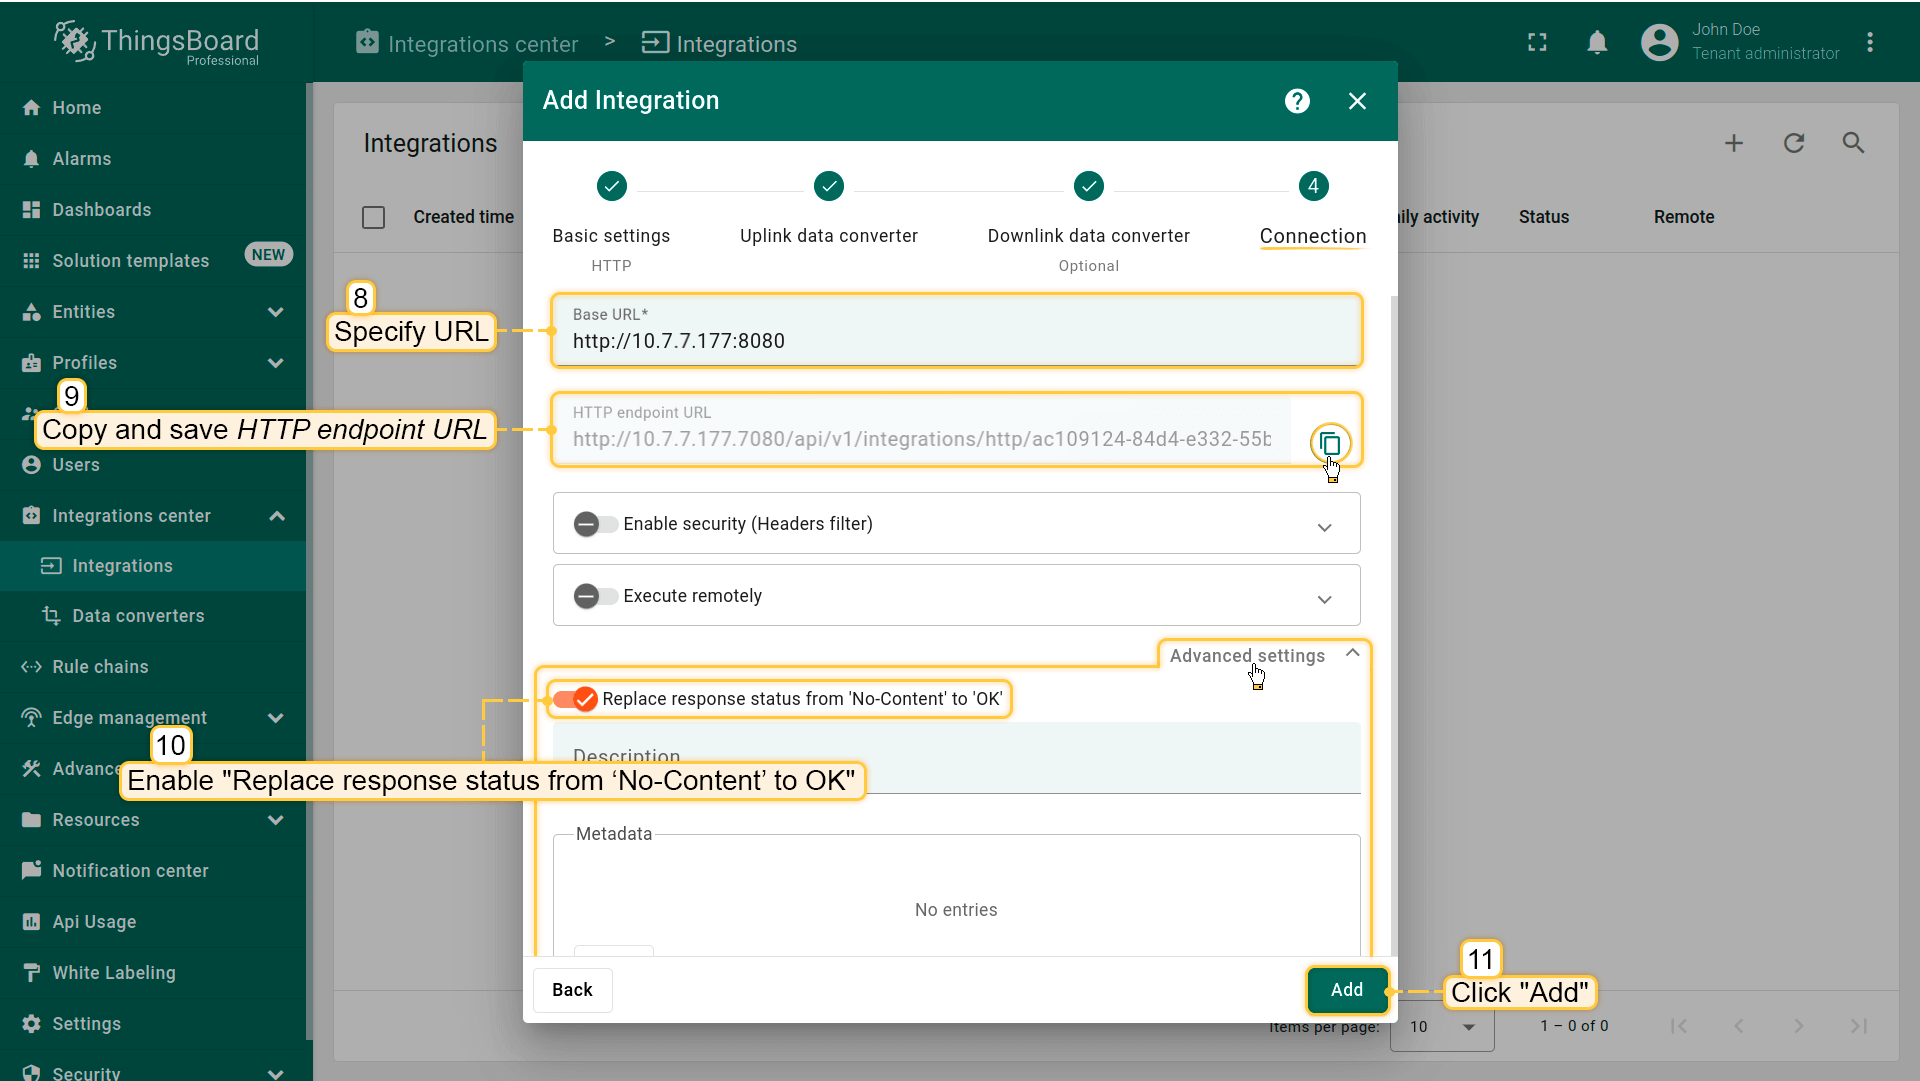
在此步骤指定“Base URL”;
-
记录“HTTP endpoint URL”,后续会用到;
-
在“Advanced settings”中启用“Replace response status from ‘No-Content’ to ‘OK’”;
-
点击“Add”保存集成。
发送上行消息
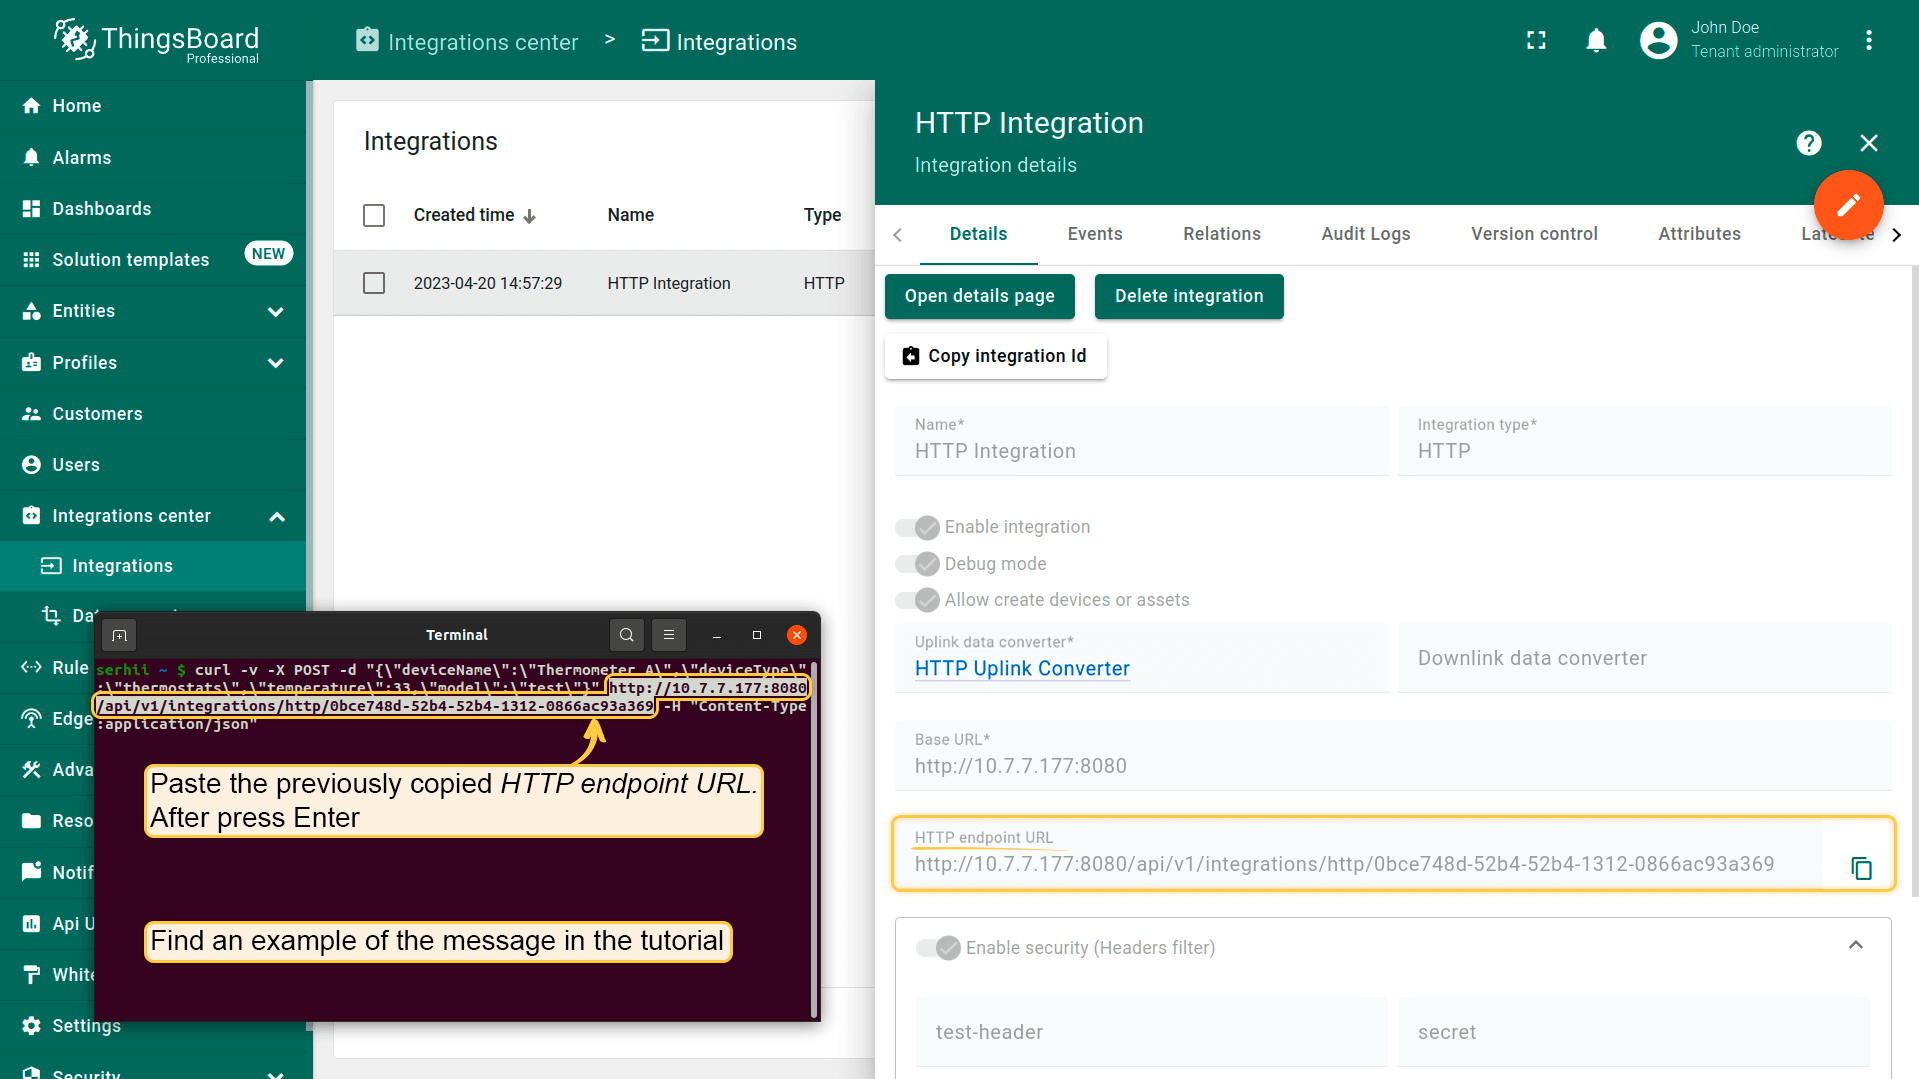
发送上行消息需要用到之前从集成中复制的“HTTP endpoint URL”。
使用下列命令发送消息。请将 $DEVICE_NAME、$DEVICE_TYPE 和 $YOUR_HTTP_ENDPOINT_URL 替换为实际值。
1
curl -v -X POST -d "{\"deviceName\":\"$DEVICE_NAME\",\"deviceType\":\"$DEVICE_TYPE\",\"temperature\":33,\"model\":\"test\"}" $YOUR_HTTP_ENDPOINT_URL -H "Content-Type:application/json"
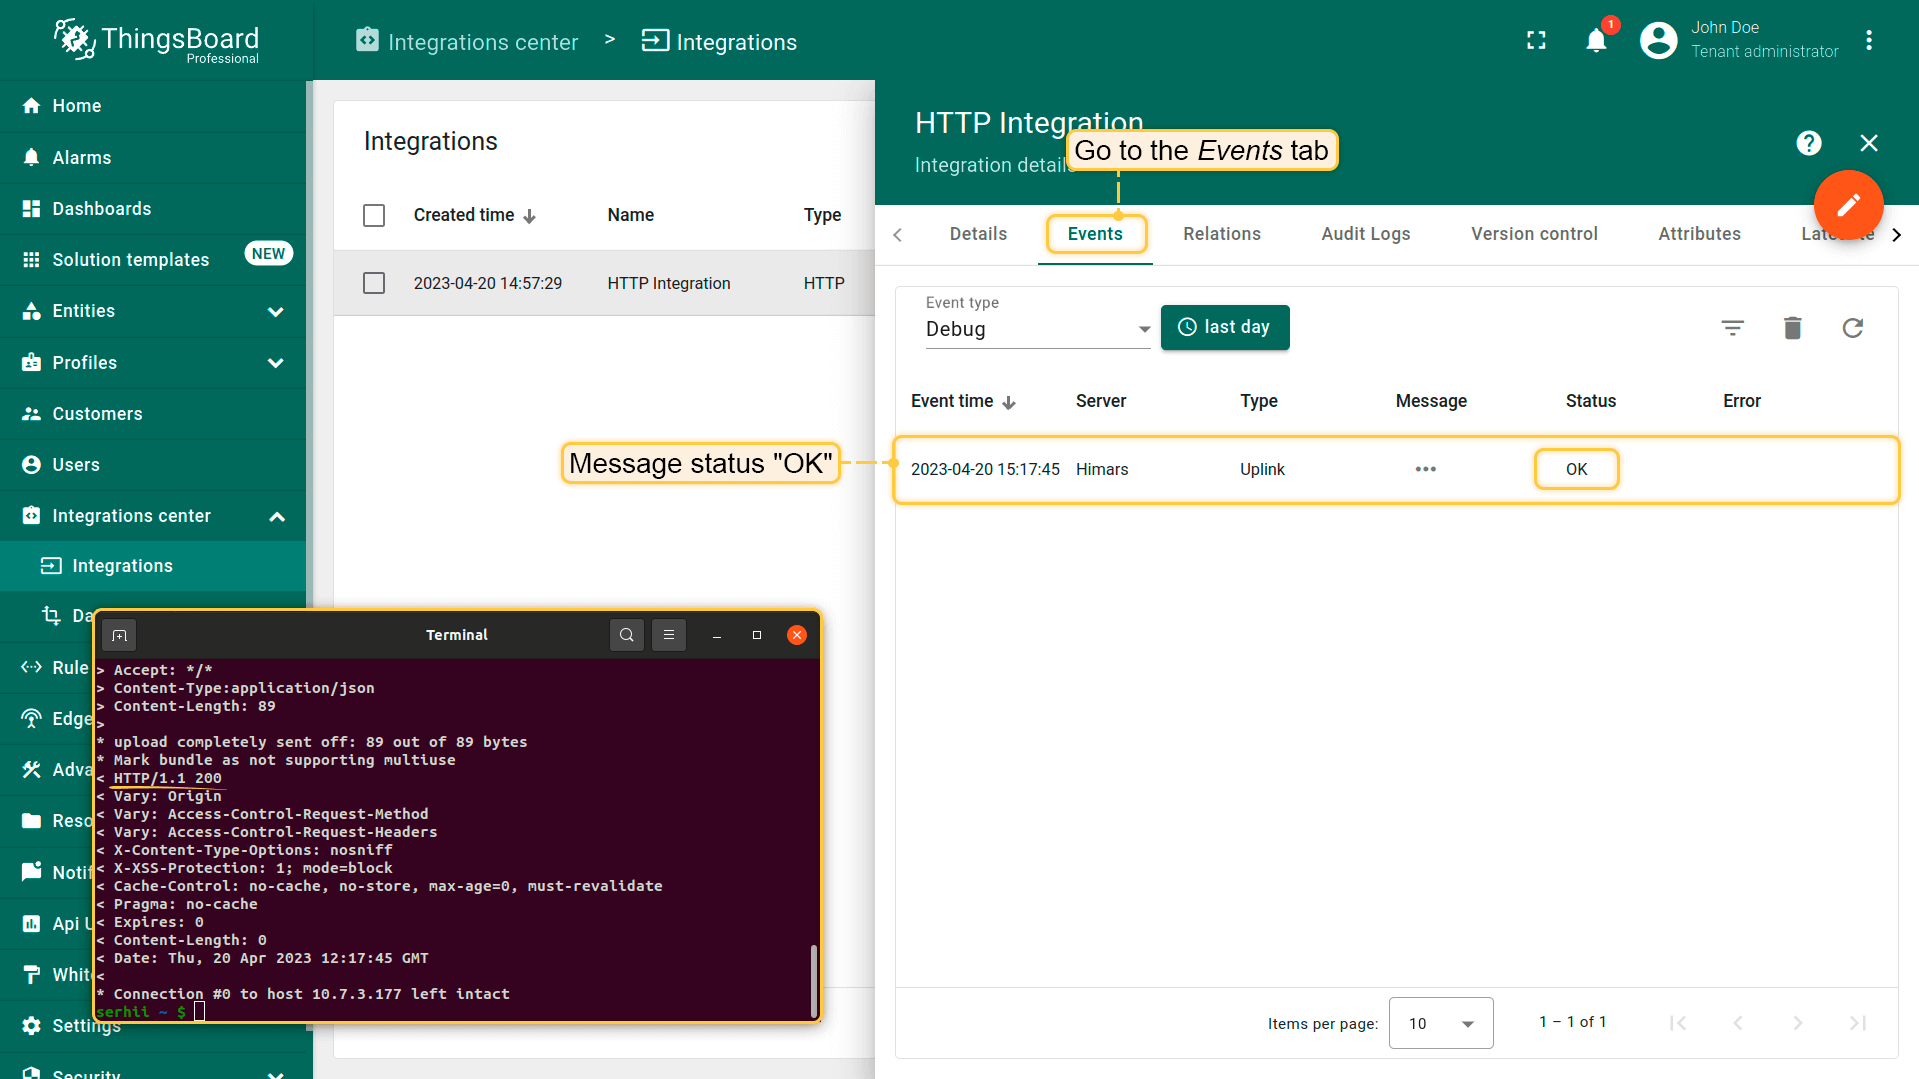
进入HTTP集成的“Events”标签。若配置正确,应能看到一条状态为’OK’的事件。
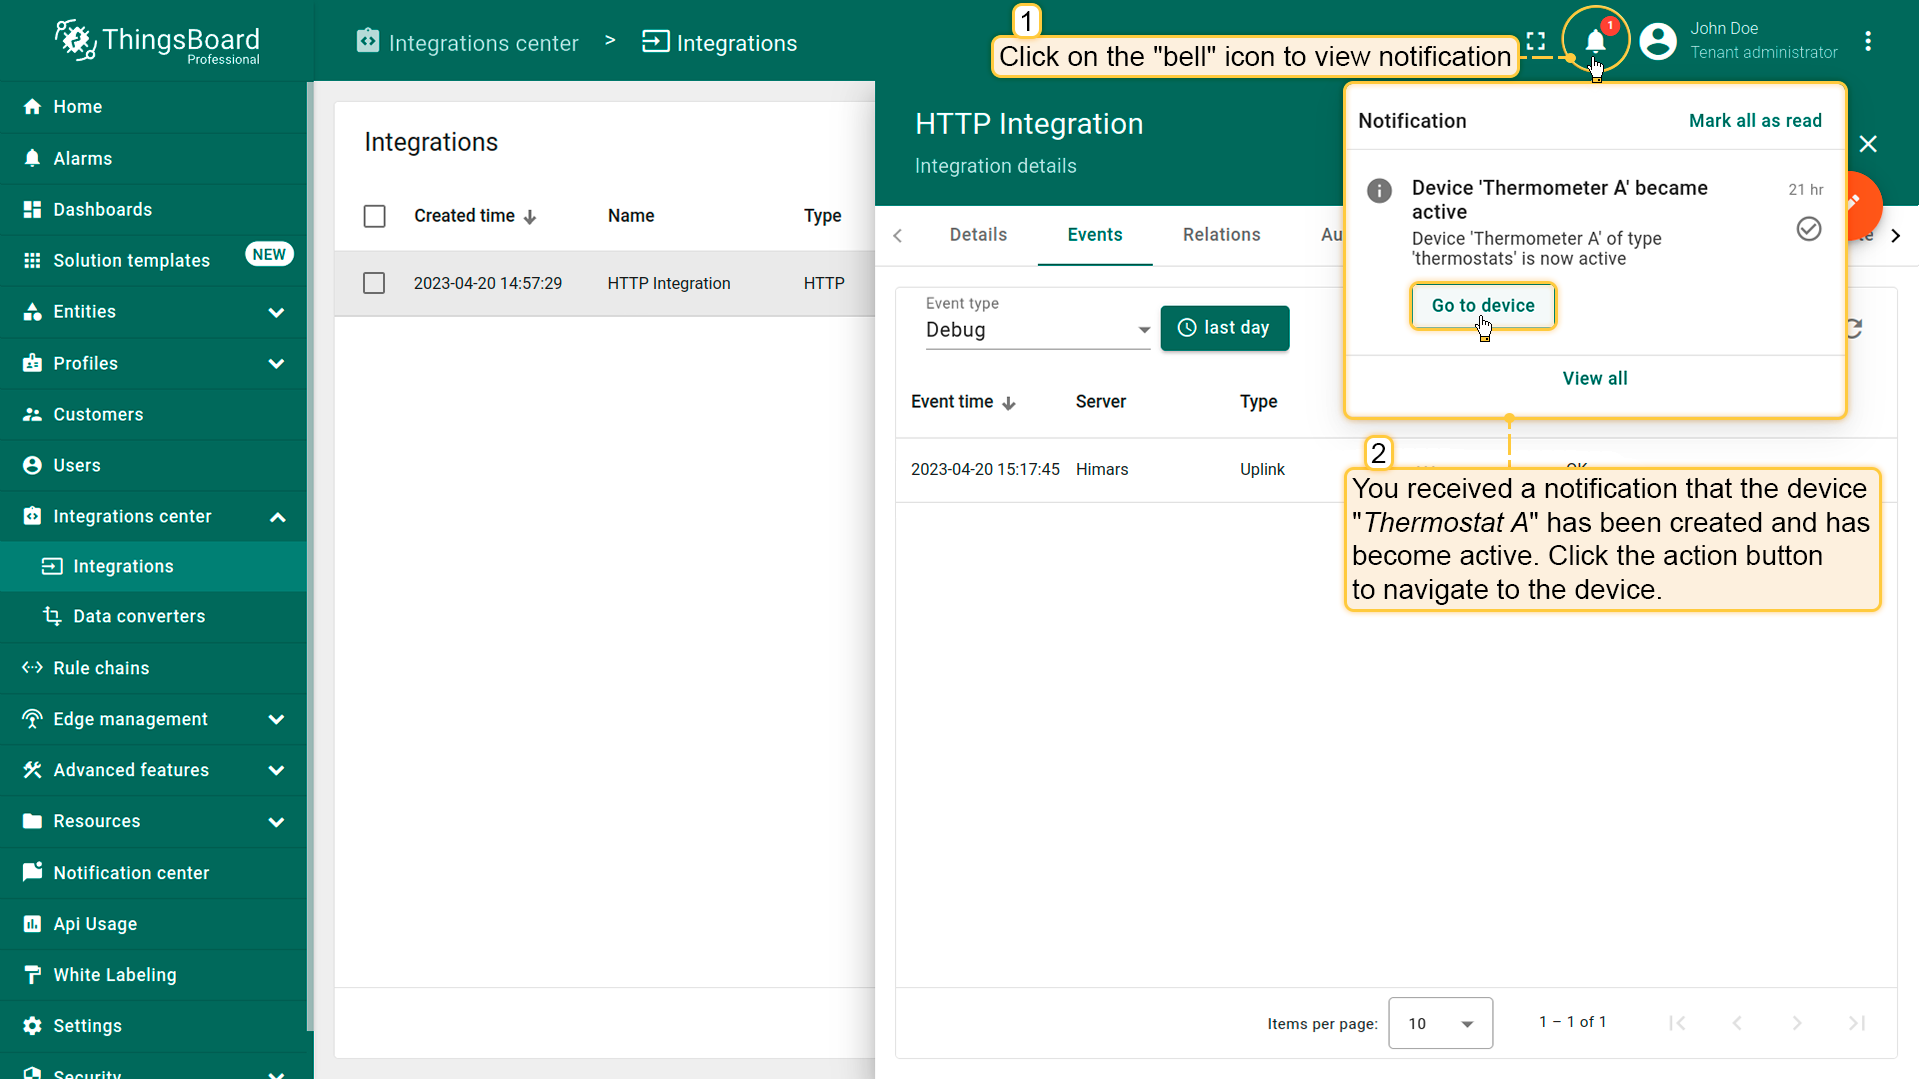
发送消息后,新设备已被创建。您会收到相关通知。点击右上角铃铛图标查看通知。
通知中有操作按钮,点击可进入新设备详情。
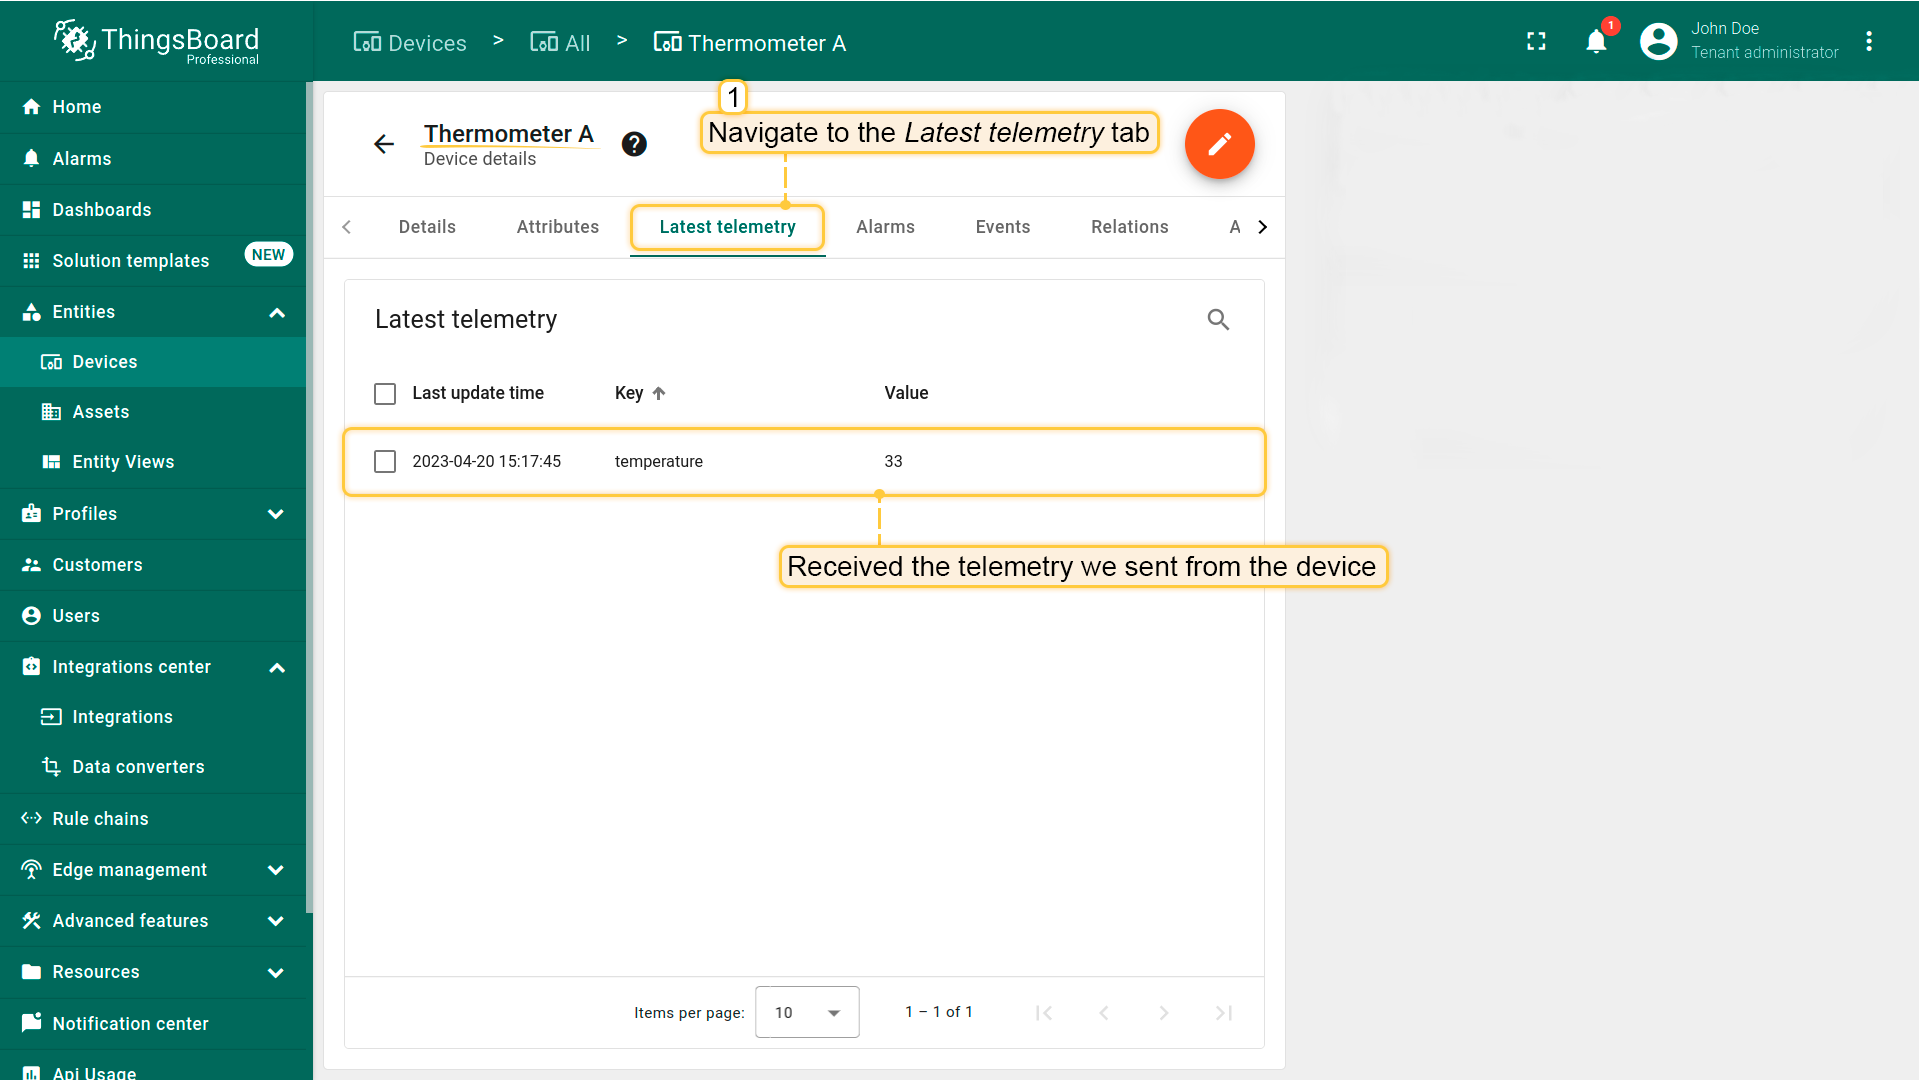
此处可看到新设备信息以及我们从设备发送到ThingsBoard的遥测数据。
了解通知及如何配置,请参阅此处。
注意
若未勾选“Allow create devices or assets”,发送包含设备(或资产)参数的消息到ThingsBoard时,若该设备(资产)不存在,则不会创建设备(资产)。
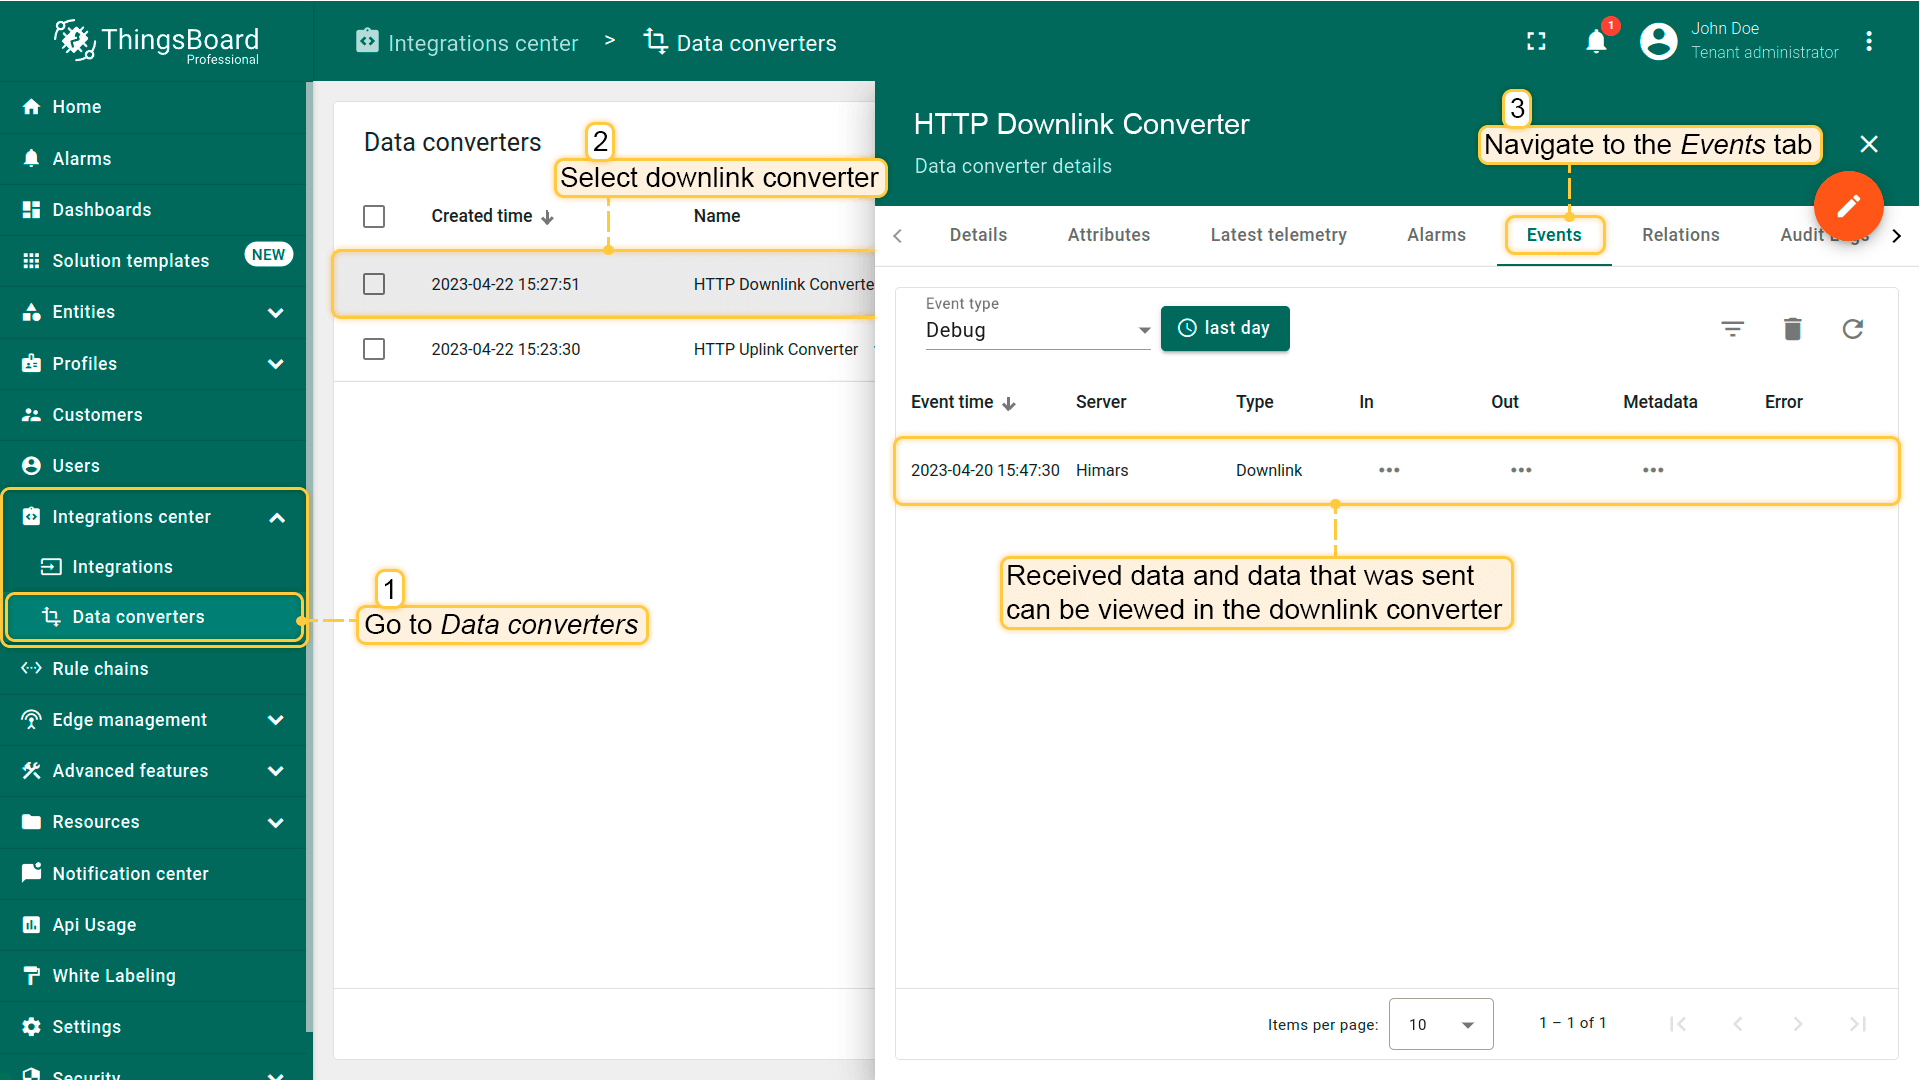
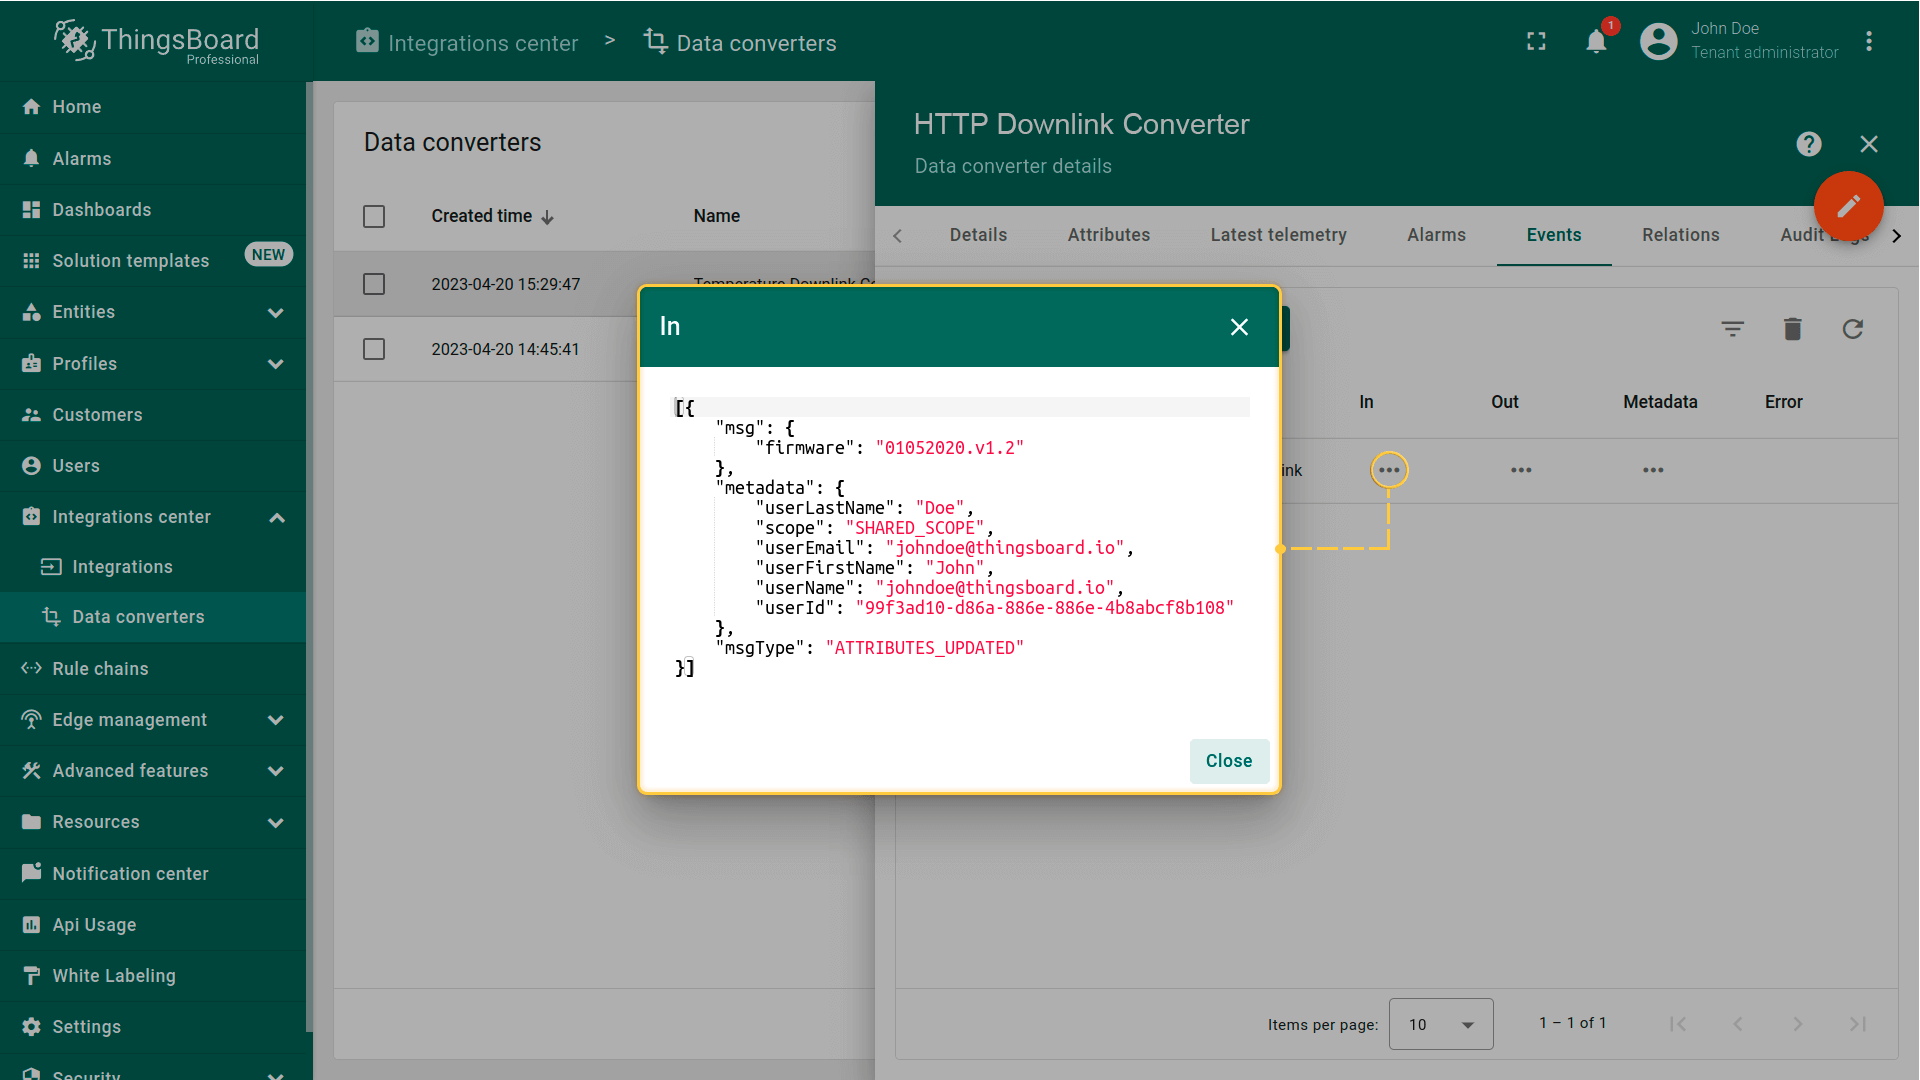
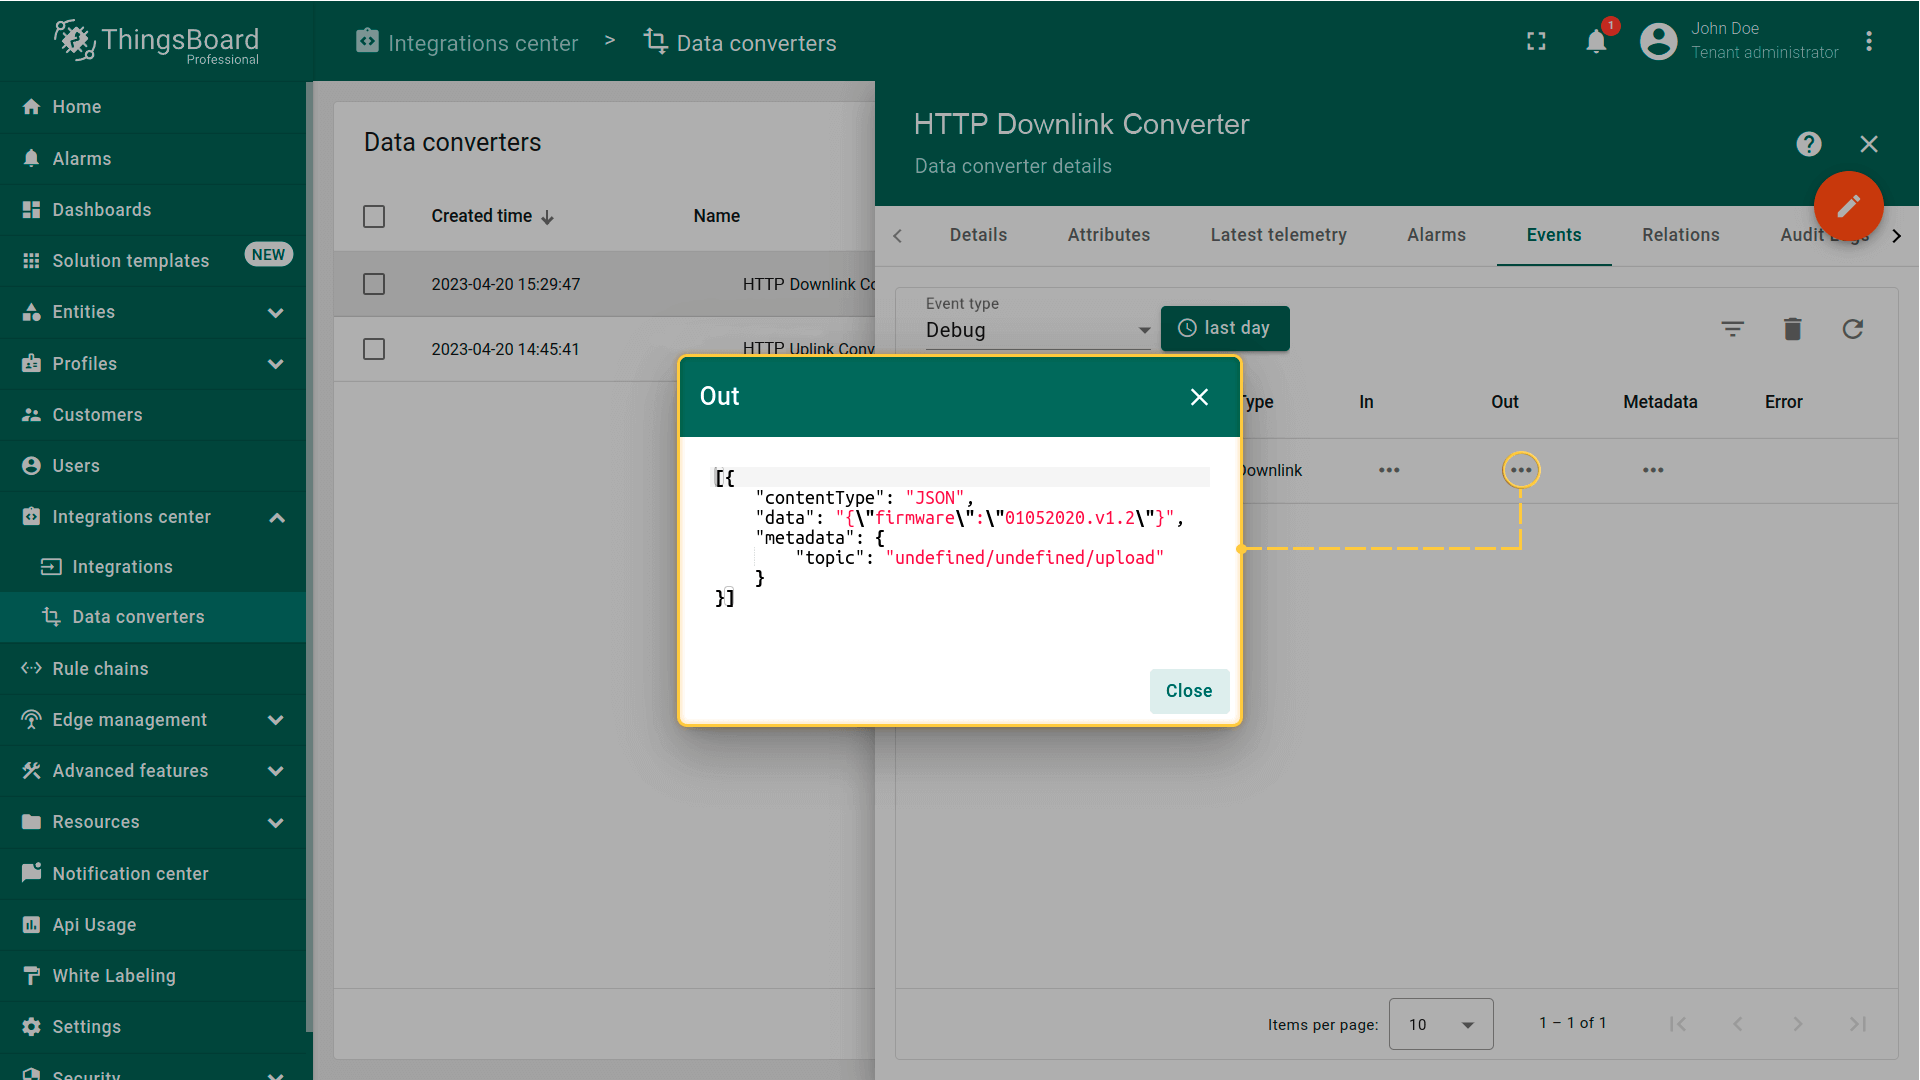
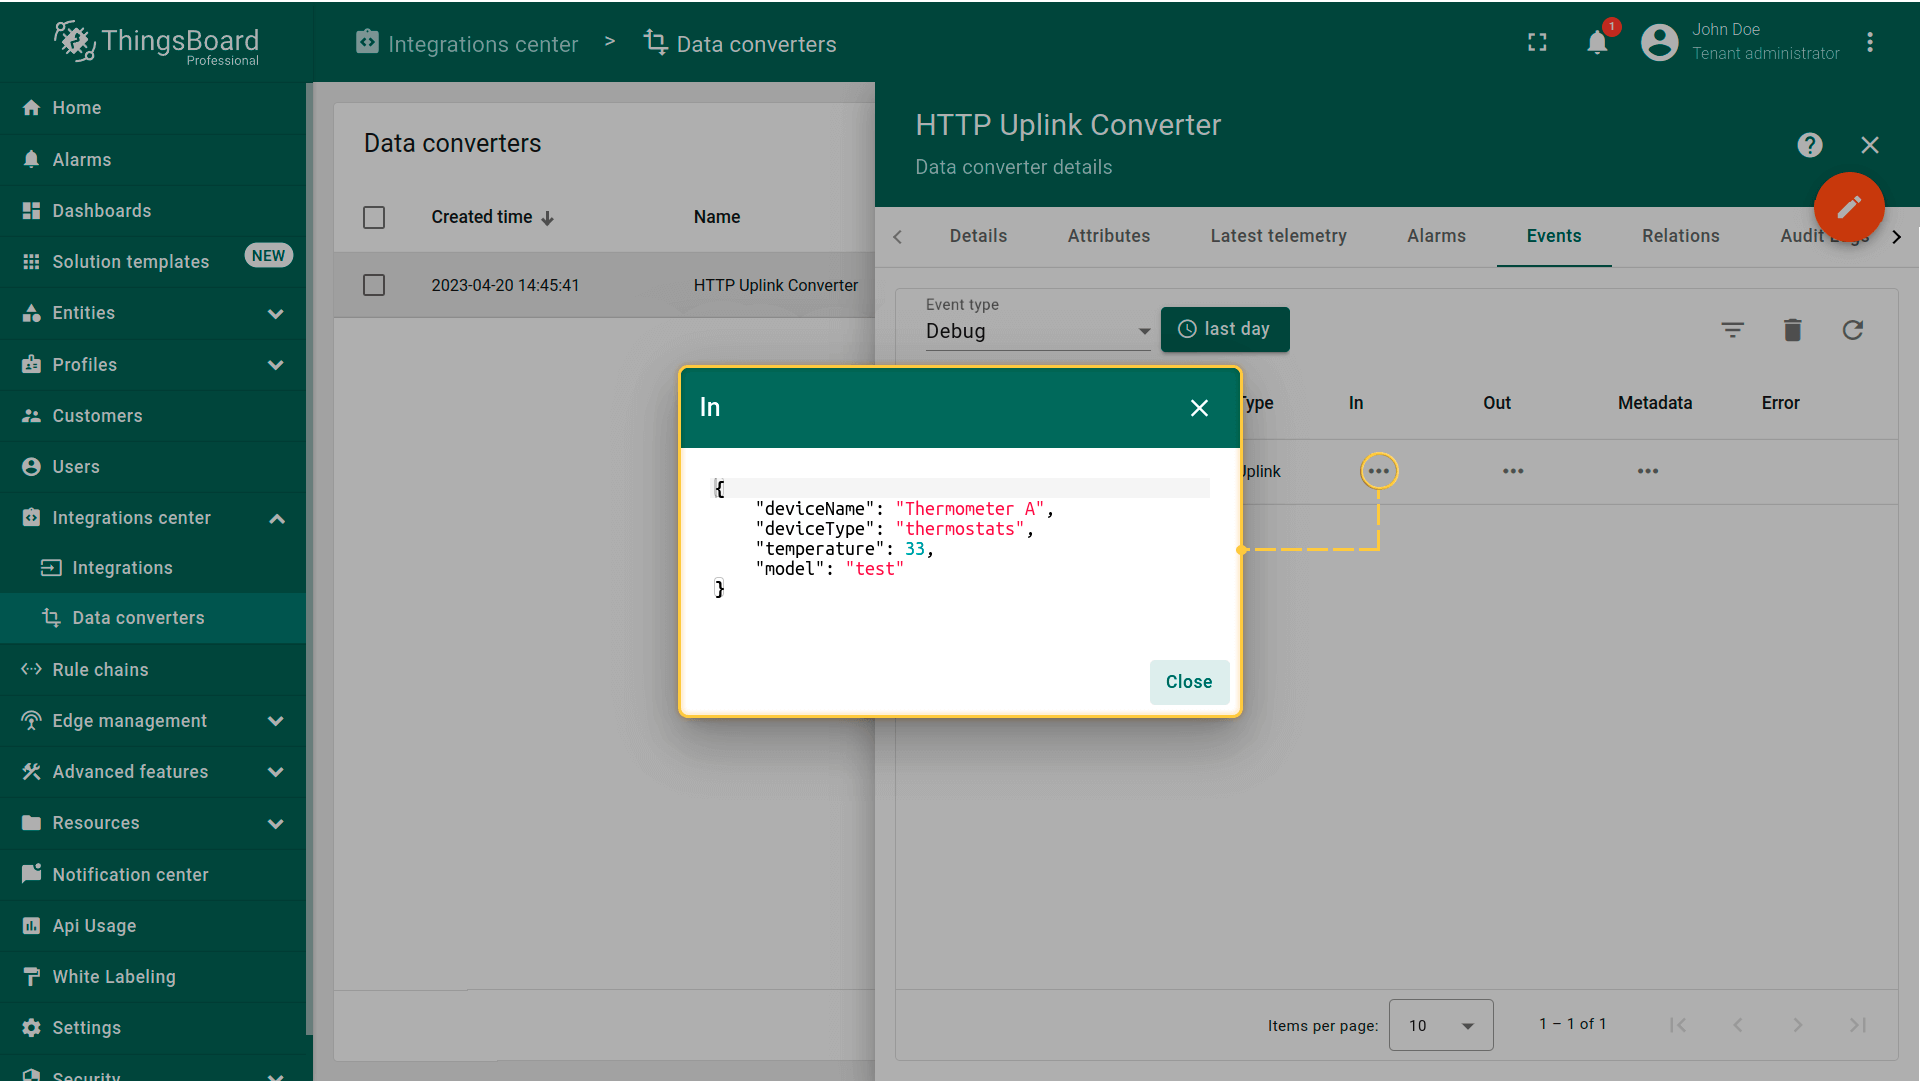
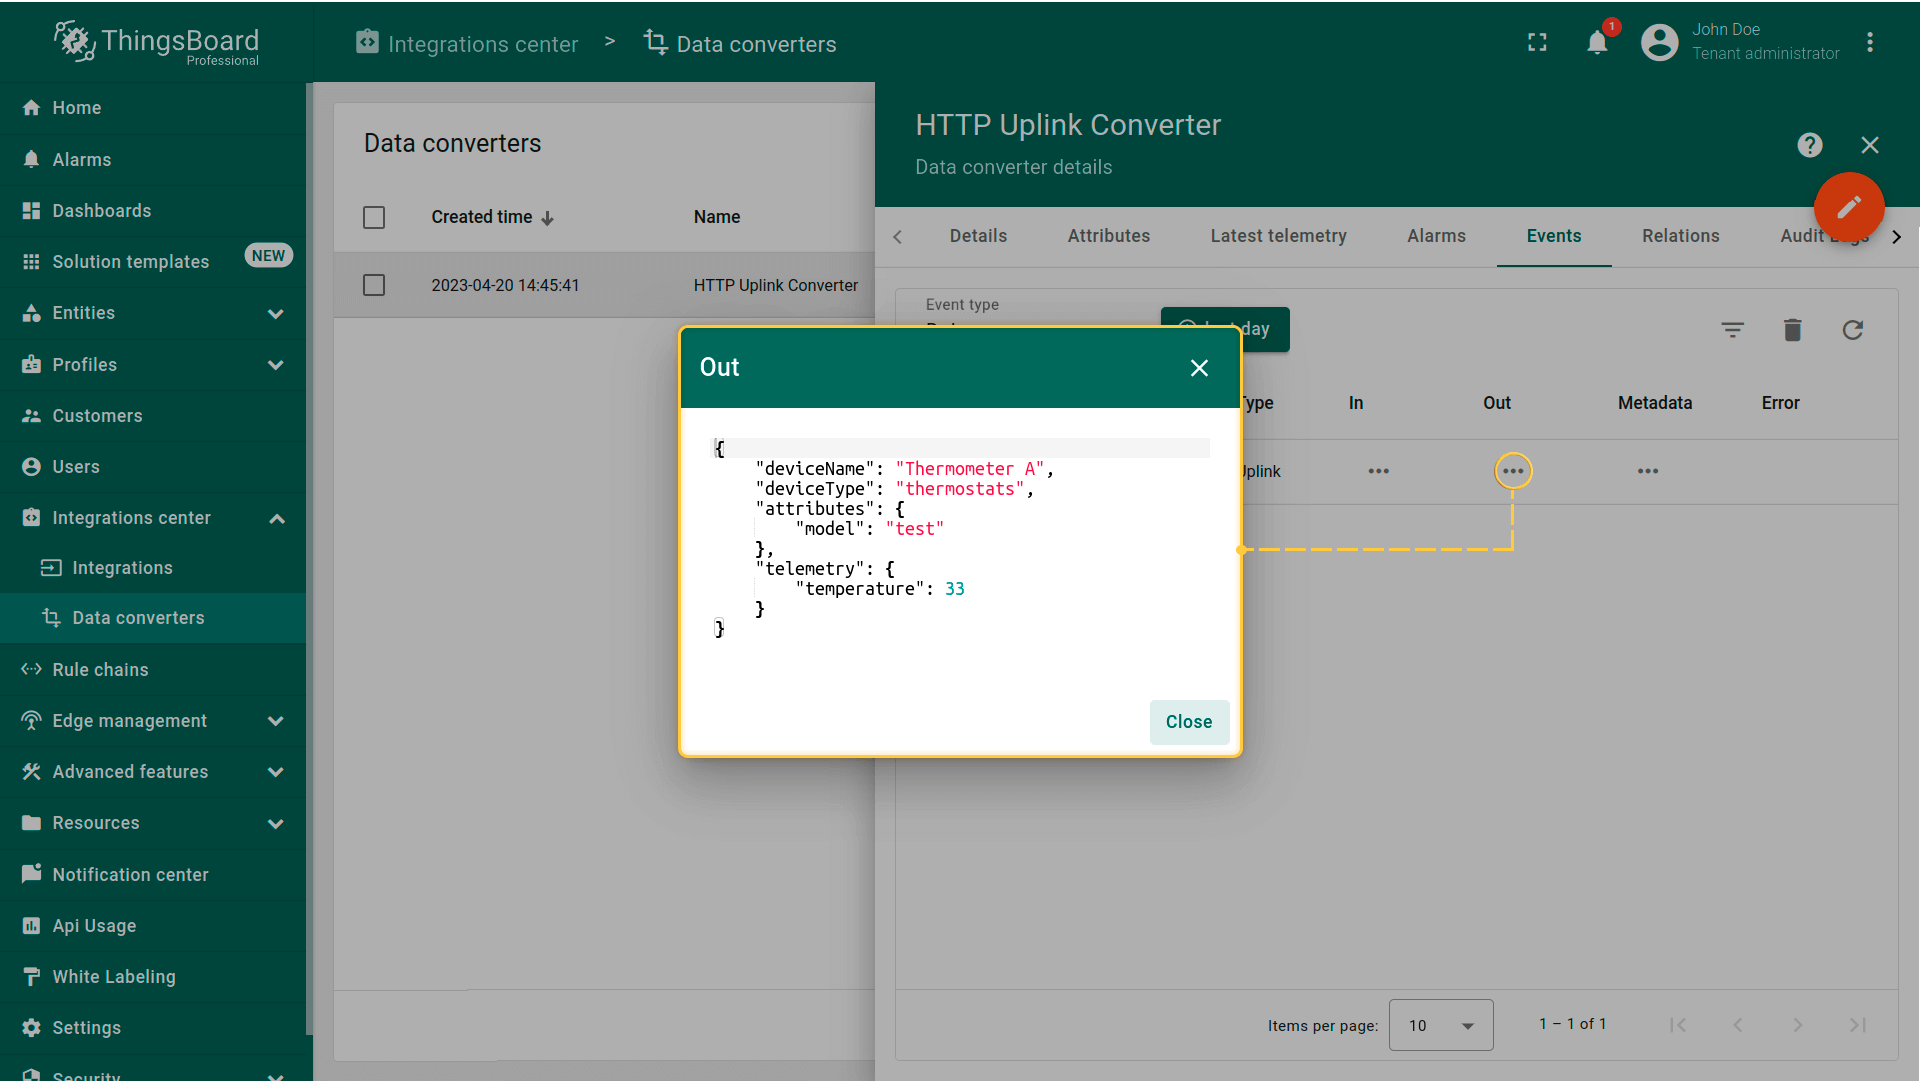
发送和接收的数据也可在上行转换器中查看,位于“Events”标签的“In”和“Out”块。

使用Dashboards处理数据。仪表板是收集和展示数据集的现代化形式,通过各种部件呈现数据。
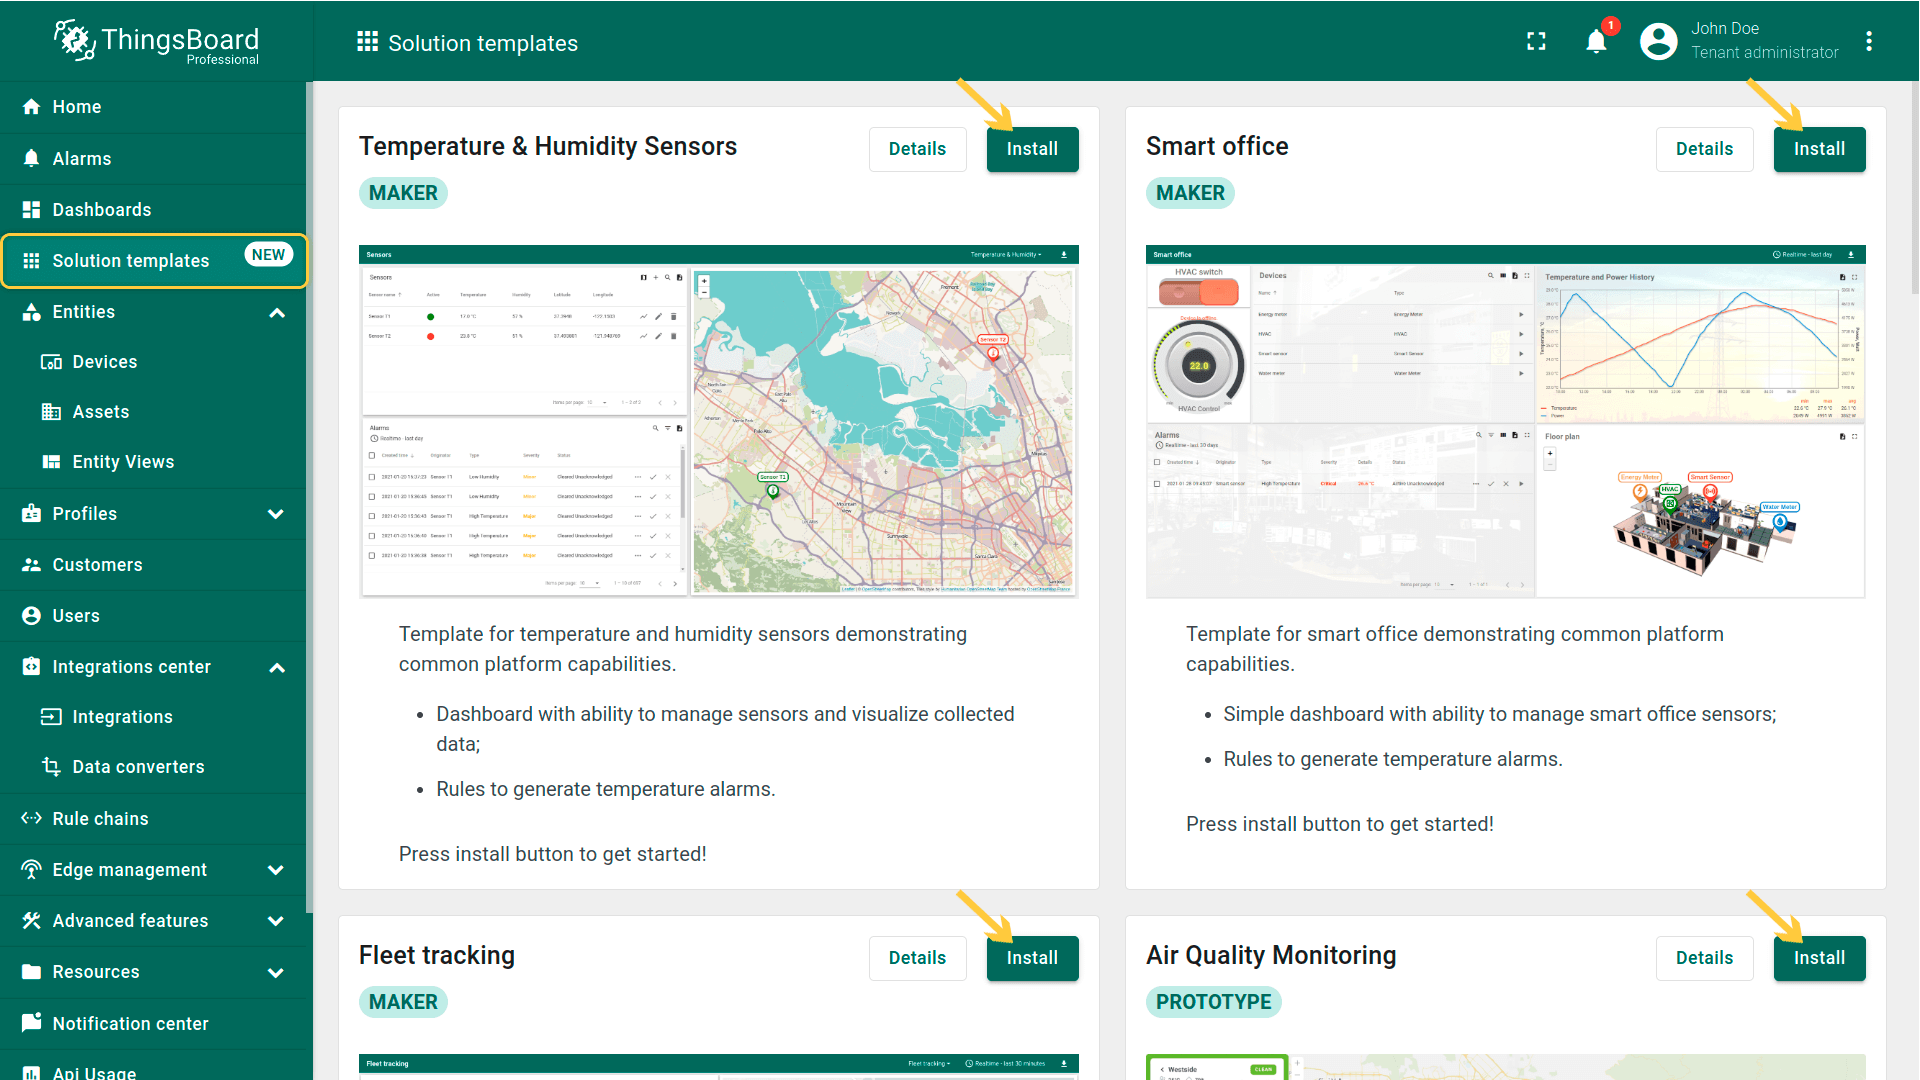
ThingsBoard提供多种仪表板示例。了解更多Solution templates请参阅此处。
启用安全选项
如需,可指定额外参数,缺少这些参数的数据将不会被纳入集成。 勾选Enable security,点击Headers filter,填写任意值并保存。
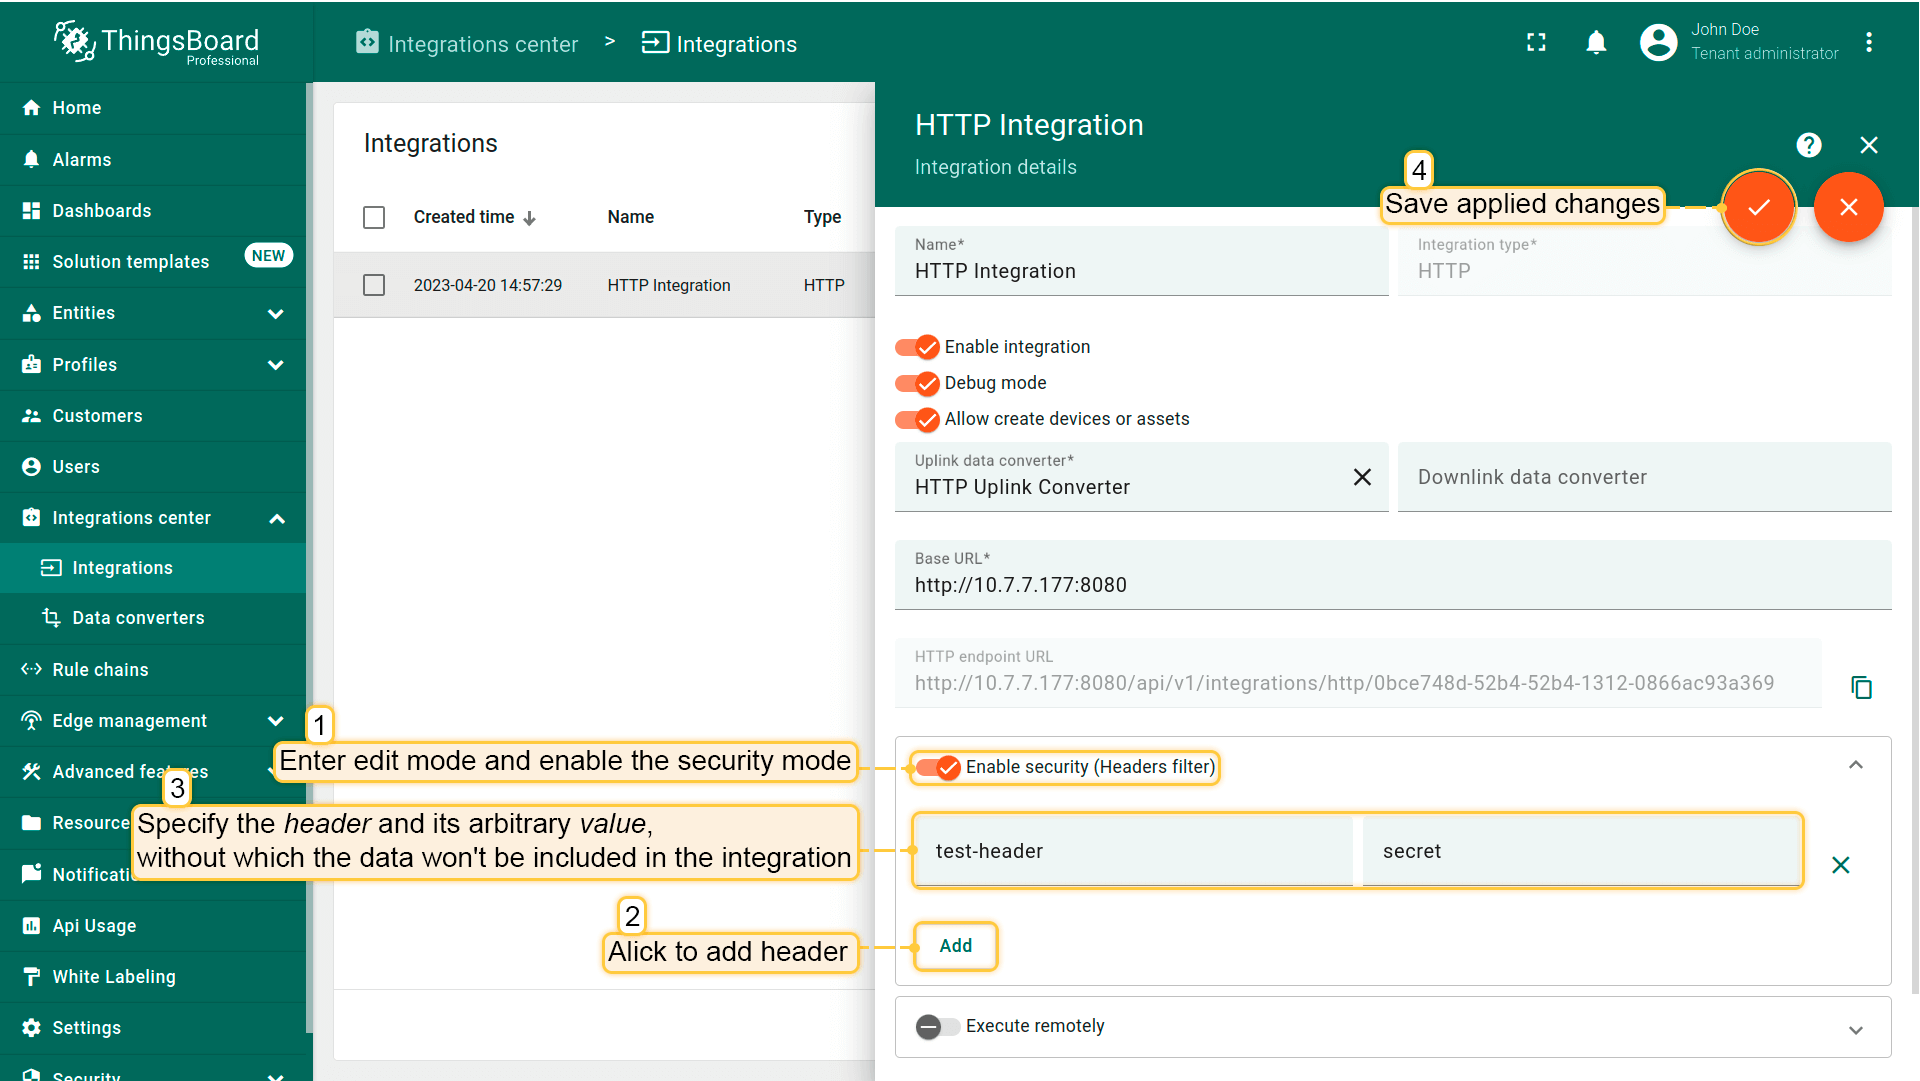
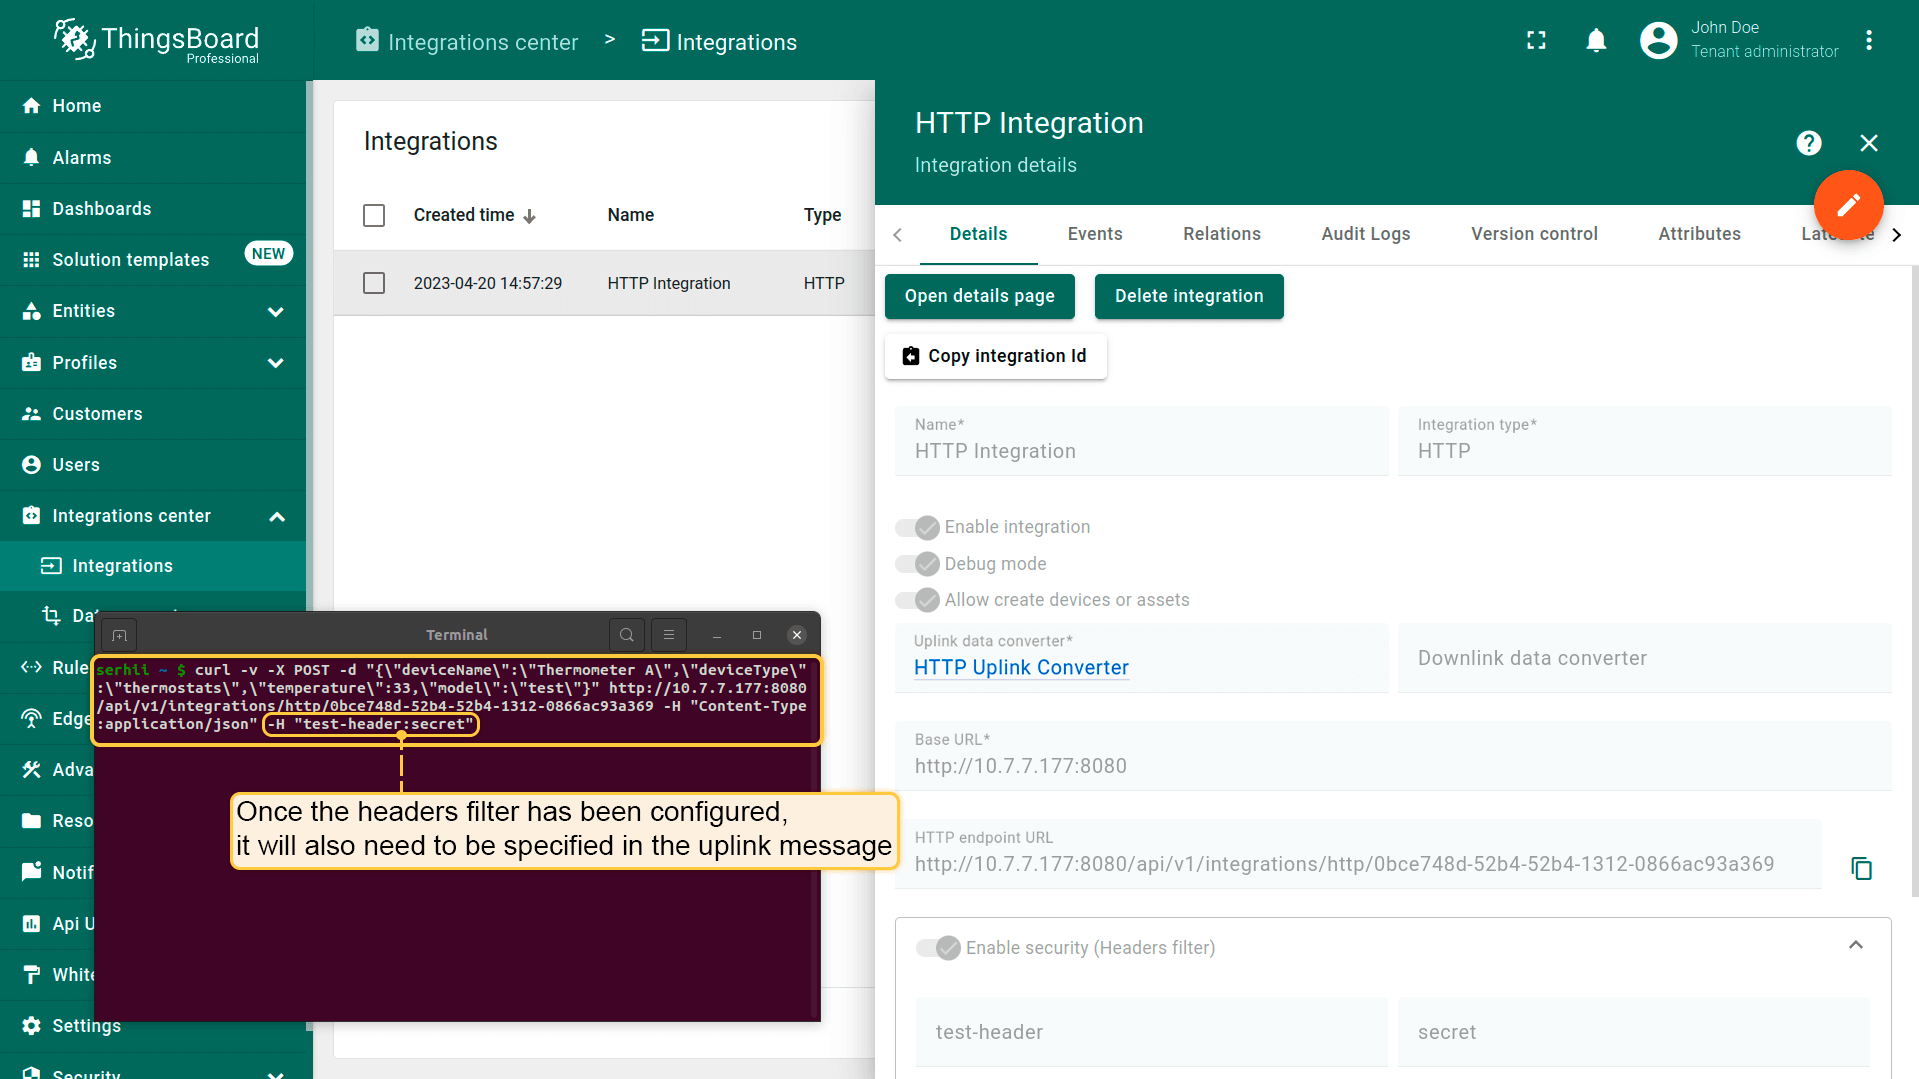
Headers filter配置后,上行消息中需加入如下头:
1
-H "test-header:secret"
使用下列命令发送启用安全选项的消息。请将 $DEVICE_NAME、$DEVICE_TYPE、$YOUR_HTTP_ENDPOINT_URL 和 $VALUE 替换为实际值。
1
curl -v -X POST -d "{\"deviceName\":\"$DEVICE_NAME\",\"deviceType\":\"$DEVICE_TYPE\",\"temperature\":33,\"model\":\"test\"}" $YOUR_HTTP_ENDPOINT_URL -H "Content-Type:application/json" -H "$VALUE"
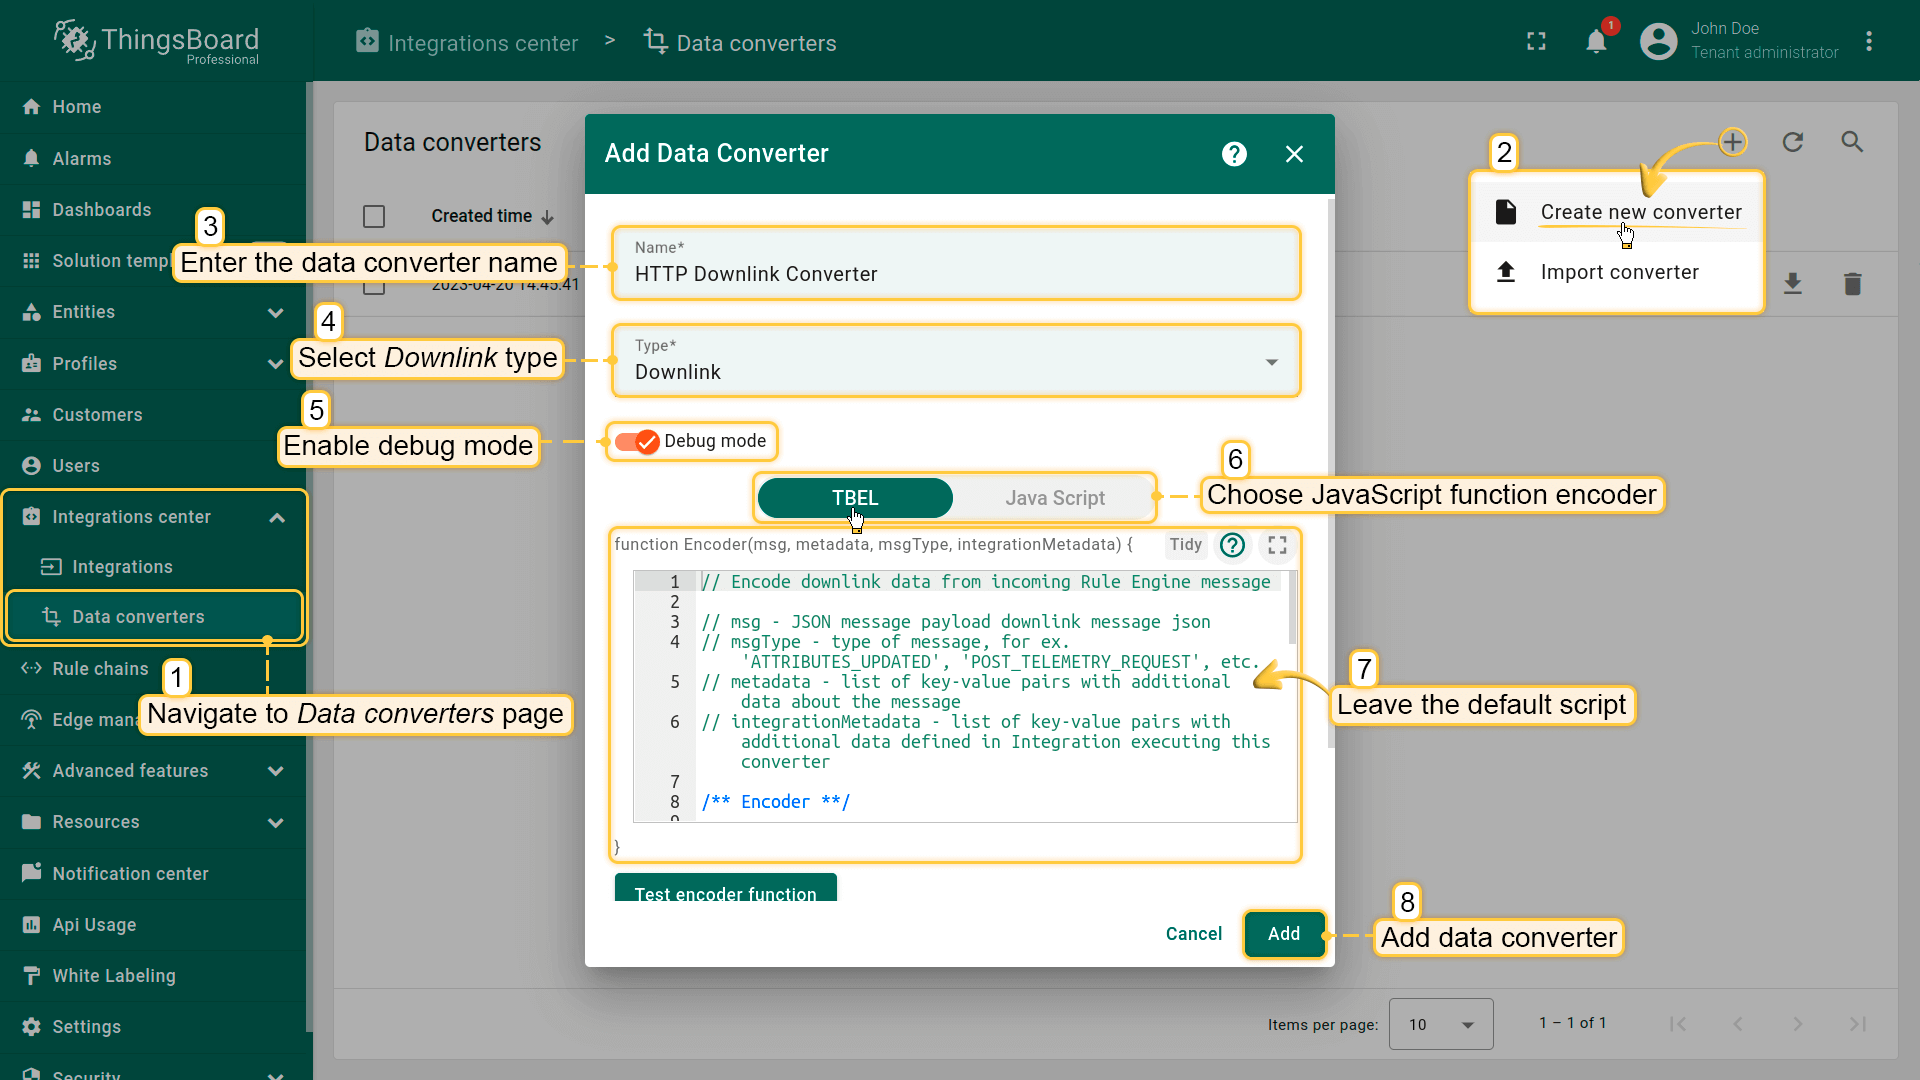
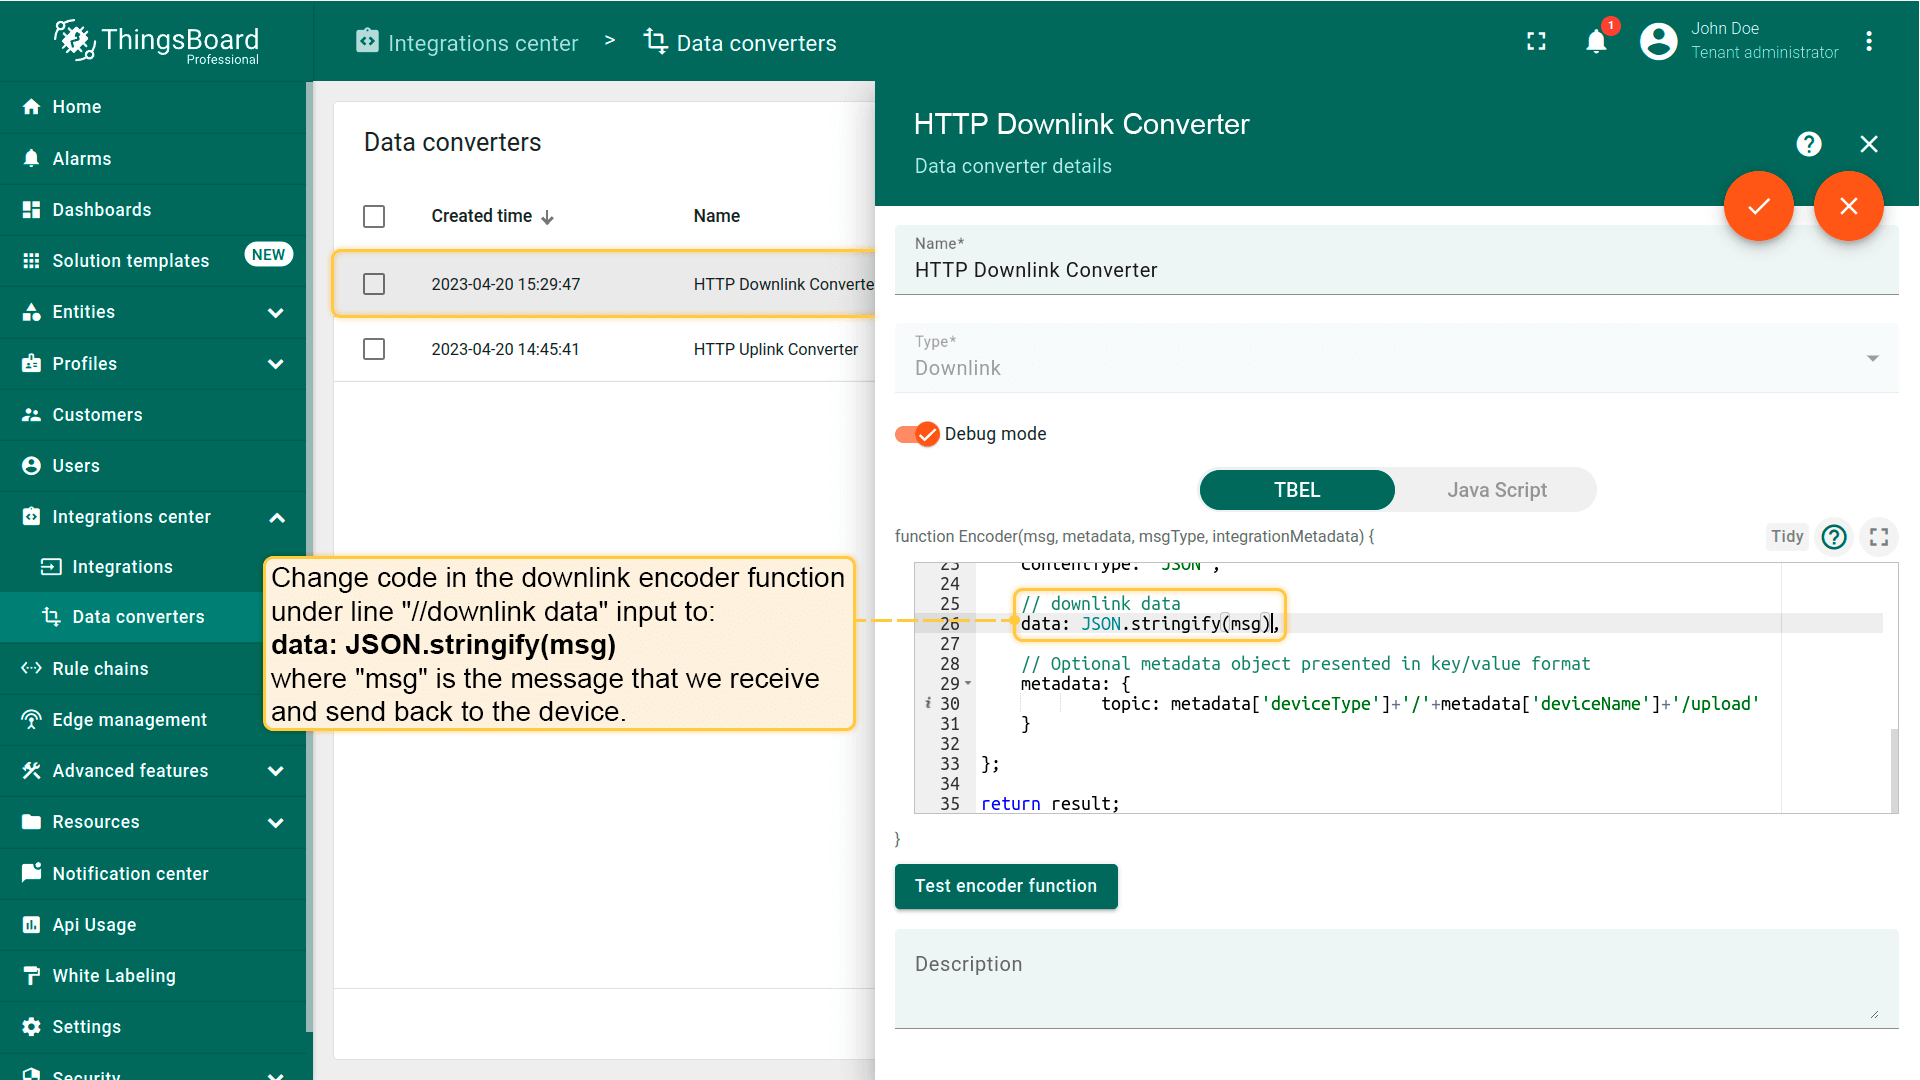
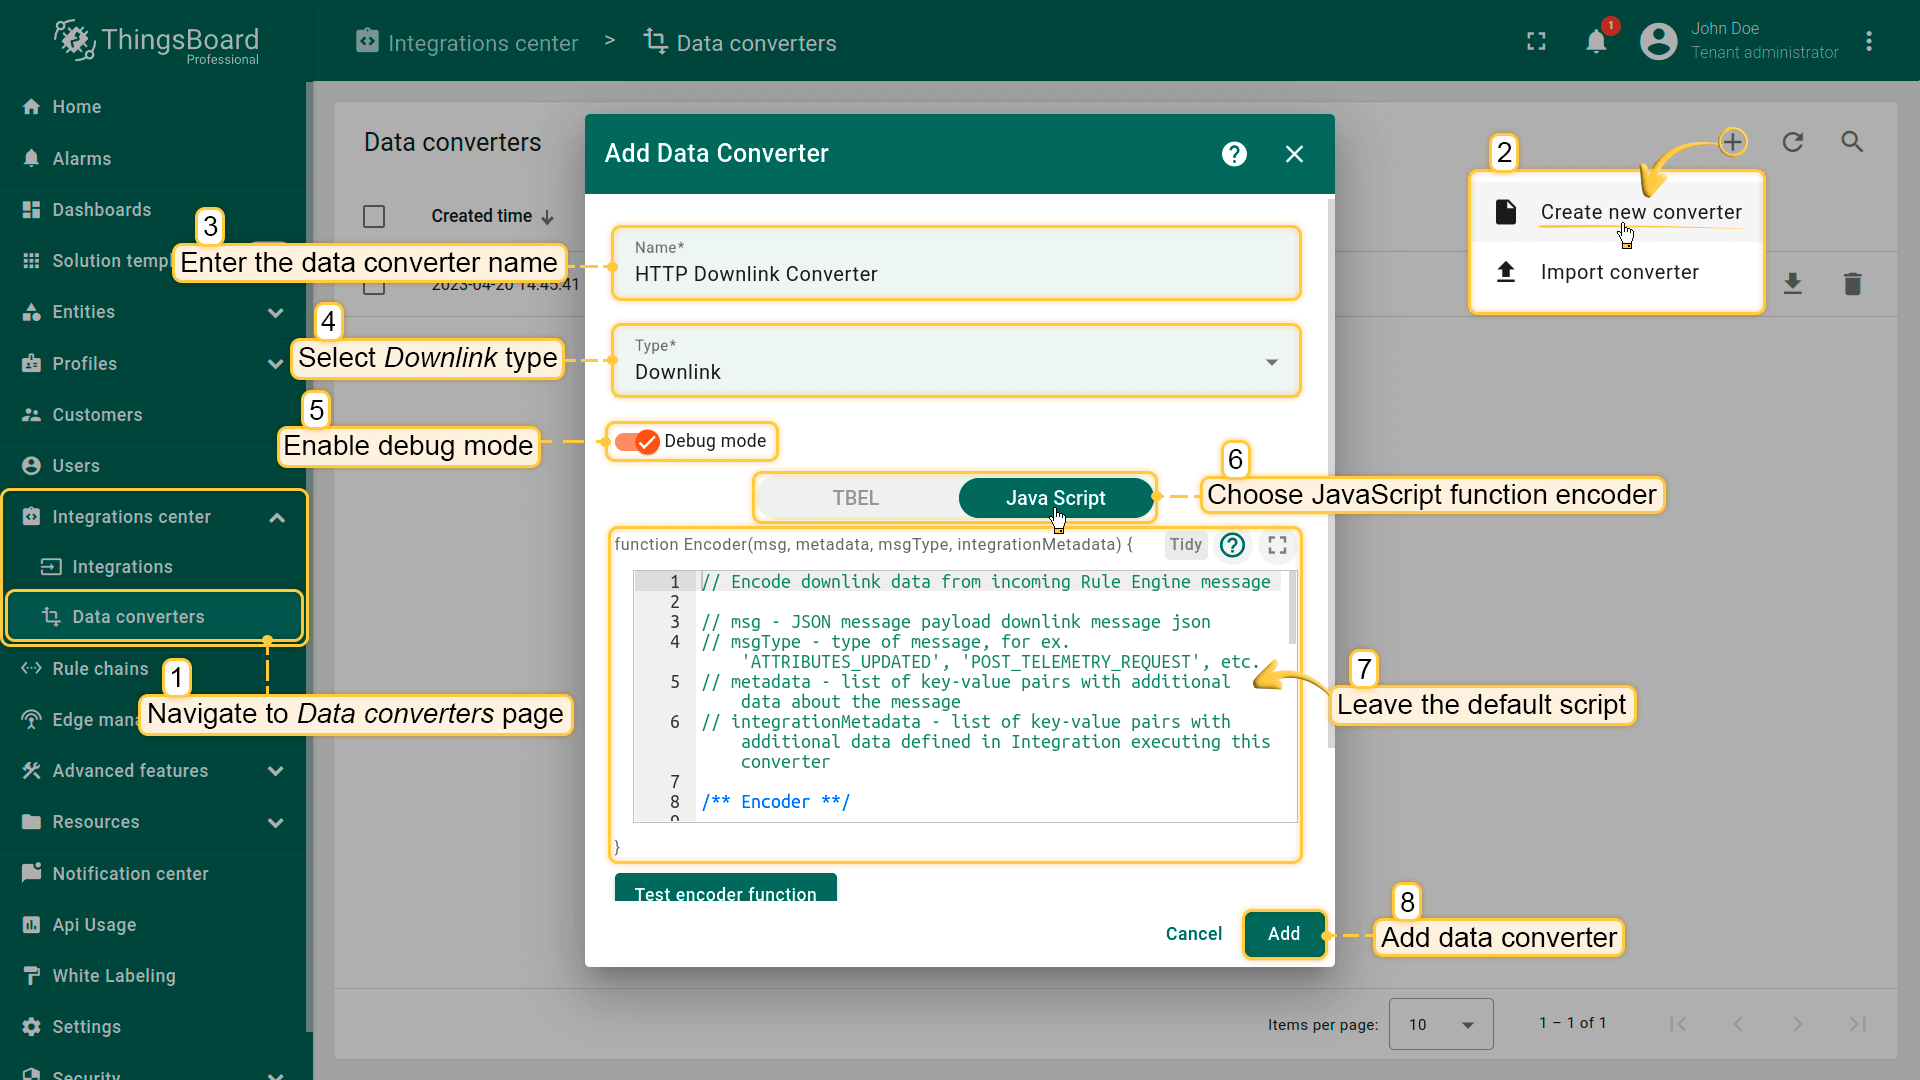
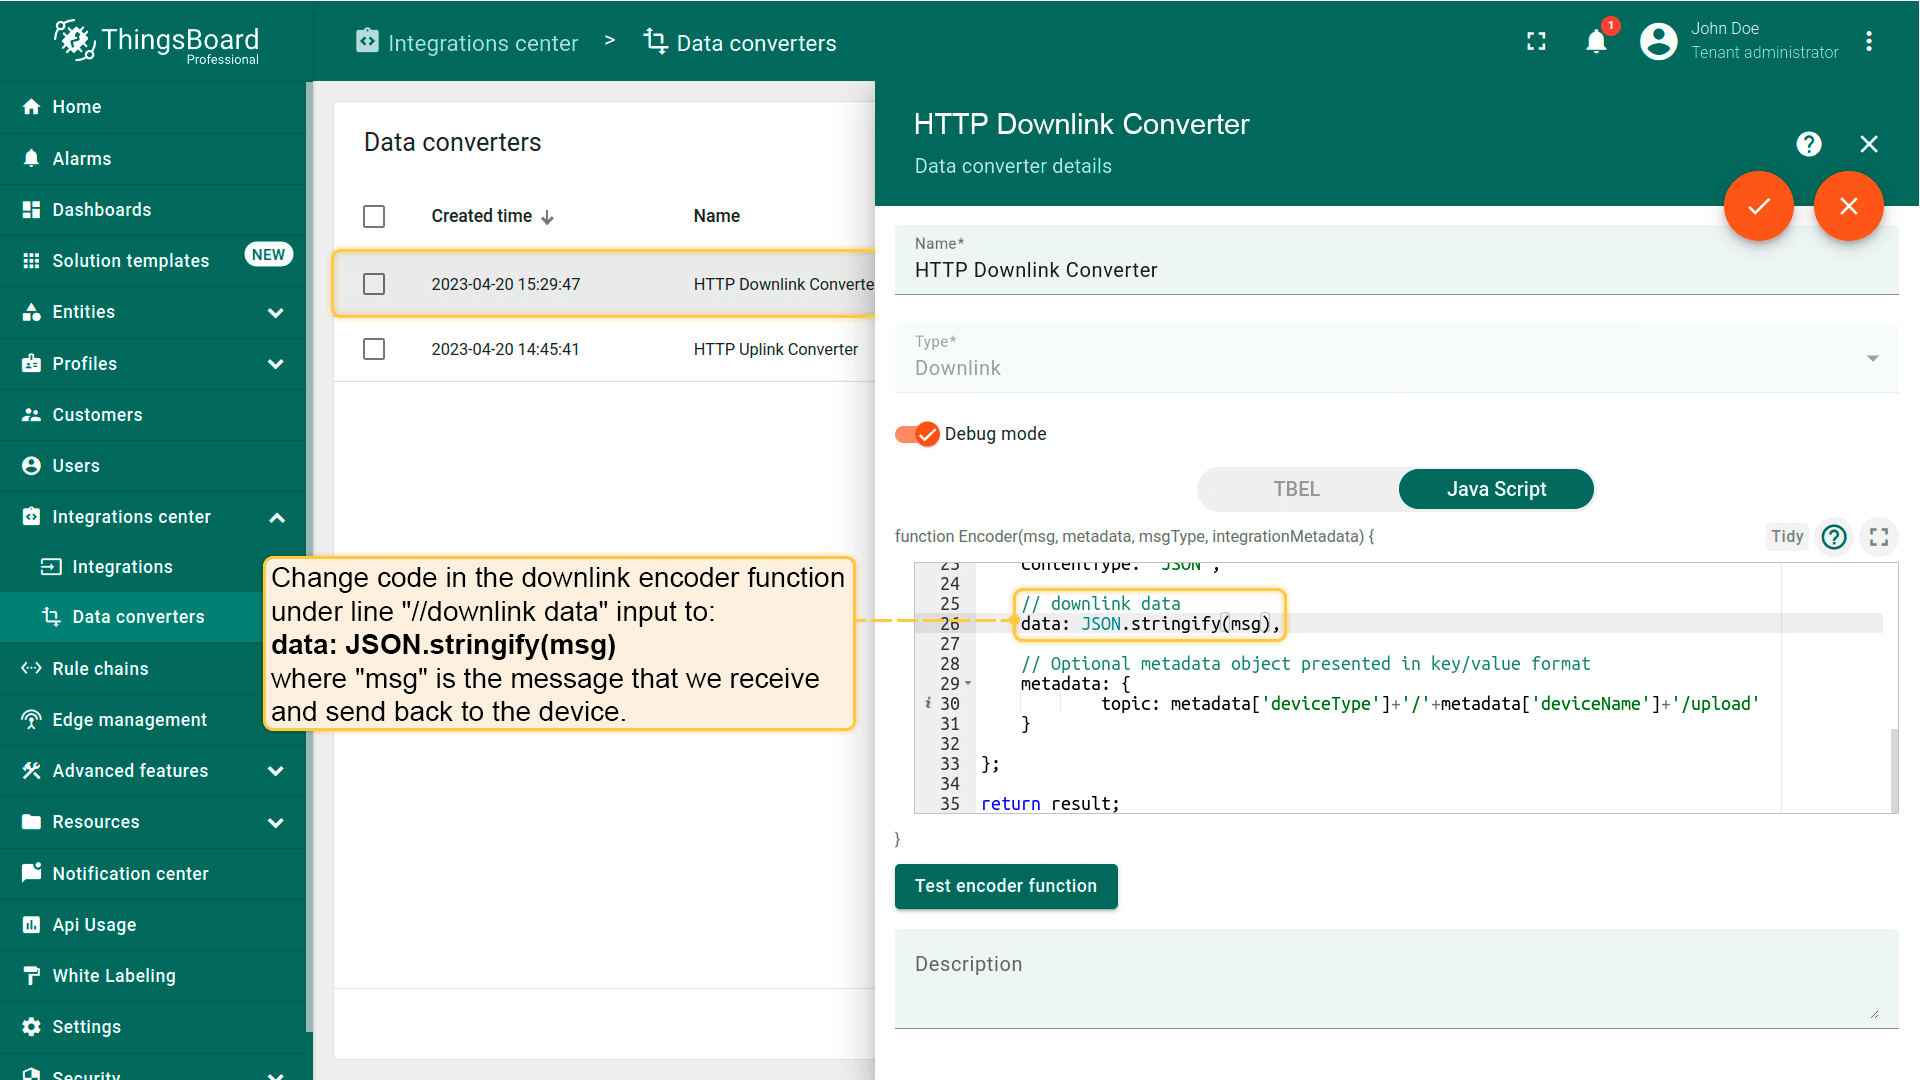
下行转换器
在“Data converters”页面创建下行转换器。要查看事件请启用“Debug mode”。
可使用 TBEL(TBEL)或 JavaScript 开发用户自定义函数。 建议使用 TBEL,其在ThingsBoard 中的执行效率远高于 JS。
|
where msg is the message that we receive and send back to the device.
|
|
其中 msg 是我们接收并发回设备的消息。
|
接下来需将刚创建的下行转换器添加到集成。
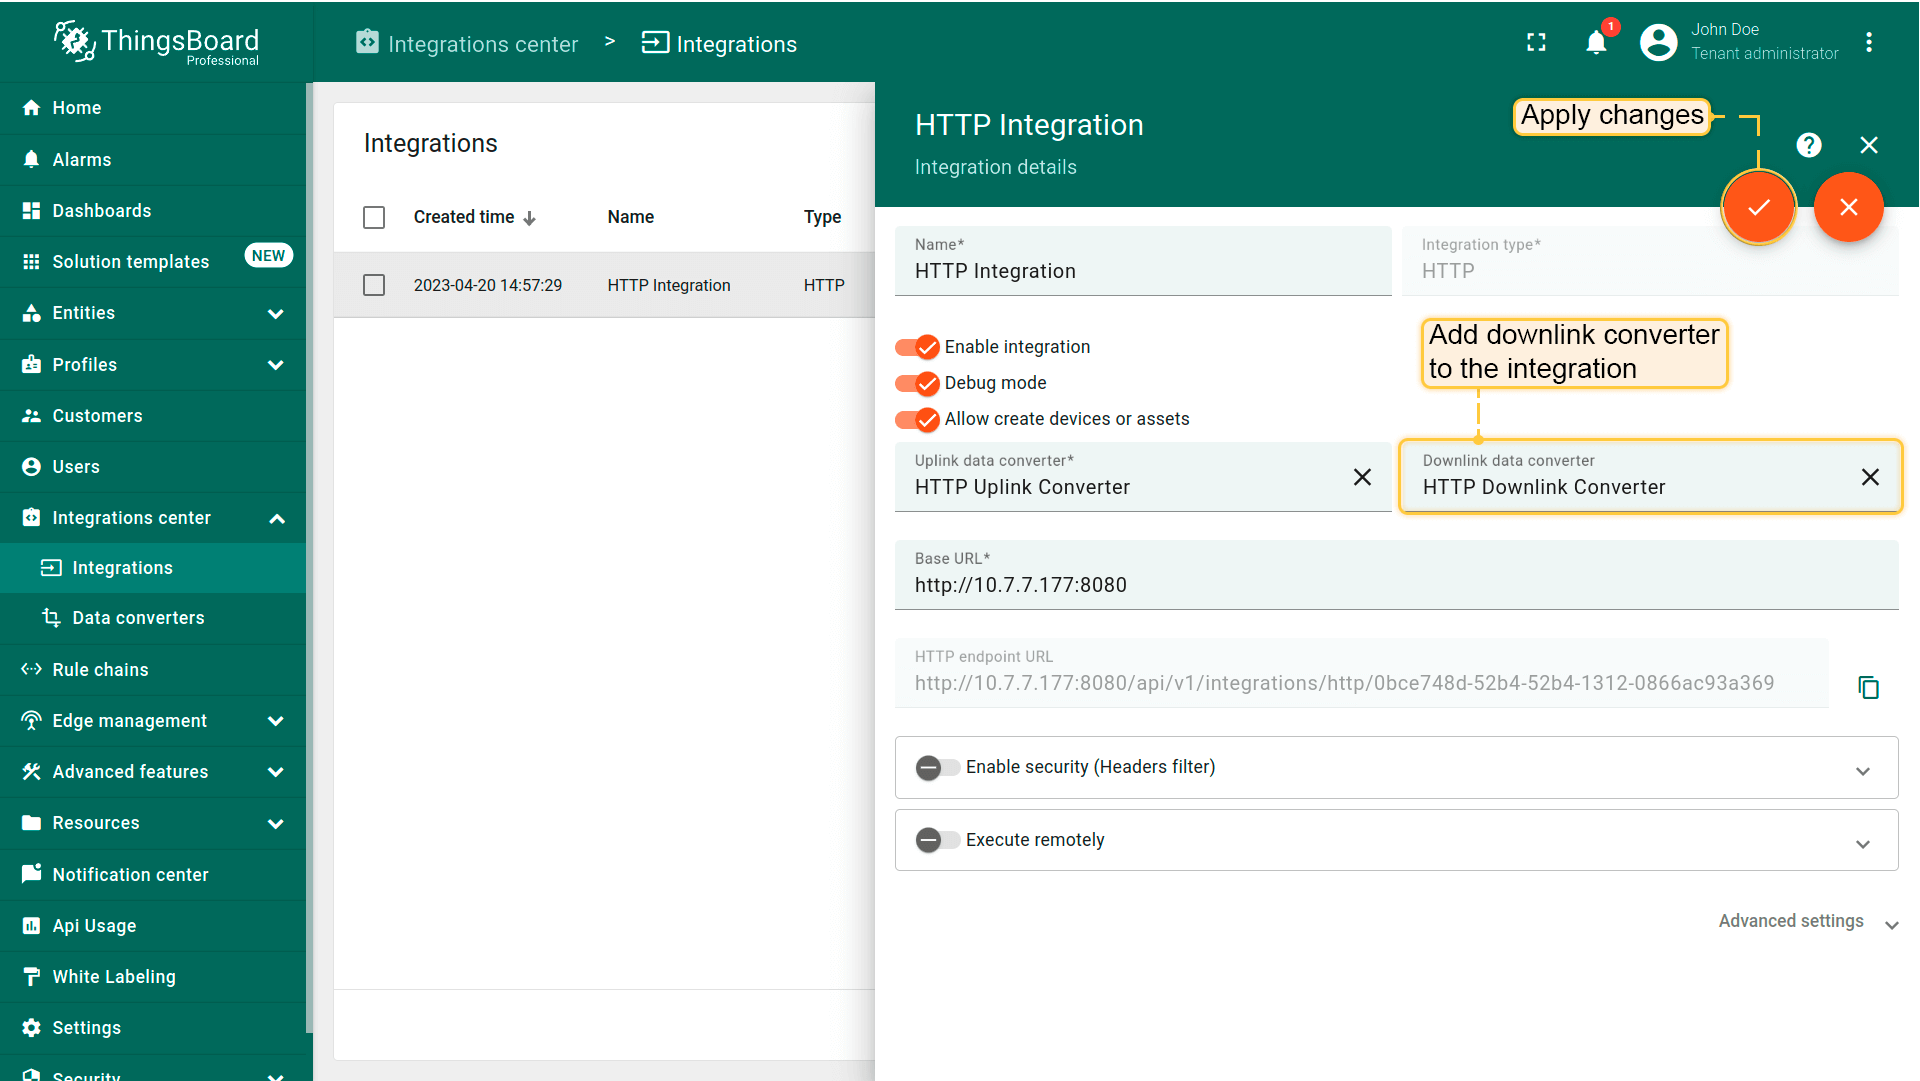
要通过集成发送下行,需修改“Root Rule chain”:
- 进入“Rule chains”页面,点击“Root Rule Chain”打开;
- 创建“integration downlink”节点,在其设置中指定您的集成;
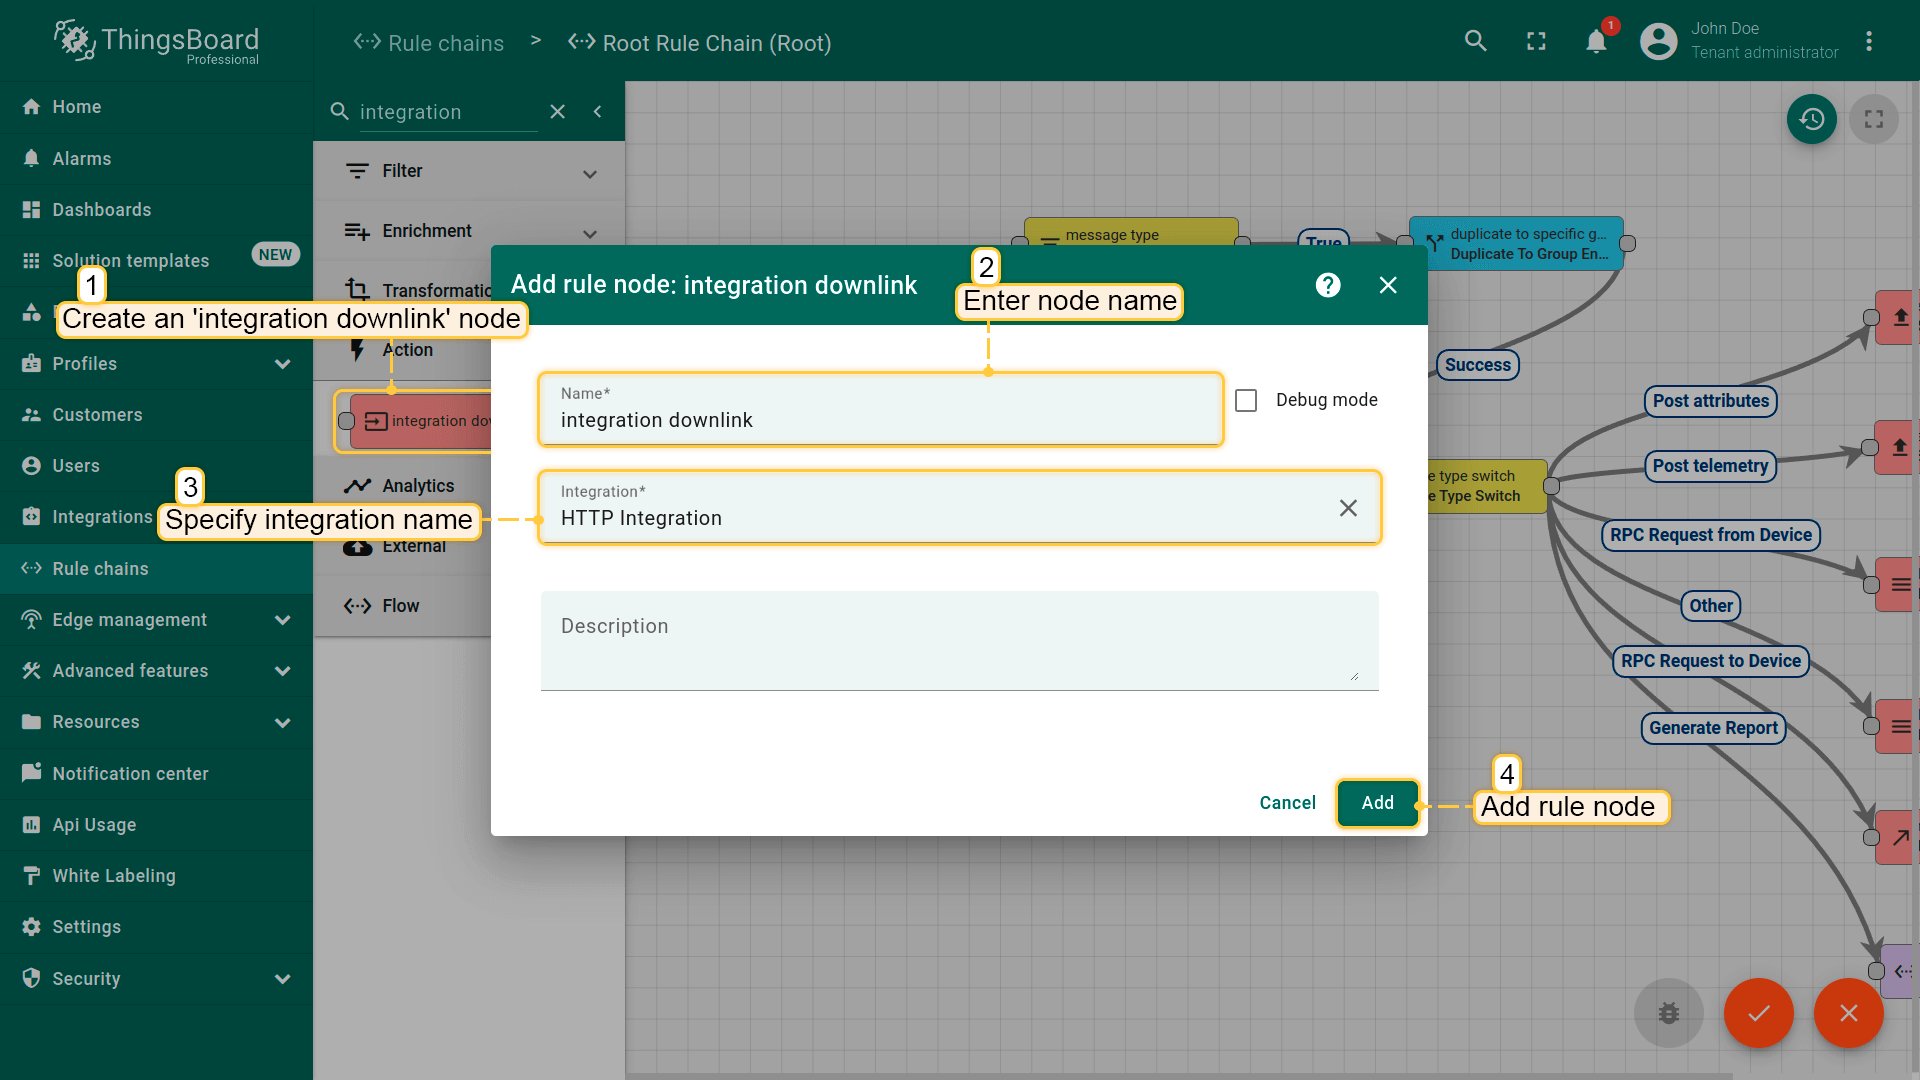
- 将“message type switch”节点的“Attributes updated”和“Post attributes”连线到“integration downlink”节点。应用更改。
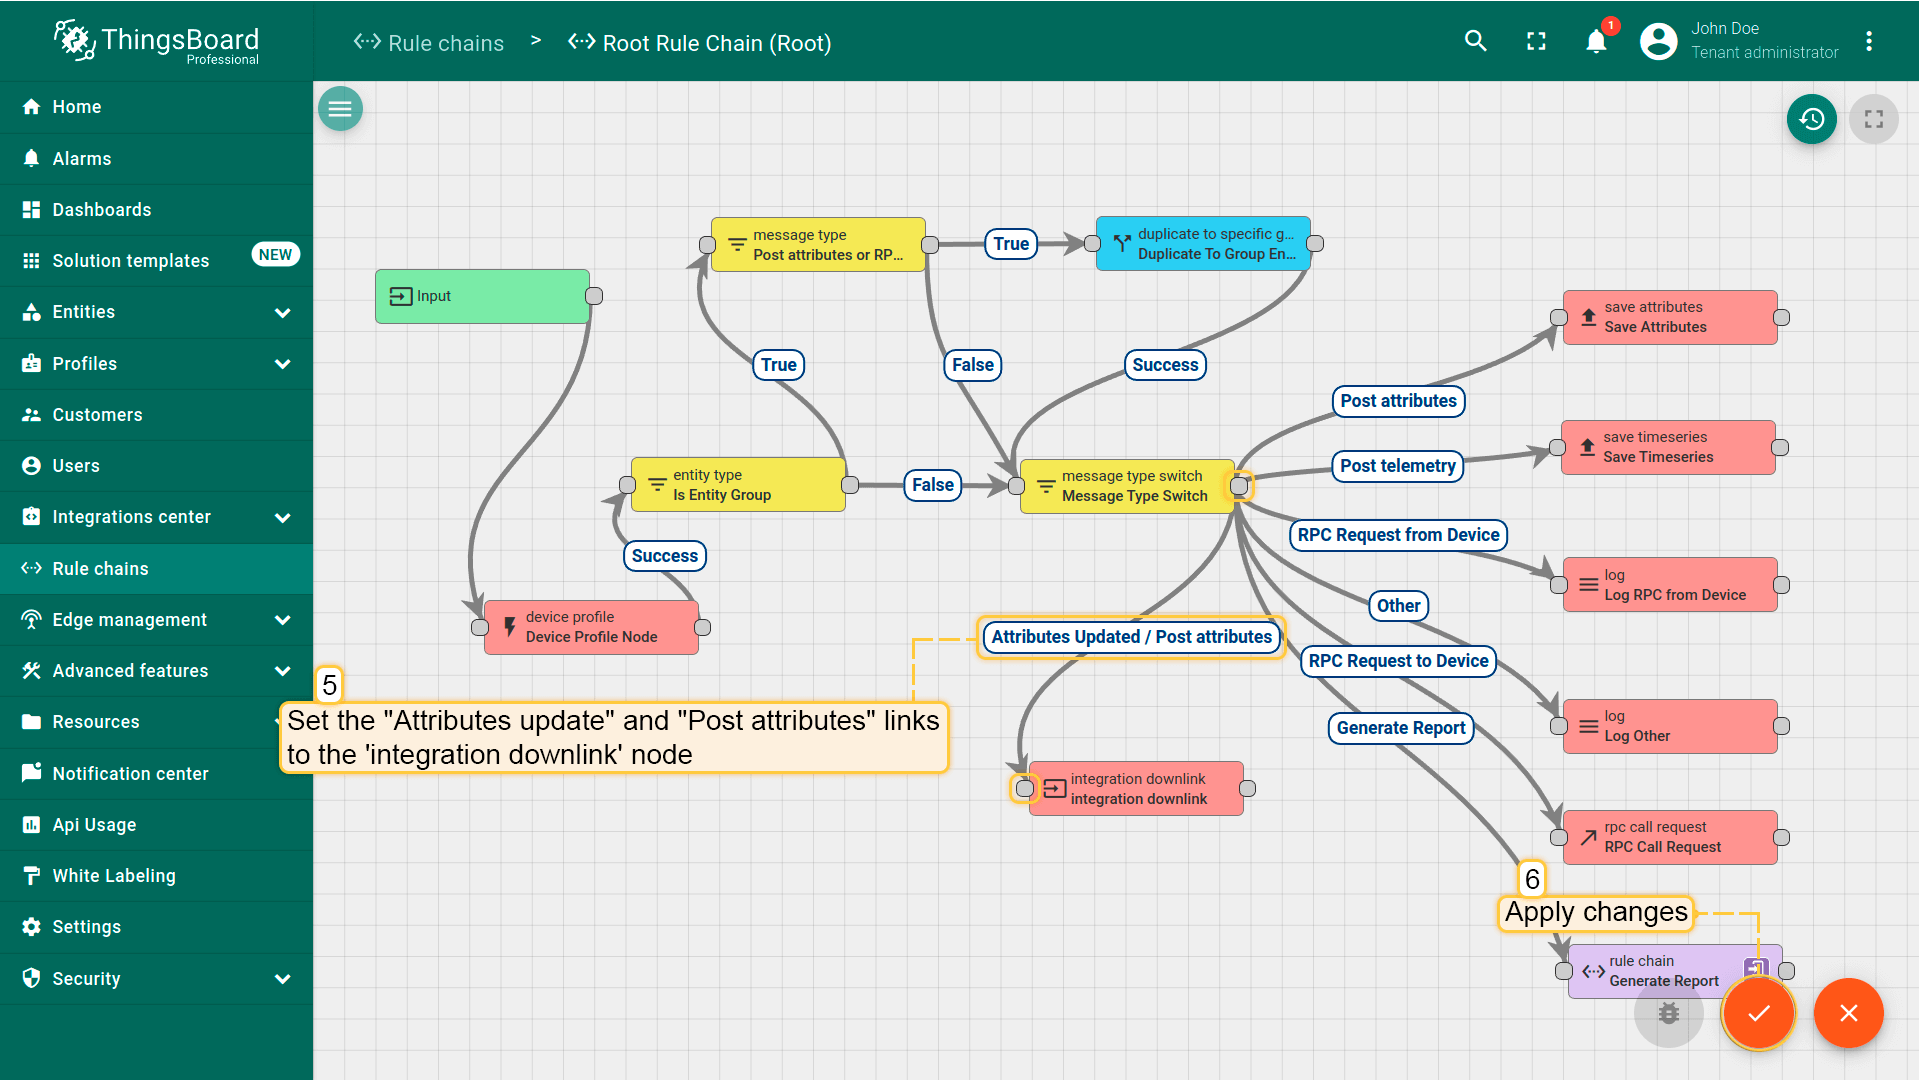
创建属性或修改属性时,下行消息将被发送到集成。
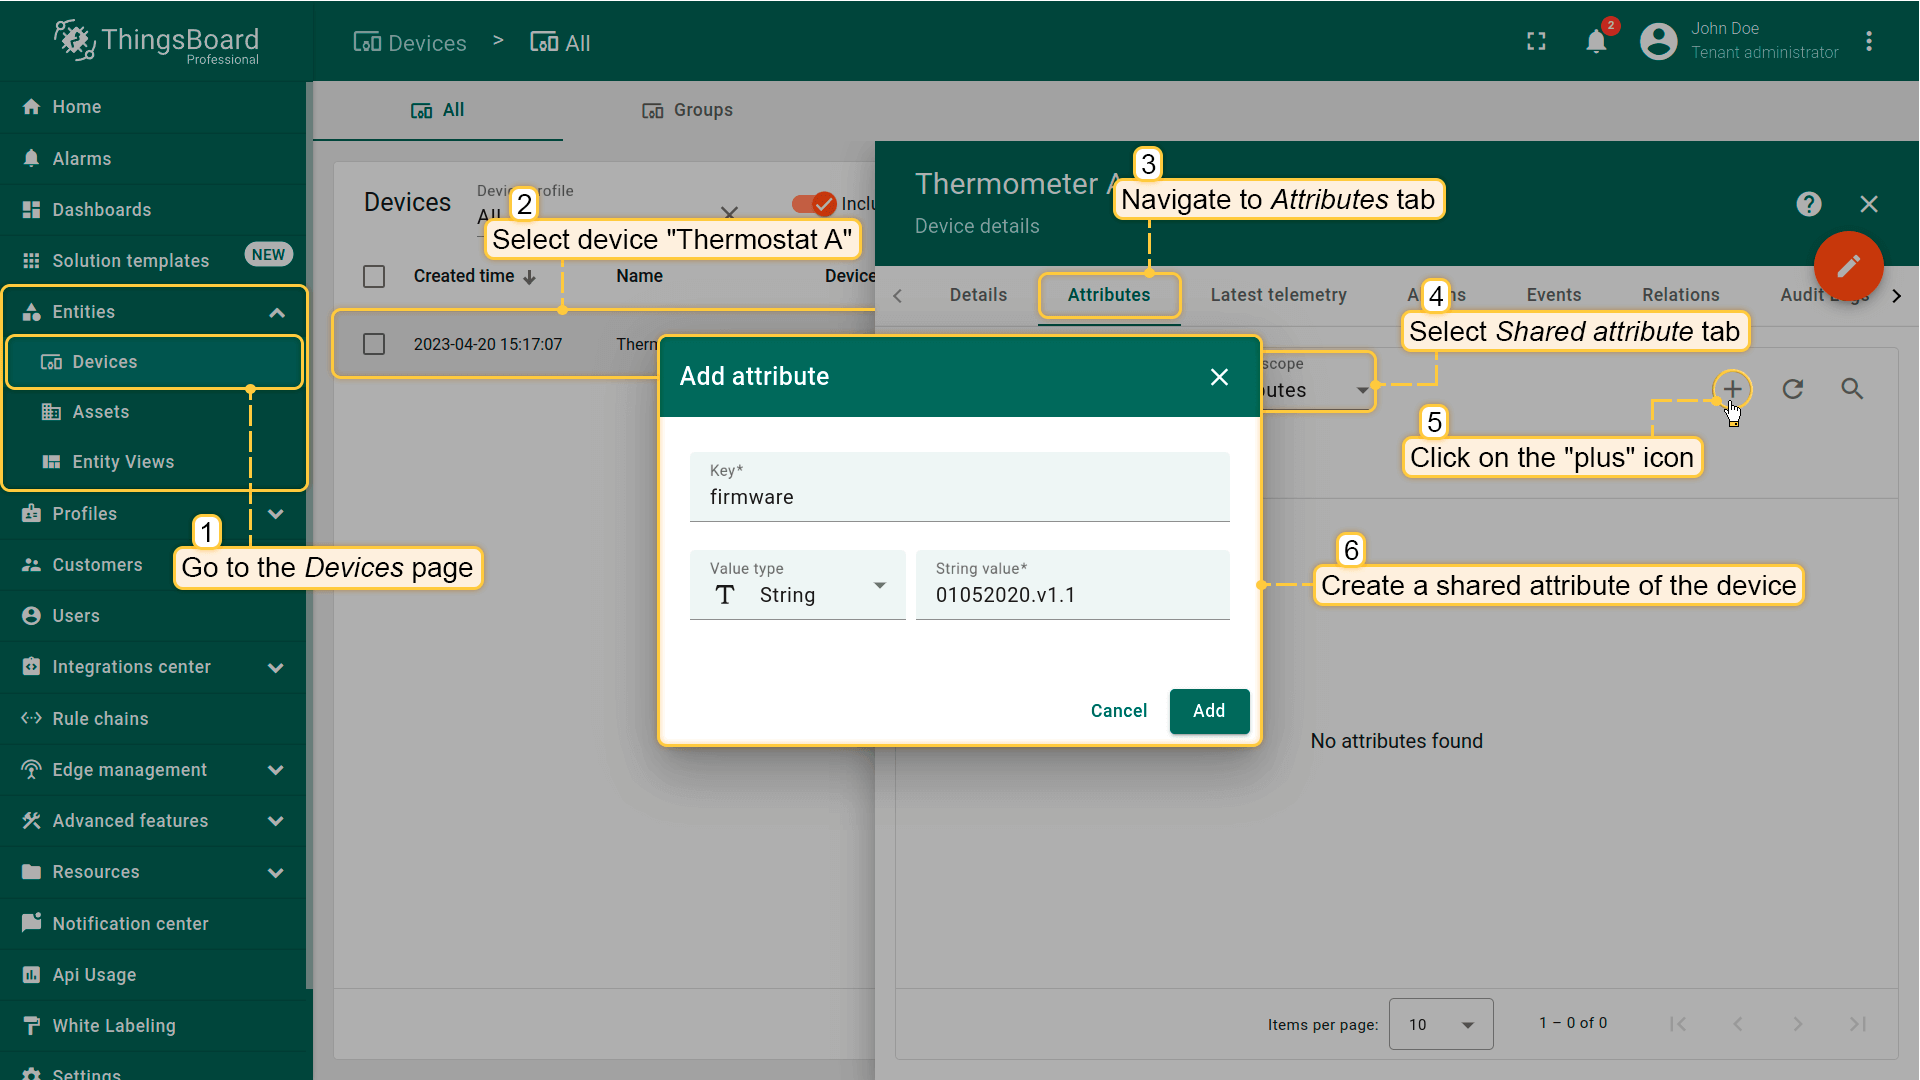
示例:进入“Devices”页面,选择设备,进入“Attributes”标签。选择Shared attributes,点击“plus”创建新属性。 设置属性名和值(例如键名为’firmware’,值为’01052020.v1.1’)并保存。
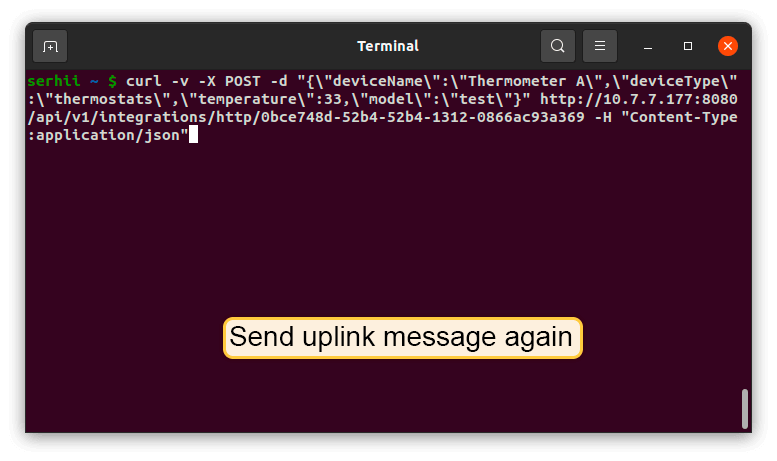
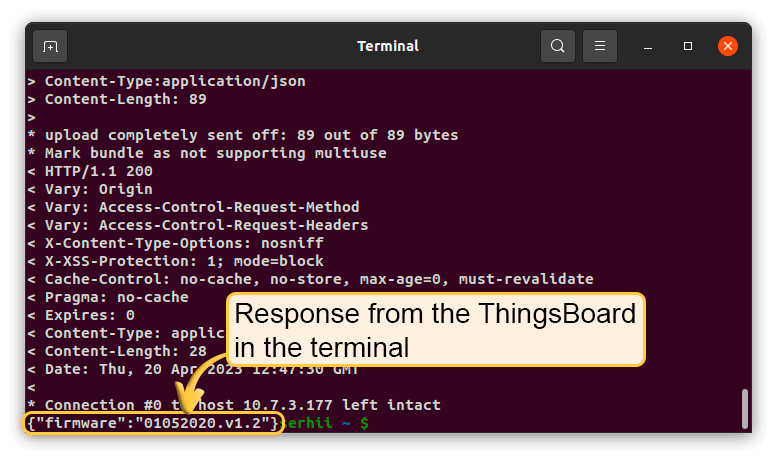
再次发送上行消息。终端中会收到ThingsBoard的响应:
接收和发送的数据可在下行转换器查看。Events标签的“In”块显示入站数据,“Out”字段显示发给设备的消息: