本教程演示如何使用 Rule Engine 在设备离线一定时间后创建 alarm。
使用场景
假设有如下场景:
-
你有一台已连接到 ThingsBoard 的设备,设备上的温度传感器会采集并上报 telemetry 数据。
-
温度传感器可能因各种故障停止上报 telemetry 数据。
因此,需要在 ThingsBoard Rule Engine 中实现以下逻辑:
-
当设备在一段时间内无活动时创建告警。这个时间可以通过两种方式定义:
-
方式一:修改全局无活动超时参数。
该参数在 thingsboard.yml 中配置(state.defaultInactivityTimeoutInSec),默认值为 600 秒(10 分钟)。 -
方式二:为单个设备设置服务端属性 “inactivityTimeout”(单位毫秒)覆盖默认值。
下文将重点介绍这种方式。
-
-
当设备恢复活动时自动清除告警。
背景说明
ThingsBoard 的 Device State 服务负责监控设备连接状态,并触发连接相关事件推送到 Rule Engine。
ThingsBoard 支持以下四类事件:
| Event Type | Description |
| Connect | 设备连接到 ThingsBoard 时触发。 |
| Disconnect | 设备与 ThingsBoard 断开连接时触发。 |
| Activity | 设备上报 telemetry、属性更新或 RPC 命令时触发。 |
| Inactivity | 设备在一段时间内无活动时触发。 |
本教程将重点介绍设备 Inactivity 事件,并说明如何:
-
使用 Rule Engine 创建 Inactivity 告警;
-
配置无活动超时参数。
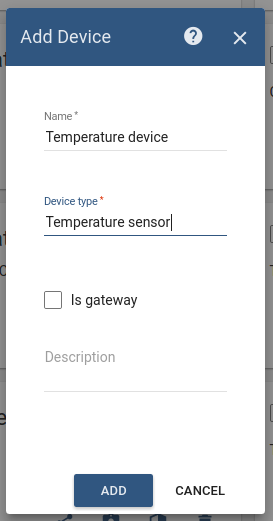
添加设备
- 在 ThingsBoard 中新增一个 Device 实体。
- 设备名称填写 Temperature device,设备类型填写 Temperature sensor:
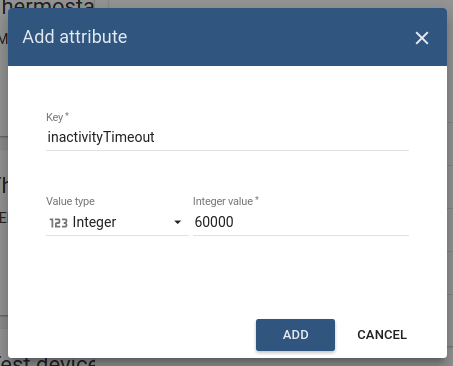
配置设备
-
进入 Devices -> Temperature device -> Attributes -> Server attributes,点击 Add;
-
设置 “inactivityTimeout” 属性,例如
60000毫秒。
配置 Rule Chain
下图为初始 Root Rule Chain(已移除与本教程无关的节点)。
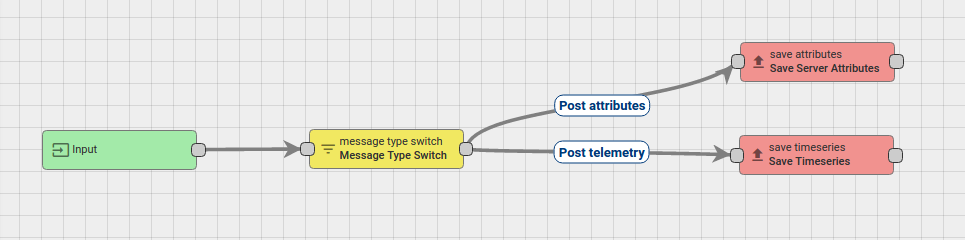
默认 rule chain 增加了以下两个 action 节点:
-
Create alarm 节点:通过 Inactivity Event 关系连接到 Message Type Switch;
-
Clear alarm 节点:通过 Activity Event 关系连接到 Message Type Switch。
最终 Rule Chain 如下图所示:

-
下载并导入上述 rule chain 对应的 json file。
-
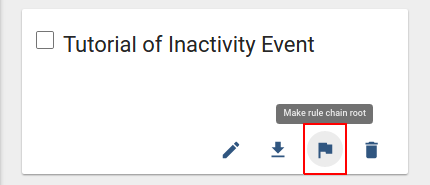
不要忘记将新 rule chain 标记为
root。
你也可以从零开始创建该 Rule Chain,步骤如下。
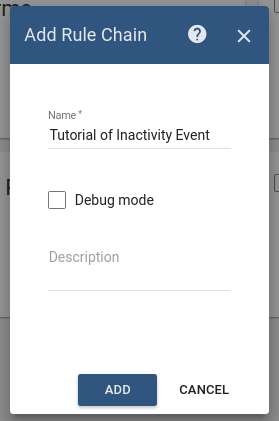
新建 Rule Chain(Tutorial of Inactivity Event)
-
进入 Rule Chains -> Add new Rule Chain
-
名称填写 Tutorial of Inactivity Event,点击 ADD。
-
新 Rule Chain 创建完成后,记得标记为
root。
添加所需节点
本教程中需要创建 5 个节点,具体如下:
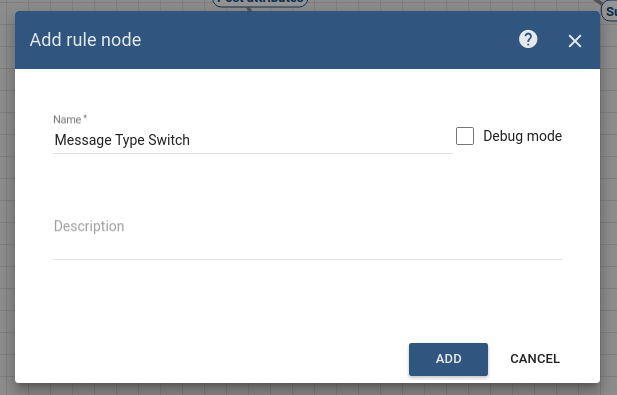
Message Type Switch 节点
添加 Message Type Switch 节点,并连接到 Input 节点。
该节点会按消息类型对入站消息进行路由,包含:
-
POST_TELEMETRY_REQUEST;
-
POST_ATTRIBUTES_REQUEST;
-
ACTIVITY_EVENT;
-
INACTIVITY_EVENT.
名称填写 Message Type Switch,然后点击 ADD。
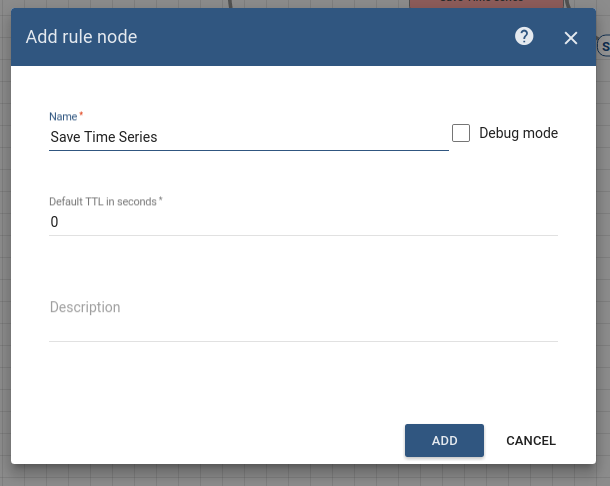
Save Timeseries 节点
添加 Save TimeSeries 节点,并通过关系类型 Post telemetry 连接到 Message Type Switch 节点。
该节点会将入站消息 payload 中的 TimeSeries 数据存入数据库,并关联到由 Message Originator 标识的设备。
名称填写 Save Time Series。
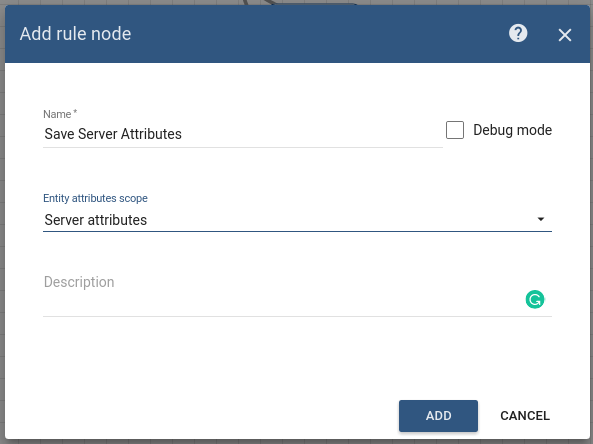
Save Server Attributes 节点
添加 Save Attributes 节点,并通过关系类型 Post attributes 连接到 Message Type Switch 节点。
该节点会将入站消息 payload 中的属性写入数据库,并关联到由 Message Originator 标识的实体。
名称填写 Save Server Attributes。
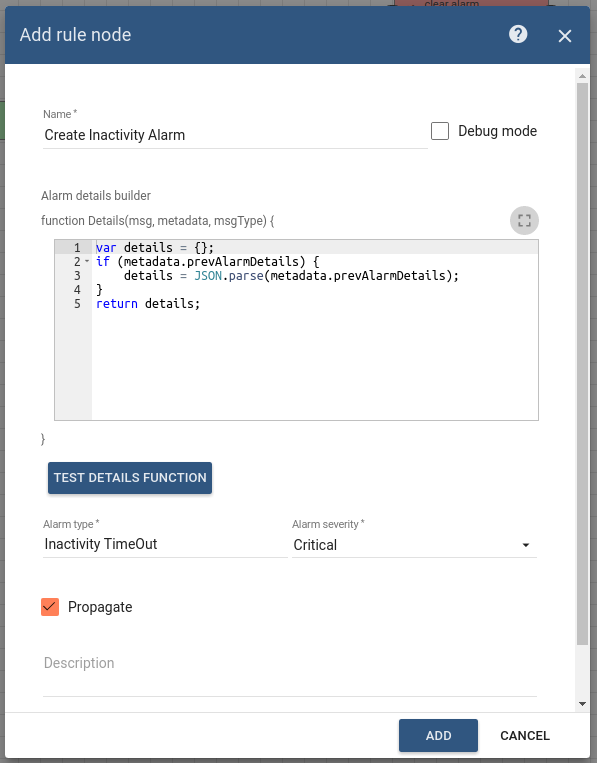
Create Inactivity alarm 节点
添加 Create alarm 节点,并通过关系类型 Inactivity Event 连接到 Message Type Switch 节点。
该节点会尝试加载 Message Originator 上配置 Alarm Type 的最新 Alarm。若存在未清除的 Alarm,则会更新;否则会新建 Alarm。
- Enter the Name field as Create Inactivity Alarm and the Alarm type as Inactivity TimeOut.
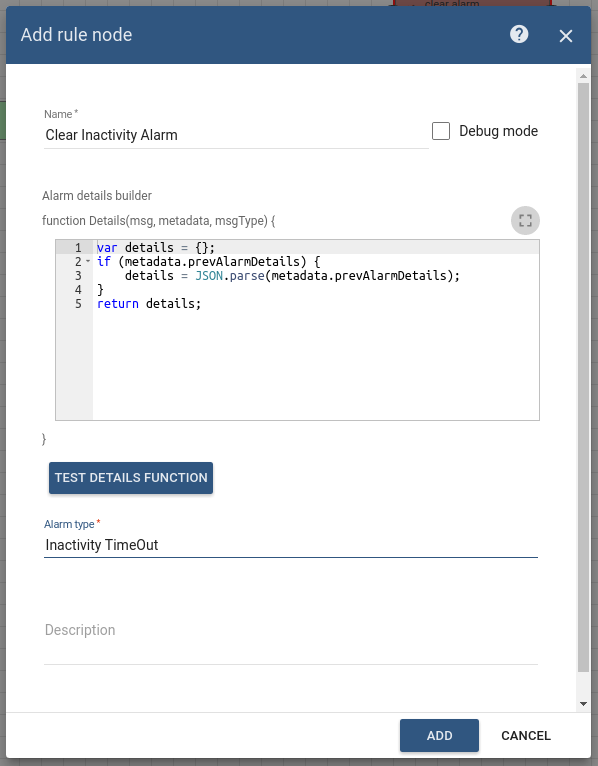
Clear Inactivity alarm 节点
添加 Clear alarm 节点,并通过关系类型 Activity Event 连接到 Message Type Switch 节点。
该节点会加载 Message Originator 上配置 Alarm Type 的最新 Alarm,若存在则清除。
- Enter the Name field as Clear Inactivity Alarm and the Alarm type as Inactivity TimeOut.
至此 Rule chain 配置完成,请保存。
如何验证 Rule Chain 并上报 telemetry
- 使用 Rest API(Telemetry upload APIs)上报设备 telemetry。
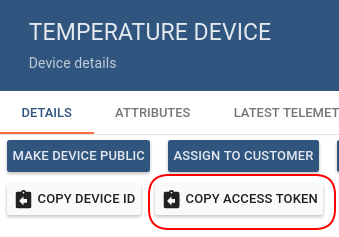
注意:你需要先从 Temperature device 复制设备访问令牌(如下图)。
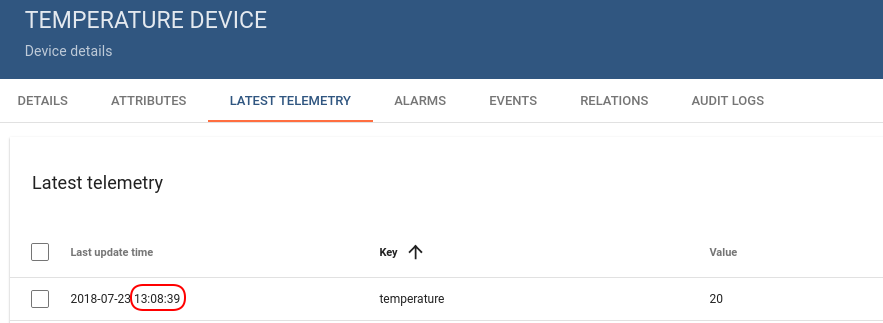
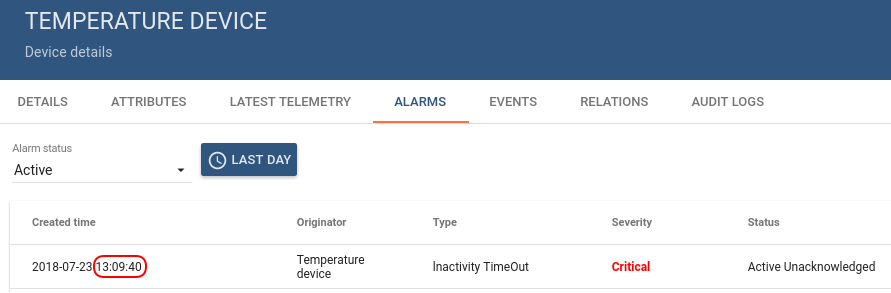
尝试上报 temperature = 20。上报后约 1 分钟应创建 Alarm:
1
2
3
curl -v -X POST -d '{"temperature":20}' http://localhost:8080/api/v1/$ACCESS_TOKEN/telemetry --header "Content-Type:application/json"

***你需要将 $ACCESS_TOKEN 替换为真实设备令牌**
此外,你还可以:
-
通过添加 alarm widget 配置 Dashboard,以可视化告警;
-
增加额外的告警处理逻辑,例如发送邮件。
具体操作可参考下方 另请参阅 中前两个链接。
另请参阅
-
Create & Clear Alarms: configure dashboard 指南 — 学习如何在 dashboard 中添加告警部件。
-
Send Email 指南。