概述
所有与部件相关的代码位于 JavaScript 区域。 内置变量 self 为部件实例的引用。 每个部件函数应定义为 self 变量的属性。 self 变量具有 ctx 属性,类型为 WidgetContext,即部件上下文的引用,包含部件实例使用的所有必要 API和数据。 以下为部件上下文属性的简要说明:
| Property | Type | Description |
|---|---|---|
| $container | jQuery Object | 部件容器元素。可使用jQuery API动态访问或修改部件DOM。 |
| $scope | IDynamicWidgetComponent | 当前部件组件的引用。当部件基于Angular方式构建时,可用于访问/修改组件属性。 |
| width | Number | 部件容器当前宽度(像素)。 |
| height | Number | 部件容器当前高度(像素)。 |
| isEdit | Boolean | 指示dashboard处于查看还是编辑状态。 |
| isMobile | Boolean | 指示dashboard视图宽度是否小于960px(默认移动端断点)。 |
| widgetConfig | WidgetConfig | 通用部件配置,包含 color(文本颜色)、backgroundColor(部件背景色)等属性。 |
| settings | Object | 部件设置,按定义的 settings json schema 包含部件专属属性。 |
| datasources | Array<Datasource> | 已解析的部件 datasources 数组。见 Subscription object。 |
| data | Array<DatasourceData> | datasources 最新数据数组。见 Subscription object。 |
| timeWindow | WidgetTimewindow | 当前部件timewindow(适用于timeseries部件)。包含当前timewindow边界信息:minTime - UTC毫秒最小时间,maxTime - UTC毫秒最大时间,interval - 当前聚合间隔(毫秒)。 |
| units | String | 可选属性,定义部件显示值的单位文本。适用于卡片、仪表盘等简单部件。 |
| decimals | Number | 可选属性,定义显示数值小数部分的位数。 |
| hideTitlePanel | Boolean | 控制部件标题面板可见性。适用于自定义标题面板或多种状态的部件。修改此属性后必须调用 updateWidgetParams()。 |
| widgetTitle | String | 若设置,将覆盖已配置的部件标题文本。修改此属性后必须调用 updateWidgetParams()。 |
| detectChanges() | Function | 触发当前部件的变更检测。当部件数据变更导致HTML模板绑定需更新时应调用。 |
| updateWidgetParams() | Function | 用运行时设置(如 widgetTitle、hideTitlePanel 等)更新部件。修改这些属性后必须调用以使修改生效。 |
| pageLink(pageSize, page, textSearch, sortOrder) | PageLink | 用于创建GET请求的排序配置。pageSize - 每页实体数,page - 页码,textSearch - 按文本过滤实体,sortOrder - 实体显示顺序。 |
| defaultSubscription | IWidgetSubscription | 默认部件订阅对象,按部件类型包含全部订阅信息(含当前数据)。见 Subscription object。 |
| timewindowFunctions | TimewindowFunctions | 管理部件数据时间范围的 timewindow 函数对象。适用于 Time-series 或 Alarm 部件。见 Timewindow functions。 |
| controlApi | RpcApi | 为 RPC(Control)部件提供 API 函数的对象。见 Control API。 |
| actionsApi | WidgetActionsApi | 与用户自定义动作相关的 API 函数集。见 Actions API。 |
| stateController | IStateController | Dashboard 状态控制器引用,提供管理当前 dashboard 状态的 API。见 State Controller。 |
实现新部件时,应定义以下JavaScript函数(注:每个函数均为可选,可按部件具体行为实现):
| Function | Description |
|---|---|
onInit() |
部件就绪初始化时调用的首个函数。用于准备部件DOM、处理部件设置并处理初始订阅信息。 |
onDataUpdated() |
部件订阅有新数据时调用。最新数据可通过部件上下文 ctx 的 defaultSubscription object 访问。 |
onResize() |
部件容器尺寸改变时调用。最新宽高可从部件上下文 ctx 获取。 |
onEditModeChanged() |
dashboard编辑模式切换时调用。当前模式由 ctx 的isEdit属性提供。 |
onMobileModeChanged() |
dashboard视图宽度越过移动端断点时调用。当前状态由 ctx 的isMobile属性提供。 |
onDestroy() |
部件元素销毁时调用。应在必要时用于释放所有资源。 |
getSettingsSchema() |
可选函数,返回部件settings schema json,作为 Settings schema section 中 Settings tab 的替代。 |
getDataKeySettingsSchema() |
可选函数,返回特定data key的settings schema json,作为 Settings schema section 中 Data key settings schema 选项卡的替代。 |
typeParameters() |
返回描述部件datasource参数的 WidgetTypeParameters 对象。见 Type parameters object。 |
actionSources() |
返回描述可用部件动作源的映射 (WidgetActionSource),用于定义用户动作。见 Action sources object。 |
Subscription object
部件订阅对象为 IWidgetSubscription 的实例,按 部件类型 包含全部订阅信息(含当前数据)。 依部件类型不同,订阅对象提供不同数据结构。 Latest values 与 Time-series 类型提供以下属性:
- datasources - array of datasources (Array<Datasource>) used by this subscription, it has the following structure:
1
2
3
4
5
6
7
8
9
10
11
12
13
14
15
16
17
18
19
20
21
22
    datasources = [
        {  // datasource
           type: 'entity',// type of the datasource. Can be "function" or "entity"
           name: 'name', // name of the datasource (in case of "entity" usually Entity name)
           aliasName: 'aliasName', // name of the alias used to resolve this particular datasource Entity
           entityName: 'entityName', // name of the Entity used as datasource
           entityType: 'DEVICE', // datasource Entity type (for ex. "DEVICE", "ASSET", "TENANT", etc.)
           entityId: '943b8cd0-576a-11e7-824c-0b1cb331ec92', // entity identificator presented as string uuid.
           dataKeys: [ //  array of keys (Array<DataKey>) (attributes or timeseries) of the entity used to fetch data
               { // dataKey
                    name: 'name', // the name of the particular entity attribute/timeseries
                    type: 'timeseries', // type of the dataKey. Can be "timeseries", "attribute" or "function"
                    label: 'Sin', // label of the dataKey. Used as display value (for ex. in the widget legend section)
                    color: '#ffffff', // color of the key. Can be used by widget to set color of the key data (for ex. lines in line chart or segments in the pie chart).
                    funcBody: "", // only applicable for datasource with type "function" and "function" key type. Defines body of the function to generate simulated data.
                    settings: {} // dataKey specific settings with structure according to the defined Data key settings json schema. See "Settings schema section".
               },
               //...
           ]
        },
        //...
    ]
- data - 此订阅范围内接收到的最新数据数组 (Array<DatasourceData>),结构如下:
1
2
3
4
5
6
7
8
9
10
11
12
13
14
    data = [
        {
            datasource: {}, // datasource object of this data. See datasource structure above.
            dataKey: {}, // dataKey for which the data is held. See dataKey structure above.
            data: [ // array of data points
                [   // data point
                    1498150092317, // unix timestamp of datapoint in milliseconds
                    1, // value, can be either string, numeric or boolean
                ],
                //...
            ]
        },
        //...
    ]
Alarm widget 类型提供以下属性:
- alarmSource - (Datasource) 获取告警的实体信息,结构如下:
1
2
3
4
5
6
7
8
9
10
11
12
13
14
15
16
17
18
    alarmSource = {
         type: 'entity',// type of the alarm source. Can be "function" or "entity"
         name: 'name', // name of the alarm source (in case of "entity" usually Entity name)
         aliasName: 'aliasName', // name of the alias used to resolve this particular alarm source Entity
         entityName: 'entityName', // name of the Entity used as alarm source
         entityType: 'DEVICE', // alarm source Entity type (for ex. "DEVICE", "ASSET", "TENANT", etc.)
         entityId: '943b8cd0-576a-11e7-824c-0b1cb331ec92', // entity identificator presented as string uuid.
         dataKeys: [ // array of keys indicating alarm fields used to display alarms data
            { // dataKey
                 name: 'name', // the name of the particular alarm field
                 type: 'alarm', // type of the dataKey. Only "alarm" in this case.
                 label: 'Severity', // label of the dataKey. Used as display value (for ex. as a column title in the Alarms table)
                 color: '#ffffff', // color of the key. Can be used by widget to set color of the key data.
                 settings: {} // dataKey specific settings with structure according to the defined Data key settings json schema. See "Settings schema section".
            },
            //...
          ]
    }
- alarms - 此订阅范围内接收到的告警数组 (Array<Alarm>),结构如下:
1
2
3
4
5
6
7
8
9
10
11
12
13
14
15
16
17
18
19
20
21
22
23
24
25
26
    alarms = [
        { // alarm
            id: { // alarm id
                entityType: "ALARM",
                id: "943b8cd0-576a-11e7-824c-0b1cb331ec92"
            },
            createdTime: 1498150092317, // Alarm created time (unix timestamp)
            startTs: 1498150092316, // Alarm started time (unix timestamp)
            endTs: 1498563899065, // Alarm end time (unix timestamp)
            ackTs: 0, // Time of alarm acknowledgment (unix timestamp)
            clearTs: 0, // Time of alarm clear (unix timestamp)
            originator: { // Originator - id of entity produced this alarm
                entityType: "ASSET",
                id: "ceb16a30-4142-11e7-8b30-d5d66714ea5a"
            },
            originatorName: "Originator Name", // Name of originator entity
            type: "Temperature", // Type of the alarm
            severity: "CRITICAL", // Severity of the alarm ("CRITICAL", "MAJOR", "MINOR", "WARNING", "INDETERMINATE")
            status: "ACTIVE_UNACK", // Status of the alarm
                                    // ("ACTIVE_UNACK" - active unacknowledged,
                                    // "ACTIVE_ACK" - active acknowledged,
                                    // "CLEARED_UNACK" - cleared unacknowledged,
                                    // "CLEARED_ACK" - cleared acknowledged)
            details: {} // Alarm details object derived from alarm details json.
        }
    ]
RPC 或 Static 部件类型中,订阅对象为可选且不包含必要信息。
Timewindow functions
用于管理部件数据时间范围的timewindow函数对象 (TimewindowFunctions)。适用于 Time-series 或 Alarm 部件。路径:widgetContext.dashboard。
| Function | Description |
|---|---|
onUpdateTimewindow(startTimeMs, endTimeMs) |
可将当前订阅时间范围更新为 startTimeMs 与 endTimeMs 指定的历史时间段。 |
onResetTimewindow() |
将订阅时间范围重置为默认值,默认由部件timewindow组件或dashboard timewindow根据部件设置决定。 |
Control API
Control API (RpcApi) 为 Control widgets 提供API函数。路径:widgetContext.controlApi。
| Function | Description |
|---|---|
sendOneWayCommand(method, params, timeout) |
向设备发送单向(无响应)RPC命令。返回命令执行promise。method - RPC方法名(字符串),params - RPC方法参数(自定义json对象),timeout - 等待响应/确认的最大毫秒数。 |
sendTwoWayCommand(method, params, timeout) |
向设备发送双向(有响应)RPC命令。返回命令执行promise,成功回调中包含响应体。 |
completedCommand() |
停止设备的RPC执行。 |
Actions API
处理用户自定义动作的API函数集 (WidgetActionsApi)。路径:widgetContext.actionsApi。
| Function | Description |
|---|---|
getActionDescriptors(actionSourceId) |
返回指定 actionSourceId 的动作描述符列表。 |
handleWidgetAction($event, descriptor, entityId, entityName) |
处理特定动作源产生的动作。$event - 关联的事件对象,descriptor - 动作描述符,entityId 和 entityName - 动作源提供的当前实体id与名称(如有)。 |
getActiveEntityInfo() |
返回部件中首个实体的信息。 |
openDashboardStateInSeparateDialog(targetDashboardStateId, params?, dialogTitle?, hideDashboardToolbar?, dialogWidth?, dialogHeight?) |
在独立对话框中打开dashboard状态。targetDashboardStateId - 要打开的状态ID,params - 状态实体及附加信息,dialogTitle - 对话框标题,hideDashboardToolbar - 是否隐藏dashboard工具栏,dialogWidth 与 dialogHeight - 对话框宽高。 |
openDashboardStateInPopover($event, targetDashboardStateId, params?, hideDashboardToolbar?, preferredPlacement?, hideOnClickOutside?, popoverWidth?, popoverHeight?, popoverStyle?) |
在弹出窗口中打开dashboard状态。$event - 关联的事件对象,targetDashboardStateId - 弹出窗口中的状态id,params - 状态实体及附加信息,hideDashboardToolbar - 是否隐藏dashboard工具栏,preferredPlacement - 弹出位置,hideOnClickOutside - 点击外部是否关闭,popoverStyle - 弹出窗口样式,popoverWidth 与 popoverHeight - 弹出窗口宽高。 |
Widget Subscription API
处理自定义订阅的API函数集 (WidgetSubscriptionApi)。路径:widgetContext.subscriptionApi。
| Function | Description |
|---|---|
createSubscription(options, subscribe?) |
创建数据订阅。options - 订阅信息,subscribe - 控制是否接收更新数据。 |
createSubscriptionFromInfo(type, subscriptionsInfo, options, useDefaultComponents, subscribe) |
创建数据订阅。type - 部件类型,subscriptionsInfo - 订阅数据描述,options - 订阅信息,useDefaultComponents - 是否使用默认订阅设置,subscribe - 控制是否接收更新数据。 |
removeSubscription(id) |
移除订阅。id - 订阅ID。 |
State Controller
Dashboard状态控制器引用 (IStateController),提供管理当前 dashboard状态的API。路径:widgetContext.dashboard.stateController。
| Function | Description |
|---|---|
openState(id, params, openRightLayout) |
导航到新dashboard状态。id - 目标状态id,params - 新状态使用的状态参数对象,openRightLayout - 可选,移动端下强制打开右侧布局。 |
updateState(id, params, openRightLayout) |
更新当前dashboard状态。id - 可选,替换当前状态的目标状态id,params - 要更新的状态参数对象,openRightLayout - 可选,移动端下强制打开右侧布局。 |
resetState() |
重置当前dashboard状态。 |
getStateId() |
返回当前dashboard状态id。 |
getStateIndex() |
返回状态嵌套深度。 |
getStateIdAtIndex(index) |
按索引返回 stateId。 |
getCurrentStateName() |
返回当前状态的 name。 |
getStateParams() |
返回当前dashboard状态参数。 |
getEntityId(entityParamName) |
按状态实体参数名返回 entityId。entityParamName - 状态实体参数名。 |
getStateParamsByStateId(id) |
返回指定 id 的dashboard状态参数。 |
openRightLayout() |
打开当前状态的右侧布局(移动端模式)。 |
preserveState() |
将状态参数保存到 preservedState。 |
cleanupPreservedStates() |
清空 preservedState。 |
Broadcast Service
Broadcast Service (BroadcastService) 用于部件间的UI级数据交换。
| Function | Description |
|---|---|
broadcast(name, args) |
向订阅者发送数据。name - 唯一标识符,args - 要发送的数据。 |
on(name, listener) |
使用唯一标识符订阅数据并处理。可添加多个订阅者。name 为订阅的唯一标识符,listener 为处理接收数据的函数。 |
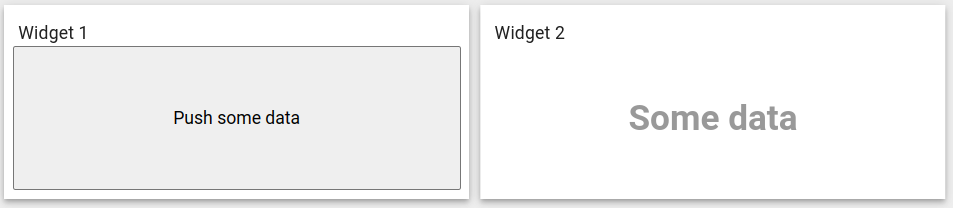
例如,将数据从部件1发送到部件2:
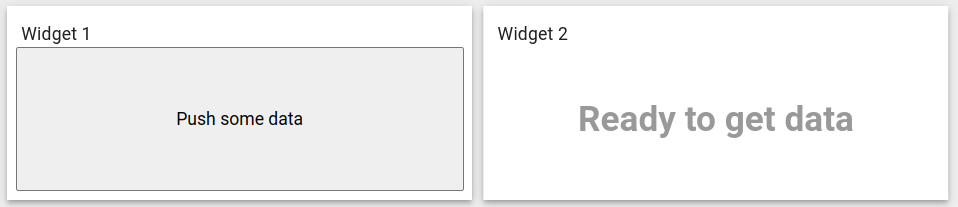
在部件1中需使用broadcast(…) 发送数据:
1
2
3
4
5
6
7
8
9
self.onInit = function() {
    ...
    let $scope = self.ctx.$scope;
    self.ctx.broadcastService = $scope.$injector.get(self.ctx.servicesMap.get('broadcastService'));
    $scope.click = function() {
        self.ctx.broadcastService.broadcast('ID', 'Some data');
    }
    ...
}
在部件2中需使用on(…) 订阅数据:
1
2
3
4
5
6
7
8
9
10
11
self.onInit = function() {
    ...
    let $scope = self.ctx.$scope;
    $scope.widgetText = 'Ready to get data';
    self.ctx.broadcastService = $scope.$injector.get(self.ctx.servicesMap.get('broadcastService'));
    self.ctx.broadcastService.on('ID', (event, args) => {
        $scope.widgetText = args[0];
        self.ctx.detectChanges();
    });
    ...
}
结果在部件2中可看到数据:
Type parameters object
描述部件datasource参数的 WidgetTypeParameters 对象,具有以下属性:
1
2
3
4
5
6
7
8
9
10
11
12
13
    return {
        maxDatasources: -1, // Maximum allowed datasources for this widget, -1 - unlimited
        maxDataKeys: -1, //Maximum allowed data keys for this widget, -1 - unlimited
        dataKeysOptional: false, //Whether this widget can be configured with datasources without data keys
        datasourcesOptional: false, //Whether this widget can be configured without datasources
        singleEntity: false, //Whether this widget will work with only one entity
        hasAdditionalLatestDataKeys: false, //Whether this widget will support additional latest data keys
        ignoreDataUpdateOnIntervalTick: true, //Use for time series widgets. if true, onDataUpdate will trigger when new data is received otherwise it will be triggered each second.
        previewWidth: 250px, //Default size of preview X axis
        previewHeight: 250px, //Default size of preview Y axis
        embedTitlePanel: false, //Whether hide title panel
        hideDataSettings: false, //Whether data settings will hide (appearance tab)
    }
Action sources object
描述可用于分配用户动作的部件动作源映射 (WidgetActionSource),结构如下:
1
2
3
4
5
6
   return {
        'headerButton': { // Action source Id (unique action source identificator)
           name: 'Header button', // Display name of action source, used in widget settings ('Actions' tab).
           multiple: true // Boolean property indicating if this action source supports multiple action definitions (for ex. multiple buttons in one cell, or only one action can by assigned on table row click.)
        }
    };
Creating simple widgets
以下教程展示如何创建各类部件的最简实现。 为精简代码,将使用ThingsBoard UI基于的Angular框架。 你也可在部件代码中使用纯JavaScript或jQuery API。
Latest Values widget
In the Widgets Bundle view, click the big “+” button at the bottom-right part of the screen and then click the “Create new widget type” button. 在 Select widget type 弹窗中点击 Latest Values。 Widget Editor 将打开,并预填默认 Latest Values 模板内容。
- 清空 “Resources” 区域中CSS选项卡的内容。
- 将以下HTML代码放入 “Resources” 区域的HTML选项卡:
1
2
3
4
5
6
7
8
  <div fxFlex fxLayout="column" style="height: 100%;" fxLayoutAlign="center stretch">
    <div>My first latest values widget.</div>
    <div fxFlex fxLayout="row" *ngFor="let dataKeyData of data" fxLayoutAlign="space-around center">
        <div>{{dataKeyData.dataKey.label}}:</div>
        <div>{{(dataKeyData.data[0] && dataKeyData.data[0][0]) | date : 'yyyy-MM-dd HH:mm:ss' }}</div>
        <div>{{dataKeyData.data[0] && dataKeyData.data[0][1]}}</div>
    </div>
  </div>
- 将以下JavaScript代码放入 “JavaScript” 区域:
1
2
3
4
5
6
7
    self.onInit = function() {
       self.ctx.$scope.data = self.ctx.defaultSubscription.data;
    }

    self.onDataUpdated = function() {
        self.ctx.detectChanges();
    }
- 点击 Widget Editor Toolbar 中的 Run 按钮,在 Widget preview 区域查看结果。
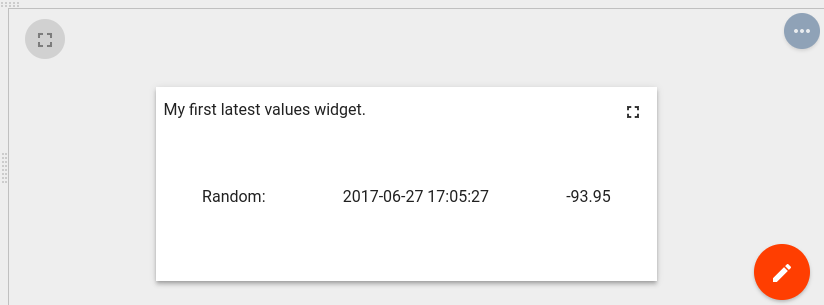
此例将 subscription 的 data 属性赋值给 $scope,从而在HTML模板中可访问。 HTML中使用 *ngFor 结构指令遍历dataKeys与datapoints,渲染最新值及对应时间戳。
Time-Series widget
In the Widgets Bundle view, click the big “+” button at the bottom-right part of the screen, then click the “Create new widget type” button. 在 Select widget type 弹窗中点击 Time-Series。 Widget Editor 将打开,并预填默认 Time-Series 模板内容。
- Replace content of the CSS tab in “Resources” section with the following one:
1
2
3
.my-data-table th {
    text-align: left;
}
- 将以下HTML代码放入 “Resources” 区域的HTML选项卡:
1
2
3
4
5
6
7
8
9
10
11
12
13
14
15
16
17
18
  <mat-tab-group style="height: 100%;">
      <mat-tab *ngFor="let datasource of datasources; let $dsIndex = index" label="{{datasource.name}}">
          <table class="my-data-table" style="width: 100%;">
              <thead>
                  <tr>
                      <th>Timestamp</th>
                      <th *ngFor="let dataKeyData of datasourceData[$dsIndex]">{{dataKeyData.dataKey.label}}</th>
                  <tr>
              </thead>
              <tbody>
                  <tr *ngFor="let data of datasourceData[$dsIndex][0].data; let $dataIndex = index">
                      <td>{{data[0] | date : 'yyyy-MM-dd HH:mm:ss'}}</td>
                      <td *ngFor="let dataKeyData of datasourceData[$dsIndex]">{{dataKeyData.data[$dataIndex] && dataKeyData.data[$dataIndex][1]}}</td>
                  </tr>
              </tbody>
          </table>
      </mat-tab>
  </mat-tab-group>
- 将以下JavaScript代码放入 “JavaScript” 区域:
1
2
3
4
5
6
7
8
9
10
11
12
13
14
15
16
17
18
19
20
21
22
23
24
25
26
27
self.onInit = function() {
    self.ctx.widgetTitle = 'My first Time-Series widget';
    self.ctx.$scope.datasources = self.ctx.defaultSubscription.datasources;
    self.ctx.$scope.data = self.ctx.defaultSubscription.data;

    self.ctx.$scope.datasourceData = [];

    var currentDatasource = null;
    var currentDatasourceIndex = -1;

    for (var i=0;i<self.ctx.$scope.data.length;i++) {
        var dataKeyData = self.ctx.$scope.data[i];
        if (dataKeyData.datasource != currentDatasource) {
            currentDatasource = dataKeyData.datasource
            currentDatasourceIndex++;
            self.ctx.$scope.datasourceData[currentDatasourceIndex] = [];

        }
        self.ctx.$scope.datasourceData[currentDatasourceIndex].push(dataKeyData);
    }
    self.ctx.updateWidgetParams();

}

self.onDataUpdated = function() {
    self.ctx.detectChanges();
}
- 点击 Widget Editor Toolbar 中的 Run 按钮,在 Widget preview 区域查看结果。
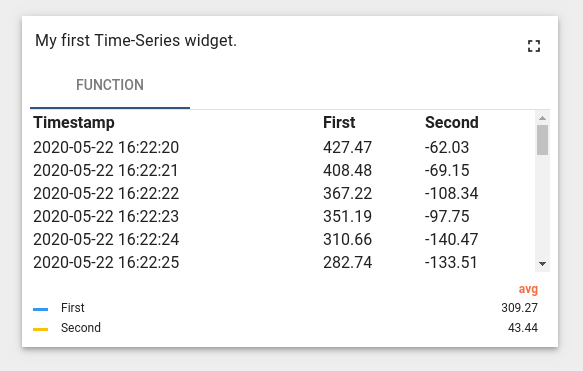
此例将 subscription 的 datasources 与 data 属性赋值给 $scope,从而在HTML模板中可访问。 引入 $scope.datasourceData 按datasource索引映射其dataKeys数据,便于在HTML中灵活访问。 HTML中使用 *ngFor 指令遍历datasources并渲染对应选项卡。 每个选项卡根据 datasourceData 的datasource索引获取dataKeys渲染表格。 表格列通过遍历 dataKeyData 渲染,数据点通过遍历各 dataKeyData 的 data 数组渲染时间戳与值。 注意本代码中 onDataUpdated 调用了 detectChanges,以便新数据到达时执行变更检测。
RPC (Control) widget
In the Widgets Bundle view, click the big “+” button at the bottom-right part of the screen and then click the “Create new widget type” button. 在 Select widget type 弹窗中点击 Control Widget。 Widget Editor 将打开,并预填默认 Control 模板内容。
- Clear content of the CSS tab of “Resources” section.
- 将以下HTML代码放入 “Resources” 区域的HTML选项卡:
1
2
3
4
5
6
7
8
9
10
11
12
13
14
15
16
17
18
19
20
21
22
23
24
25
26
    <form #rpcForm="ngForm" (submit)="sendCommand()">
      <div class="mat-content mat-padding" fxLayout="column">
        <mat-form-field class="mat-block">
          <mat-label>RPC method</mat-label>
          <input matInput required name="rpcMethod" #rpcMethodField="ngModel" [(ngModel)]="rpcMethod"/>
          <mat-error *ngIf="rpcMethodField.hasError('required')">
            RPC method name is required.
          </mat-error>
        </mat-form-field>
        <mat-form-field class="mat-block">
          <mat-label>RPC params</mat-label>
          <input matInput required name="rpcParams" #rpcParamsField="ngModel" [(ngModel)]="rpcParams"/>
          <mat-error *ngIf="rpcParamsField.hasError('required')">
            RPC params is required.
          </mat-error>
        </mat-form-field>
        <button [disabled]="rpcForm.invalid || !rpcForm.dirty" mat-raised-button color="primary" type="submit" >
          Send RPC command
        </button>
        <div>
          <label>RPC command response</label>
          <div style="width: 100%; height: 100px; border: solid 2px gray" [innerHTML]="rpcCommandResponse">
          </div>
        </div>
      </div>
    </form>
- 将以下JSON内容放入 Settings schema section 的 “Settings schema” 选项卡:
1
2
3
4
5
6
7
8
9
10
11
12
13
14
15
16
17
18
19
20
21
22
23
{
    "schema": {
        "type": "object",
        "title": "Settings",
        "properties": {
            "oneWayElseTwoWay": {
                "title": "Is One Way Command",
                "type": "boolean",
                "default": true
            },
            "requestTimeout": {
                "title": "RPC request timeout",
                "type": "number",
                "default": 500
            }
        },
        "required": []
    },
    "form": [
        "oneWayElseTwoWay",
        "requestTimeout"
    ]
}
- 将以下JavaScript代码放入 “JavaScript” 区域:
1
2
3
4
5
6
7
8
9
10
11
12
13
14
15
16
17
18
19
20
21
22
23
24
25
26
27
28
29
30
31
32
33
34
35
self.onInit = function() {

    self.ctx.$scope.sendCommand = function() {
        var rpcMethod = self.ctx.$scope.rpcMethod;
        var rpcParams = self.ctx.$scope.rpcParams;
        var timeout = self.ctx.settings.requestTimeout;
        var oneWayElseTwoWay = self.ctx.settings.oneWayElseTwoWay ? true : false;

        var commandObservable;
        if (oneWayElseTwoWay) {
            commandObservable = self.ctx.controlApi.sendOneWayCommand(rpcMethod, rpcParams, timeout);
        } else {
            commandObservable = self.ctx.controlApi.sendTwoWayCommand(rpcMethod, rpcParams, timeout);
        }
        commandObservable.subscribe(
            function (response) {
                if (oneWayElseTwoWay) {
                    self.ctx.$scope.rpcCommandResponse = "Command was successfully received by device.<br> No response body because of one way command mode.";
                } else {
                    self.ctx.$scope.rpcCommandResponse = "Response from device:<br>";
                    self.ctx.$scope.rpcCommandResponse += JSON.stringify(response, undefined, 2);
                }
                self.ctx.detectChanges();
            },
            function (rejection) {
                self.ctx.$scope.rpcCommandResponse = "Failed to send command to the device:<br>"
                self.ctx.$scope.rpcCommandResponse += "Status: " + rejection.status + "<br>";
                self.ctx.$scope.rpcCommandResponse += "Status text: '" + rejection.statusText + "'";
                self.ctx.detectChanges();
            }

        );
    }

}
- 在 Widget title 字段填写部件类型名称,例如 “My first control widget”。
- 点击 Widget Editor Toolbar 中的 Run 按钮,在 Widget preview 区域查看结果。
- 在预览区域点击dashboard编辑按钮调整部件尺寸,然后点击dashboard应用按钮。最终部件效果见下图。
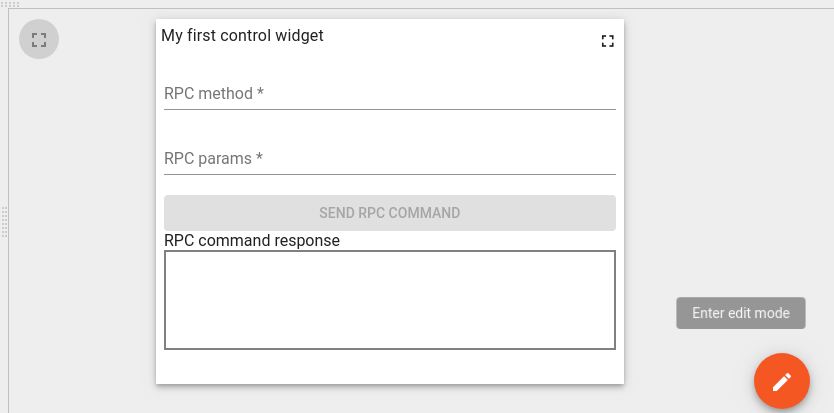
- 点击 Widget Editor Toolbar 中的 Save 按钮保存部件类型。
要测试该部件的RPC功能,需将其放入dashboard并绑定到支持RPC的设备。步骤如下:
- 以租户管理员身份登录。
- 进入 Devices 创建新设备,例如命名 “My RPC Device”。
- 打开设备详情,点击 “Copy Access Token” 复制设备访问令牌。
- 下载 mqtt-js-rpc-from-server.sh 和 mqtt-js-rpc-from-server.js,放在同一目录。 编辑 mqtt-js-rpc-from-server.sh,将 $ACCESS_TOKEN 替换为设备访问令牌,然后安装mqtt客户端库。
- 运行 mqtt-js-rpc-from-server.sh 脚本,控制台应显示 “connected”。
- 进入 Dashboards 创建新dashboard,例如 “My first control dashboard”,并打开。
- 点击dashboard的 “edit” 按钮。在编辑模式下,点击dashboard工具栏上的 “Entity aliases” 按钮。
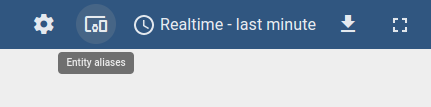
- 在 Entity aliases 弹窗中点击 “Add alias”。
- 填写 “Alias name” 字段,例如 “My RPC Device Alias”。
- 在 “Filter type” 中选择 “Entity list”。
- 在 “Type” 中选择 “Device”。
- 在 “Entity list” 中选择设备,此例为 “My RPC Device”。
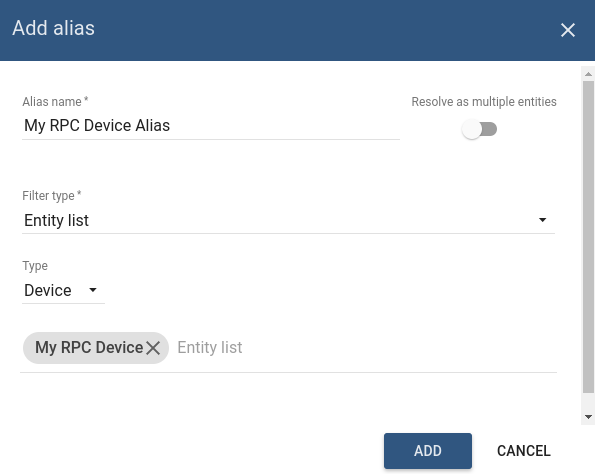
- 在 Entity aliases 中点击 “Add” 再点击 “Save”。
- 点击dashboard的 “+” 按钮,然后点击 “Create new widget” 按钮。
- 选择保存RPC部件的 Widget Bundle,并选择 “Control widget” 选项卡。
- 点击你的部件,此例为 “My first control widget”。
- 在 Add Widget 弹窗的 Target device 中选择设备别名,此例为 “My RPC Device Alias”。
- 点击 Add。Control部件将出现在dashboard上。点击dashboard的 Apply changes 保存并退出编辑。
- 在 RPC method 填写RPC方法名,例如 “TestMethod”。
- 在 RPC params 填写RPC参数,例如 “{ param1: “value1” }”。
- 点击 Send RPC command 按钮,部件中将显示响应。
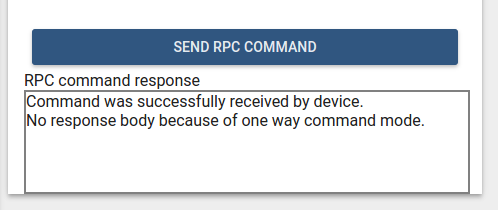
设备控制台将输出如下内容:
1
2
  request.topic: v1/devices/me/rpc/request/0
  request.body: {"method":"TestMethod","params":"{ param1: \"value1\" }"}
要测试“Two way”RPC模式,需修改对应的部件设置。步骤如下:
- 点击dashboard的 “edit” 按钮。在编辑模式下,点击Control部件顶部的 Edit widget 按钮。
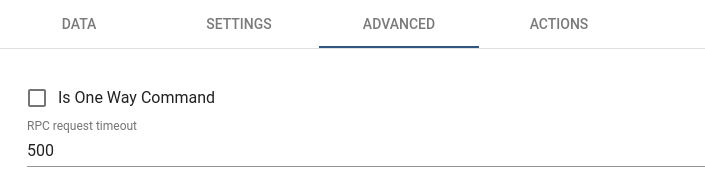
- 在部件详情中选择 “Advanced” 选项卡,取消勾选 “Is One Way Command”。
- 点击部件详情顶部的 Apply changes,关闭详情后再点击dashboard的 Apply changes。
- 按前述步骤填写RPC方法名和参数。 点击 Send RPC command 按钮,部件中将显示响应。
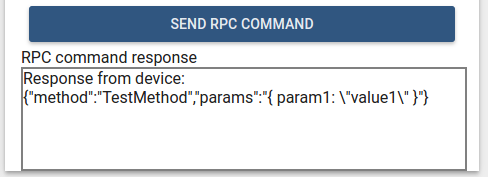
- 停止 mqtt-js-rpc-from-server.sh 脚本。 点击 Send RPC command 按钮,部件中将显示如下响应。
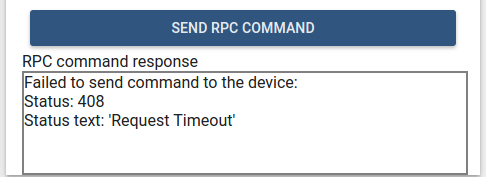
此例使用 controlApi 发送RPC命令,并引入自定义部件设置以配置RPC模式与RPC请求超时。 设备响应由 commandObservable 处理,包含成功与失败回调,分别接收响应或包含请求执行结果的拒绝对象。
Alarm widget
In the Widgets Bundle view, click the big “+” button at the bottom-right part of the screen and then click the “Create new widget type” button. Click the Alarm Widget button on the Select widget type popup. Widget Editor 将打开,并预填默认 Alarm 模板内容。
- 将 “Resources” 区域中CSS选项卡内容替换为以下内容:
1
2
3
.my-alarm-table th {
    text-align: left;
}
- 将以下HTML代码放入 “Resources” 区域的HTML选项卡:
1
2
3
4
5
6
7
8
9
10
11
12
13
14
15
16
17
18
  <div fxFlex fxLayout="column" style="height: 100%;">
      <div>My first Alarm widget.</div>
      <table class="my-alarm-table" style="width: 100%;">
          <thead>
              <tr>
                  <th *ngFor="let dataKey of alarmSource?.dataKeys">{{dataKey.label}}</th>
              <tr>
          </thead>
          <tbody>
              <tr *ngFor="let alarm of alarms">
                  <td *ngFor="let dataKey of alarmSource?.dataKeys"
                      [ngStyle]="getAlarmCellStyle(alarm, dataKey)">
                      {{getAlarmValue(alarm, dataKey)}}
                  </td>
              </tr>
          </tbody>
      </table>
  </div>
- 将以下JSON内容放入 Settings schema section 的 “Settings schema” 选项卡:
1
2
3
4
5
6
7
8
9
10
11
12
13
14
15
16
17
18
19
20
{
    "schema": {
        "type": "object",
        "title": "AlarmTableSettings",
        "properties": {
            "alarmSeverityColorFunction": {
                "title": "Alarm severity color function: f(severity)",
                "type": "string",
                "default": "if(severity == 'CRITICAL') {return 'red';} else if (severity == 'MAJOR') {return 'orange';} else return 'green'; "
            }
        },
        "required": []
    },
    "form": [
        {
            "key": "alarmSeverityColorFunction",
            "type": "javascript"
        }
    ]
}
- 将以下JavaScript代码放入 “JavaScript” 区域:
1
2
3
4
5
6
7
8
9
10
11
12
13
14
15
16
17
18
19
20
21
22
23
24
25
26
27
28
29
30
31
32
33
34
35
36
37
38
39
40
41
42
43
44
45
46
47
48
49
50
51
52
53
self.onInit = function() {
    var pageLink = self.ctx.pageLink(100);

    pageLink.typeList = self.ctx.widgetConfig.alarmTypeList;
    pageLink.statusList = self.ctx.widgetConfig.alarmStatusList;
    pageLink.severityList = self.ctx.widgetConfig.alarmSeverityList;
    pageLink.searchPropagatedAlarms = self.ctx.widgetConfig.searchPropagatedAlarms;

    self.ctx.defaultSubscription.subscribeForAlarms(pageLink, null);
    self.ctx.$scope.alarmSource = self.ctx.defaultSubscription.alarmSource;

    var alarmSeverityColorFunctionBody = self.ctx.settings.alarmSeverityColorFunction;
    if (typeof alarmSeverityColorFunctionBody === 'undefined' || !alarmSeverityColorFunctionBody.length) {
        alarmSeverityColorFunctionBody = "if(severity == 'CRITICAL') {return 'red';} else if (severity == 'MAJOR') {return 'orange';} else return 'green';";
    }

    var alarmSeverityColorFunction = null;
    try {
        alarmSeverityColorFunction = new Function('severity', alarmSeverityColorFunctionBody);
    } catch (e) {
        alarmSeverityColorFunction = null;
    }

    self.ctx.$scope.getAlarmValue = function(alarm, dataKey) {
        var alarmKey = dataKey.name;
        if (alarmKey === 'originator') {
            alarmKey = 'originatorName';
        }
        var value = alarm[alarmKey];
        if (alarmKey === 'createdTime') {
            return self.ctx.date.transform(value, 'yyyy-MM-dd HH:mm:ss');
        } else {
            return value;
        }
    }

    self.ctx.$scope.getAlarmCellStyle = function(alarm, dataKey) {
        var alarmKey = dataKey.name;
        if (alarmKey === 'severity' && alarmSeverityColorFunction) {
            var severity = alarm[alarmKey];
            var color = alarmSeverityColorFunction(severity);
            return {
                color: color
            };
        }
        return {};
    }
}

self.onDataUpdated = function() {
    self.ctx.$scope.alarms = self.ctx.defaultSubscription.alarms.data;
    self.ctx.detectChanges();
}
- 点击 Widget Editor Toolbar 中的 Run 按钮,在 Widget preview 区域查看结果。

此例将 subscription 的 alarmSource 与 alarms 赋值给 $scope,从而在HTML模板中可访问。 HTML中使用 *ngFor 指令遍历 alarmSource 的dataKeys渲染列。 表格行通过遍历 alarms 数组渲染,单元格通过遍历 dataKeys 渲染。 getAlarmValue 获取告警值,并通过 ctx 的 date 属性使用 DatePipe 格式化 createdTime。 getAlarmCellStyle 为告警单元格设置自定义样式。本例引入 alarmSeverityColorFunction 设置,根据告警级别返回颜色。 getAlarmCellStyle 内调用 alarmSeverityColorFunction 获取告警级别单元格颜色。 注意本代码中 onDataUpdated 用订阅的最新告警更新 alarms,并调用 detectChanges() 执行变更检测。
Static widget
In the Widgets Bundle view, click the big “+” button at the bottom-right part of the screen and then click the “Create new widget type” button. 在 Select widget type 弹窗中点击 Static Widget。 Widget Editor 将打开,并预填默认 Static 模板内容。
- 将以下HTML代码放入 “Resources” 区域的HTML选项卡:
1
2
3
4
  <div fxFlex fxLayout="column" style="height: 100%;" fxLayoutAlign="space-around stretch">
    <h3 style="text-align: center;">My first static widget.</h3>
    <button mat-raised-button color="primary" (click)="showAlert()">Click me</button>
  </div>
- 将以下JSON内容放入 Settings schema section 的 “Settings schema” 选项卡:
1
2
3
4
5
6
7
8
9
10
11
12
13
14
15
16
{
    "schema": {
        "type": "object",
        "title": "Settings",
        "properties": {
            "alertContent": {
                "title": "Alert content",
                "type": "string",
                "default": "Content derived from alertContent property of widget settings."
            }
        }
    },
    "form": [
        "alertContent"
    ]
}
- 将以下JavaScript代码放入 “JavaScript” 区域:
1
2
3
4
5
6
7
8
9
10
11
self.onInit = function() {

    self.ctx.$scope.showAlert = function() {
        var alertContent = self.ctx.settings.alertContent;
        if (!alertContent) {
            alertContent = "Content derived from alertContent property of widget settings.";
        }
        window.alert(alertContent);
    };

}
- 点击 Widget Editor Toolbar 中的 Run 按钮,在 Widget preview 区域查看结果。
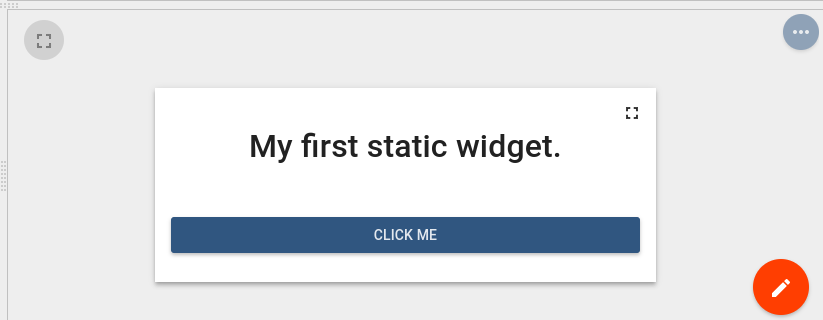
这是一个纯静态HTML部件,无订阅数据,也未使用特殊部件API。 仅实现自定义 showAlert 函数,用部件设置的 alertContent 显示弹窗。 可在 Widget preview 区域切换到dashboard编辑模式,在部件详情的 “Advanced” 选项卡中修改 alertContent。 修改后即可看到新的弹窗内容。