- Overview
- OAuth 2.0 authentication flow
- Scenario description
- Mapping of the external user into ThingsBoard internal user structure
- OAuth 2.0 configuration parameters
- HaProxy configuration
Overview
ThingsBoard allows you to provide Single Sign-On functionality for your customers and automatically create tenants, customers, or sub customers using external user management platforms, that supports the OAuth 2.0 protocol.
A list of platforms that supports the OAuth 2.0 protocol: Google, Okta, Auth0, etc.
OAuth 2.0 authentication flow
ThingsBoard supports the Authorization Code grant type to exchange an authorization code for an access token.
Once the user returns to the ThingsBoard client via redirect URL, the platform will get the authorization code from the URL and will use it to request an access token from the external user management platform.
Using the basic mapper or custom mapper, external user info object will be converted from external platform into ThingsBoard internal OAuth 2.0 user.
After this, the regular ThingsBoard authorization flow will happen.
Scenario description
In this sample, we are going to use Google the authentication. The user is going to be logged into the Tenant, and the Tenant name is going to be equal to the user’s email. If the Tenant does not exist in the system, the new Tenant will be created.
As a second step, we are going to add a new external provider for authentication - Auth0. In this case, the User is going to be logged into the Tenant which name is going to be equal to a user email domain name. Additionally, for every user, we are going to create a new Customer and the Customer name is going to be equal to a user email.
To map that external user info from Google and Auth0 platform, we are going to use a built-in basic mapper.
If basic mapper functionality doesn’t fit your business needs, you can configure the custom mapper, so that you are able to add an implementation that fits your specific needs.
Login with Google
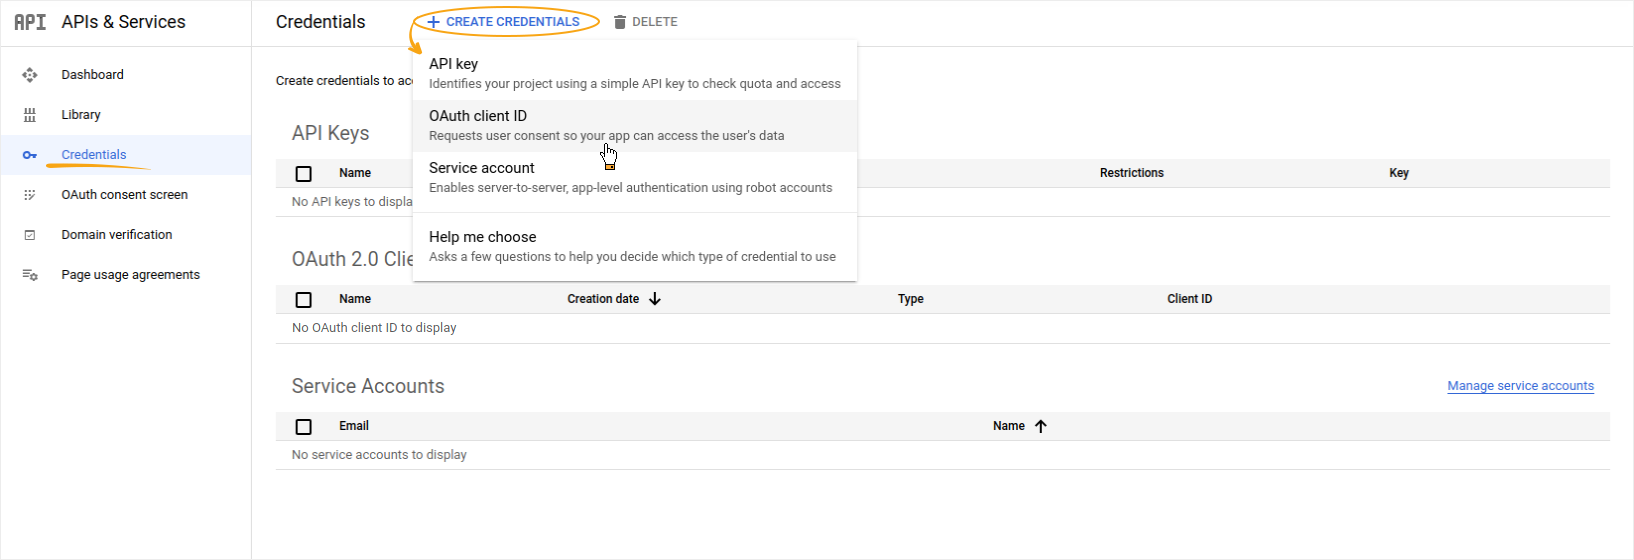
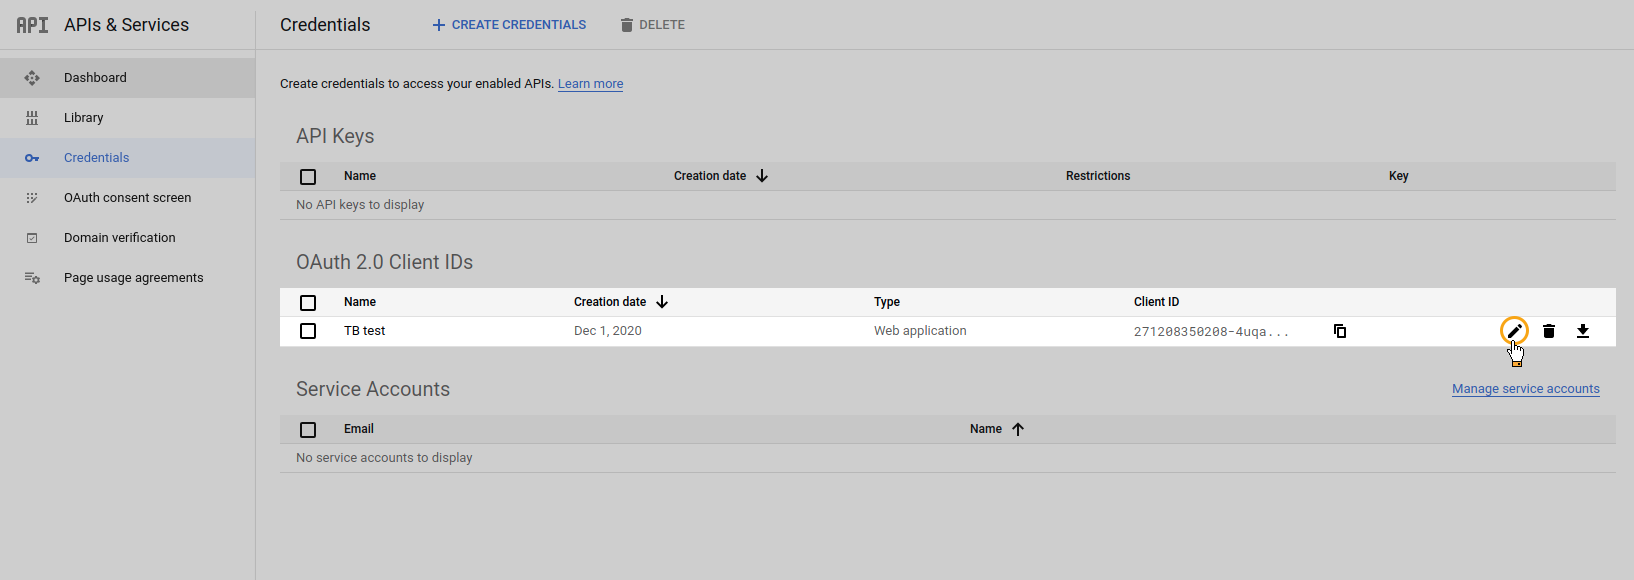
To use Google OAuth 2.0 authentication platform for Login, you need to set up a project in the Google API Console to obtain OAuth 2.0 credentials.
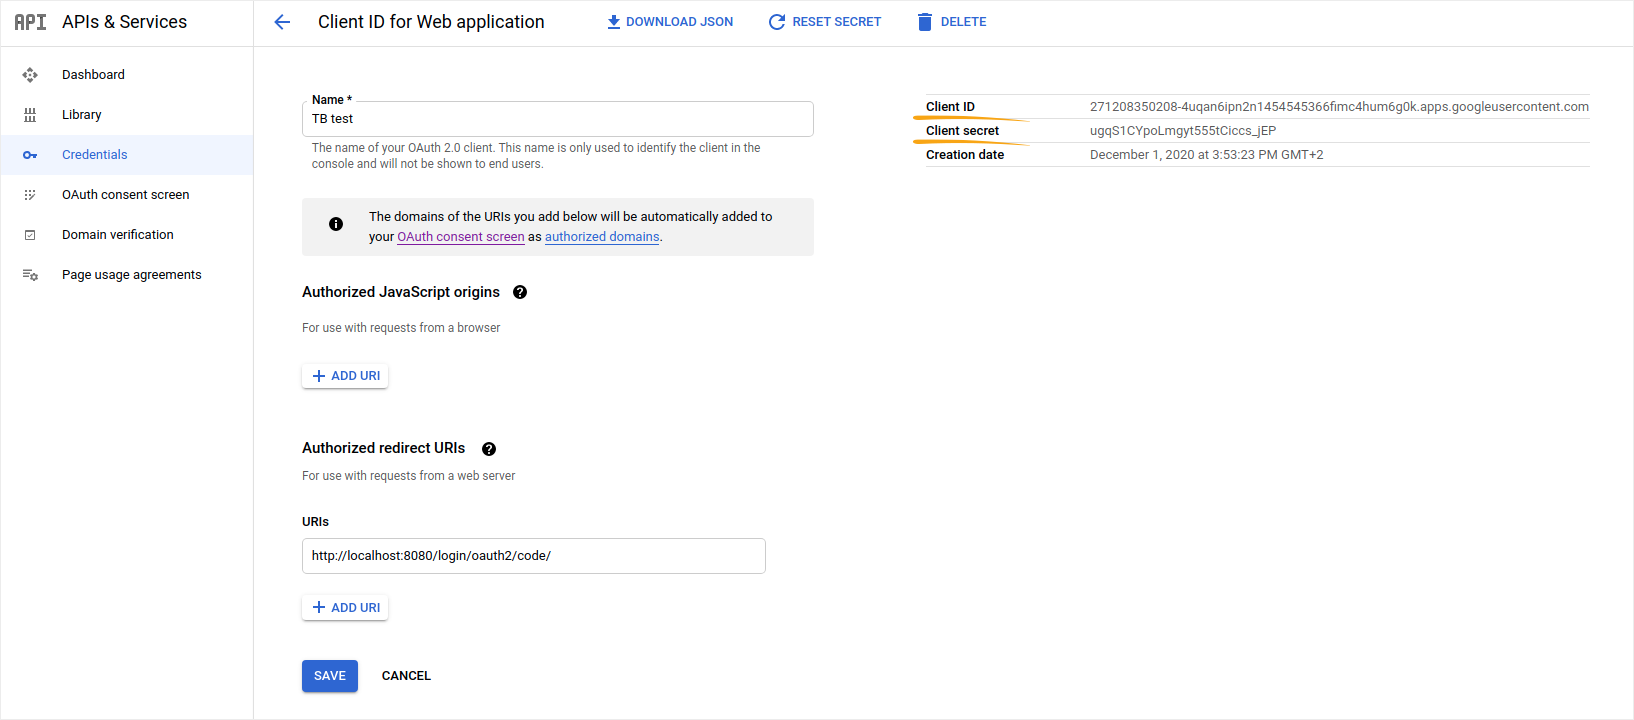
Please, follow the instructions on the OpenID Connect page to configure the OAuth 2.0 Client. After completing the instructions above, you should have a new OAuth Client with credentials consisting of a Client ID and a Client Secret.
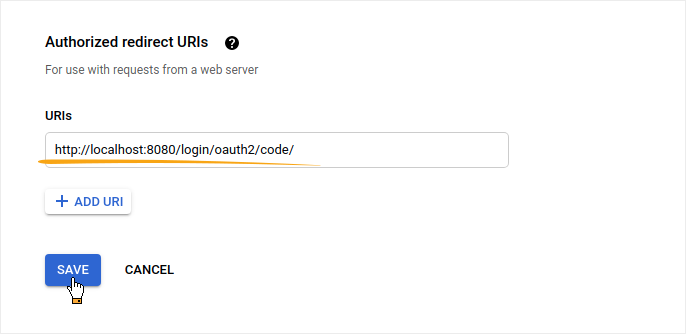
Please, add the ThingsBoard default redirect URI, which we are going to use in this example, to the Authorized Redirect URI section:
1
http://localhost:8080/login/oauth2/code/
Configuration of ThingsBoard
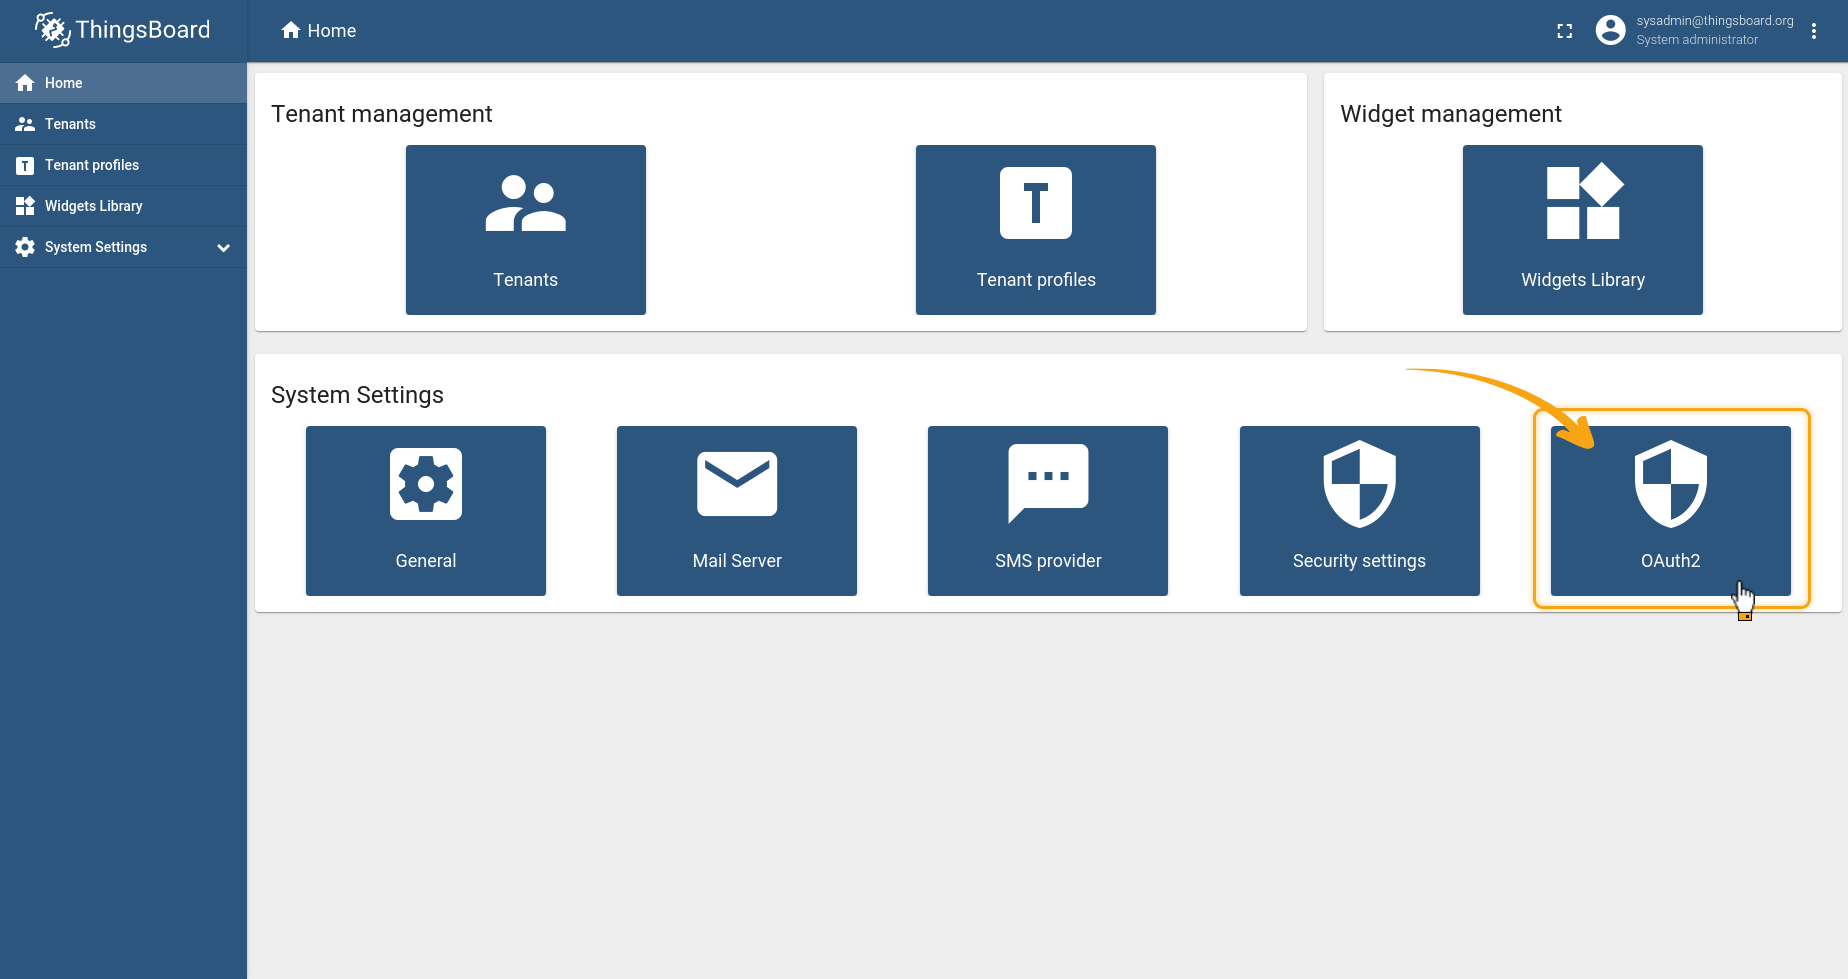
Go to your ThingsBoard as a System Administrator (sysadmin@thingsboard.org / sysadmin). Check the General Settings -> Base URL should not contain “/” at the end (e.g. “http://127.0.0.1:8080” instead of “https://127.0.0.1:8080/”). Then in the Home section, find the “OAuth2” icon and click on it.
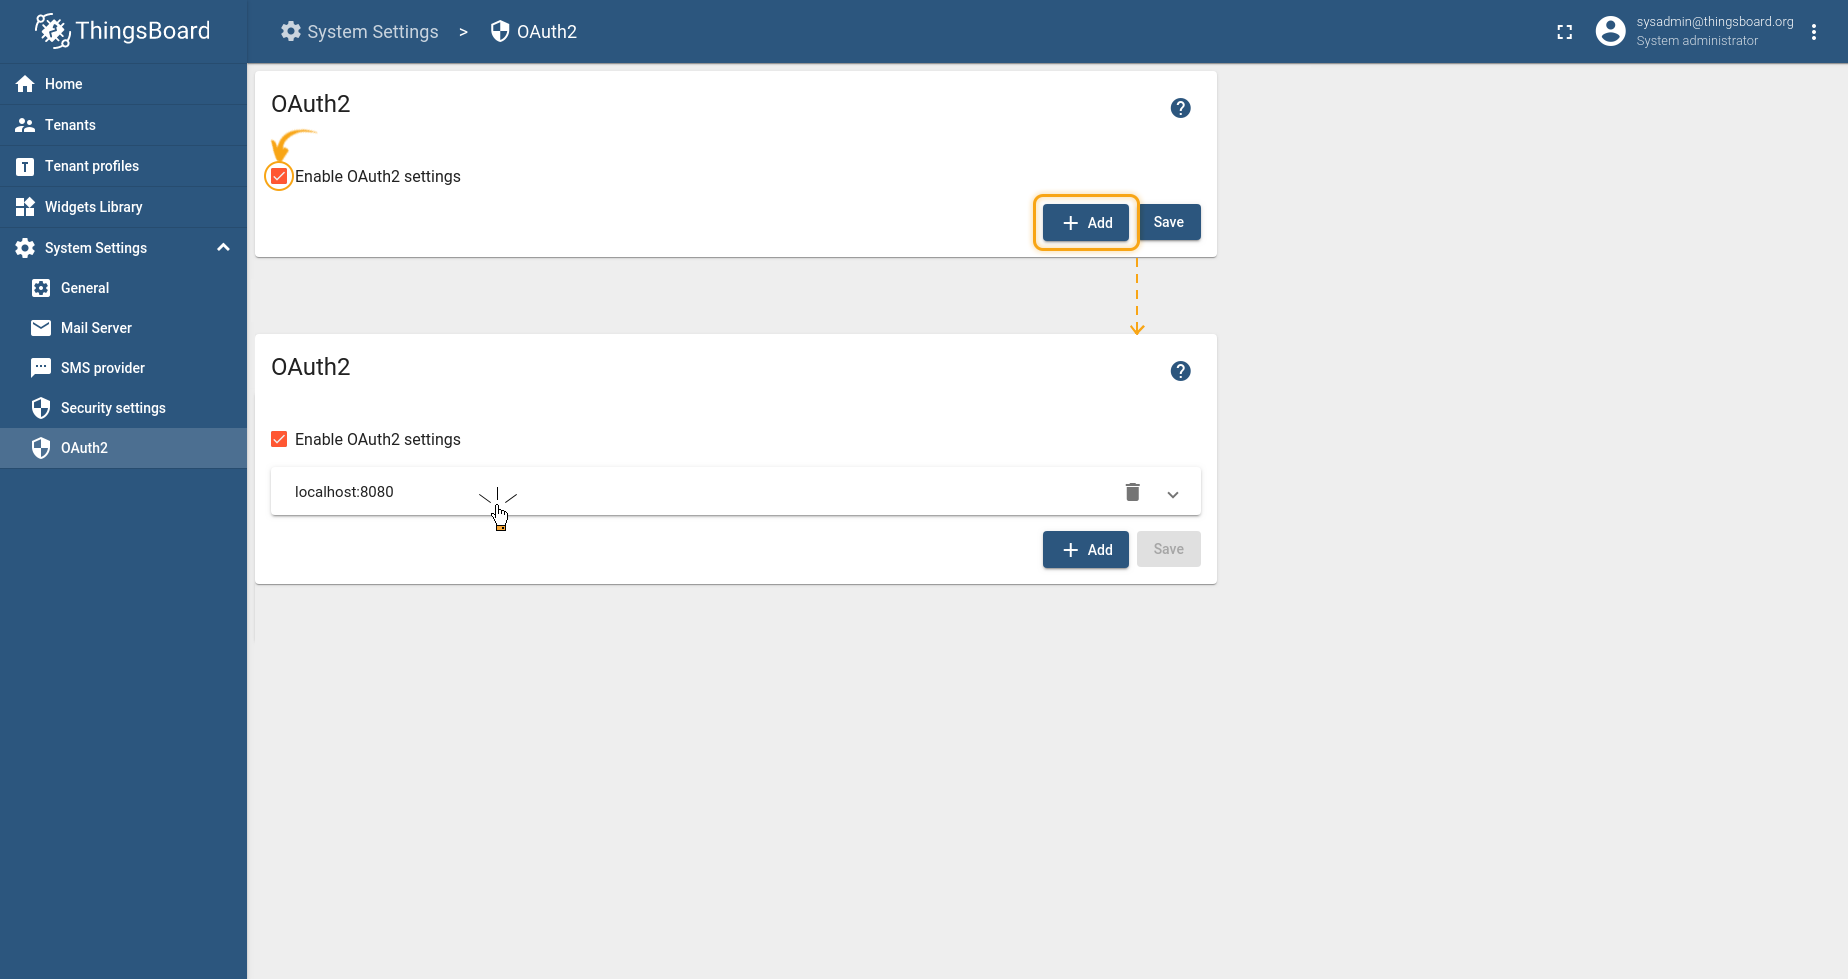
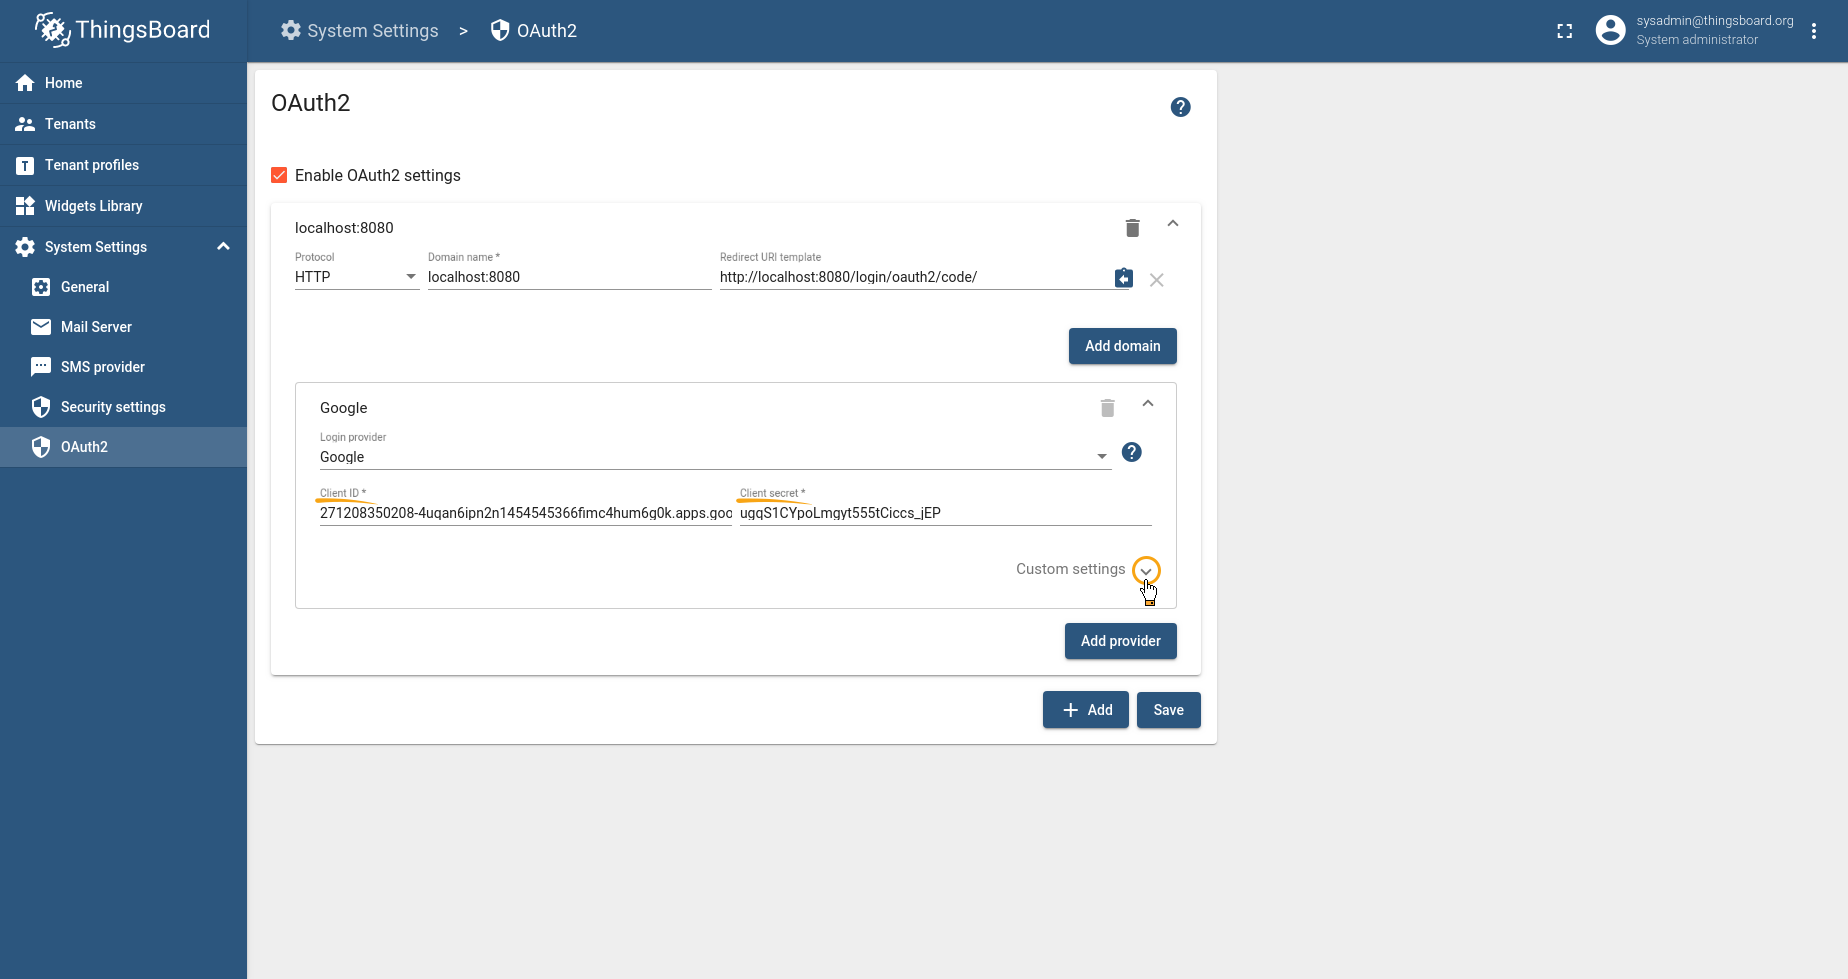
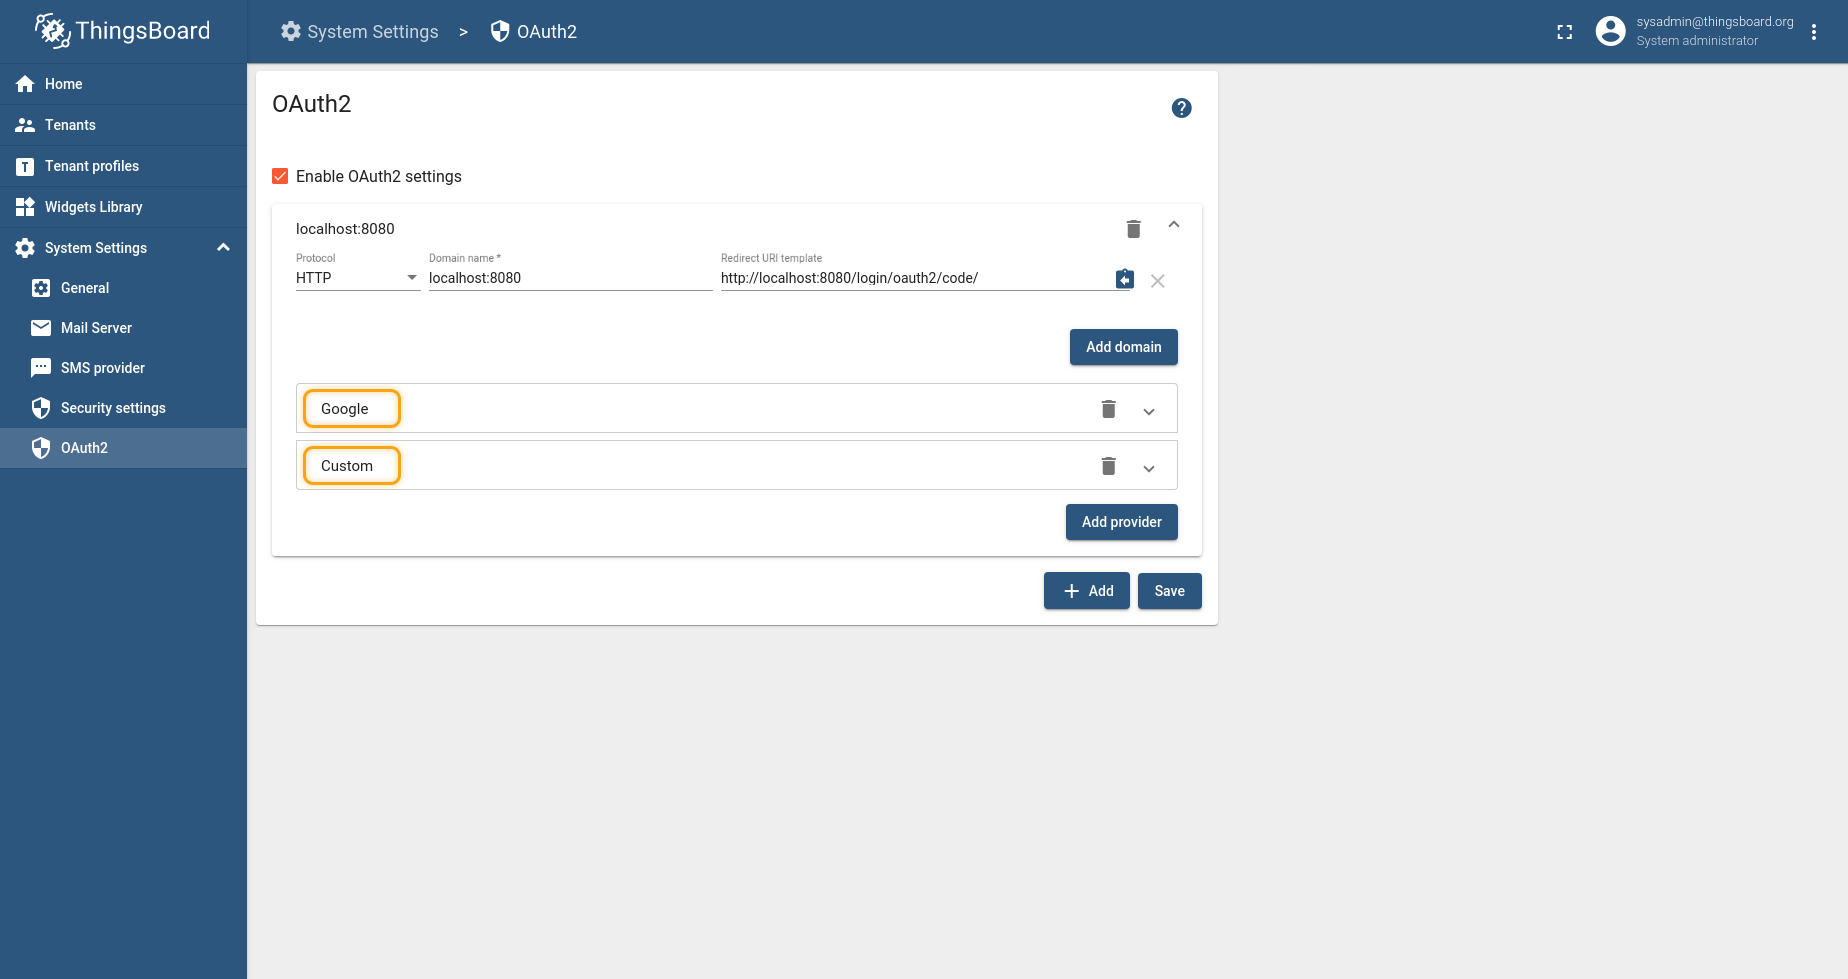
Check the Enable OAuth2 settings and click on + Add. Click on localhost in the window that appears, for further settings.
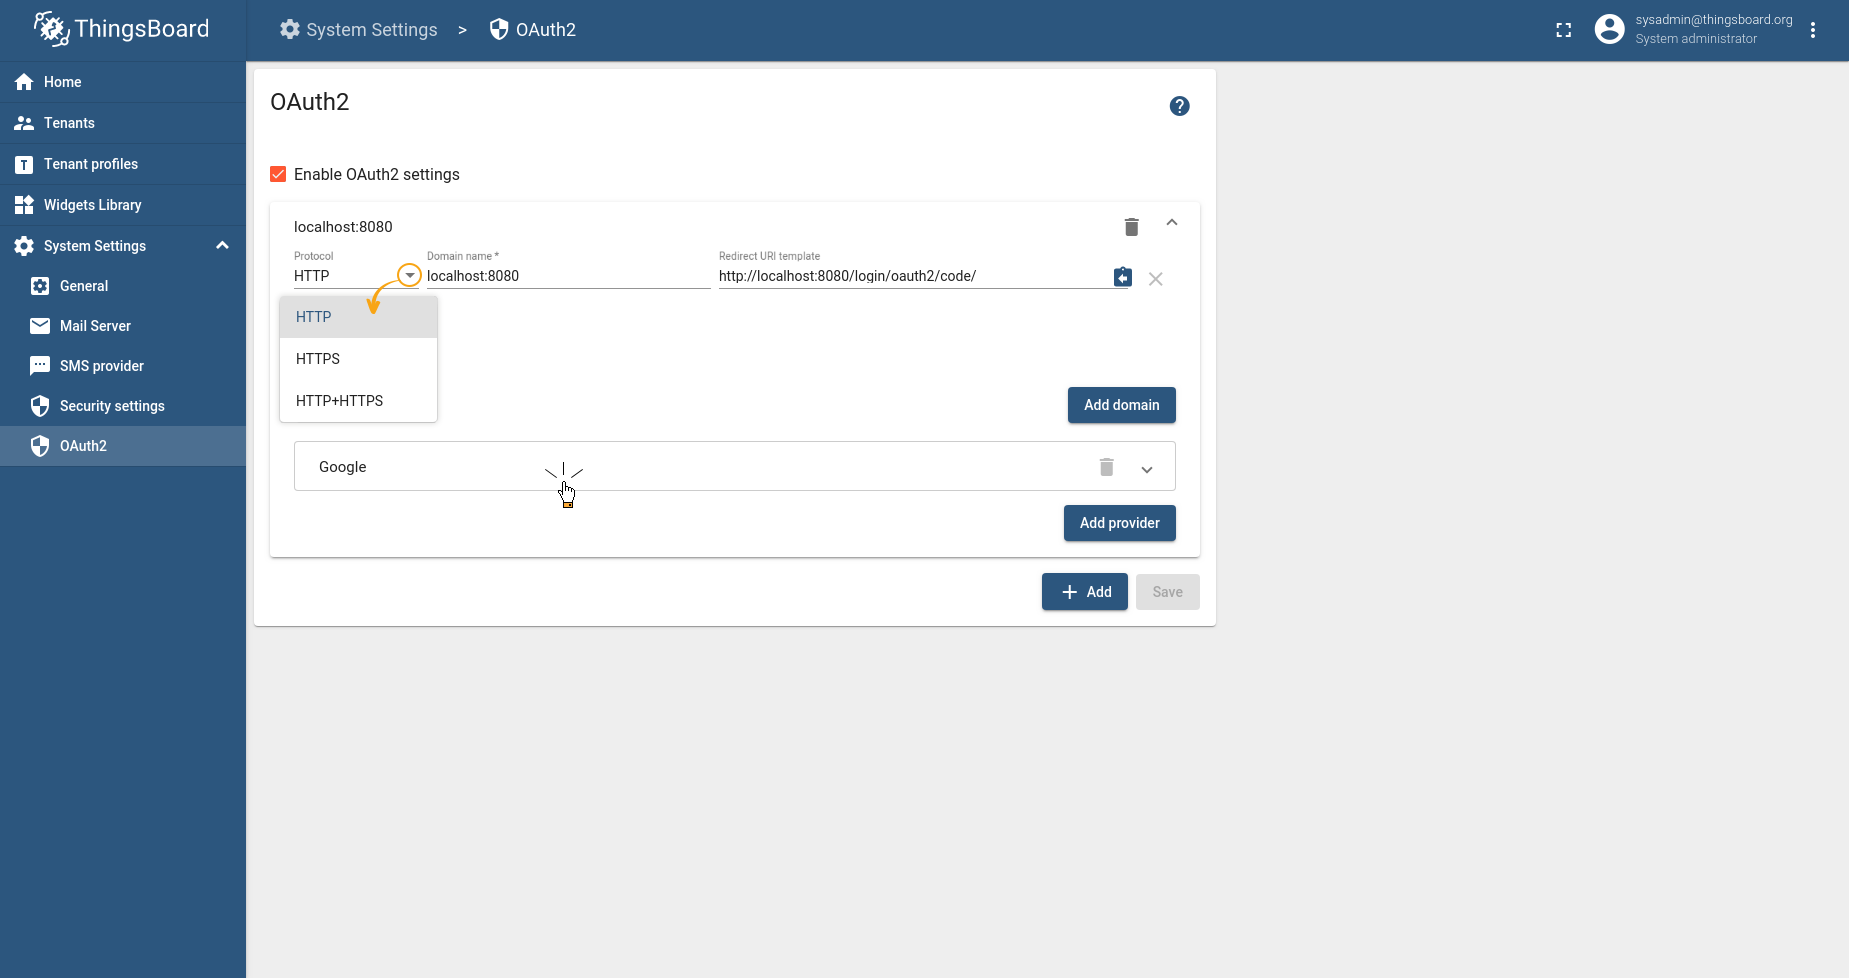
Select the required protocol. If you decide to use the HTTP protocol, be sure to write down its port 8080 in the domain name (localhost:8080). In this example, we will configure the Google provider. Click on this block.
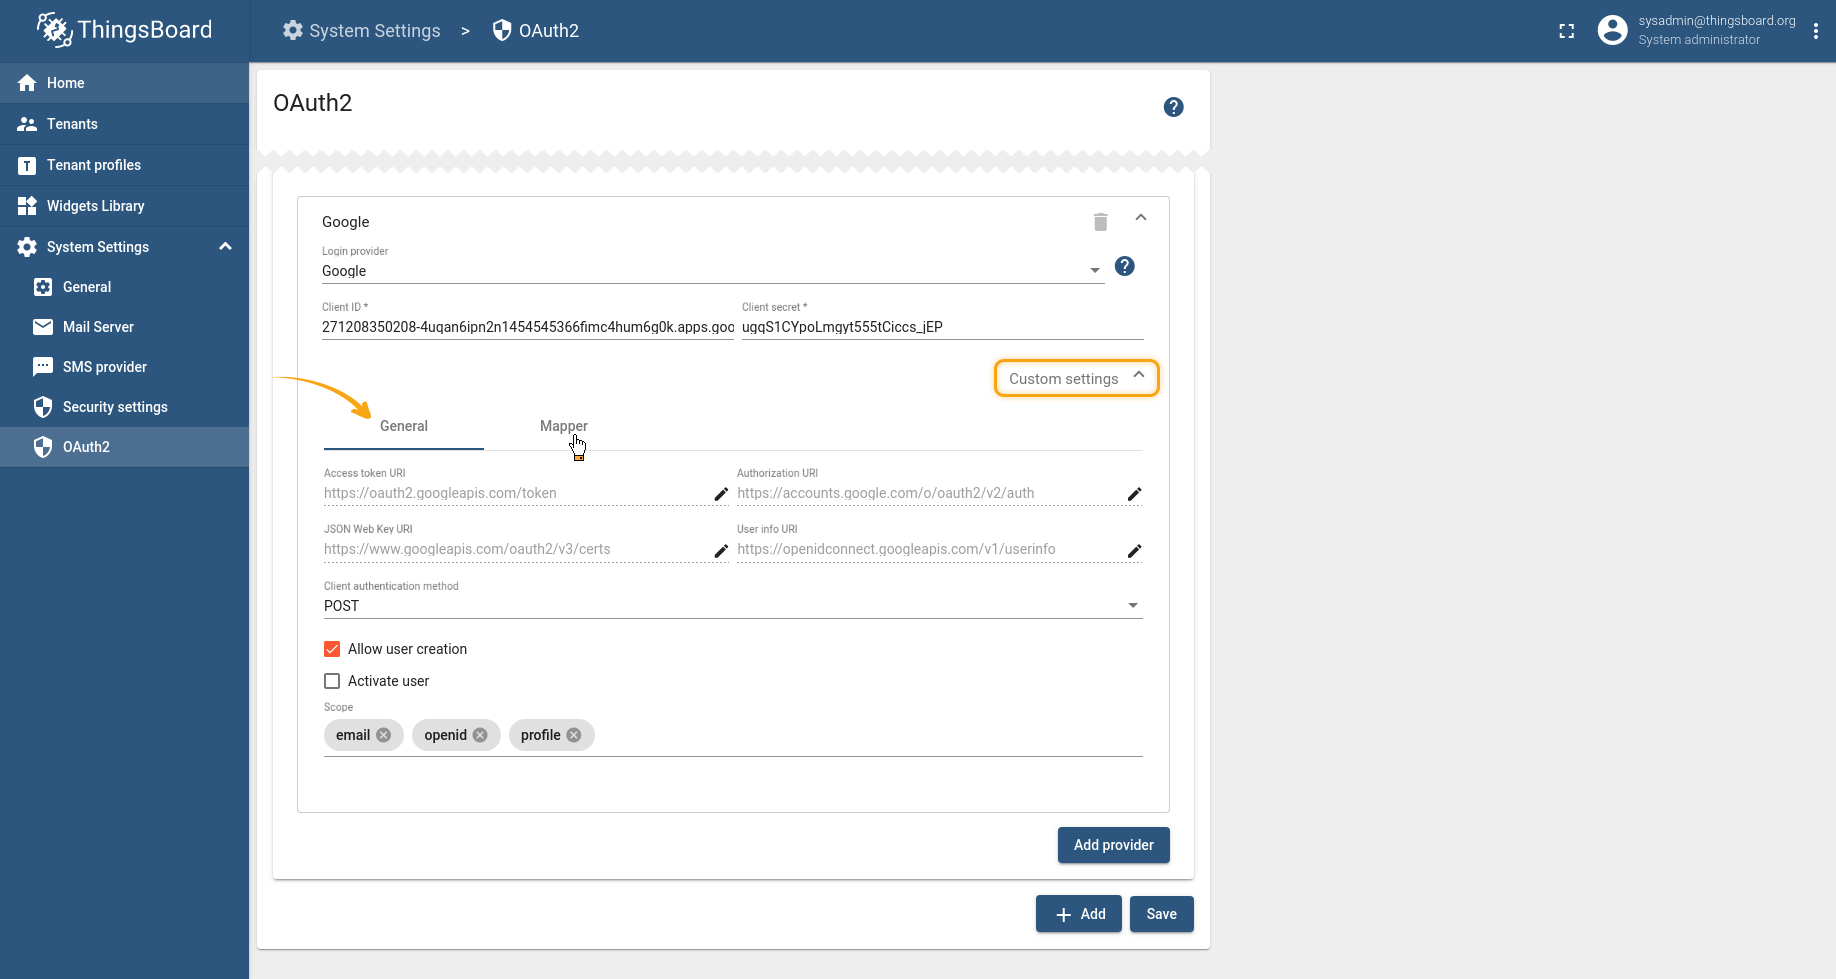
Please provide information (client ID and Client secret) from your Google API console. Then expand the Custom settings menu.
Let’s make the settings for the General block. Use this link to see the list of up-to-date URLs like accessTokenUri, authorizationUri, etc. Select POST in the Client authentication method field. Then check the “Allow user creation” checkbox. Add to the scope field: openid, email, profile. And go to the Mapper block.
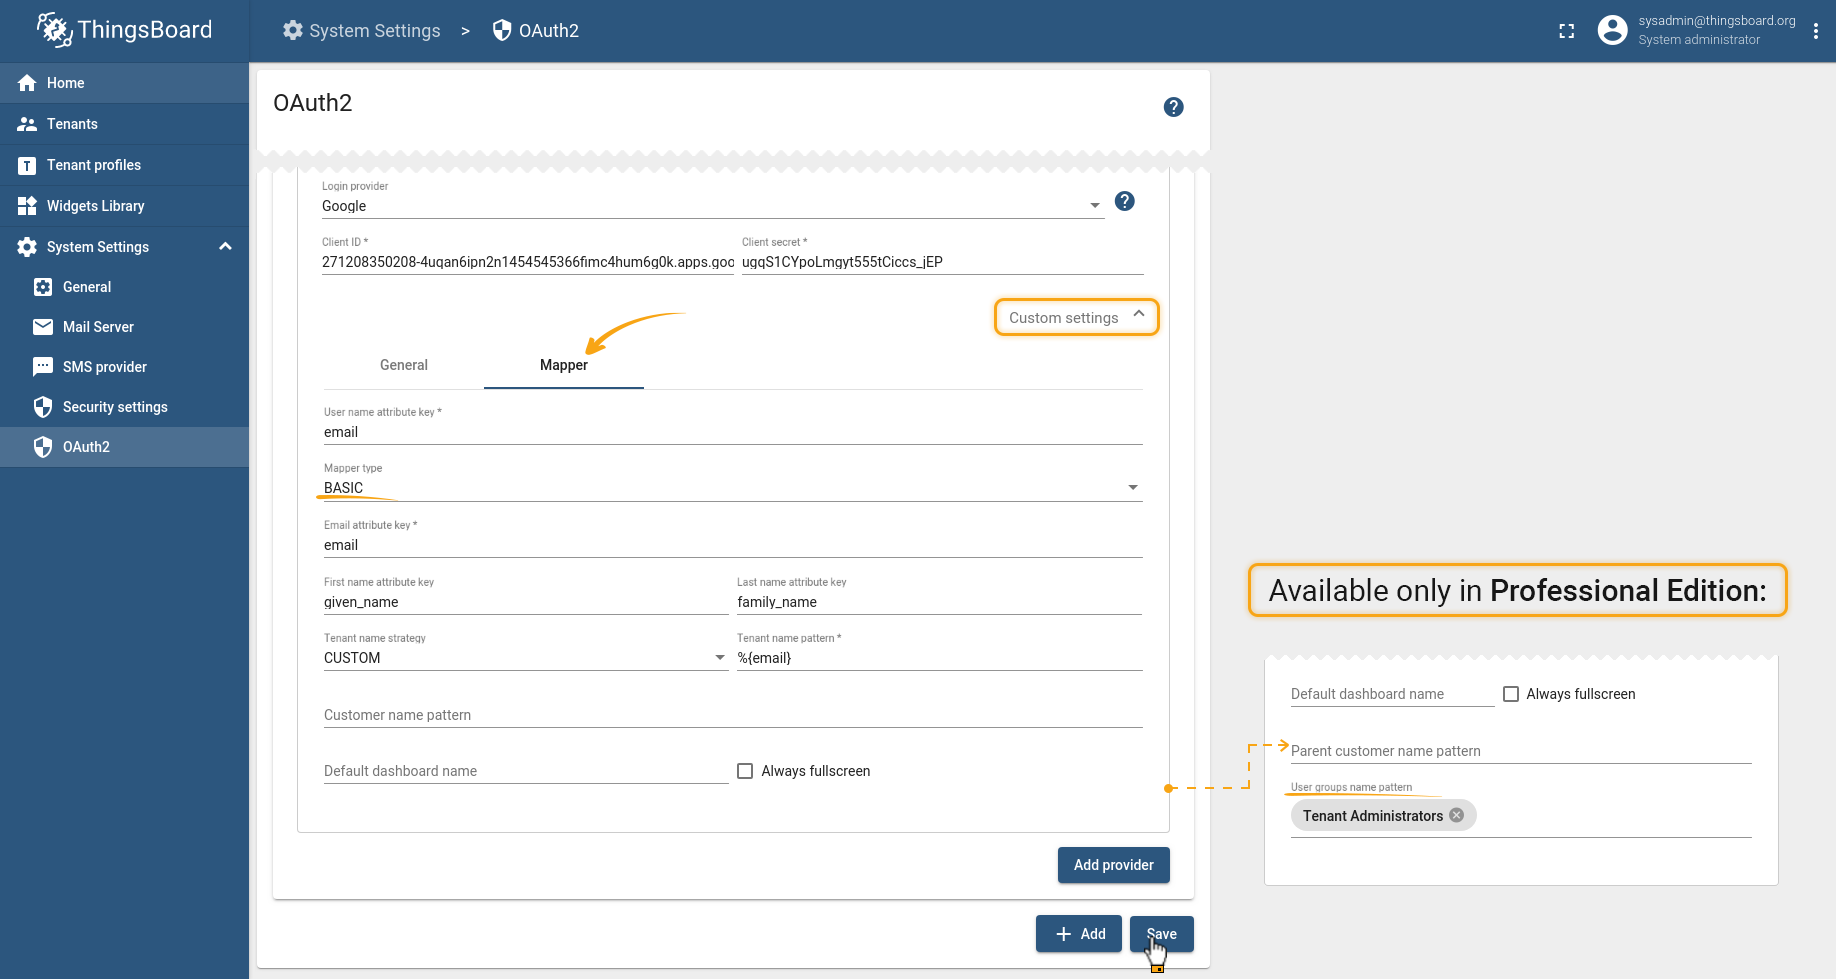
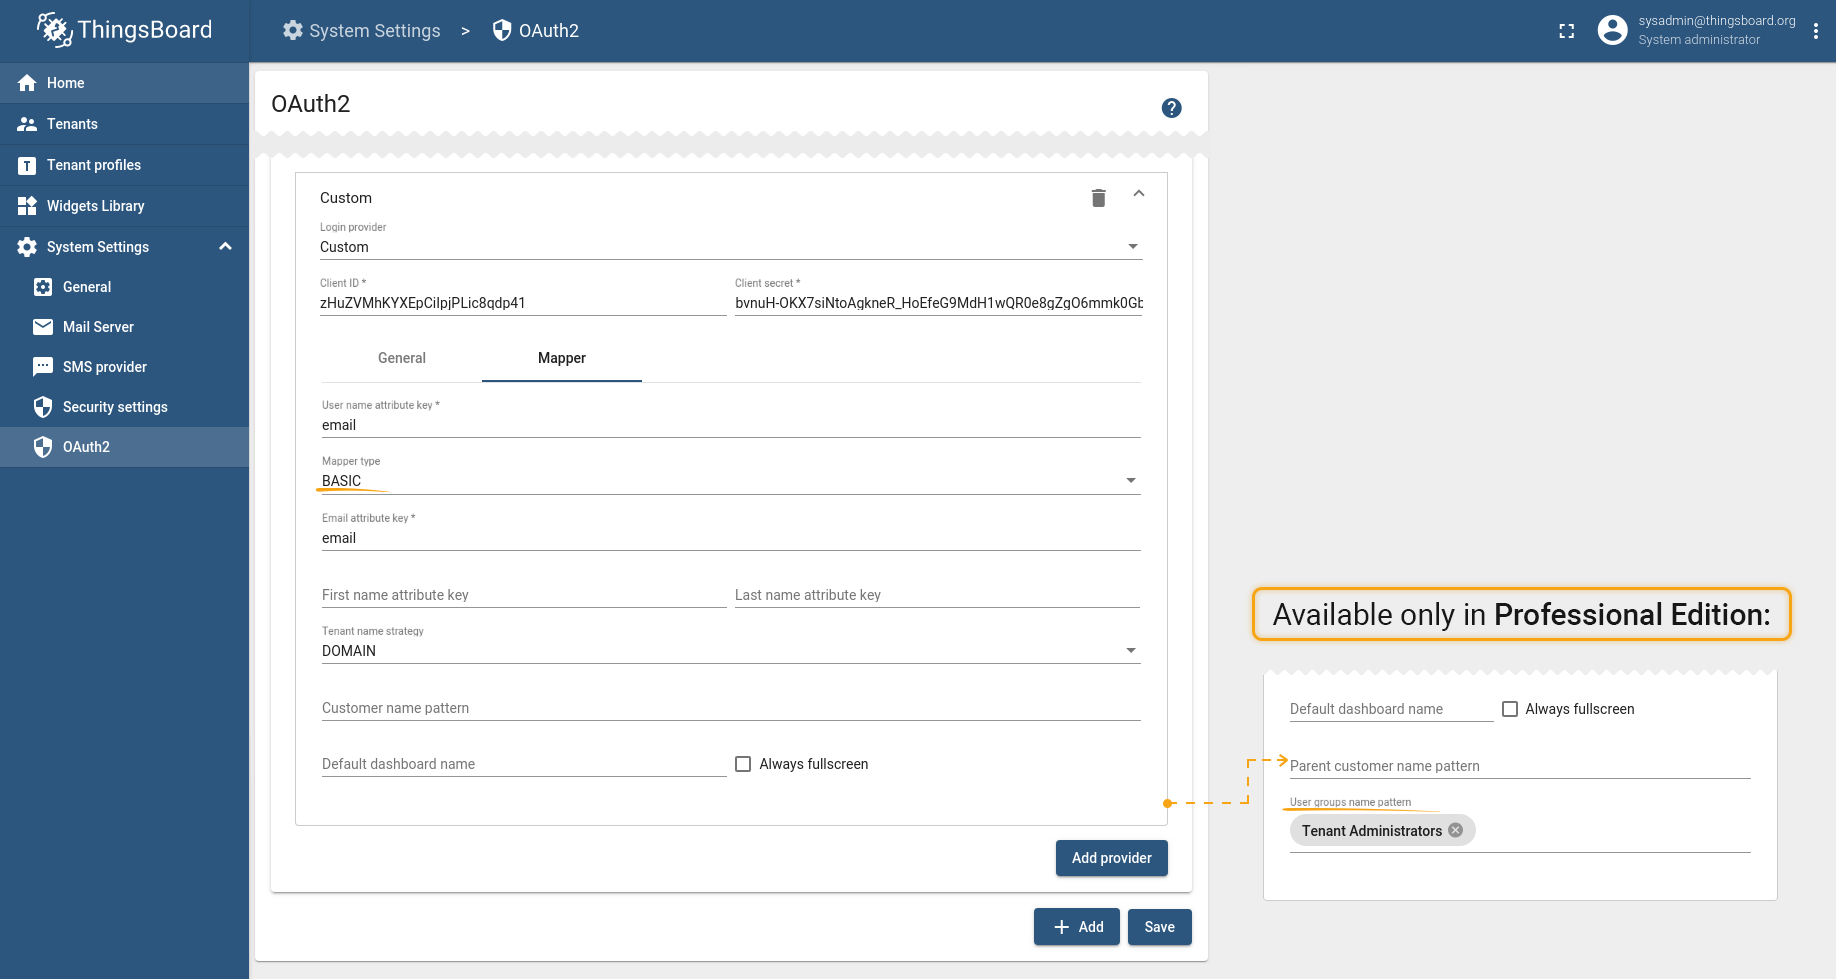
Select the Basic type and fill in the fields, if necessary (described in more detail below in this article in the Basic mapper part). Some configurations are available only in Professional Edition. Then, save the settings.
So that the resulted oauth2 configurations for Google will look similar to the provided below.
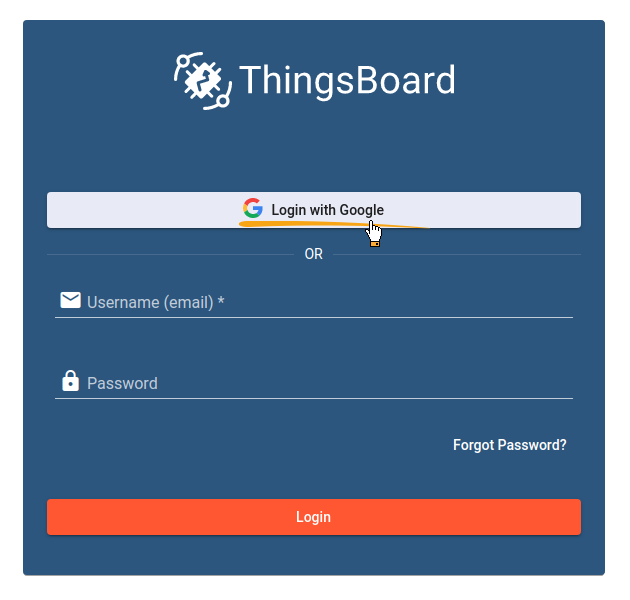
If we navigate to the Login screen, we will see an additional Login option with Google:
Once we click it and select one of our Google Account, we are going to be logged into ThingsBoard with our Google’s email as a Tenant Administrator email:
If you log in as the System Administrator, you will see that the Tenant name is our Google’s email, according to basic mapper:
Login with Auth0
Now let’s add one more provider to our list - Auth0. This time we are going to create customers for our users inside a single domain tenant.
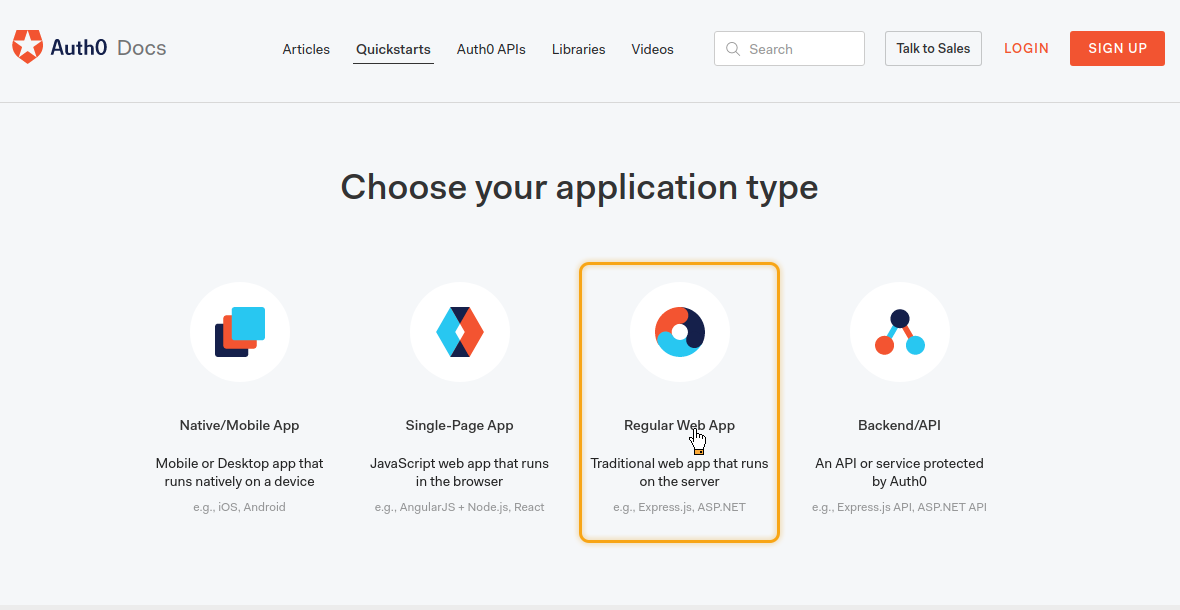
To use the Auth0 authentication platform for Login, let’s create a new application of the ‘Regular Web App’ type following this link.
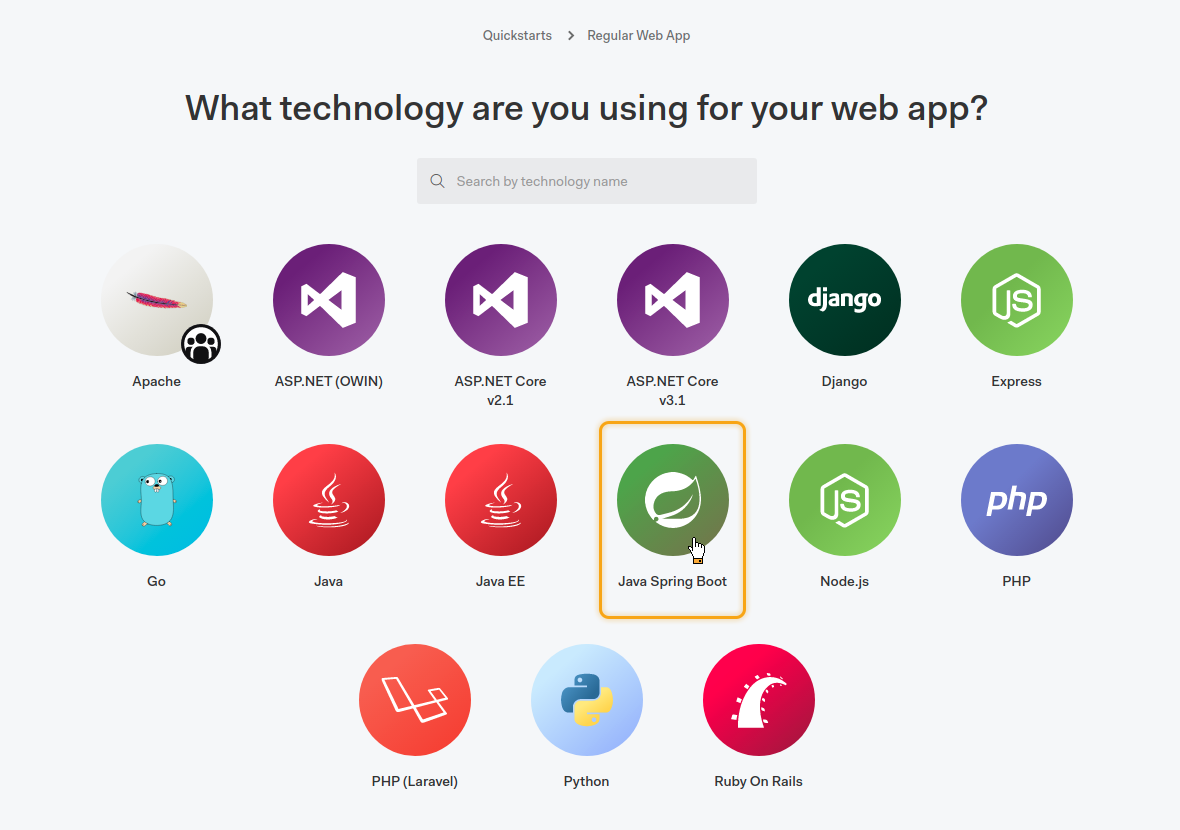
From the list of technologies please select Java Spring Boot:
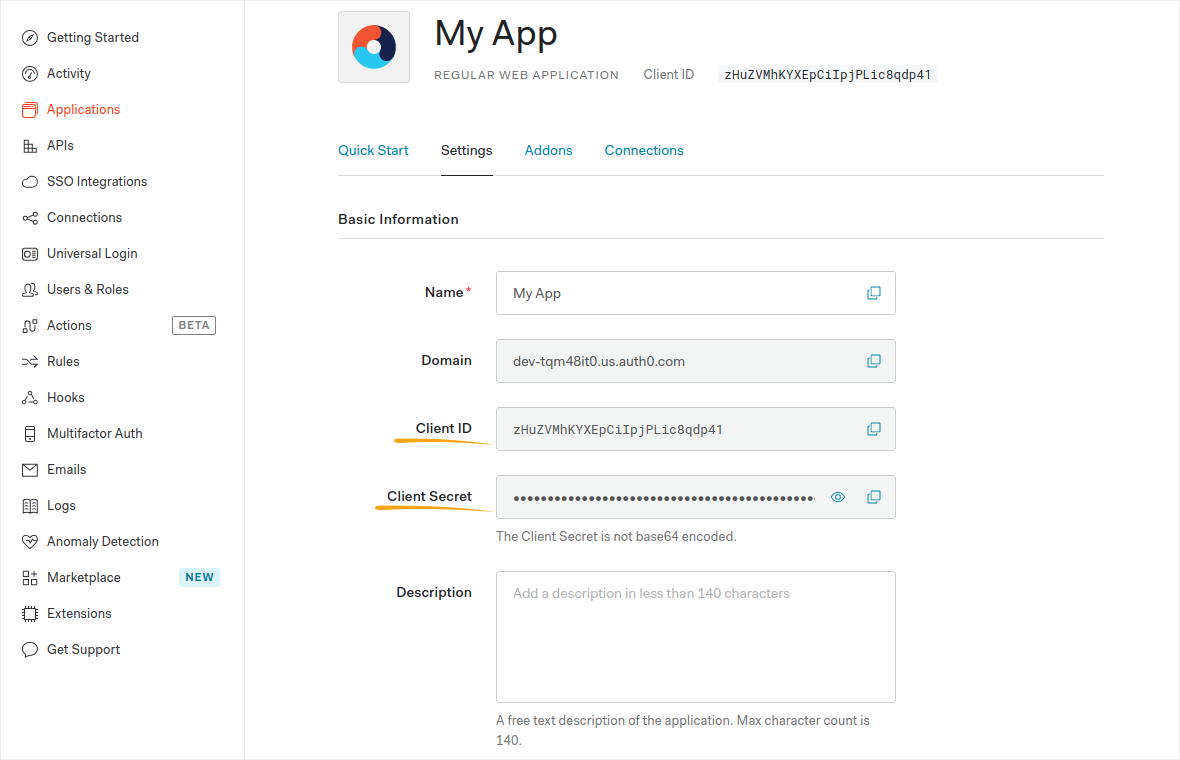
Once your application is created, you can navigate to application details to obtain clientId and clientSecret:
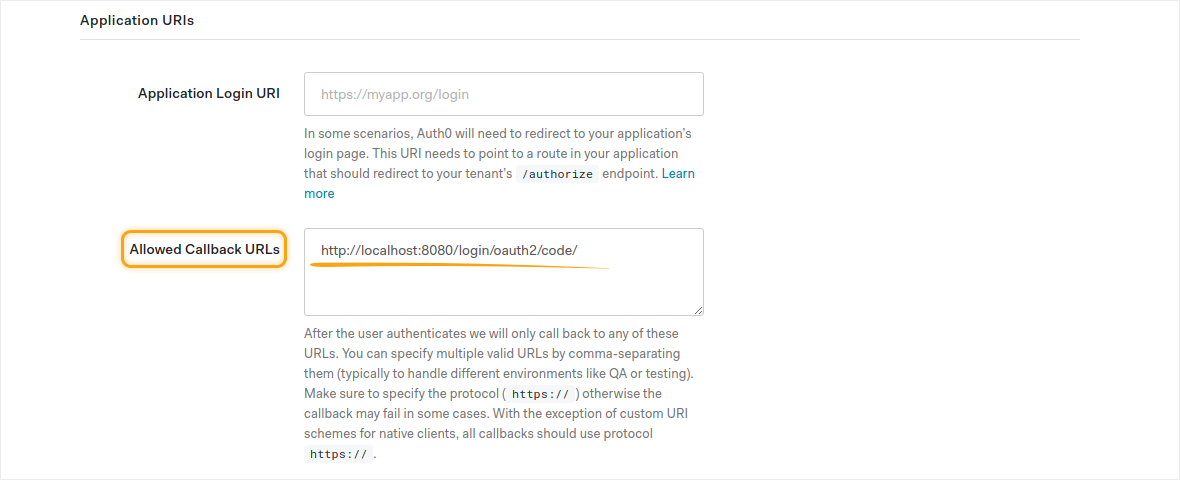
As well, please update your allowed Callback URLs:
1
http://localhost:8080/login/oauth2/code/
Please, note that it is not necessary to update the Application login URI.
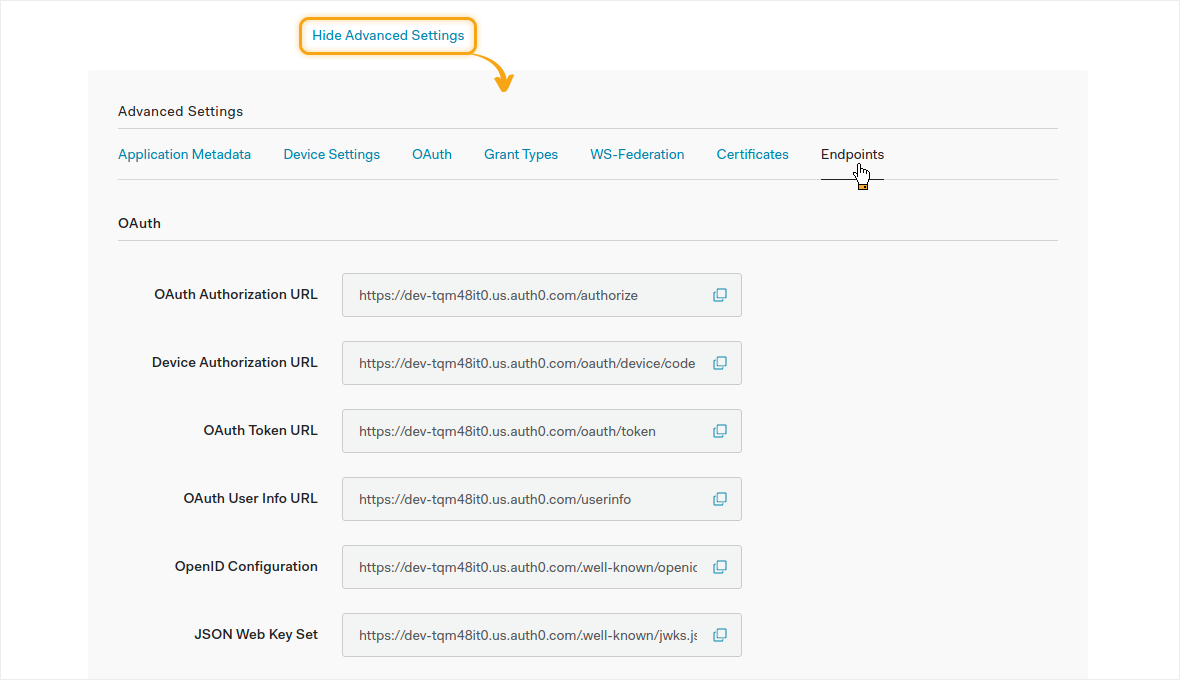
In the advanced details section you will be able to find all the required URLs (endpoints) for OAuth 2.0 configuration:
Configuration of ThingsBoard
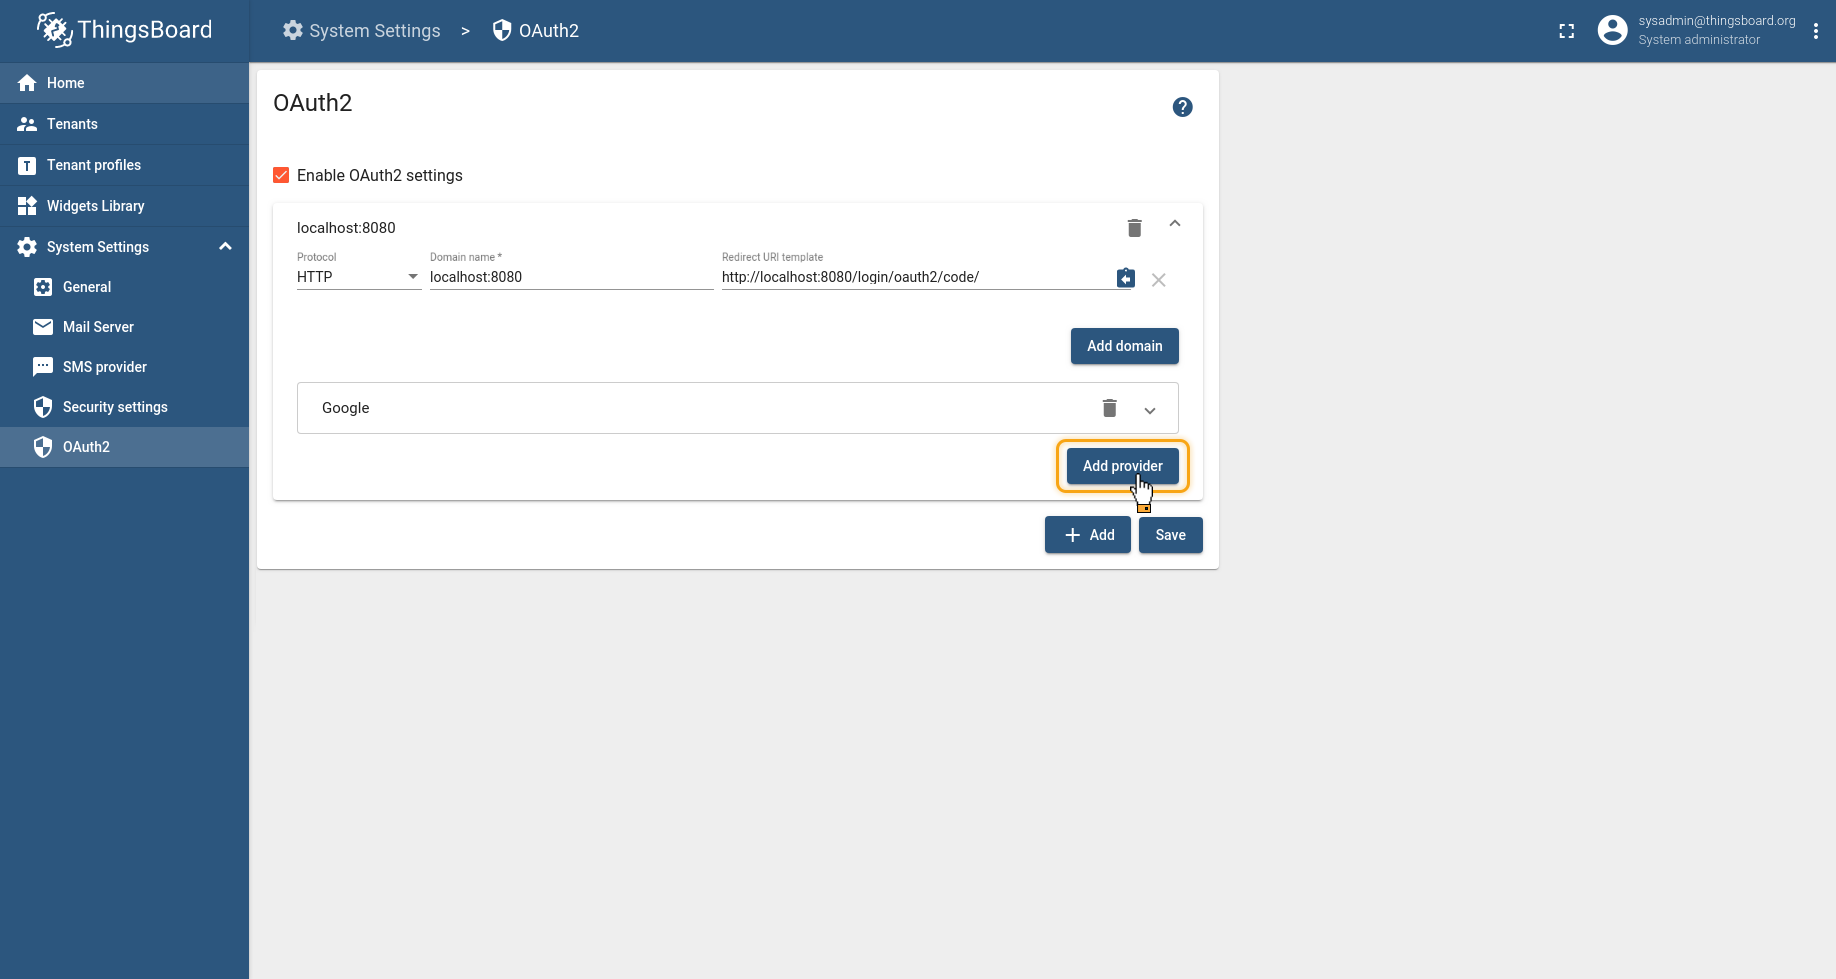
Now we can add one more provider:
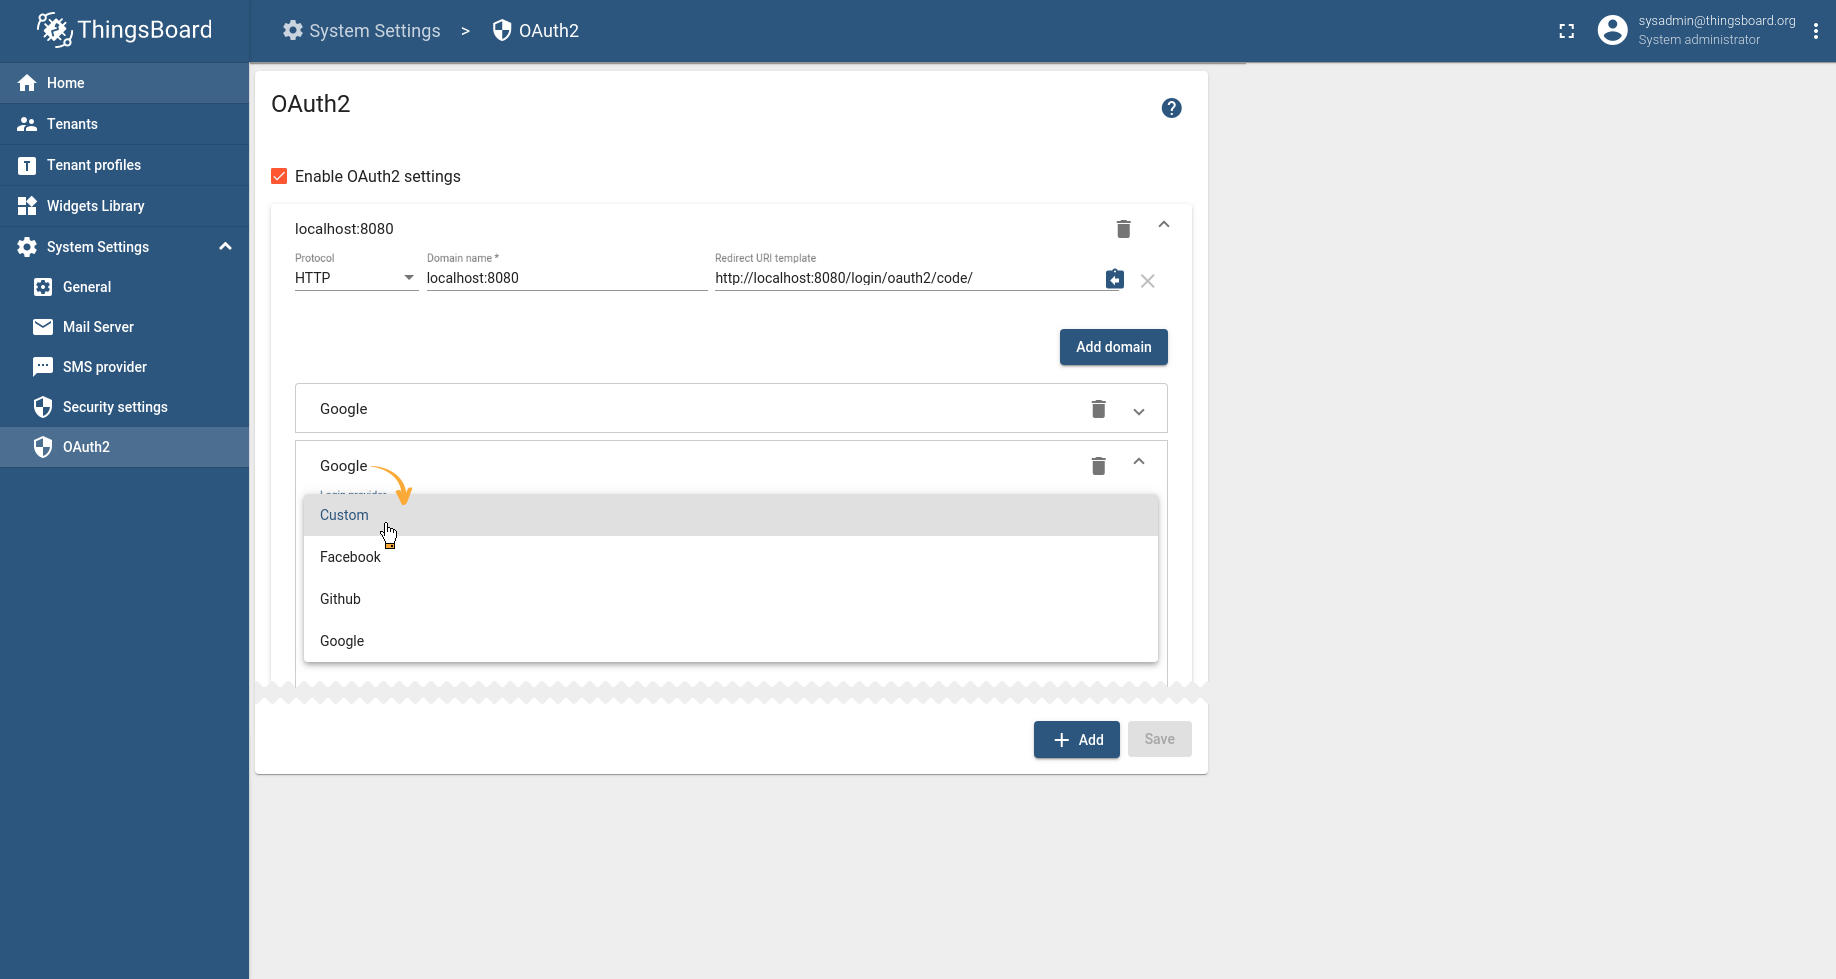
Then select Custom:
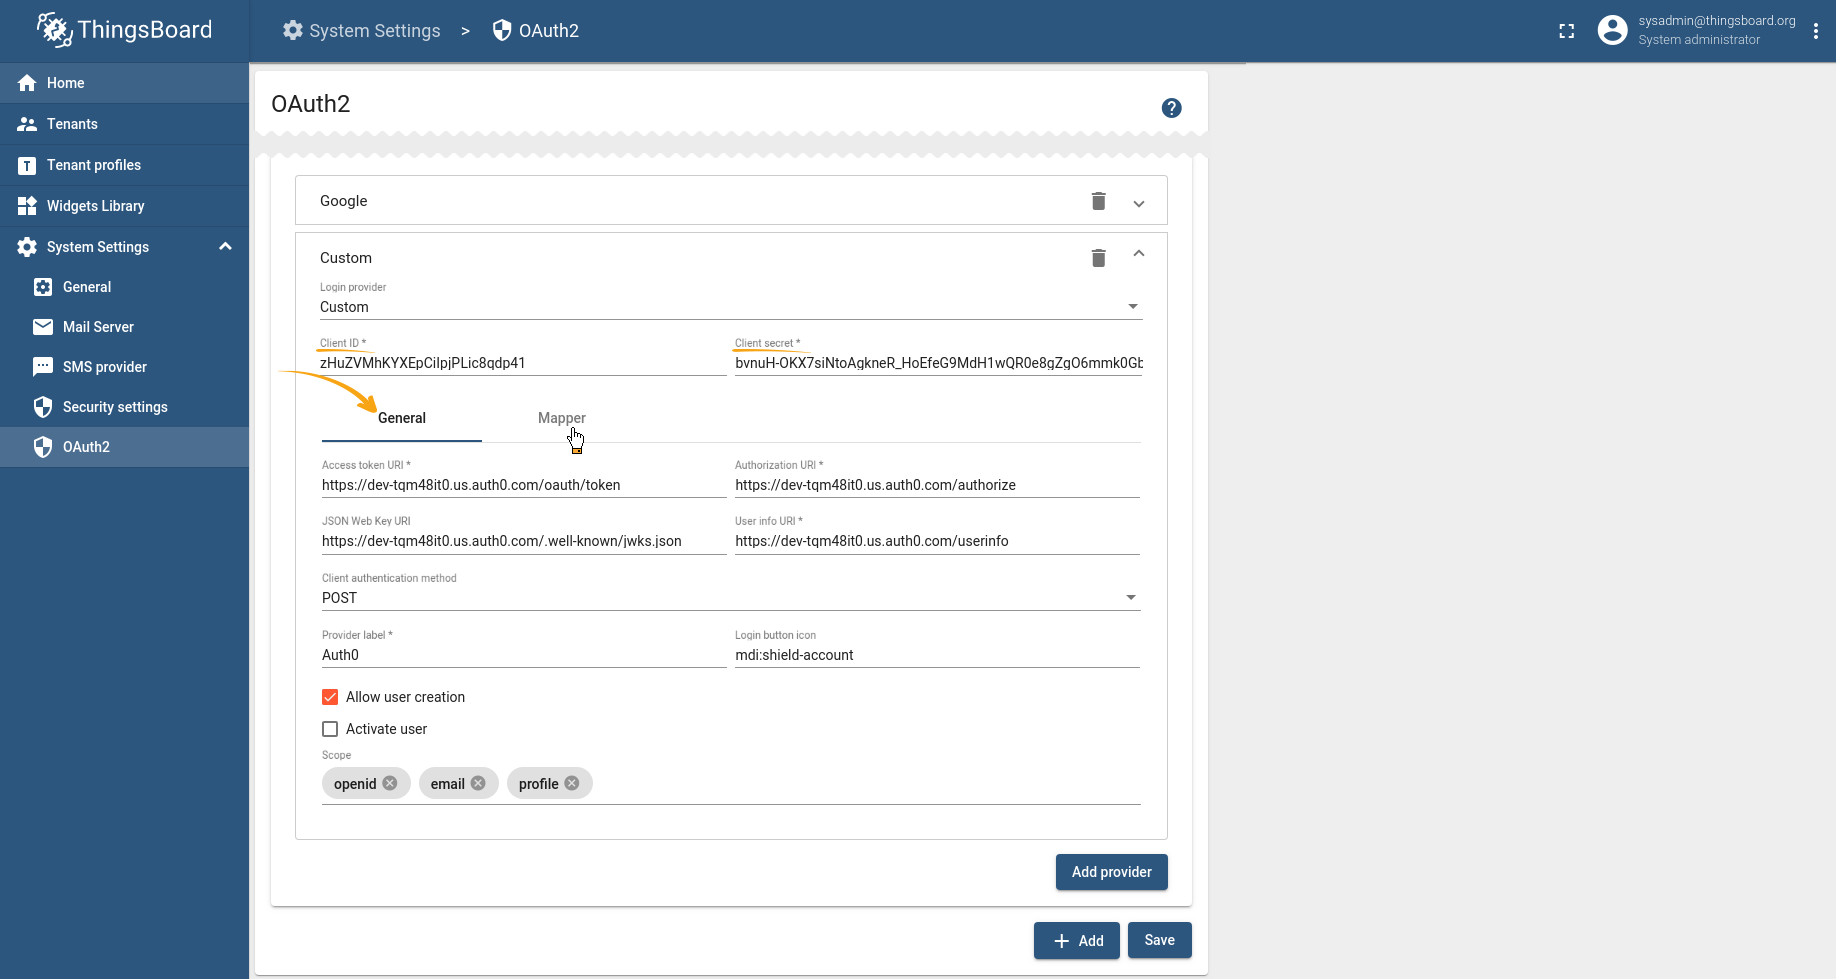
Please provide information (client ID and Client secret) from your application details, and you may find all the required URLs in the advanced details section.
Select POST in the client authentication method field. We indicate Auth0 in the provider label field. Then check the “Allow user creation” checkbox. Add to the scope field: openid, email, profile. And go to the Mapper block.
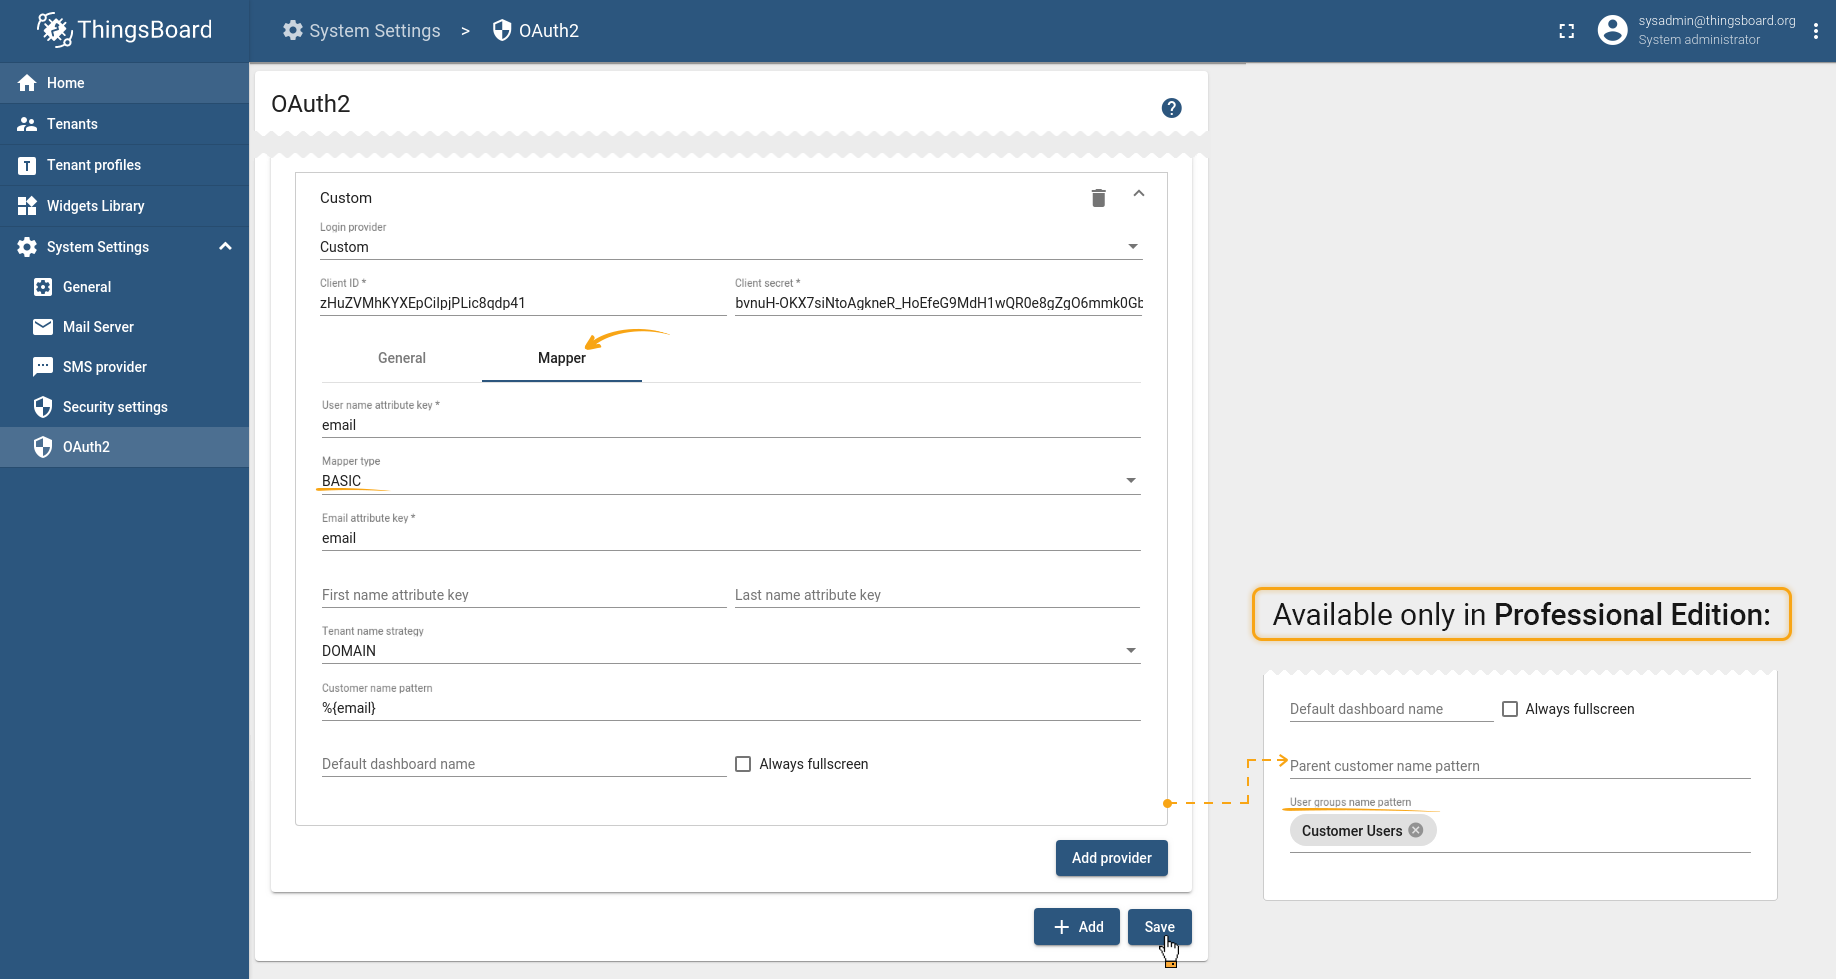
Select the Basic type and, if necessary fill in the fields (described in more detail below in this article in the Basic mapper part). Some configurations are available only in Professional Edition. Then, save the settings.
So that the resulted oauth2 configurations for OAuth0 will look similar to the provided below.
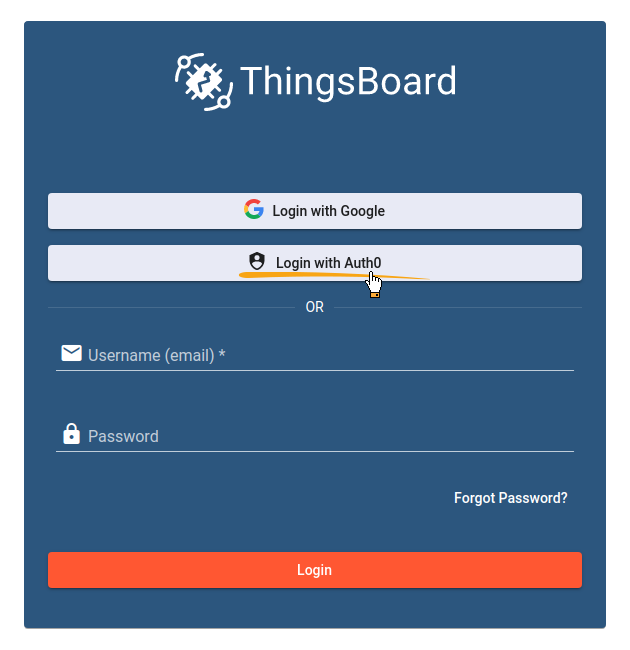
If we navigate to Login screen, we will see two possible Login with options - Google and Auth0:
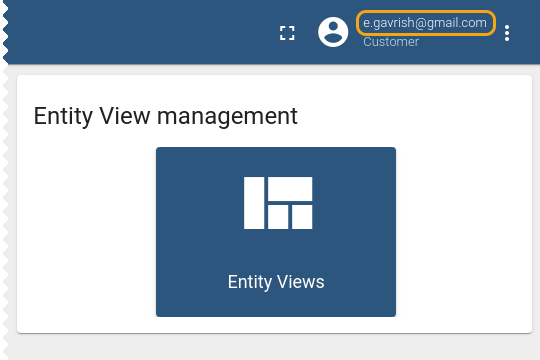
Once we click it and select our Auth0 Account, we are going to be logged into ThingsBoard with our email’s as Customer User:
If we are logged as System Administrator, you will see that Tenant name is our Auth0 email domain name, according to basic mapper:
We have completed our sample and now your users are not required to create accounts inside ThingsBoard - they can use already exist SSO providers for this.
Resulted Snippet
This snippet contains both providers that are used in our sample:
Mapping of the external user into ThingsBoard internal user structure
Mapping of the external user info object into ThingsBoard user can be achieved in two ways - using the Basic and Custom mappers. The main functionality of the mapper is to map key-value attributes from the external user info object into the expected structure of the ThingsBoard OAuth 2.0 User:
1
2
3
4
5
6
7
8
9
10
11
12
13
14
15
16
17
public class OAuth2User {
    private String tenantName;
    private TenantId tenantId;
    private String customerName;
    private CustomerId customerId;
    private String email;
    private String firstName;
    private String lastName;
    private boolean alwaysFullScreen;
    private String defaultDashboardName;

    // NOTE: Next configurations available only in Professional Edition

    private List<String> userGroups;
    private String parentCustomerName;
    private CustomerId parentCustomerId;
}
Basic mapper
A basic mapper is able to merge an external OAuth 2.0 user info object into the ThingsBoard OAuth 2.0 user with a predefined set of rules.
To use a basic mapper please set mapperConfig.type or SECURITY_OAUTH2_DEFAULT_MAPPER_TYPE environment variable to basic.
Here are the details of other properties:
-
allowUserCreation - if this option is set to true, then in case, the user account does not exist in the ThingsBoard yet, it will be created. If this option is set to false, the user will get access denied error, in case, he tries to log in with an external OAuth 2.0 provider, but there is no user on ThingsBoard with those credentials.
-
emailAttributeKey - this is the key to the attributes from the external OAuth 2.0 user info that is going to be used as ThingsBoard user email property.
-
firstNameAttributeKey - this is the key to the attributes from the external OAuth 2.0 user info that is going to be used as ThingsBoard user first name property.
-
lastNameAttributeKey - this is the key to the attributes from the external OAuth 2.0 user info that is going to be used as ThingsBoard user surname property.
- tenantNameStrategy -
this option specifies which tenant is going to be chosen for creating the user.
A basic mapper provides three possible options strategy for a generating Tenant name from an external user info object - domain, email, or custom:
- domain - the name of the Tenant will be extracted as the domain from the email of the user;
- email - the name of the Tenant will be the user’s email;
- custom - a custom pattern can be set for the Tenant name. Please see tenantNamePattern.
-
tenantNamePattern - In case, the tenantNameStrategy is custom you can specify the name of the Tenant, where the user is going to be created with a help of a custom pattern. You can use attributes from the external user info object to put them into the Tenant’s name. Please use %{attribute_key} as placeholder for the attribute value.
Tenant pattern examples:
- Demo Tenant # Hard coded Tenant name;
- Demo Tenant %{email} # if the user’s email is test@demo.com, the Tenant’s name will be the ‘Demo Tenant test@demo.com’;
- %{givenName} # if the user’s givenName attribute is Demo User, the Tenant name will be ‘Demo User’.
-
customerNamePattern User can be created under specific Customer, and not under the Tenant if this pattern field is not empty. You can use attributes from the external user info object to put them into the Customer name. Please use %{attribute_key} as placeholder for the attribute value.
Customer pattern examples:
- Demo Customer # Hard coded Customer name;
- Demo Customer %{email} # If the user’s email attribute is test@demo.com, the Customer name will be ‘Demo Customer test@demo.com’;
- %{city} # If the user’s city attribute is New York, the Customer name will be ‘New York’.
-
defaultDashboardName A user will be redirected to a specific Dashboard if this field is not empty.
-
alwaysFullScreen If this field is true and defaultDashboardName is not empty, the User will be redirected to a specific Dashboard in a fullscreen mode.
-
parentCustomerNamePattern
NOTE: This configuration available only in Professional Edition.
The Customer of the user can be created in the hierarchy under this parent Customer if this pattern field is not empty. You can use attributes from the external user info object to put them into the Parent Customer name. Please use %{attribute_key} as a placeholder for the attribute value.
Parent Customer pattern examples:
- Demo Parent Customer # Hard coded Parent Customer name;
- Demo Parent Customer %{email} # If user’s email attribute is test@demo.com, Parent Customer name is going to be ‘Demo Parent Customer test@demo.com’;
- %{country} # If user’s country attribute is Top Customer, Parent Customer name is going to be ‘Parent Customer’.
-
userGroupsNamePattern
NOTE: This configuration available only in Professional Edition.
By default, the newly created user is assigned only to the All user’s group. You can customize this behavior by specifying a list of groups, where a user has to be assigned to as well. You can use attributes from the external user info object to put them into user group names. Please use %{attribute_key} as placeholder for attribute value. If groups don’t exist, this group will be created automatically.
User groups pattern examples:
- Tenant Administrators, Managers # Hard coded user groups;
- %{job_title} # If user’s job_title attribute is Manager, user is going to be assigned into Manager user group.
Custom mapper
If the basic mapper functionality doesn’t cover your business needs, with the help of the custom mapper you are able to add an implementation that fits your specific goals.
A custom mapper designed as a separate microservice that is running nearby the ThingsBoard core microservice. ThingsBoard forwards all mapping requests to this microservice and expects as a response ThingsBoard OAuth 2.0 user object:
1
2
3
4
5
6
7
8
9
10
11
12
13
14
15
16
public class OAuth2User {
    private String tenantName;
    private TenantId tenantId;
    private String customerName;
    private CustomerId customerId;
    private String email;
    private String firstName;
    private String lastName;
    private boolean alwaysFullScreen;
    private String defaultDashboardName;

    // NOTE: Next configurations available only in Professional Edition
    private List<String> userGroups;
    private String parentCustomerName;
    private CustomerId parentCustomerId;
}
Please refer to this base implementation as a starting point for your custom mapper.
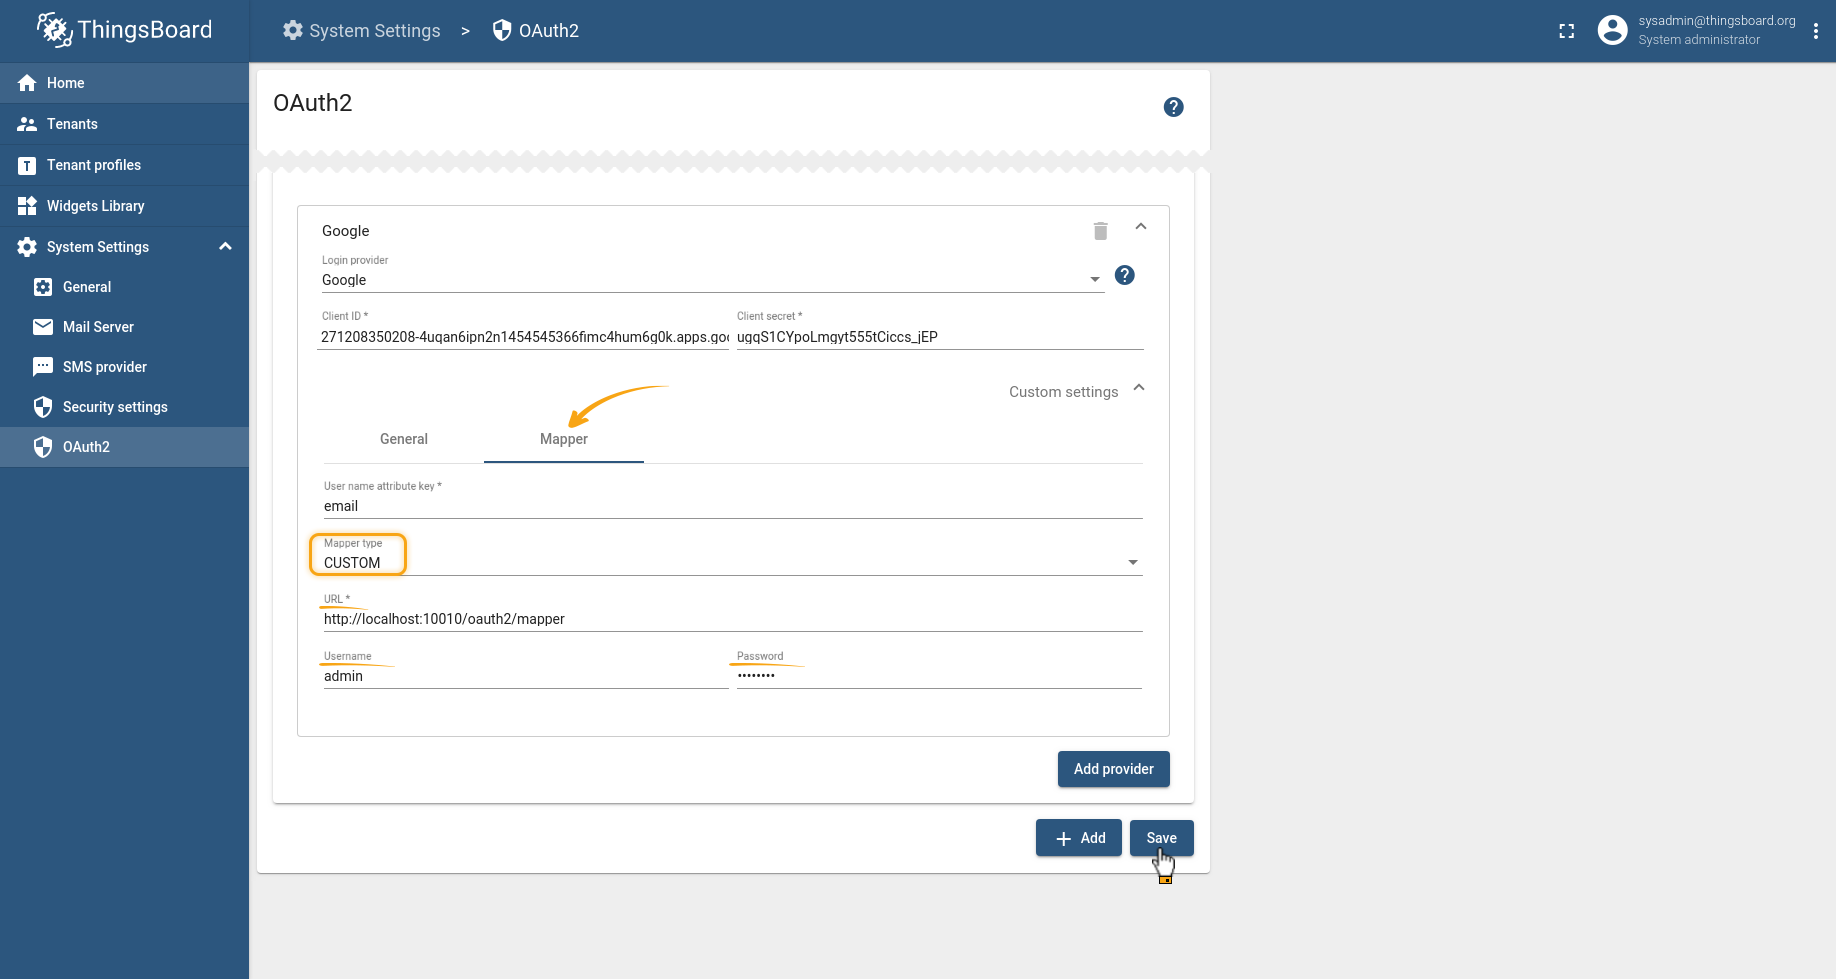
To use the custom mapper please set mapperConfig.type or SECURITY_OAUTH2_DEFAULT_MAPPER_TYPE environment variable to custom.
Here are the details of other properties:
-
URL
URL of the custom mapper endpoint.
-
username
If the custom mapper endpoint configured with basic authorization, specify the username in this property.
-
password
If the custom mapper endpoint configured with basic authorization, specify the password in this property.
Here is an example of demo configuration:
1
2
3
4
  custom:
    url: http://localhost:10010/oauth2/mapper
    username: admin
    password: pa$$word
OAuth 2.0 configuration parameters
| Key | Description |
|---|---|
| security.oauth2.enabled | Enable/disable OAuth 2.0 login functionality |
| security.oauth2.loginProcessingUrl | Redirect URL where access code from external user management system will be processed |
| security.oauth2.clients.default.loginButtonLabel | Label that going to be show on login button - ‘Login with {loginButtonLabel}’ |
| security.oauth2.clients.default.loginButtonIcon | Icon that going to be show on login button. Material design icon ID. List of icon IDs could be found here |
| security.oauth2.clients.default.clientName | Logical name of the client or registration |
| security.oauth2.clients.default.clientId | Client ID |
| security.oauth2.clients.default.clientSecret | Client secret |
| security.oauth2.clients.default.accessTokenUri | URI for the token endpoint |
| security.oauth2.clients.default.authorizationUri | URI for the authorization endpoint |
| security.oauth2.clients.default.scope | Sets the scope(s) used for the client |
| security.oauth2.clients.default.redirectUriTemplate | URI (or uri template) for the redirection endpoint. Must be in sync with ‘security.oauth2.loginProcessingUrl’ (domain name added) |
| security.oauth2.clients.default.jwkSetUri | URI for the JSON Web Key (JWK) Set endpoint |
| security.oauth2.clients.default.authorizationGrantType | Authorization grant type used for the client |
| security.oauth2.clients.default.clientAuthenticationMethod | Authentication method used when authenticating the client with the authorization server |
| security.oauth2.clients.default.userInfoUri | URI for the user info endpoint |
| security.oauth2.clients.default.userNameAttributeName | Attribute name used to access the user’s name from the user info response |
HaProxy configuration
If ThingsBoard is running under a load balancer like HAProxy please configure properly balance algorithm to make sure that the correct session is available on the ThingsBoard instance:
1
2
3
4
backend tb-api-backend
  ...
  balance source # balance must be set to 'source'
  ...
As well please configure properly ACL mapping for HTTP and HTTPs requests:
1
2
3
4
frontend http-in
  ...
  acl tb_api_acl path_beg /api/ /swagger /webjars /v2/ /static/rulenode/ /oauth2/ /login/oauth2/ # '/oauth2/ /login/oauth2/' added
  ...
1
2
3
4
frontend https_in
  ...
  acl tb_api_acl path_beg /api/ /swagger /webjars /v2/ /static/rulenode/ /oauth2/ /login/oauth2/ # '/oauth2/ /login/oauth2/' added
  ...
