ThingsBoard self-registration feature allows tenant to configure sign-up page for its customers to be able to simply sign-up and login to the ThingsBoard with predefined permission configurations. This feature was introduced in ThingsBoard PE 2.4.1.
This documentation page contains complete use case configuration example.
Use Case description
As a Tenant Administrator, I would like to allow users to register their own account on my IoT Platform instance. Once they register, I would like to allow them to see specific dashboards and provisioning their own devices or claim existing devices. Let’s start with the prerequisites.
Prerequisites
Step 1. Assign DNS record to your ThingsBoard IP address
We also need a valid DNS name to be assigned to your ThingsBoard instance. You can use any domain registrar, if you don’t have a domain. If you do have the domain name, contact your system administrator to issue sub-domain, for example iot.mycompany.com.
Step 2. ReCAPTCHA v2
We need to protect our sign-up form from Robots. Generate the ReCAPTCHA for that purpose. Navigate to the Google ReCaptcha admin console and use your new domain name there. Important: use ReCAPTCHA v2 only. See example configuration below.
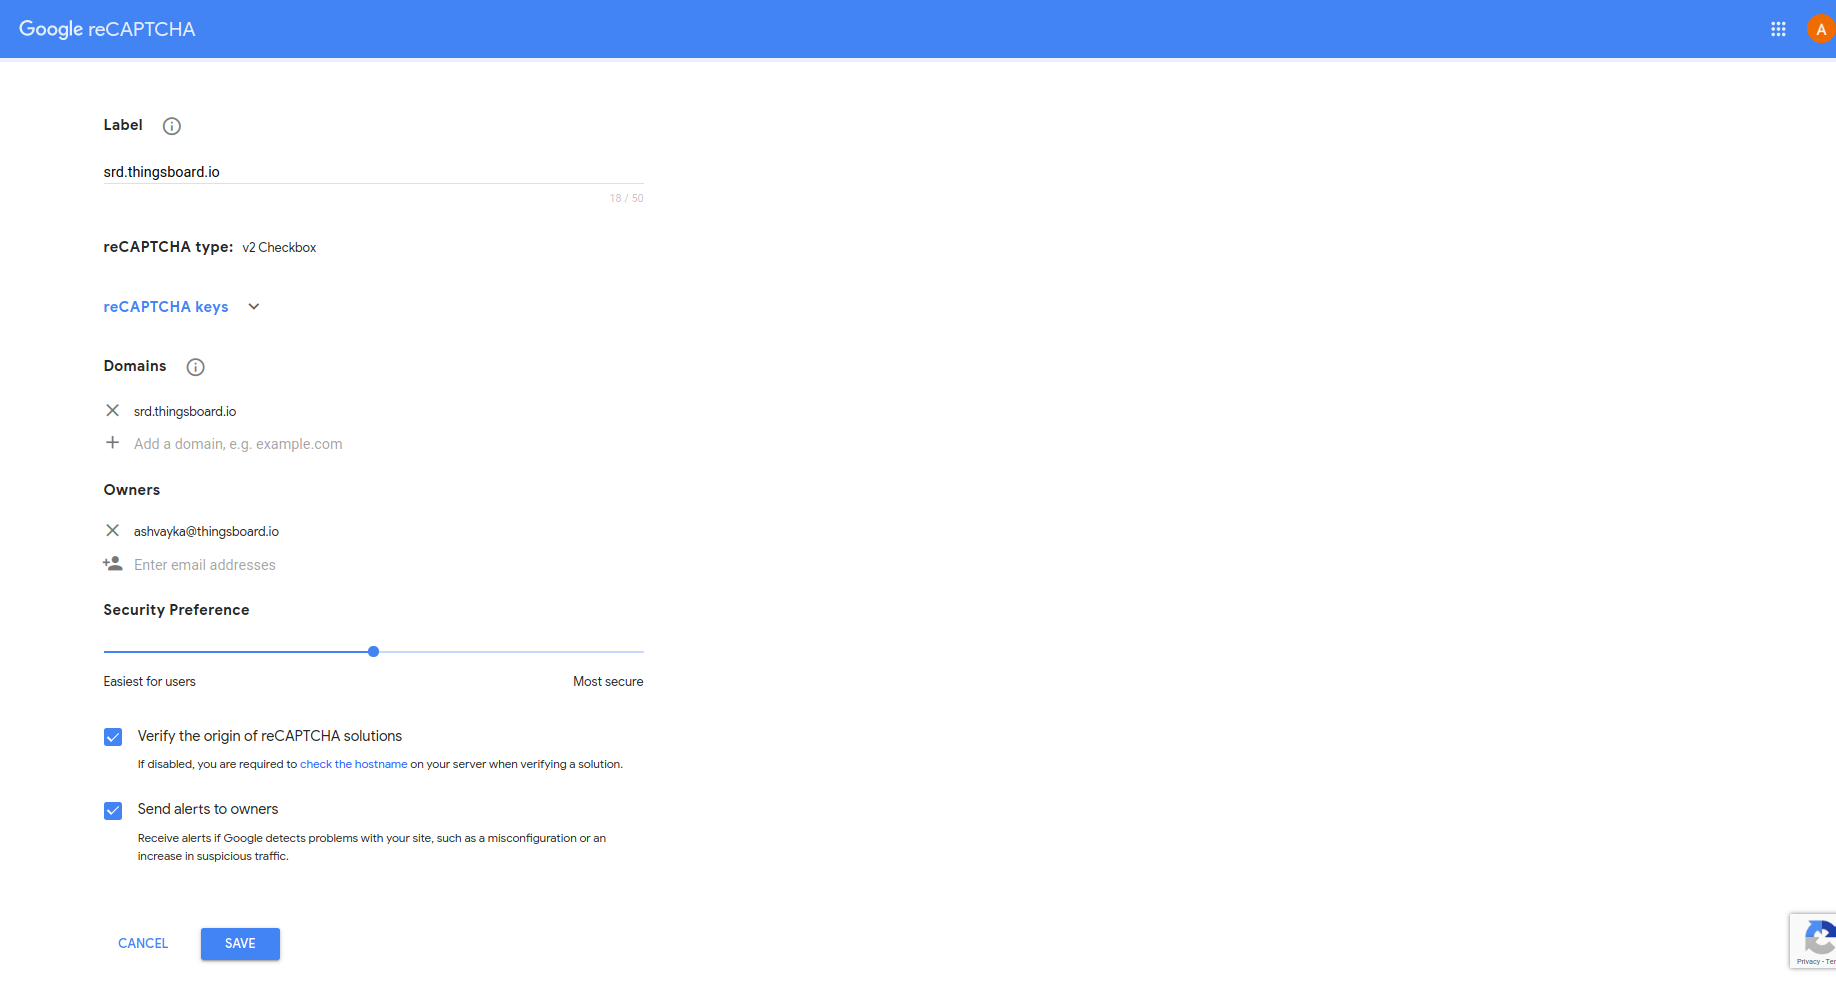
Copy-paste the site key and secret to the safe place.
Prerequisites summary
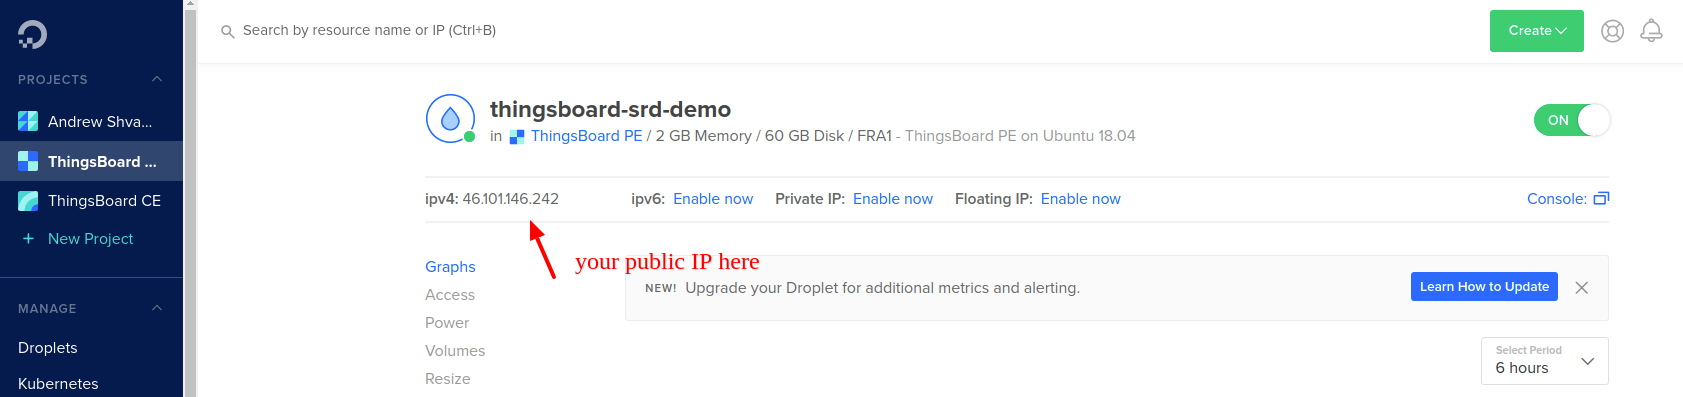
We have prepared a ThingsBoard Prototype instance running on DigitalOcean. Specific domain name: srd.thingsboard.io (srd stands for “self registration demo”) to server’s IP address: 46.101.146.242.
ThingsBoard configuration
Step 3. Create new User Roles
Create the “Customer Administrator” Role. Navigate to “Roles” and click on “+” button. This role is auto-generated when you create first Customer entity in scope of your Tenant. If you don’t have this Role yet, you can easily add it. The Role type is “Generic” and it allows “All” operations for “All” entities.

So, when you apply this role to your customer user, Customer User can control every entity in scope of the Customer. Of course, you may create different role. For example, we may create a Role that is read-only.
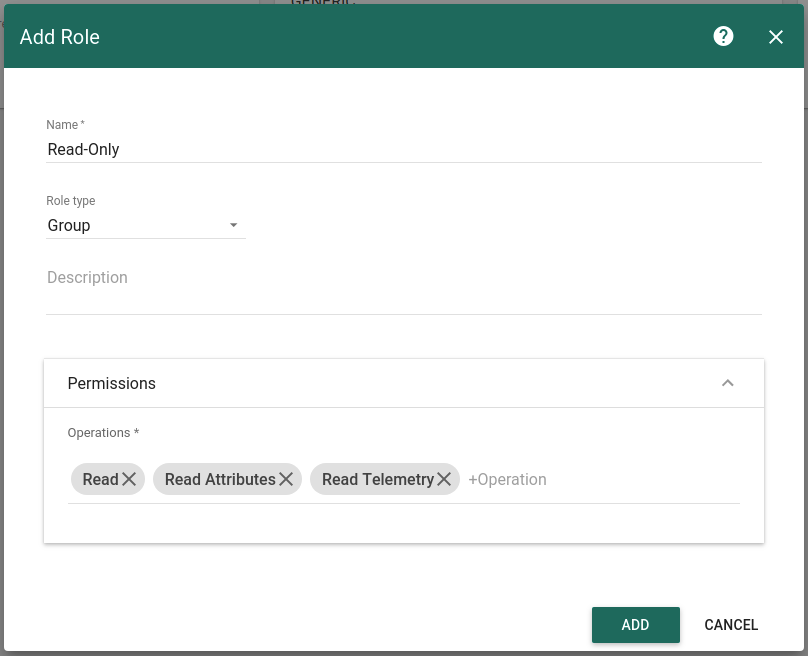
“Read-Only” Group Role. We will use this Role to allow read-only access to the specific dashboard. This Dashboard will be the same for all our Self-Registered Customers.
Step 4. Create shared dashboard
First, navigate to “Device Groups”->”All” and create sample device with name “Device A” and type “sensor”. This is necessary to pass certain validation while importing the dashboard.
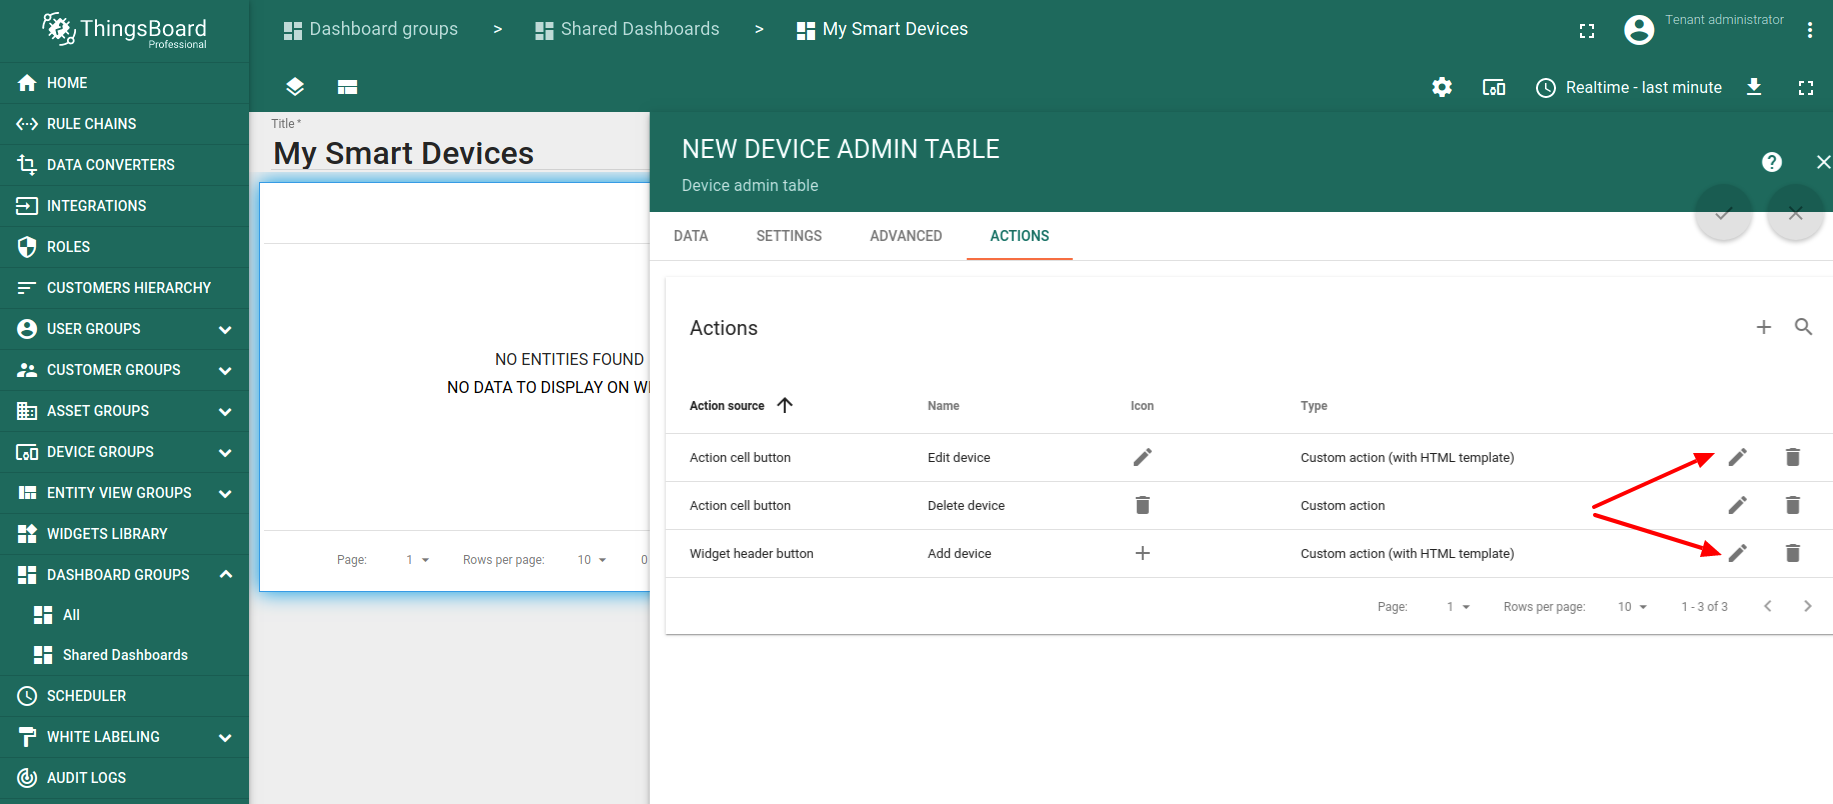
Now, let’s navigate to the Dashboard Groups and create a new Group called “Shared Dashboards”. Import a simple dashboard that shows you a list of devices. This dashboard provides the ability to add/edit/remove devices. BTW, we use new widget from Entity Admin Widgets Bundle.
Few things to notice here.
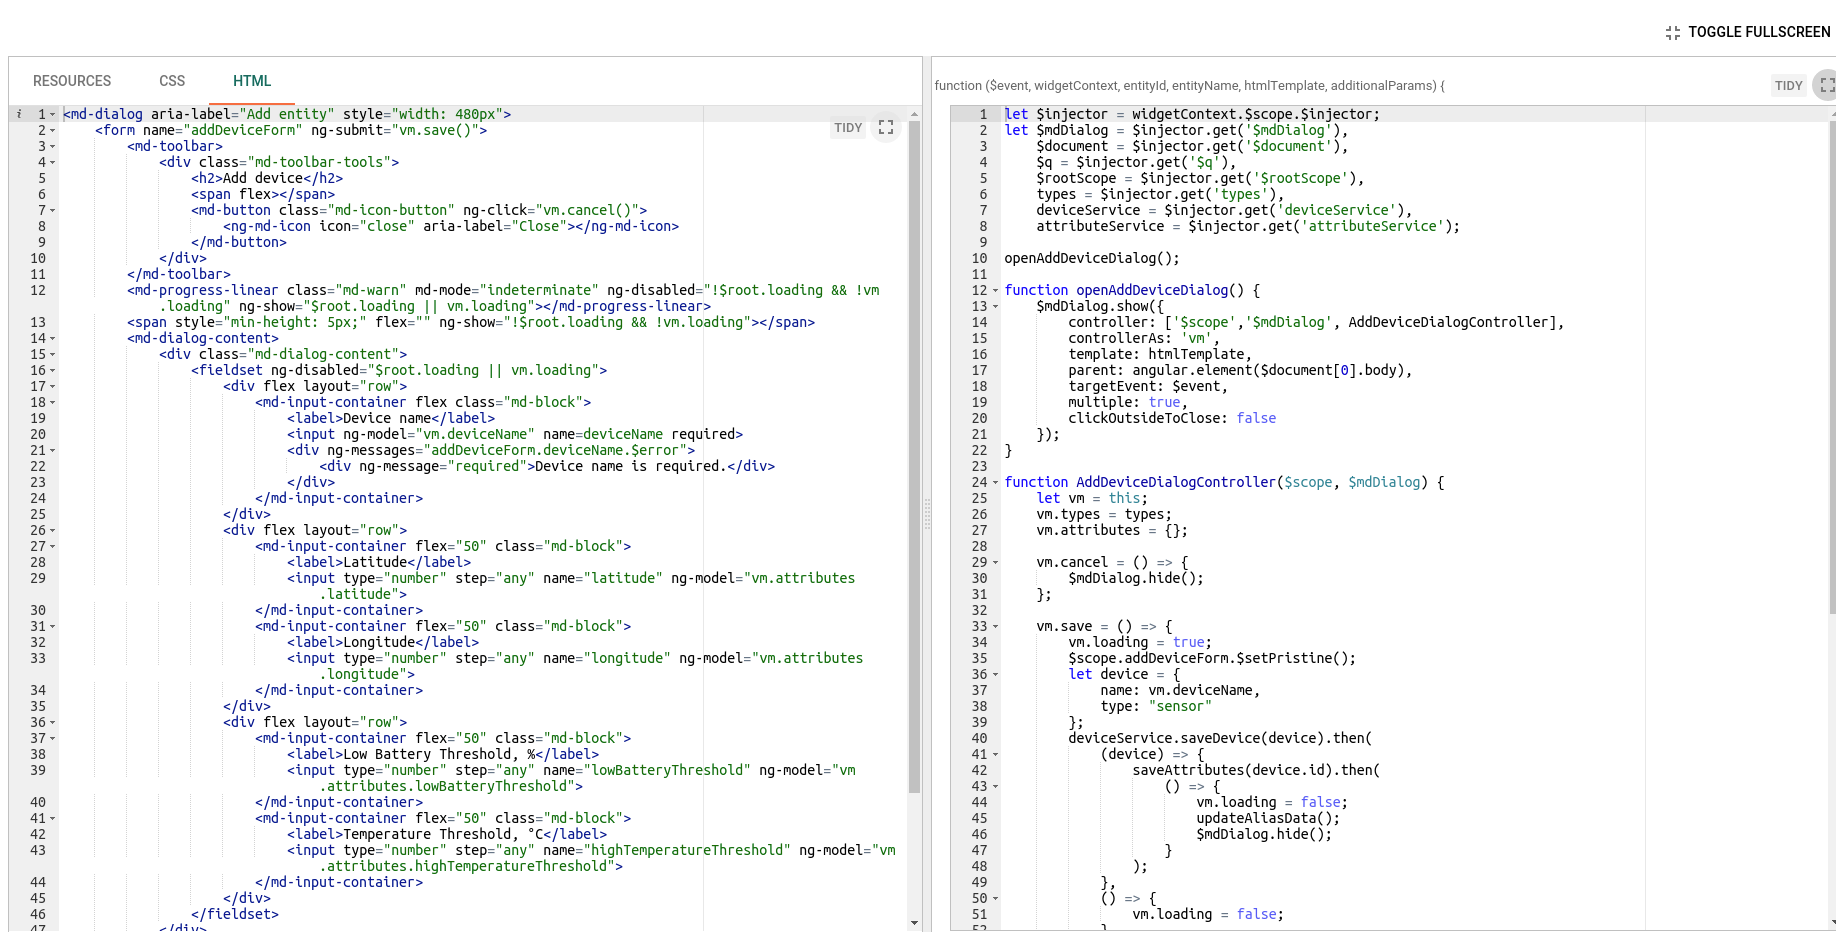
Let’s see what happens when we want to add a device. This and other UI forms are configured in the widget configuration. Open an Edit mode, Click on Edit widget and navigate to “Actions”. Here you can see three custom actions. Delete action is as simple as that, but Add and Edit Device actions uses brand new feature called “HTML Templates”. Now you can completely control the UI and logic of your dialogs. Let’s open an “Add” action and expand it to full screen.
You can see custom Resources, CSS, HTML and JS tabs. This is the exact place where Add/Edit dialogs are configured. See more on the custom actions and forms in a separate video tutorial.
Step 5. Signup Form to open Dashboard on Full Screen
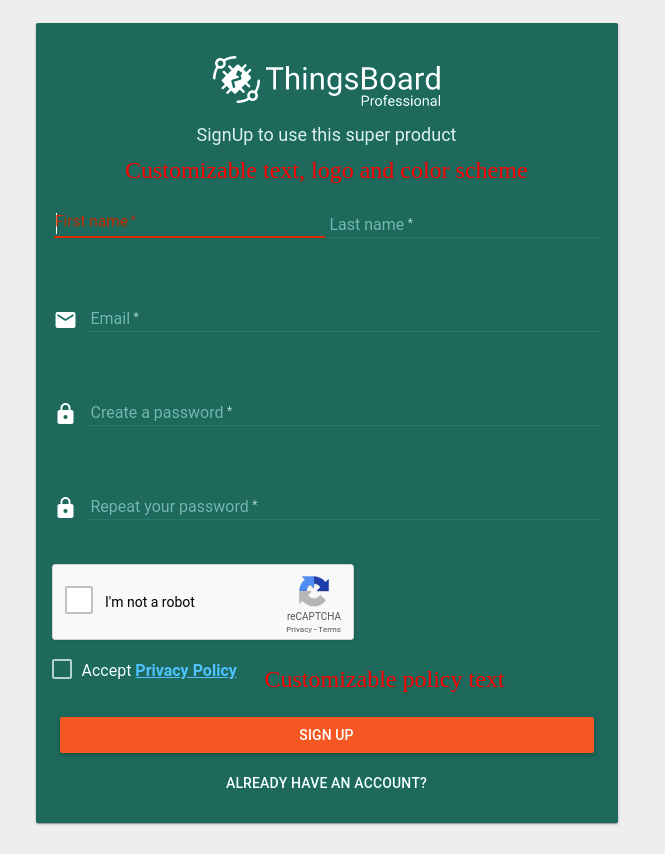
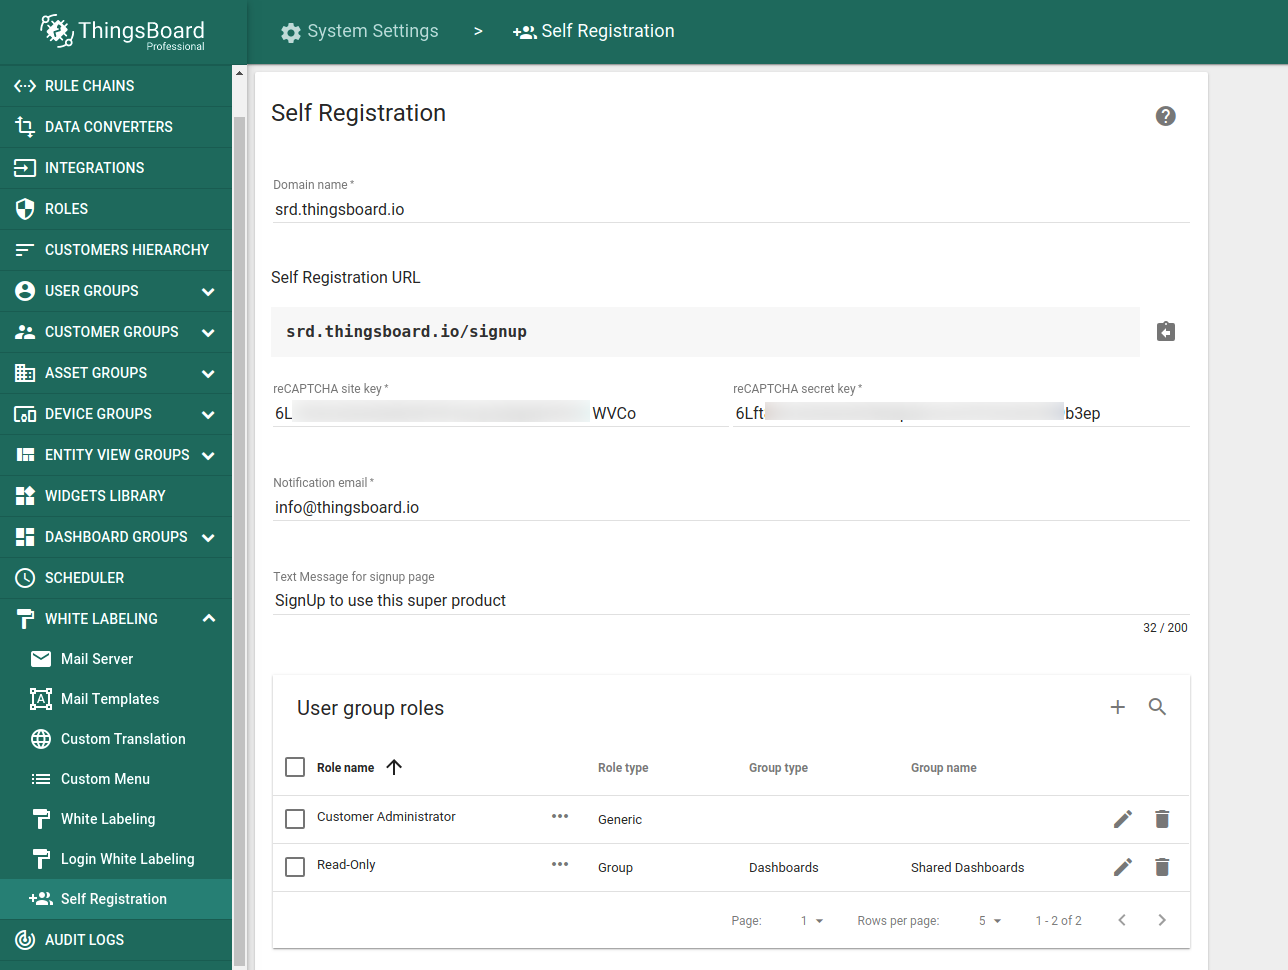
Finally, we can provision our Signup Form. Use your domain and ReCAPTCHA credentials.
Add two User Group Roles. One is for Customer Administrator. It is important that our new User will be able to create and edit any entities within this Customer. Second is the Read-Only access to the shared dashboard that we have just created. We also select this dashboard as default and mark “Always Full Screen”.
Change the text message and privacy policy (optional).
Congratulations! We have completed our self-registration form setup. Save now and navigate to sign-up form. Create a new user and see that they are completely isolated and control their own devices.
See signup form example below: