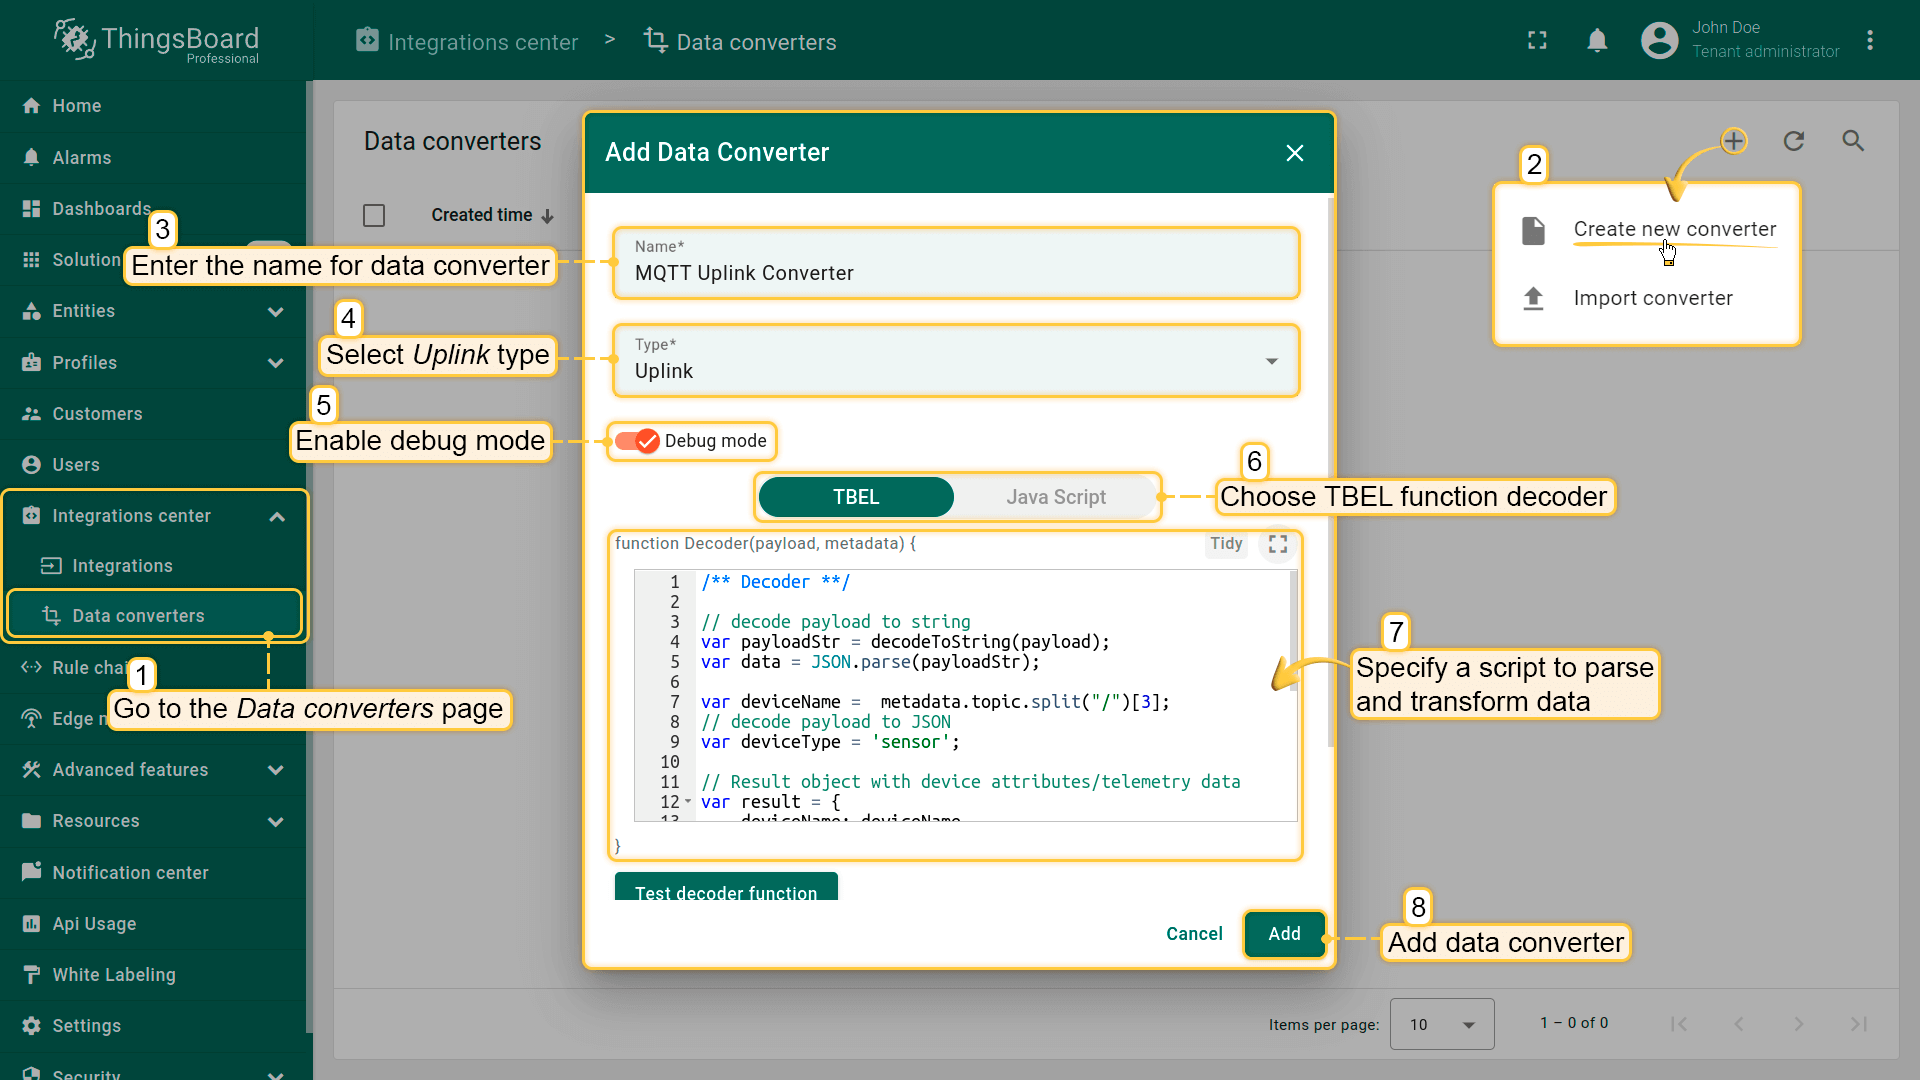
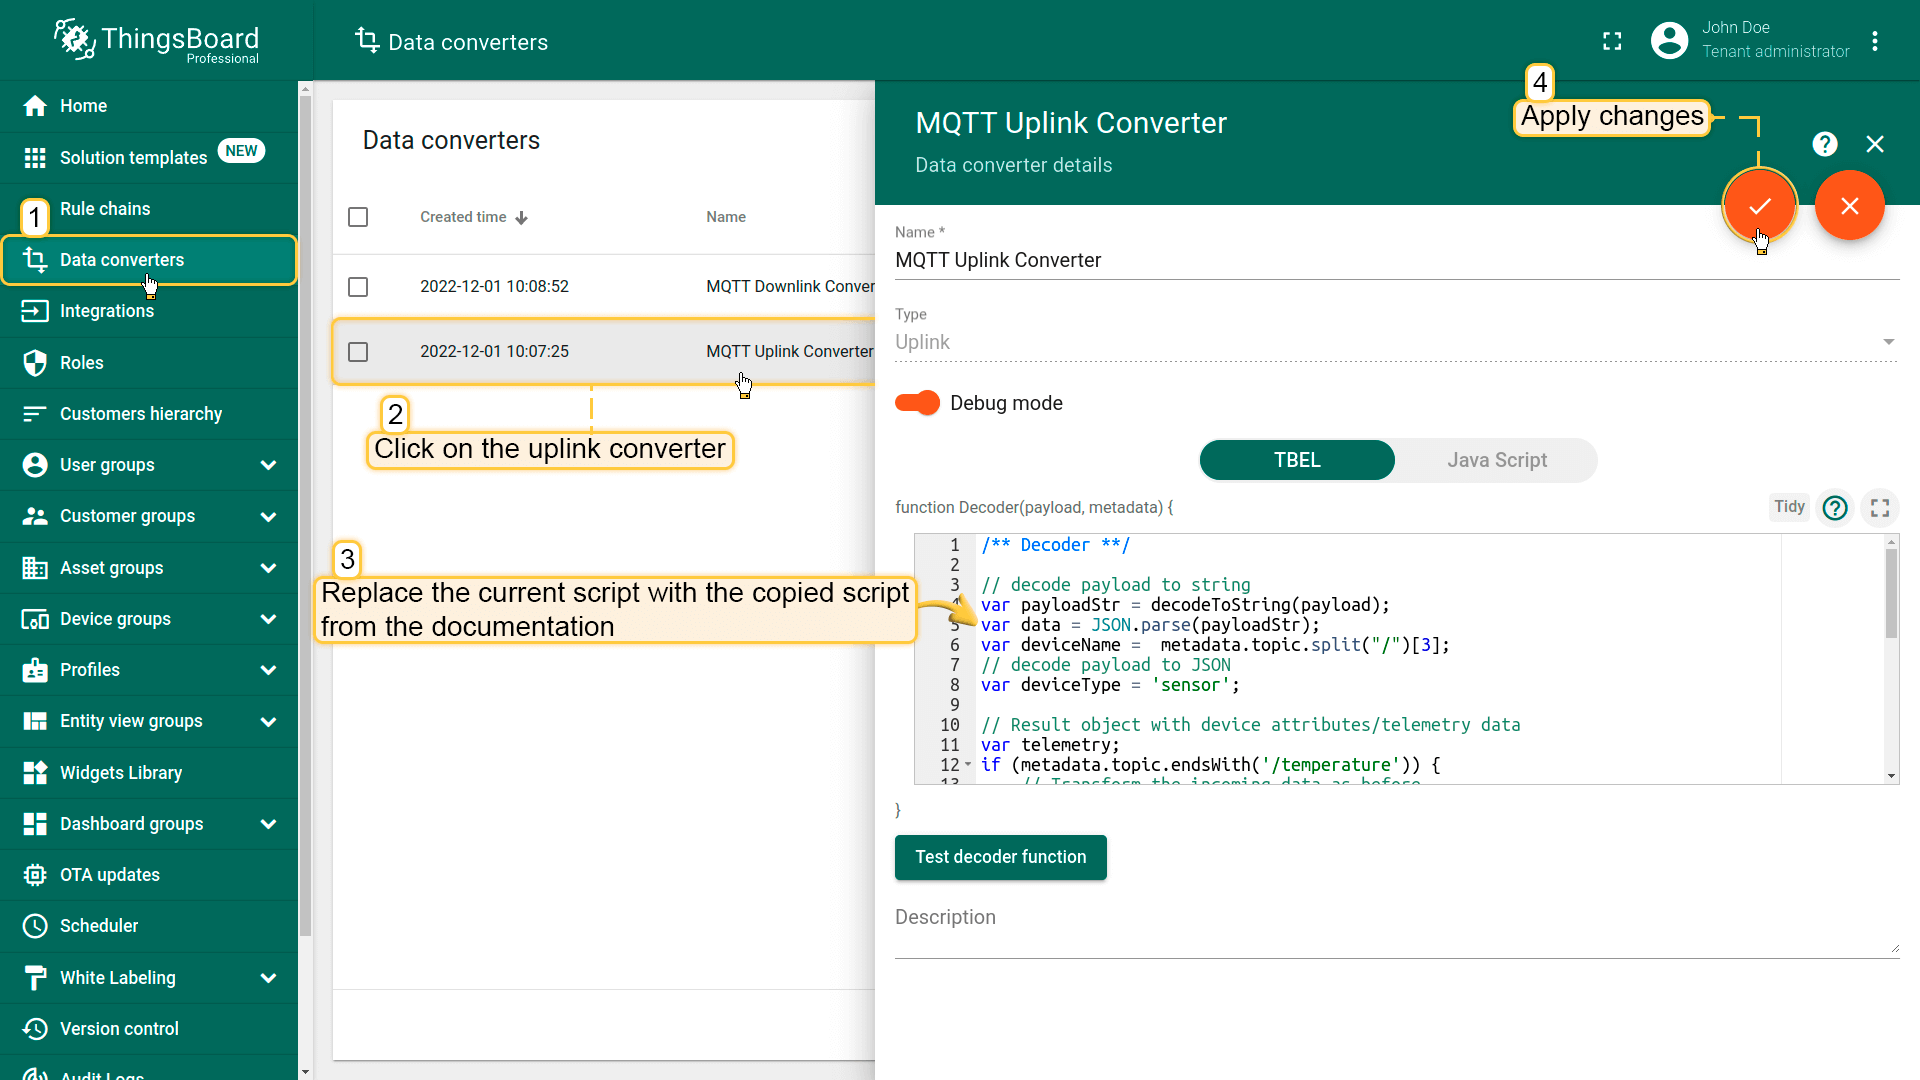
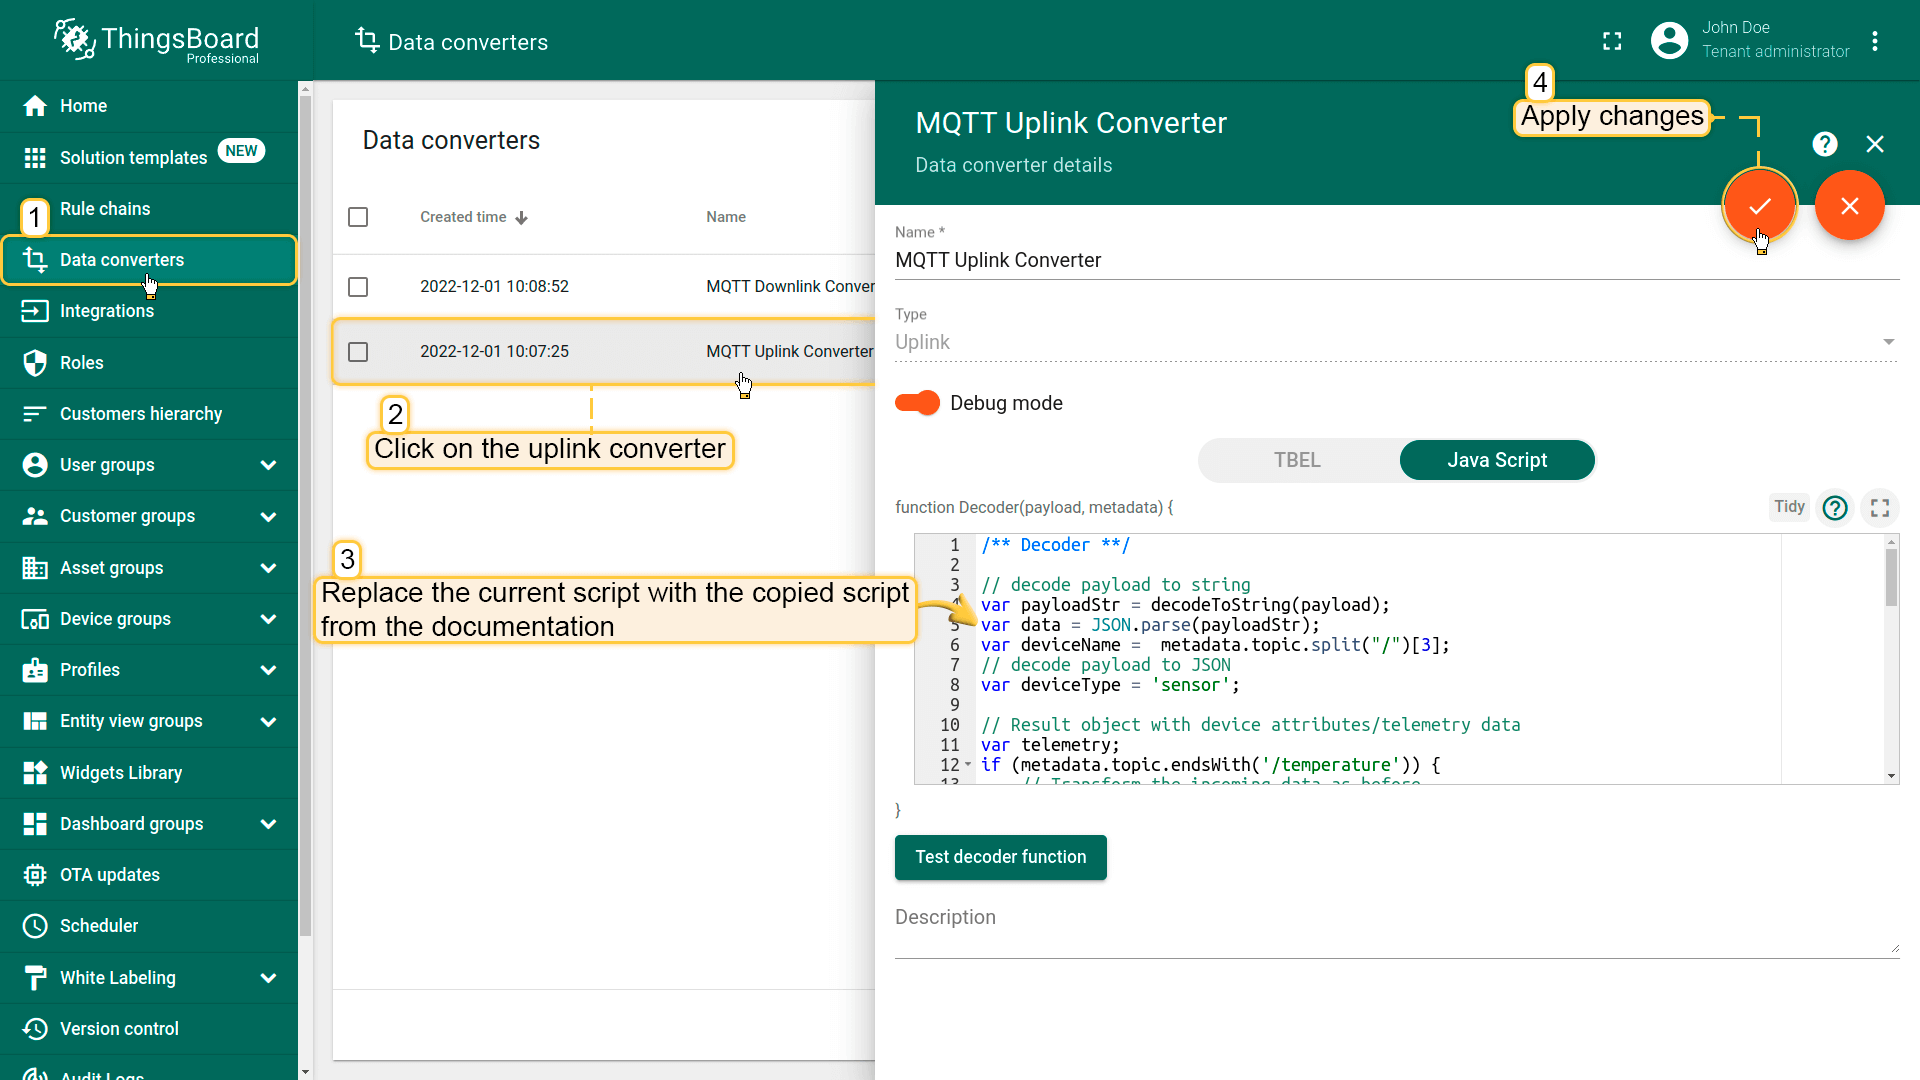
/** Decoder **/// decode payload to stringvarpayloadStr=decodeToString(payload);vardata=JSON.parse(payloadStr);vardeviceName=metadata.topic.split("/")[3];// decode payload to JSONvardeviceType='sensor';// Result object with device attributes/telemetry datavarresult={deviceName:deviceName,deviceType:deviceType,attributes:{integrationName:metadata['integrationName'],},telemetry:{temperature:data.value,}};/** Helper functions 'decodeToString' and 'decodeToJson' are already built-in **/returnresult;
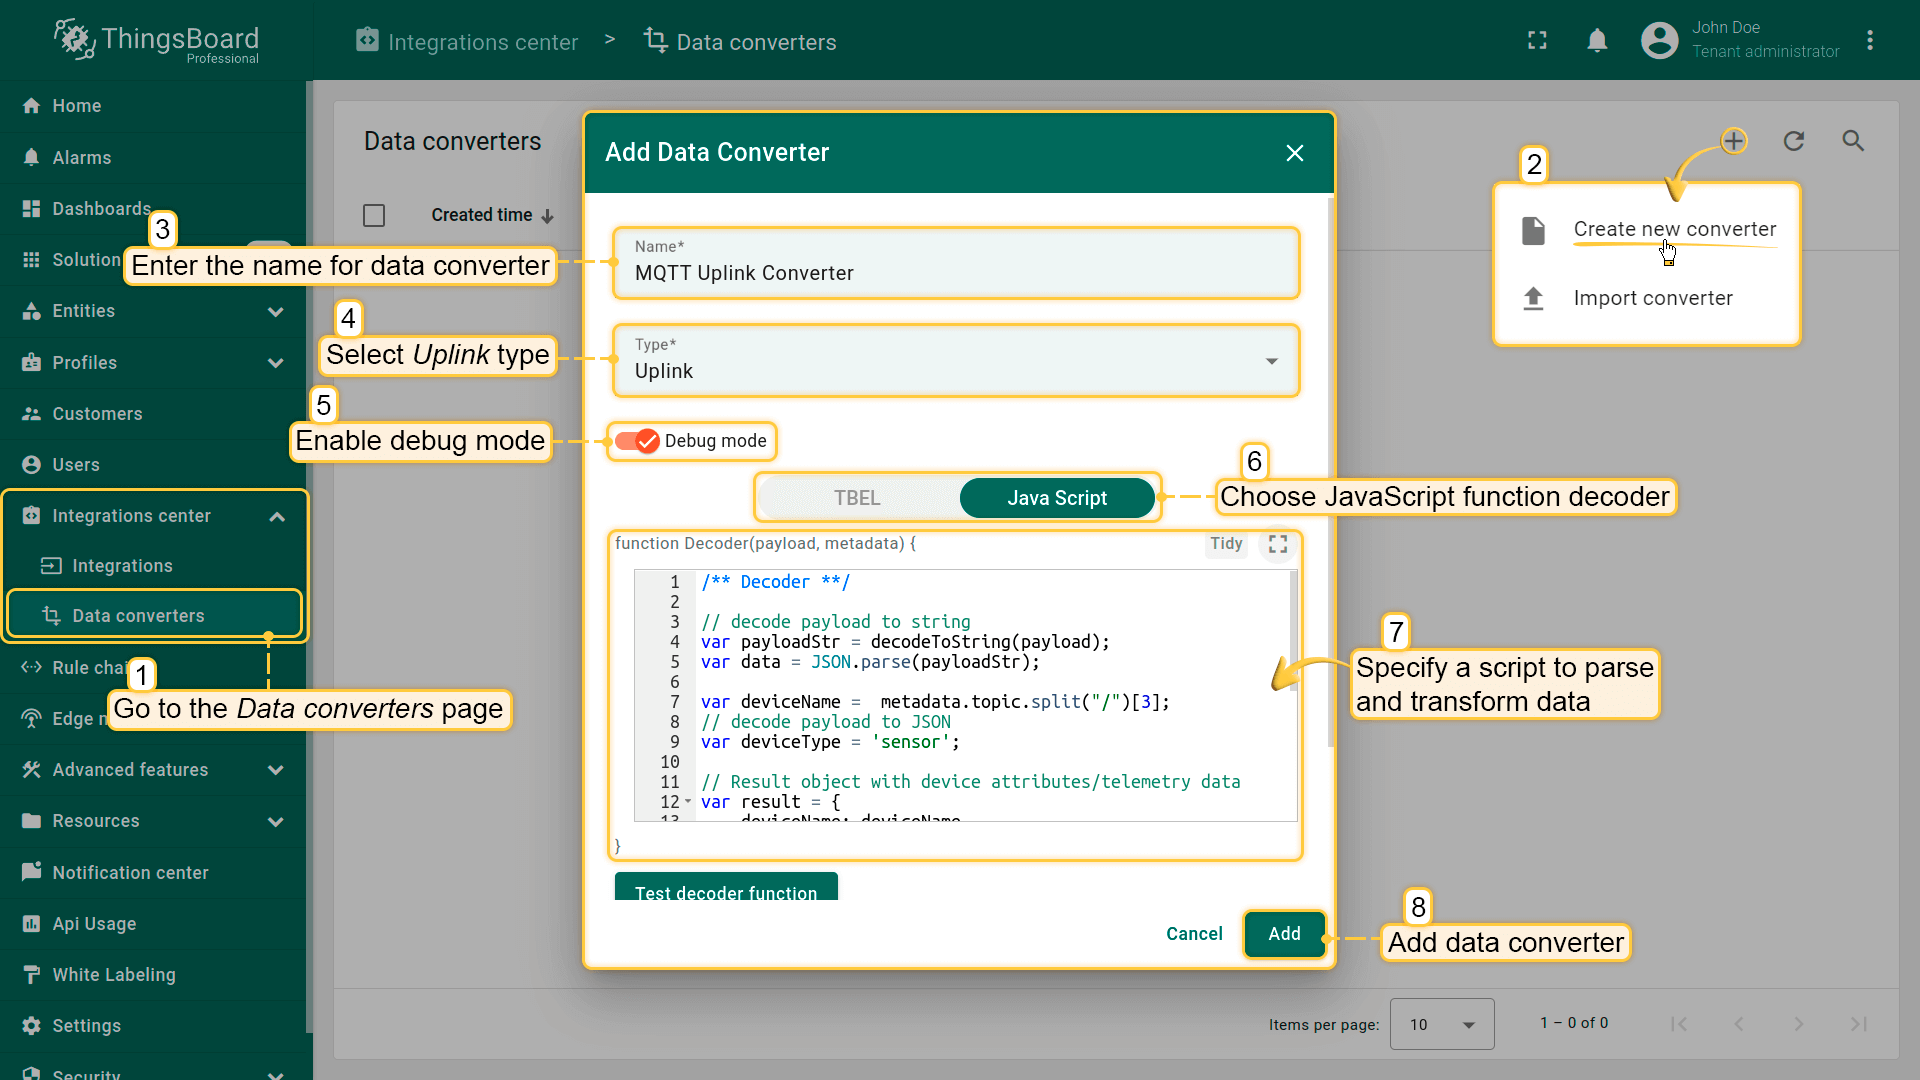
/** Decoder **/// decode payload to stringvarpayloadStr=decodeToString(payload);vardata=JSON.parse(payloadStr);vardeviceName=metadata.topic.split("/")[3];// decode payload to JSONvardeviceType='sensor';// Result object with device attributes/telemetry datavarresult={deviceName:deviceName,deviceType:deviceType,attributes:{integrationName:metadata['integrationName'],},telemetry:{temperature:data.value,}};/** Helper functions **/functiondecodeToString(payload){returnString.fromCharCode.apply(String,payload);}functiondecodeToJson(payload){// convert payload to string.varstr=decodeToString(payload);// parse string to JSONvardata=JSON.parse(str);returndata;}returnresult;
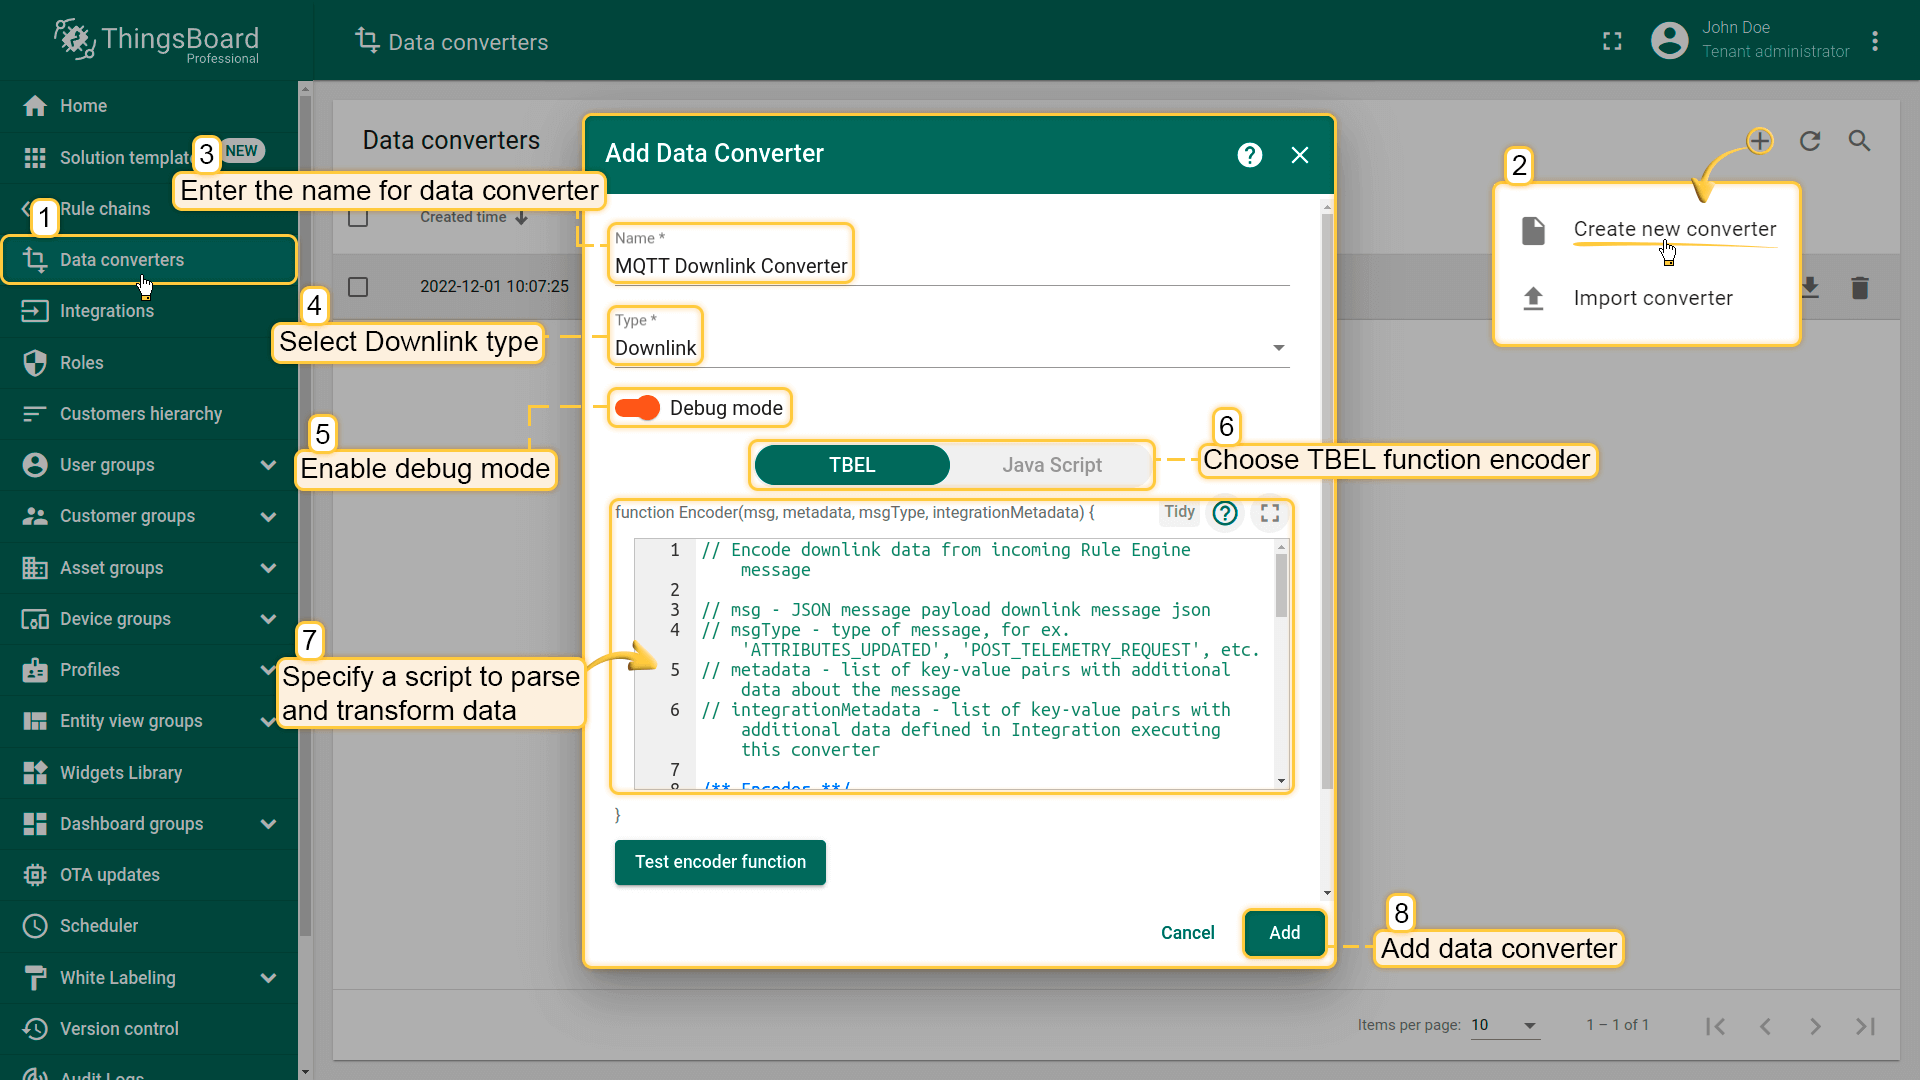
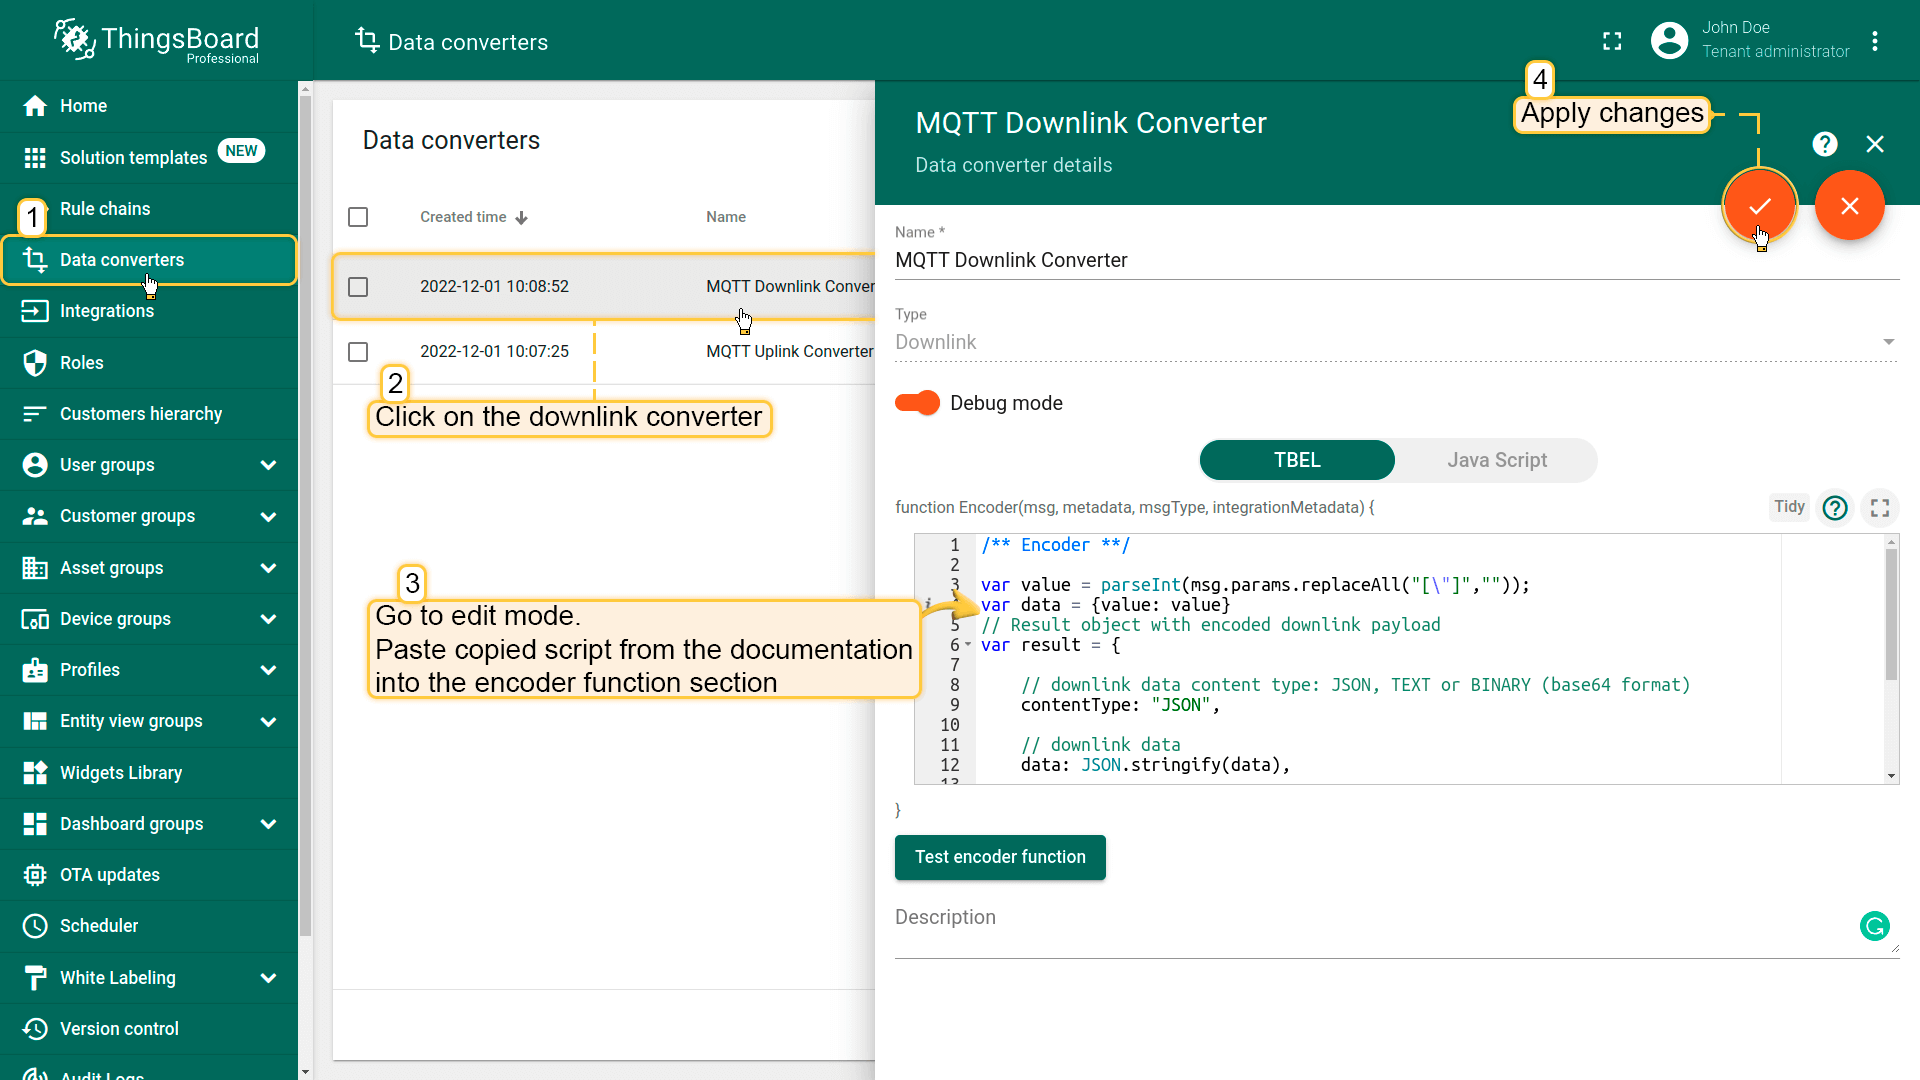
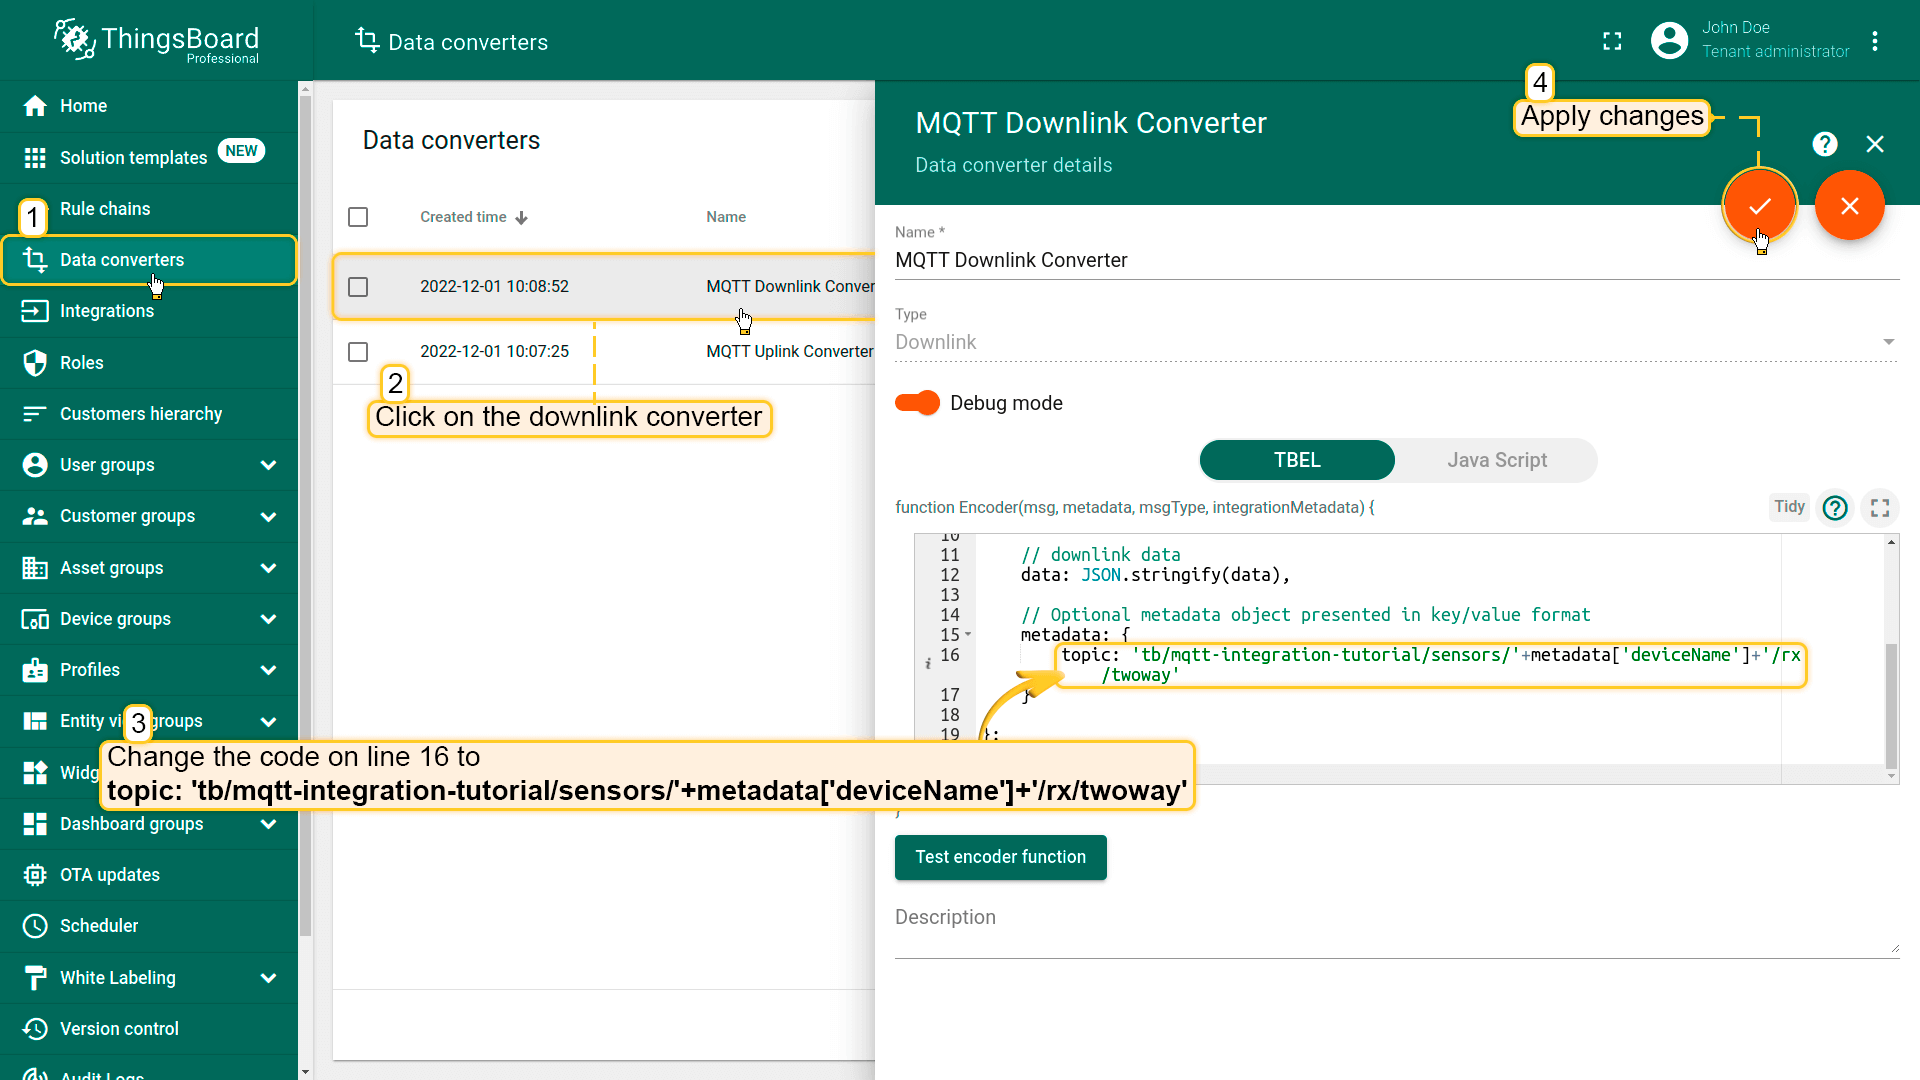
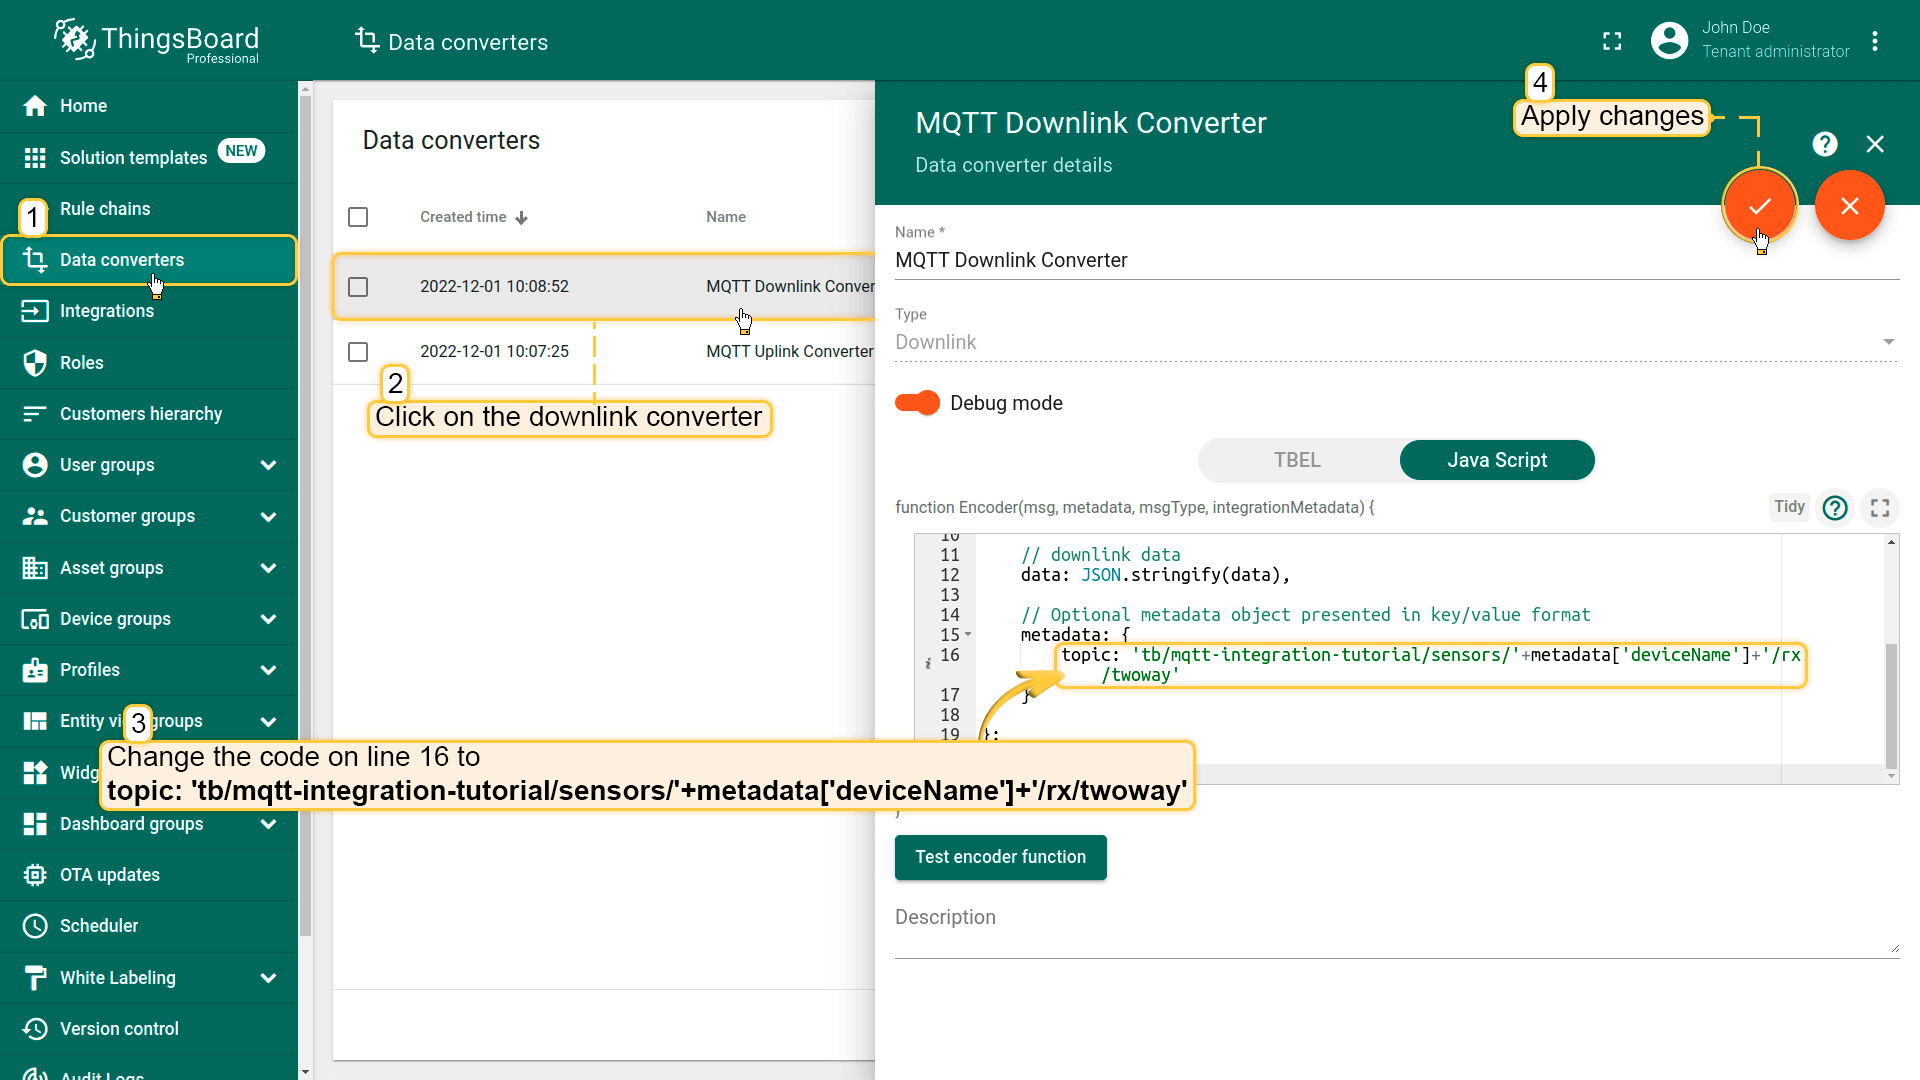
// Encode downlink data from incoming Rule Engine message// msg - JSON message payload downlink message json// msgType - type of message, for ex. 'ATTRIBUTES_UPDATED', 'POST_TELEMETRY_REQUEST', etc.// metadata - list of key-value pairs with additional data about the message// integrationMetadata - list of key-value pairs with additional data defined in Integration executing this converter/** Encoder **/vardata={};// Process data from incoming message and metadatadata.tempFreq=msg.temperatureUploadFrequency;data.humFreq=msg.humidityUploadFrequency;data.devSerialNumber=metadata['ss_serialNumber'];// Result object with encoded downlink payloadvarresult={// downlink data content type: JSON, TEXT or BINARY (base64 format)contentType:"JSON",// downlink datadata:JSON.stringify(data),// Optional metadata object presented in key/value formatmetadata:{topic:metadata['deviceType']+'/'+metadata['deviceName']+'/upload'}};returnresult;
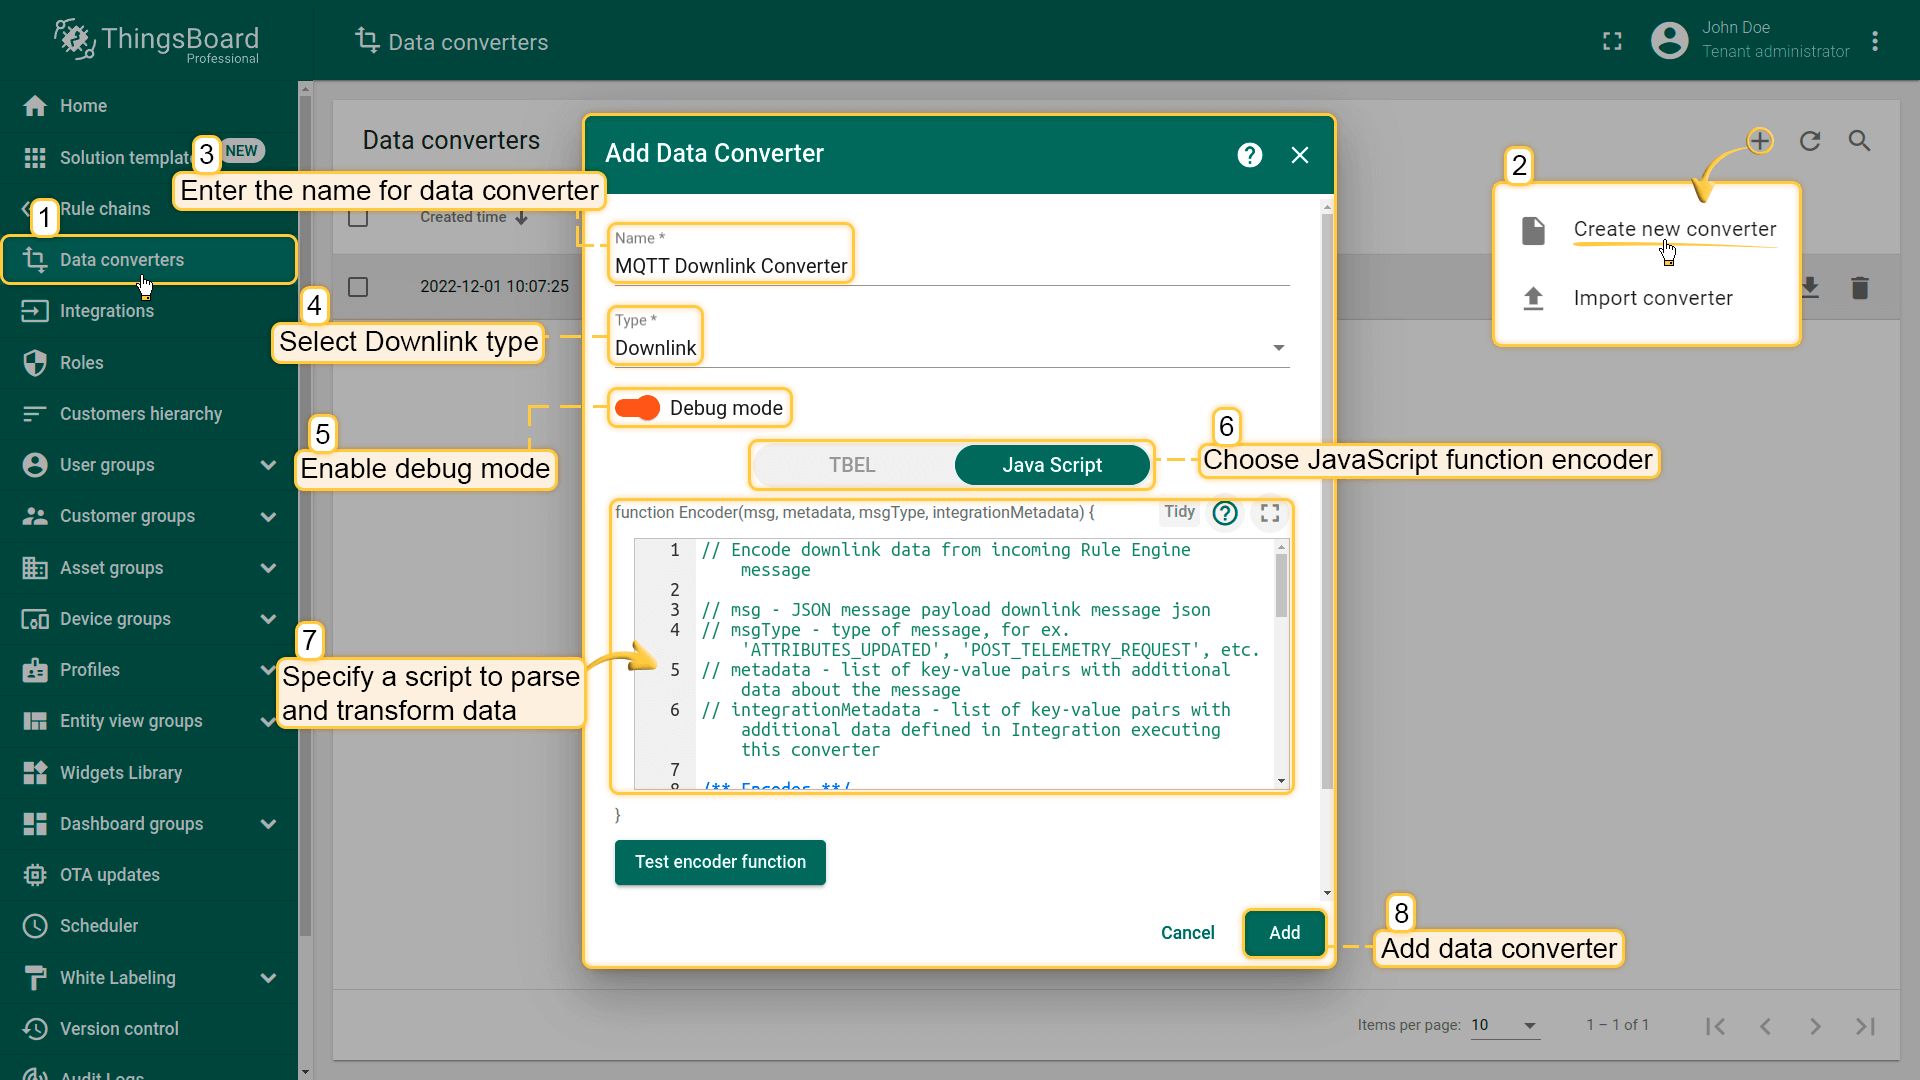
// Encode downlink data from incoming Rule Engine message// msg - JSON message payload downlink message json// msgType - type of message, for ex. 'ATTRIBUTES_UPDATED', 'POST_TELEMETRY_REQUEST', etc.// metadata - list of key-value pairs with additional data about the message// integrationMetadata - list of key-value pairs with additional data defined in Integration executing this converter/** Encoder **/vardata={};// Process data from incoming message and metadatadata.tempFreq=msg.temperatureUploadFrequency;data.humFreq=msg.humidityUploadFrequency;data.devSerialNumber=metadata['ss_serialNumber'];// Result object with encoded downlink payloadvarresult={// downlink data content type: JSON, TEXT or BINARY (base64 format)contentType:"JSON",// downlink datadata:JSON.stringify(data),// Optional metadata object presented in key/value formatmetadata:{topic:metadata['deviceType']+'/'+metadata['deviceName']+'/upload'}};returnresult;
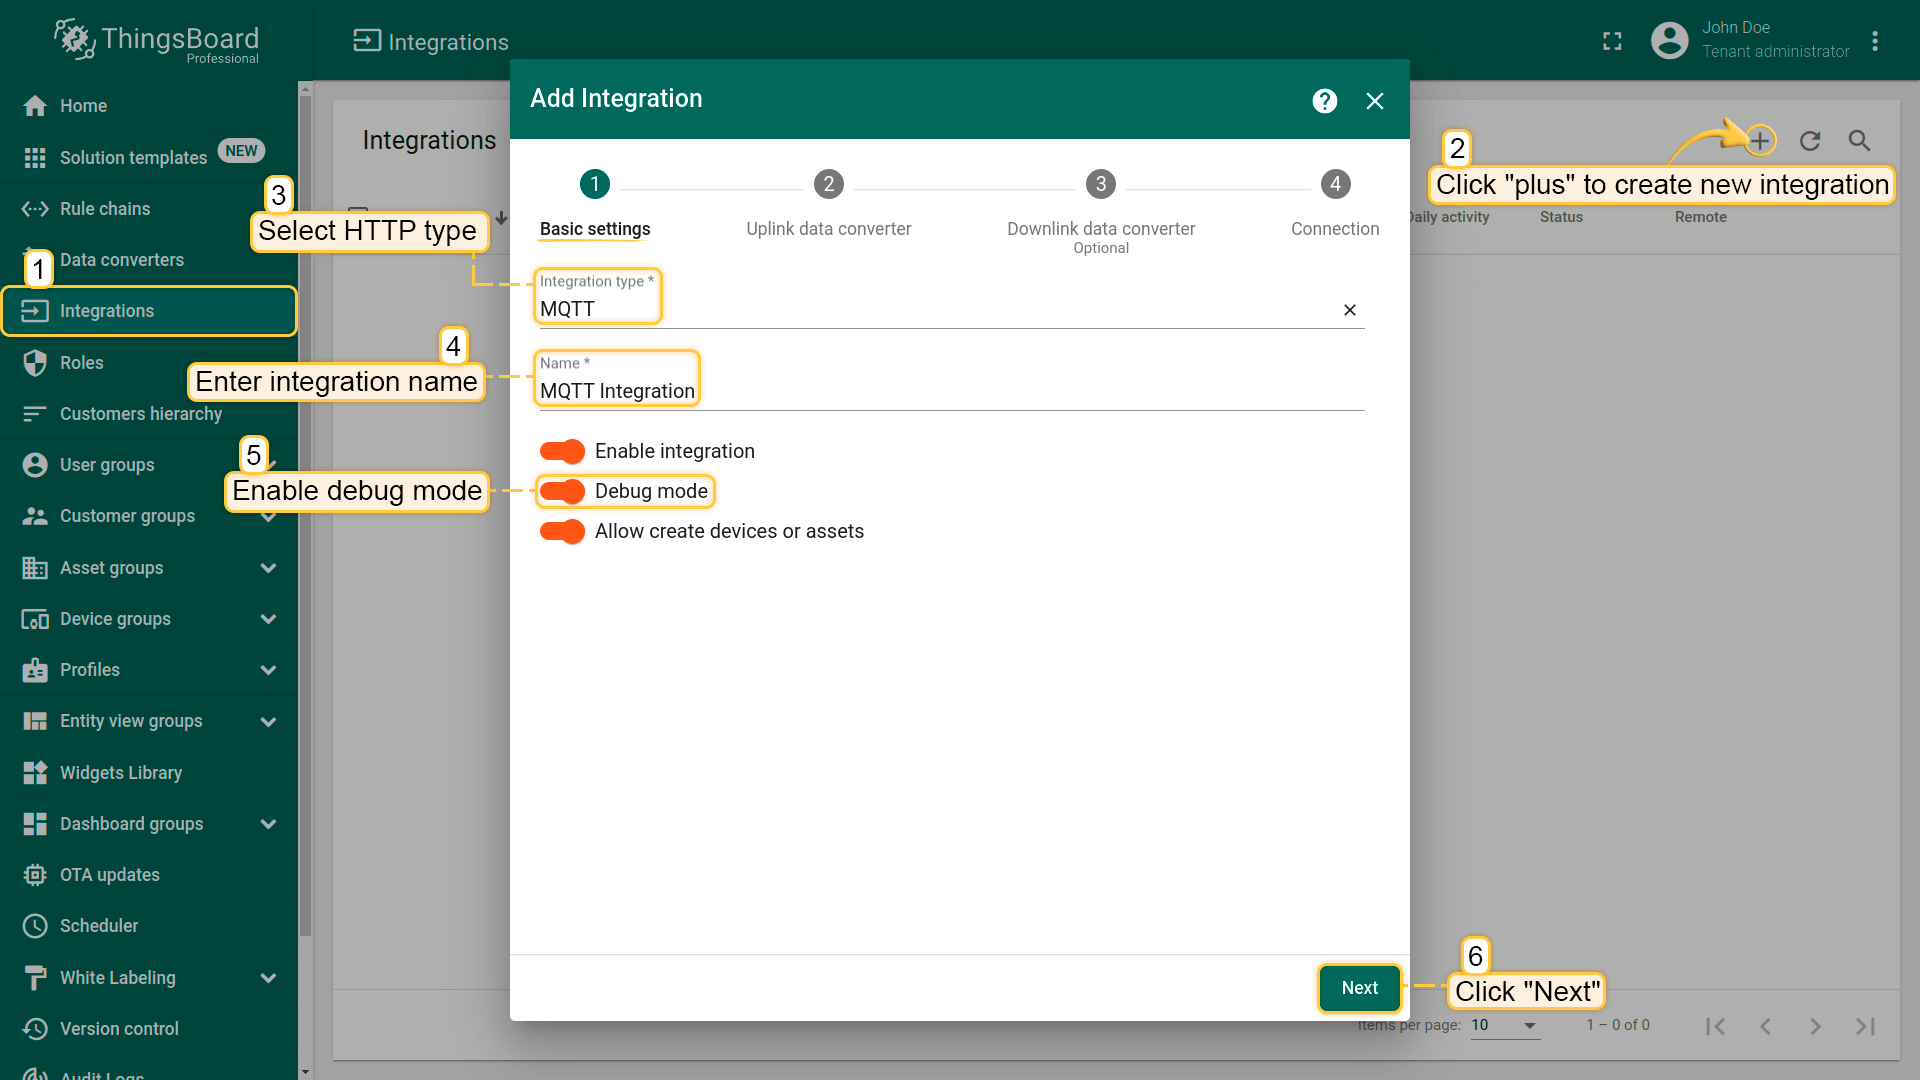
MQTT集成配置
进入Integrations center -> Integrations页面,点击“plus”添加新集成。命名为“MQTT Integration”,选择类型MQTT;
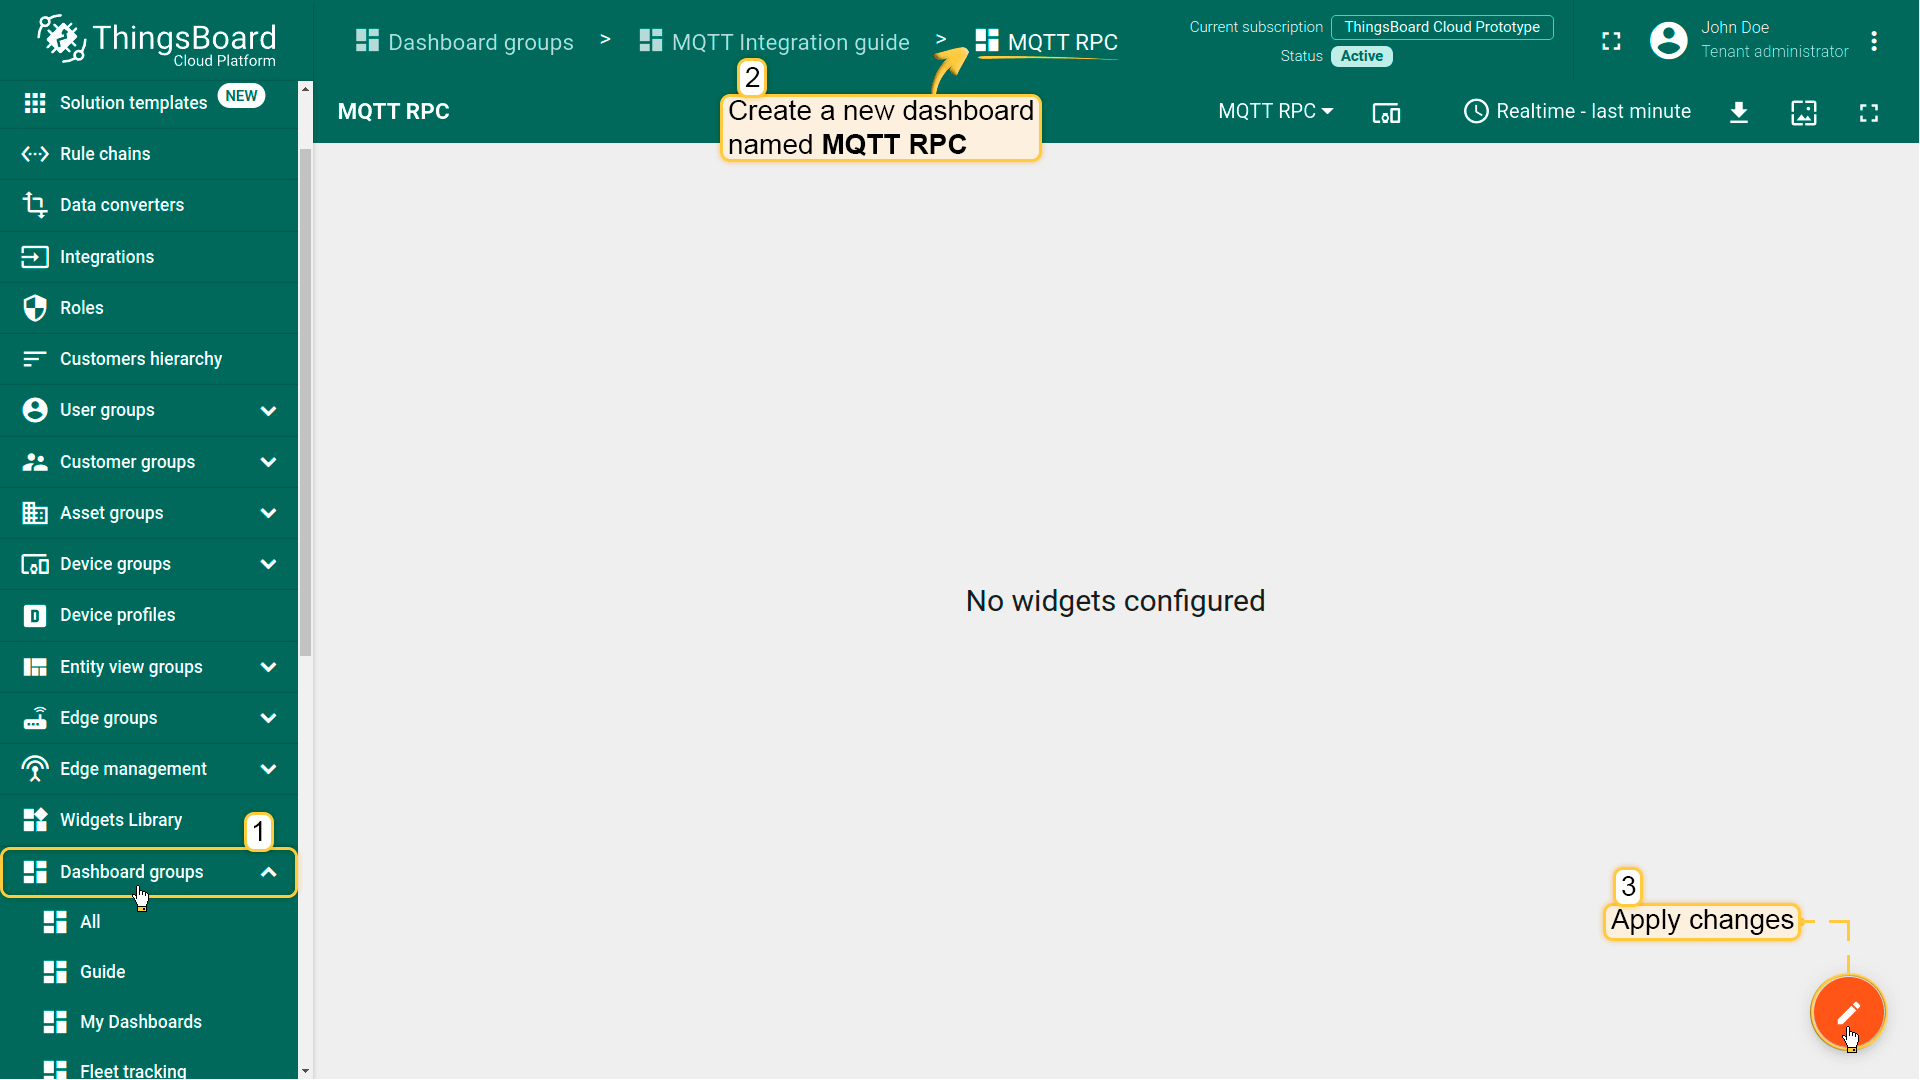
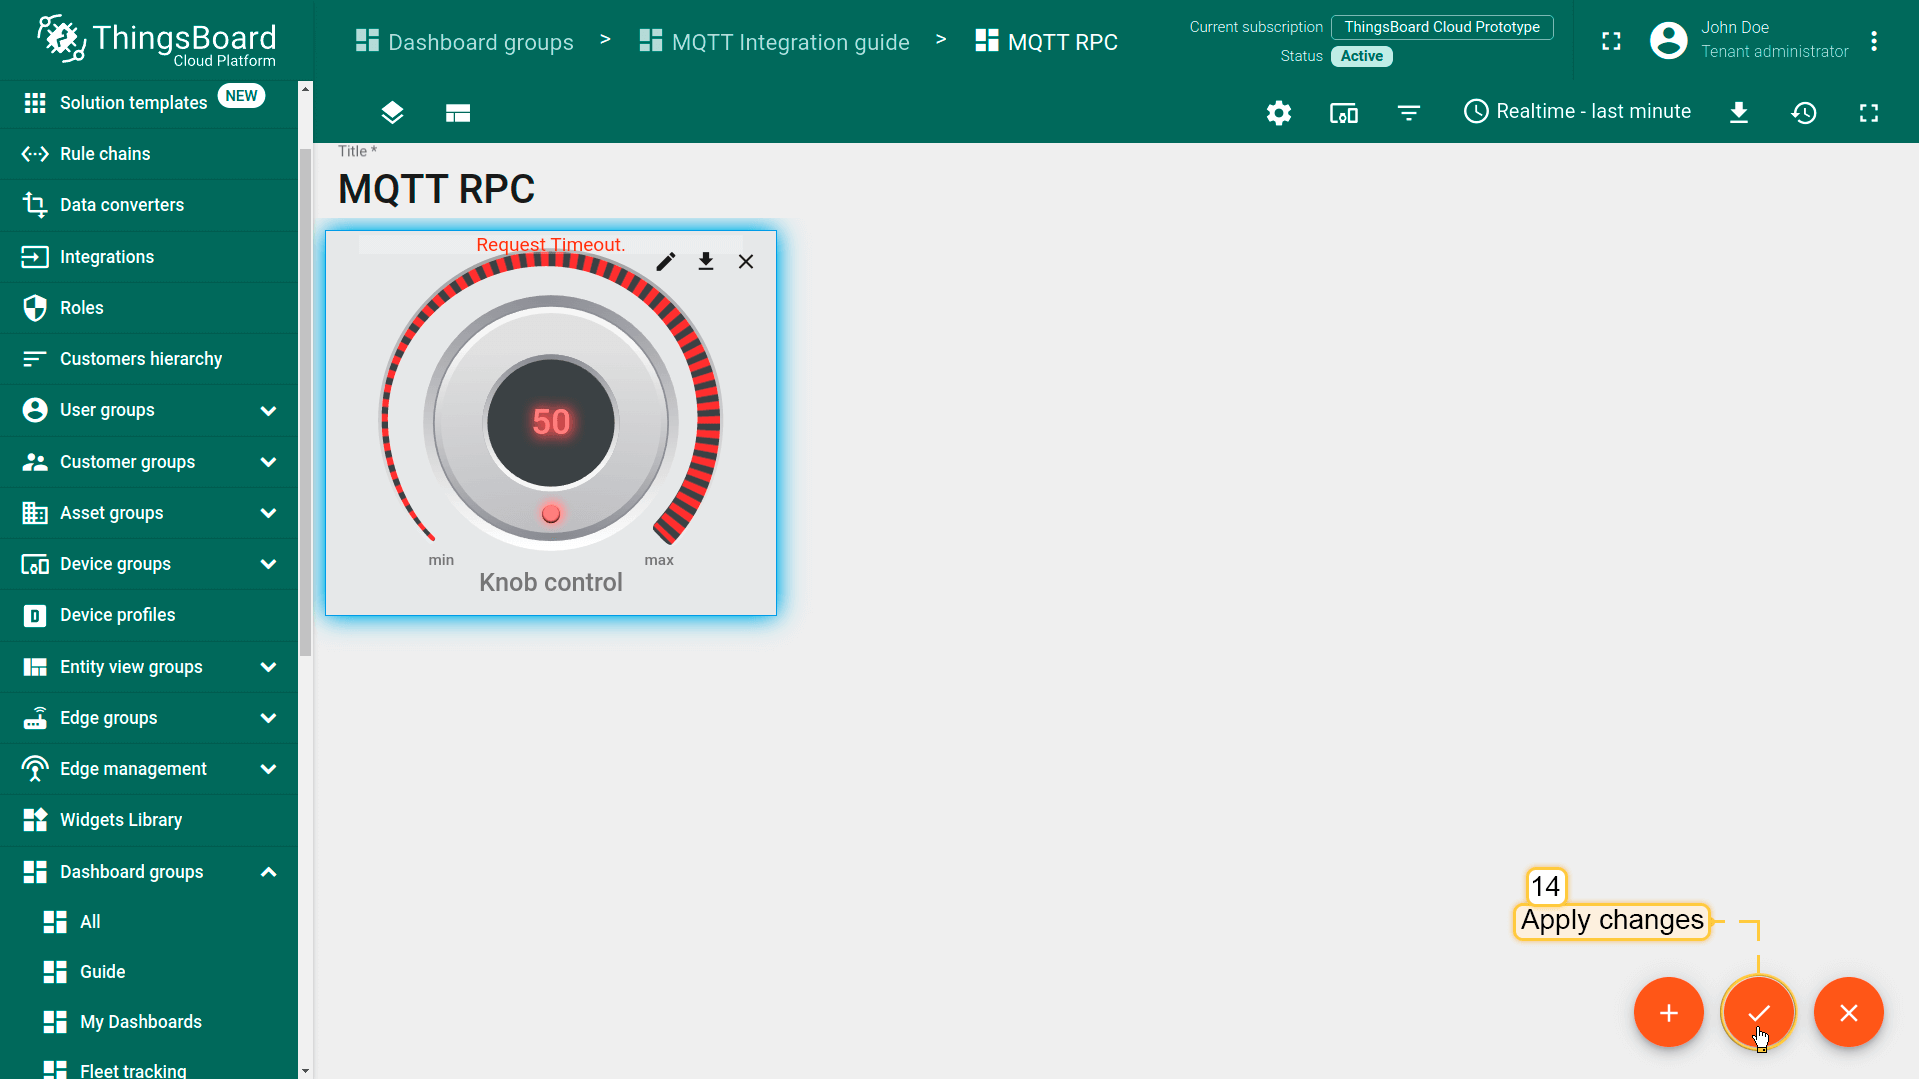
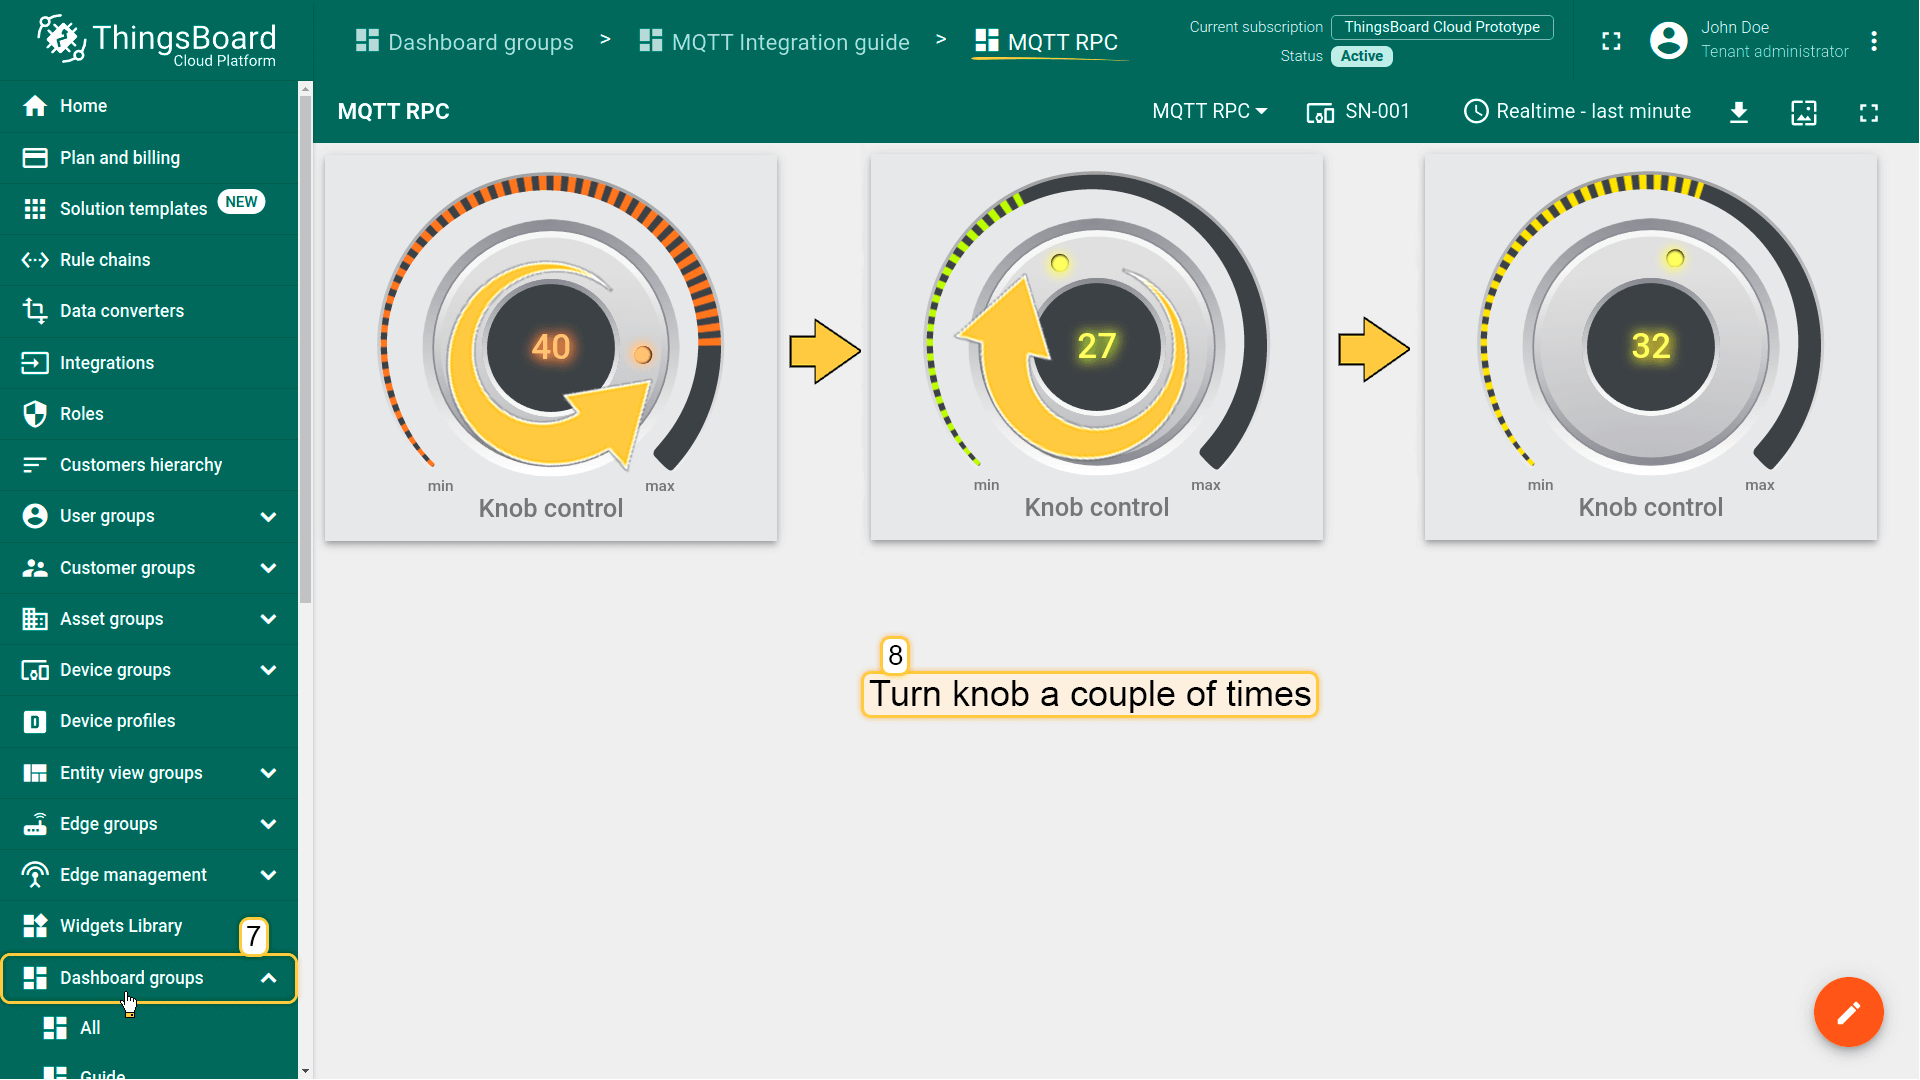
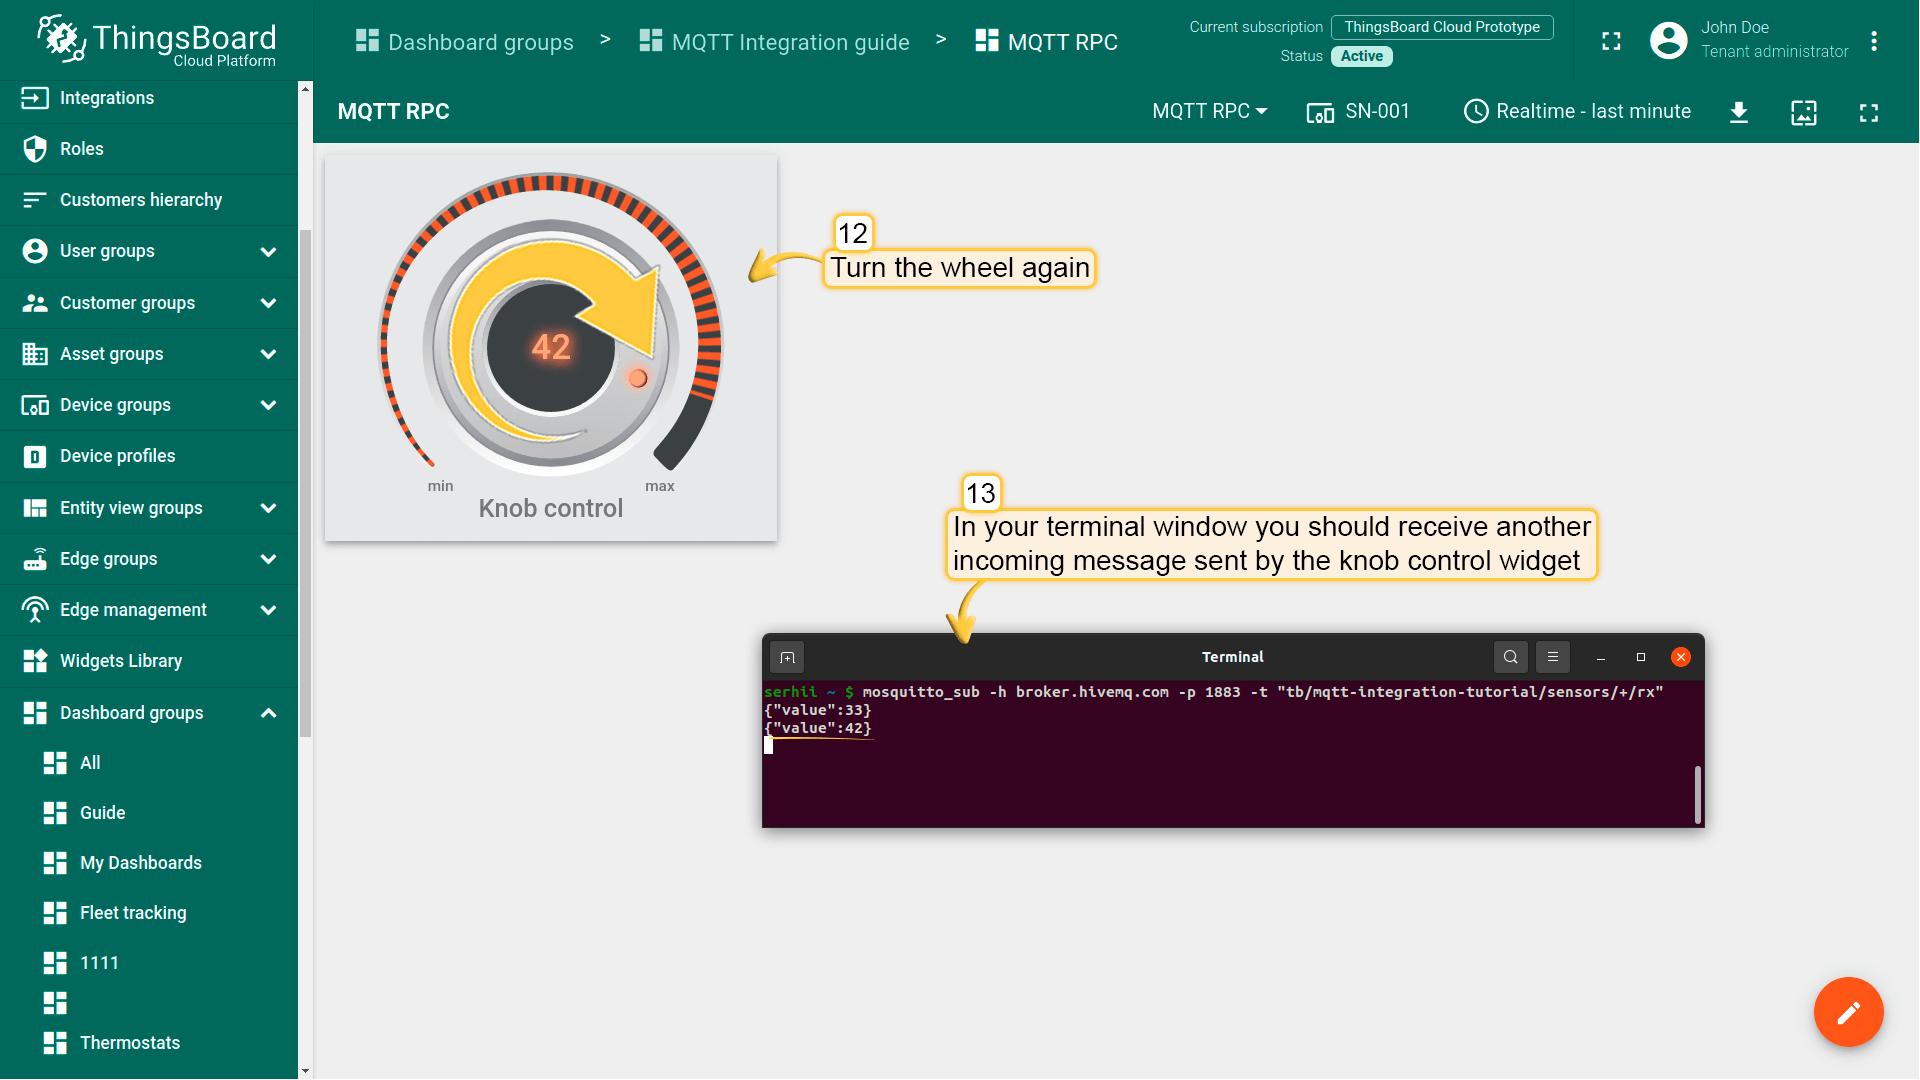
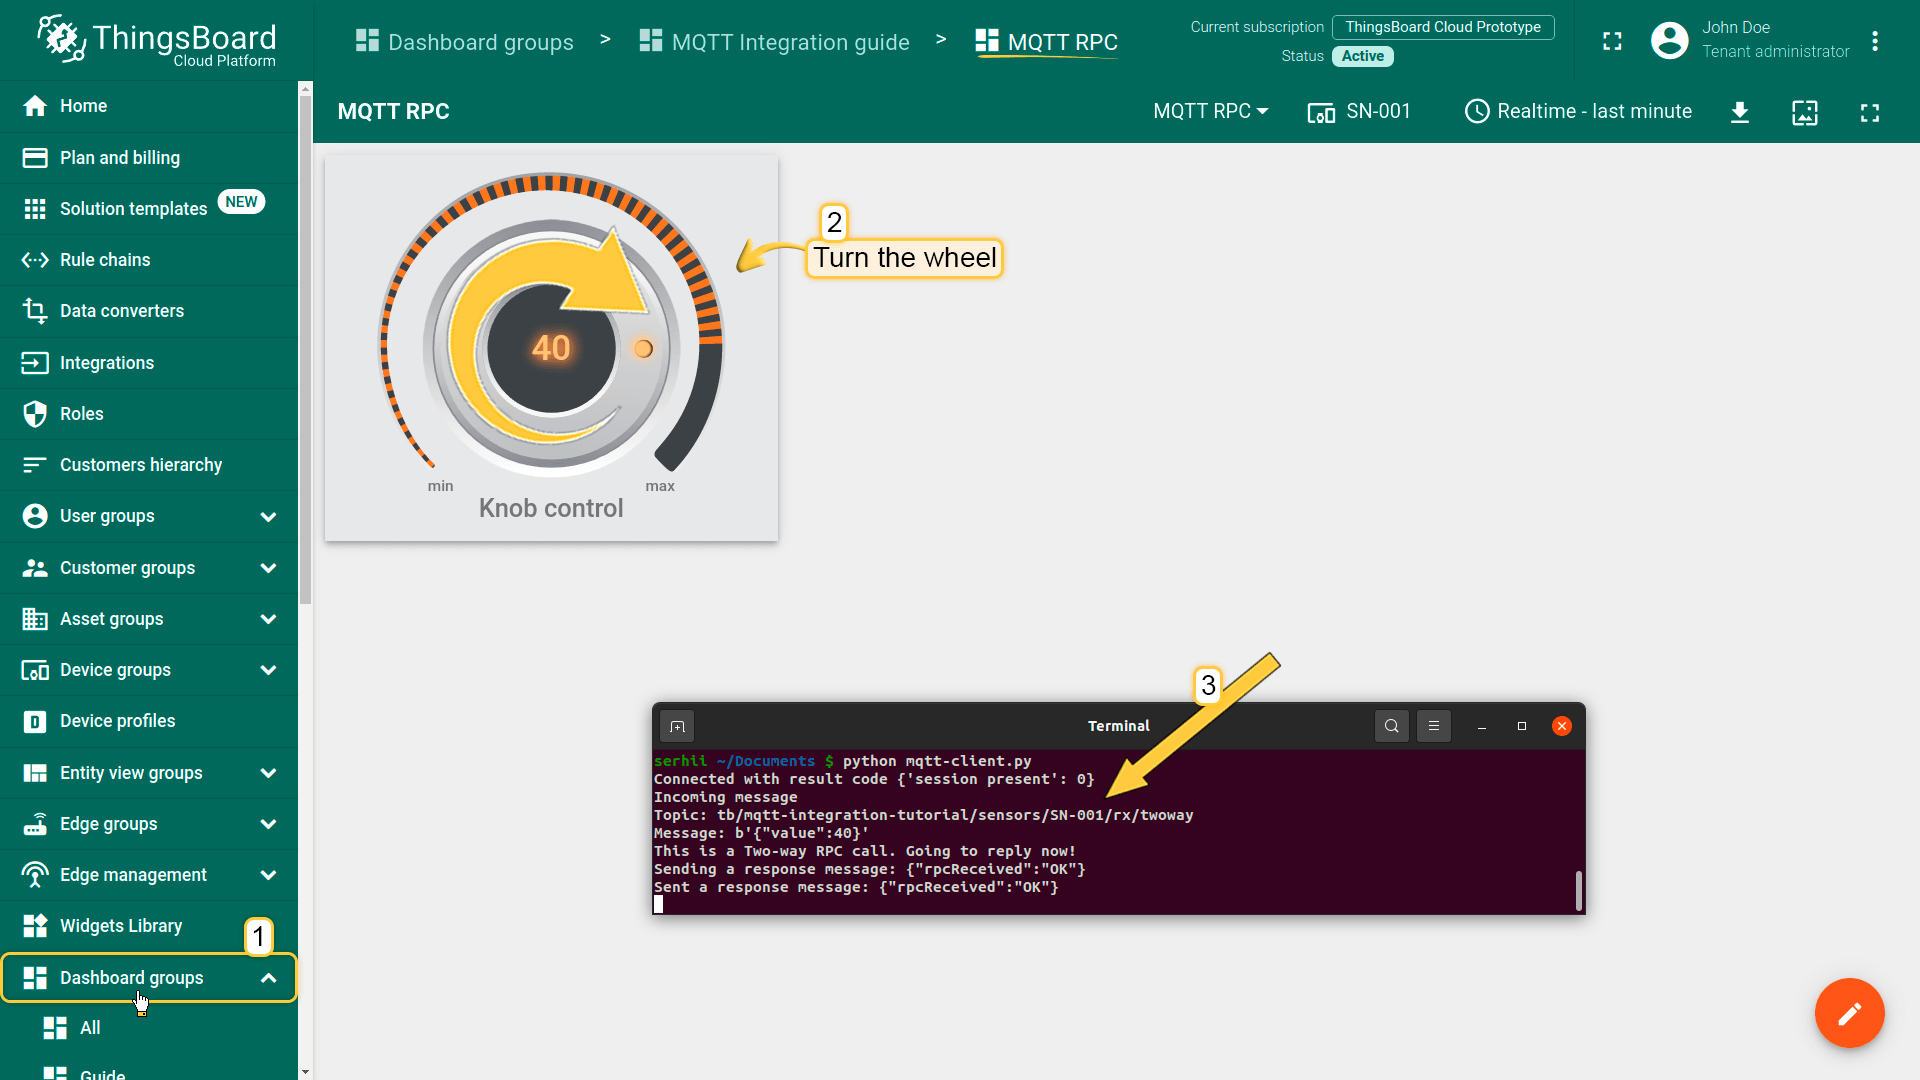
Go to Dashboards page and create a new dashboard named MQTT RPC. Open this dashboard;
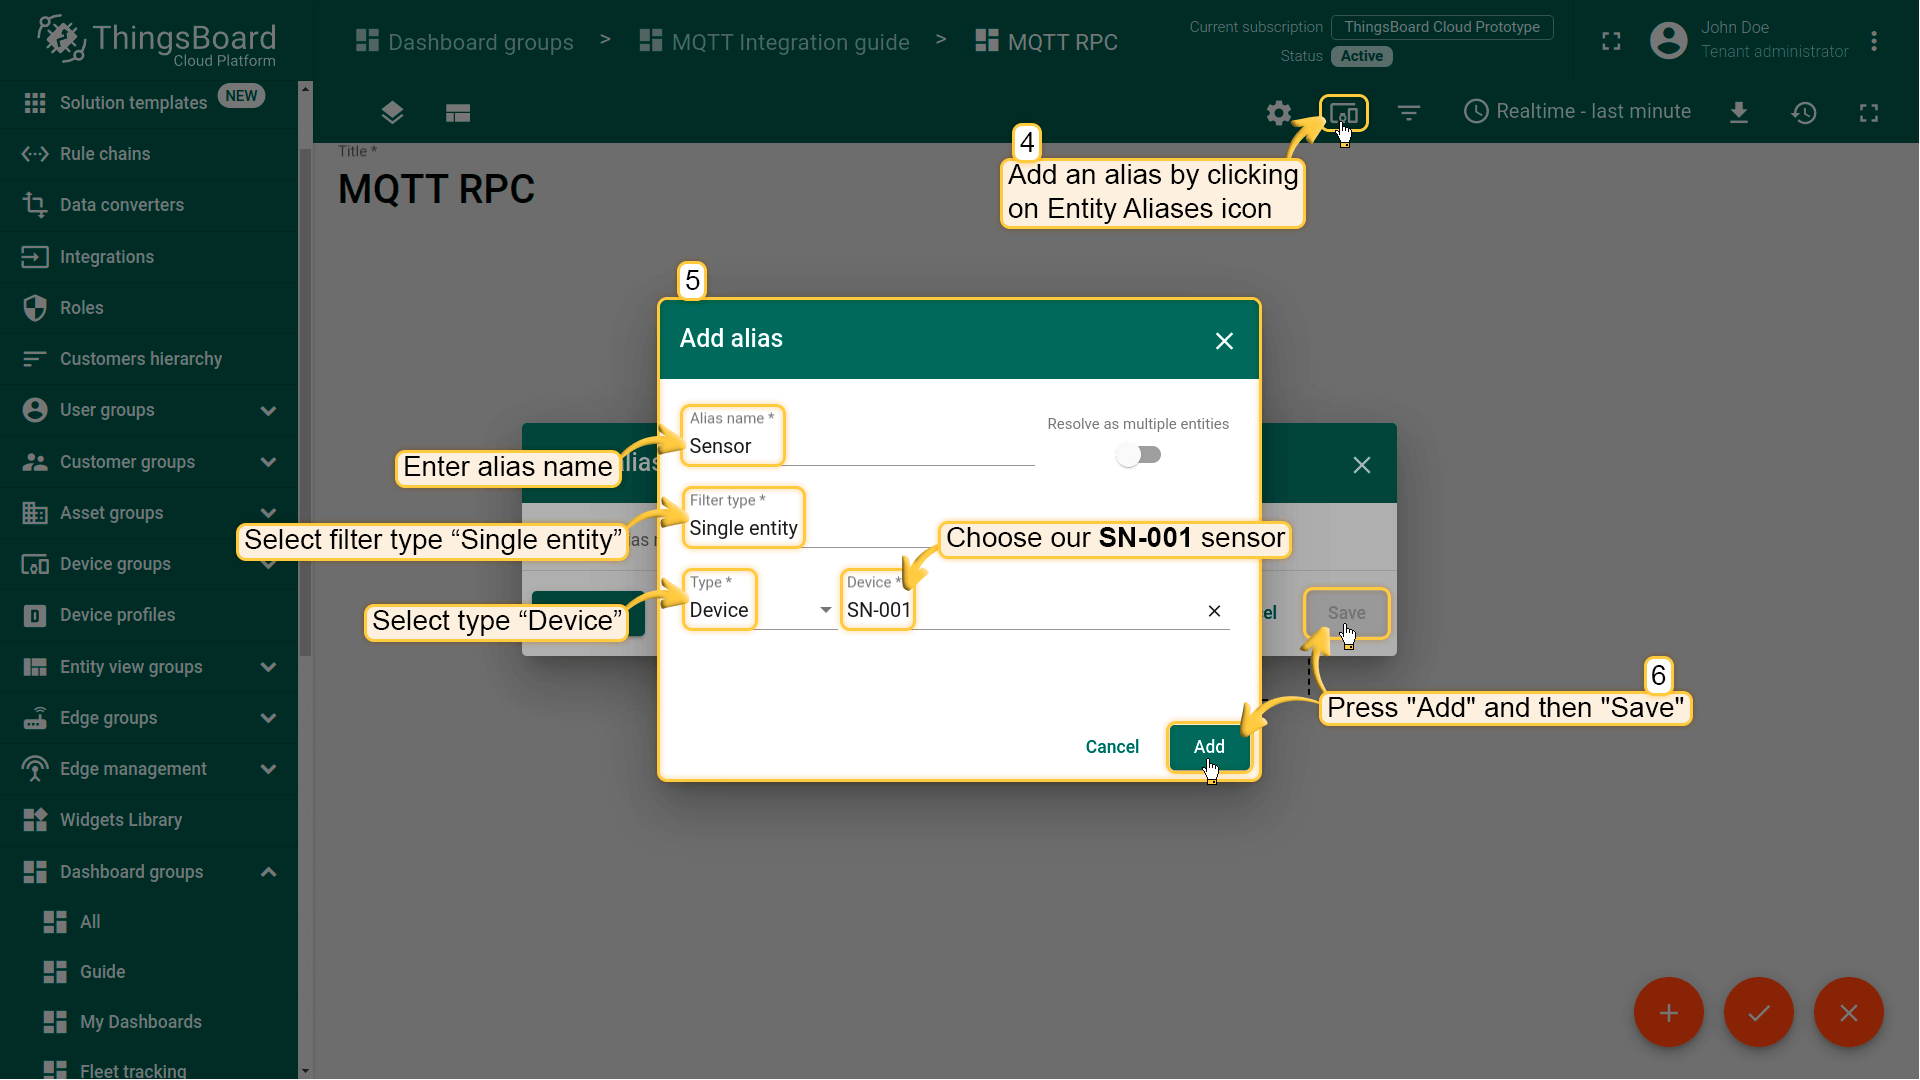
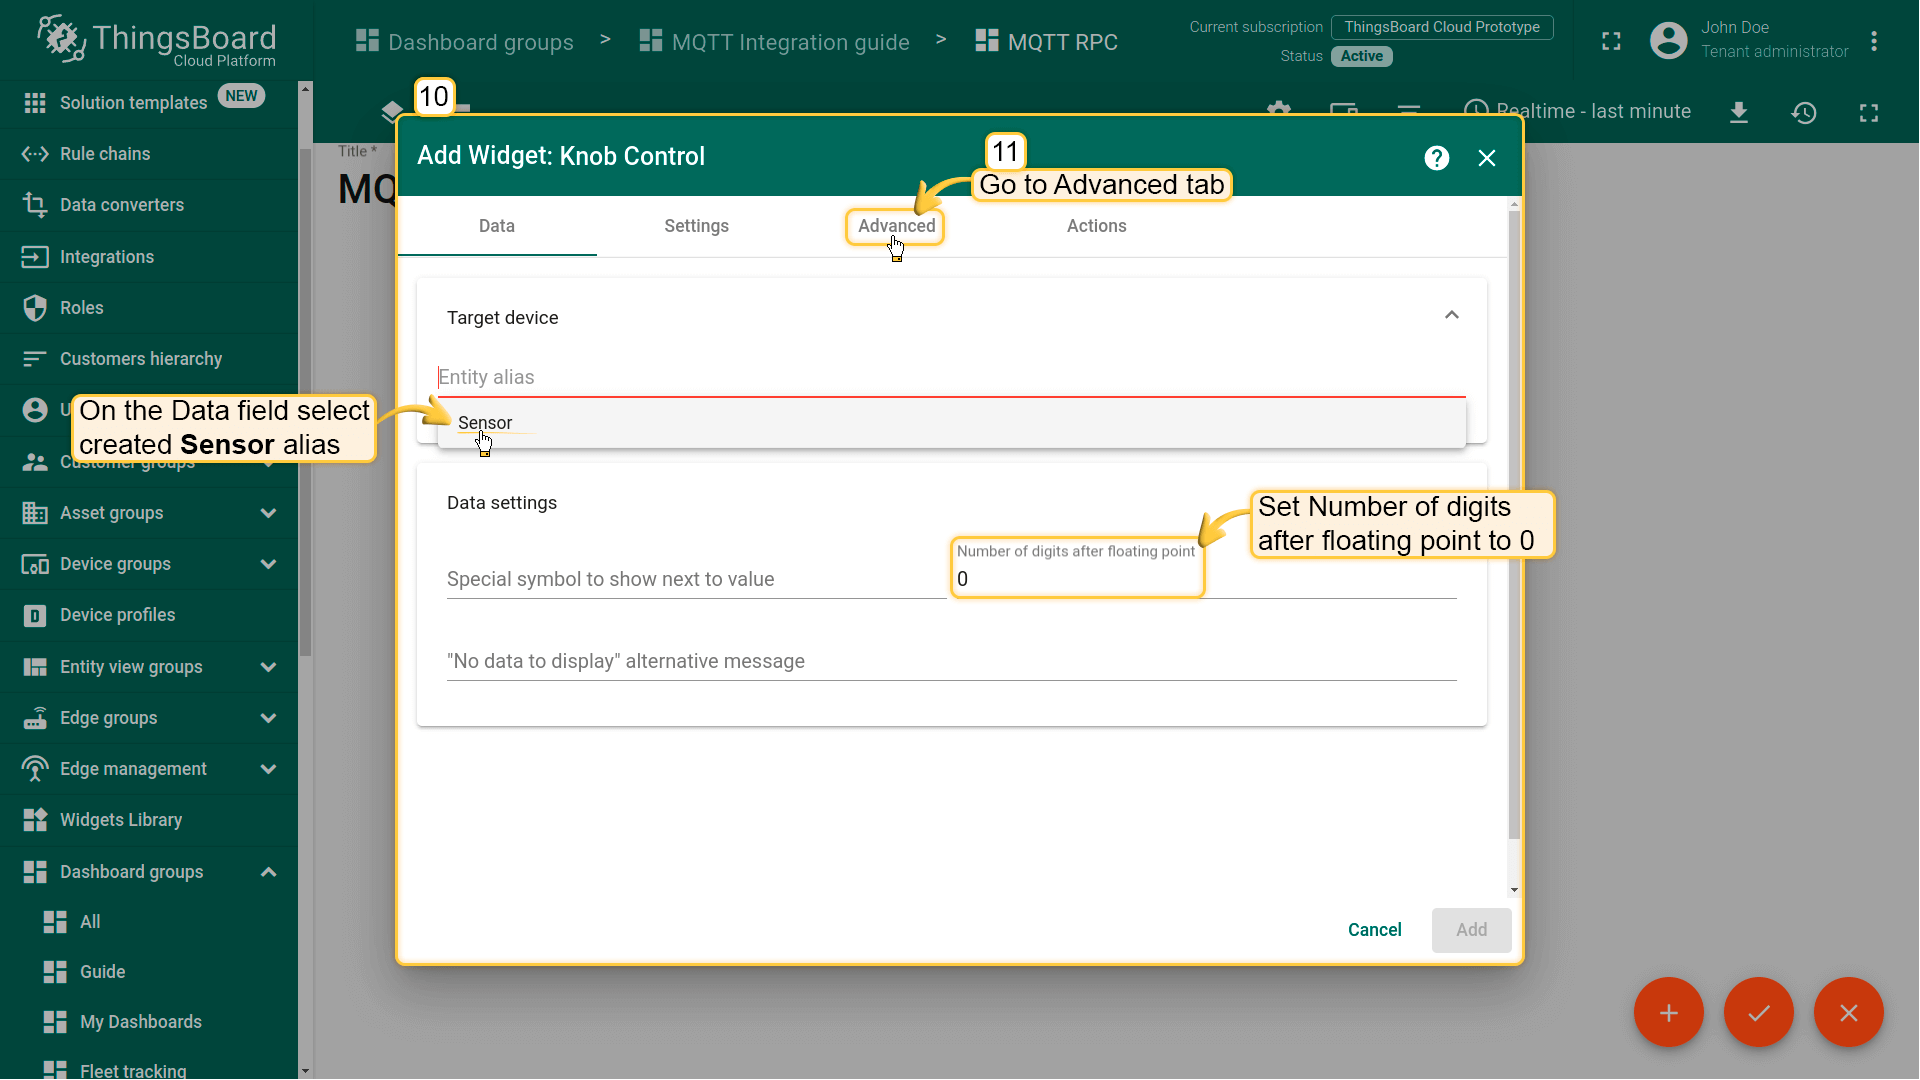
Add an alias by clicking on Entity Aliases icon on the top-right. Name the alias (Sensor, for example), select filter type "Single Entity", type "Device" and choose our SN-001 sensor. Press Add and then Save;
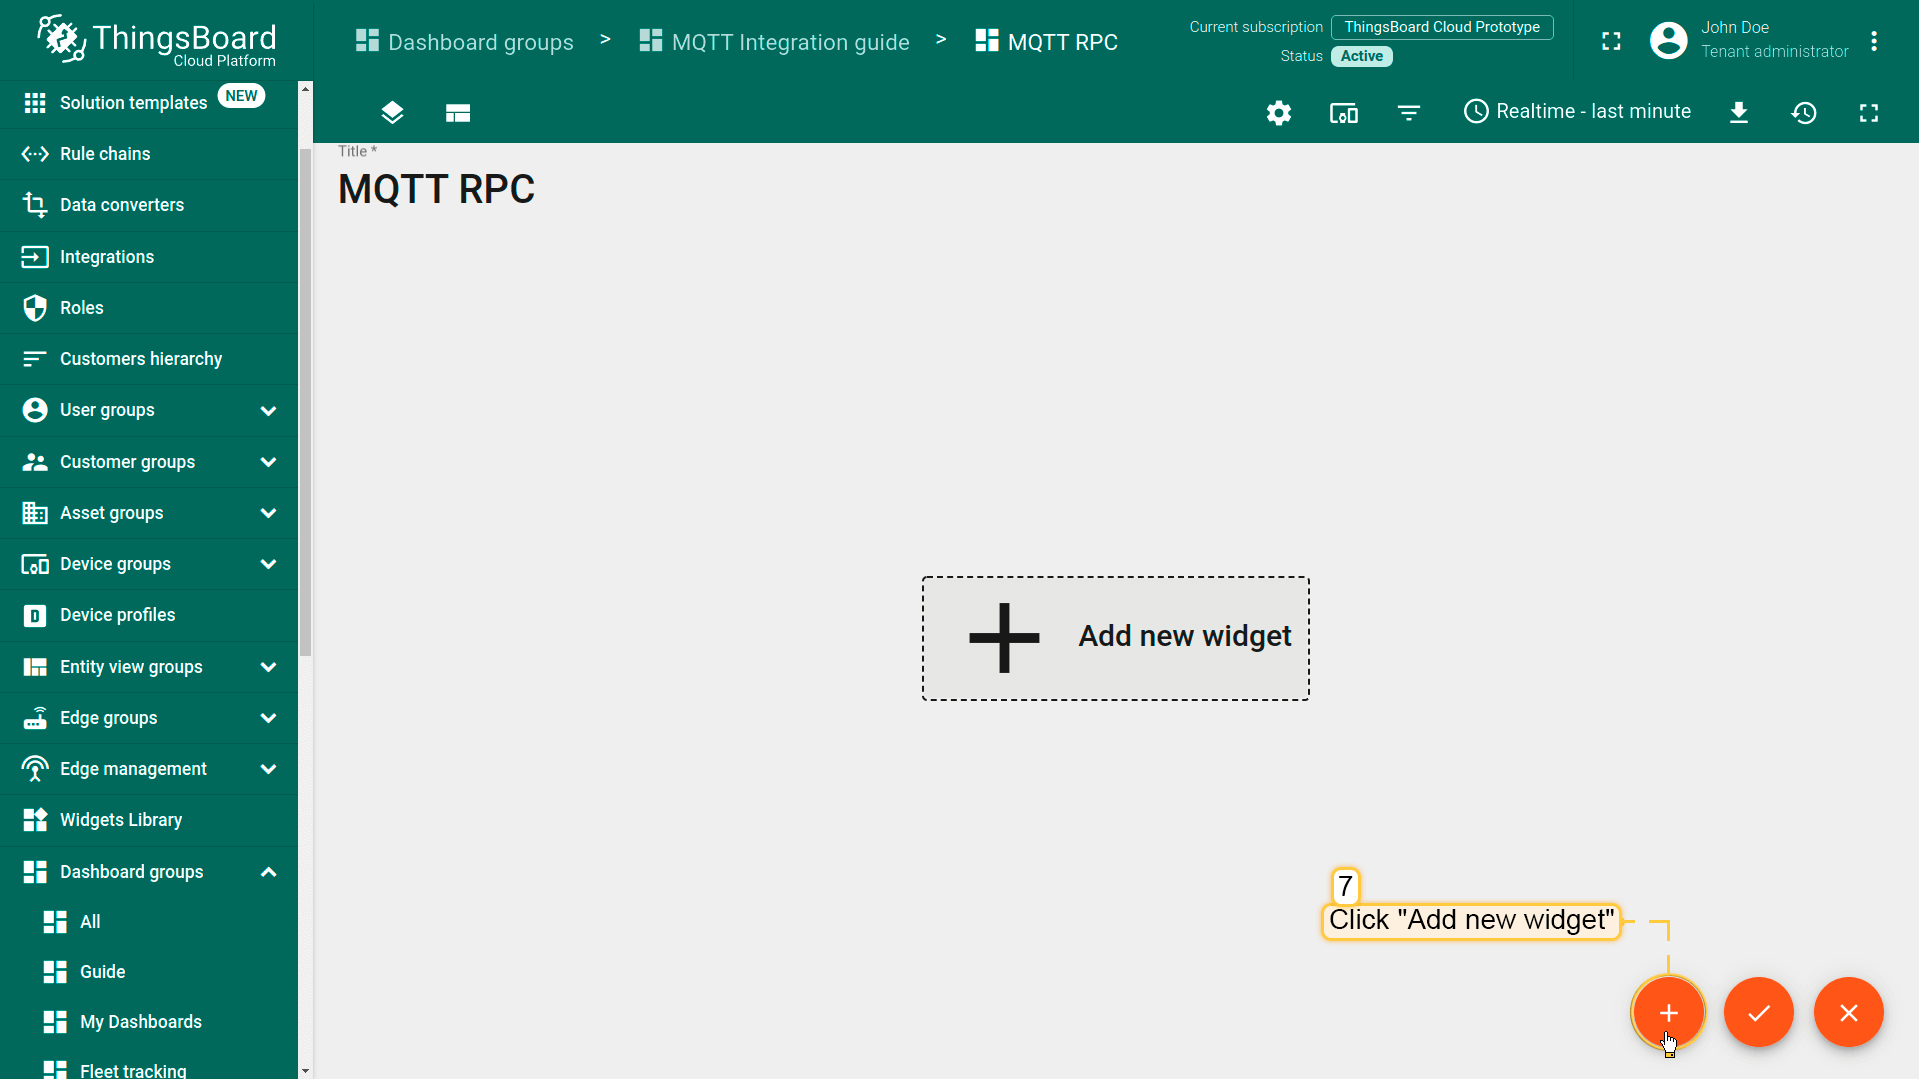
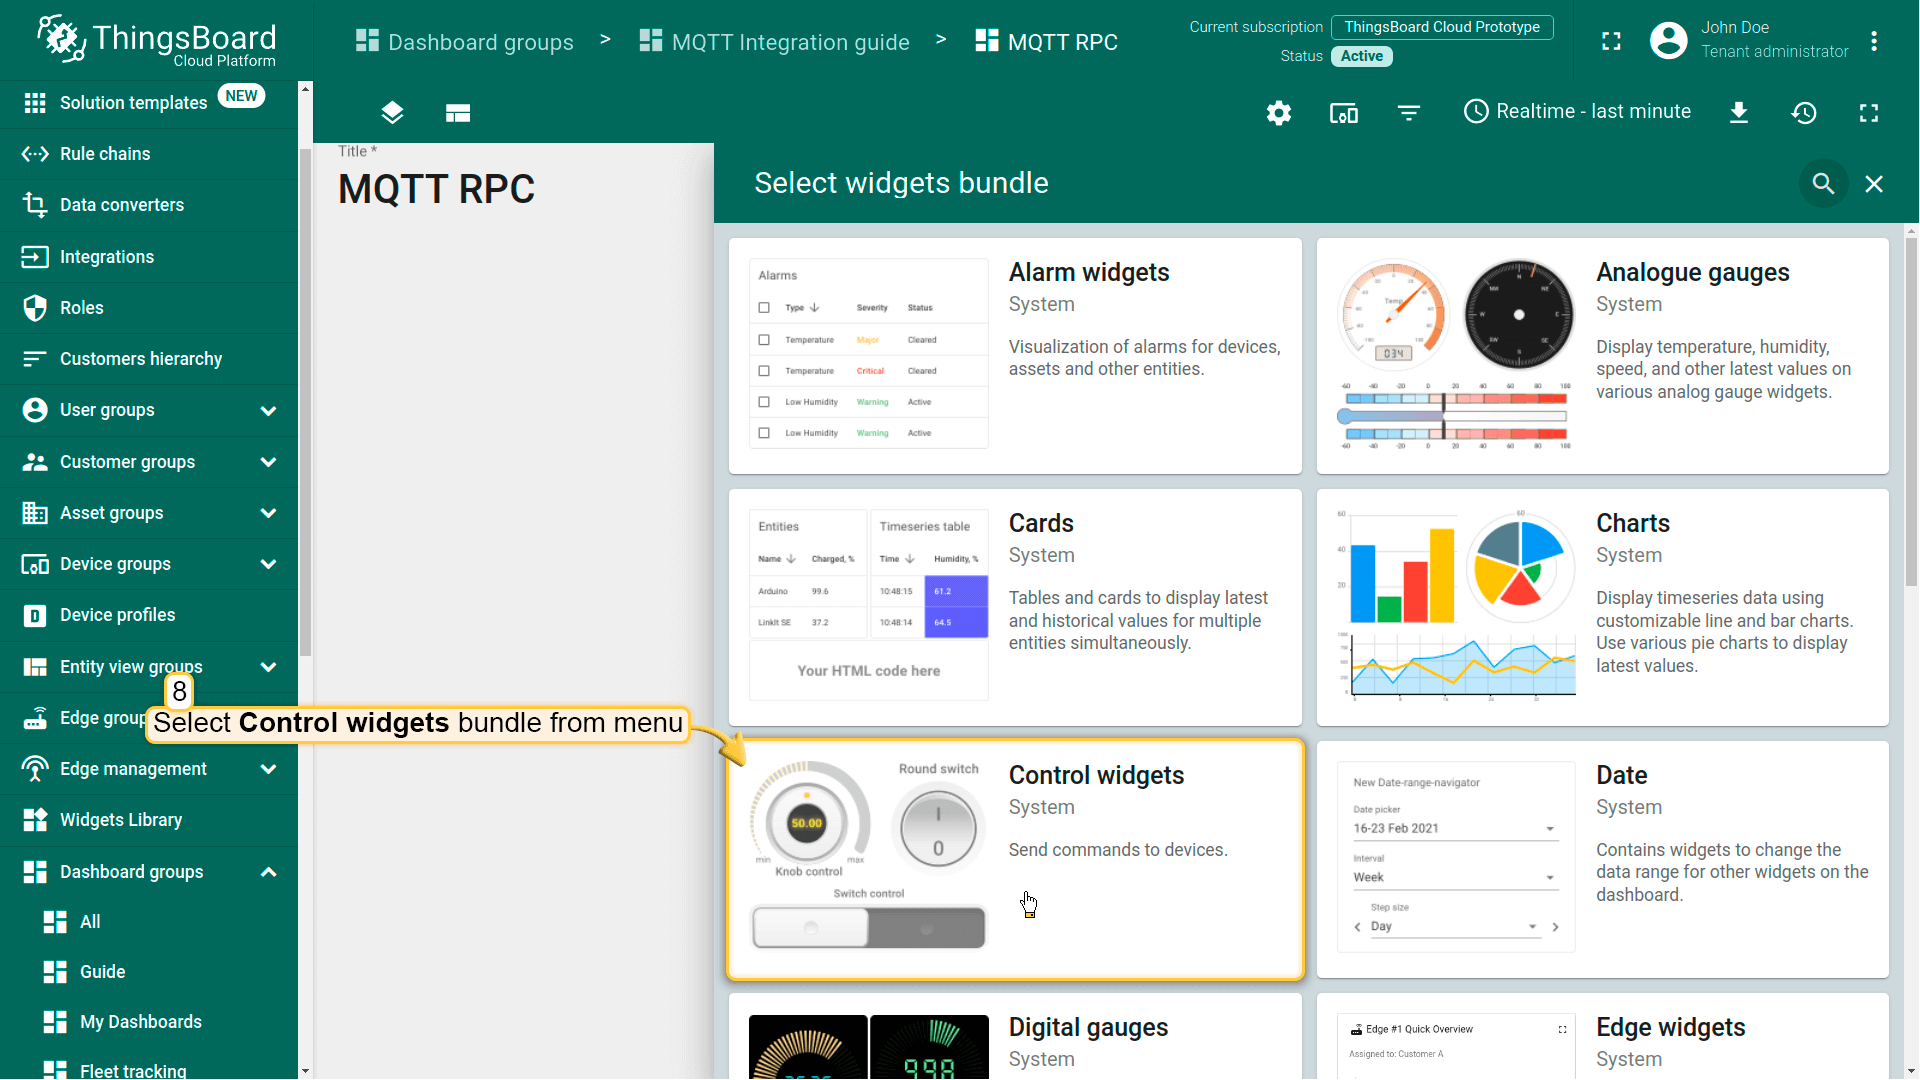
Now Add New Widget;
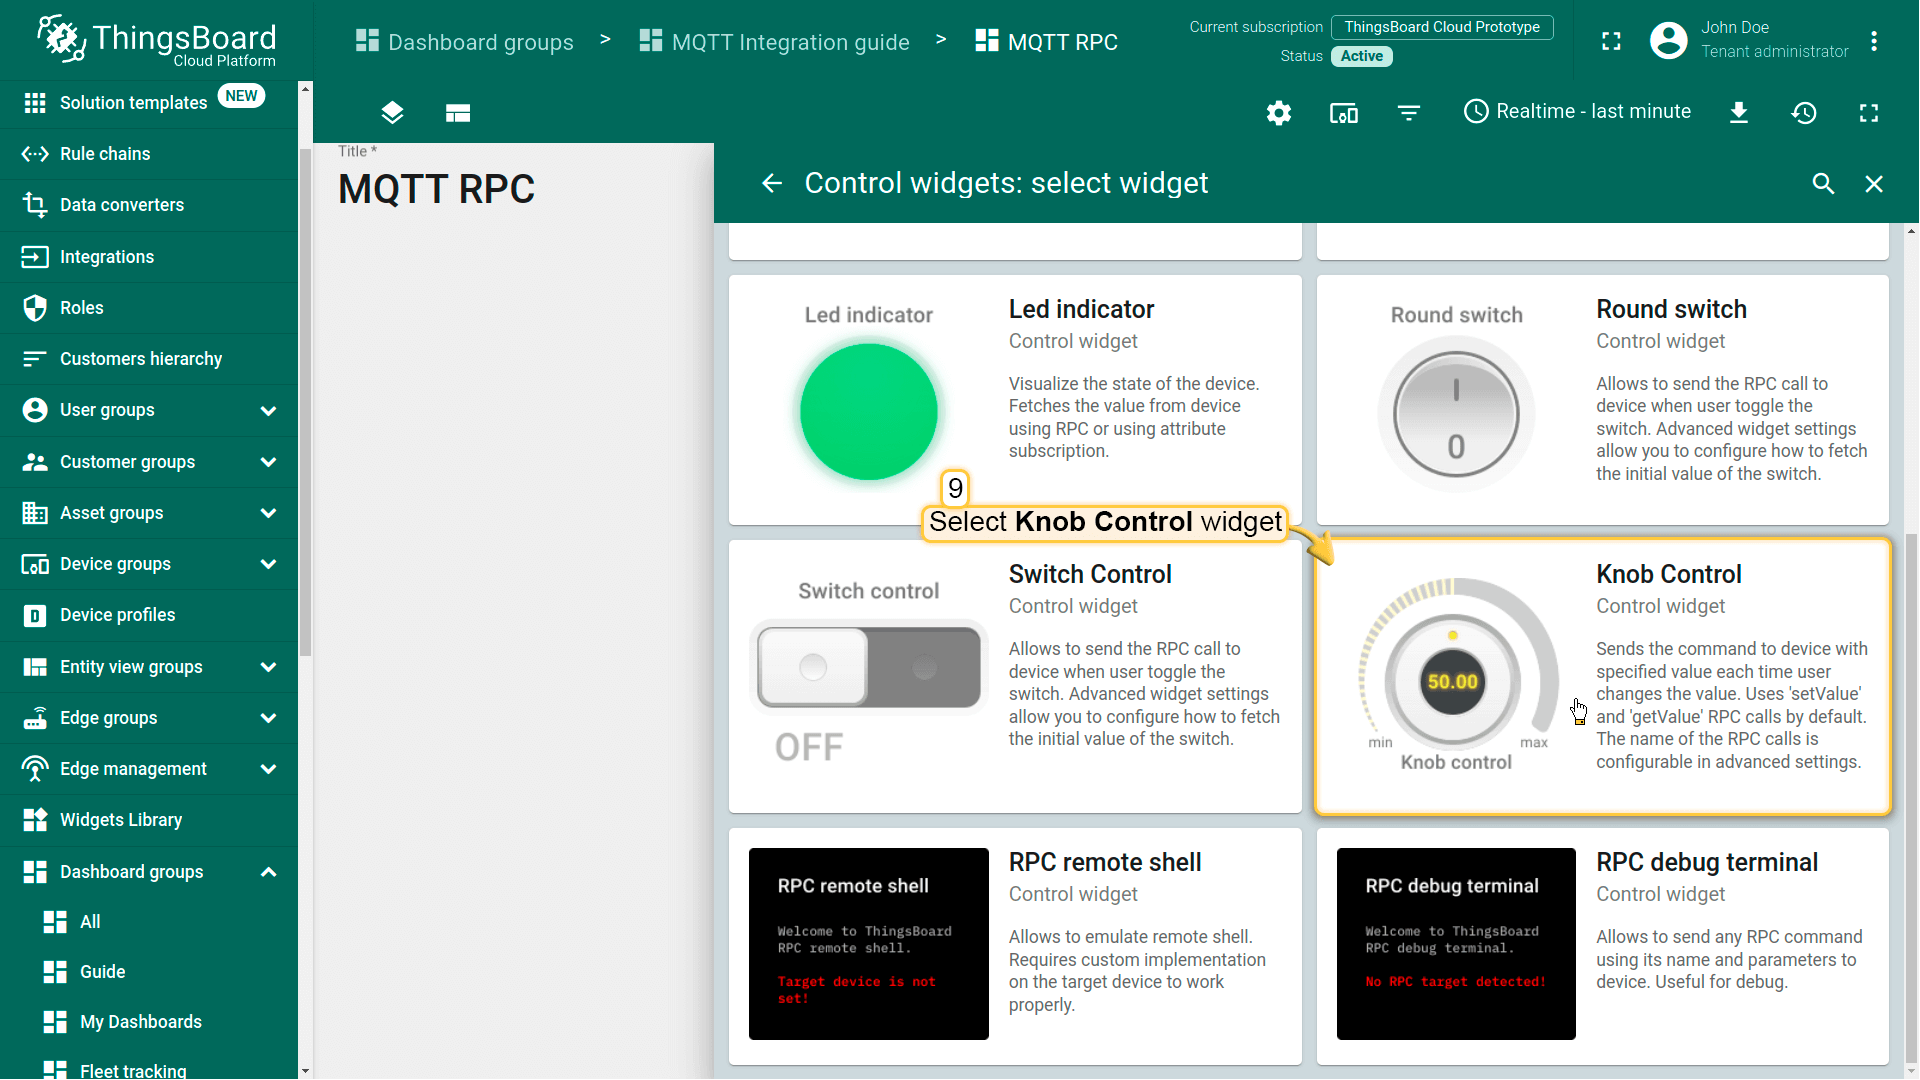
Select Control Widgets from drop down menu;
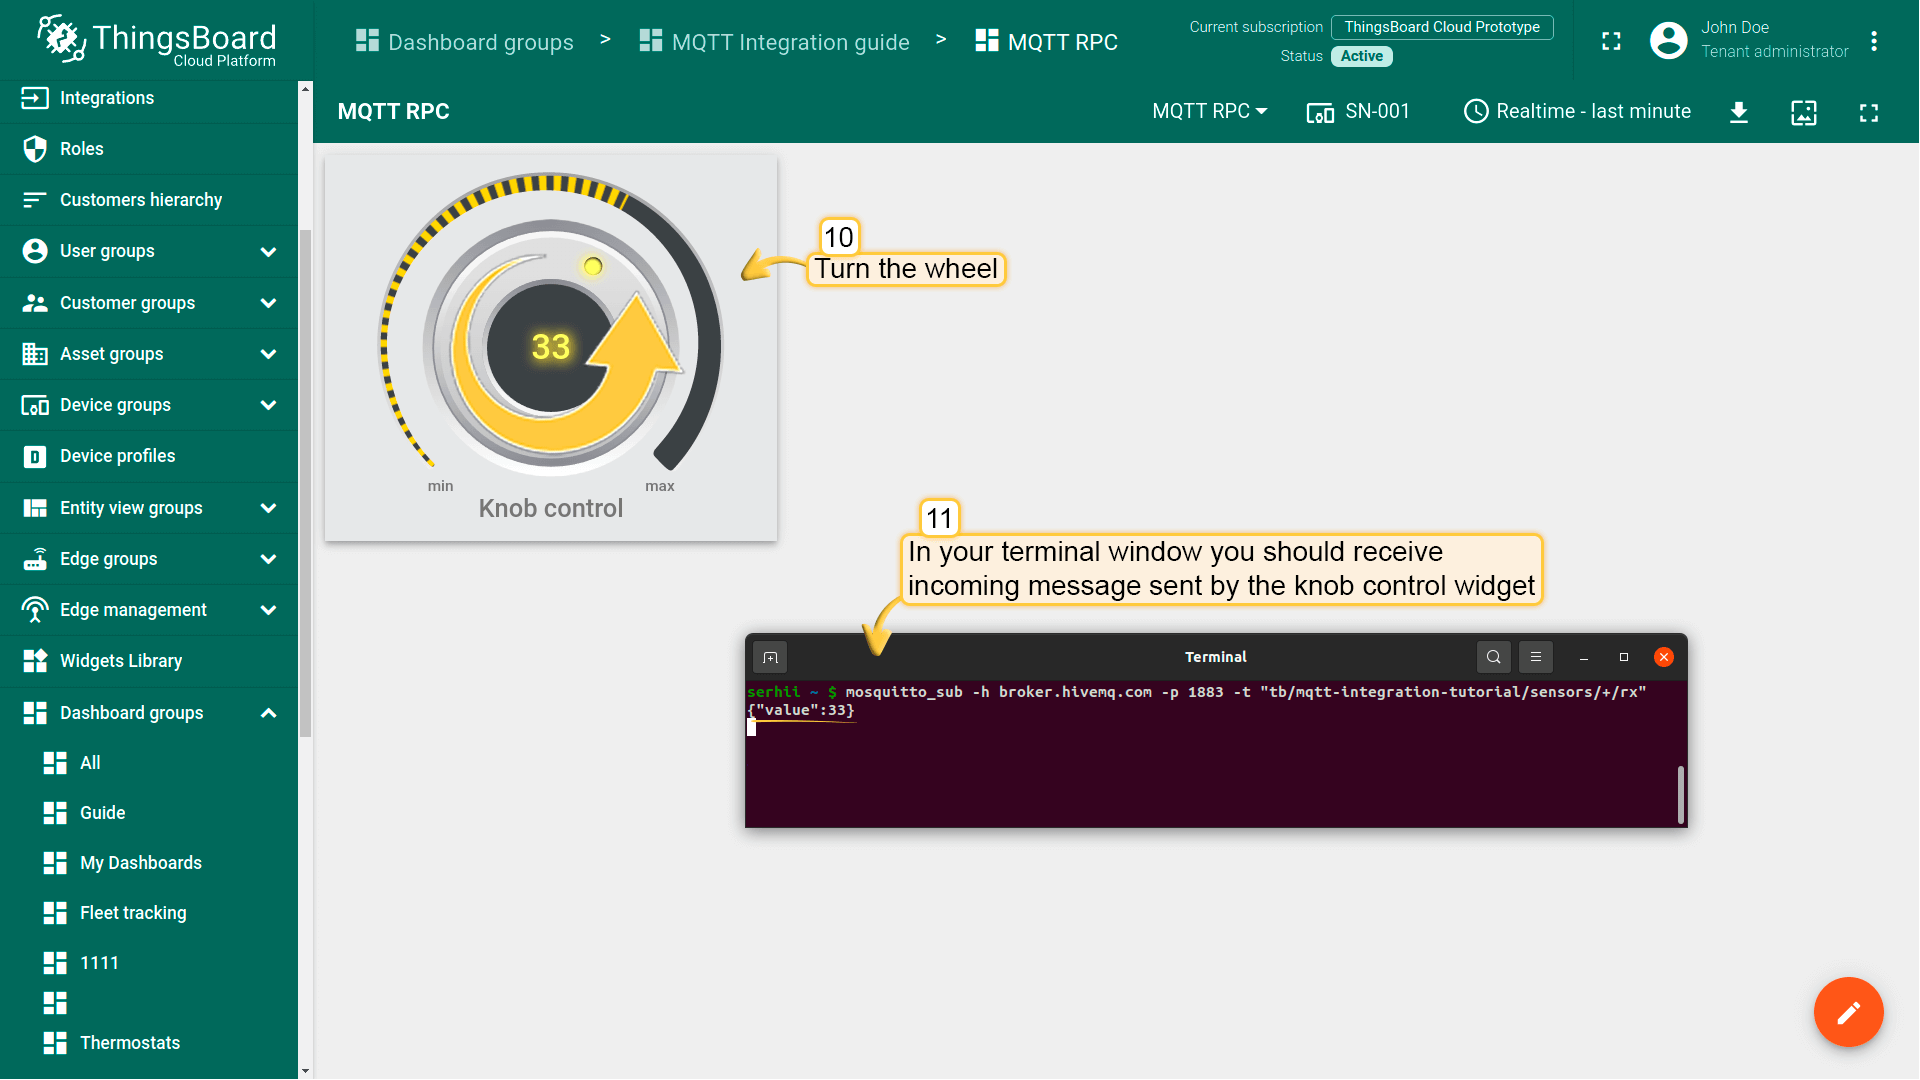
Select Knob Control widget;
On the Data field select created alias (Sensor). Set Number of digits after floating point to 0;
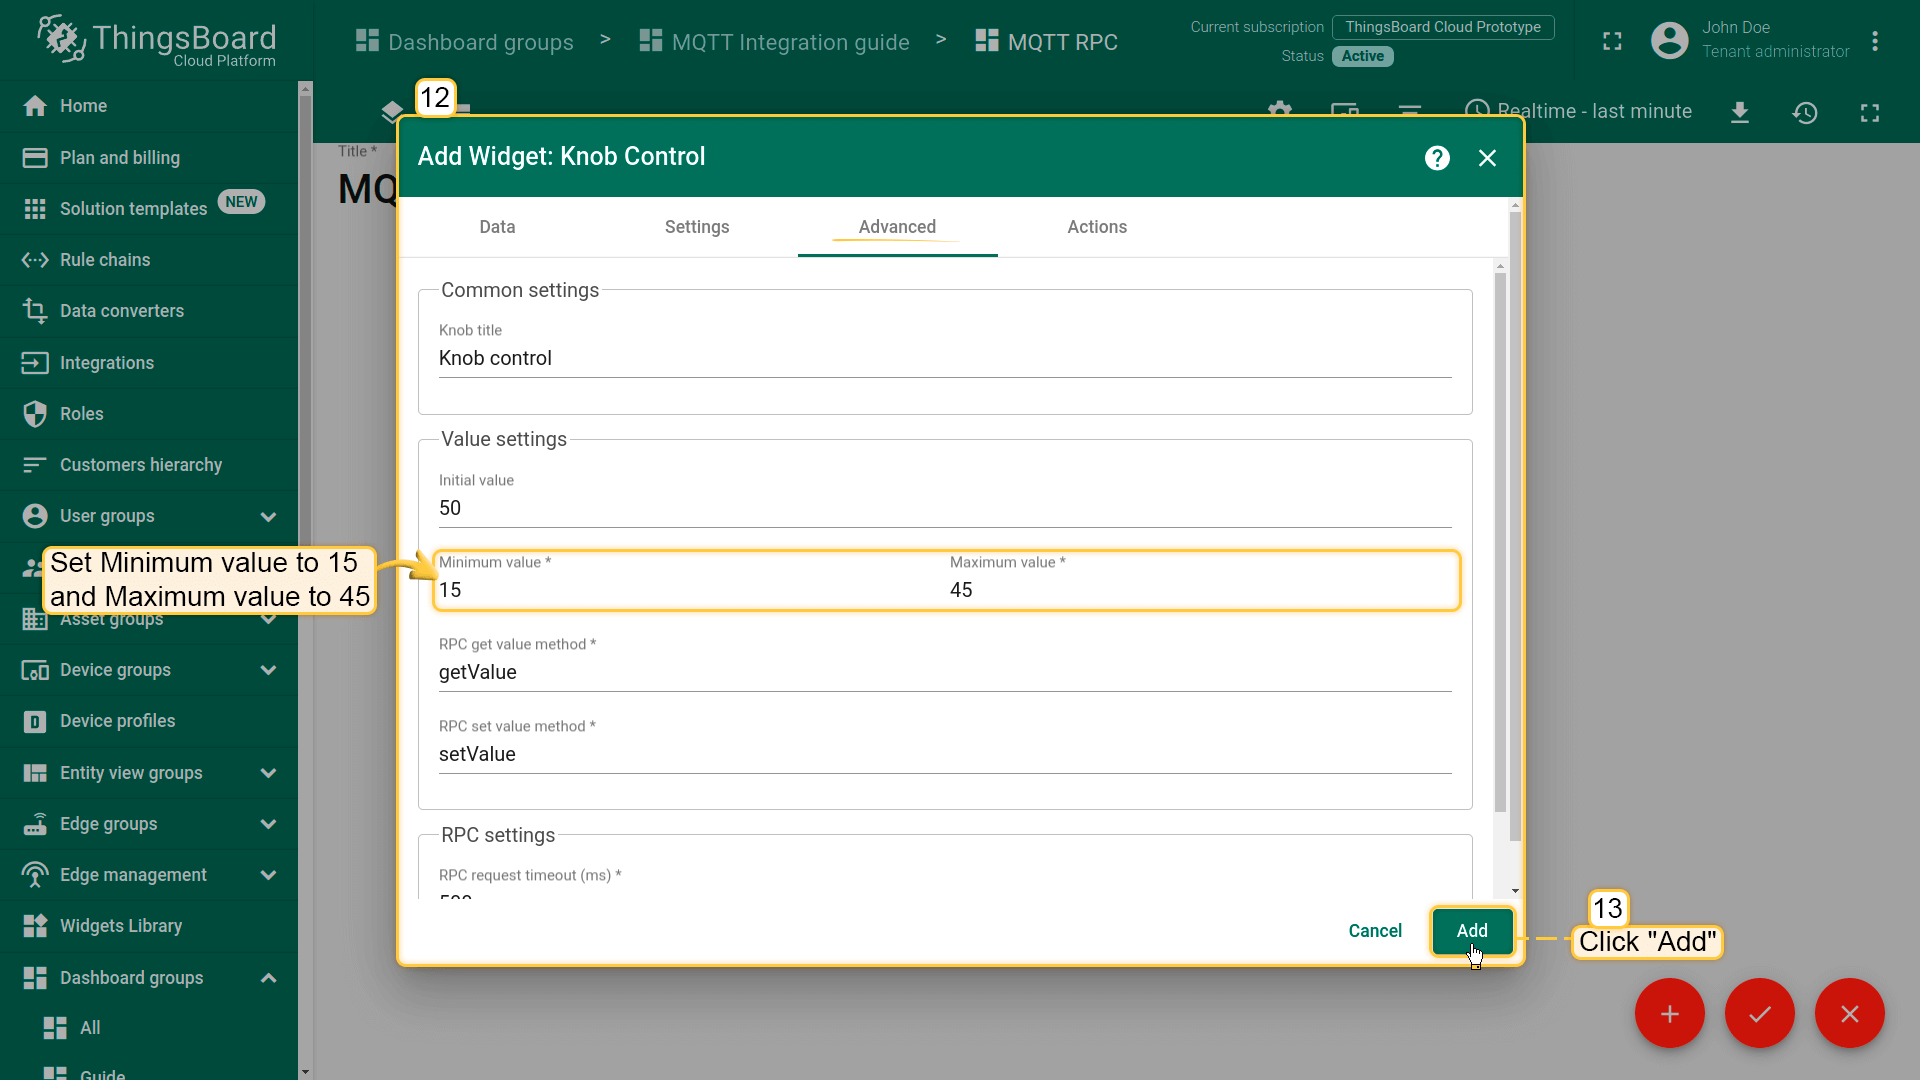
Go to Advanced tab and set Minimum value to 15 and Maximum value to 45. Leave the rest by default. Click Add to create widget;
Save the changes to the dashboard.
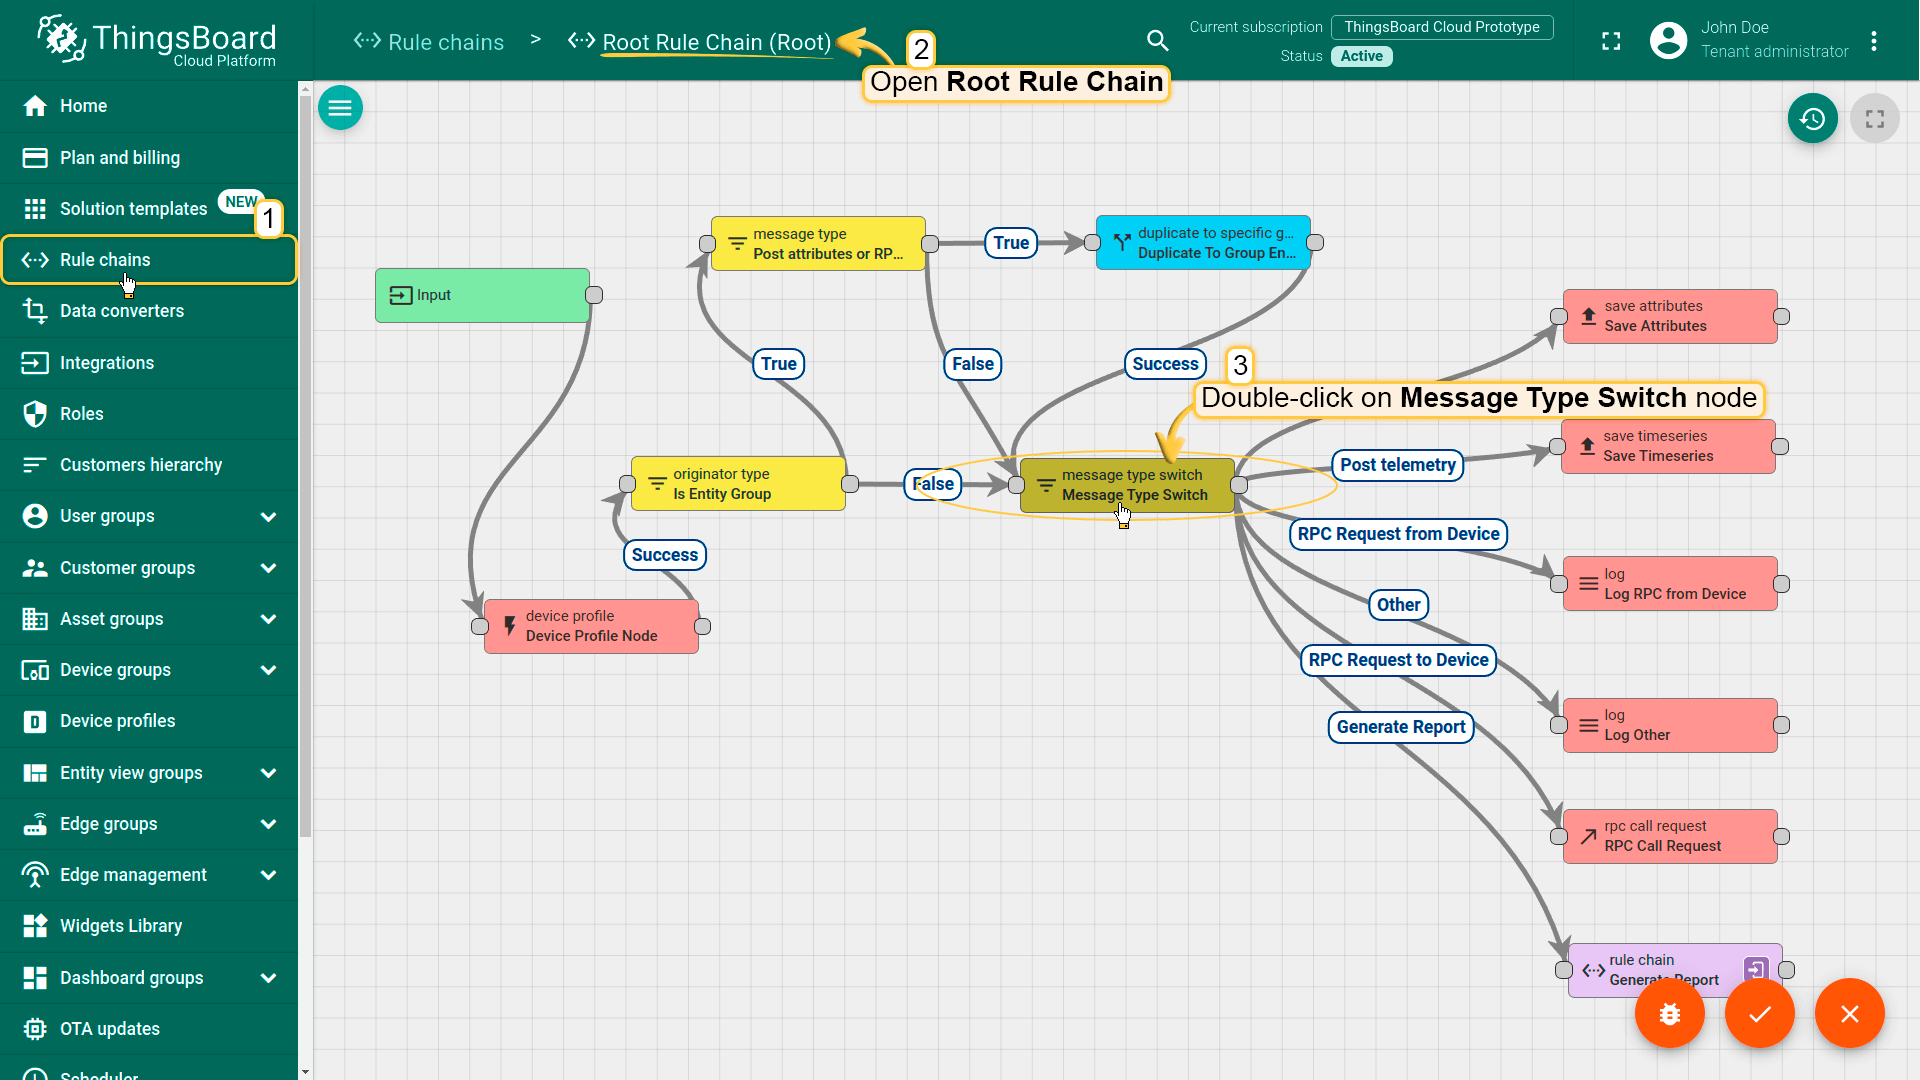
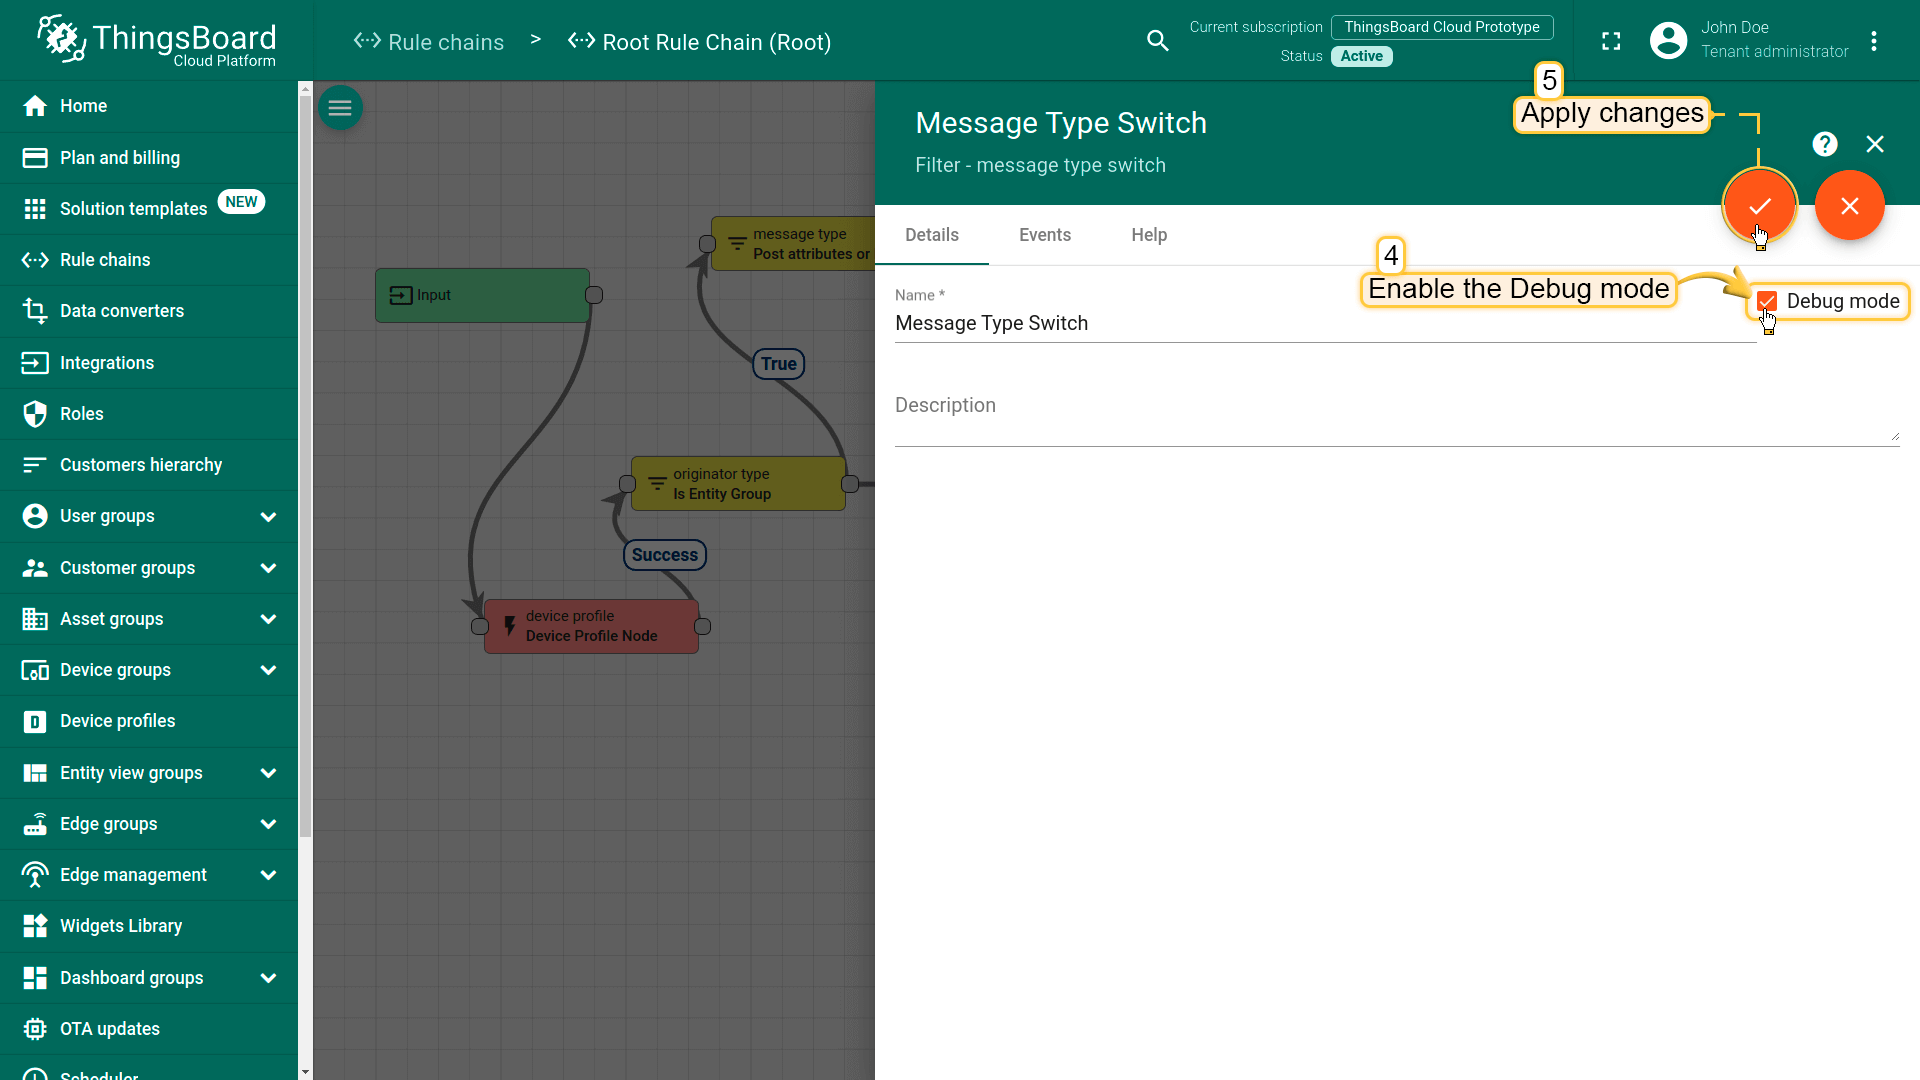
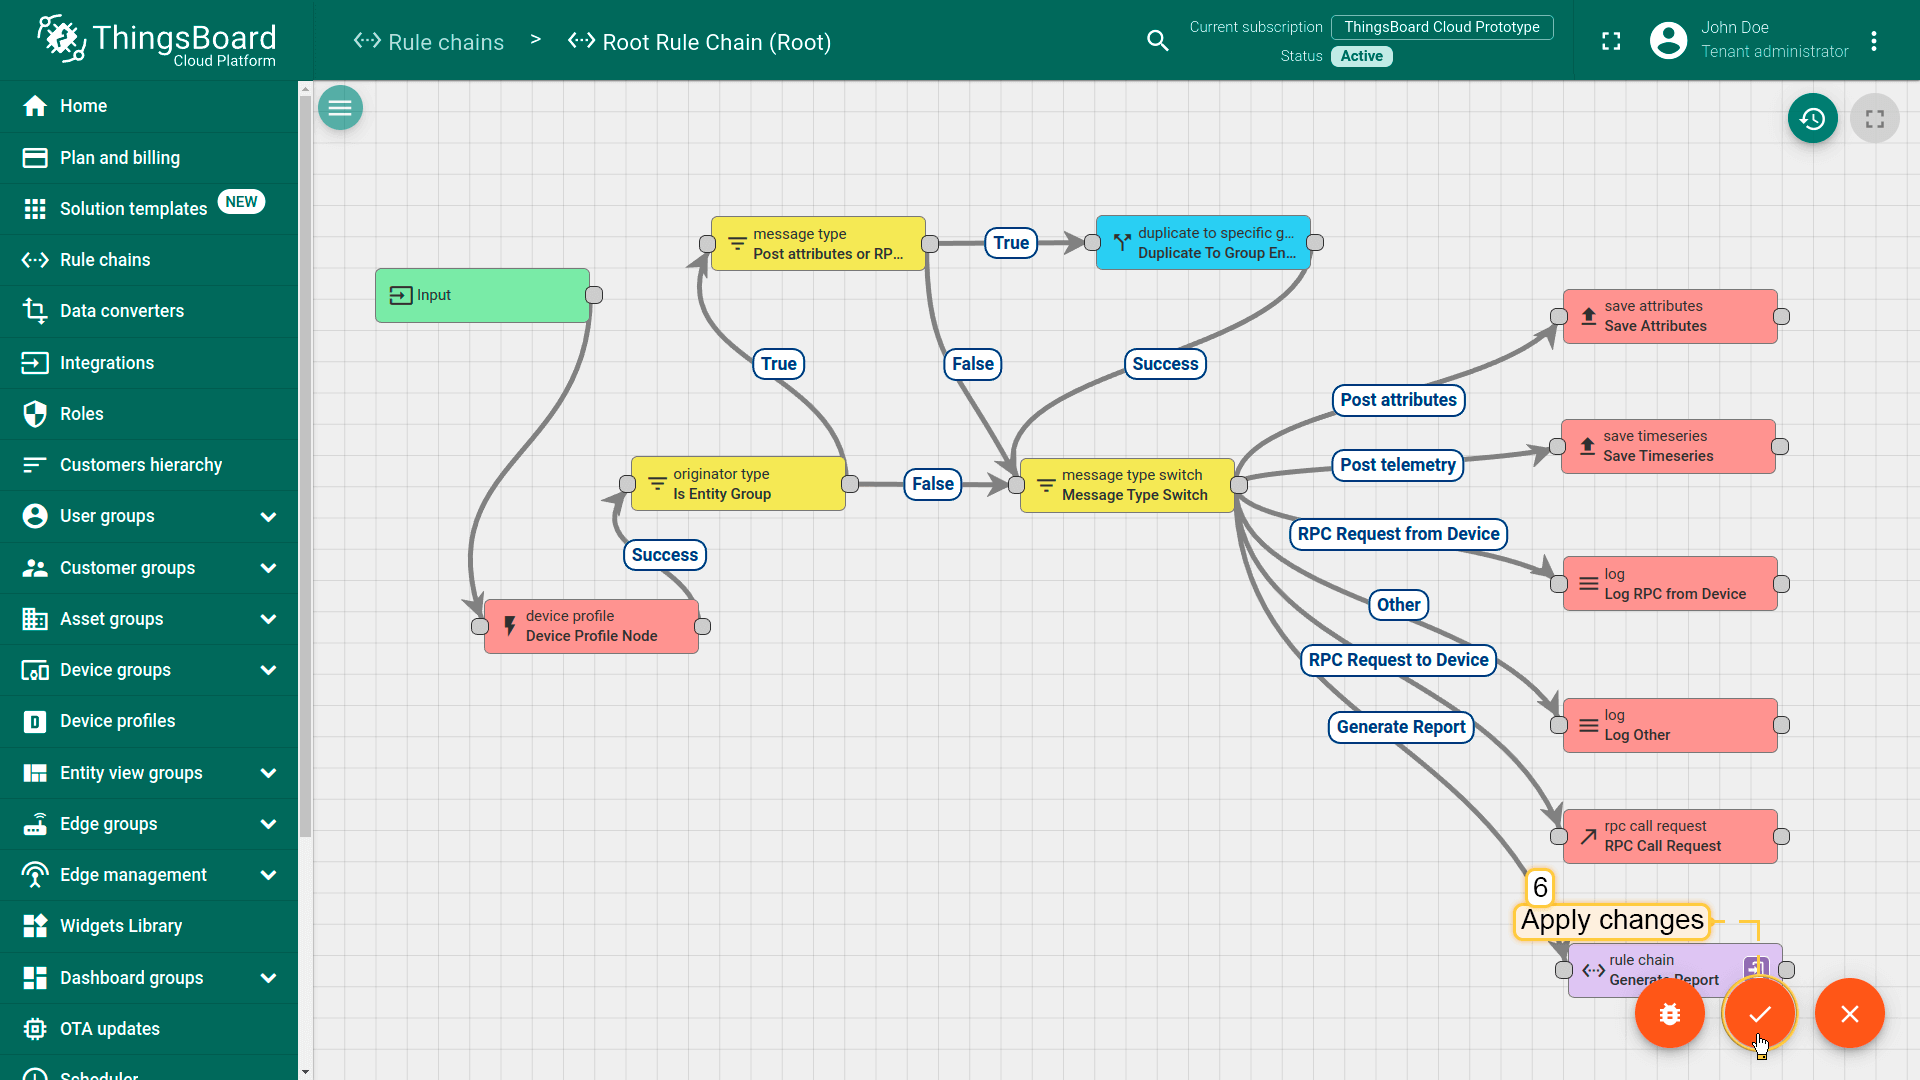
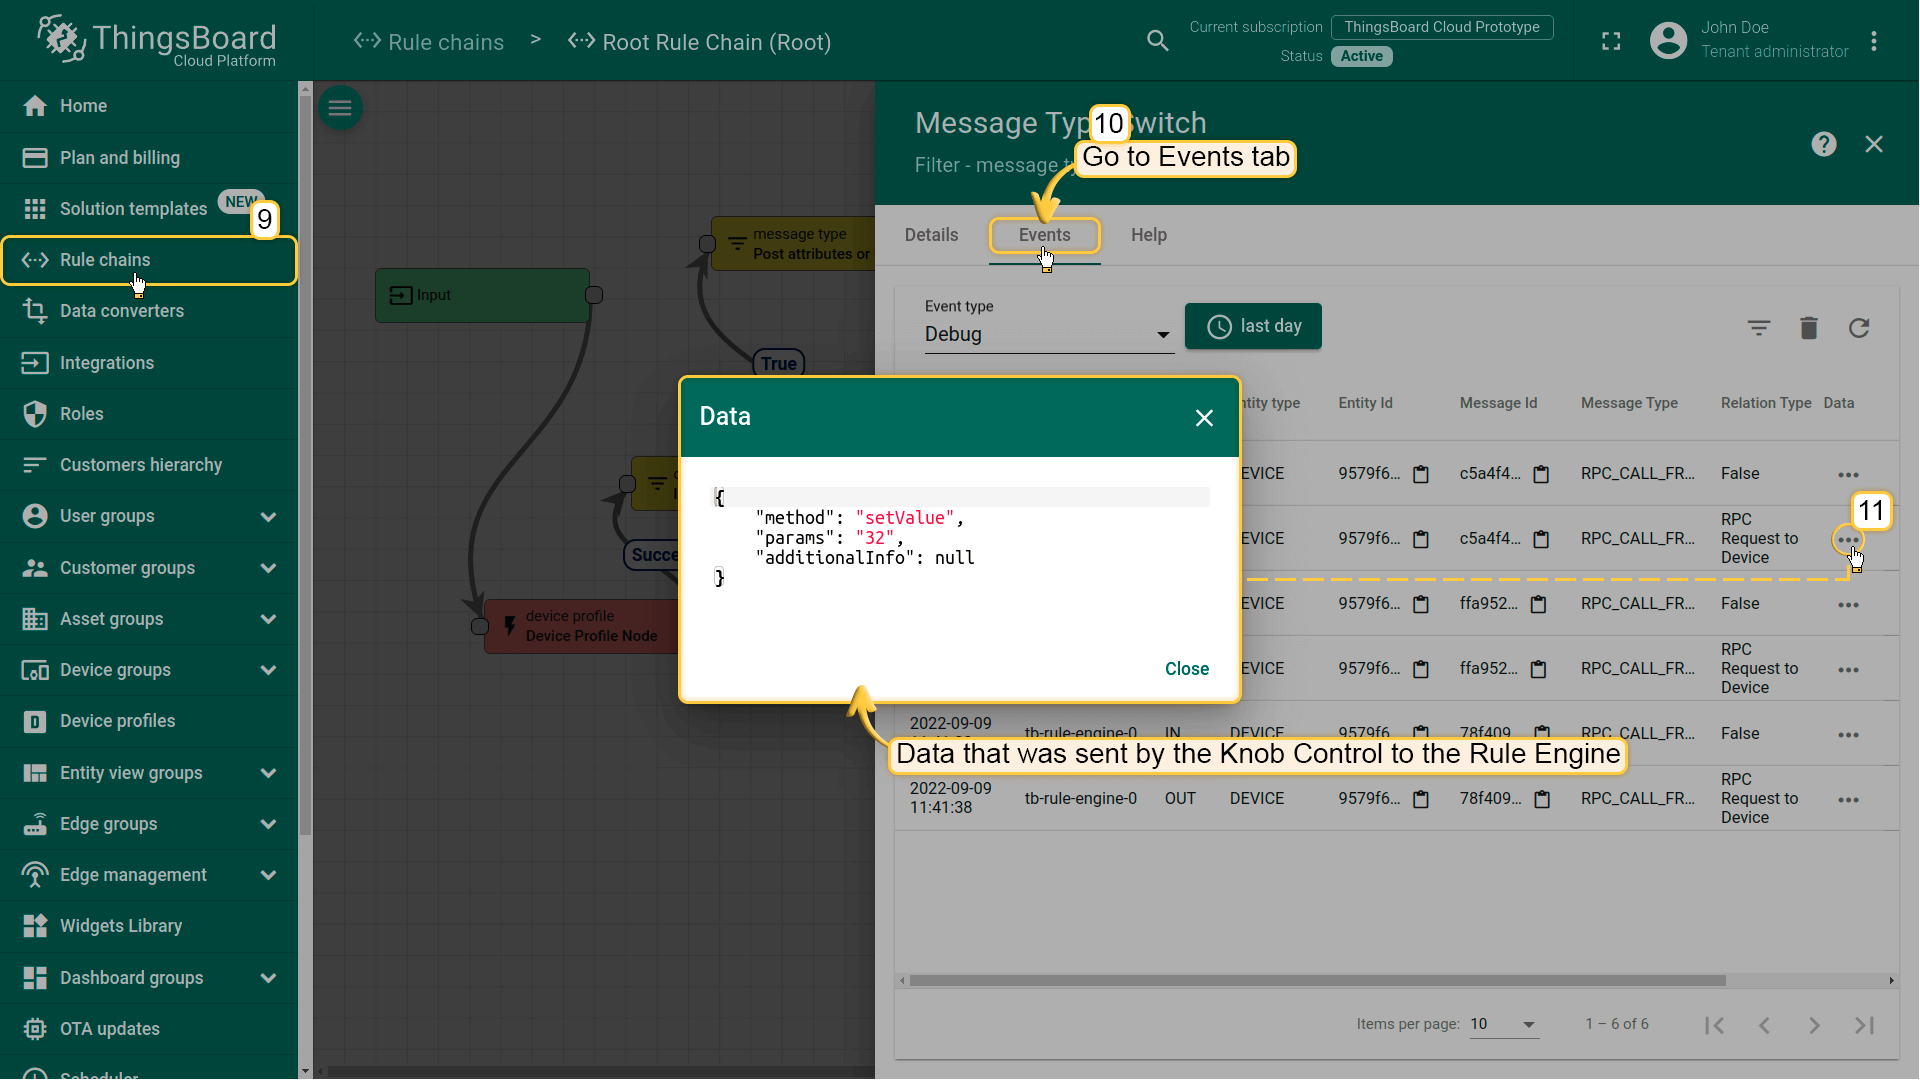
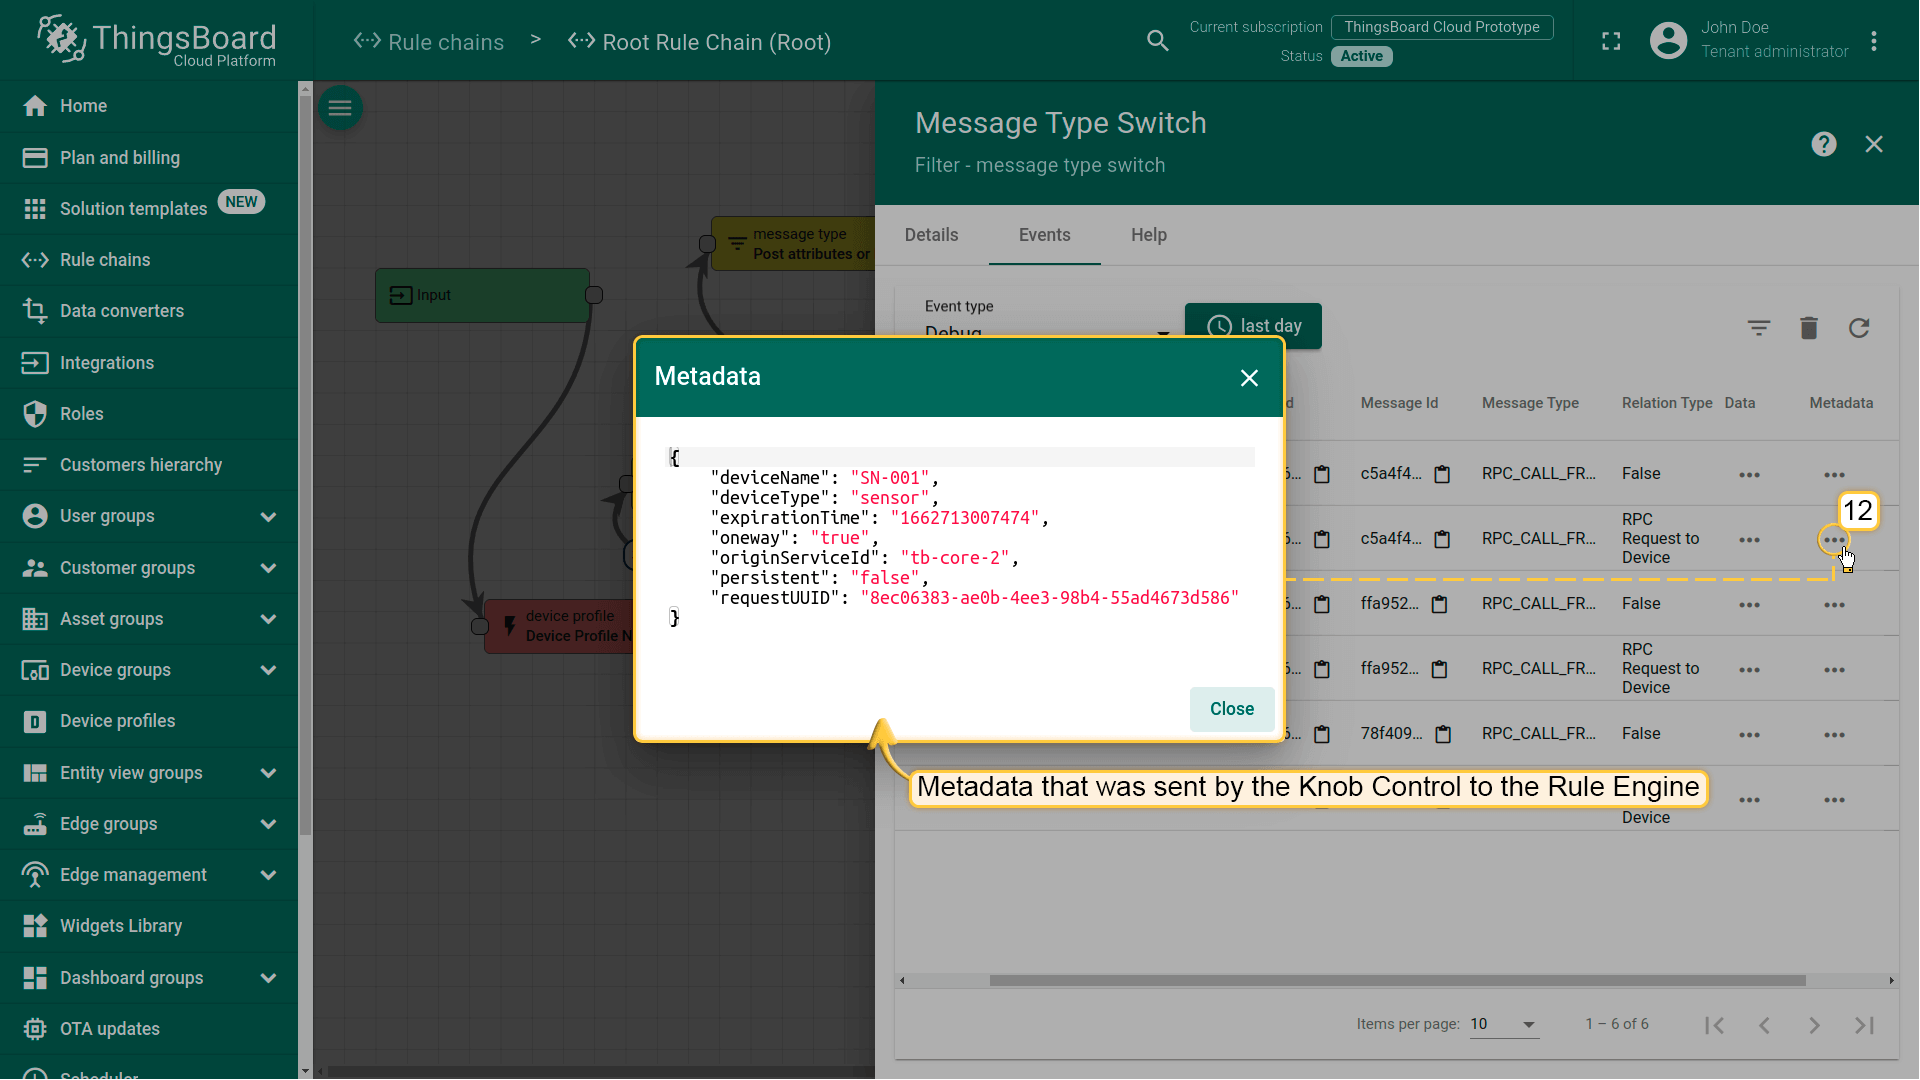
进入Rule Chains页面,打开Root Rule Chain。双击message type switch节点并启用其Debug mode。
返回仪表板,旋转旋钮几次。
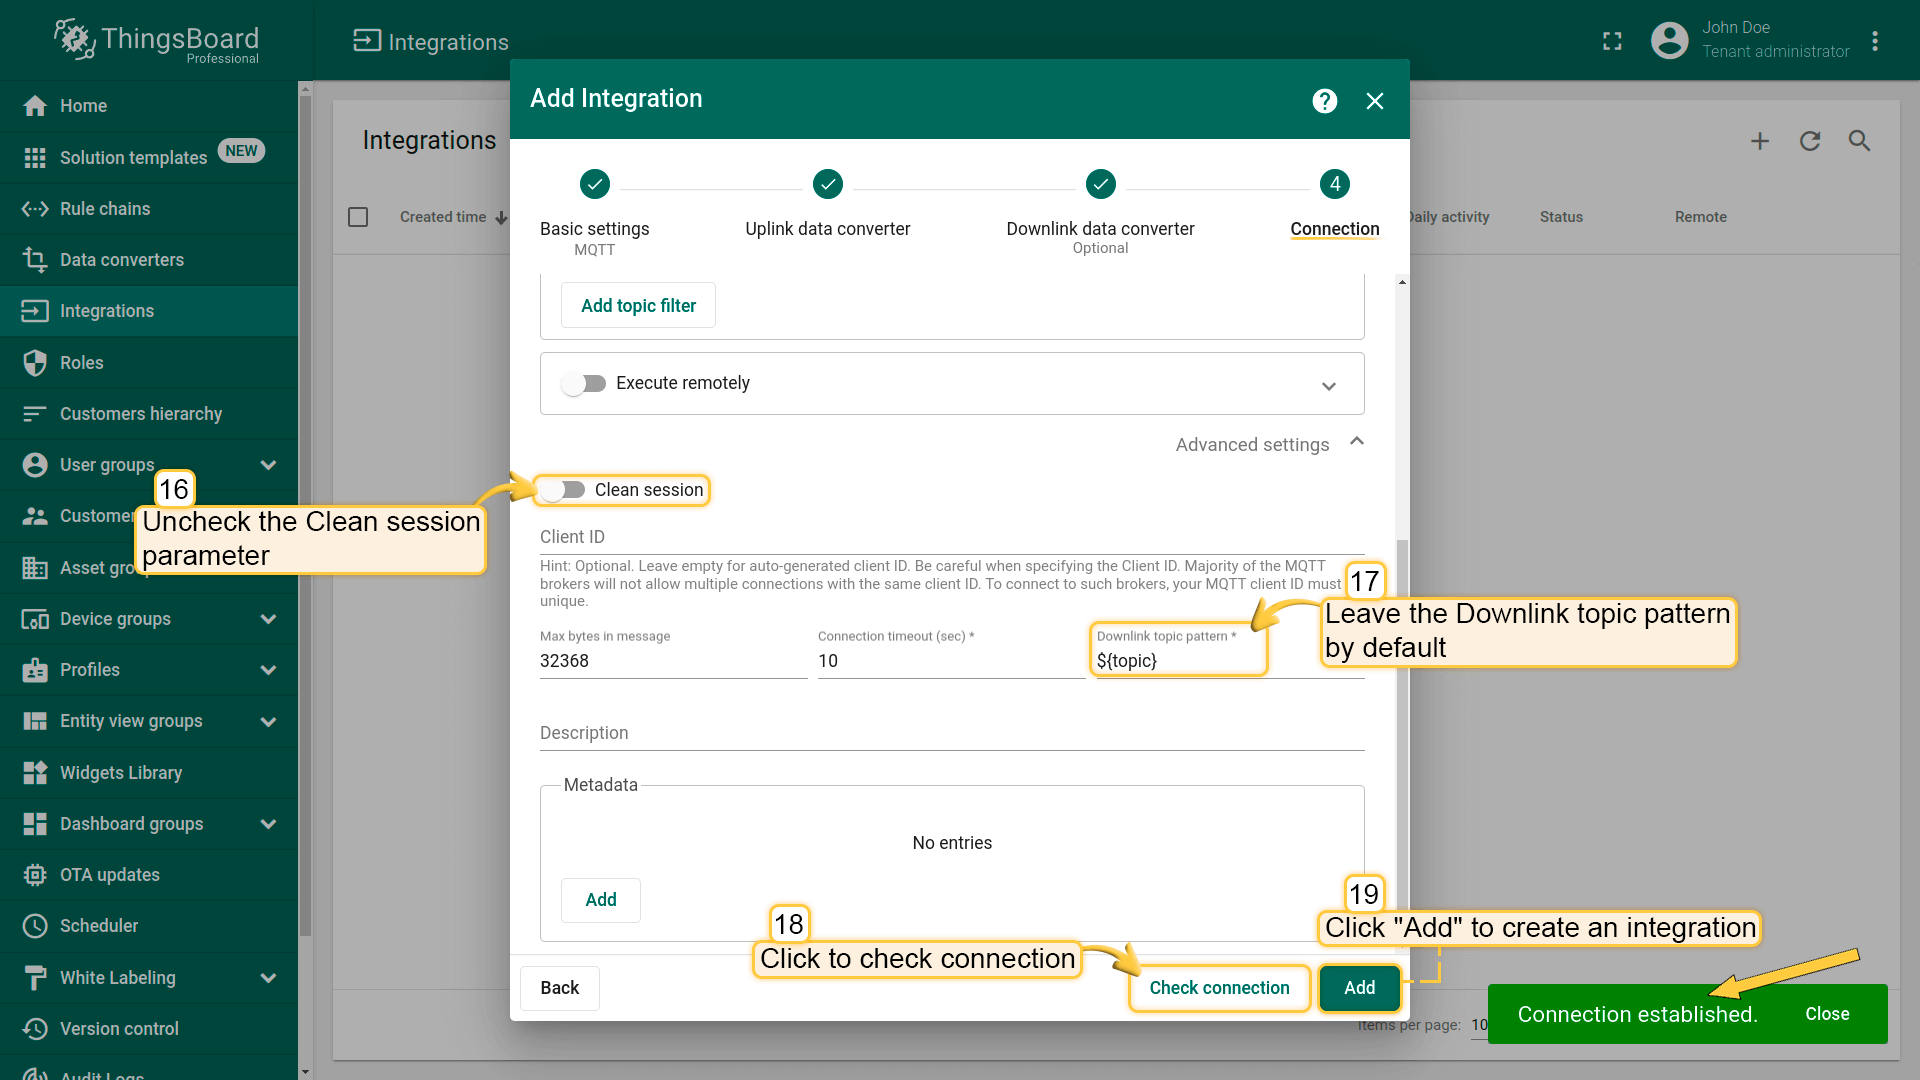
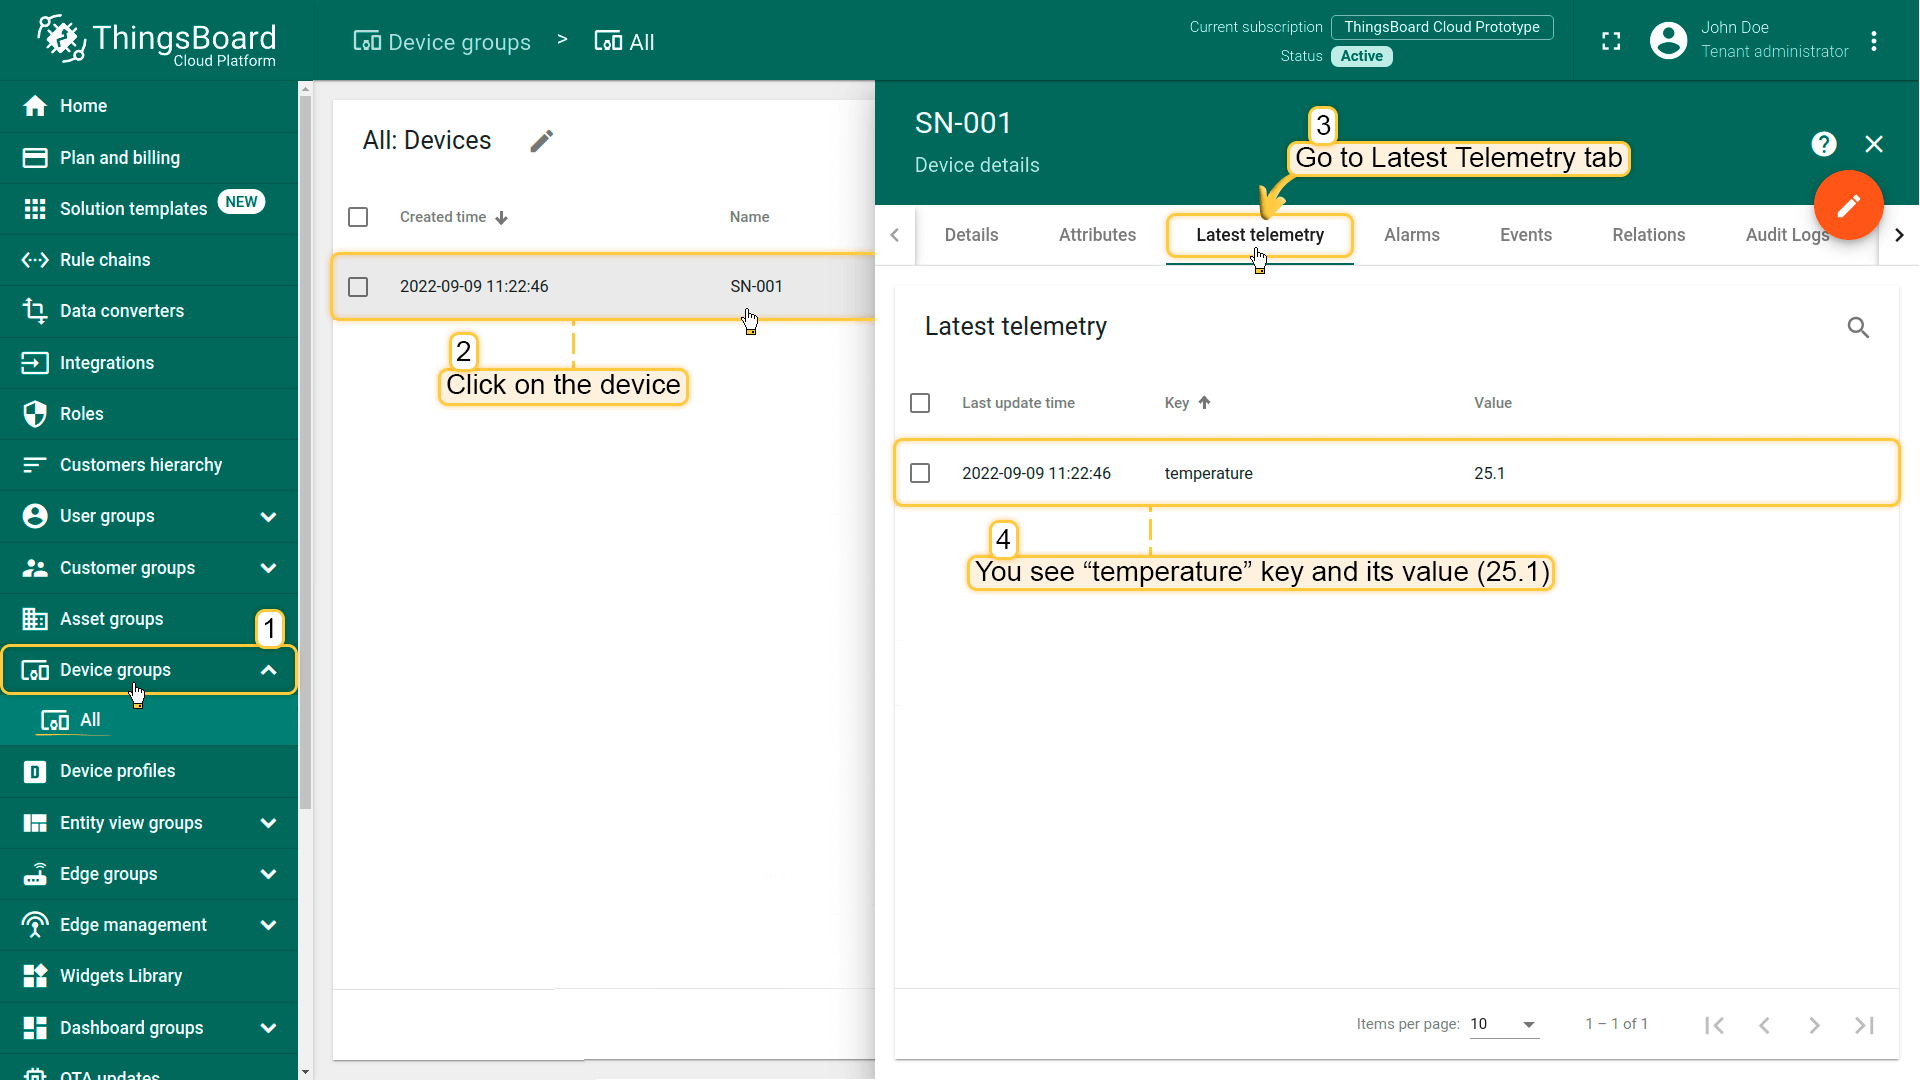
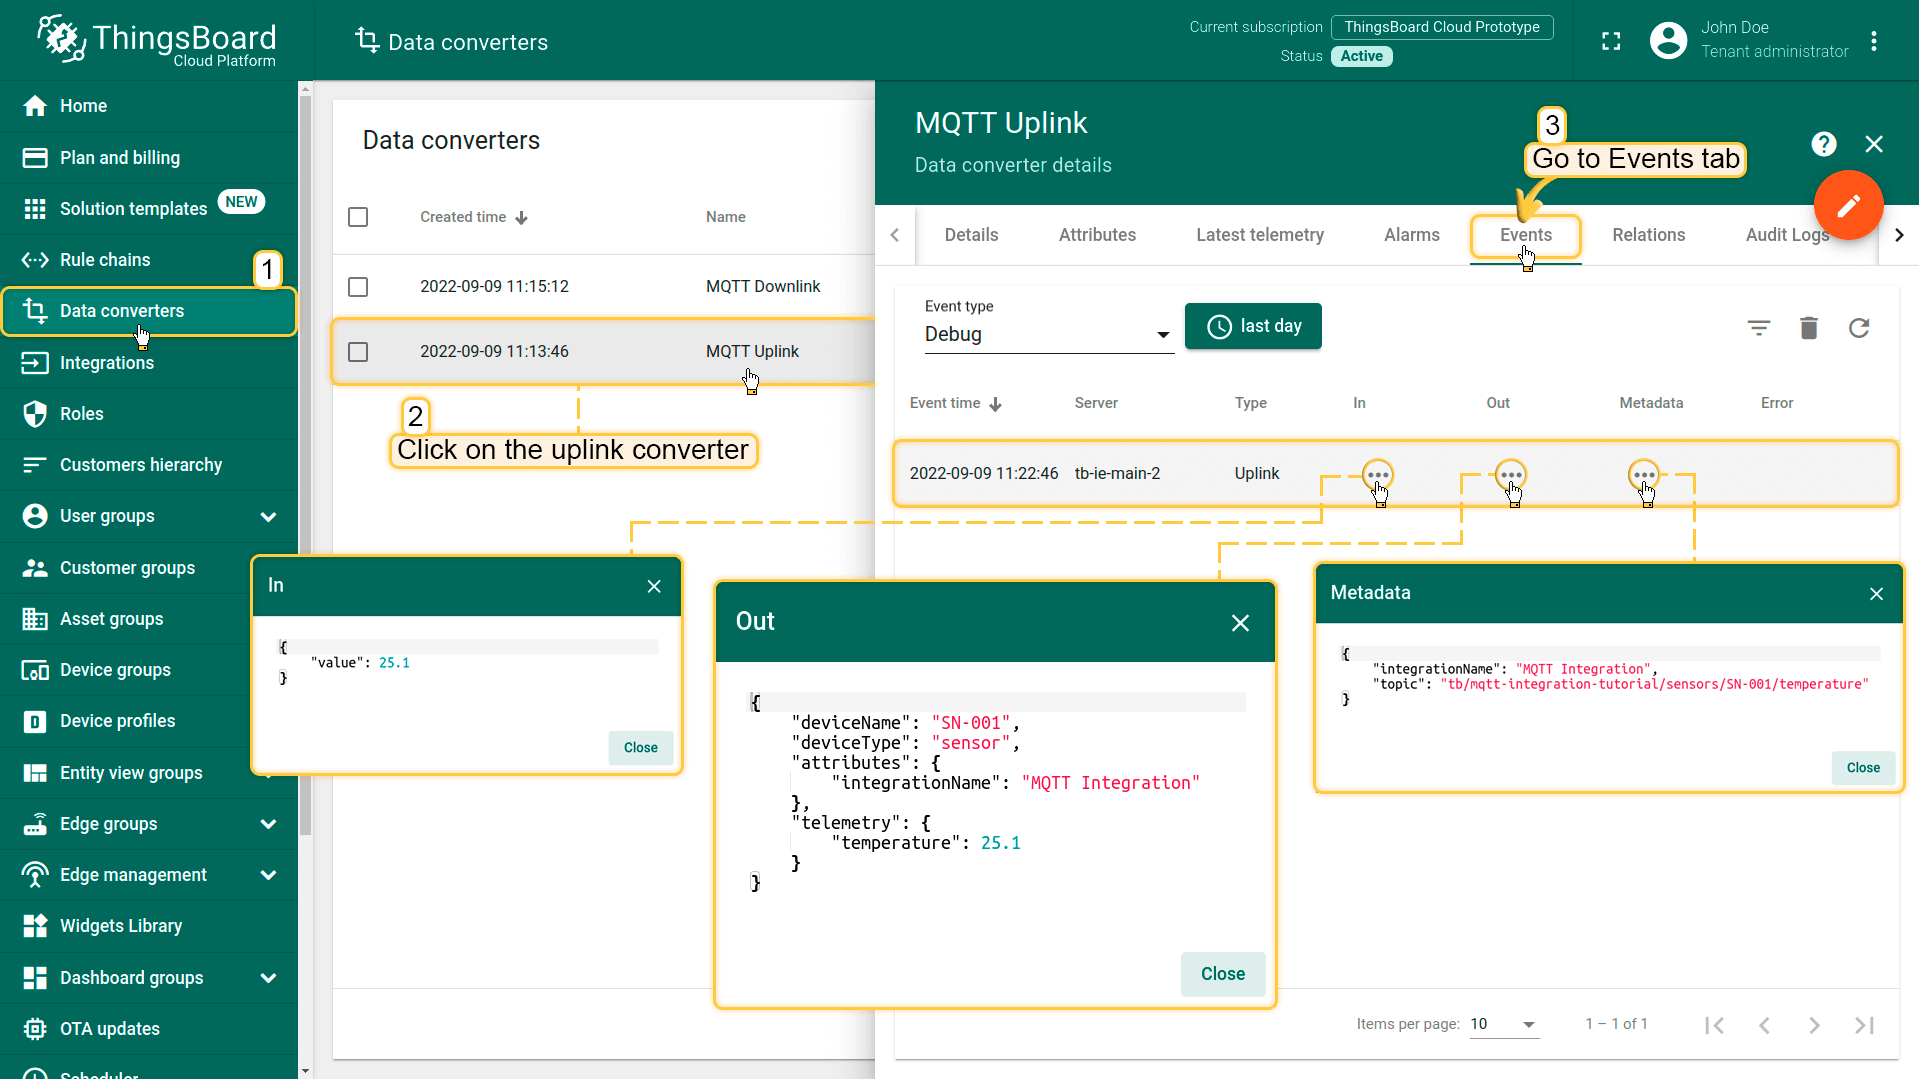
message type switch节点的Events标签中应能看到消息类型为RPC_CALL_FROM_SERVER_TO_DEVICE、关系类型为RPC Request to Device的入站消息。可查看Knob Control发送给规则引擎的data和metadata。
要使传感器执行该命令,需将RPC Request to Device类型消息转发到下行数据转换器。
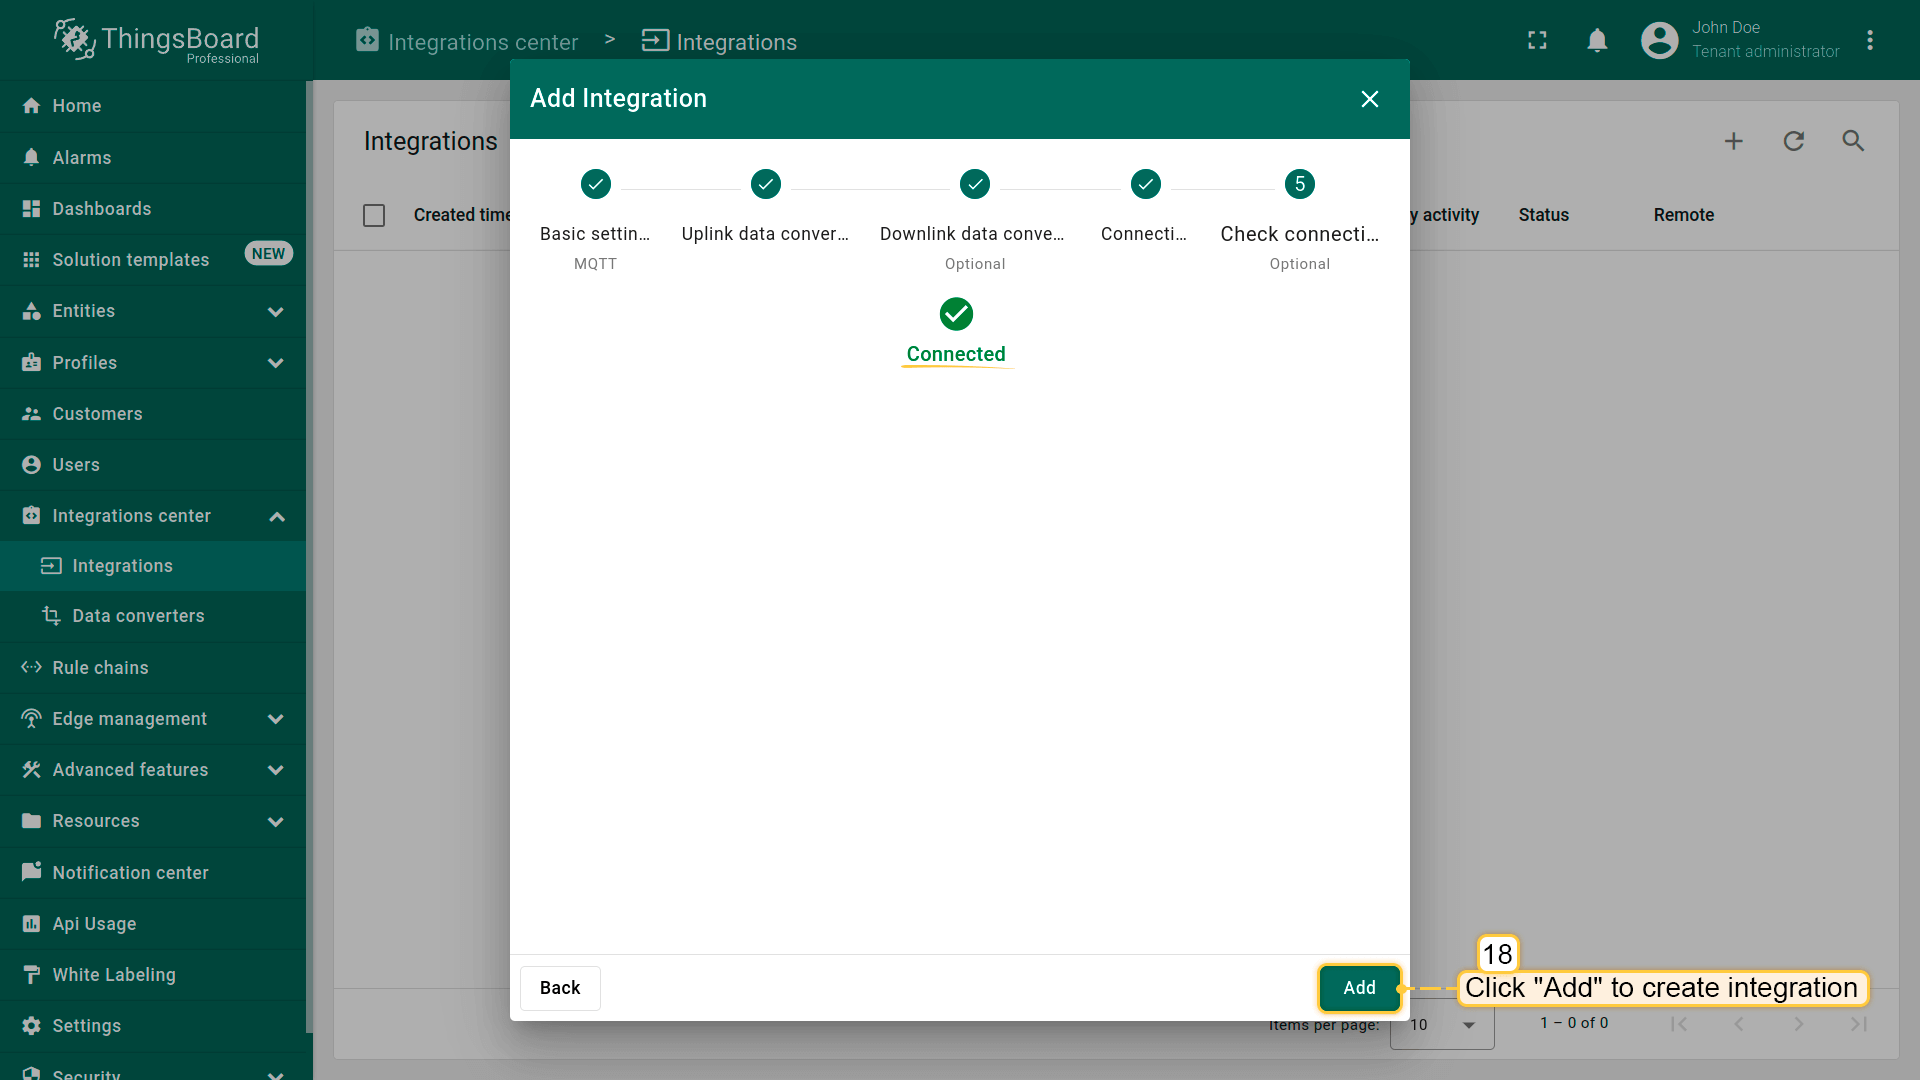
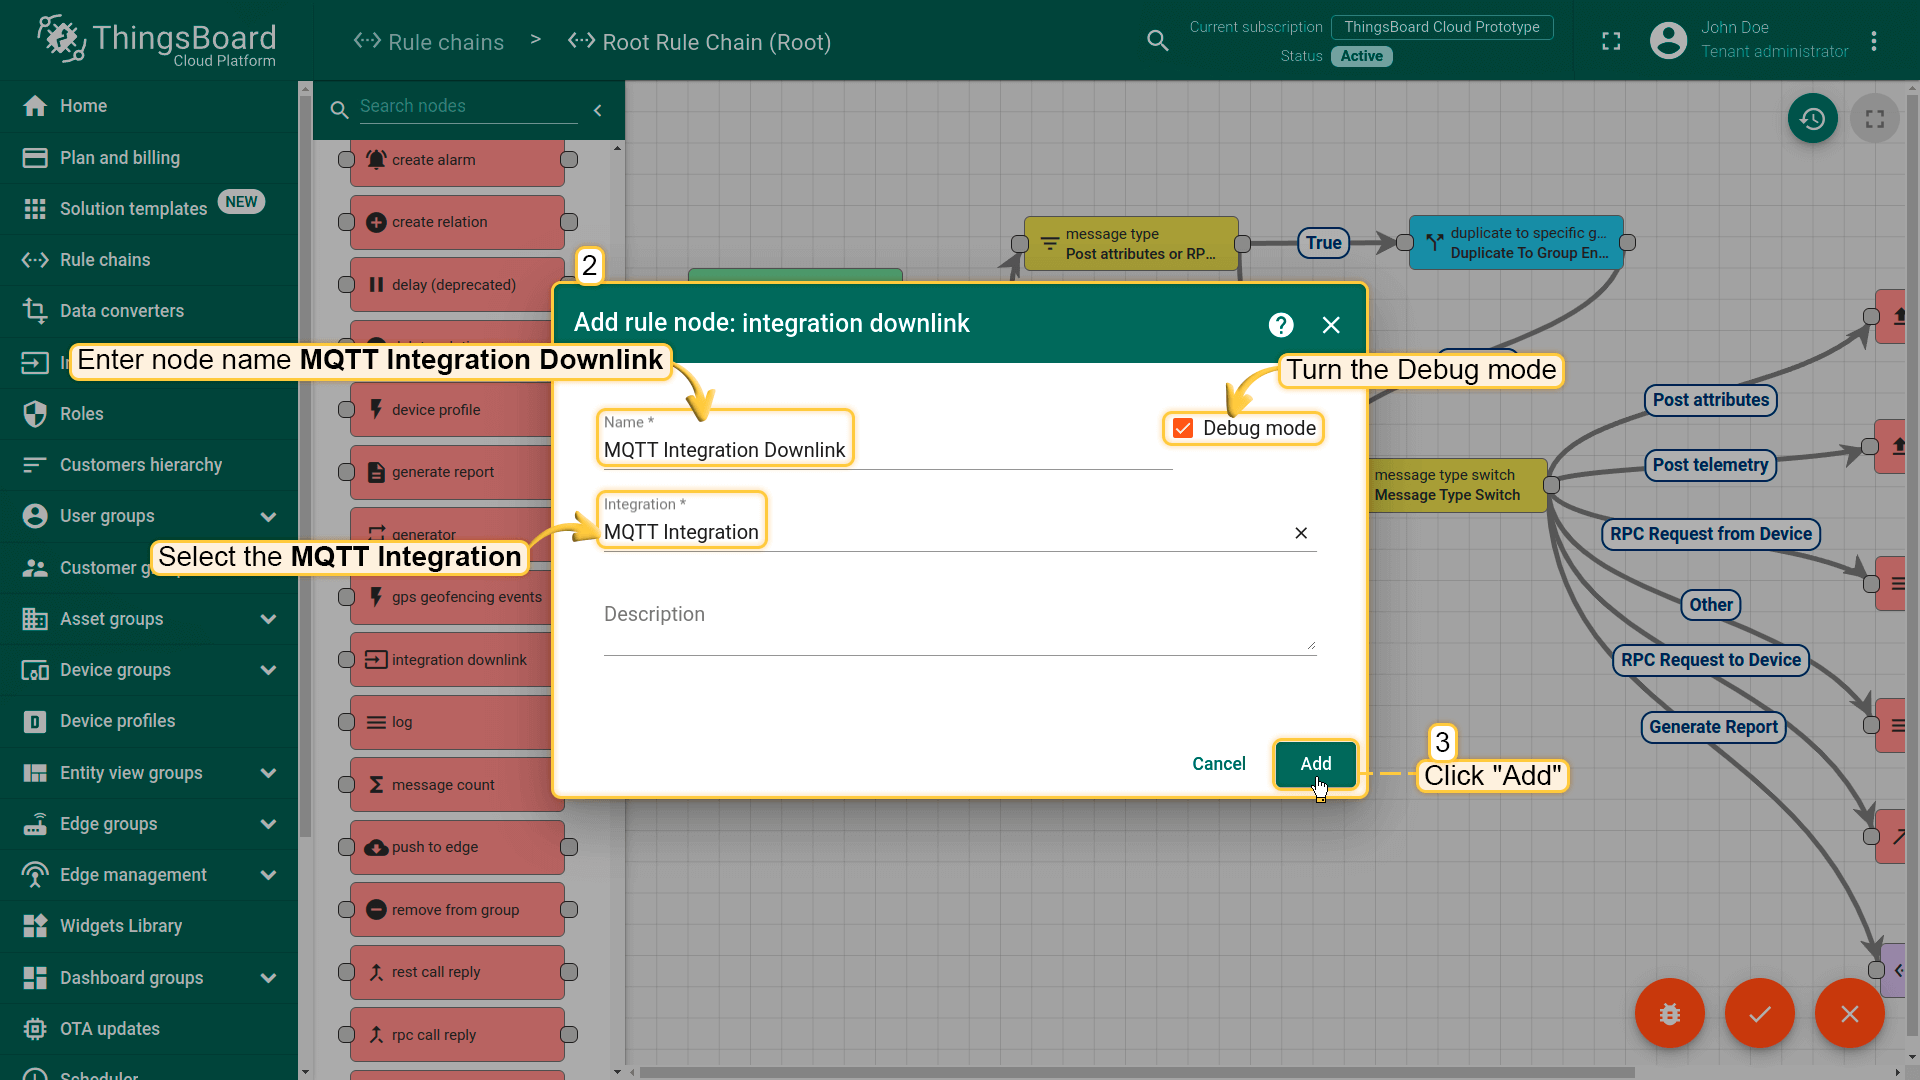
在Root Rule Chain编辑器中找到integration downlink节点,拖放到规则链。命名为MQTT Integration Downlink,选择MQTT Integration,点击Add。
从Message Type Switch拖拽连线到MQTT Integration Downlink,标签为”RPC Request to Device”,点击add。
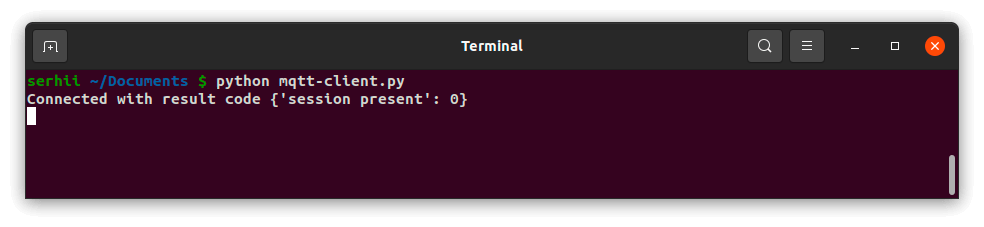
Incoming message
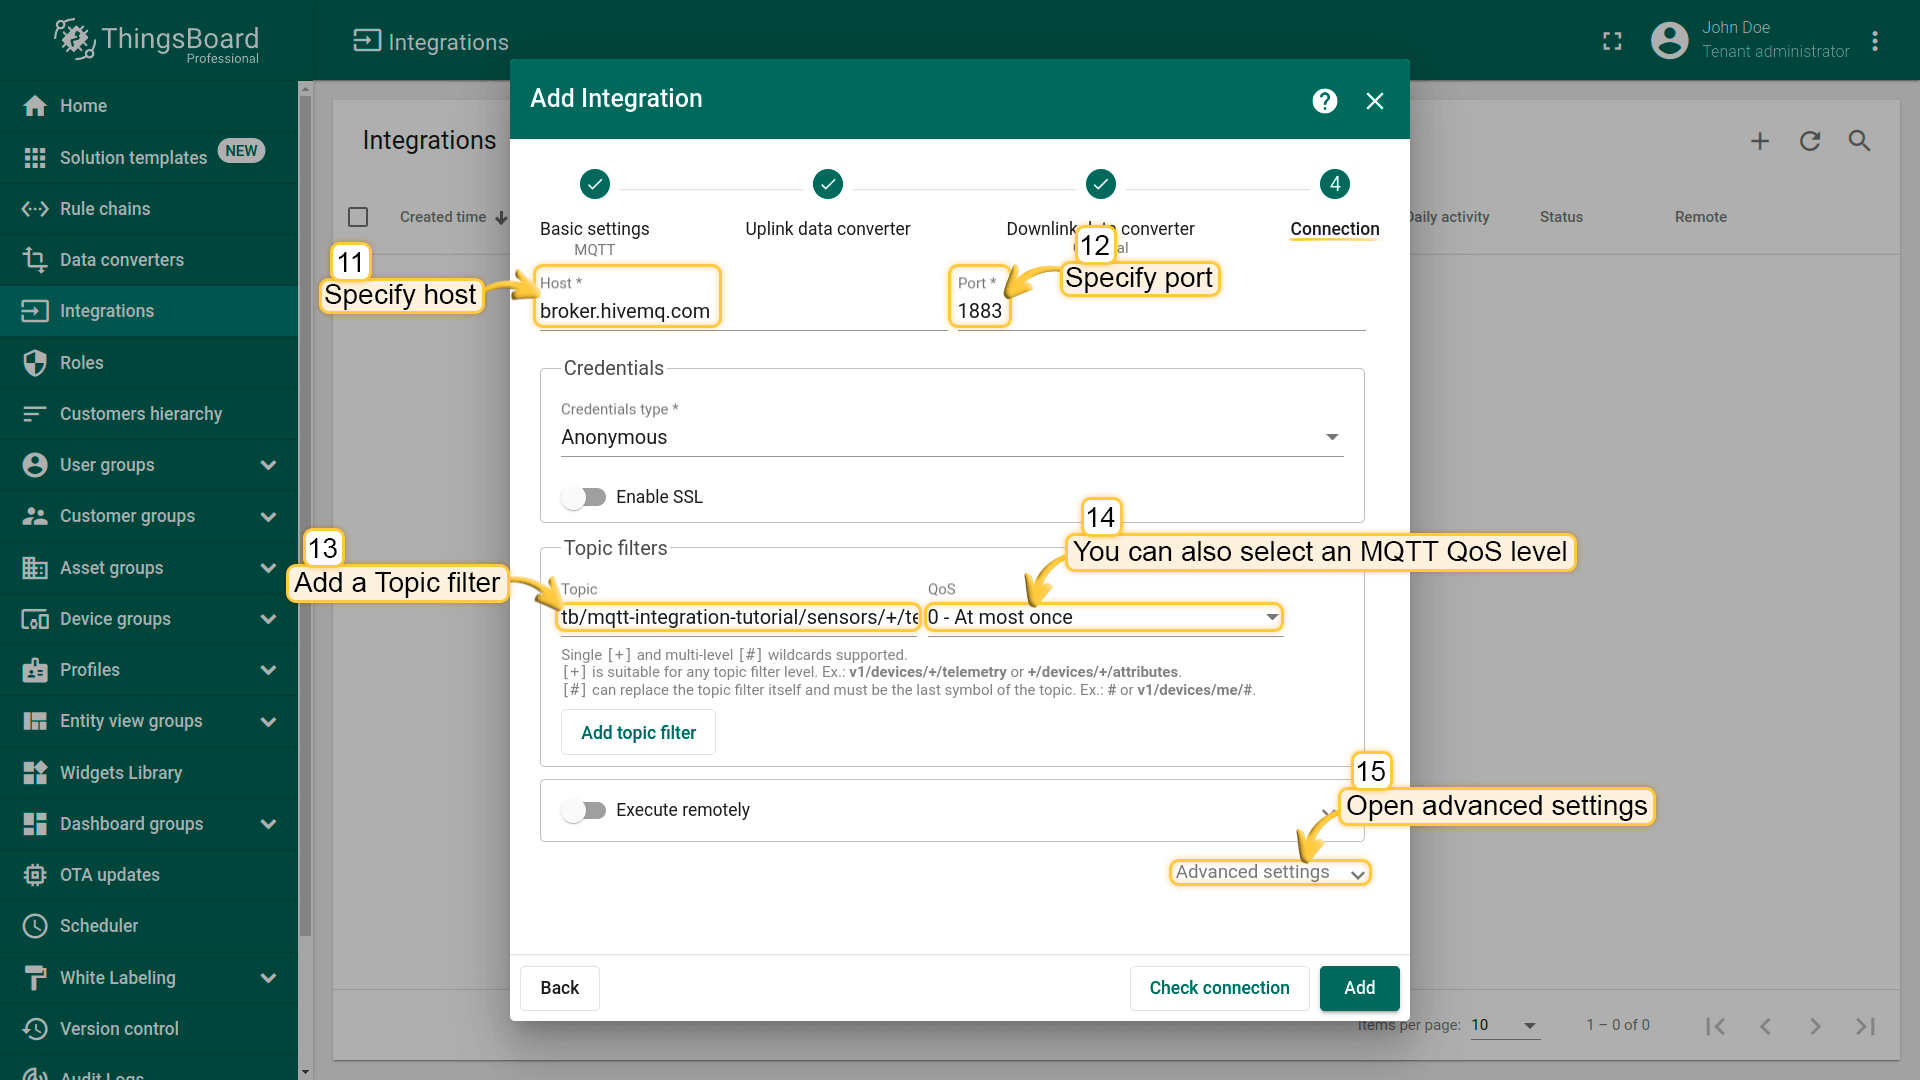
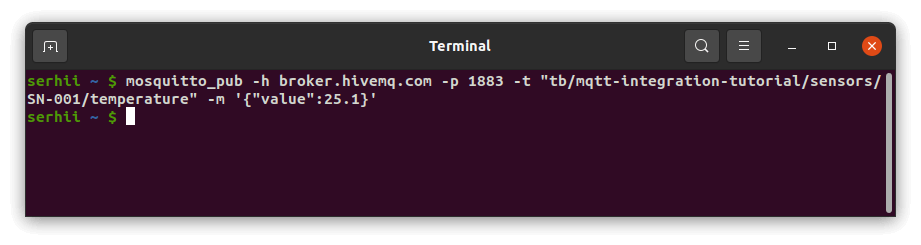
Topic: tb/mqtt-integration-tutorial/sensors/SN-001/rx/twoway
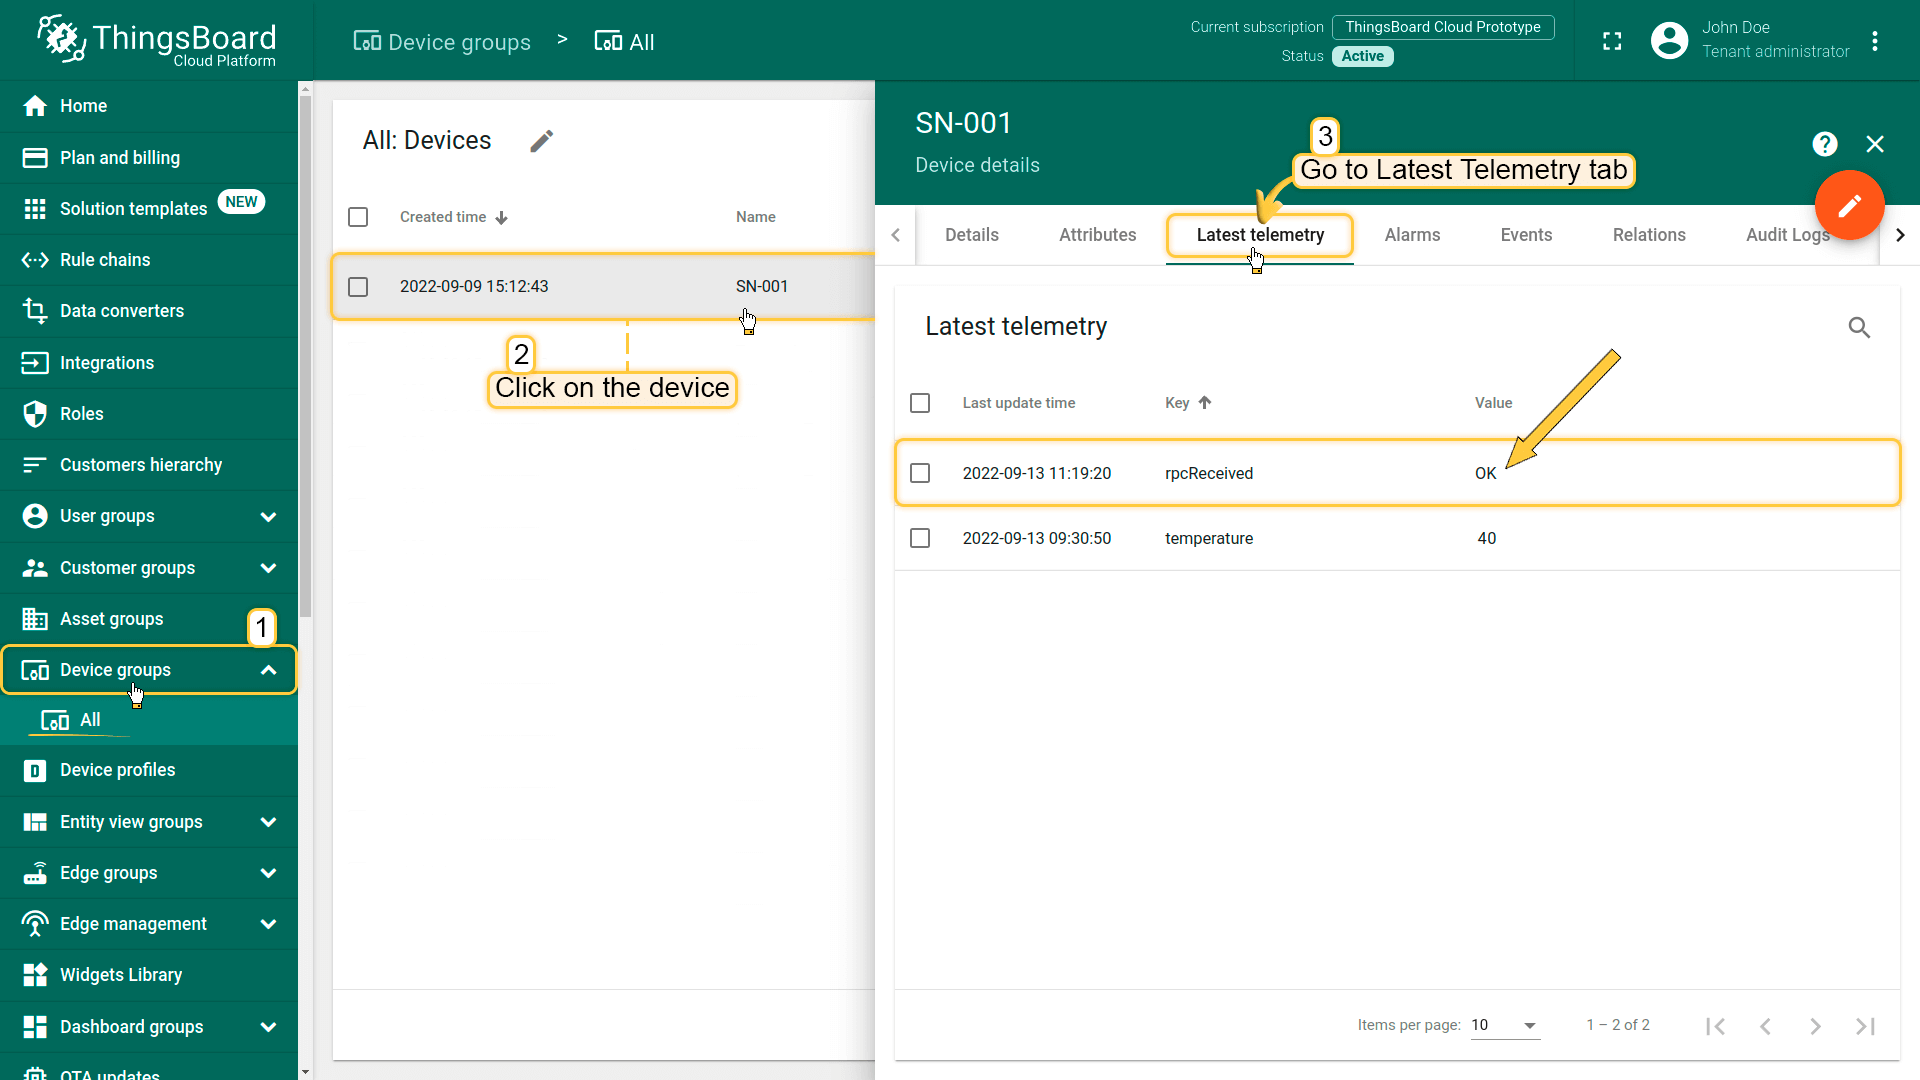
Message: {"value":40}
This is a Two-way RPC call. Going to reply now!
Sending a response message: {"rpcReceived":"OK"}