- Overview
- Use case
- Prerequisites
- Message flow
- Creation of the Telegram Bot
- Configure Rule Chains
- Post telemetry and verify
- See Also
- Next steps
Overview
Telegram provides a possibility to create Telegram Bots, which are considered as third-party applications.
So, In this tutorial, we are going to demonstrate how you can create a Telegram Bot
and configure your ThingsBoard rule engine to be able to send notifications to Telegram App using Rest API Call extension.
Use case
This tutorial is based on the create & clear alarms tutorial and it’s use case. We will reuse the rule chains from above mentioned tutorial and will add few more rule nodes to integrate with Telegram
Let’s assume your device is using DHT22 sensor to collect and push temperature readings to ThingsBoard. DHT22 sensor is good for -40 to 80°C temperature readings.We want to generate Alarms if temperature is out of good range and send notifications to Telegram App when the alarm was created.
In this tutorial we will configure ThingsBoard Rule Engine to:
-
Send a message notification to the user if the alarm was created.
-
Add current alarm type and it originator to the message body using Script Transform node.
Prerequisites
We assume you have completed the following guides and reviewed the articles listed below:
- Getting Started guide.
- Rule Engine Overview.
- Create & clear alarms guide.
Message flow
In this section, we explain the purpose of each node in this tutorial:
- Node A: Transform Script node.
- This node will be used to creating a body of the Telegram message notification.
- Node B: REST API Call node.
- This node will send Telegram message payload to the configured REST endpoint. In our case, it is Telegram REST API.
Creation of the Telegram Bot
The BotFather is the main bot that will help you to create new bots and change their settings.
Once the creation of the bot is finished, you can generate an authorization token for your new bot. The token is a string that looks like this - ‘110201543:AAHdqTcvCH1vGWJxfSeofSAs0K5PALDsaw’ that is required to authorize the bot.
Prerequisites :
- ThingsBoard is up and running
- Telegram Bot is created
Getting the Chat ID
In the next step, we need to retrieve a Chat ID. The Chat ID is needed to send messages via the HTTP API.
There are several ways to get the Chat ID:
-
First of all, you need send some message to your Bot:
-
in the private chat;
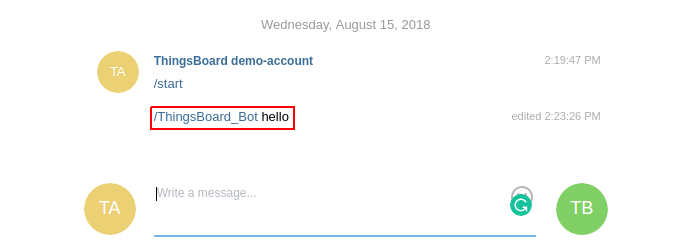
-
in the group where your Bot was added as a member.
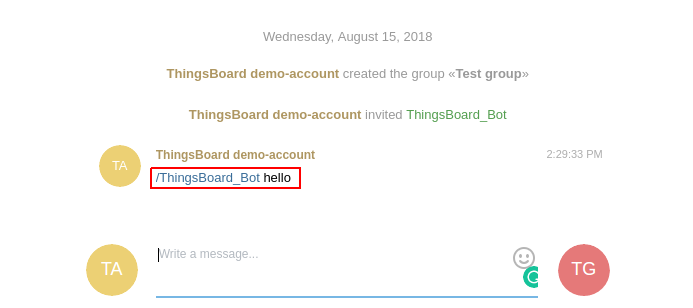
where ThingsBoard_Bot is name of the Telegram bot. -
-
Next, open your web browser and enter the following URL:
1
2
3
4
5
https://api.telegram.org/bot"YOUR_BOT_TOKEN"/getUpdates

"YOUR_BOT_TOKEN" has to be replaced by the authentication token of your bot, e.g.:

https://api.telegram.org/bot110201543:AAHdqTcvCH1vGWJxfSeofSAs0K5PALDsaw/getUpdates
From the outcoming data you can find field ‘id’. This is the so-called chat_id.
- First option:

- Second option:

After that, you can start to configure Rule engine to use Rest API Call extension.
Configure Rule Chains
In this tutorial, we used Rule Chains from create & clear alarms tutorial.
We modified Rule Chain Create & Clear Alarms by adding nodes that was described above in the section Message flow
and renamed this rule chain to: Create/Clear Alarms & send notifications to Telegram.
The following screenshots show how the above Rule Chains should look like:
- Create/Clear Alarms & send notifications to Telegram:

- Root Rule Chain:
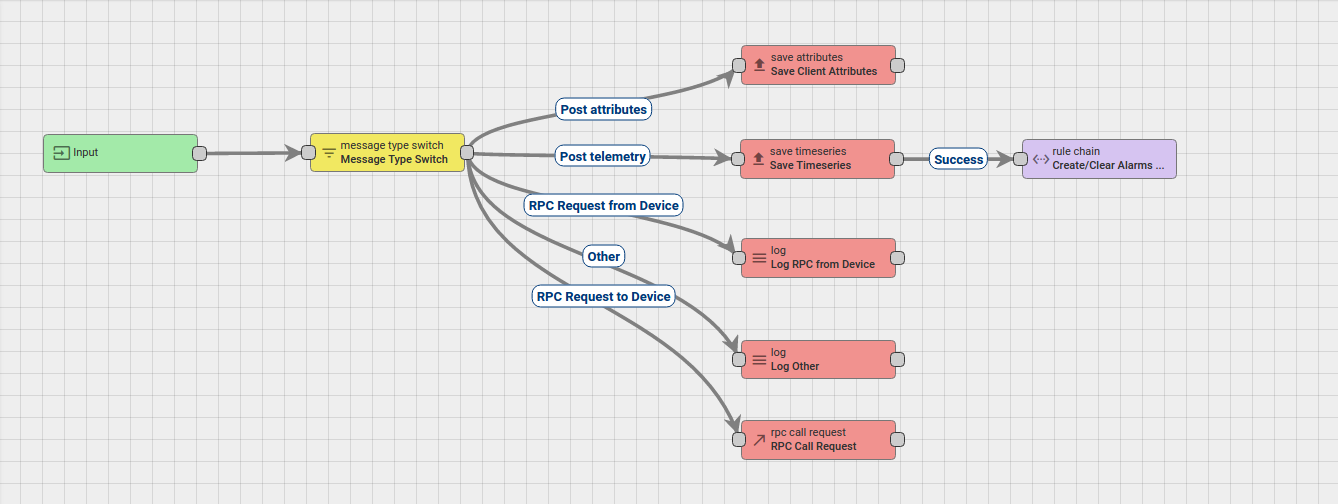
The following section shows you how to modify this rule chain from scratch.
Modify Create/Clear Alarm & Send Email
Adding the required nodes
In this rule chain, you will create 2 nodes as it will be explained in the following sections:
Node A: Transform Script
-
Add the Transform Script node and connect it to the Create Alarm node with a relation type Created.
This node will use for creating a body of the message notification.
Body Template must have 2 parameters:-
chat_id;
-
text.
this is an example of the outbound message:
-
1
{"chat_id" : "PUT YOUR CHOSEN CHAT_ID", "text" : "SOME MESSAGE YOU WANT TO RECEIVE"}
- To do this use the following script:
1
2
3
4
5
 var newMsg ={};
 newMsg.text = '"' +  msg.name + '"' + " alarm was created for device: " + '"' + metadata.deviceName + '"';
 newMsg.chat_id = 337878729; //has to be replaced by the actual chat id

 return {msg: newMsg, metadata: metadata, msgType: msgType};
- Enter the Name field as New telegram message.
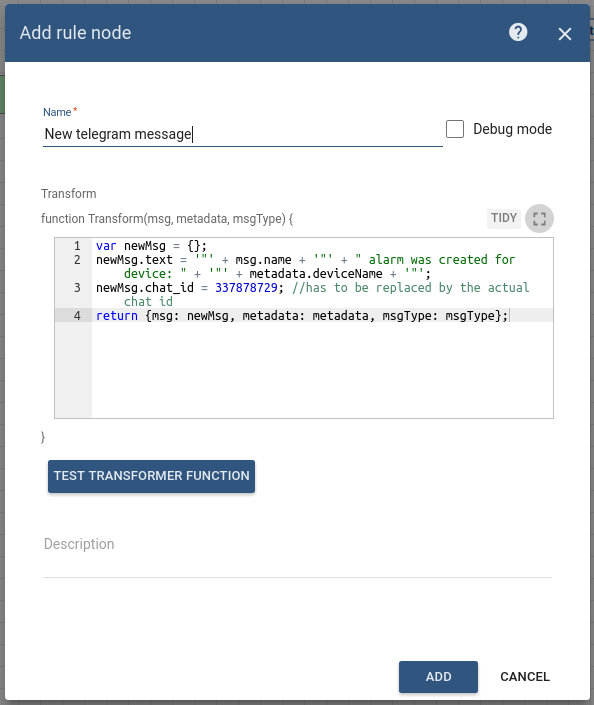
Node B: REST API Call
-
Add the REST API Call node and connect it to the Transform Script node with a relation type Success.
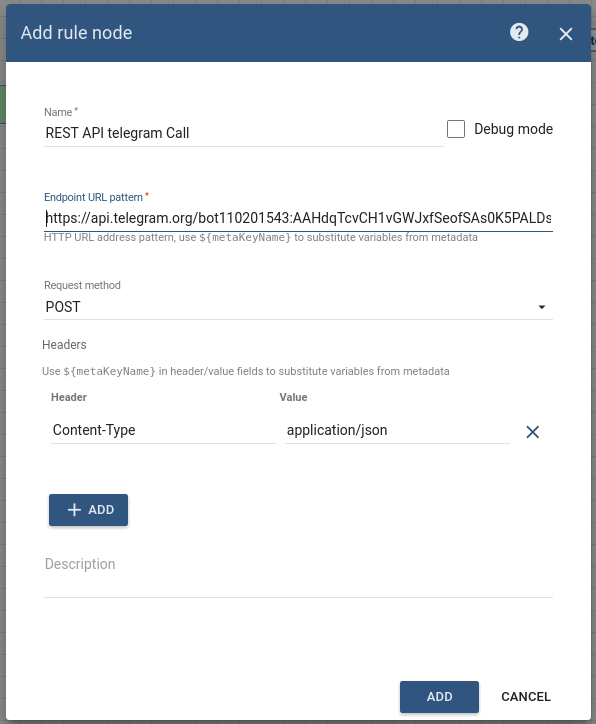
This node will send full Message payload to the configured REST endpoint. In our case, it is the Telegram REST API.
At the scope of this tutorial, we will use ‘/sendMessage’ action path to refer to Telegram Bot API to send a message. -
Fill in the fields with the input data shown in the following table:
Field Input Data Name REST API telegram Call Endpoint URL pattern https://api.telegram.org/bot"YOUR_BOT_TOKEN"/sendMessage Request method POST Header Content-Type Value application/json
Post telemetry and verify
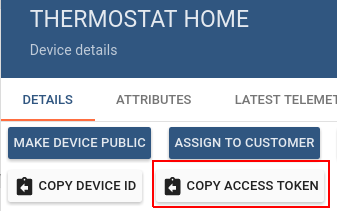
For posting device telemetry we will use the Rest APIs, Telemetry upload APIs. For this we will need to copy device access token from then device Thermostat Home.
Lets post temperature = 99. Alarm should be created:
1
2
3
curl -v -X POST -d '{"temperature":99}' http://localhost:8080/api/v1/$ACCESS_TOKEN/telemetry --header "Content-Type:application/json"

**you need to replace $ACCESS_TOKEN with actual device token**
You should understand that message won’t be sent to the Telegram App when the alarm was updated, only in the case when the alarm will be created.
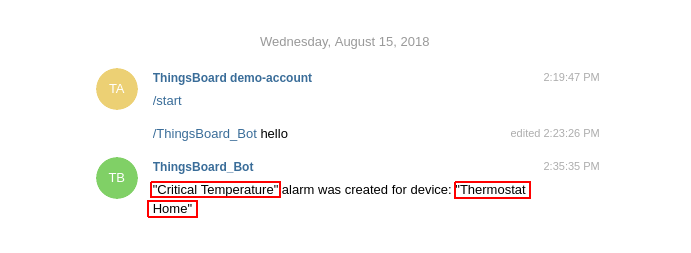
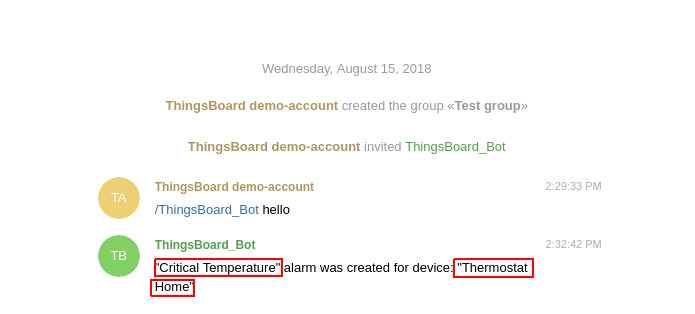
Finally, we can see that the message was received with the correct values:
- first option:
- second option:
Also, you can:
-
configure Alarm Details function in the Create and Clear Alarm nodes.
-
configure the Dashboard by adding an alarm widget to visualize the alarms.
-
define other additional logic for alarm processing, for example, sending an email.
Please refer to the links under the See Also section to see how to do this.
See Also
-
Create & Clear Alarms: alarm details: guide - to learn how to configure Alarm Details function in Alarm nodes.
-
Create & Clear Alarms: configure dashboard guide - to learn how to add an Alarm widget to the dashboard.
-
Send Email tutorial.
Next steps
-
入门指南 - 快速学习ThingsBoard相关功能。
-
连接设备 - 学习如何根据你的连接方式或解决方案连接设备。
-
可 视 化 - 学习如何配置复杂的ThingsBoard仪表板说明。
-
数据处理 - 学习如何使用ThingsBoard规则引擎。
-
数据分析 - 学习如何使用规则引擎执行基本的分析任务。
-
高级功能 - 学习高级ThingsBoard功能。

