本指南将帮助您在ThingsBoard平台实例上启用远程日志功能并读取ThingsBoard IoT Gateway的日志。
本指南将使用以下环境: 1.本地安装的ThingsBoard平台实例(安装方法见此处)。
- ThingsBoard IoT Gateway(安装方法见此处)。
步骤1:启用远程日志并设置日志级别
要启用并设置日志级别,请按以下步骤操作:
-在Web界面中打开网关设备详情。
-进入「属性」标签页。
-在实体属性范围列表中选择共享属性。
-点击「+」按钮(添加新属性)。
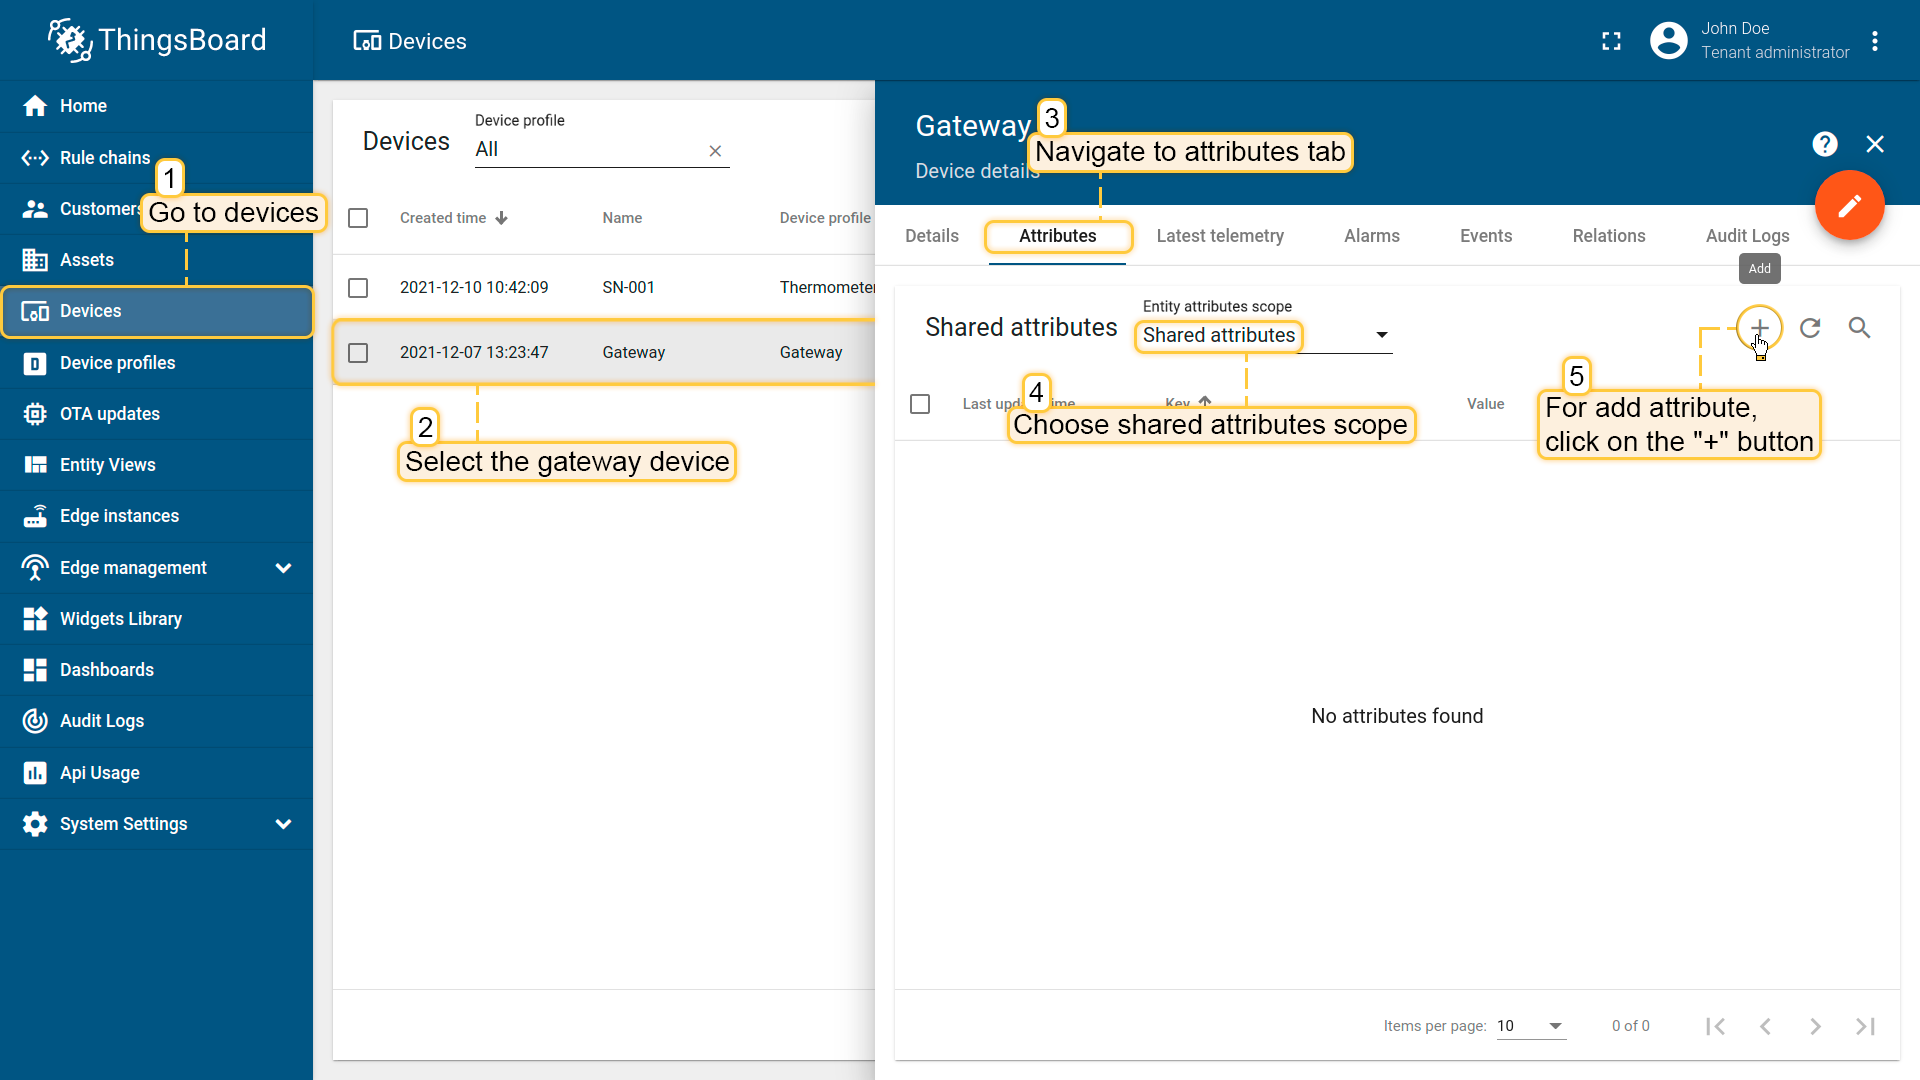 -在”添加属性”对话框中,按以下值填写字段:
- 名称字段必须为RemoteLoggingLevel
- 值字段用于设置日志级别,可选值如下:
-在”添加属性”对话框中,按以下值填写字段:
- 名称字段必须为RemoteLoggingLevel
- 值字段用于设置日志级别,可选值如下:
1
2
3
4
5
6
 DEBUG
 INFO
 WARNING
 ERROR
 CRITICAL
 NONE
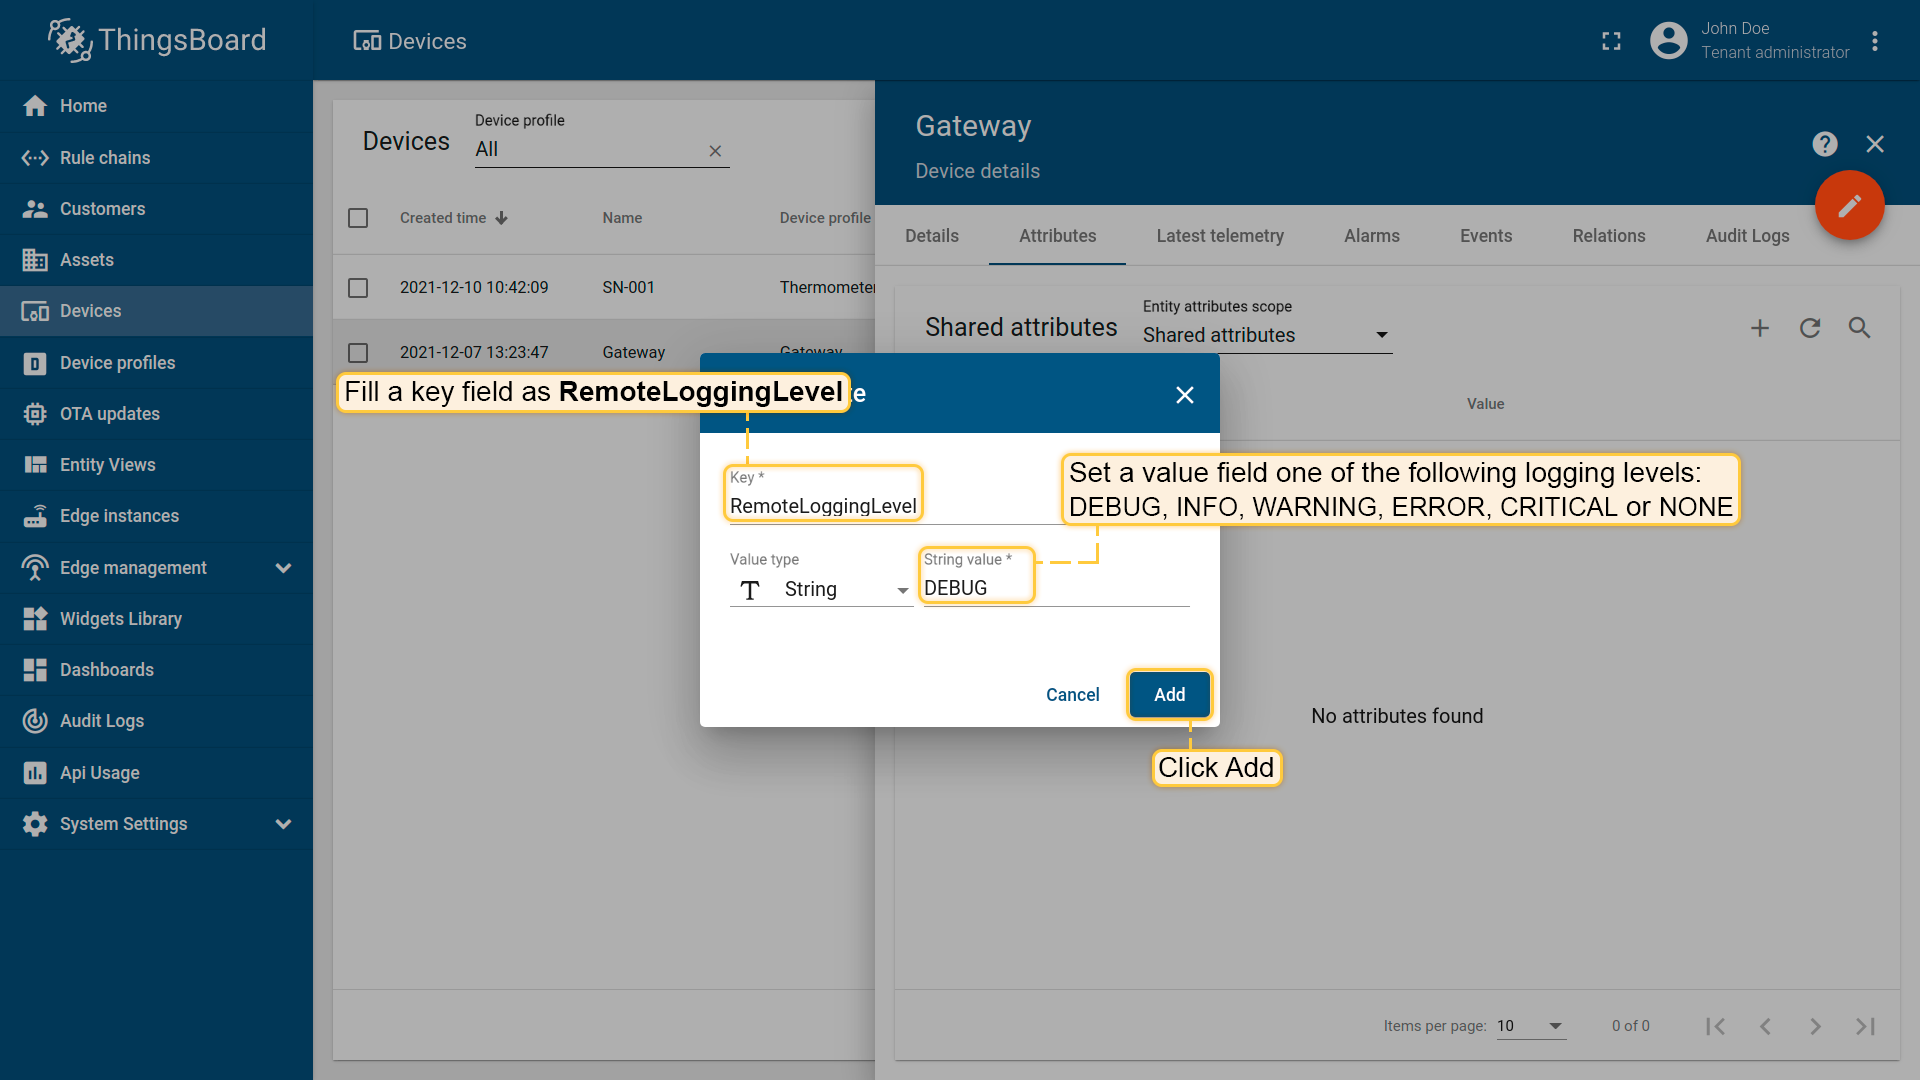 -点击添加
-点击添加
 -如果网关尚未运行,请启动网关[可选]。
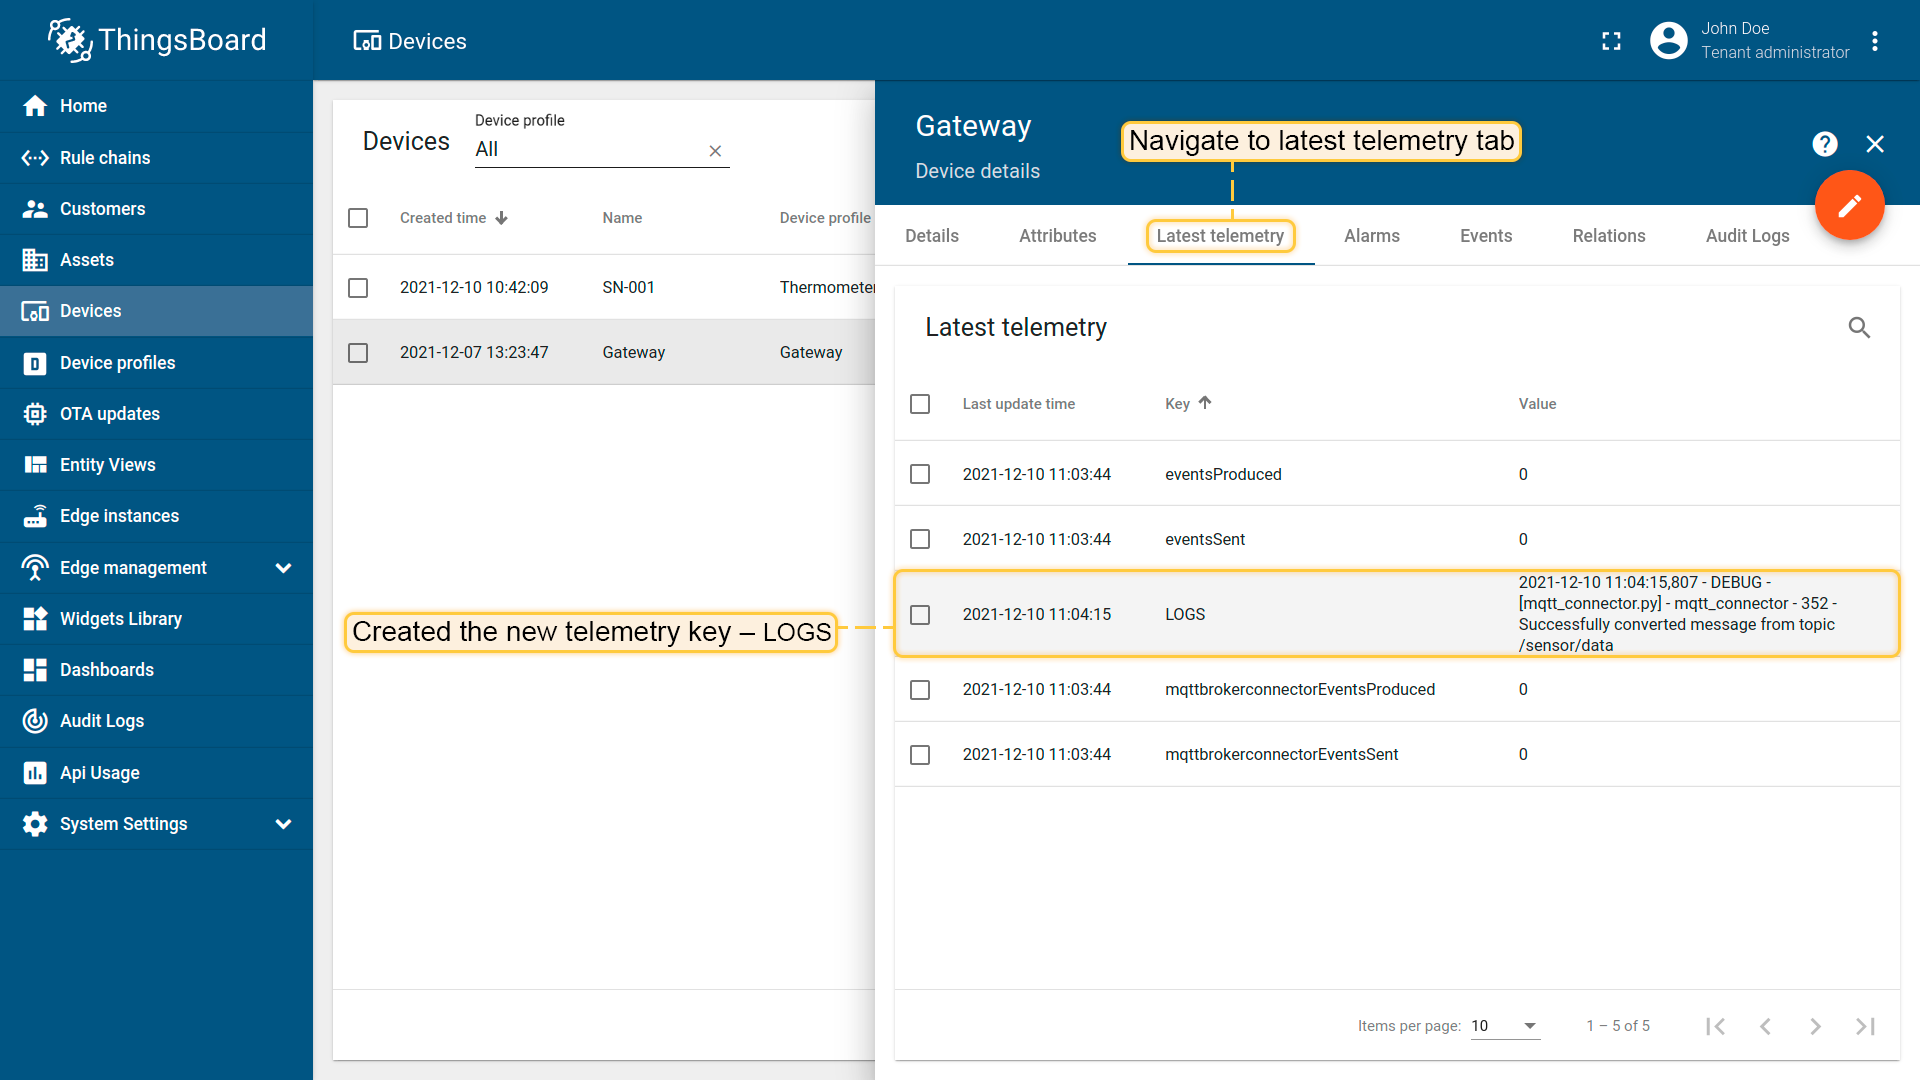
-打开网关设备的最新遥测标签页,您将看到新的遥测键——LOGS。
步骤2:在仪表板上显示日志
在设备详情窗口查看日志可能不太方便。我们应该将日志显示在仪表板上, 这样就可以查看所有日志,而不仅是最新的一条。 请按以下步骤操作:
-勾选LOGS键并点击”在组件上显示“按钮:

-我们将使用默认的卡片组件:

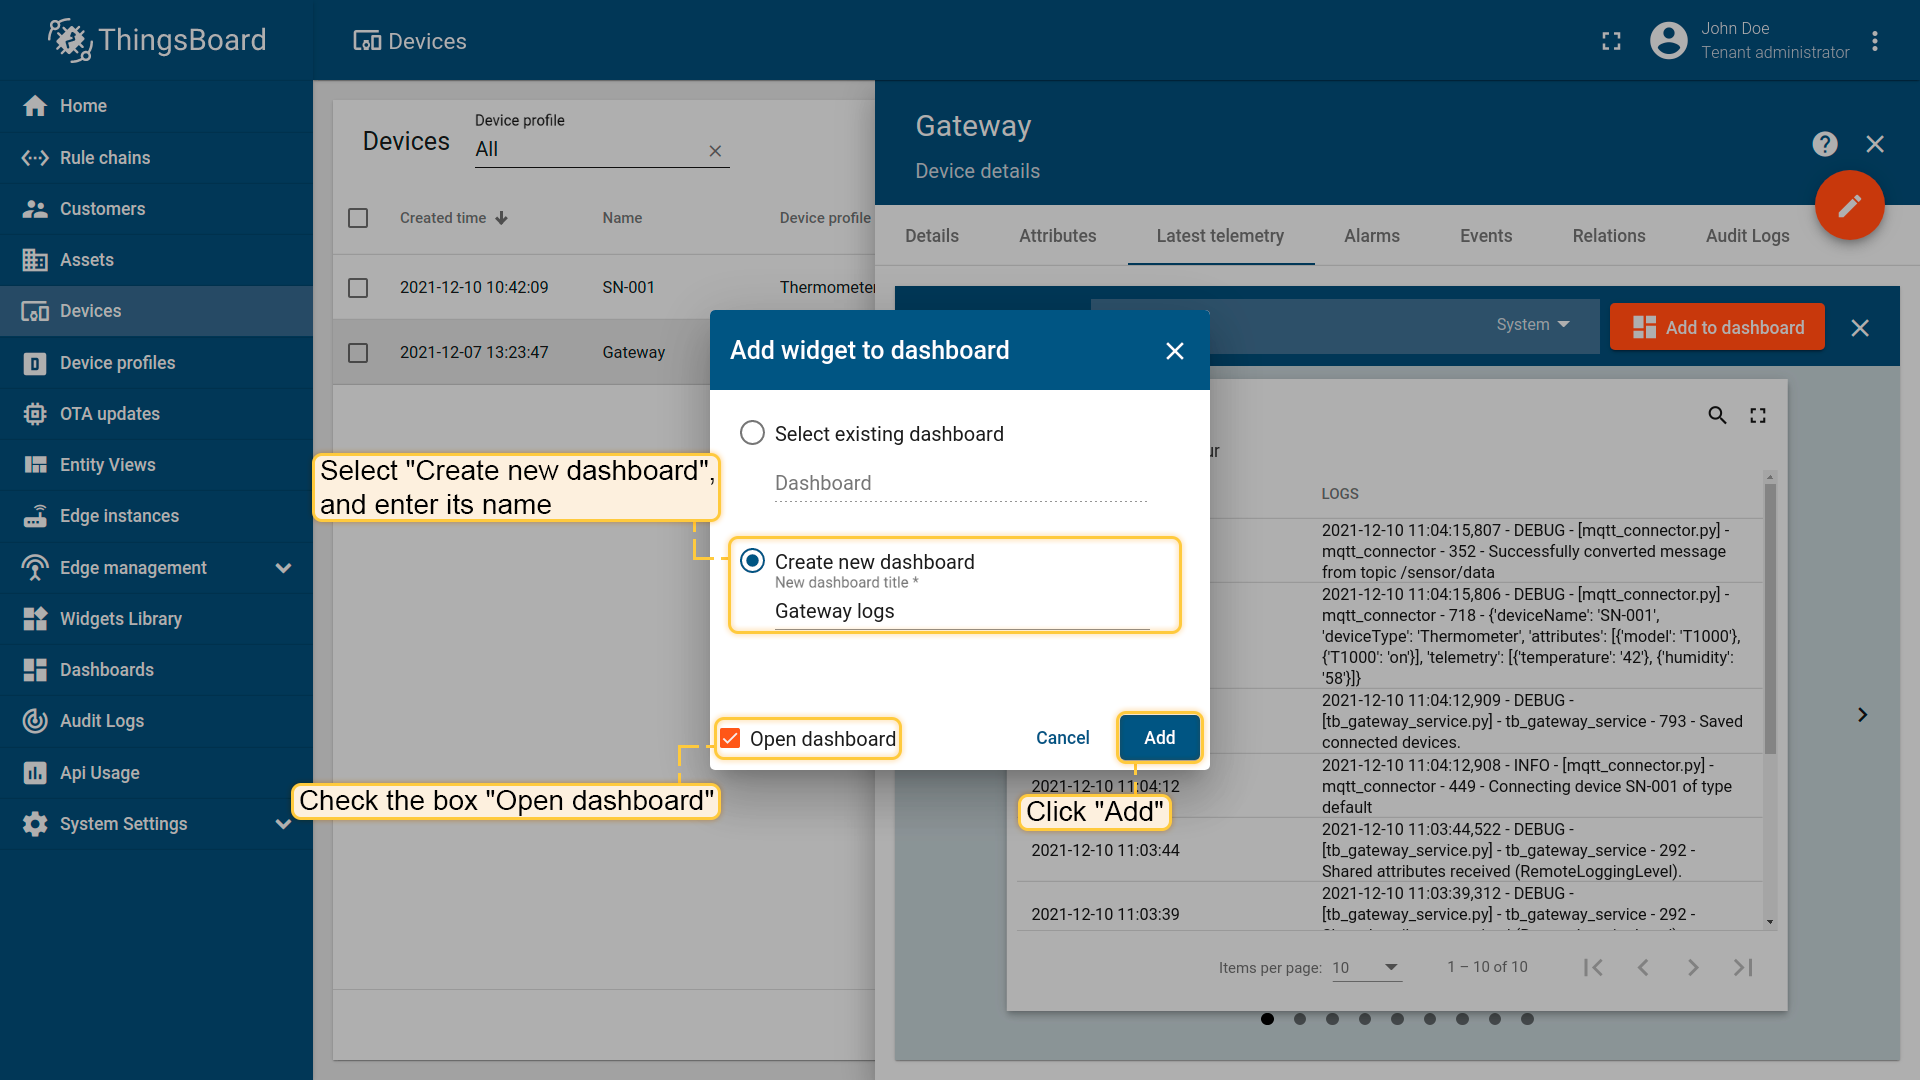
-选择时间序列表格卡片组件并将其添加到仪表板。可以添加到新建的仪表板或已有的仪表板。
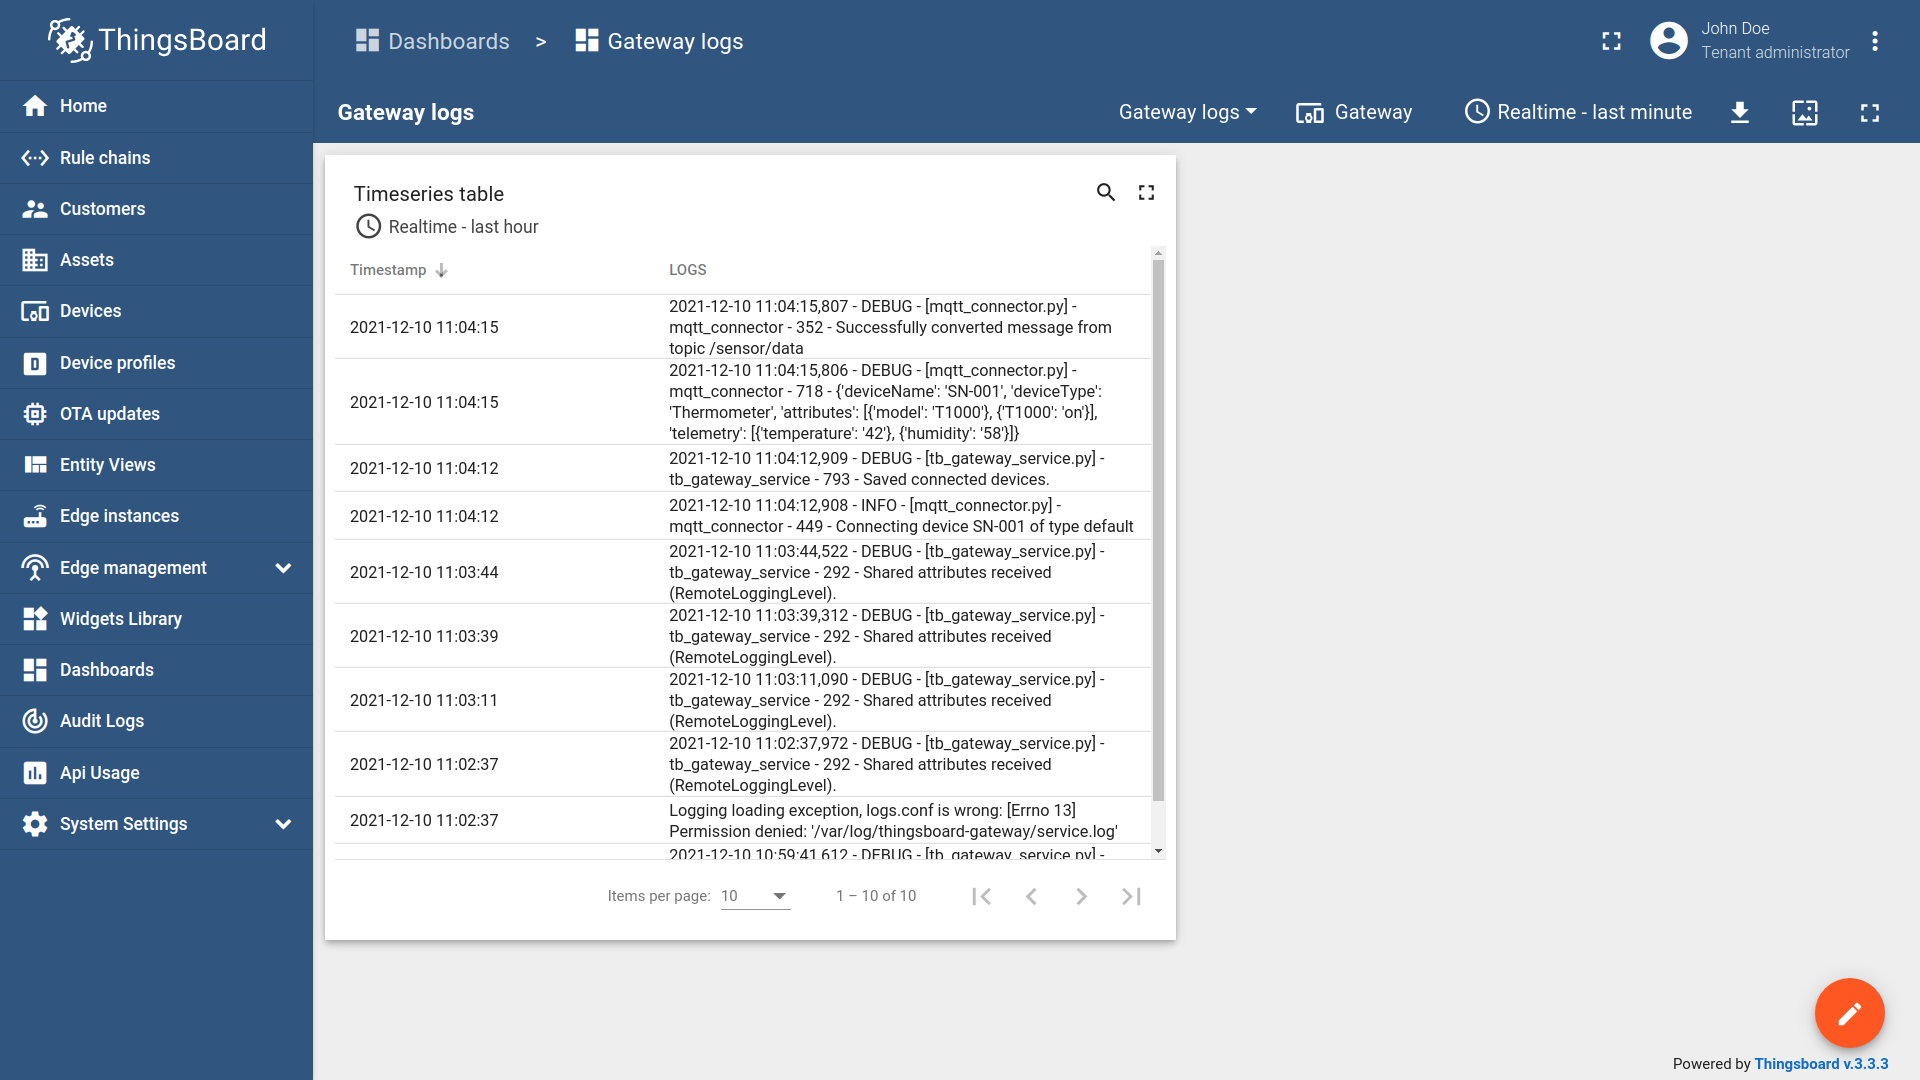
-现在我们可以从ThingsBoard环境中监控网关设备的状态了。
下一步
浏览ThingsBoard主要功能相关指南: