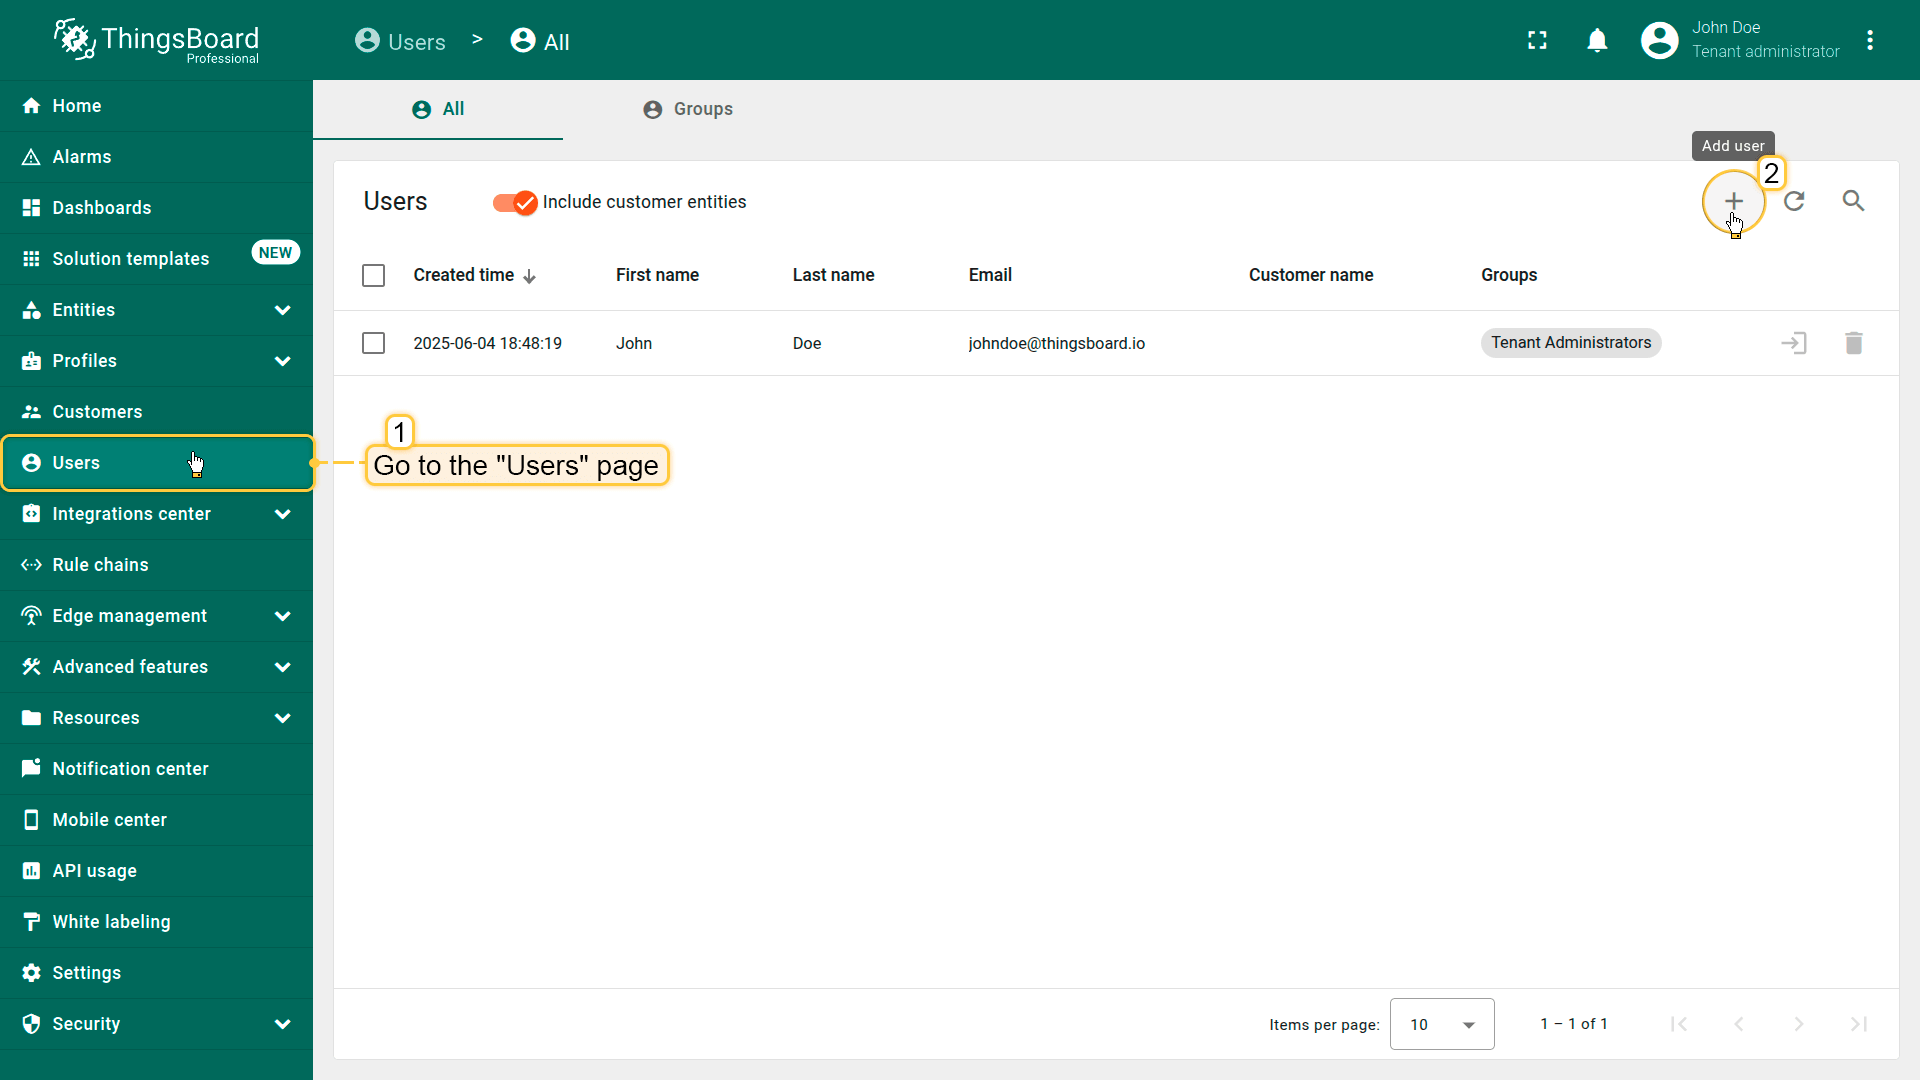
Log in as a Tenant Administrator or Customer Administrator. Navigate to the "Users" section from the left-hand menu. Click the "Add user" button in the top-right corner.
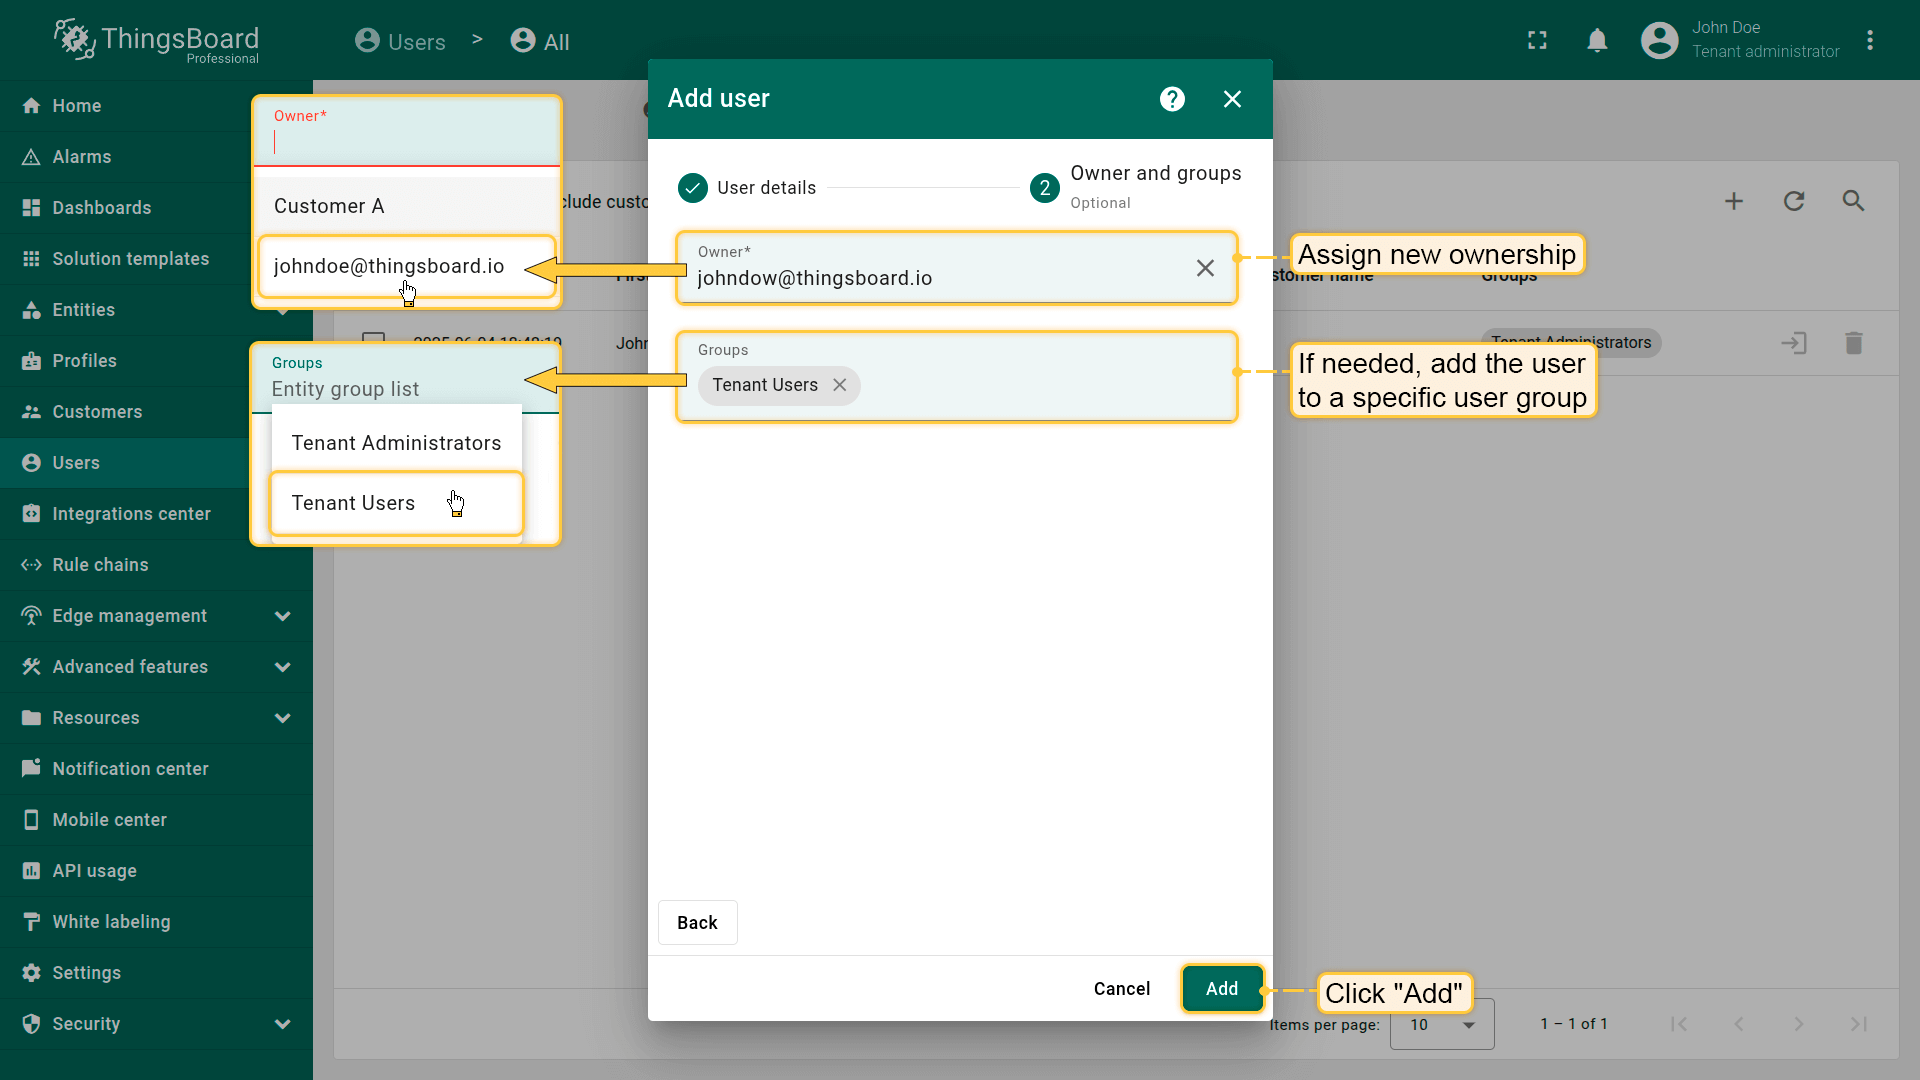
Fill in the user form: provide the user's email address (used as the login username); Optional fields: enter additional details such as first name, last name, and phone number. (Optional) Configure activation method: choose either Display activation link or Send activation email. (Optional) Change ownership and assign permissions.
Assign ownership and place the user into a specific user group with the appropriate permissions. Click "Add" to create the user.
If you selected the "Display activation link" option, you will need to copy the activation link.
The user has been created. Send the activation link to the user so they can activate their account.
以用户身份登录
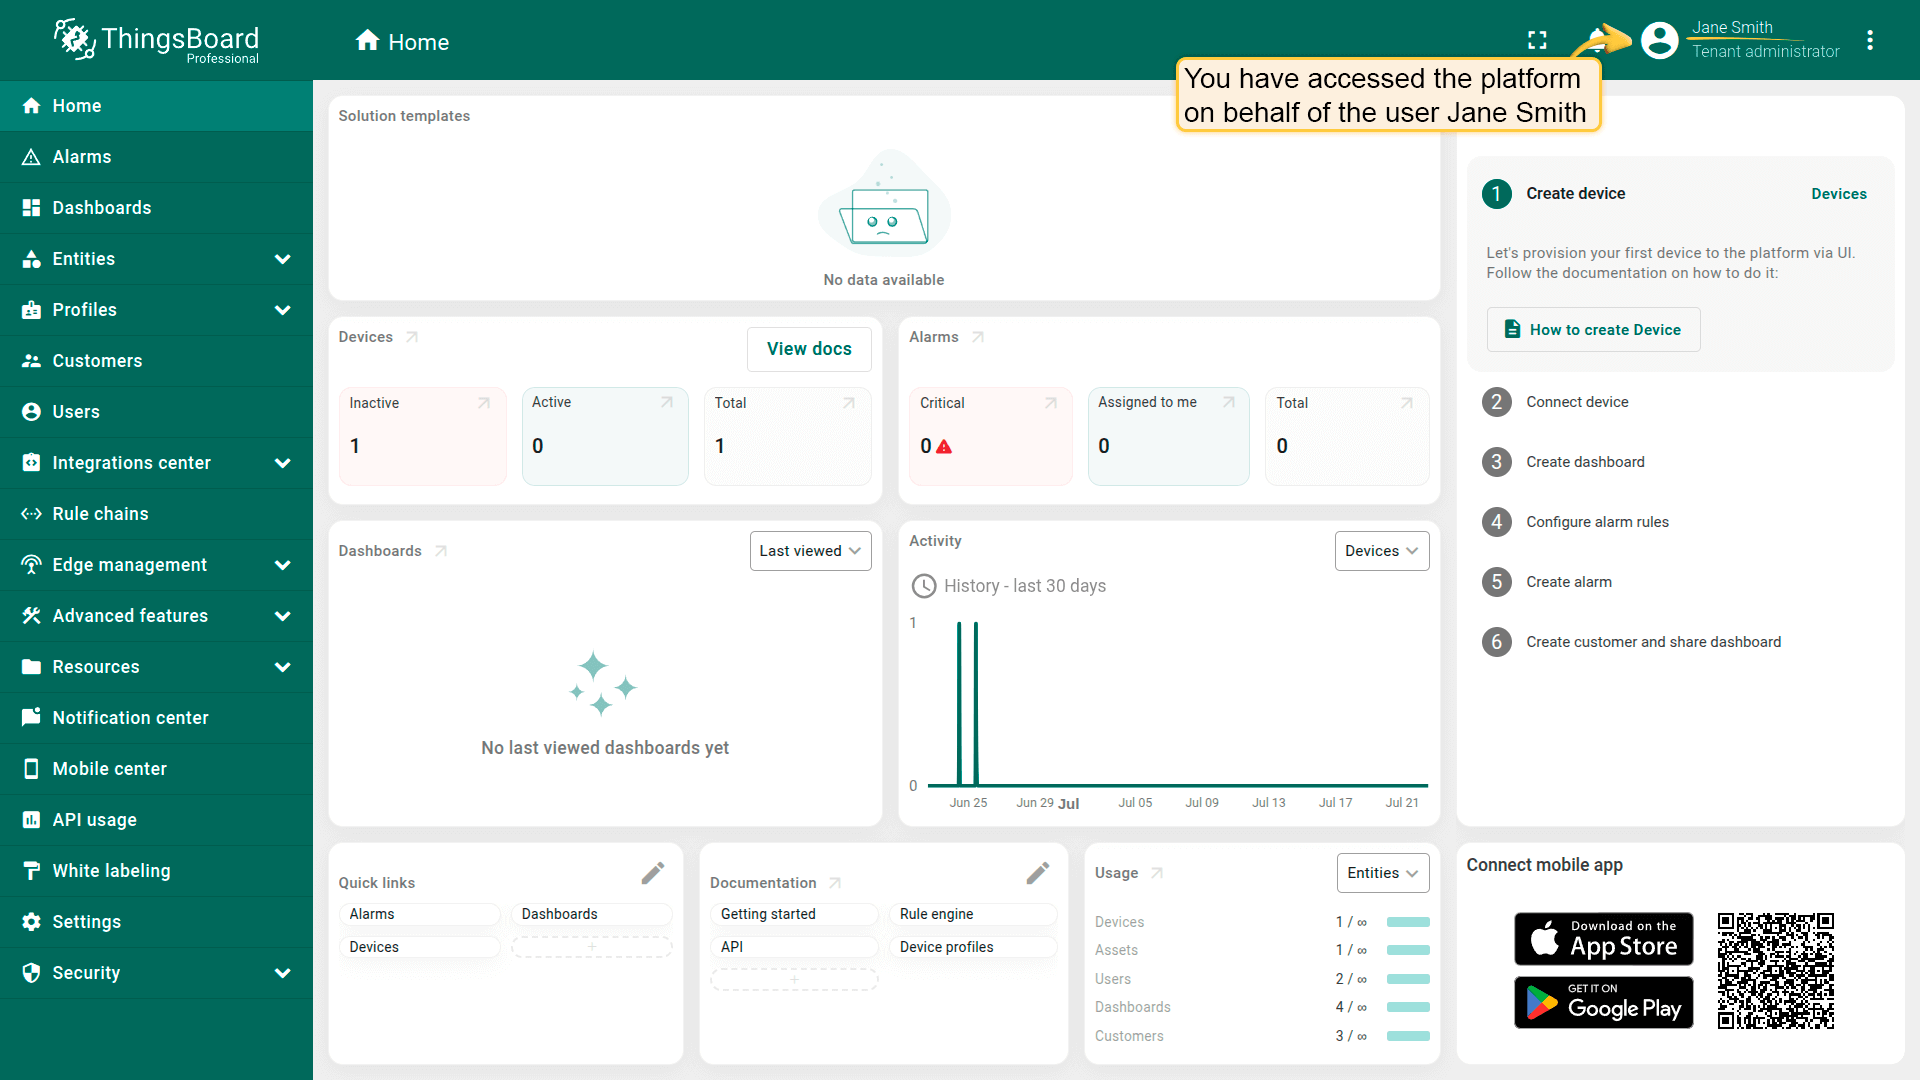
你可以临时以新用户身份访问平台,便于验证权限或排查访问问题。
以用户身份登录:
进入Users列表。
点击目标用户旁的登录图标。
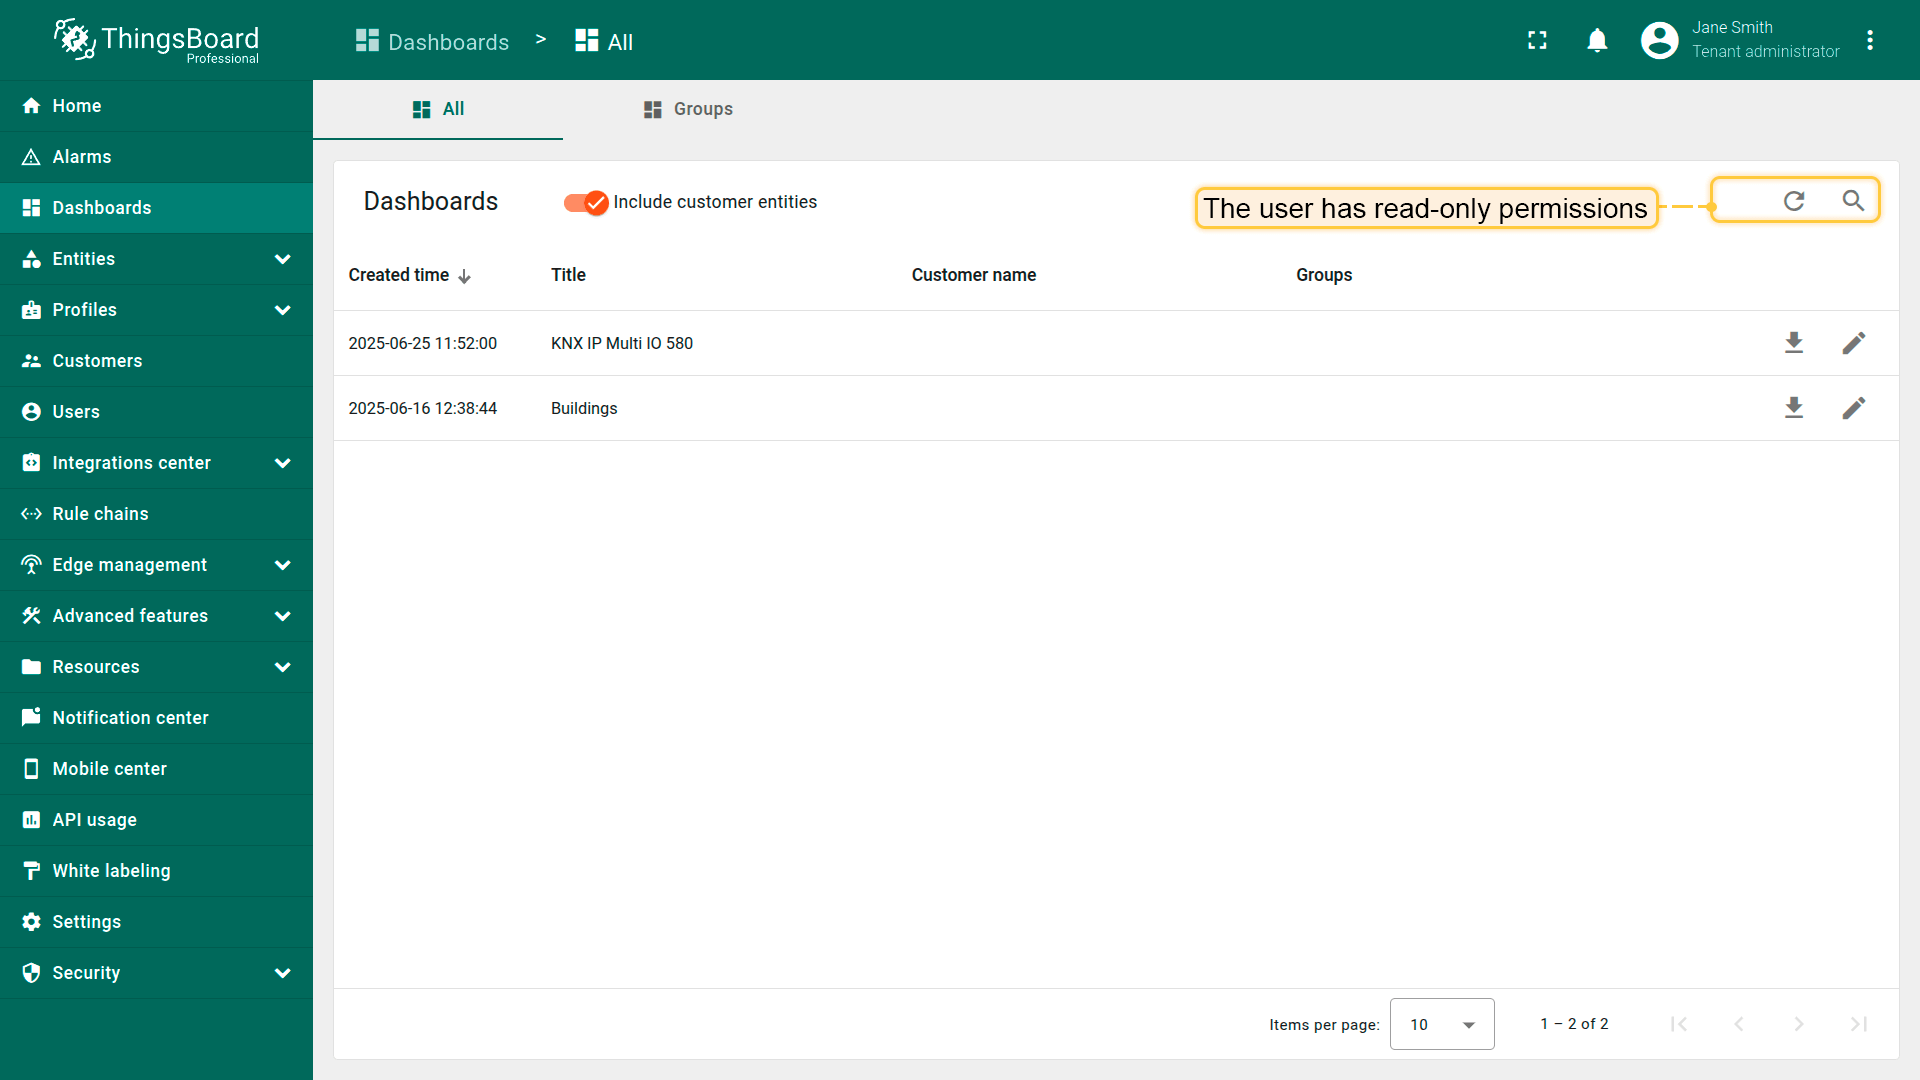
说明:示例中用户为只读权限,可查看仪表板或设备,但不能新增、编辑或删除对象。
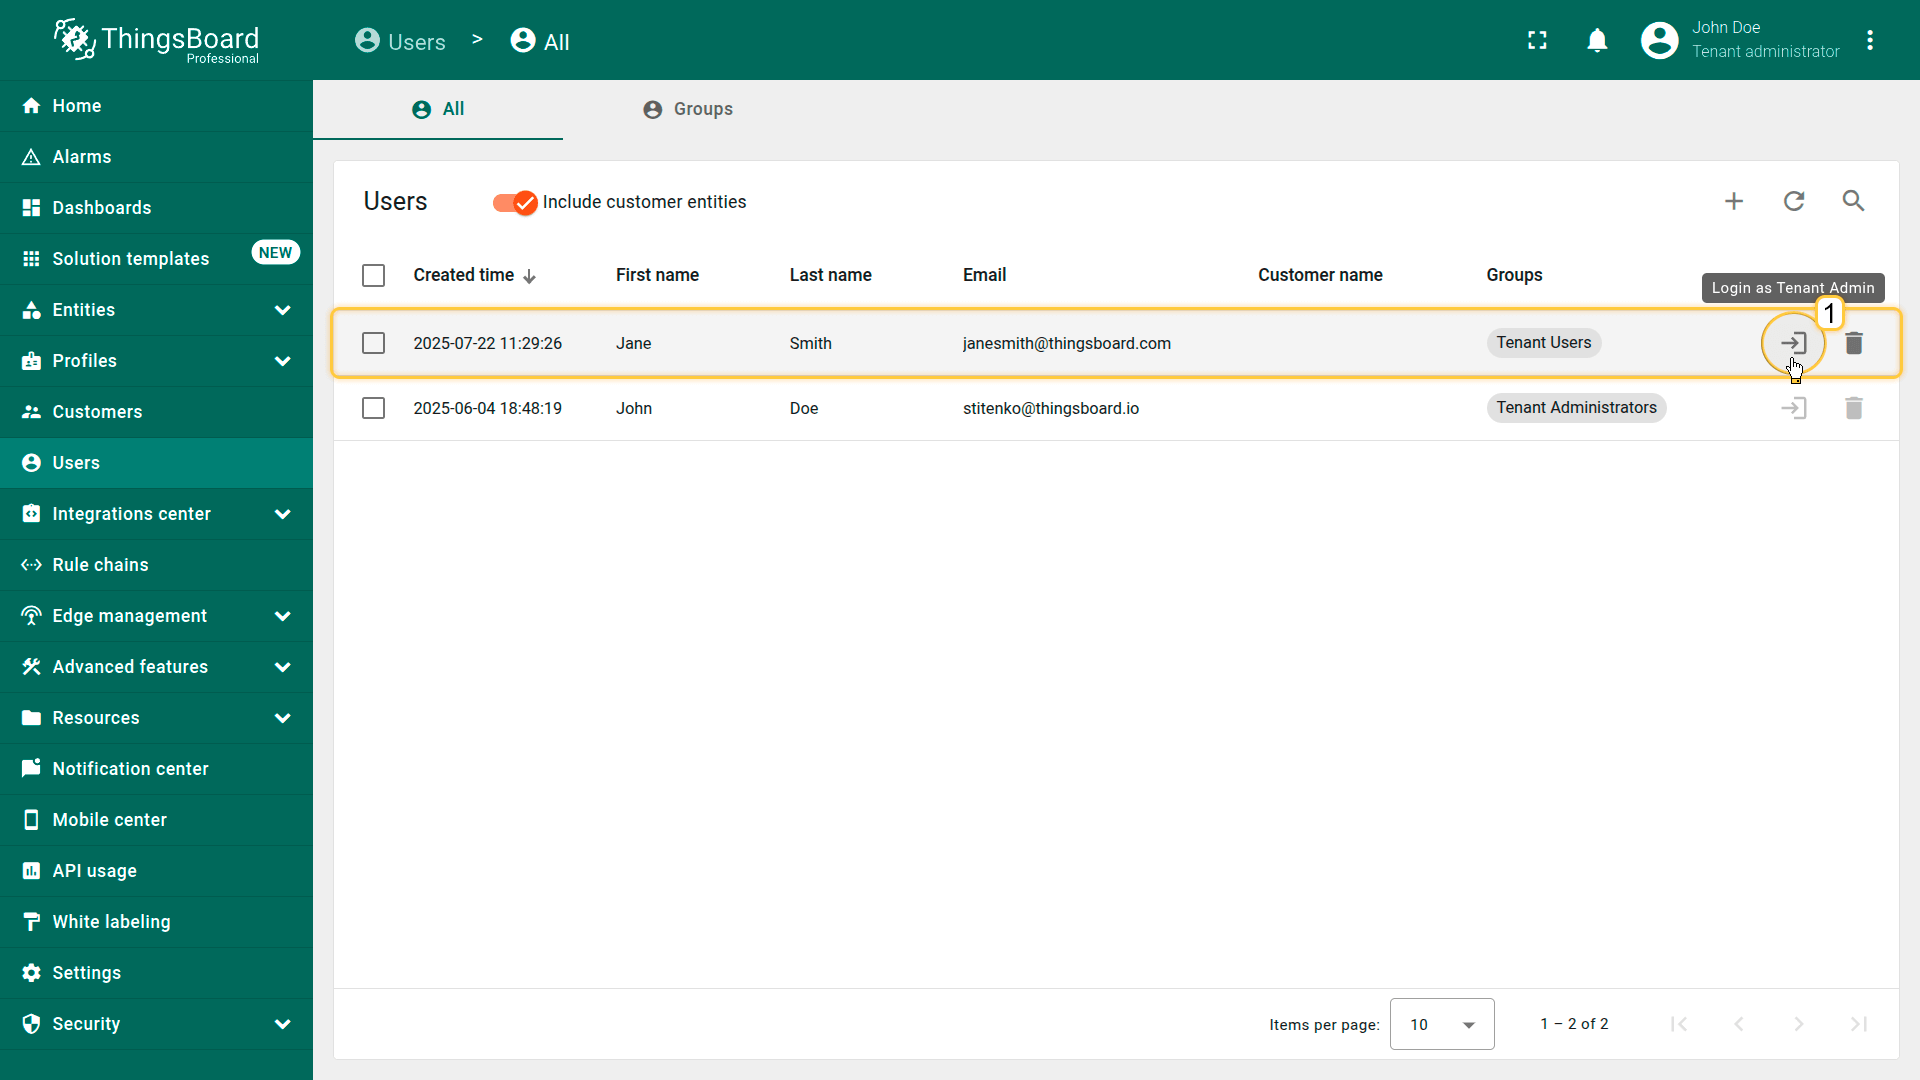
Go to the Users list, and click the "login" icon next to the desired user's name.
This allows you to temporarily access the platform as that user, which is useful for testing permissions or helping troubleshoot access issues.
In this example, the user has read-only permissions. They can view resources such as dashboards or devices, but cannot add, edit, or delete any objects.
用户激活
用户收到激活链接后(邮件或其他方式),可按以下步骤激活账号:
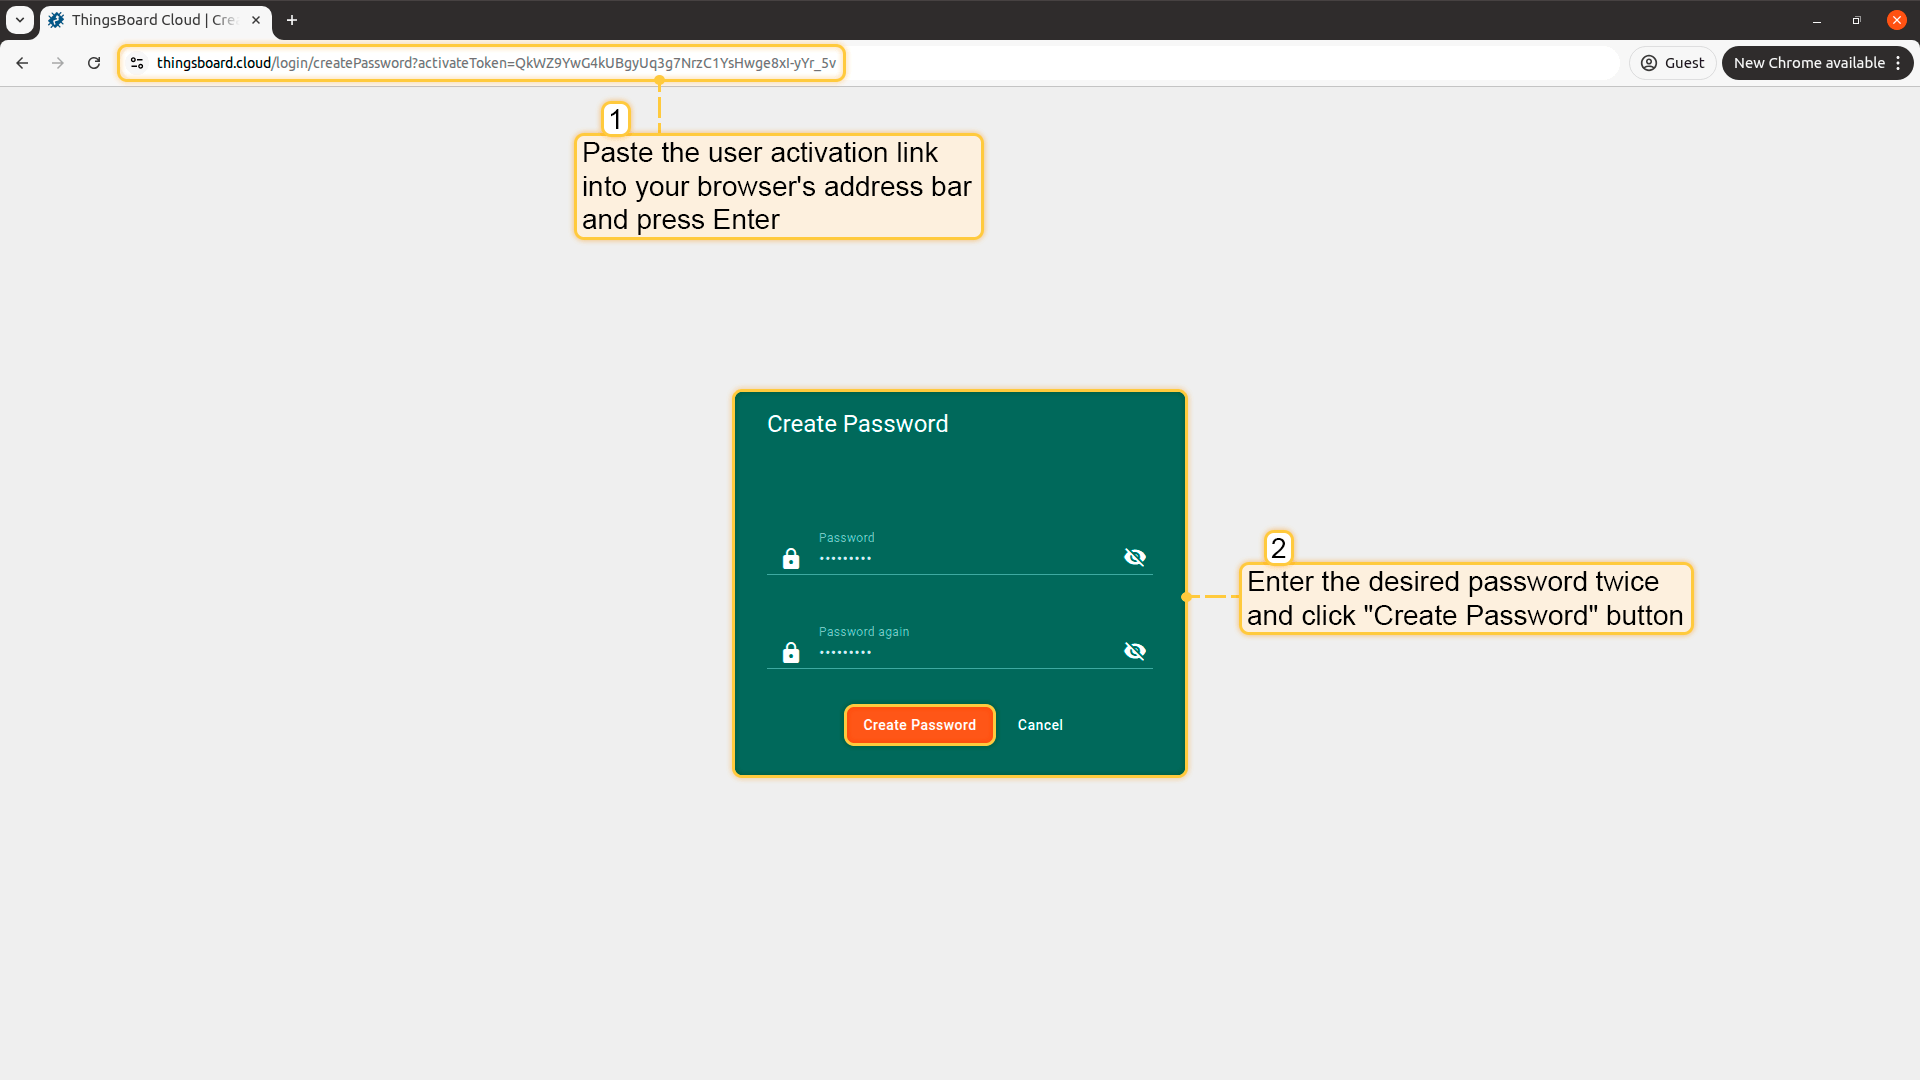
点击激活链接,或复制到浏览器地址栏后按Enter。
系统会提示创建密码。
输入密码两次确认。
点击“Create Password”。
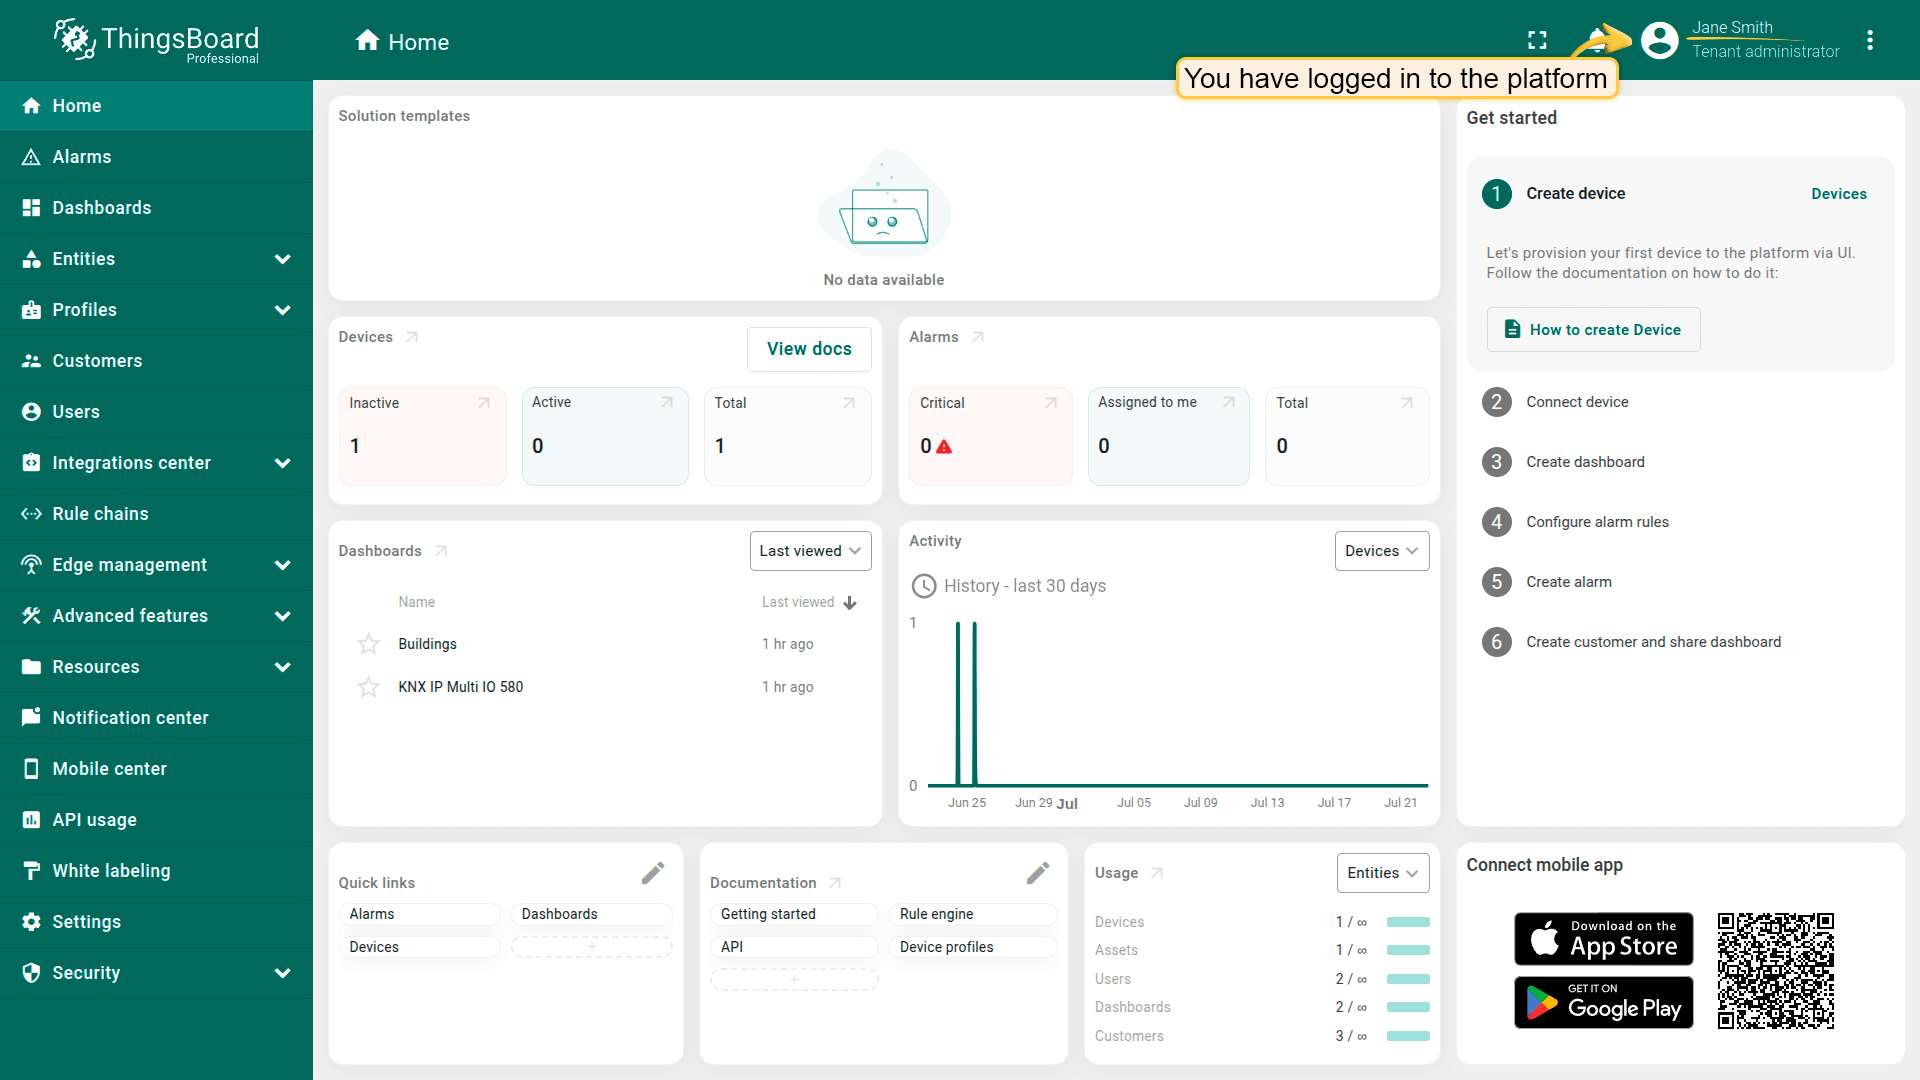
完成后,用户将登录到其实例,并依据分配的权限访问资源。
Click the activation link, or copy and paste it into your browser’s address bar and press Enter. You will be prompted to create a password. Enter the desired password twice to confirm. Click "</b>Create Password</b>".
After completing this step, the user will log in to their instance and gain access to resources according to the permissions assigned to them.
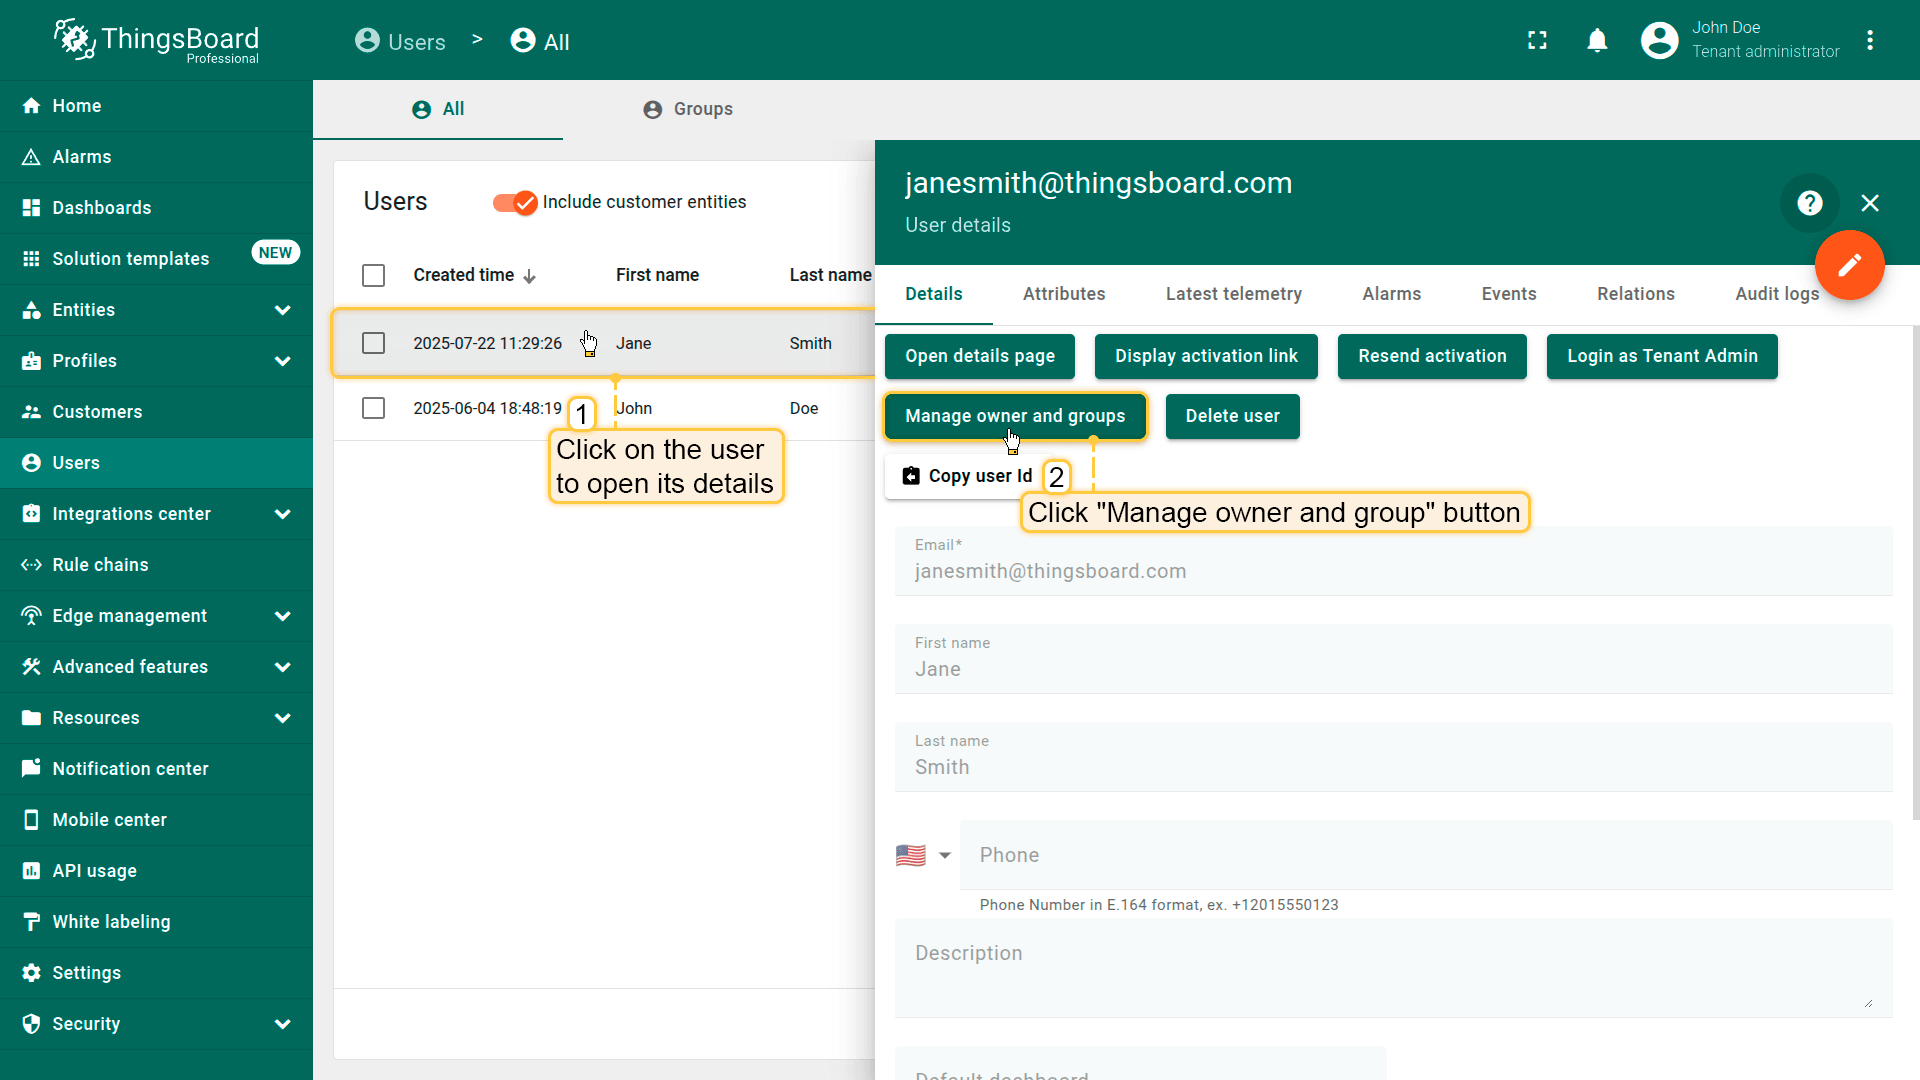
Click user to open its details view and click the "Manage owner and groups" button.
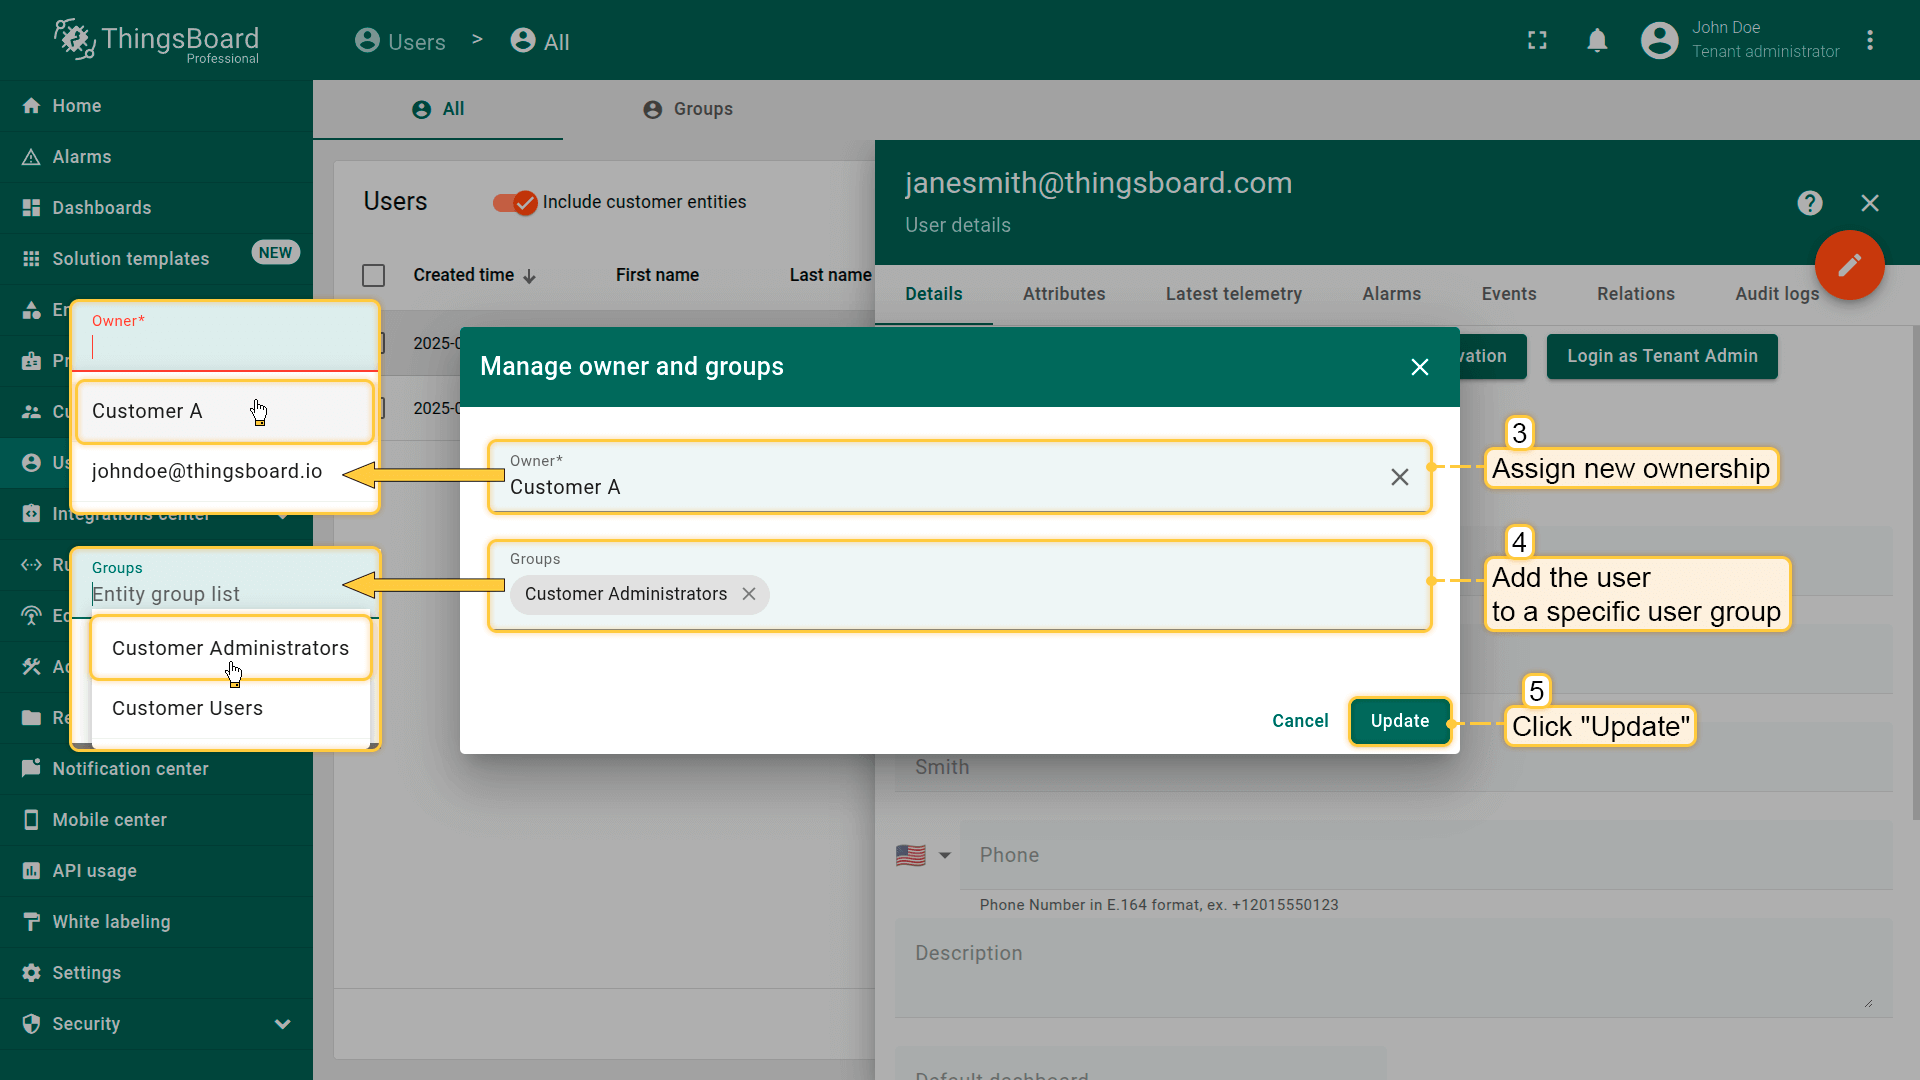
Perform the required actions: Select a new owner or the user from the dropdown list; Add the user to one or more existing user groups, or create a new group if needed. Click "Update" to confirm and apply the changes.
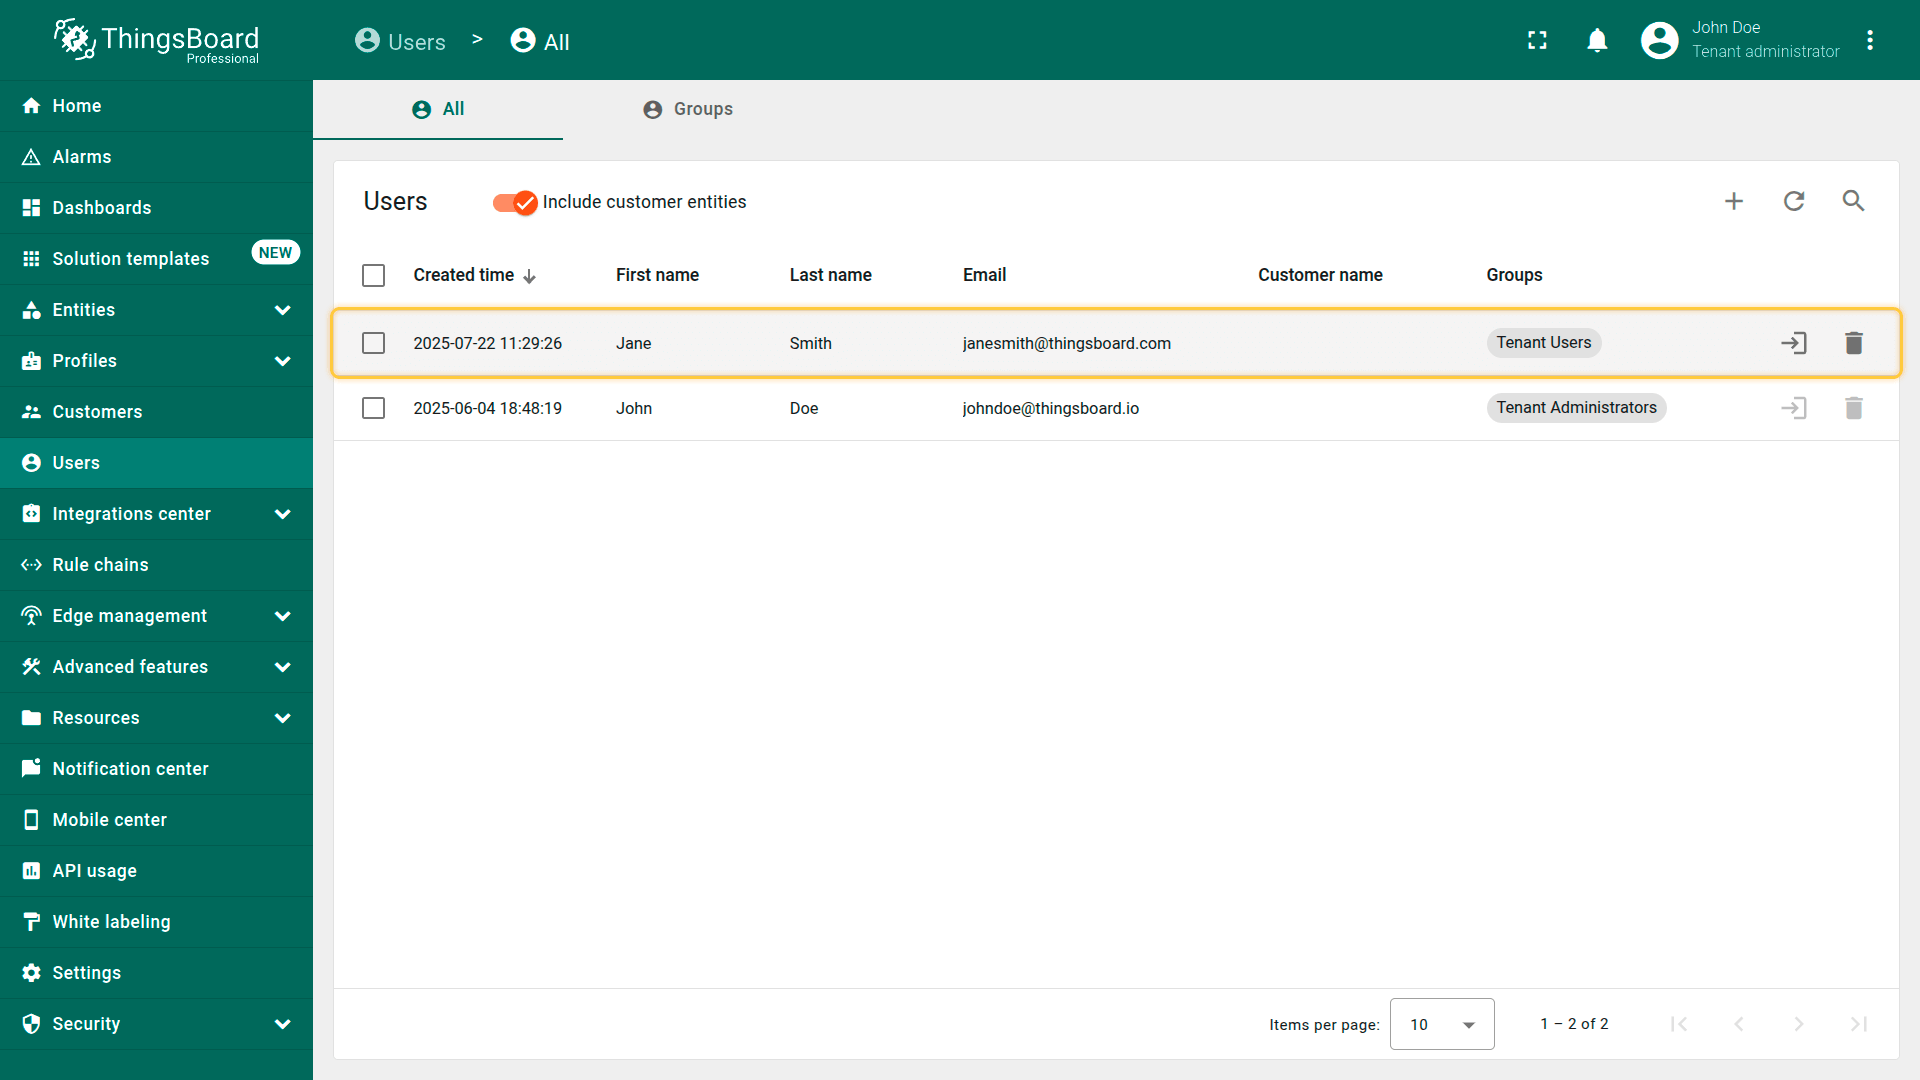
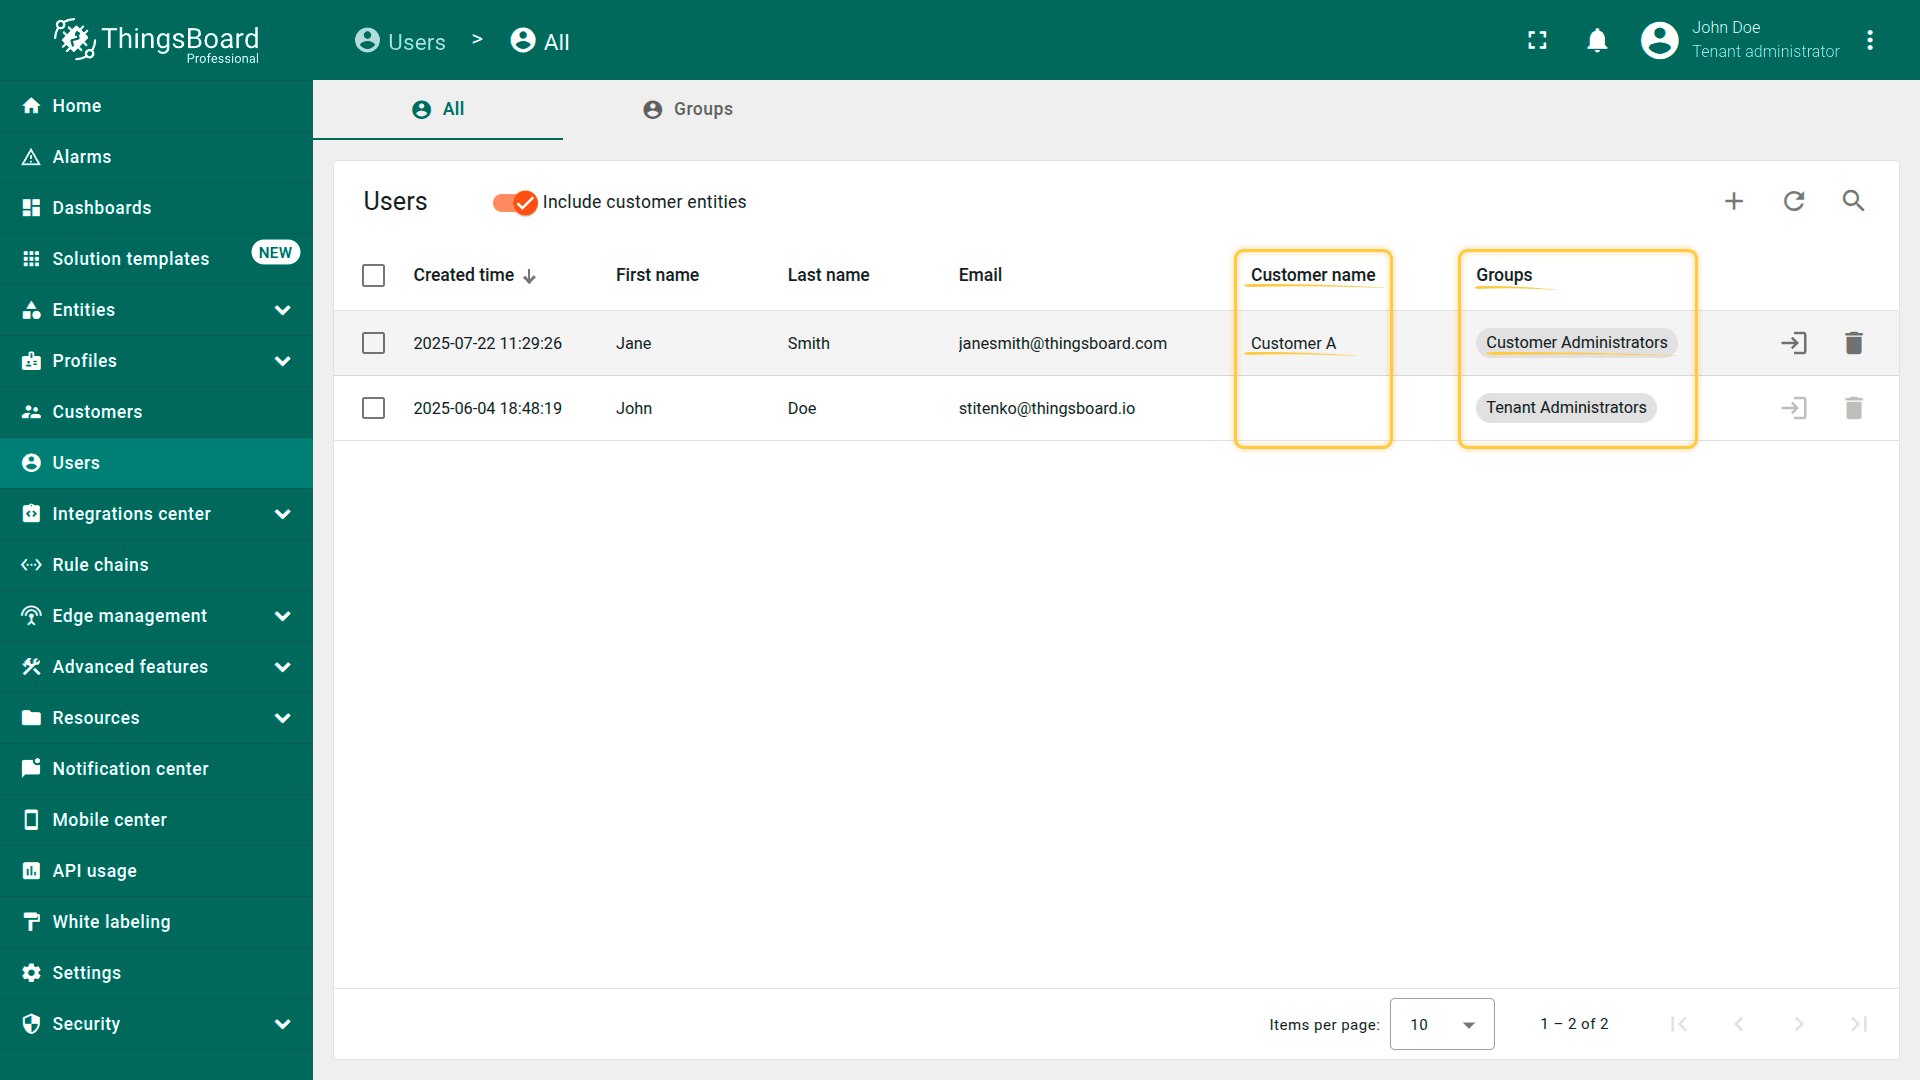
In the "Groups" column, you can see the name of the group to which the user has been added.
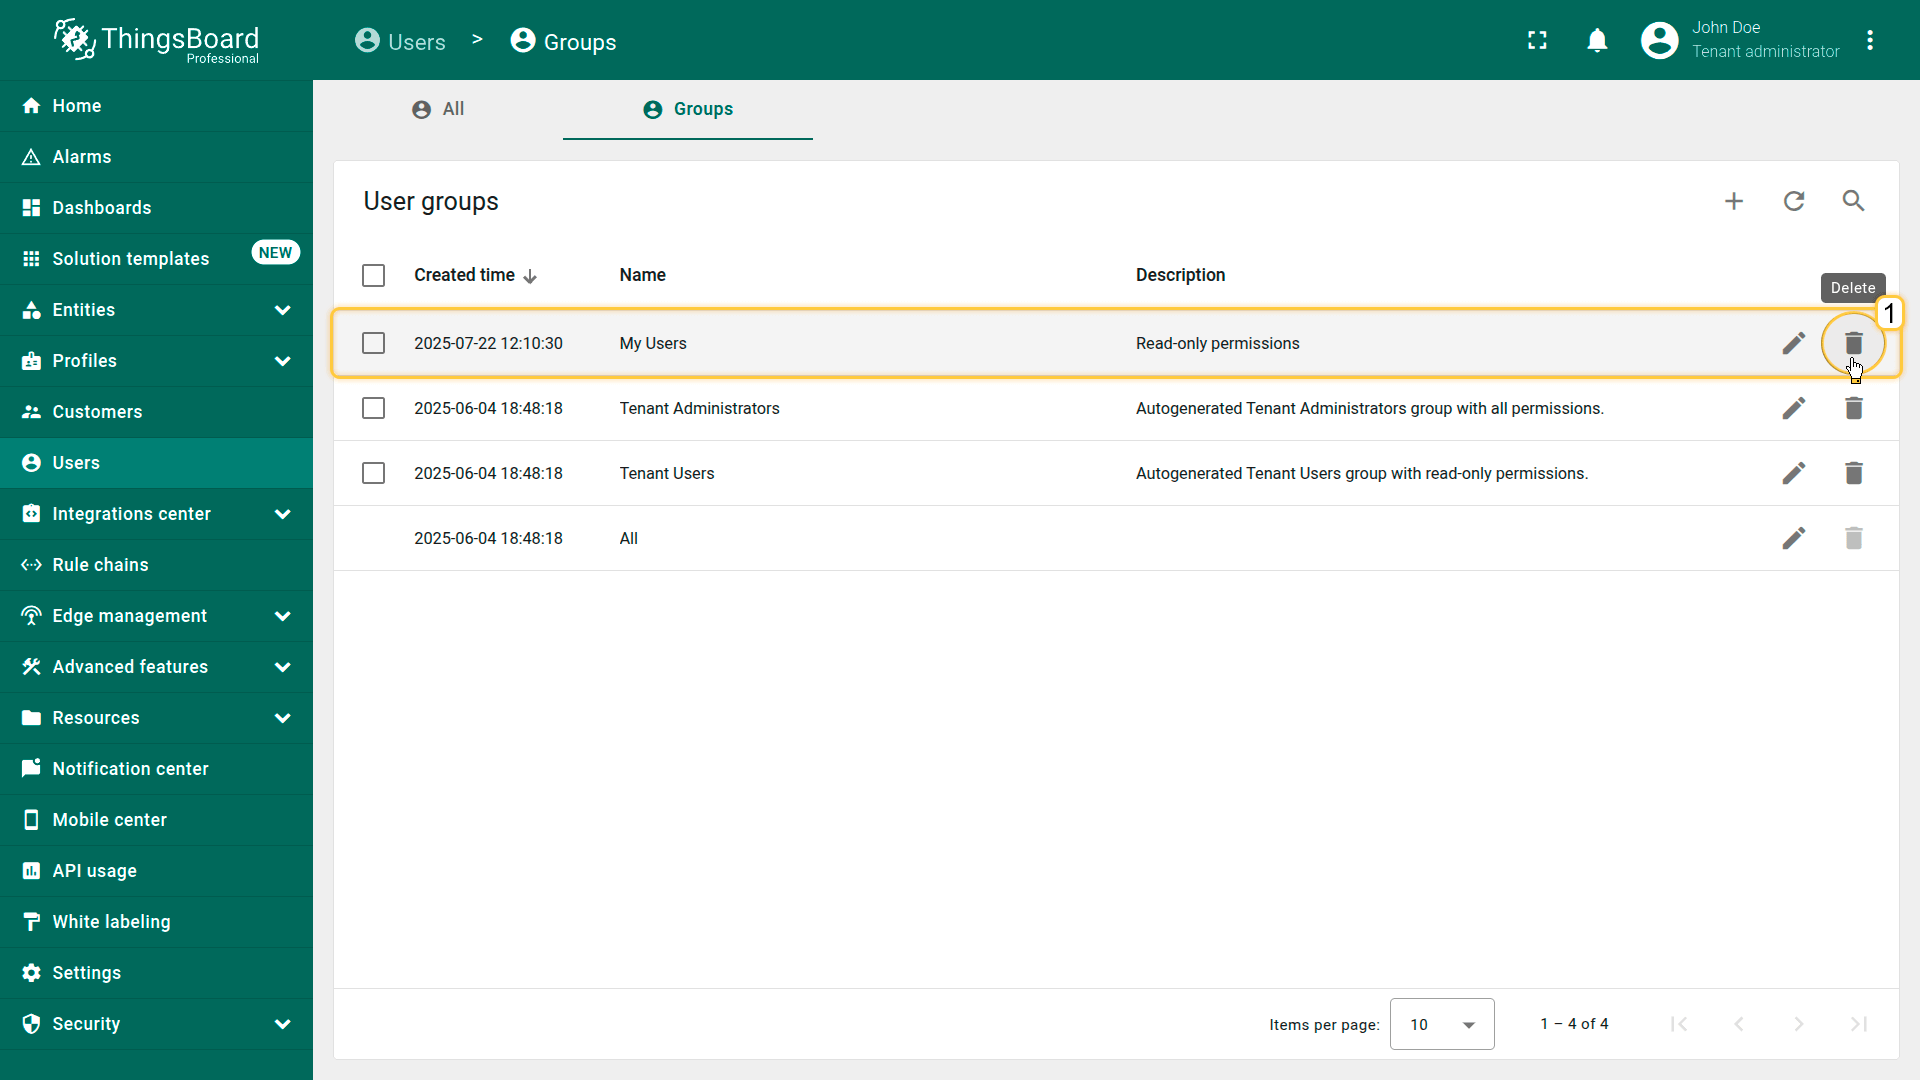
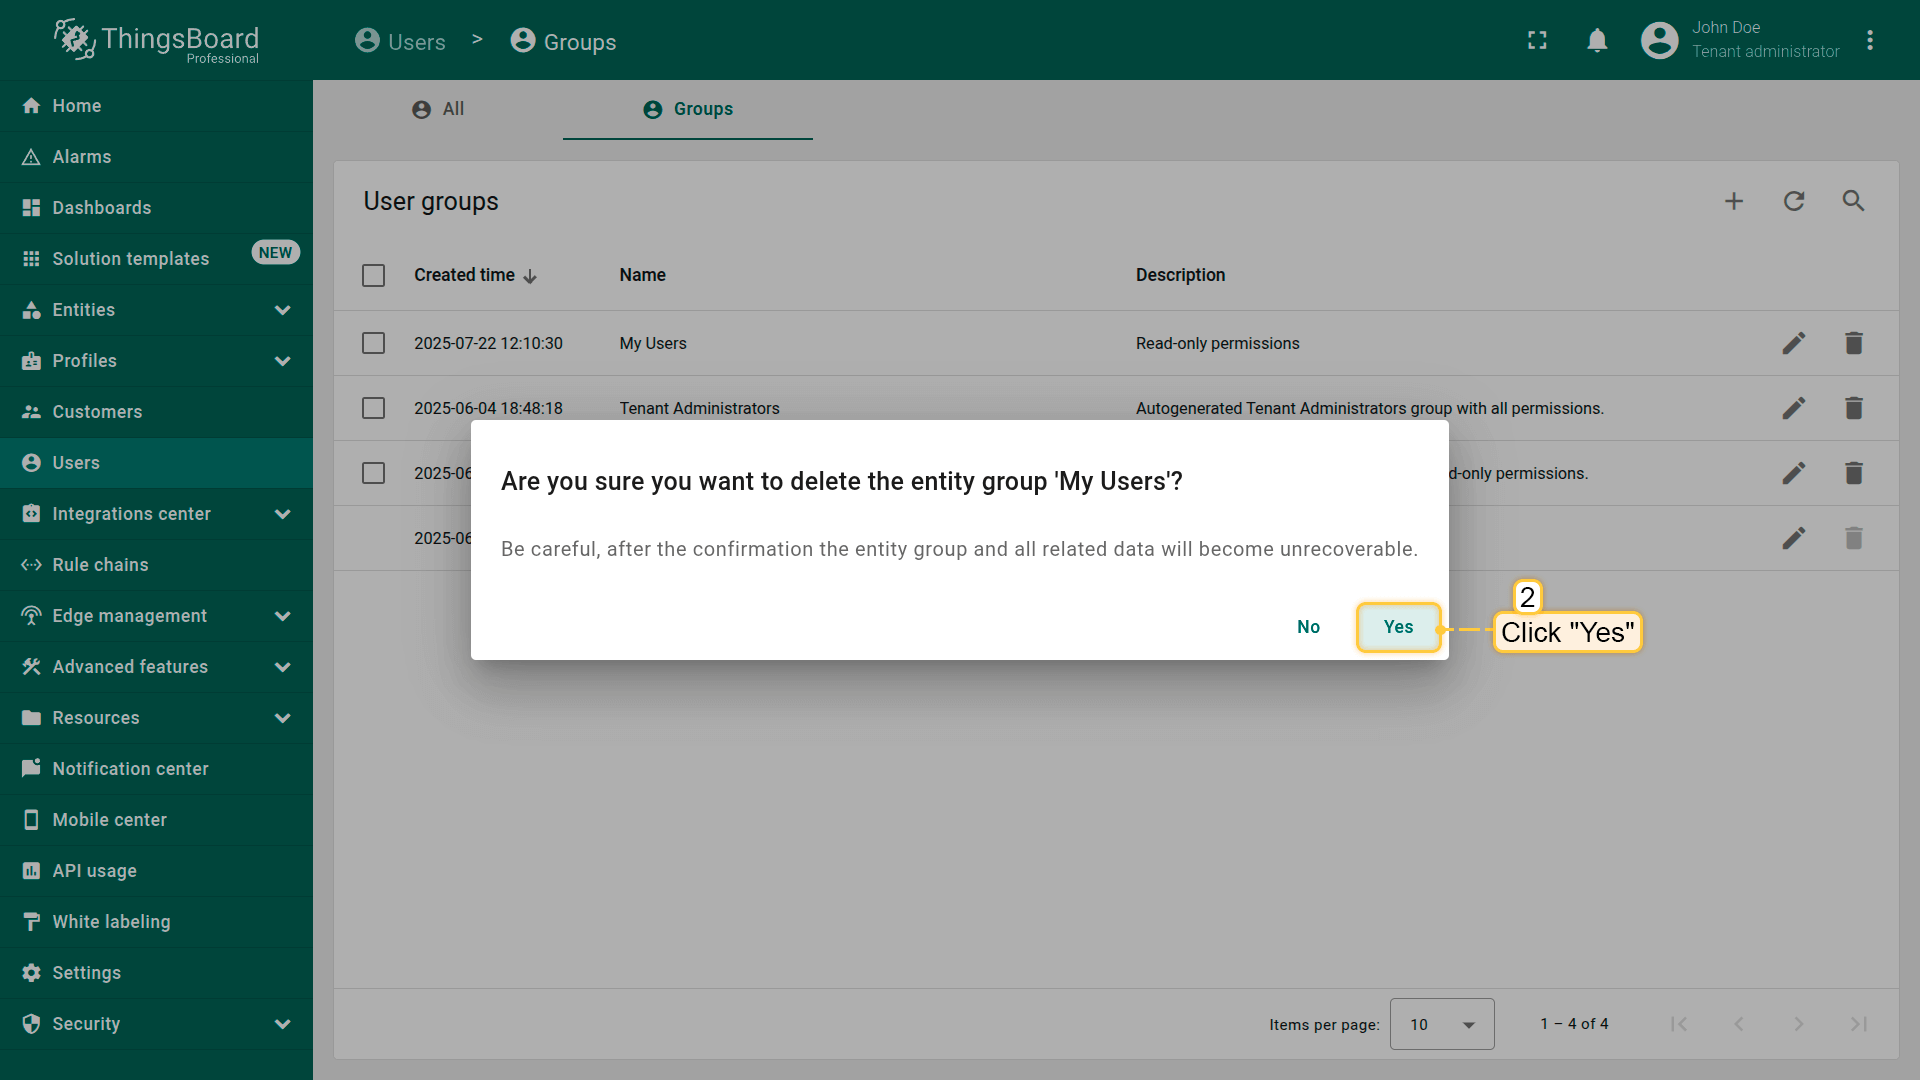
From the Users screen, navigate to the "Groups" tab, and click the "trash bin" icon (🗑)️ at the end of the row for the group you want to delete.
Confirm the deletion in the dialog prompt.
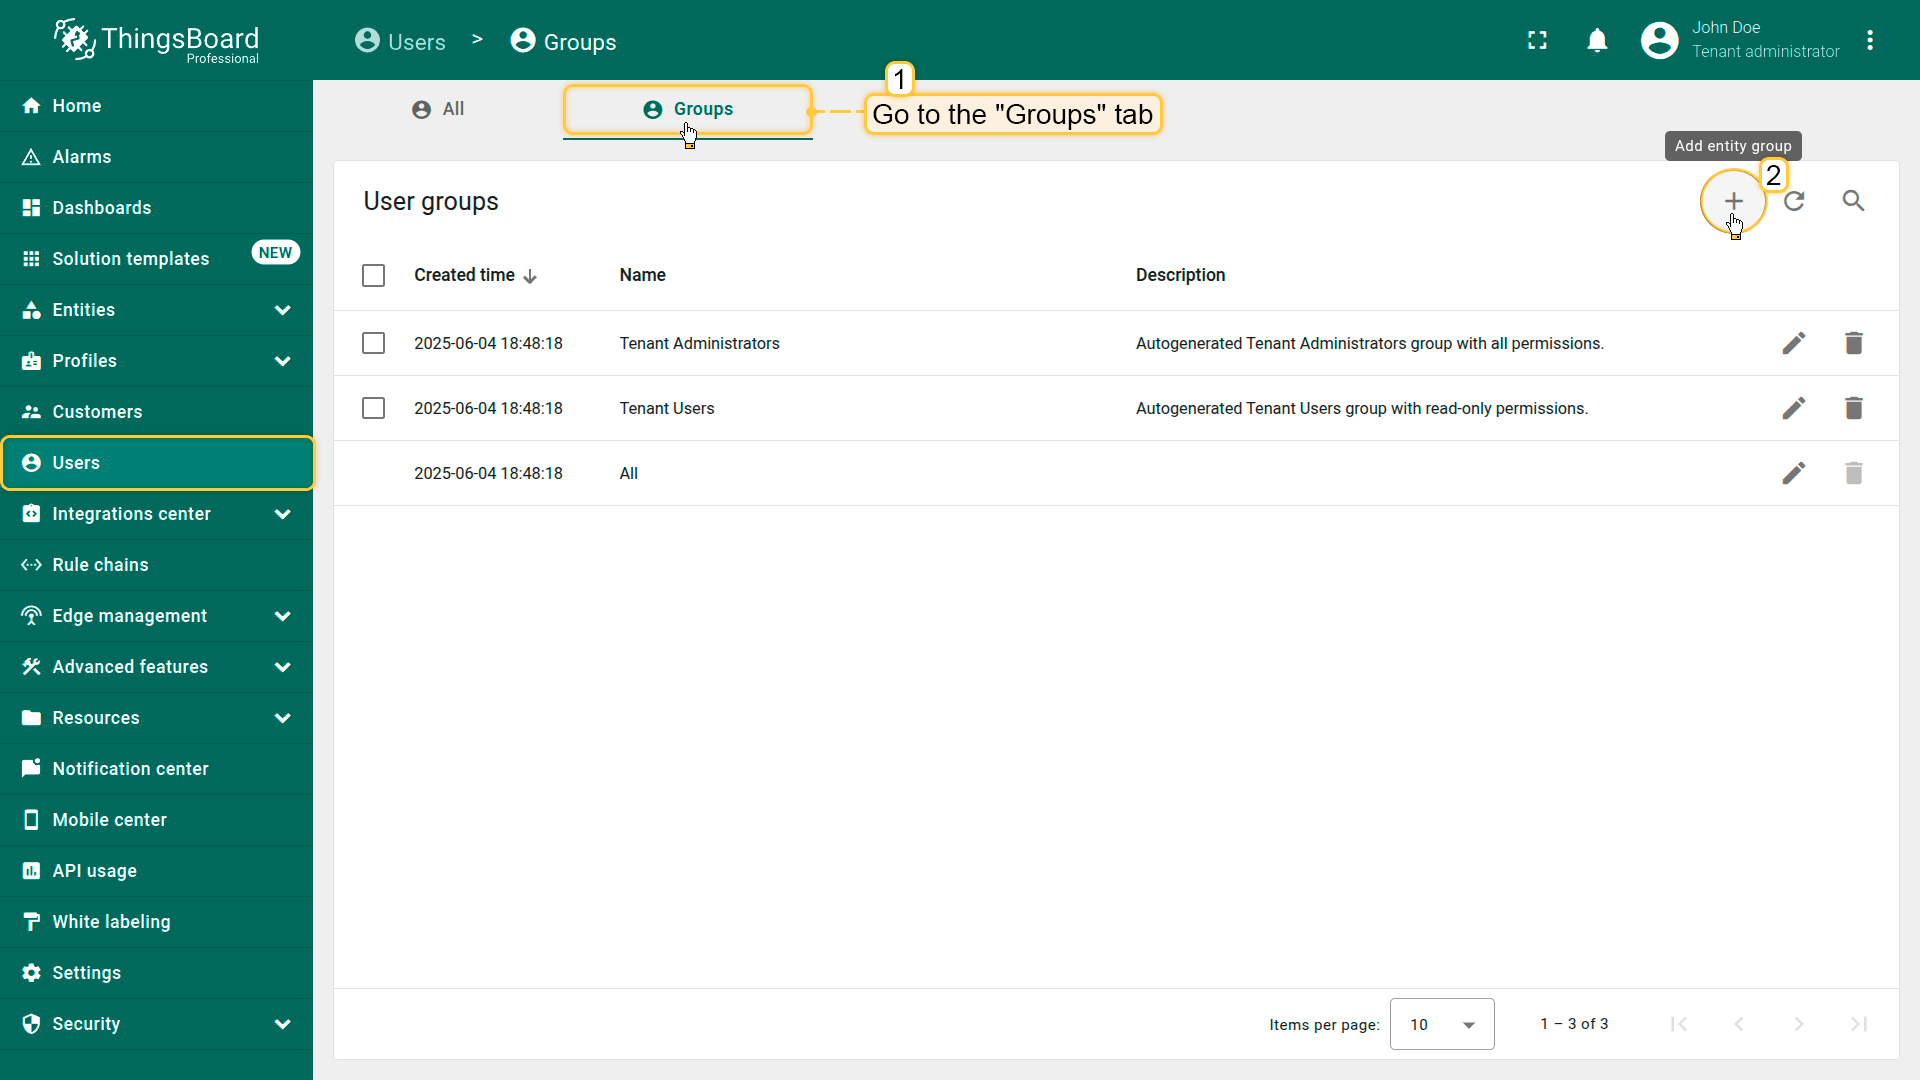
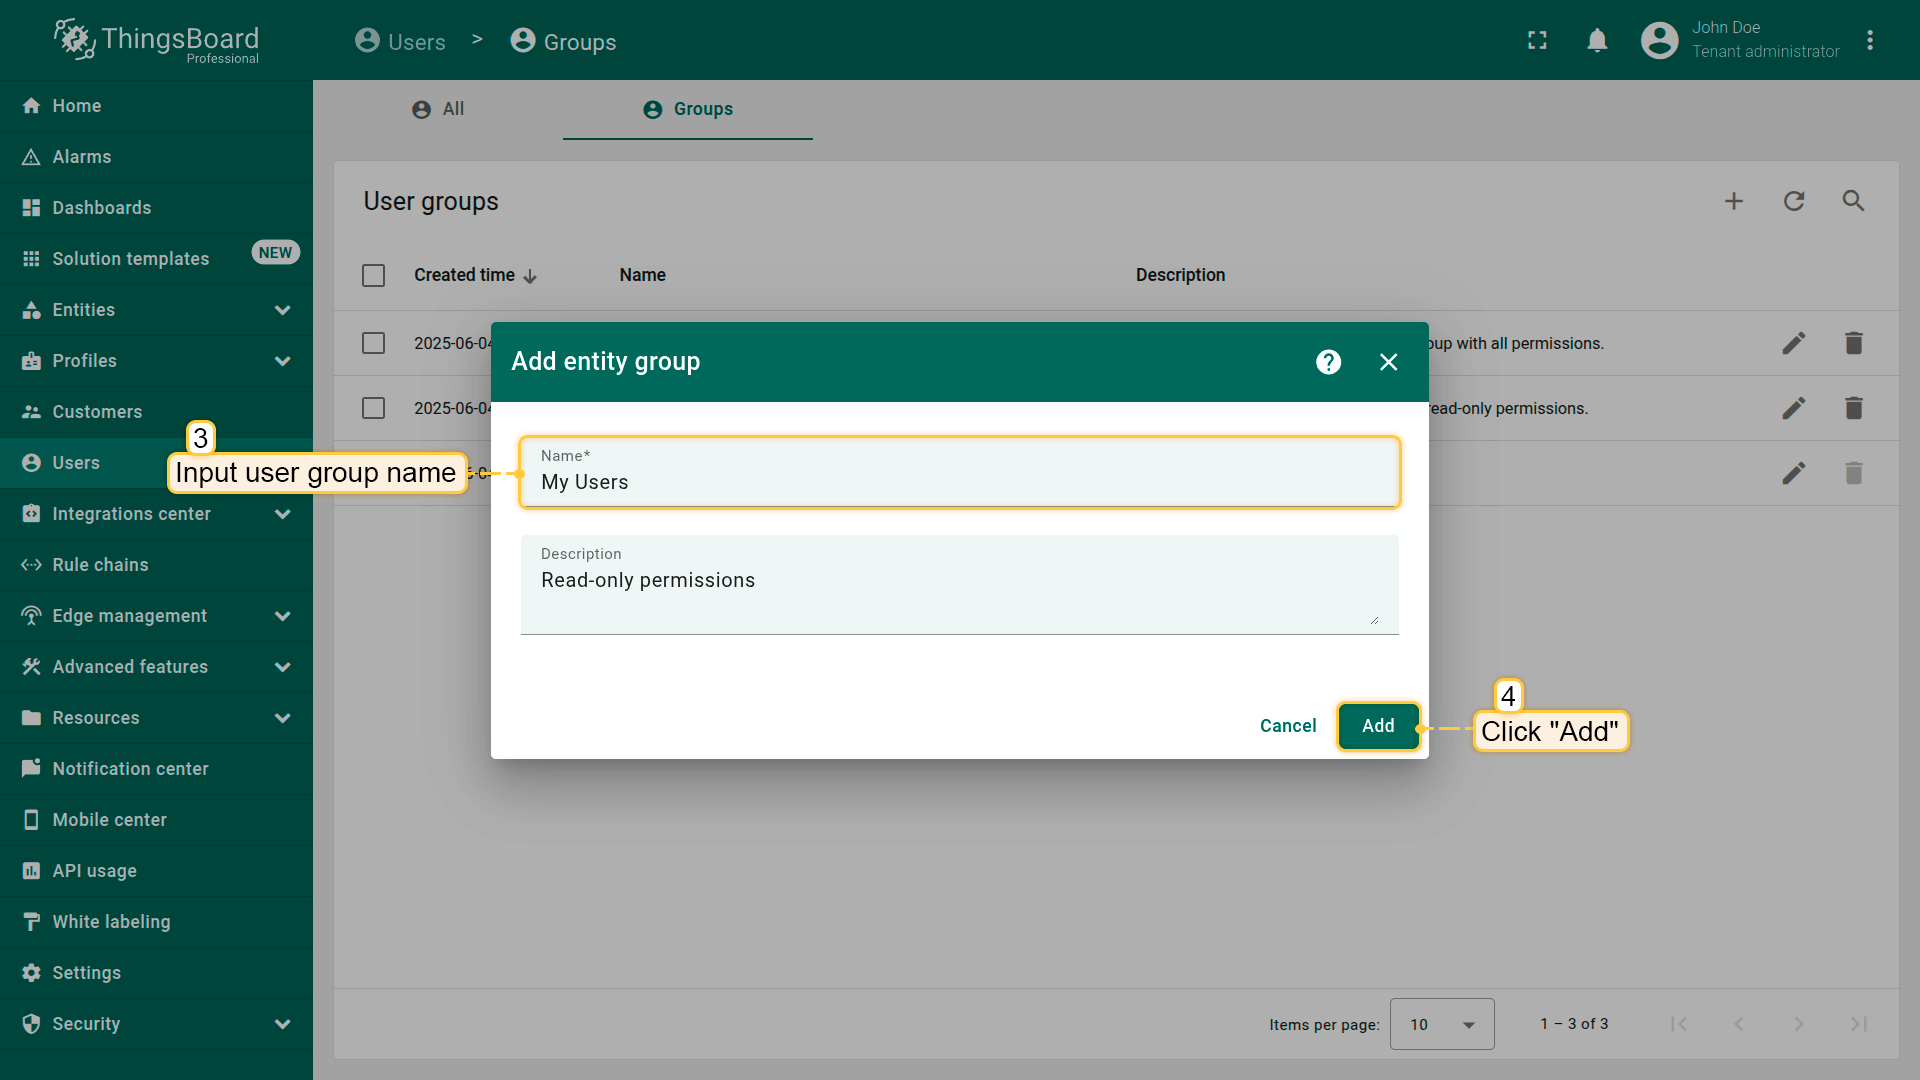
From the Users screen, navigate to the "Groups" tab. Click the "+" (Add entity group) icon in the upper-right corner.
Enter the name for the new user group and click "Add" to create the group.
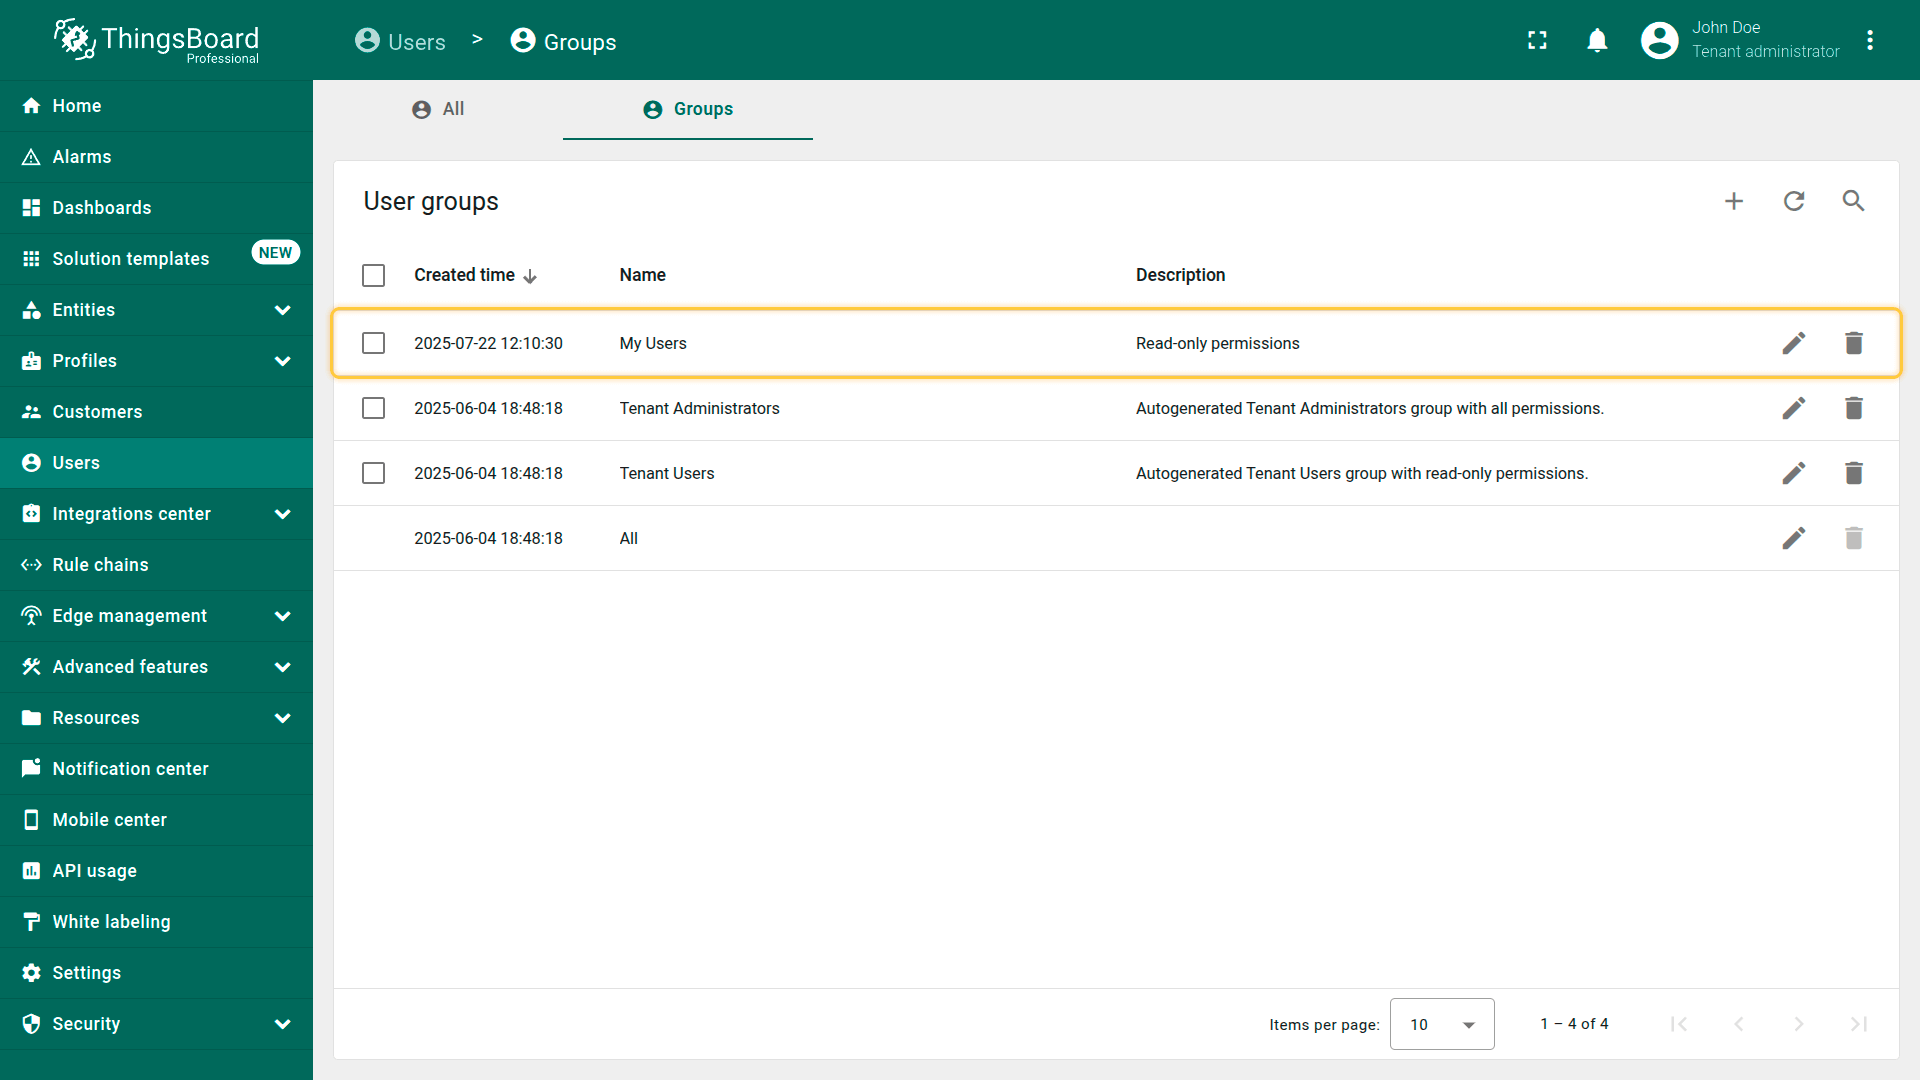
Once created, you can add users to this group and configure group-level permissions to control access to specific entities, dashboards, or features.
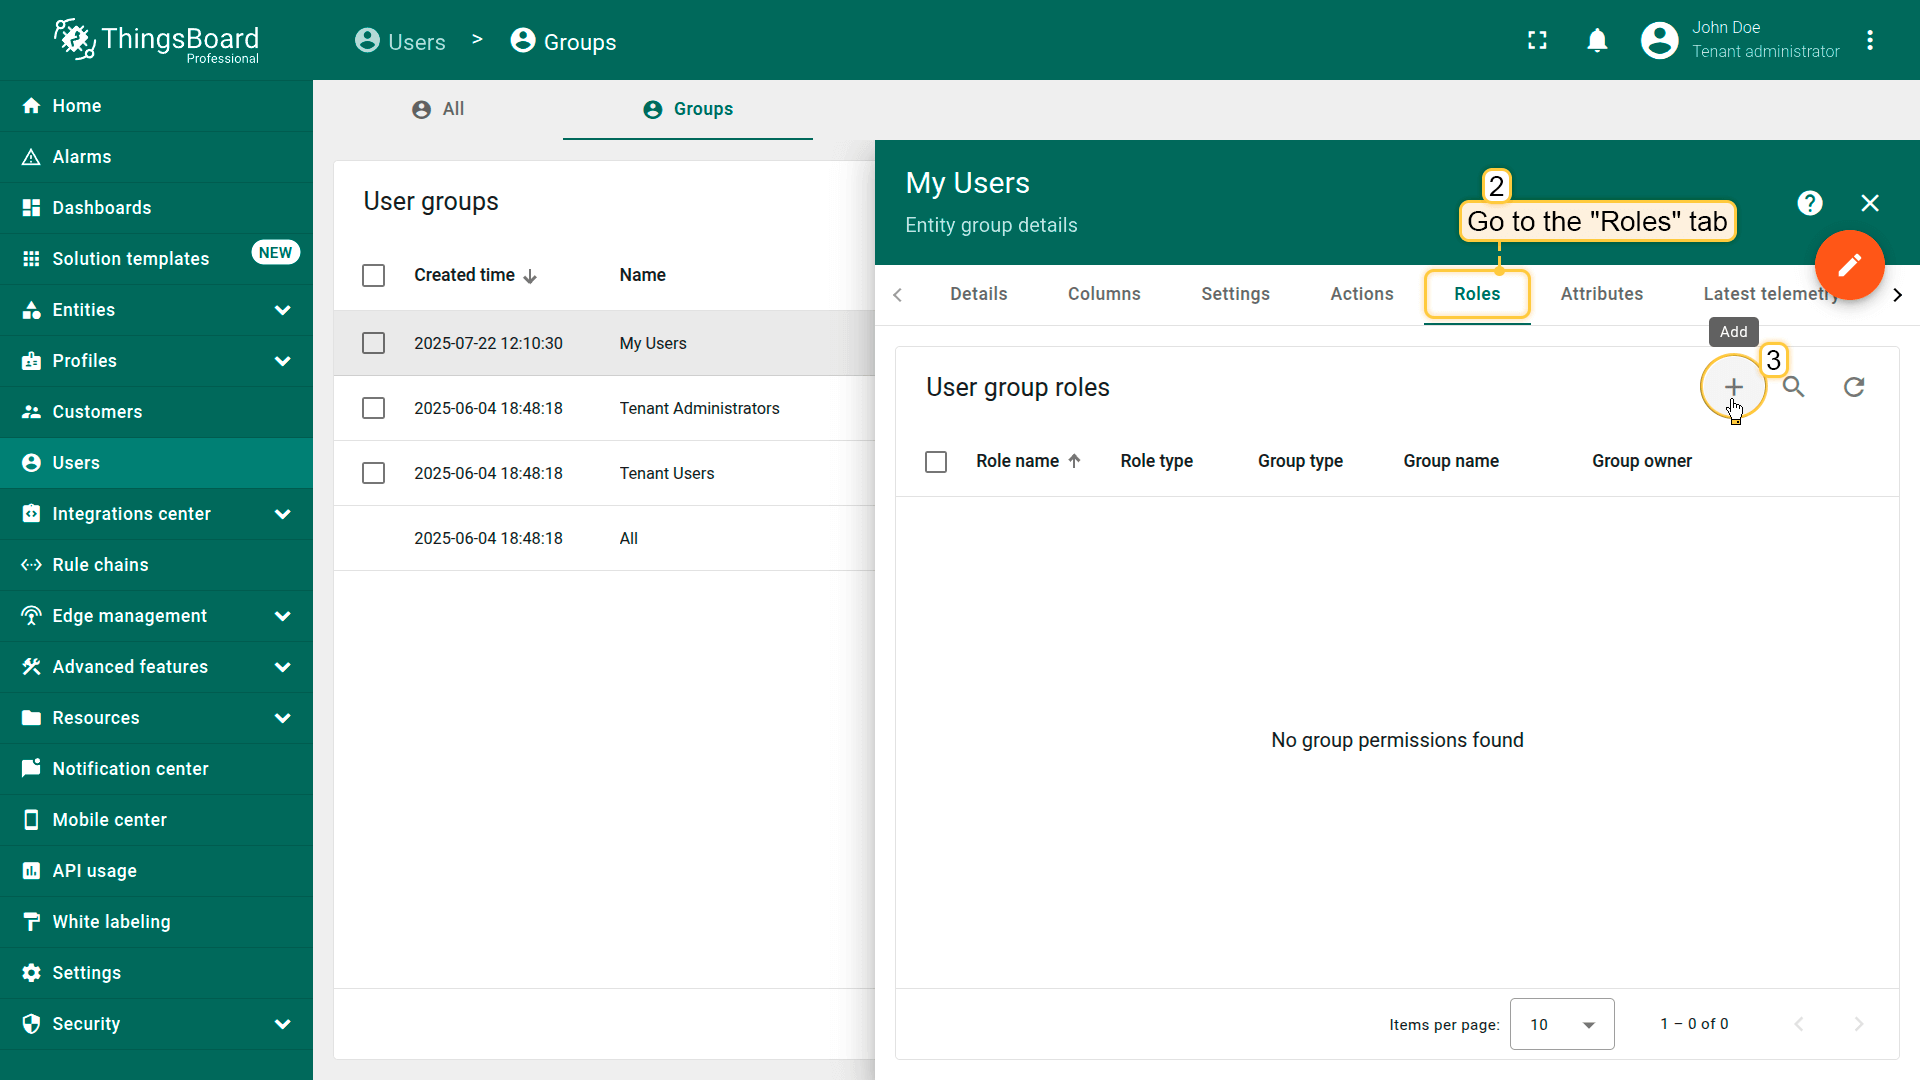
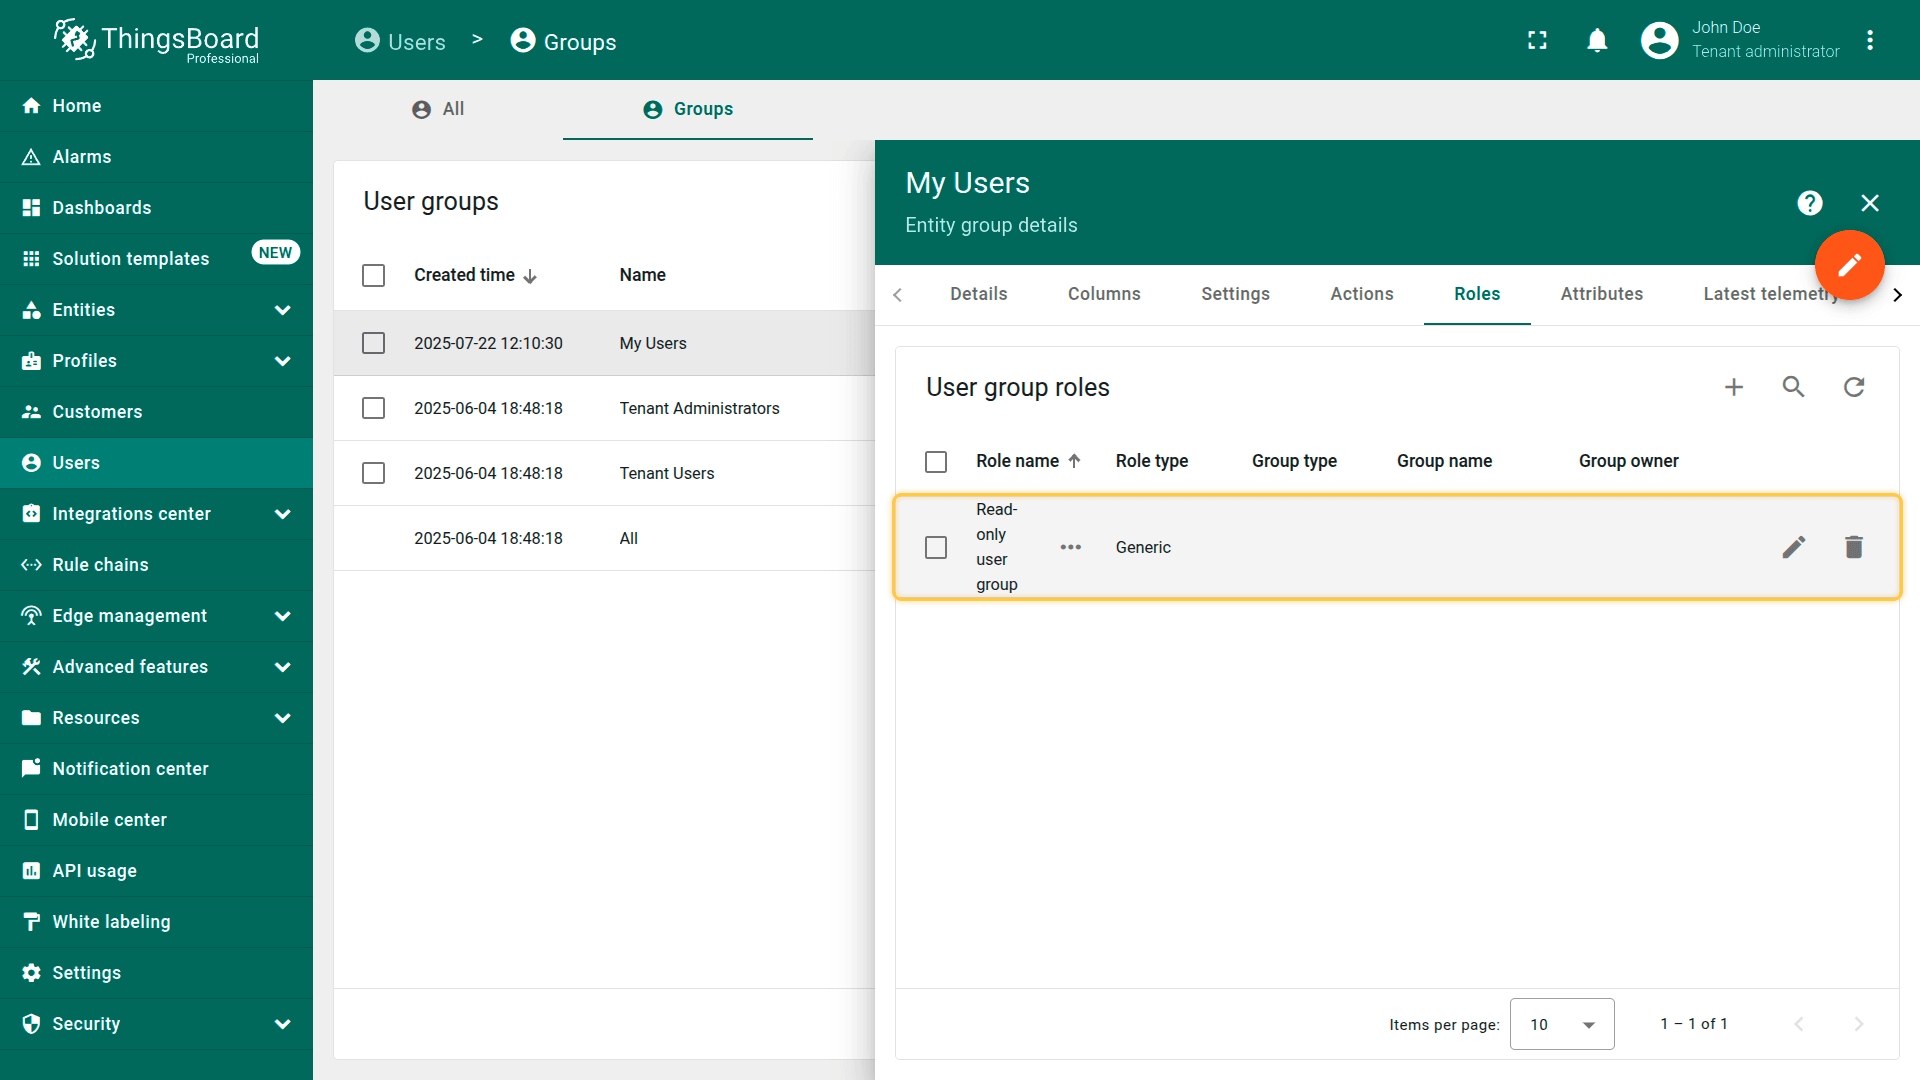
In the "Groups" tab of the Users section, click the "pencil" (✏️) icon next to the desired user group.
In the group details view, navigate to the "Roles" tab. Click "+" (Add) to assign a role to the group.
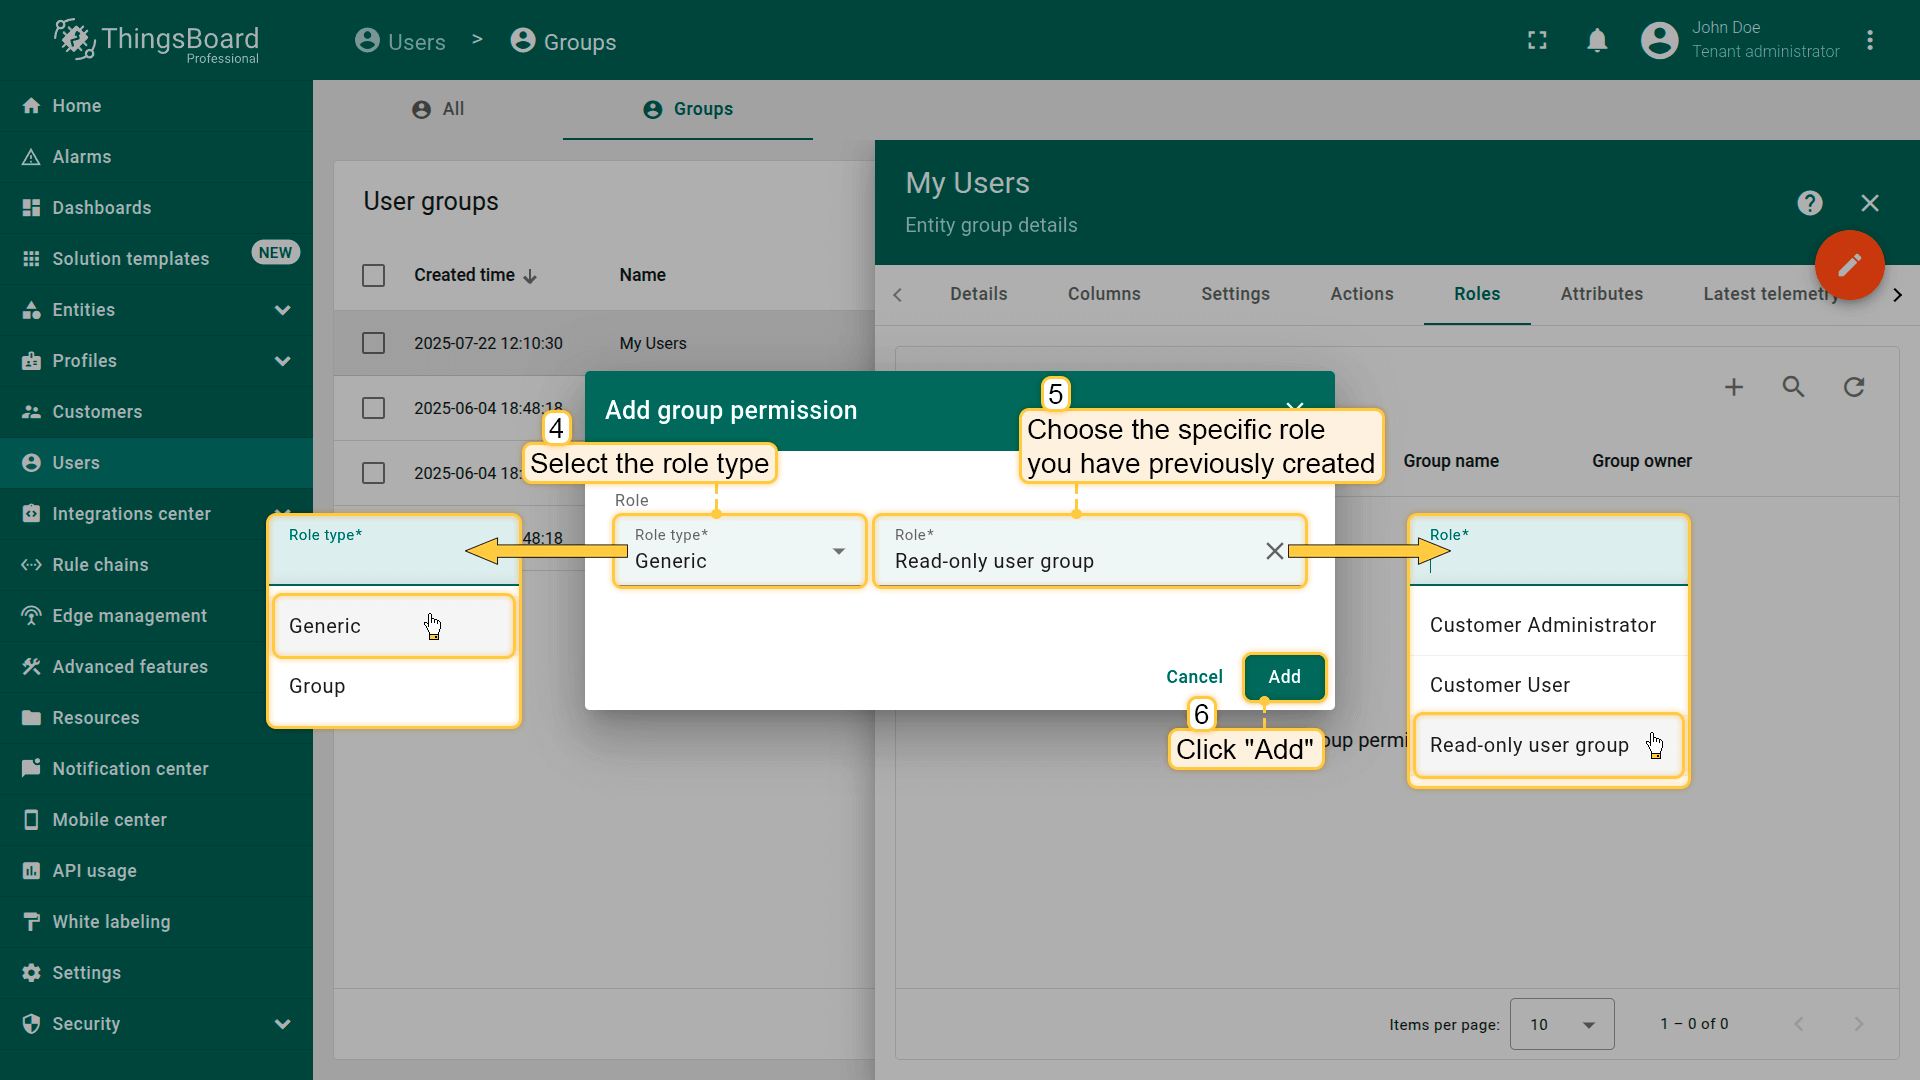
In the dialog window: select the role type, choose the specific role you have previously created, and click "Add" to apply the role to the group.
Once completed, all users in this group will inherit the permissions defined by the selected role.
删除用户组
具备权限的用户可以删除用户组。
删除用户组不会移除组内用户,用户仍保留在系统中。
用户可同时属于多个组,删除某个组后仍可能通过其他组保留访问权限;且所有用户默认都属于“All”组。
删除用户组:
在 Users 页面进入“Groups”选项卡。
点击目标用户组行末的垃圾桶图标(🗑)。
在对话框中确认删除。
说明:删除用户组会撤销该组对其成员赋予的权限。
From the Users screen, navigate to the "Groups" tab, and click the "trash bin" icon (🗑)️ at the end of the row for the group you want to delete.
Confirm the deletion in the dialog prompt.