概述
实体表(Entity Table)部件显示与所选别名和筛选器匹配的实体列表及其最新值,支持附加全文搜索和分页选项。 可通过部件样式、数据源键和 部件操作进行高度自定义。
配置实体表部件
要开始使用实体表部件,需先创建仪表板并向其添加部件。
创建仪表板
首先创建仪表板以可视化我们的遥测数据。 可使用现有仪表板或为新用例创建新仪表板。本示例中,我们为教程创建了名为“Entity Table”的新仪表板。
向仪表板添加部件
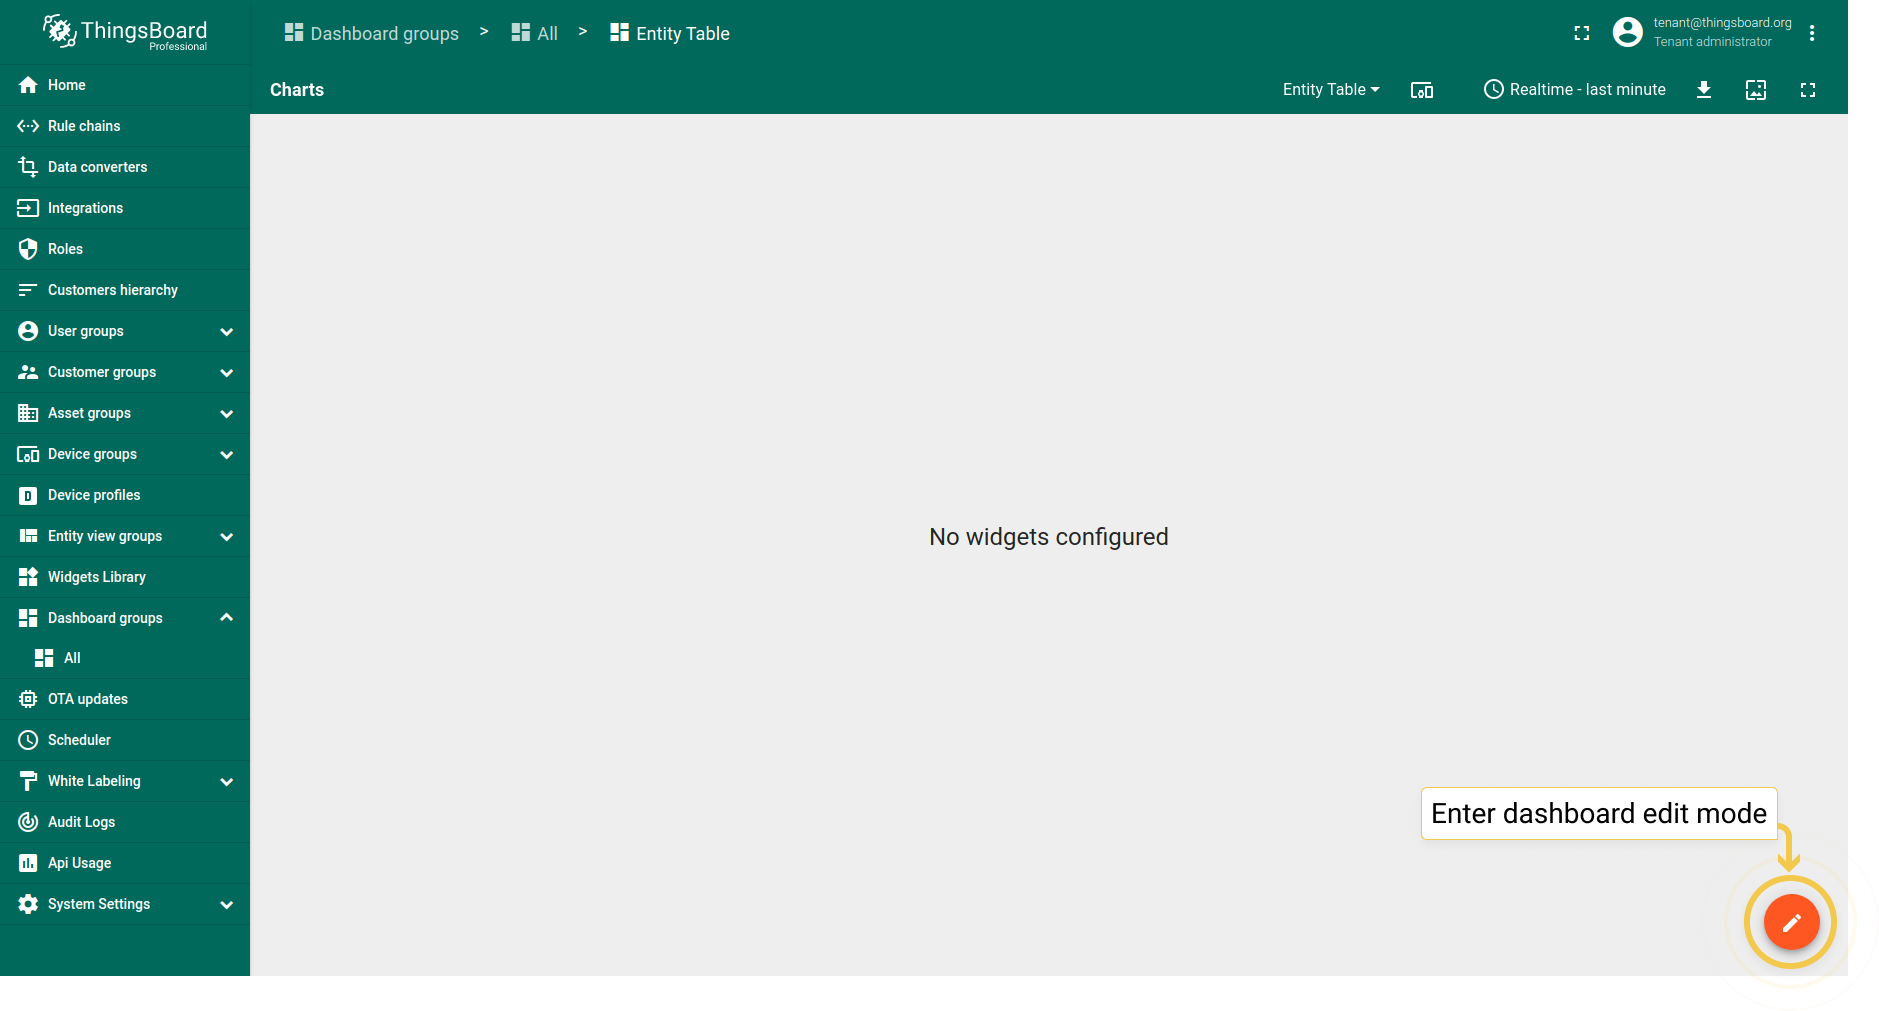
下一步是可视化遥测数据。要向仪表板添加实体表部件,请执行:
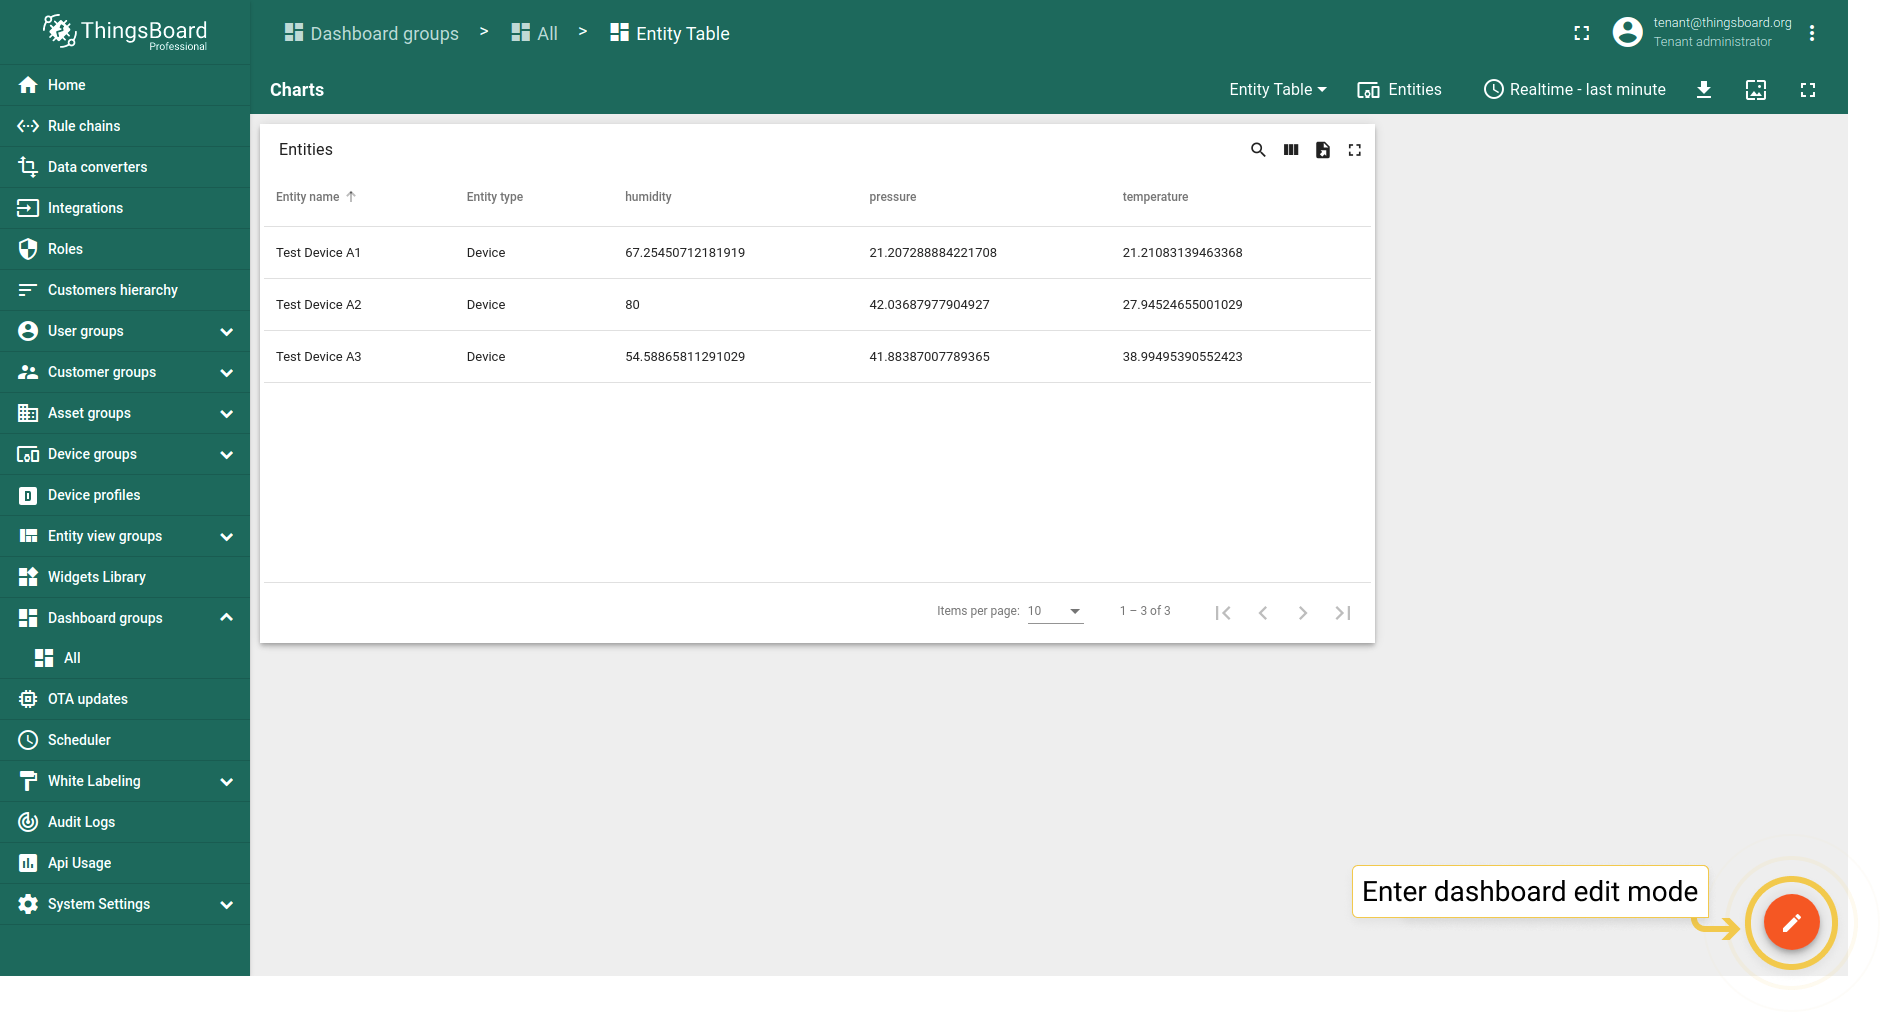
- Enter dashboard edit mode by clicking the pencil icon in the lower right corner of the screen.
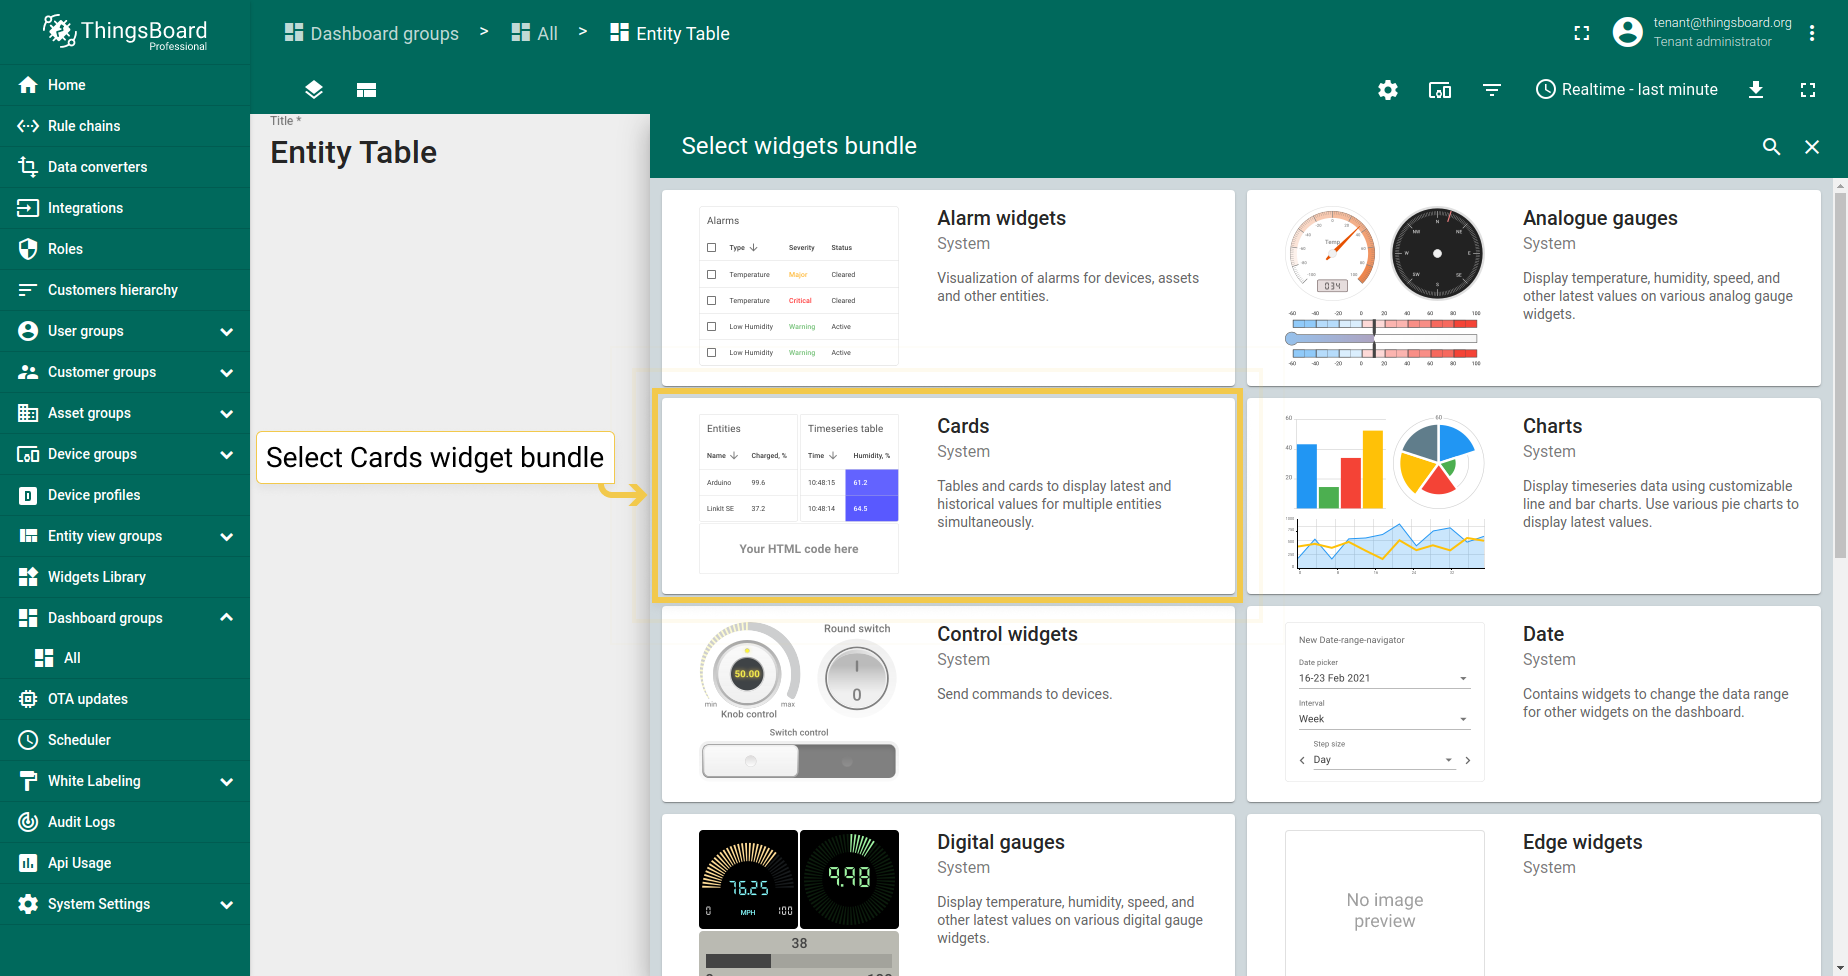
- Click the big sign in the middle of the screen or the plus icon ("Add new widget") in the lower right corner of the screen. From the drop-up menu, select Create new widget.
- In the widgets bundle selection dialog window, choose Cards.
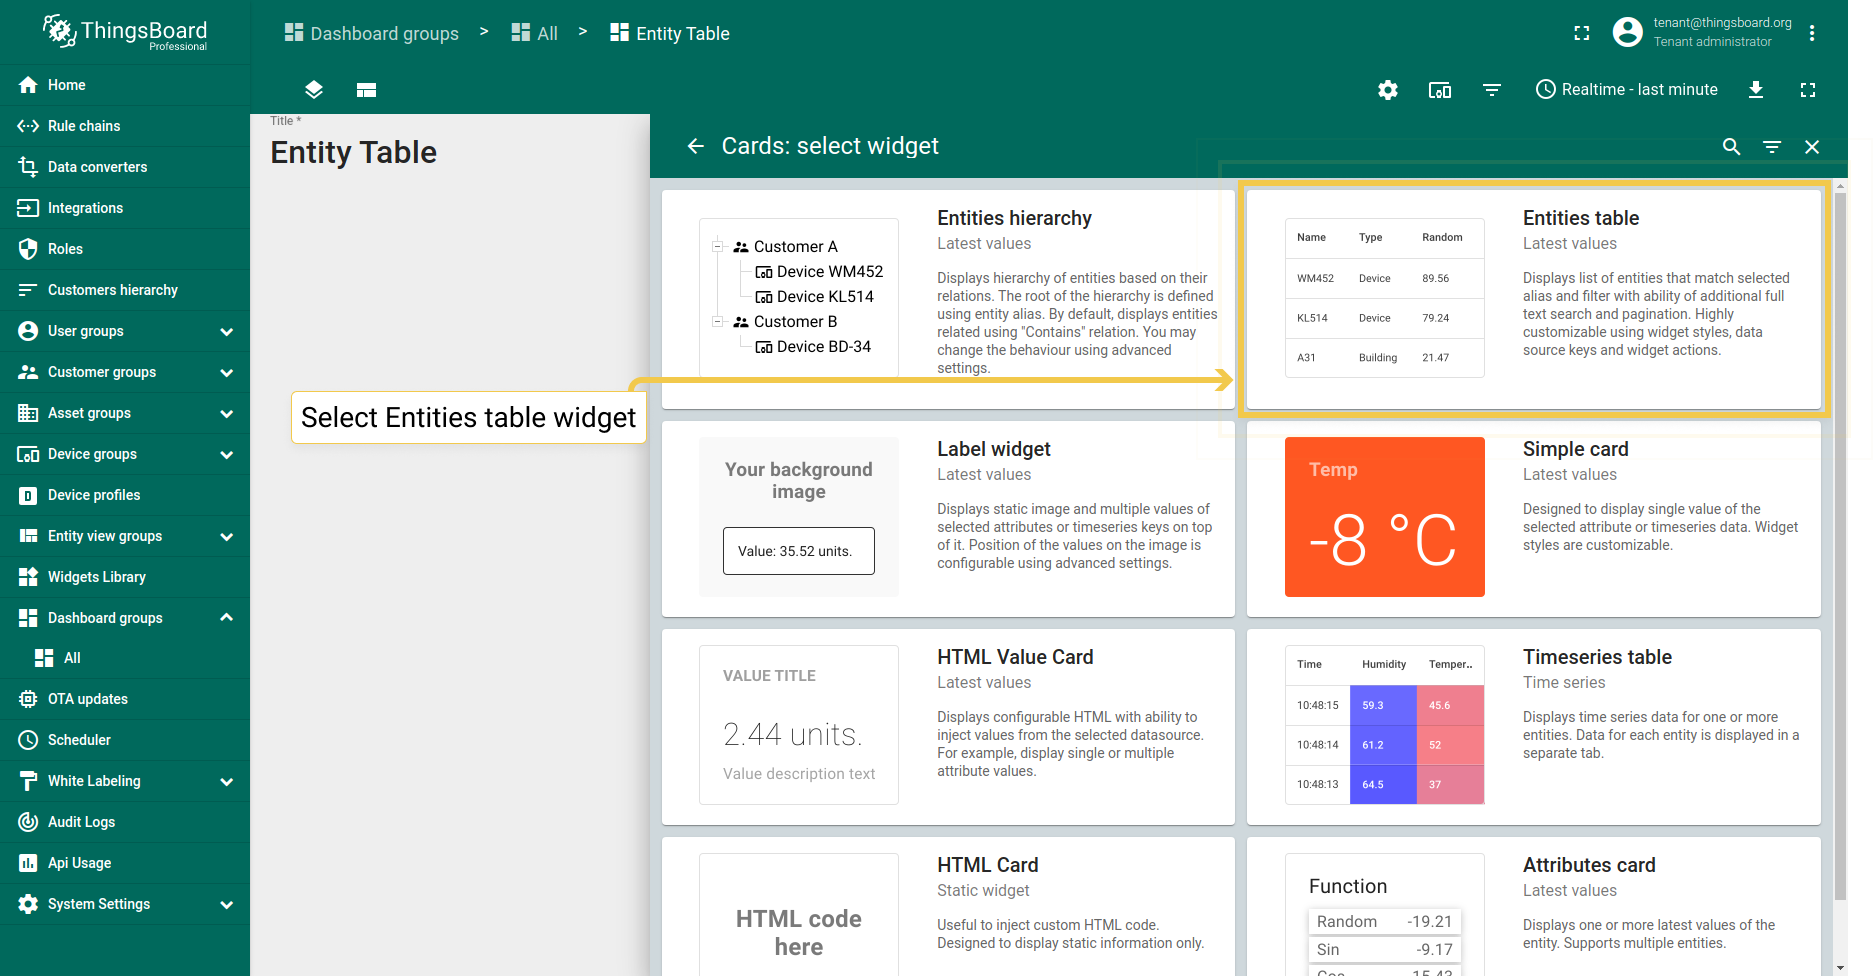
- From the Cards bundle, select the Entities table widget.
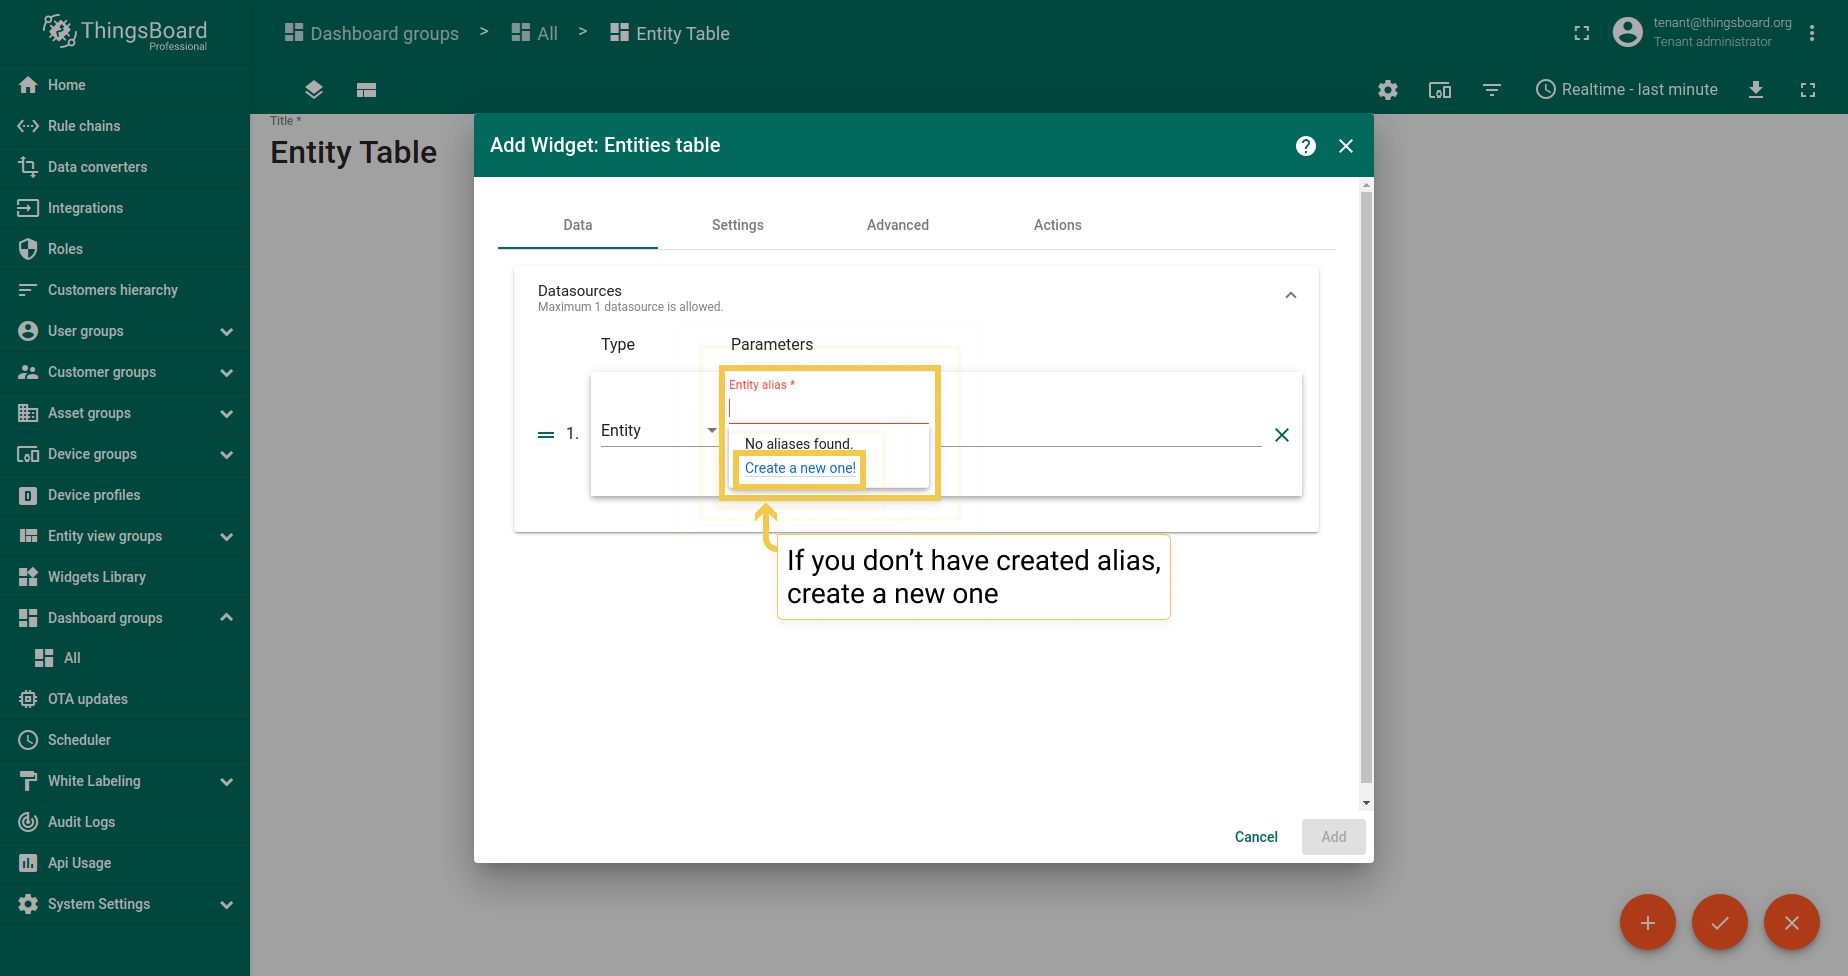
- Click Add to attach a datasource to your widget to specify entity from which we will receive telemetry data.
- If you have added an alias before, select it from the drop-down menu. If not, click "Create a new one!".
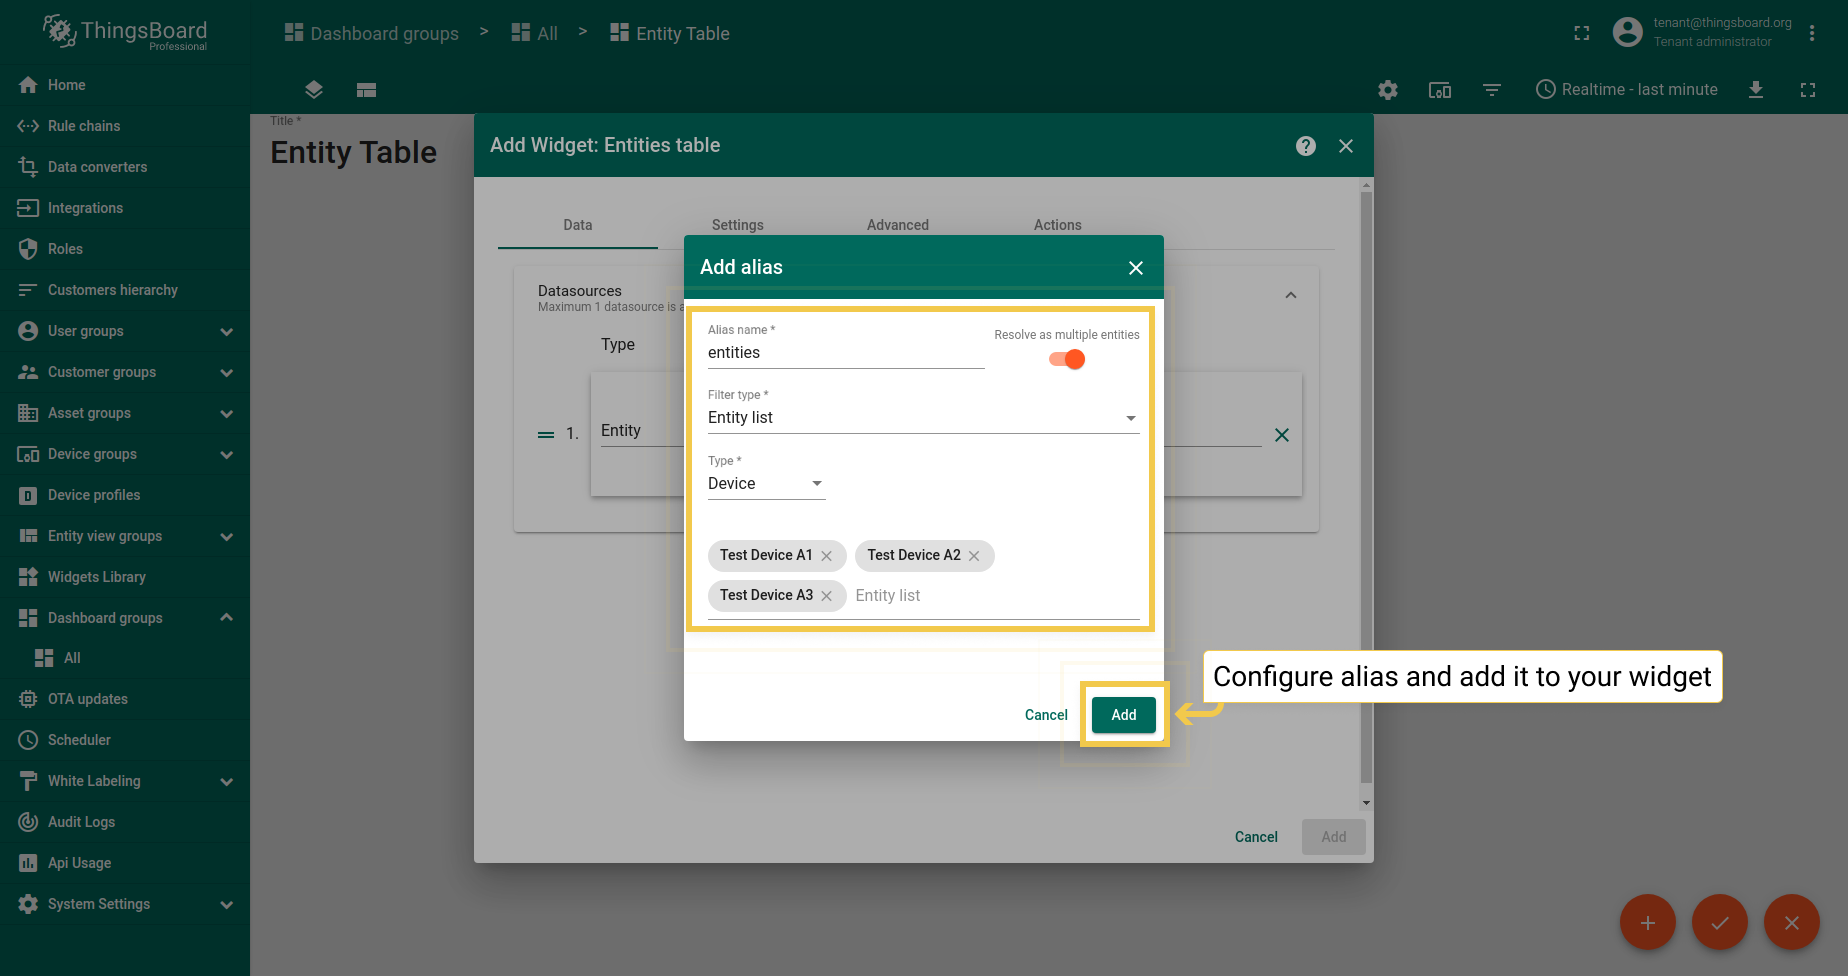
- You can learn how to add an alias and aliases types by following the link below the screenshots section. After configuring the alias settings, click Add.
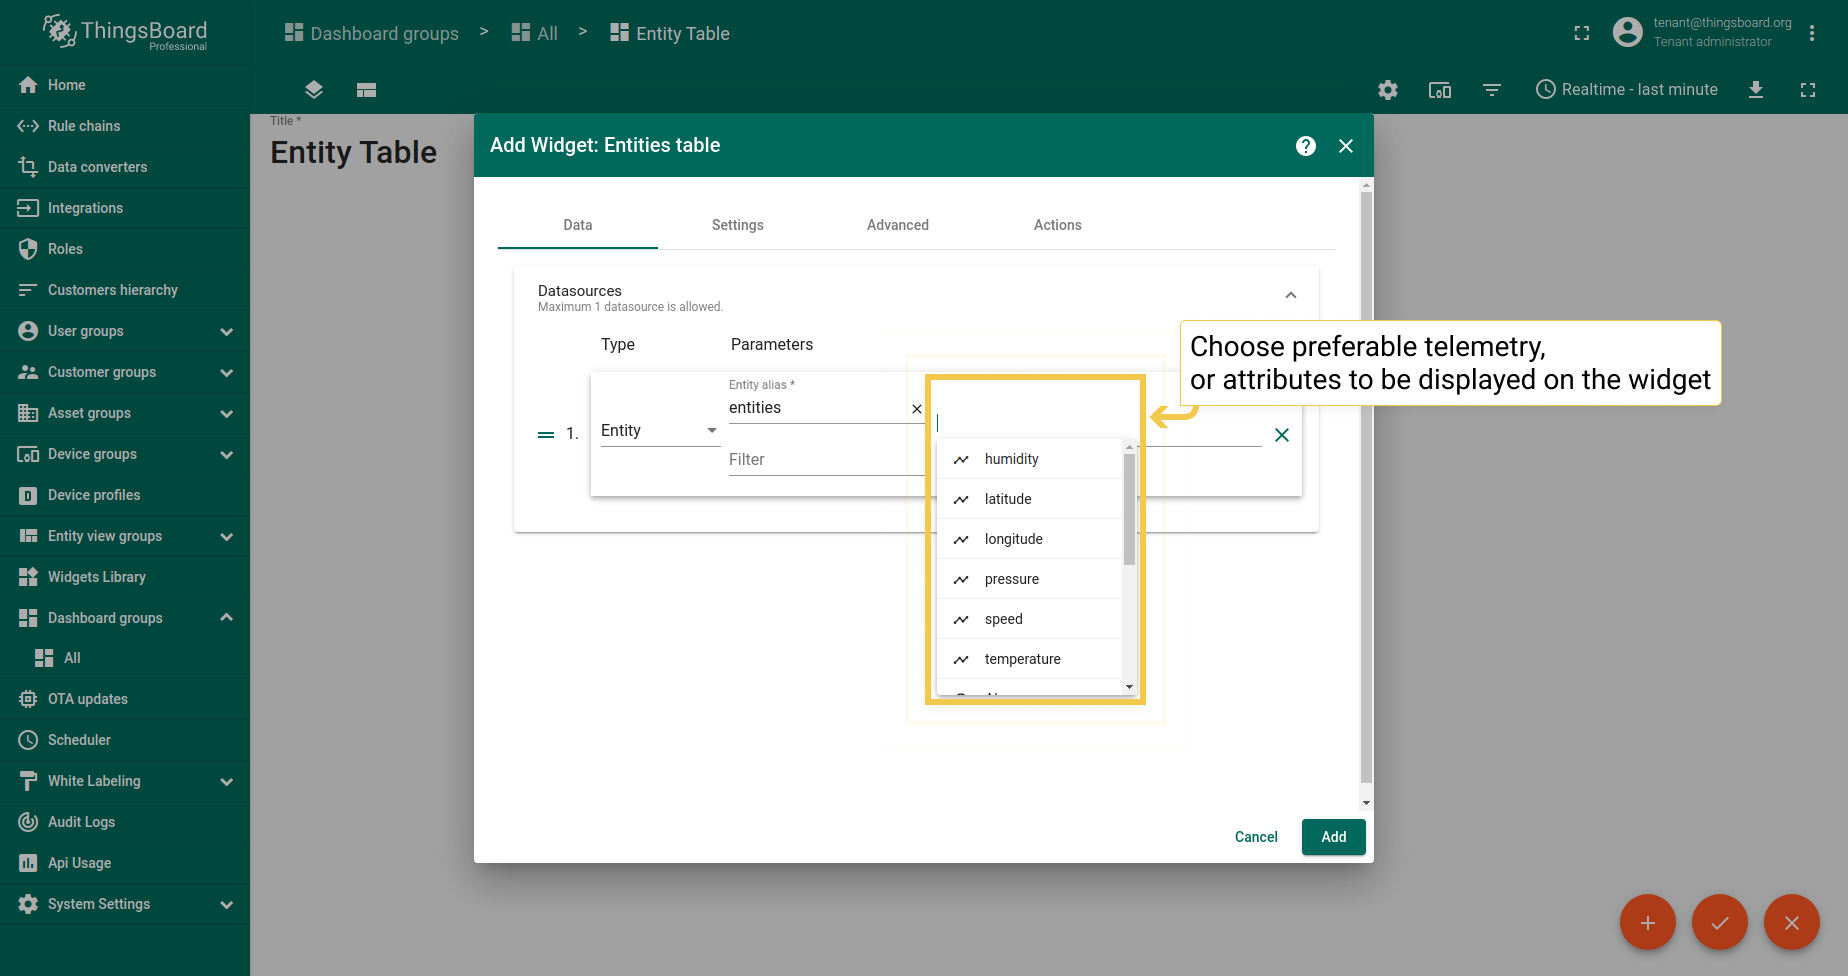
- Add telemetry from the drop-down menu to be displayed on the widget.
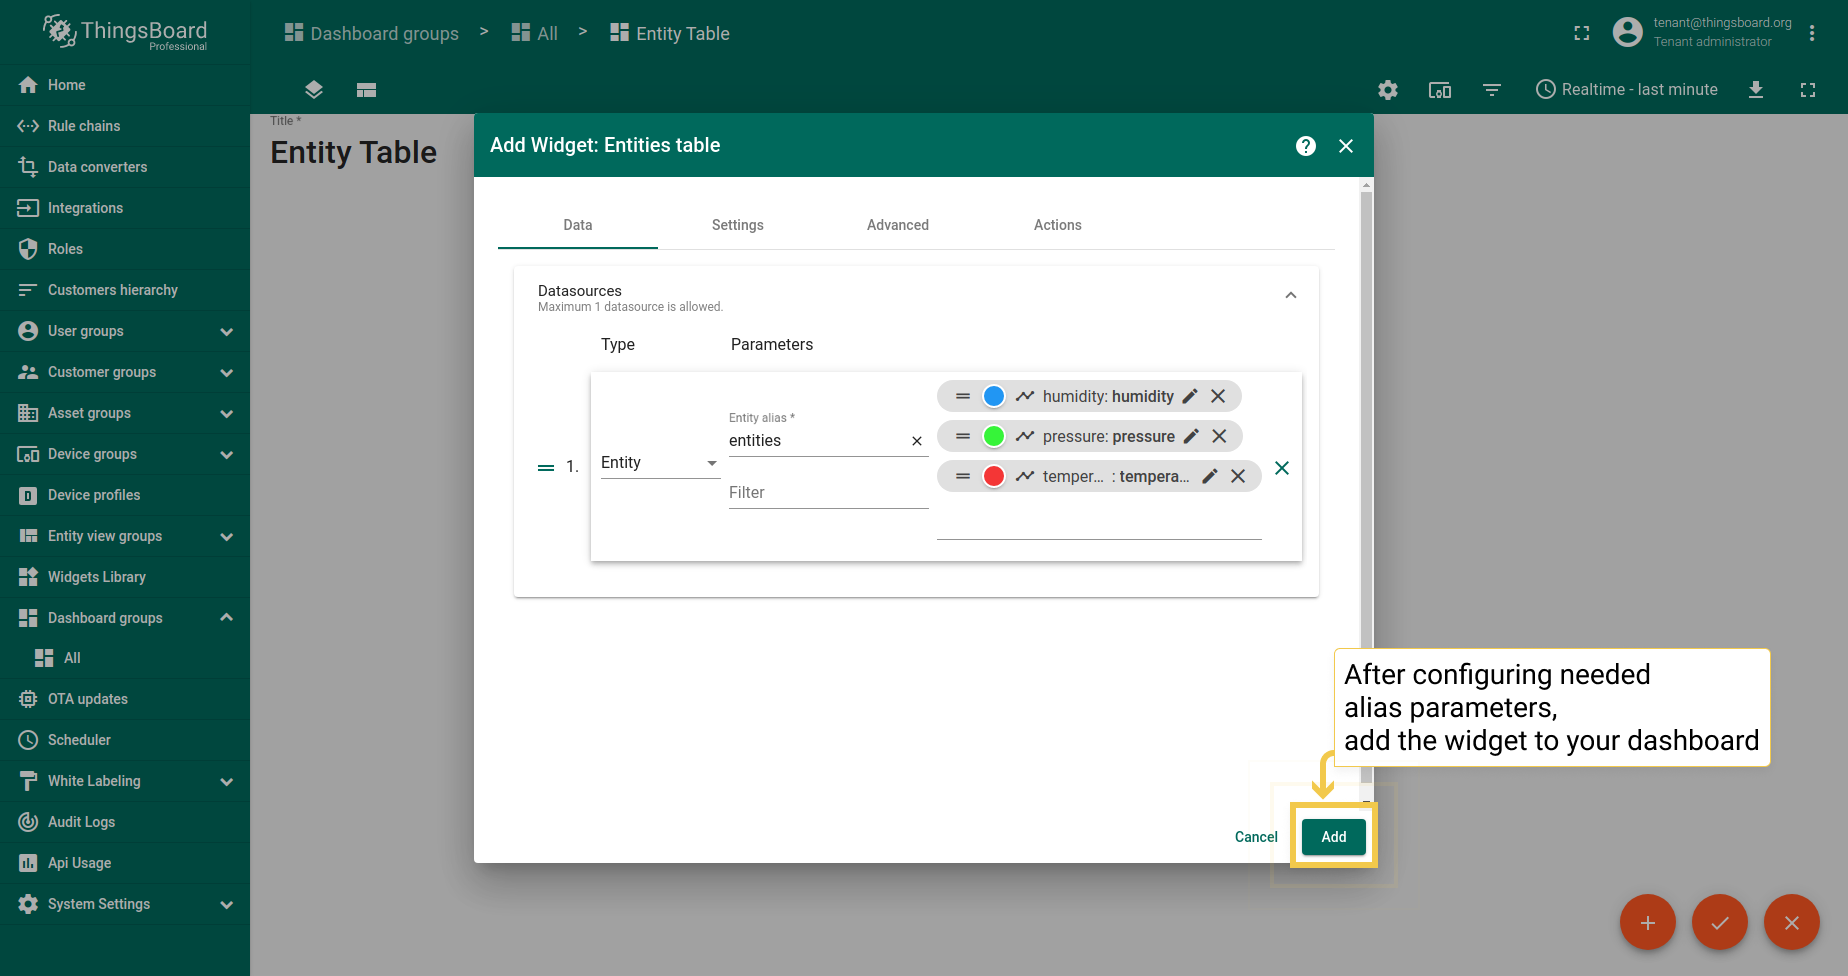
- When you are done configuring datasource, click Add.
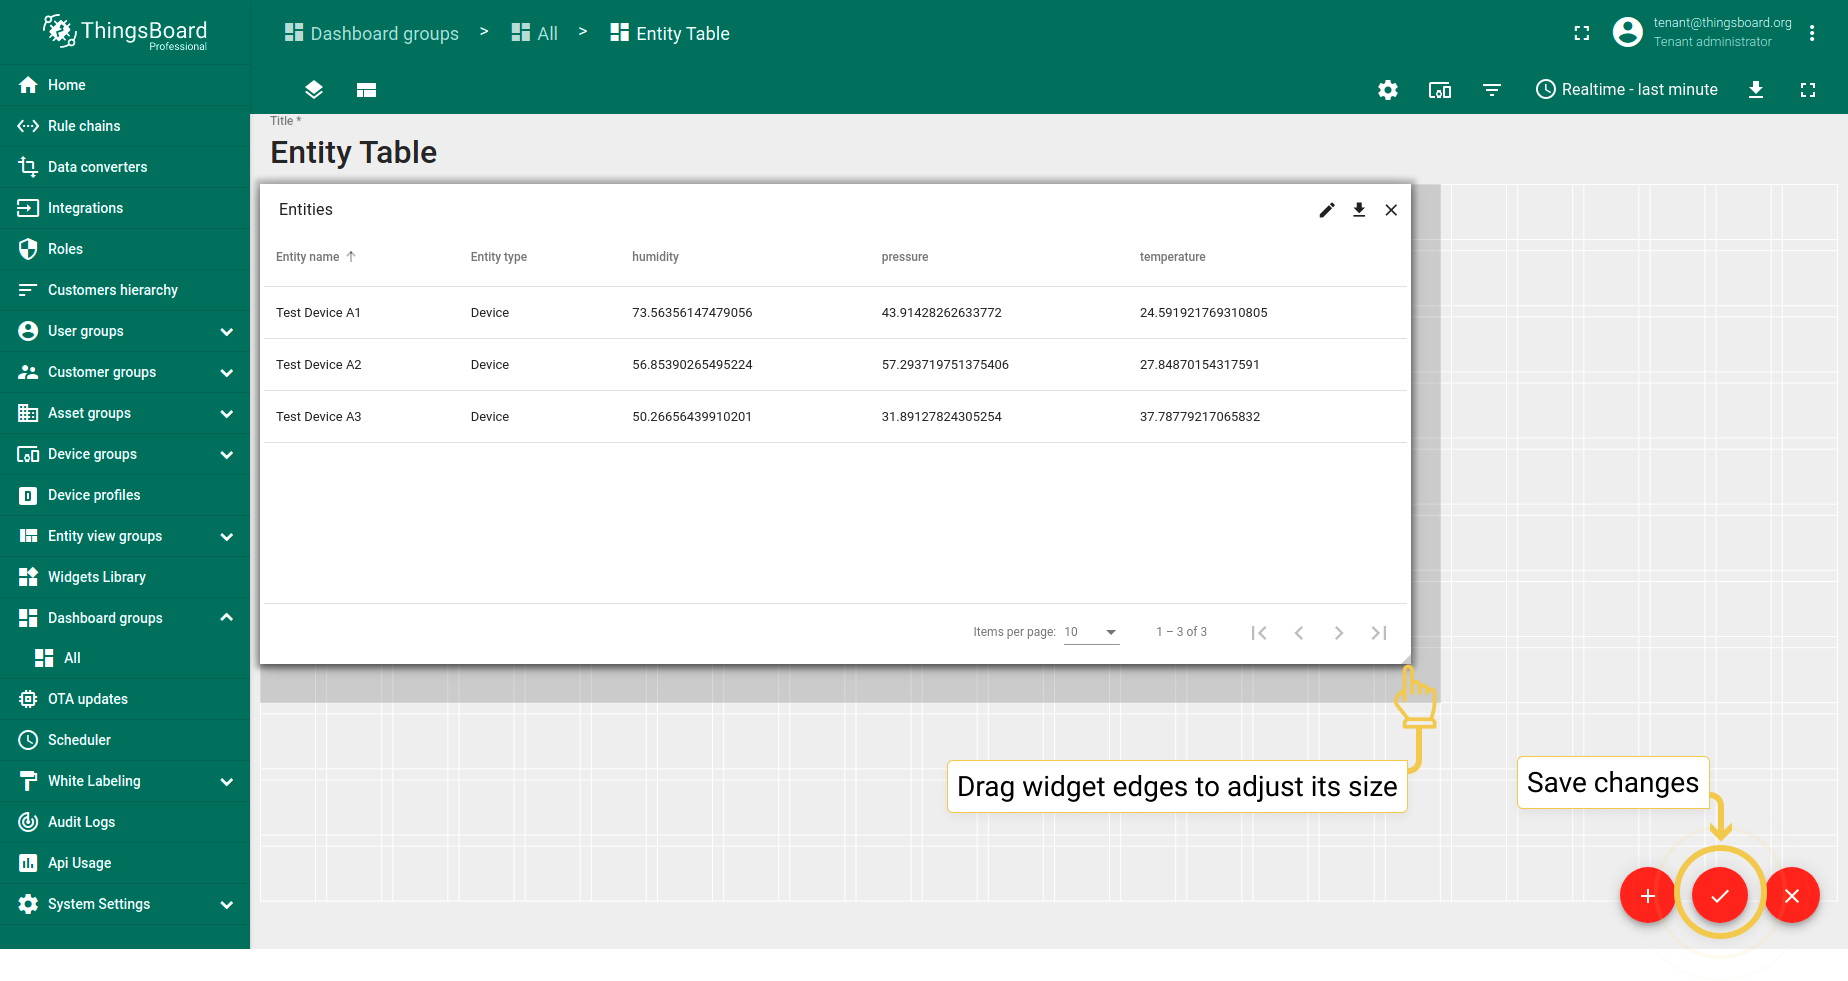
- Drag the edges of the widget to adjust its size and save all applied changes by clicking the checkmark in the lower right corner of the screen.


学习如何向部件添加别名。
设置
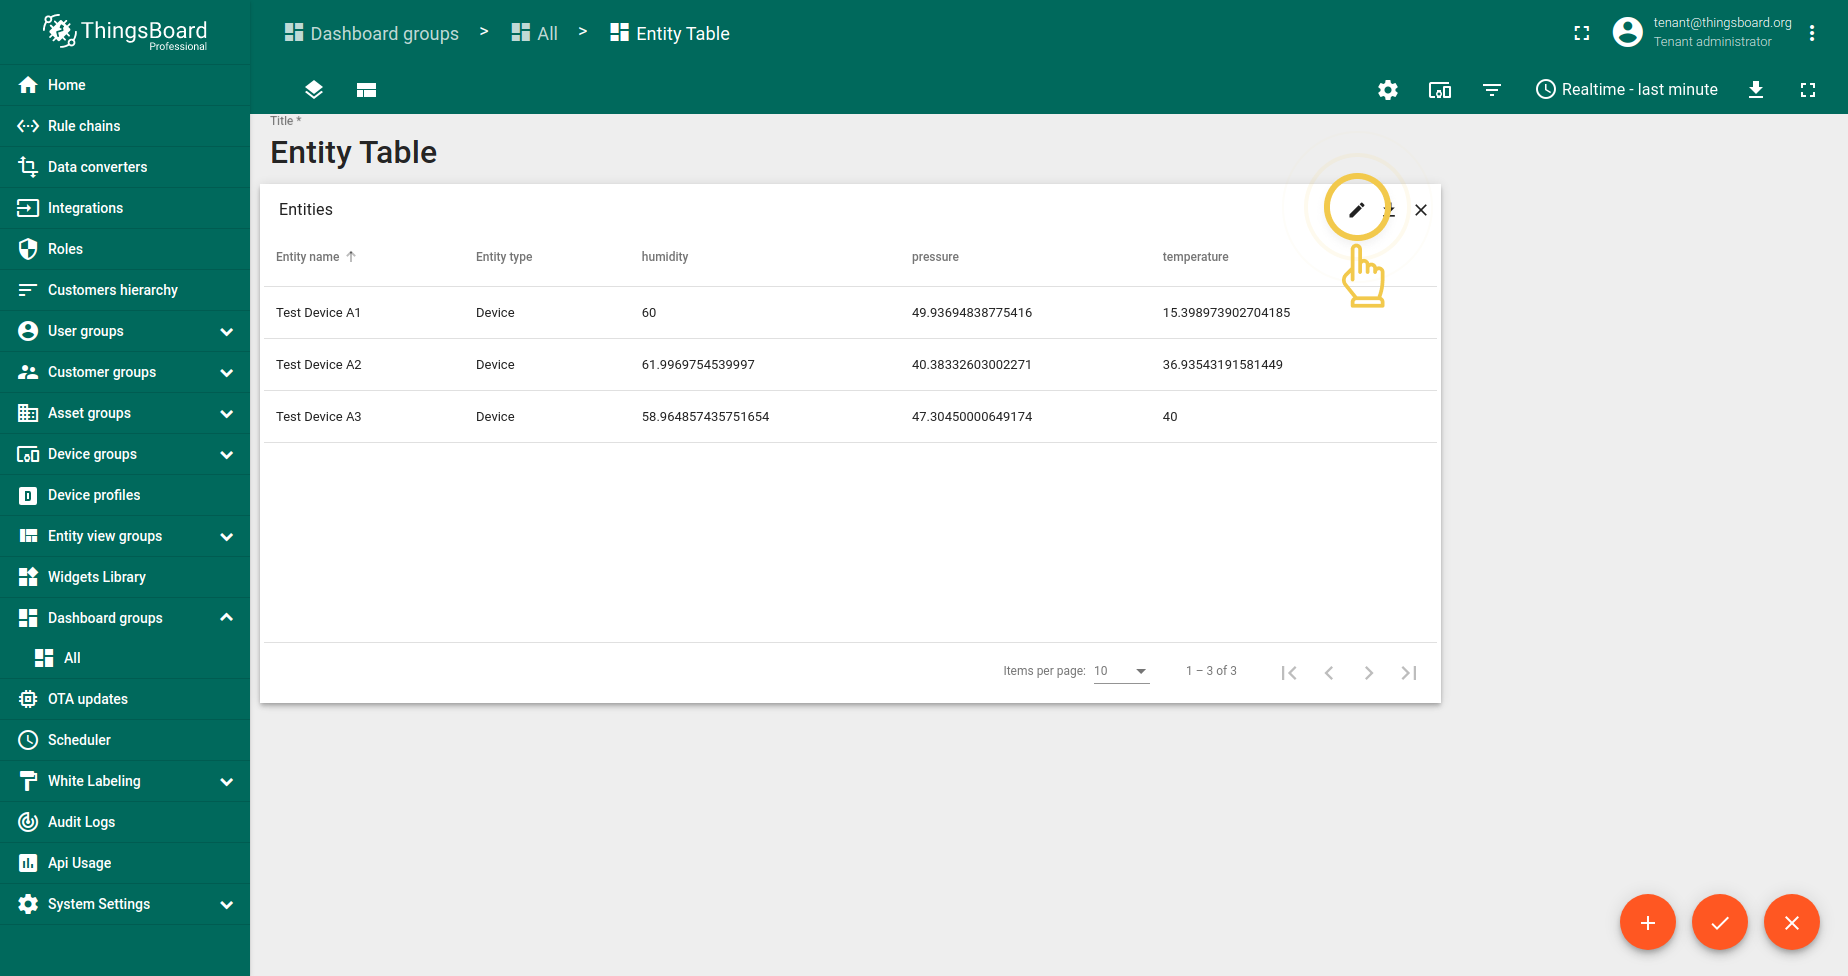
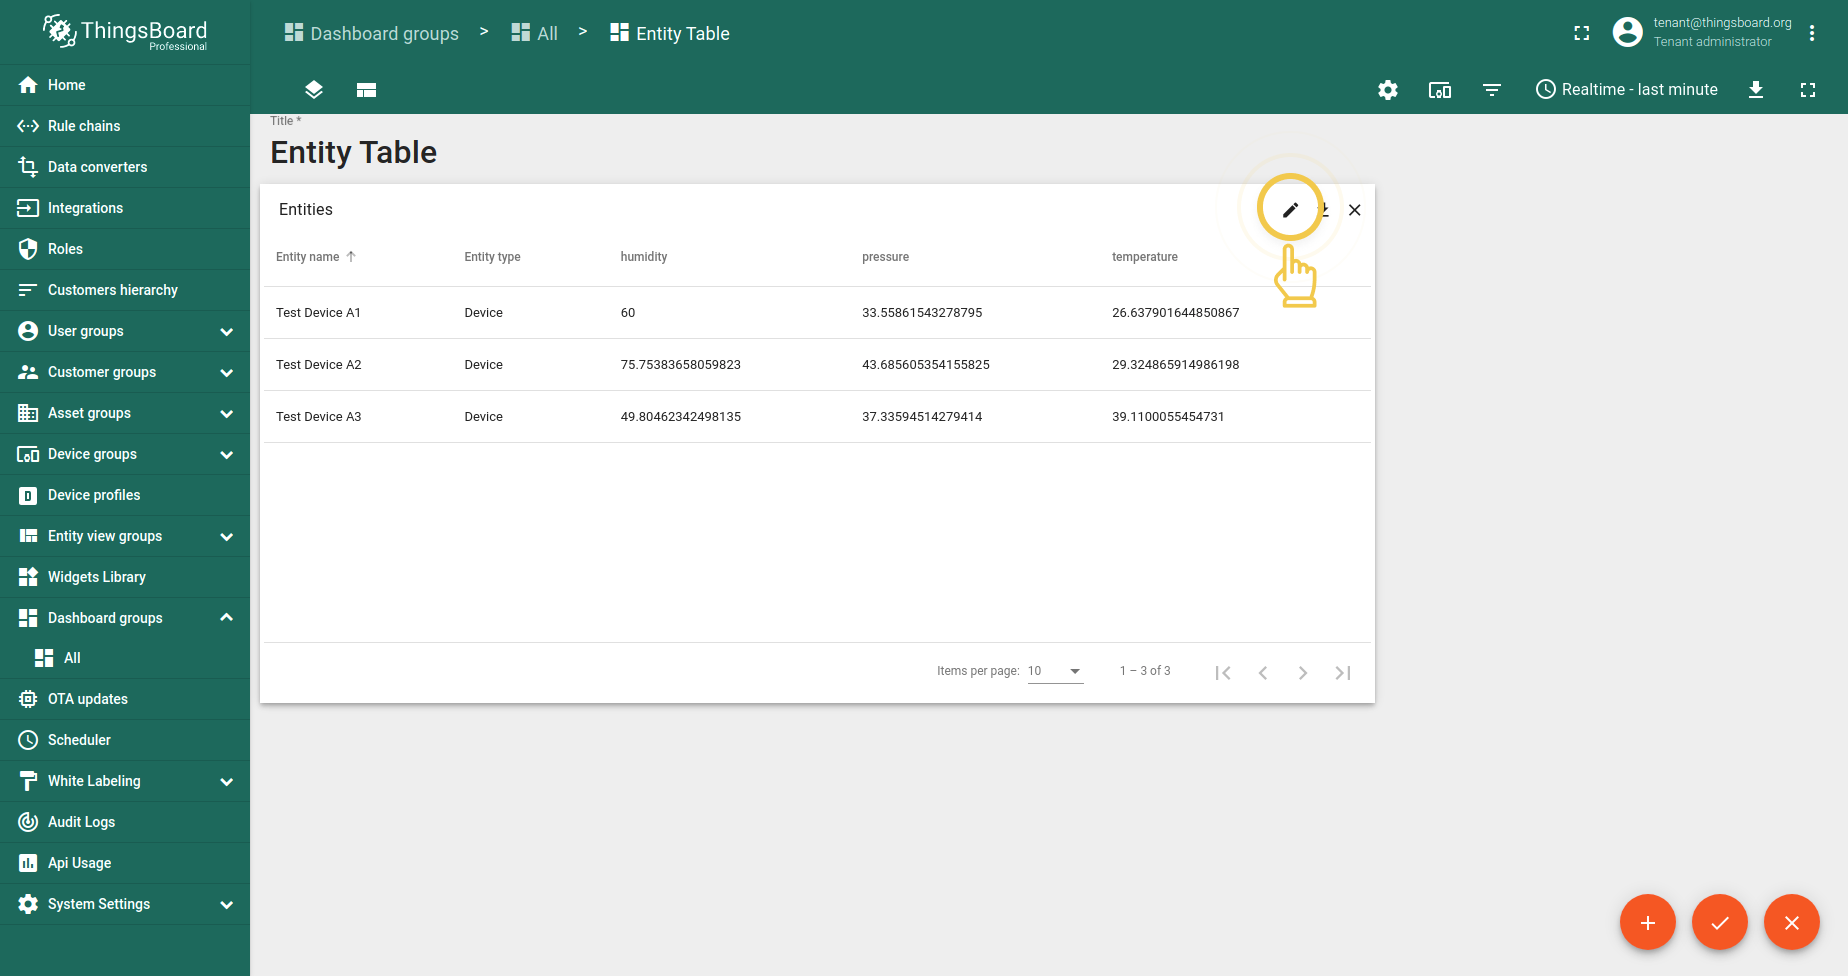
要开始自定义部件,应在仪表板编辑模式下点击部件右上角的铅笔图标进入部件编辑模式。
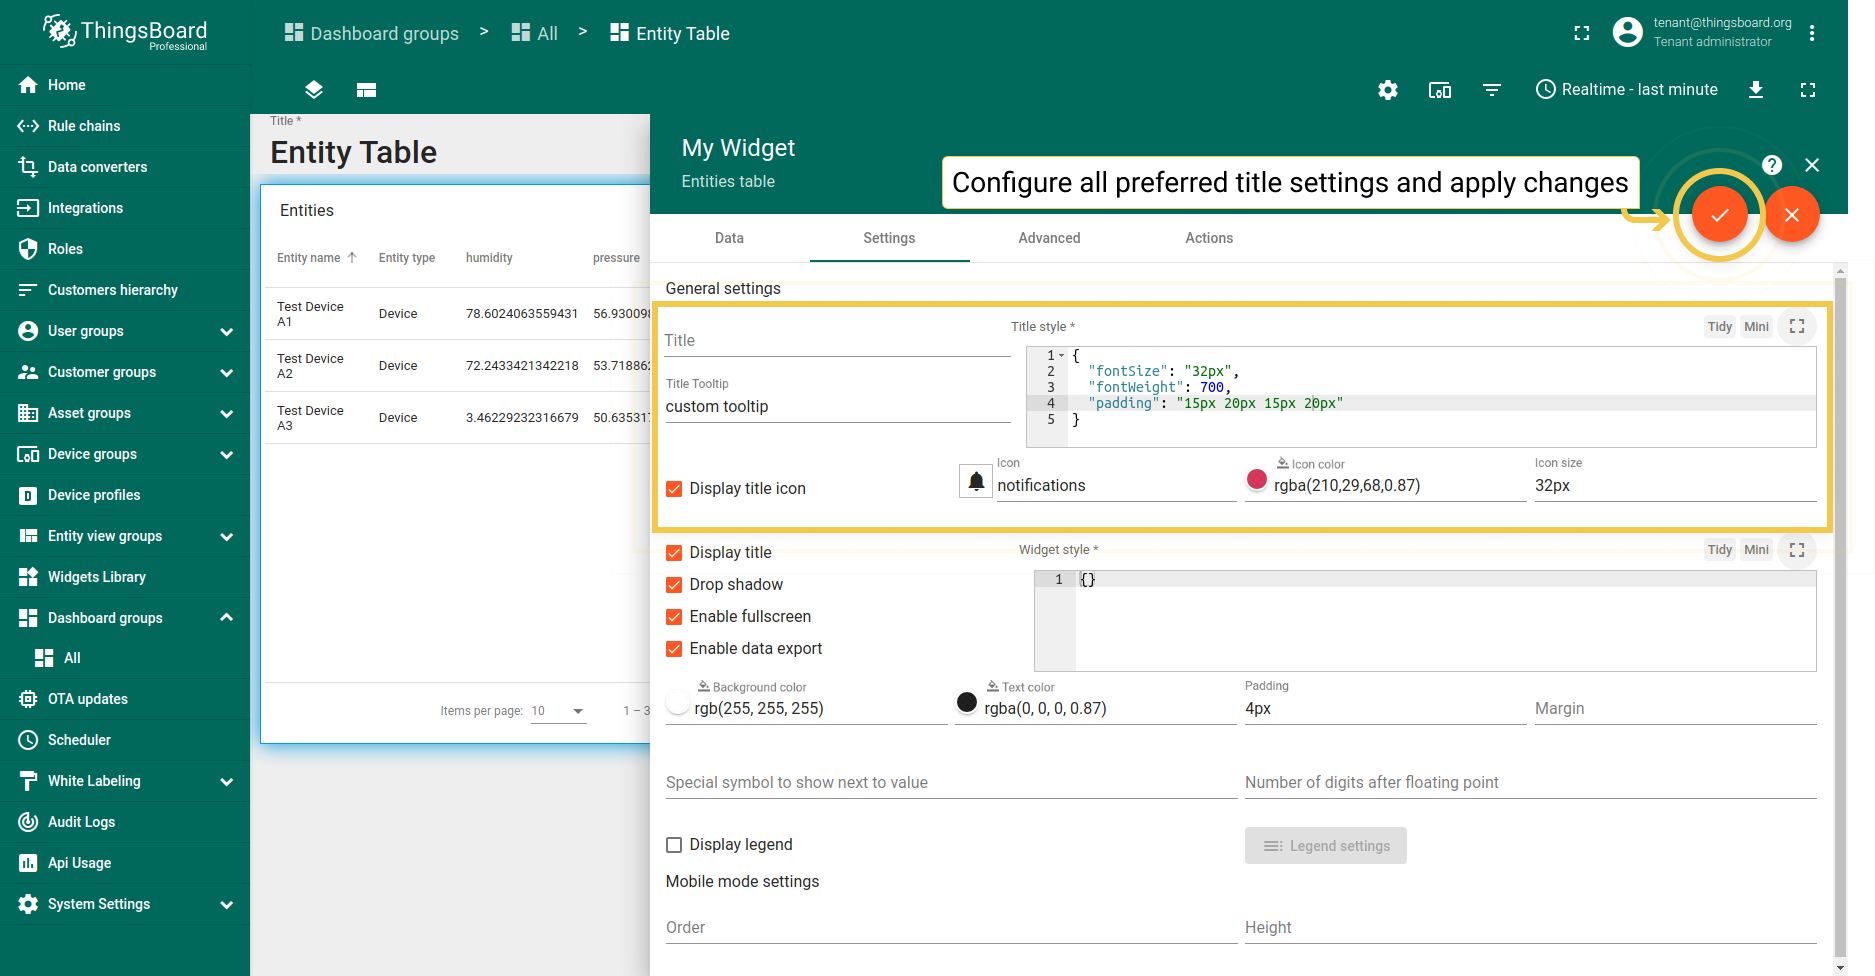
1. 标题样式
可更改部件标题tooltip和标题样式。标题本身需通过高级标题设置修改。 还可为标题添加图标并调整其颜色、不透明度和大小。下方为配置及对应效果。
- You are able to change Title setting, its tooltip and customize title style. In addition, you can add an icon and adjust its settings.
- After setting up all preferred configurations, apply the changes by clicking the checkmark in the upper right corner of the screen.
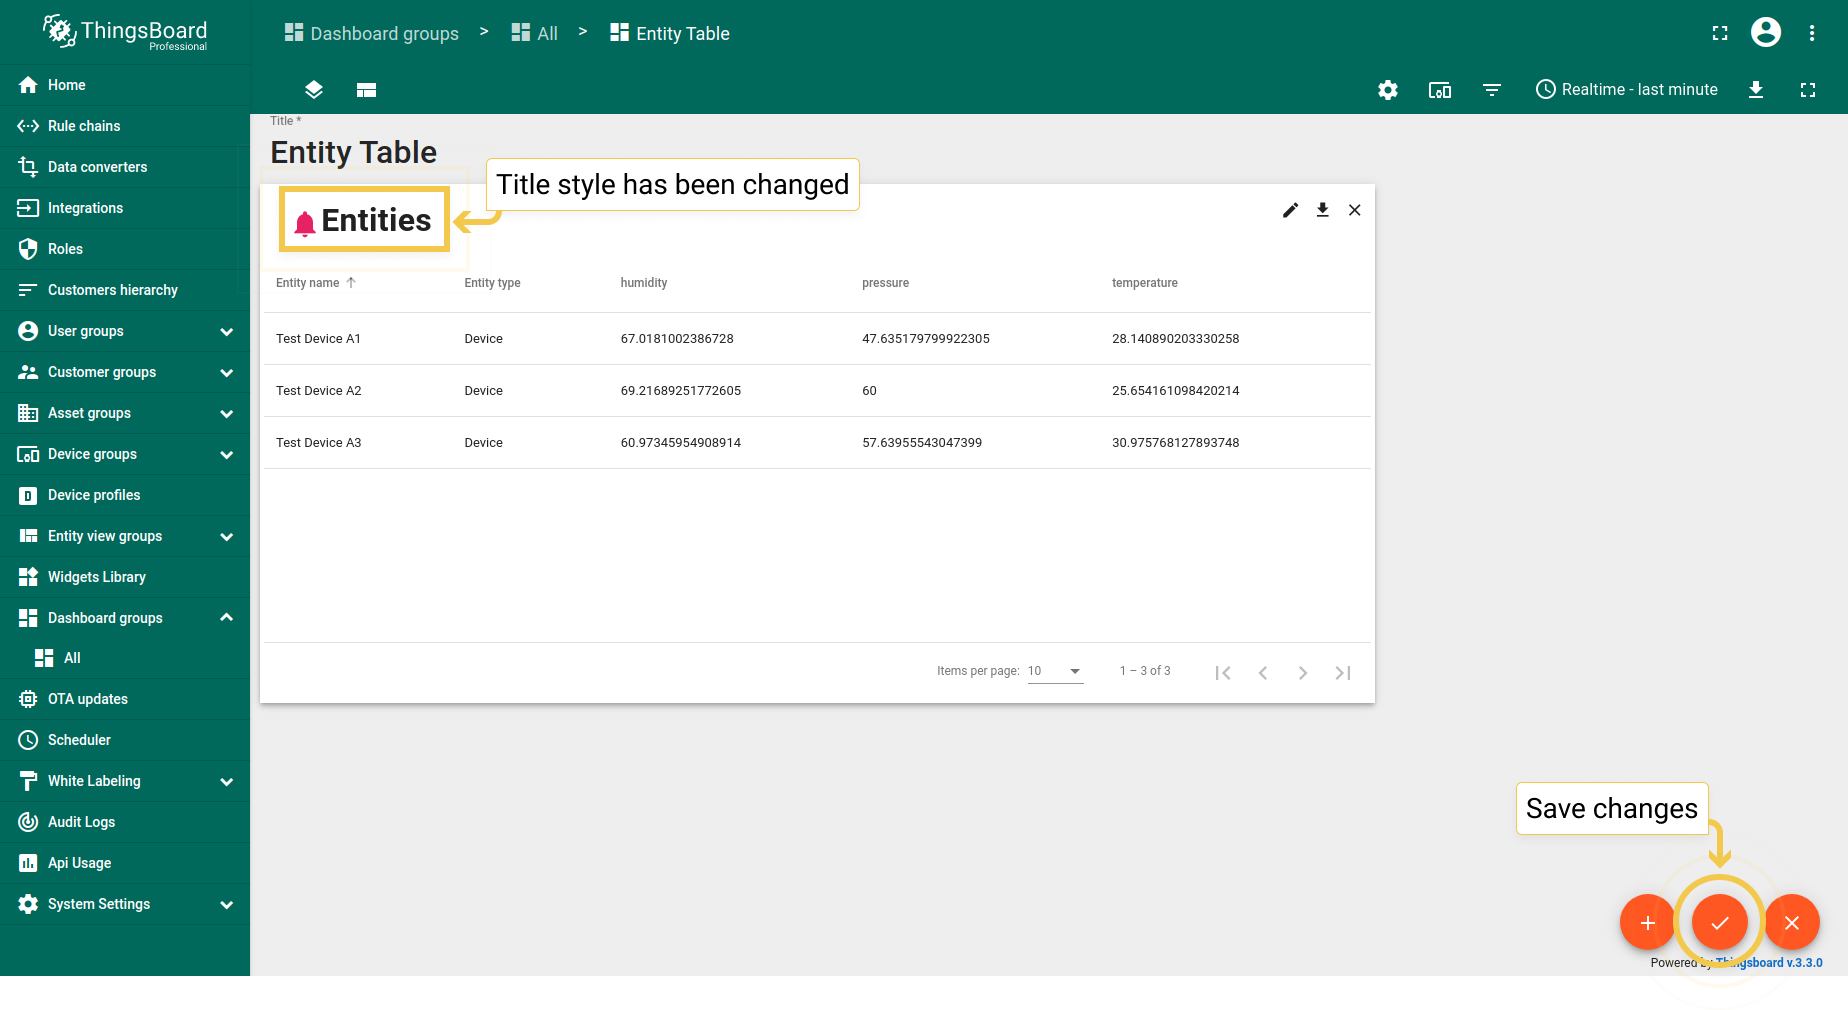
- As you can see, the title style has been changed, and the custom has been added icon next to it. To save all applied changes, click the checkmark in the lower right corner of the screen.

复选框负责显示/隐藏部件标题、部件阴影及启用/禁用全屏模式。
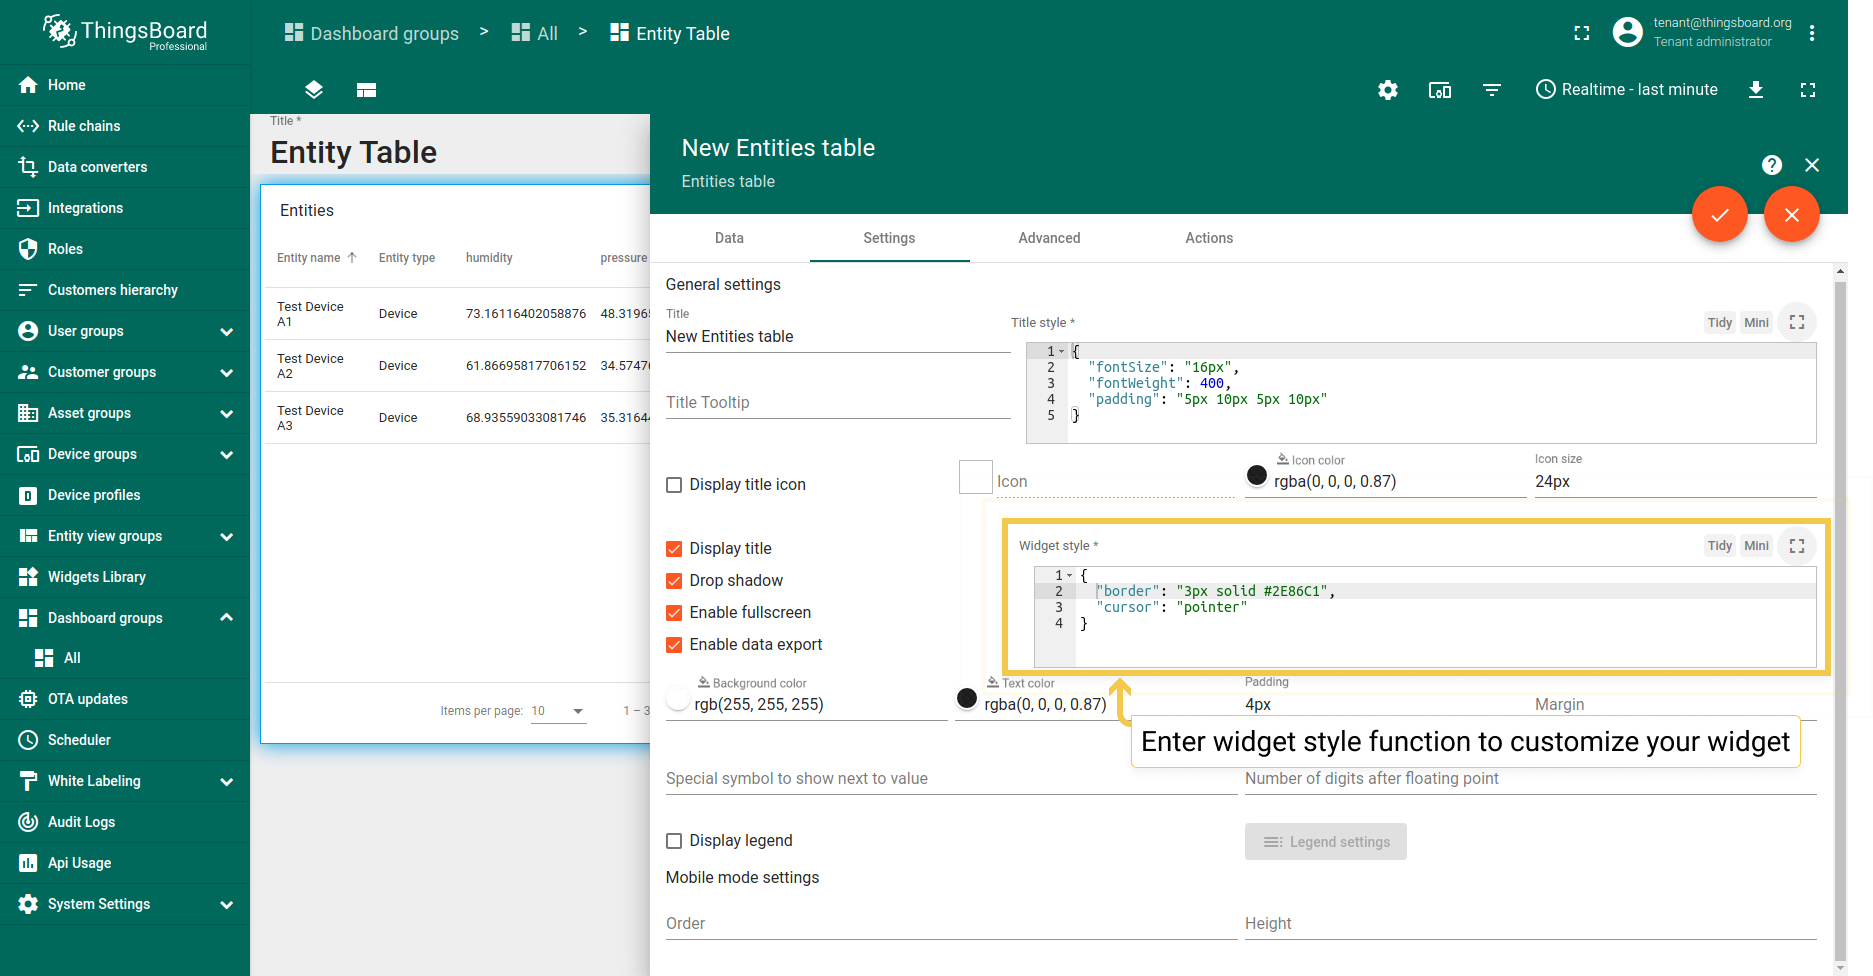
2. 部件样式
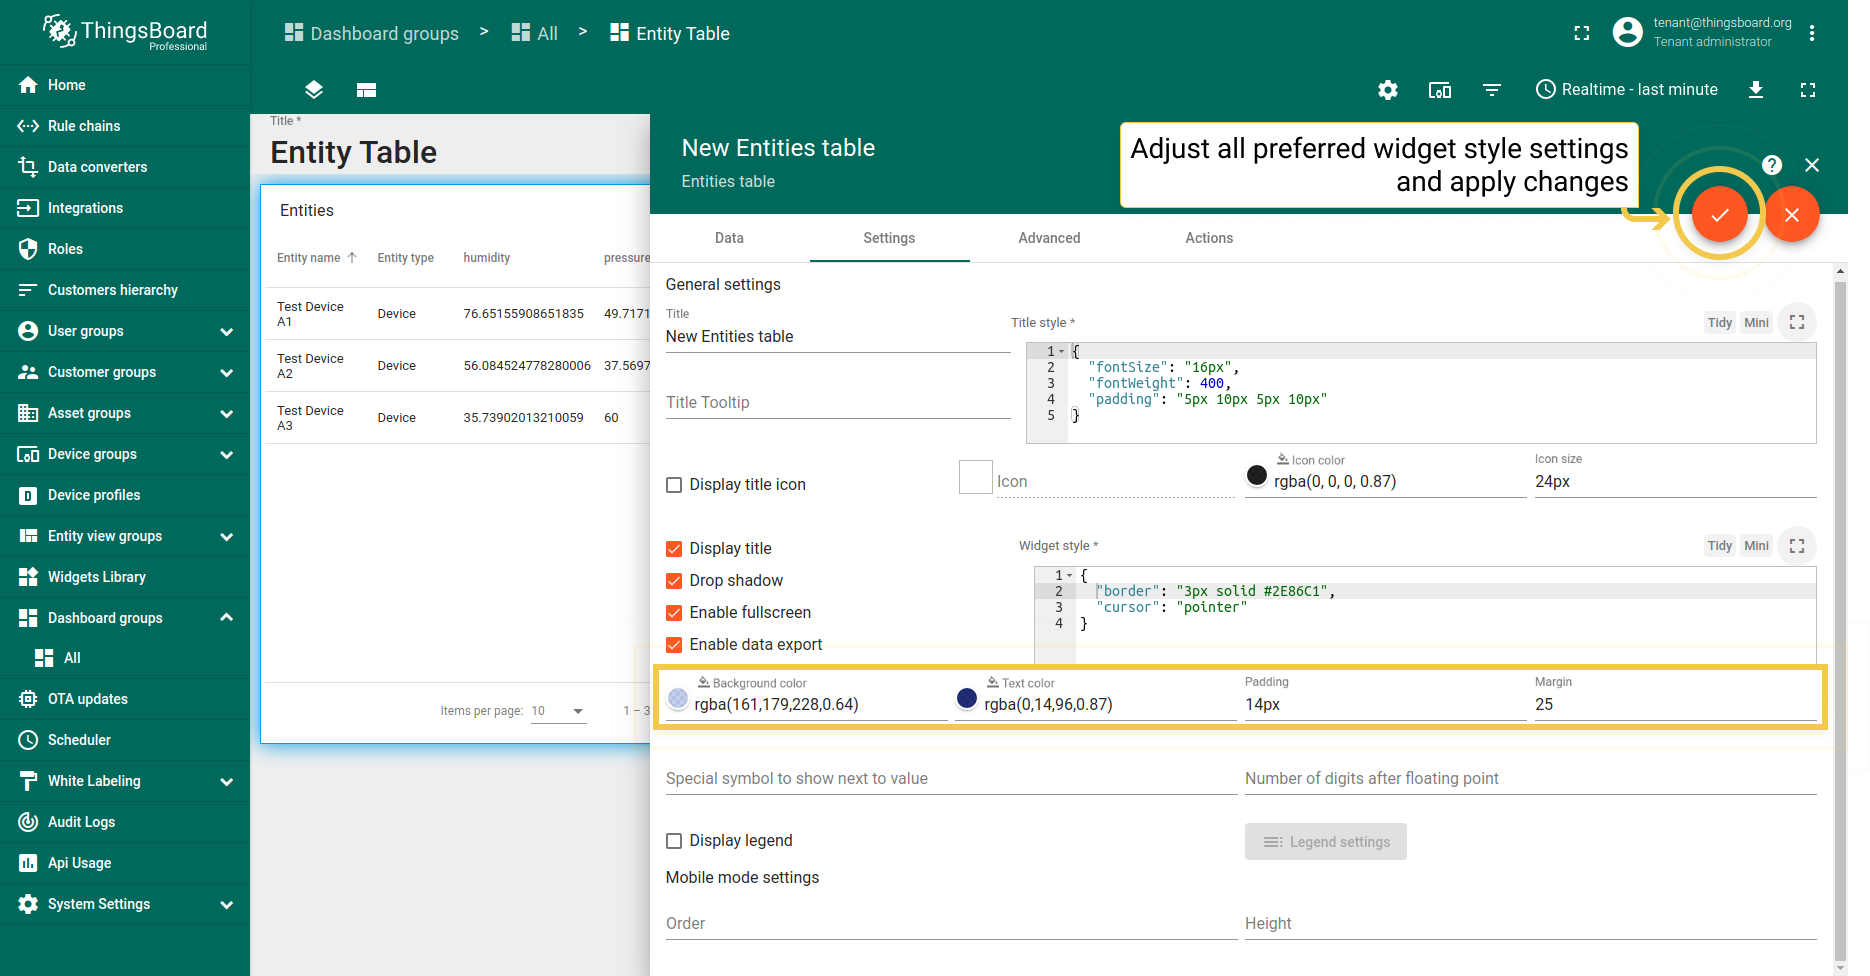
可使用CSS属性为部件自定义样式。 该样式将应用于部件的主div元素。 还可更改背景色、文字颜色、内边距和外边距。下方为配置及对应效果。
请注意,样式和背景色仅为示例,并非我们的指导规范。
1
2
3
4
{
  "border": "3px solid #2E86C1",
  "cursor": "pointer"
}
- In the widget style field, enter the function to customize the appearance of the widget.
- You can manually adjust the background and text colors by clicking the corresponding circles and moving sliders to select the color you want. Enter the preferred value in the padding and margin lines. After configuring the desired options, click the checkmark in the upper right corner of the screen.
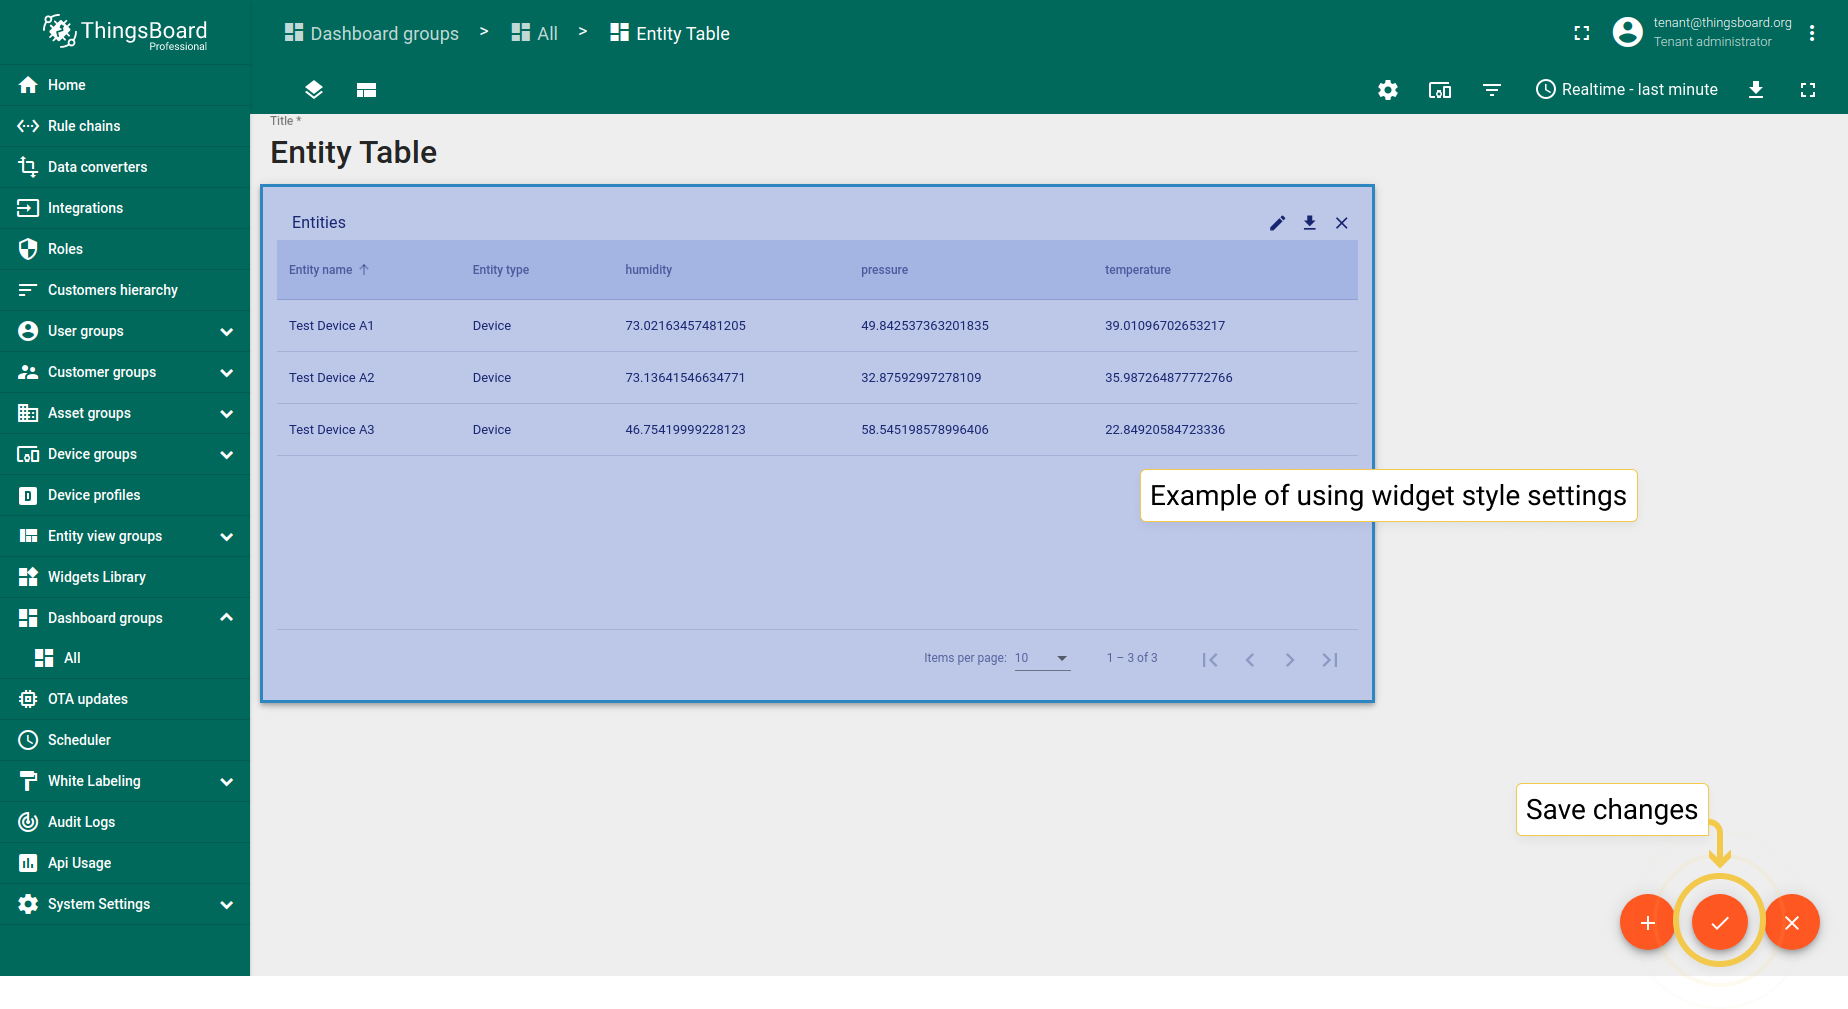
- As you can see, the appearance of the widget has changed. To save all applied changes, click the checkmark in the lower right corner of the screen.
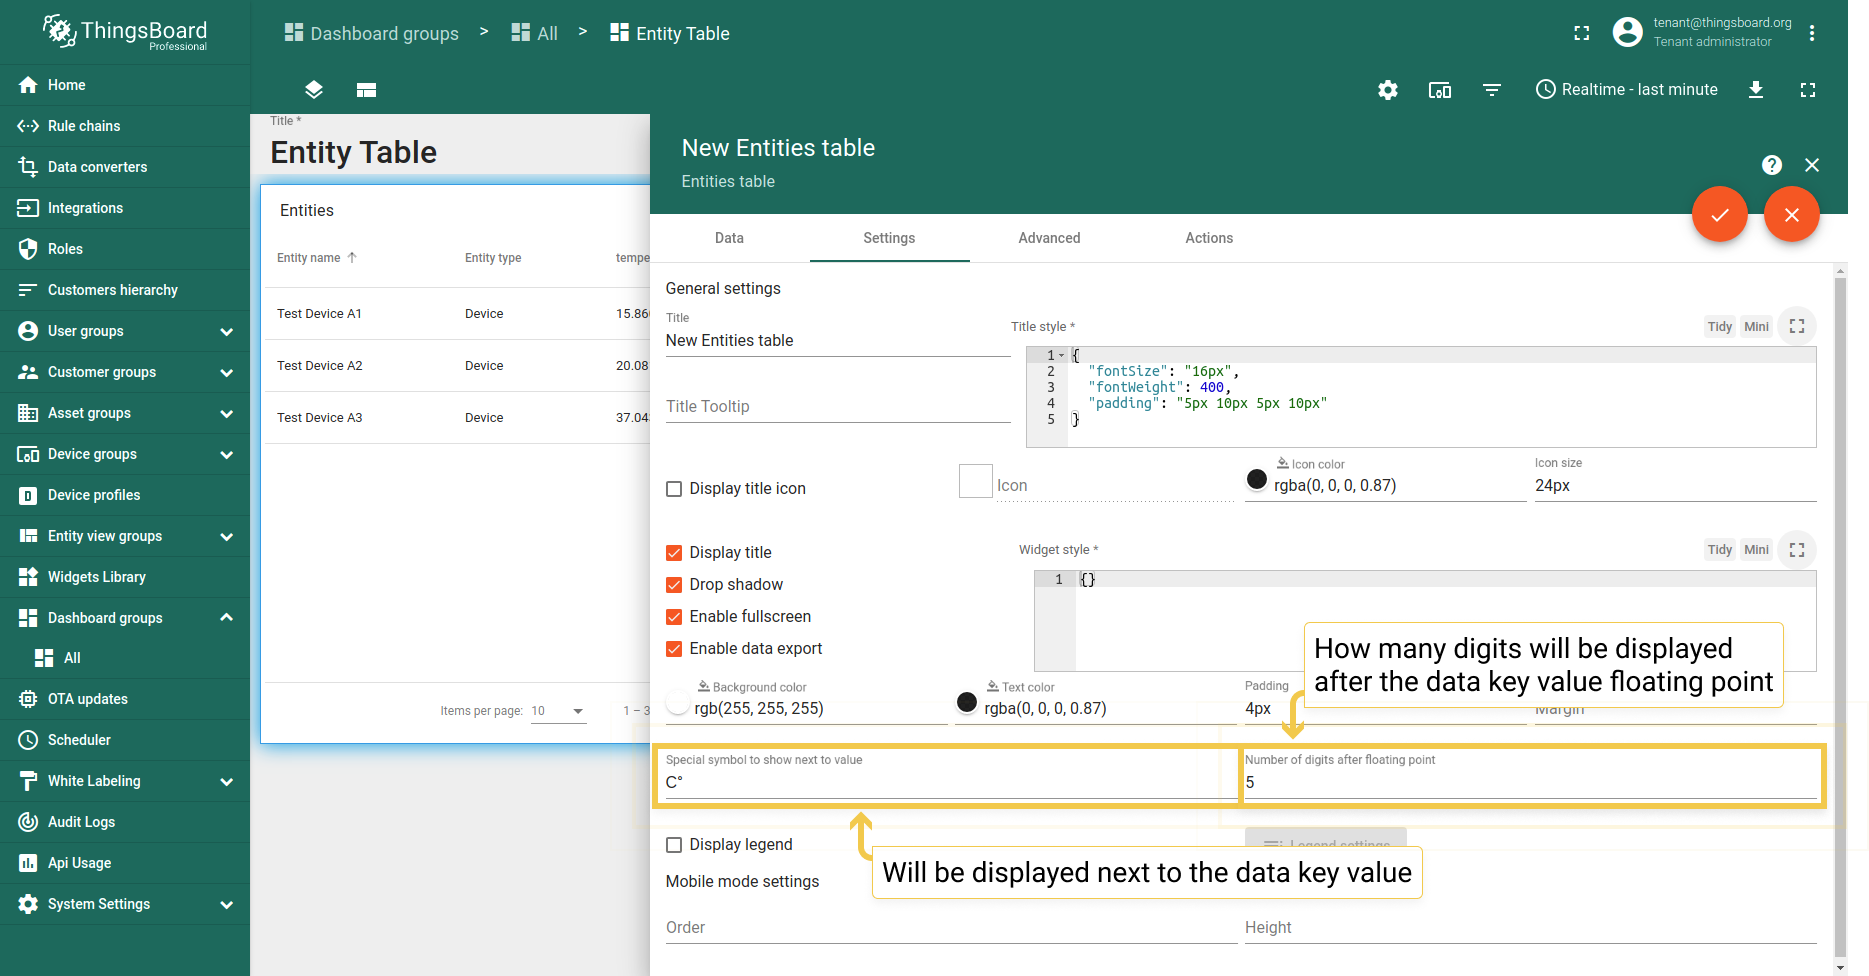
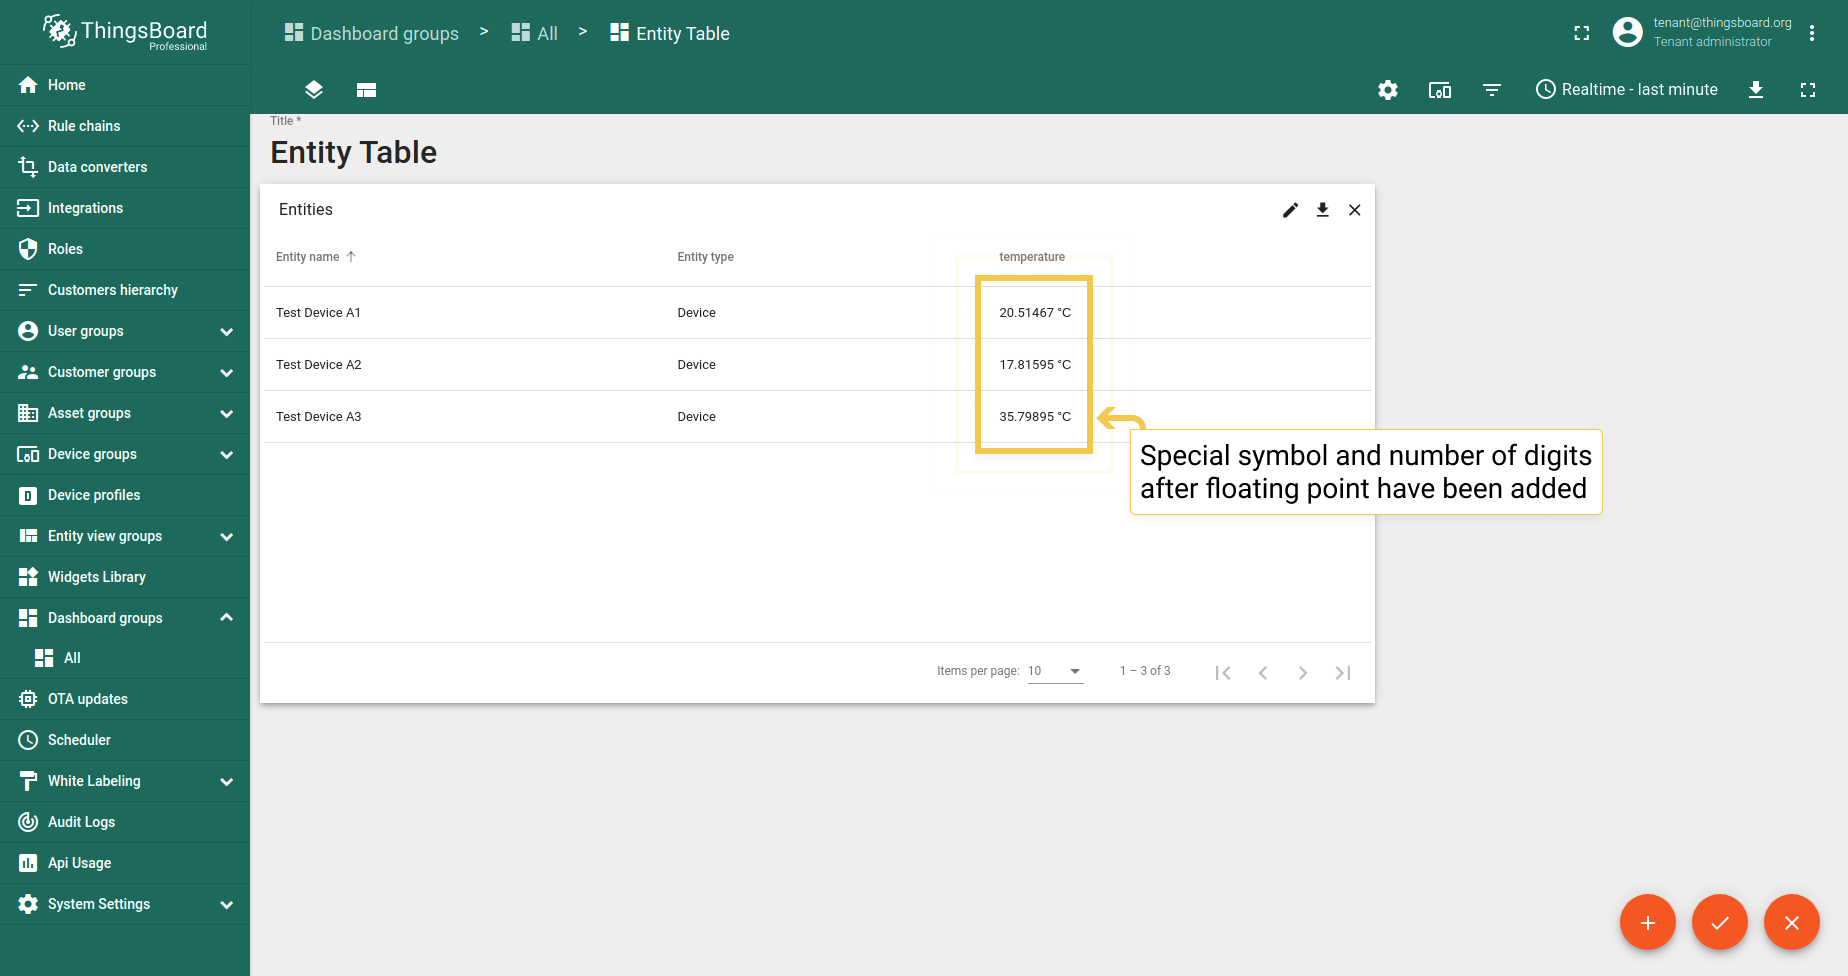
3. 特殊符号和浮点数位数
可为部件实体值添加将显示在旁的特殊符号。还可自定义值浮点数后显示的位数。 下方为配置及对应效果。
- Enter the desired symbol to be shown next to the value. Enter the number of the digits to be displayed after the floating point number. Apply the changes by clicking the checkmark in the upper right corner of the screen.
- As you can see, the special symbol has been added, and the number of digits has been changed.
4. 图例设置
图例设置仅在默认启用此选项的时序部件中有意义。此处了解更多图例设置。
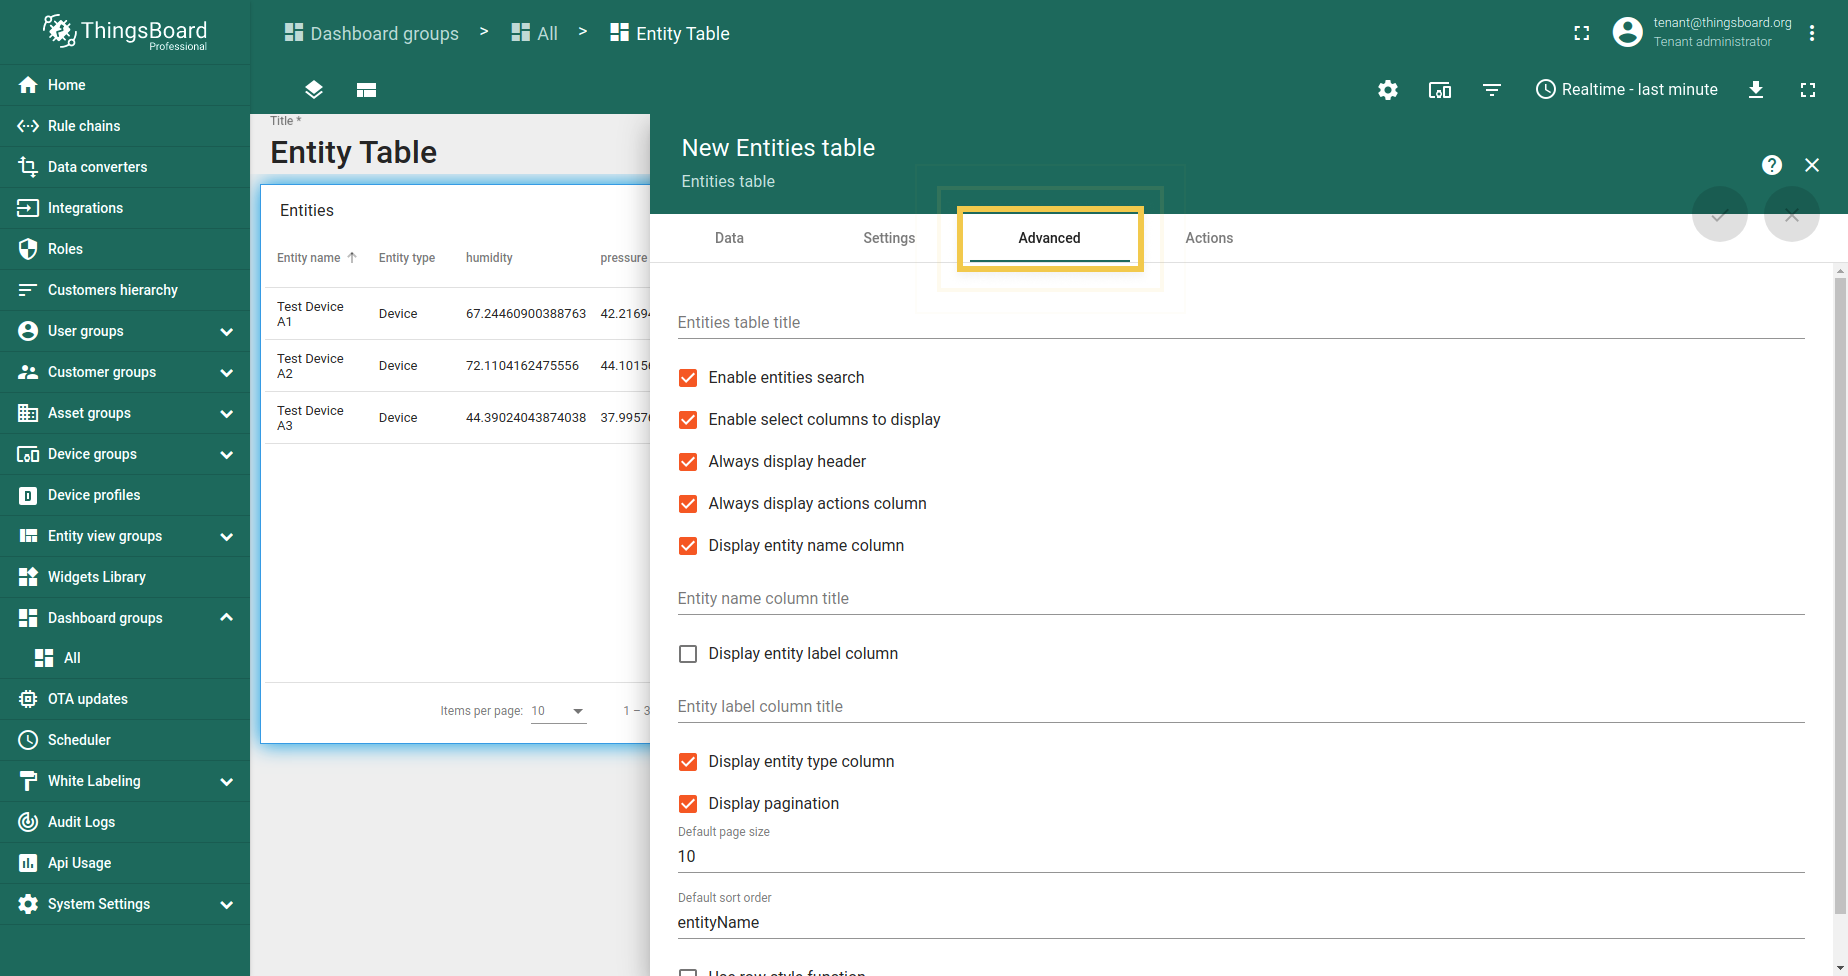
高级设置
实体表部件的高级设置允许调整部件标题、更改部件上对象的可见性、 自定义列、设置分页、 表格数据排序以及更改部件行样式。
要进入高级模式并开始调整上述设置,请执行:
- Click the pencil icon ("Enter edit mode") in the lower right corner of the screen.
- Click the pencil icon (“Edit widget”) in the upper right corner of the Entity Table widget itself.
- Move to the Advanced cell.
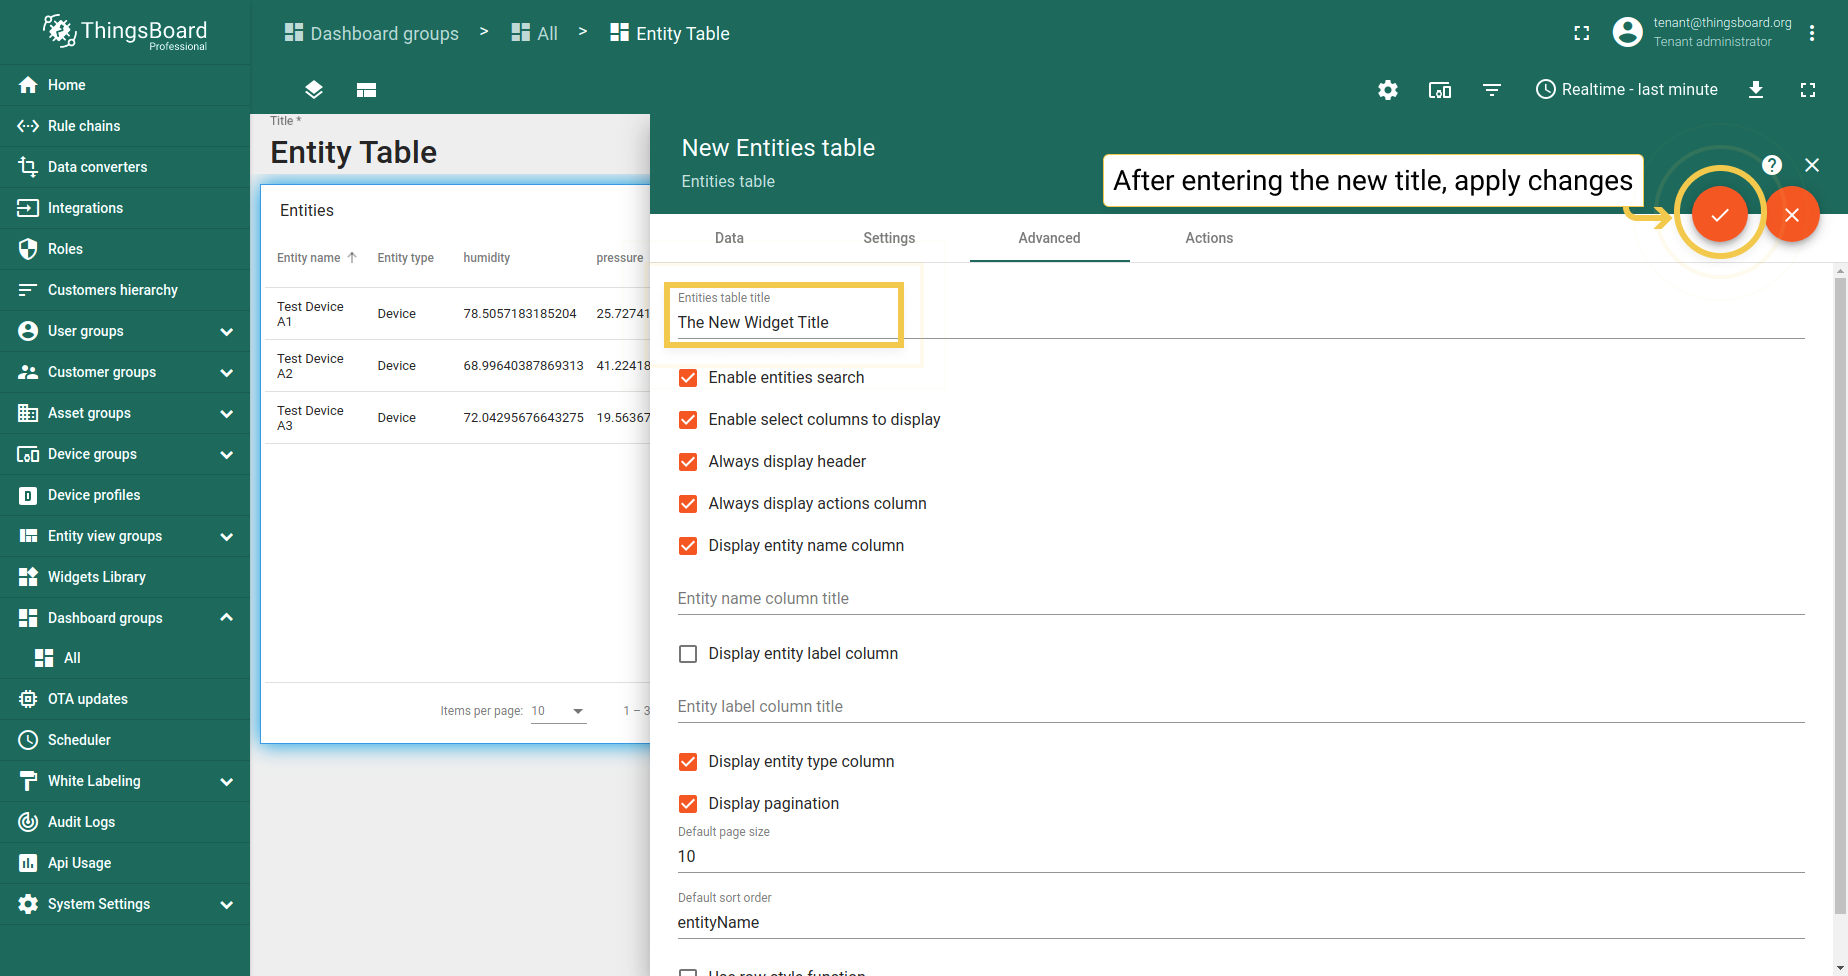
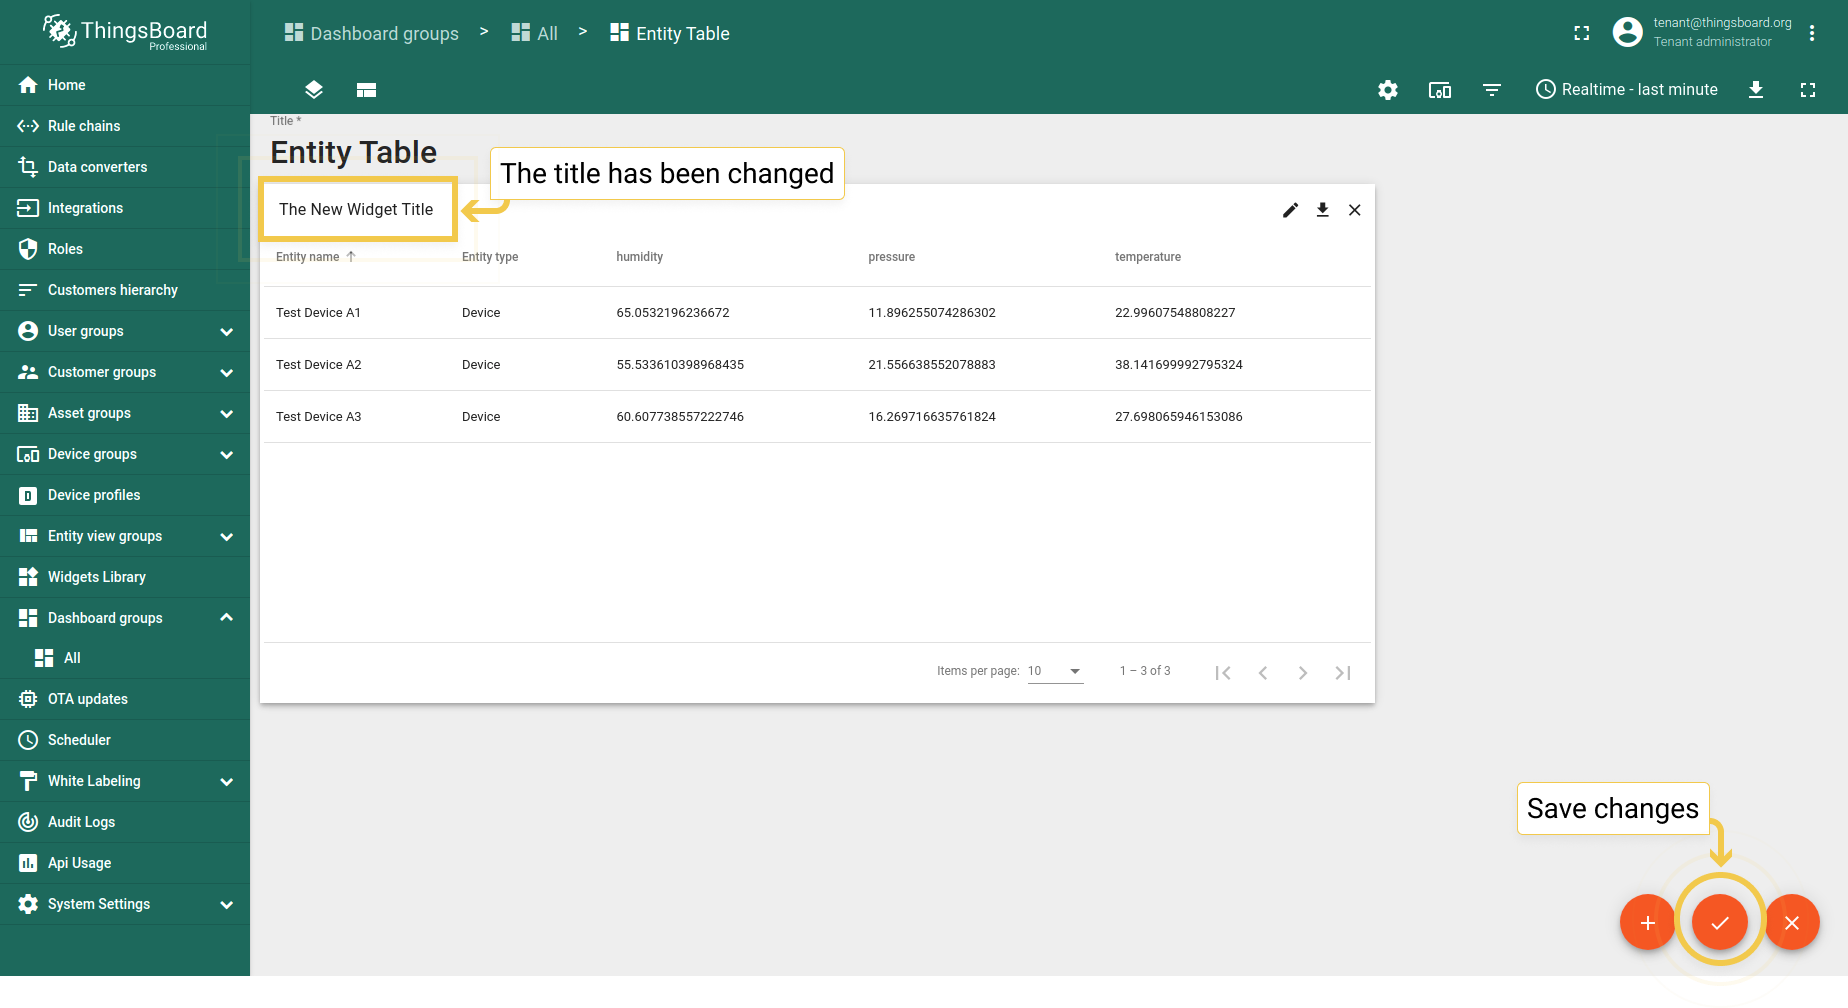
1. 实体表标题
ThingsBoard对名称无符号或字符数量限制。但若标题过长,在实体表部件中将无法完整显示,会以省略号截断。不过,应用更改并全屏打开部件后,将能看到完整标题。例如,可使用简短标题如“新部件标题”:
- Enter the desired title in the title bar. Click the orange checkmark in the upper right corner.
- The title of the widget has been changed.
2. 复选框设置
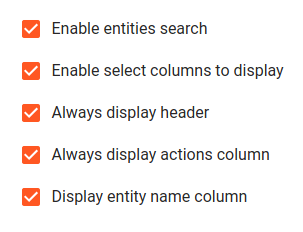
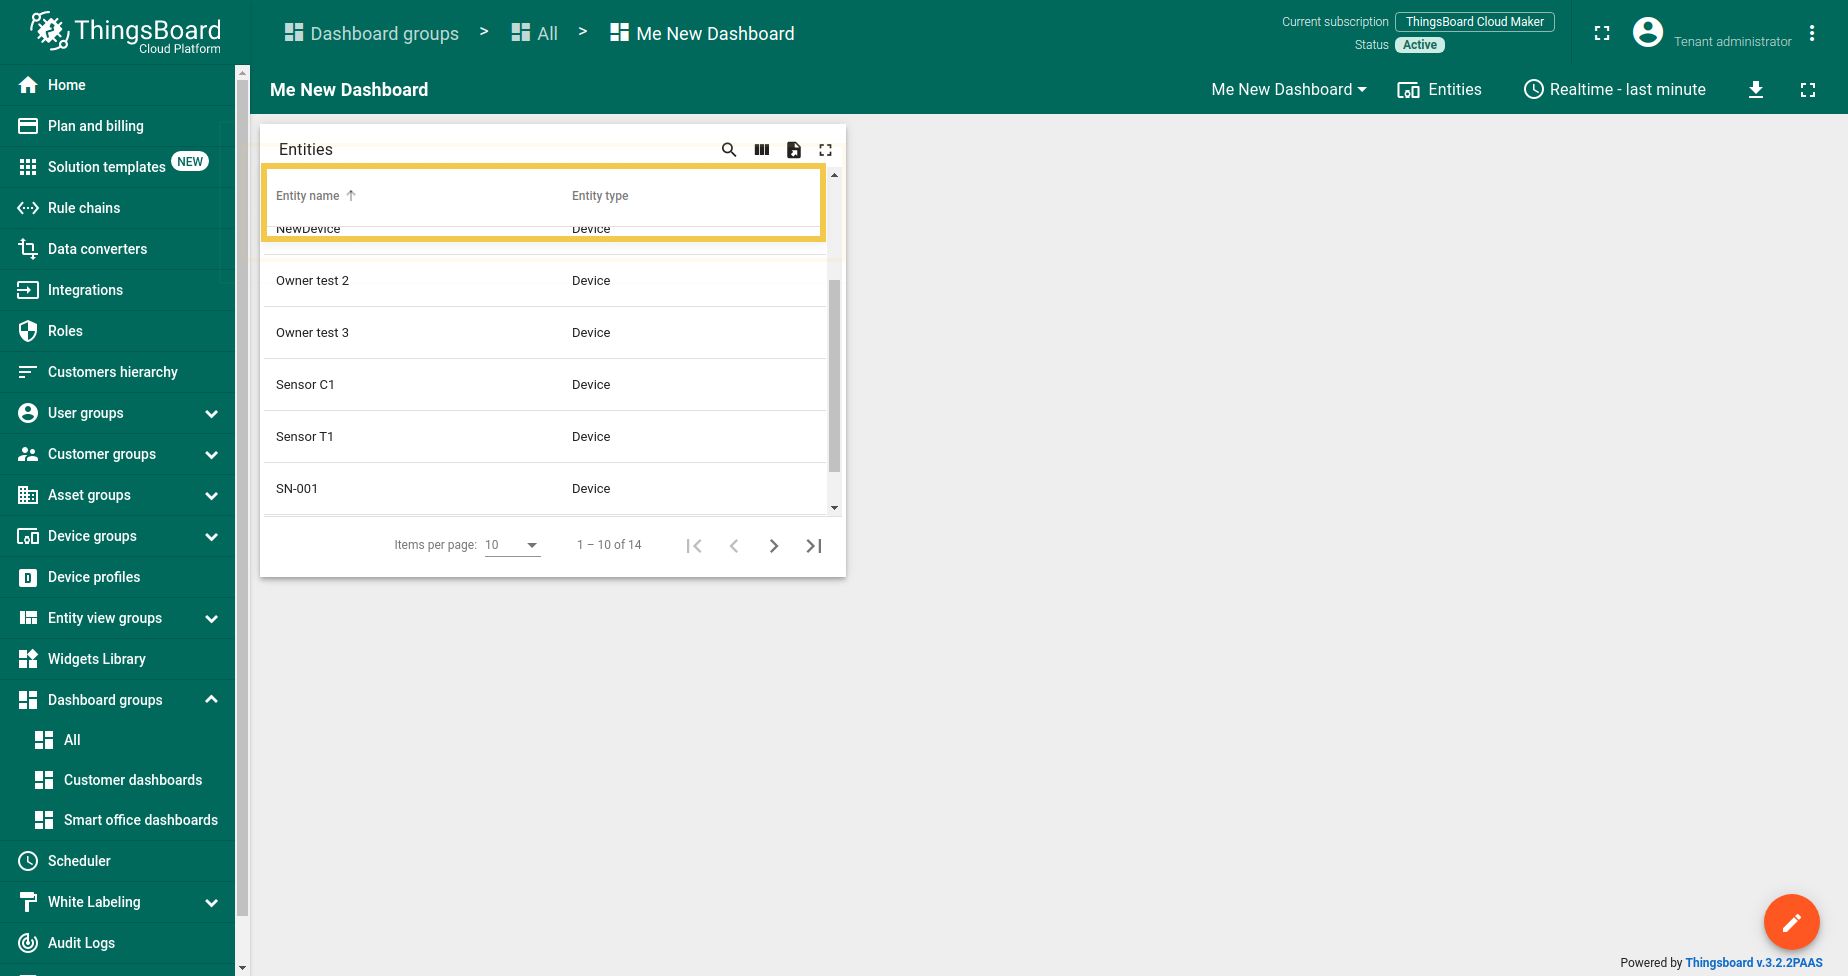
- 启用实体搜索
勾选此复选框后,部件右上角的放大镜可用于搜索部件实体。
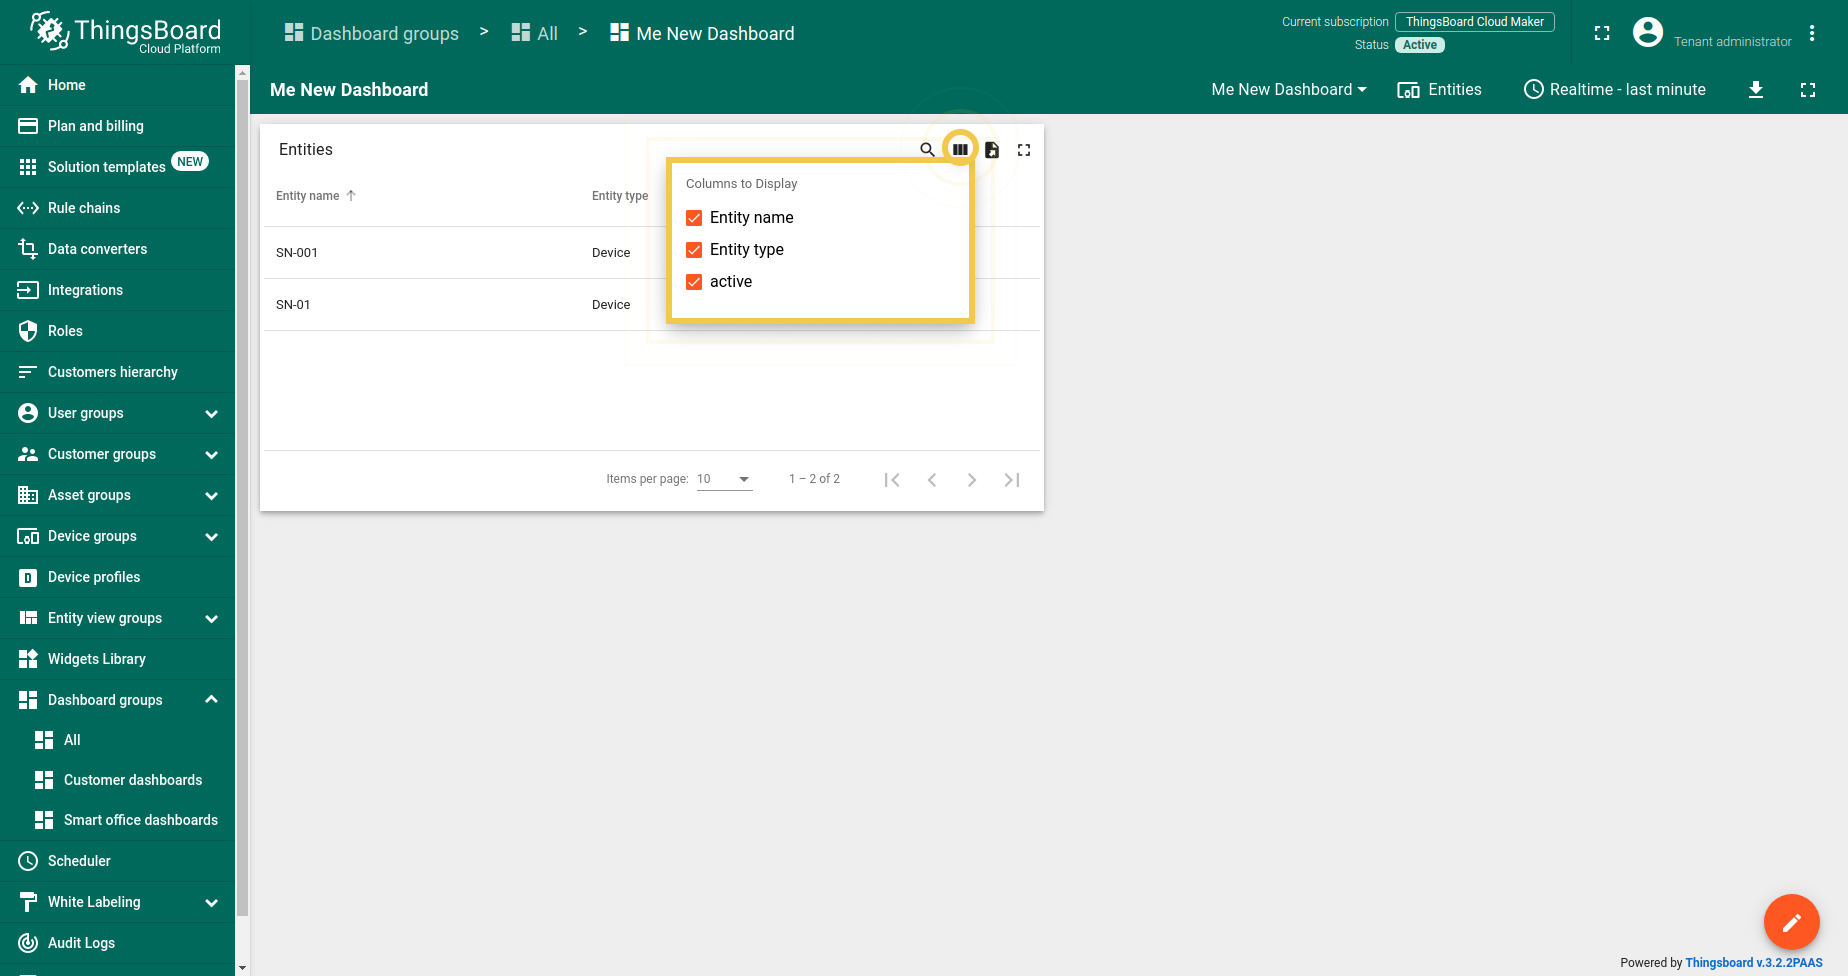
- 启用选择要显示的列
勾选此复选框后,部件右上角的黑条可用于选择隐藏和显示哪些列。
- 始终显示表头
勾选此复选框后,滚动实体列表时部件表头始终可见。若不勾选,表头将停留在顶部。
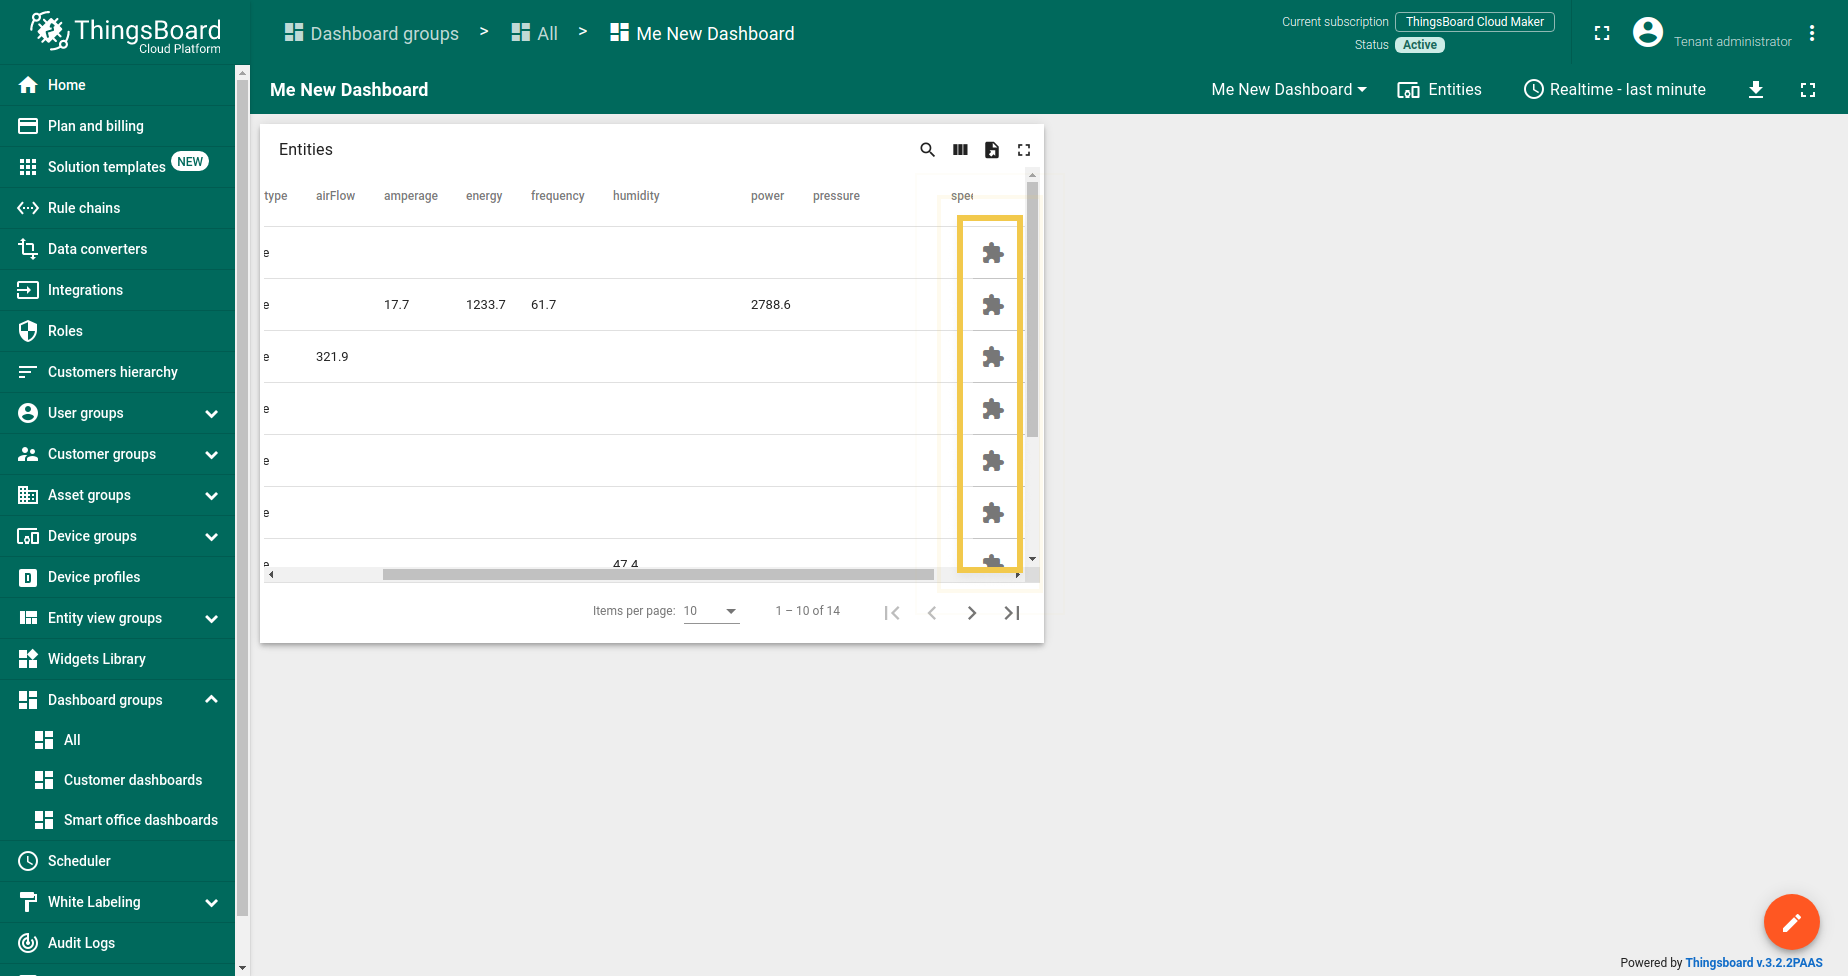
- 始终显示操作列
勾选此复选框后,滚动部件遥测数据时行操作单元格始终可见。若不勾选,行操作单元格将停留在行末。
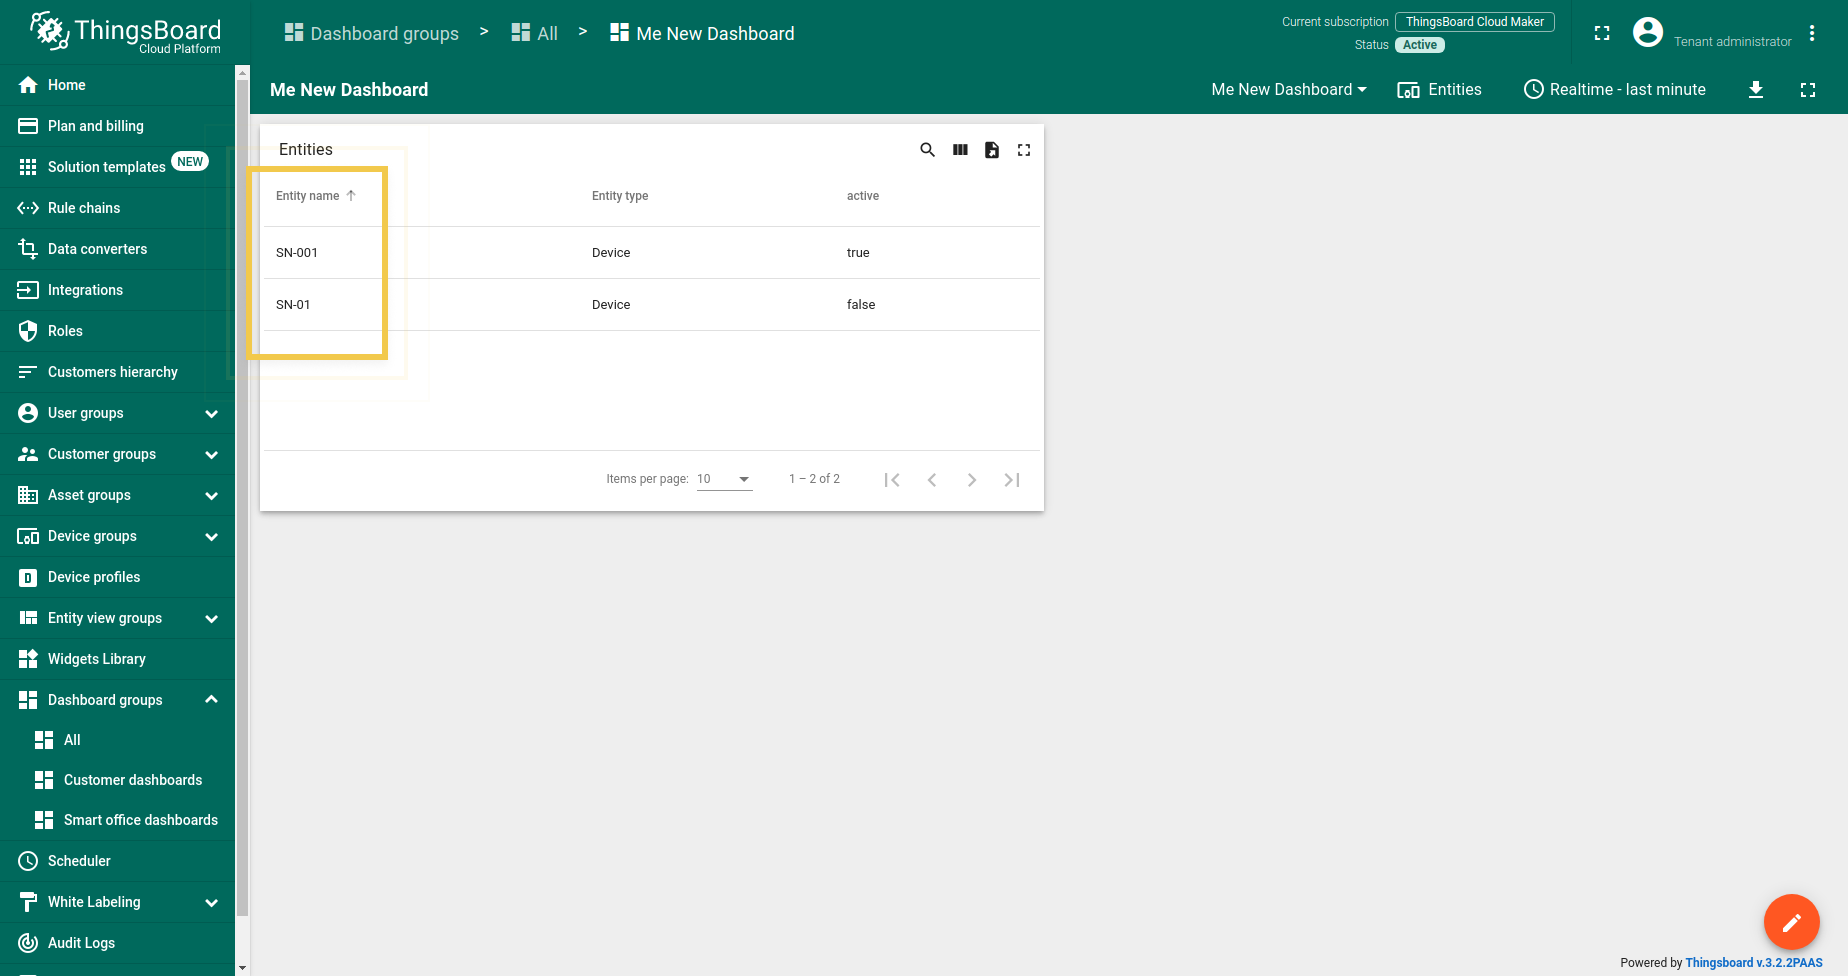
- 显示实体名称列
勾选此复选框后,实体名称列可见。若不勾选,将隐藏。
3. 列设置
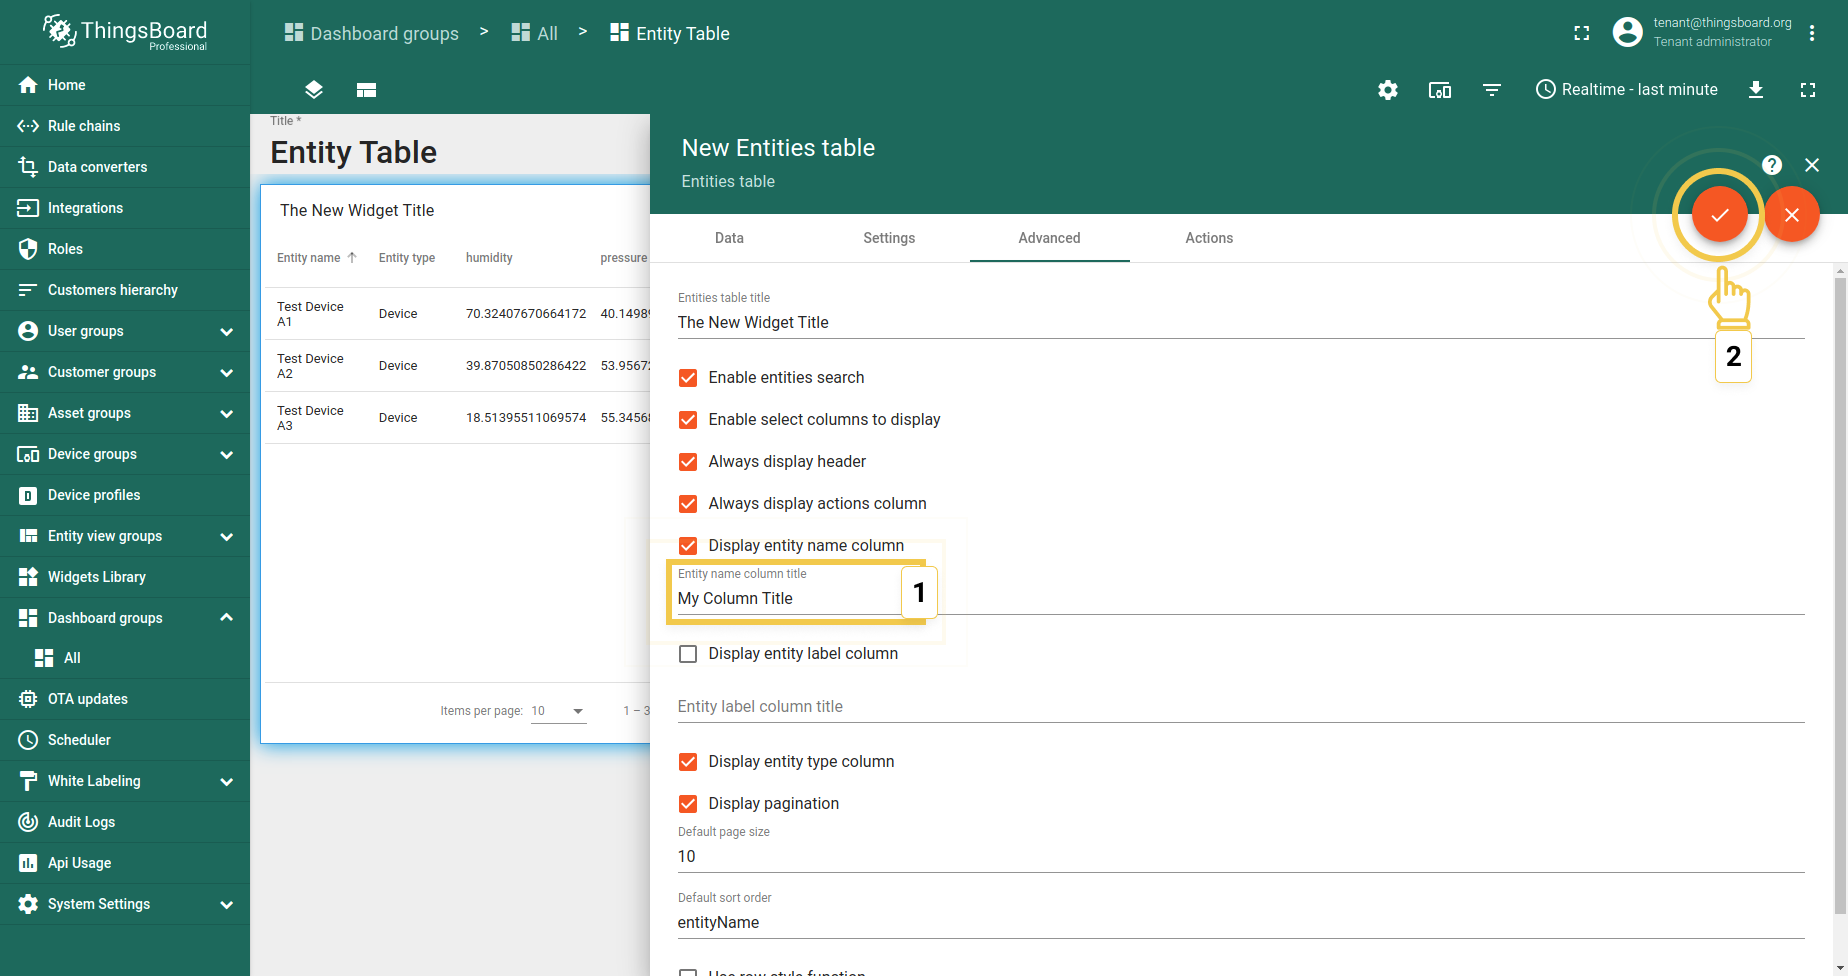
3.1. 实体列标题
要更改列标题,请执行:
- Enter the new title in the corresponding line.
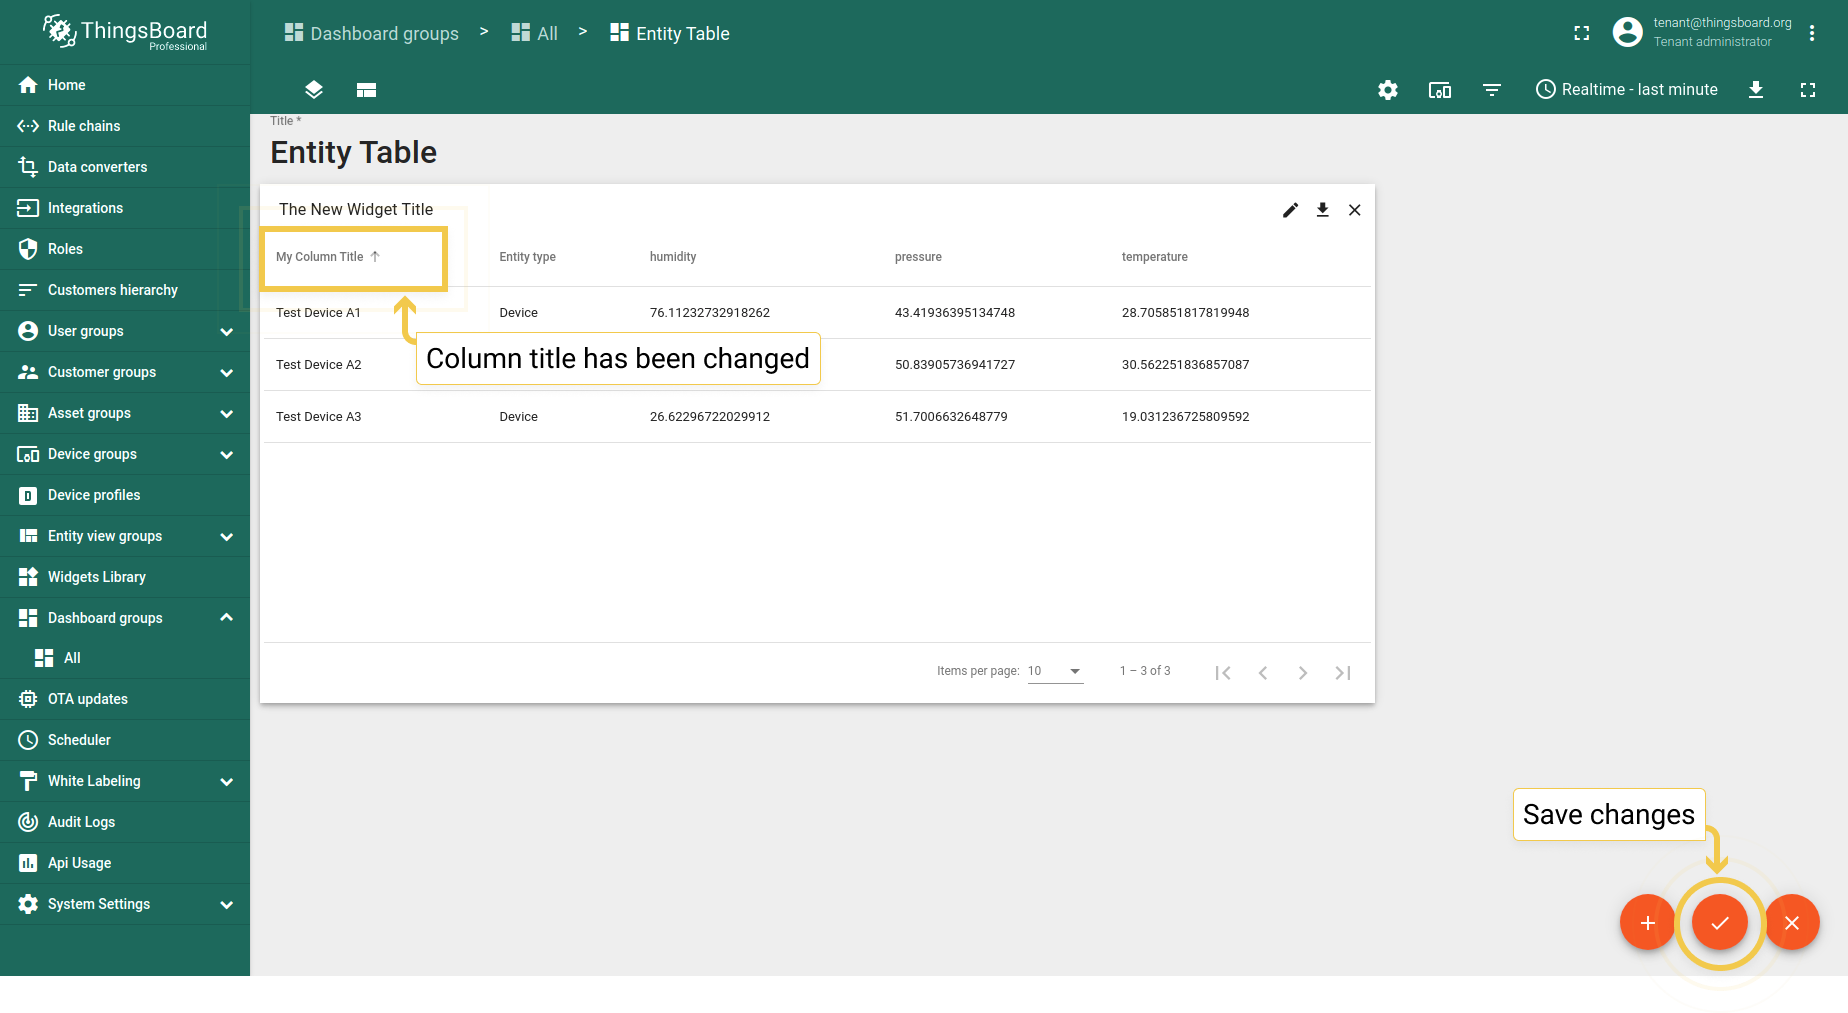
- Click the orange checkmark in the upper right corner to apply changes. An entity column title has been changed.
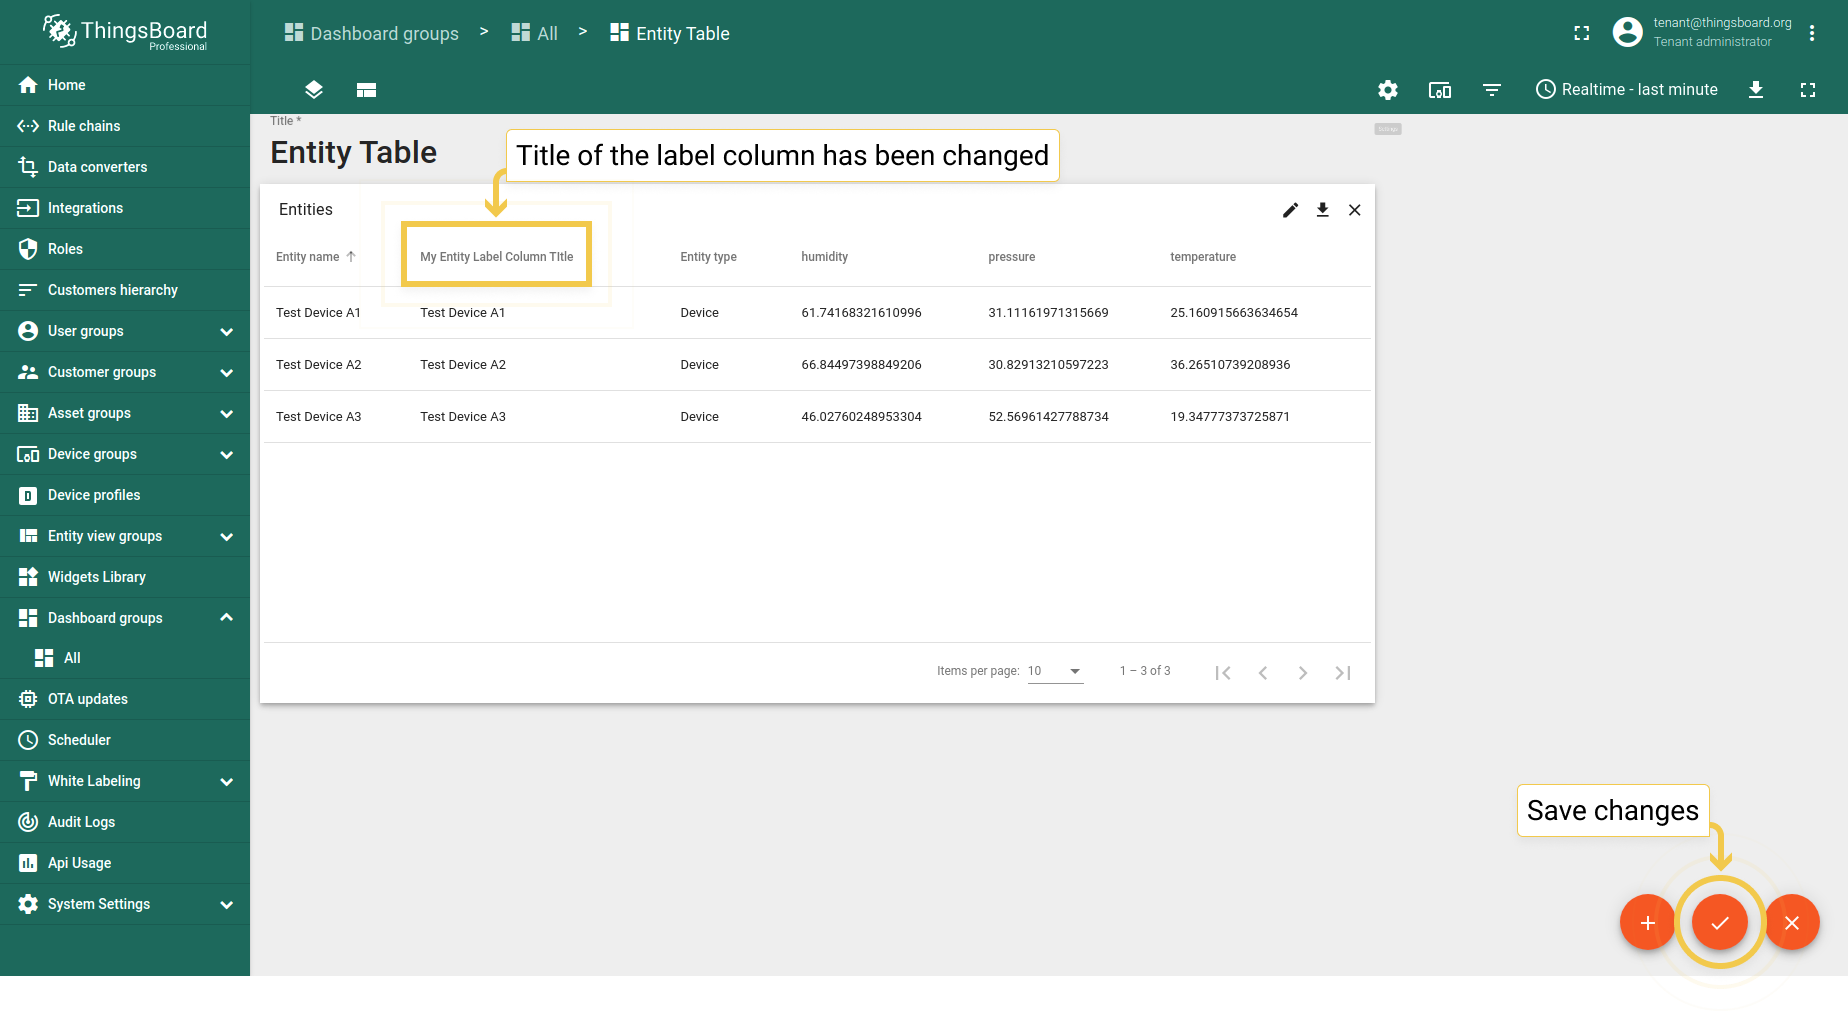
3.2. 显示实体标签列
勾选“显示实体标签列”复选框后,可添加标签列并命名。 点击右上角的橙色勾选标记后,将出现带自定义名称的标签列。

3.3. 显示实体类型列
“显示实体类型列”复选框负责在部件上显示实体类型(如“device”)。默认显示实体类型列,取消勾选可隐藏。
4. 分页
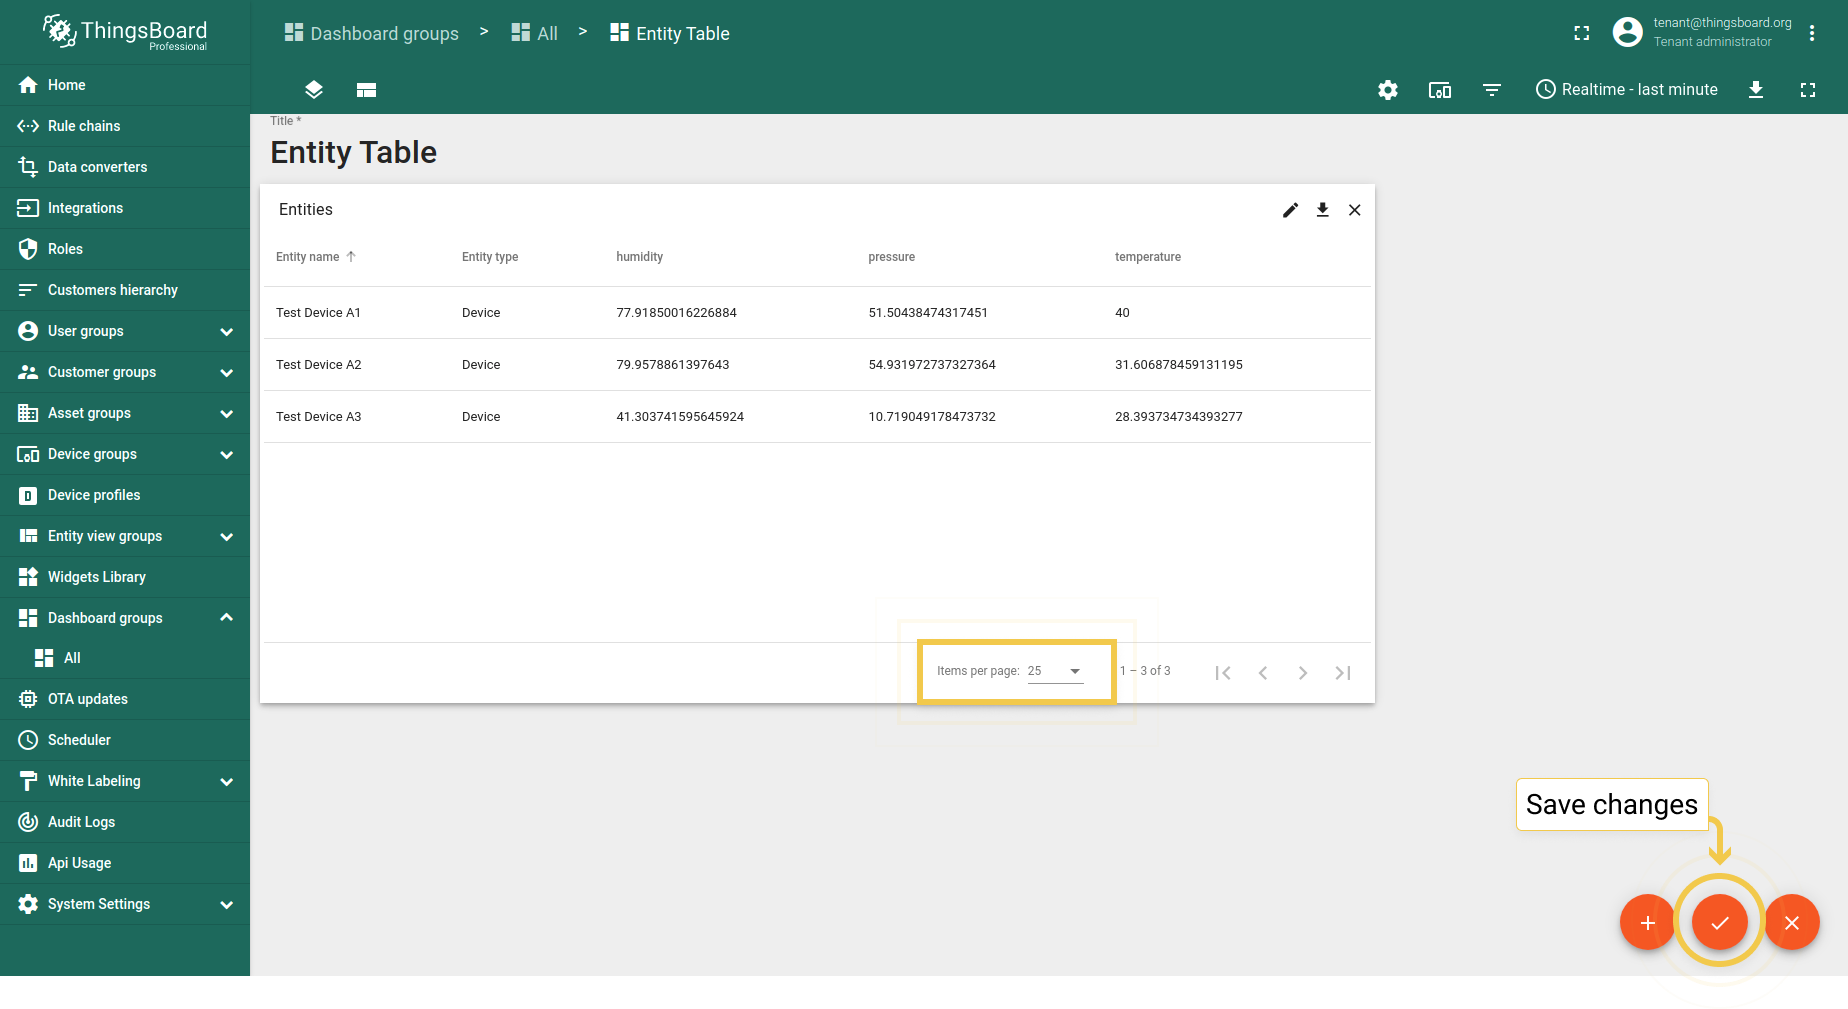
默认情况下,部件显示每页可见条数及总页数。显示该信息为可选。 通过勾选/取消“显示分页”复选框可更改。禁用该复选框后,将不显示每页条数和页数信息。 要应用更改,请点击右上角的橙色勾选标记。
请注意:要理解以下设置,需启用“显示分页”复选框以查看每页条数。
默认每页大小为10条。若要更改该数值,请执行:
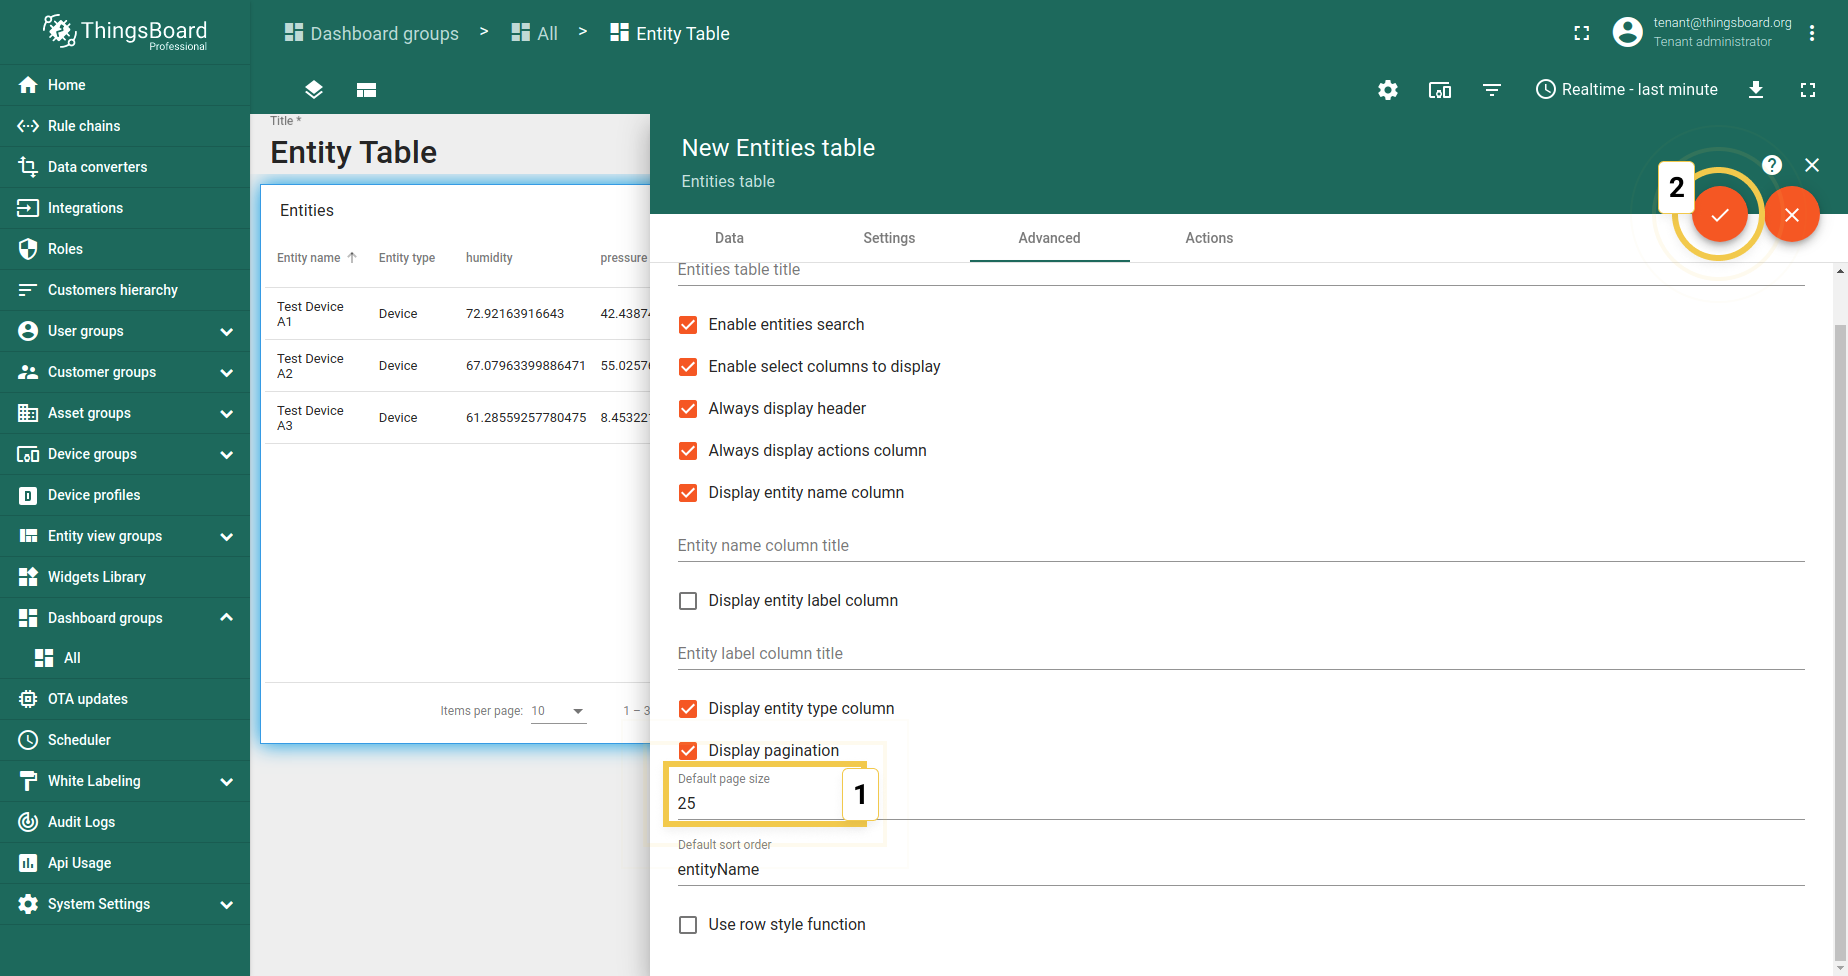
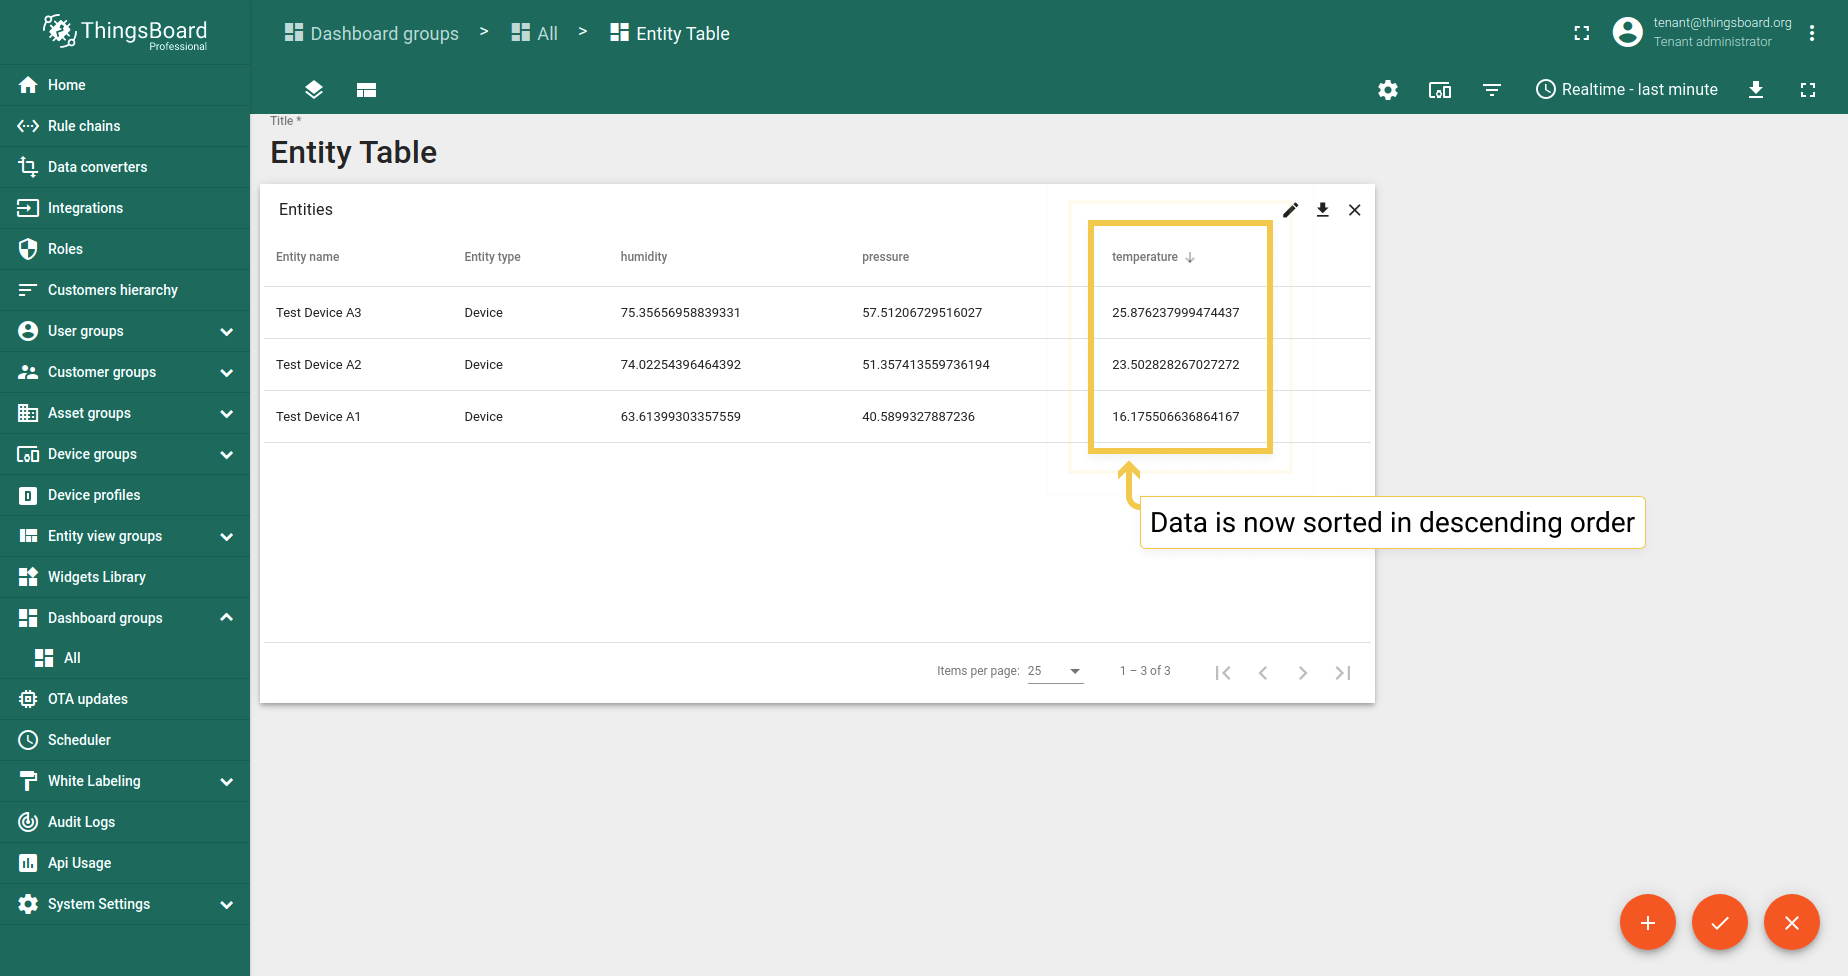
5. 表格部件中的数据排序
默认情况下,表格部件中的数据按升序排序。 若列中的值非数值(如名称和类型),则按字母顺序规则排序。
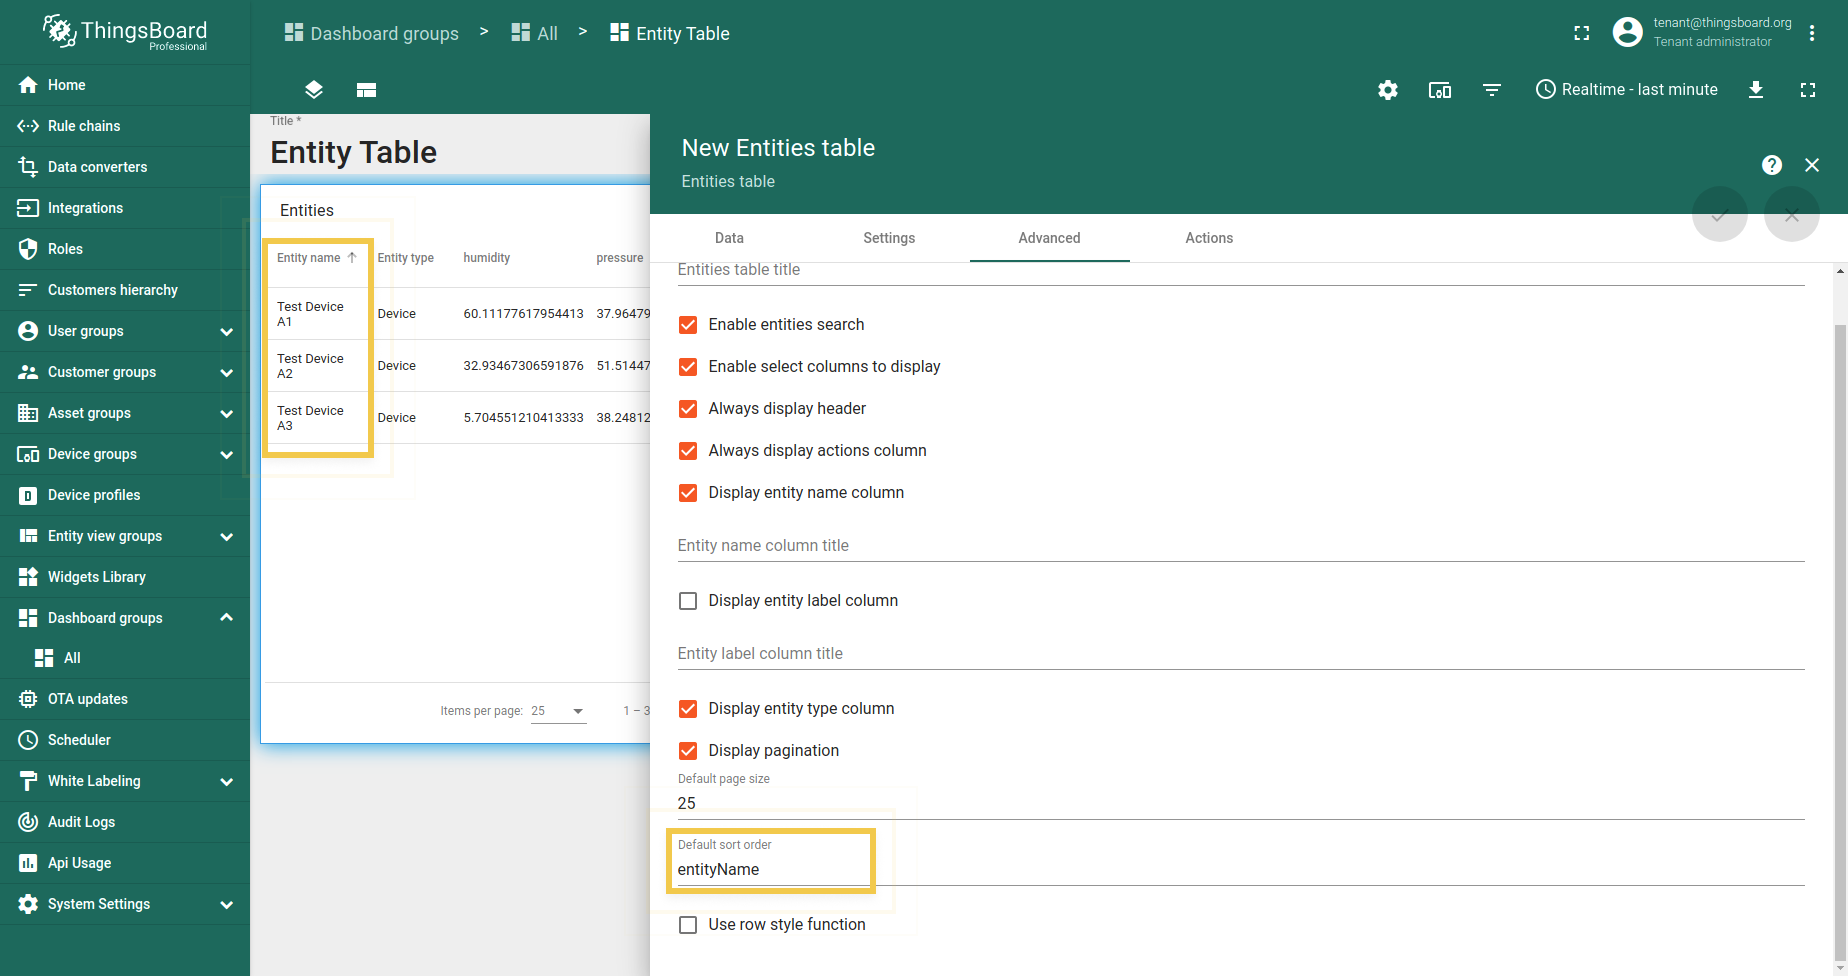
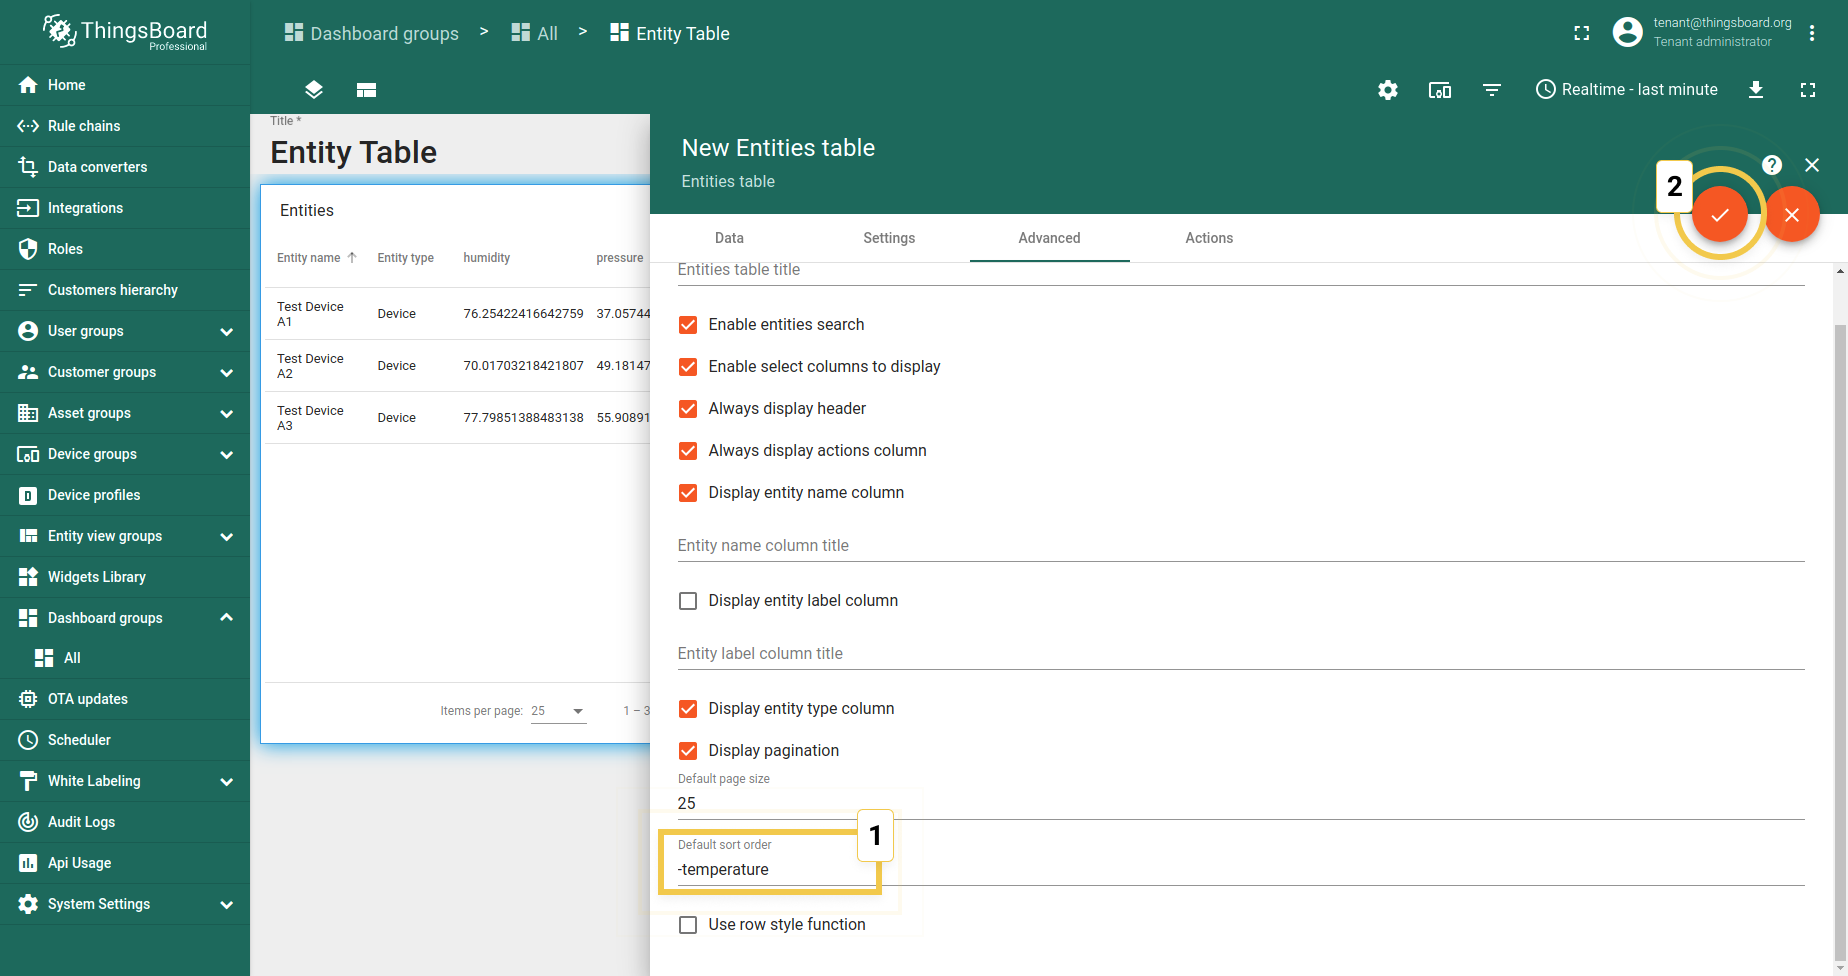
若要按遥测数据键类型(temperature、humidity等)排序,可在默认排序顺序行中输入值的名称。 示例中使用temperature。 若需改为降序排序,请执行:
- As was mentioned, the default sort order is ascending.
- Type the “-” (minus) symbol in front of the data key name in the Default sort order line. Click the orange checkmark in the upper right corner to apply the changes
- Now, the telemetry data is sorted in the descending order we needed.

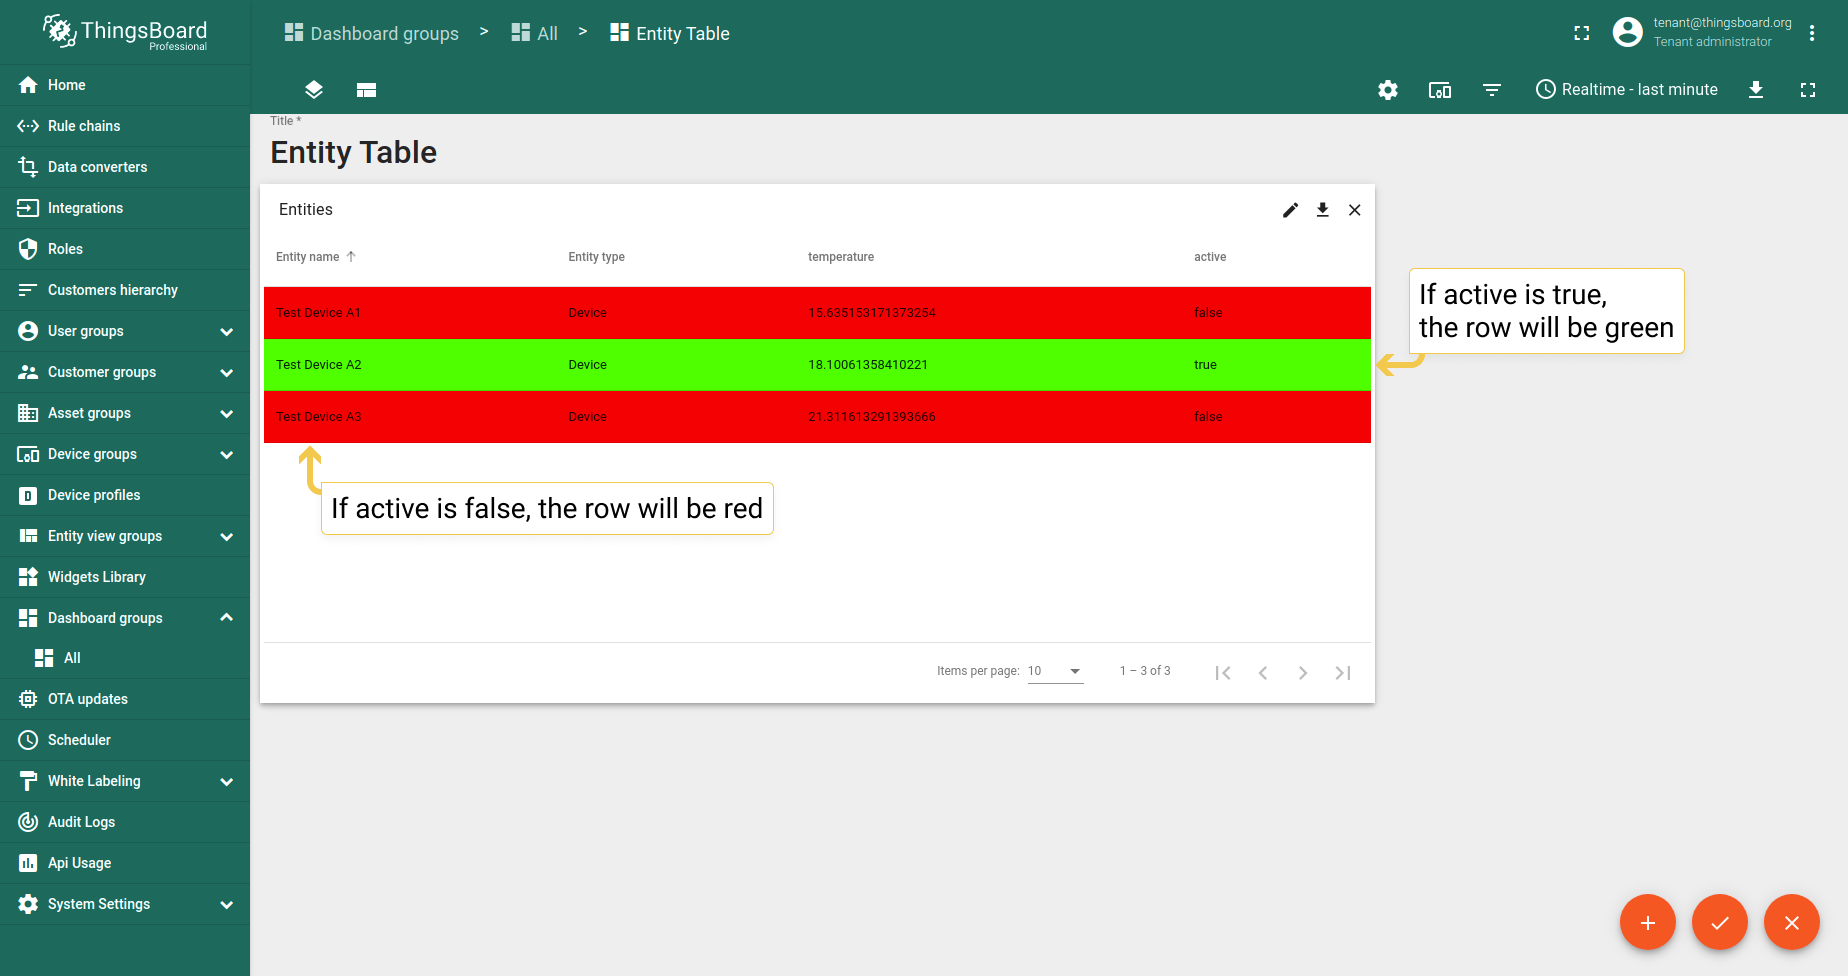
6. 行样式函数
自3.2.2版本起,可根据条件更改部件行样式。通过简单示例说明: 假设需要观察哪些设备处于活跃状态、哪些不活跃。为简化任务,应使用行样式函数。
示例及对应效果:
1
2
3
4
5
6
7
result = {background:"white"};
if (entity.active == "false") {
   result.background = '#FF0000';
} else {
   result.background = '#00FF00';
}
return result;
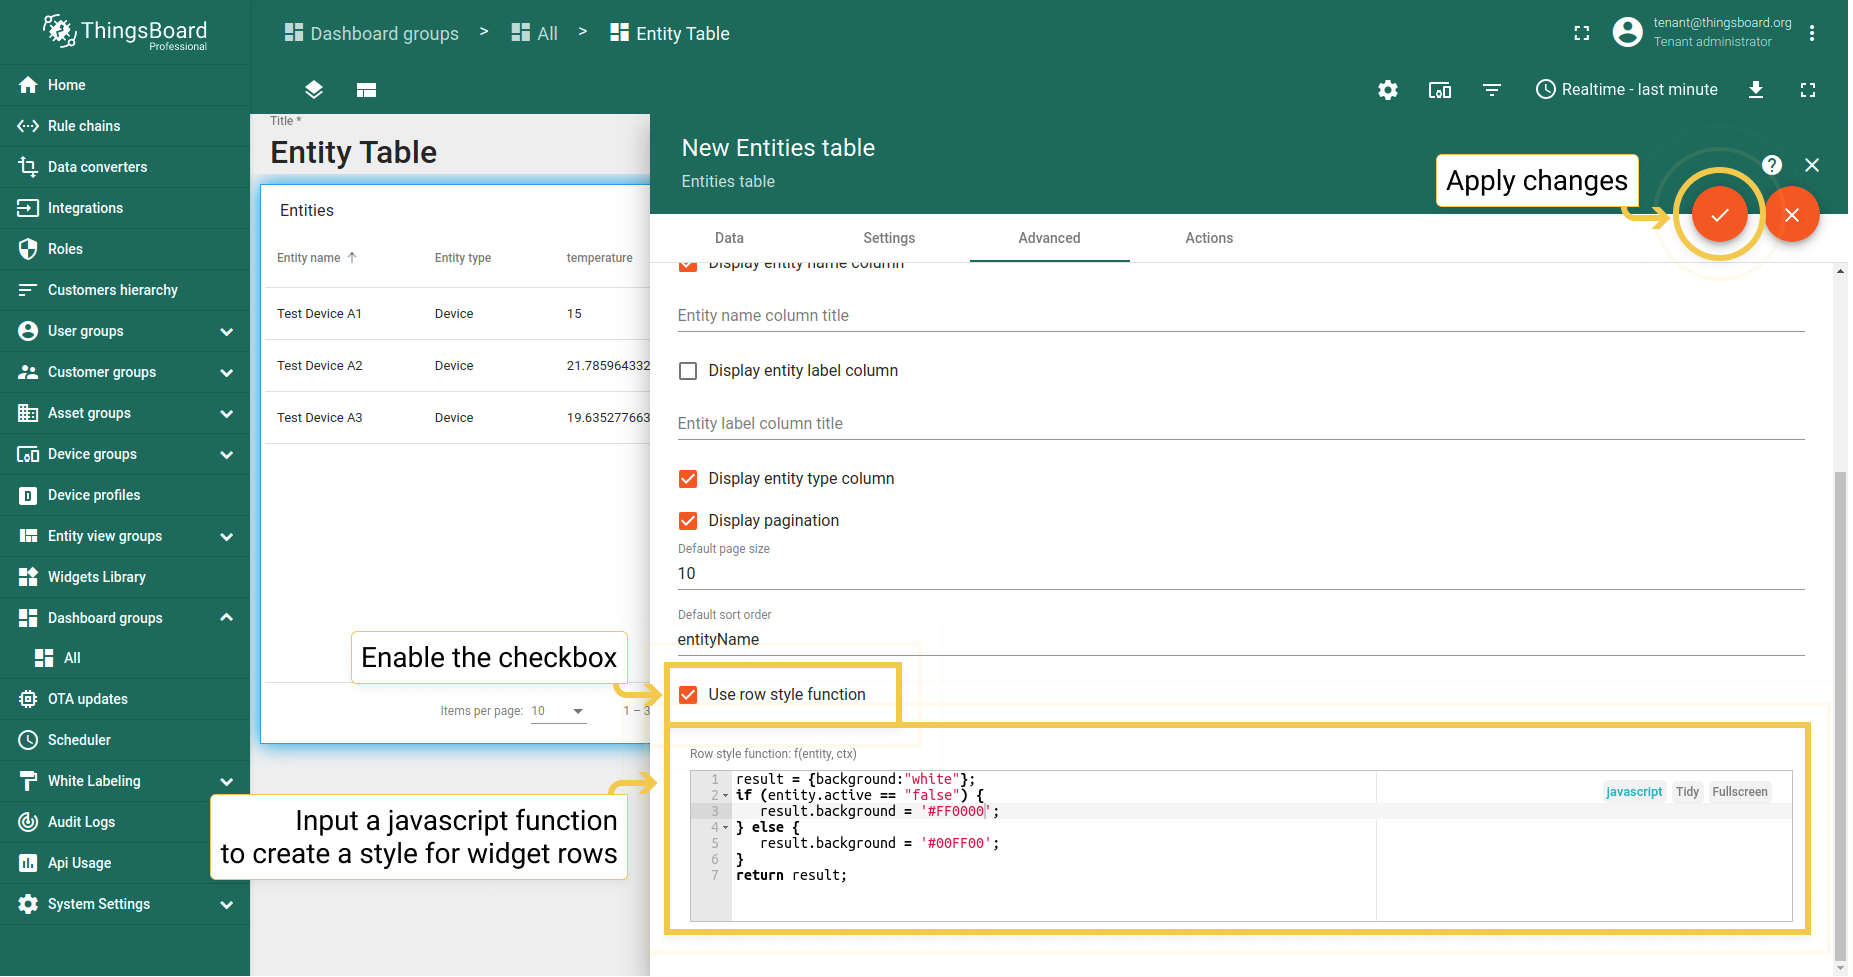
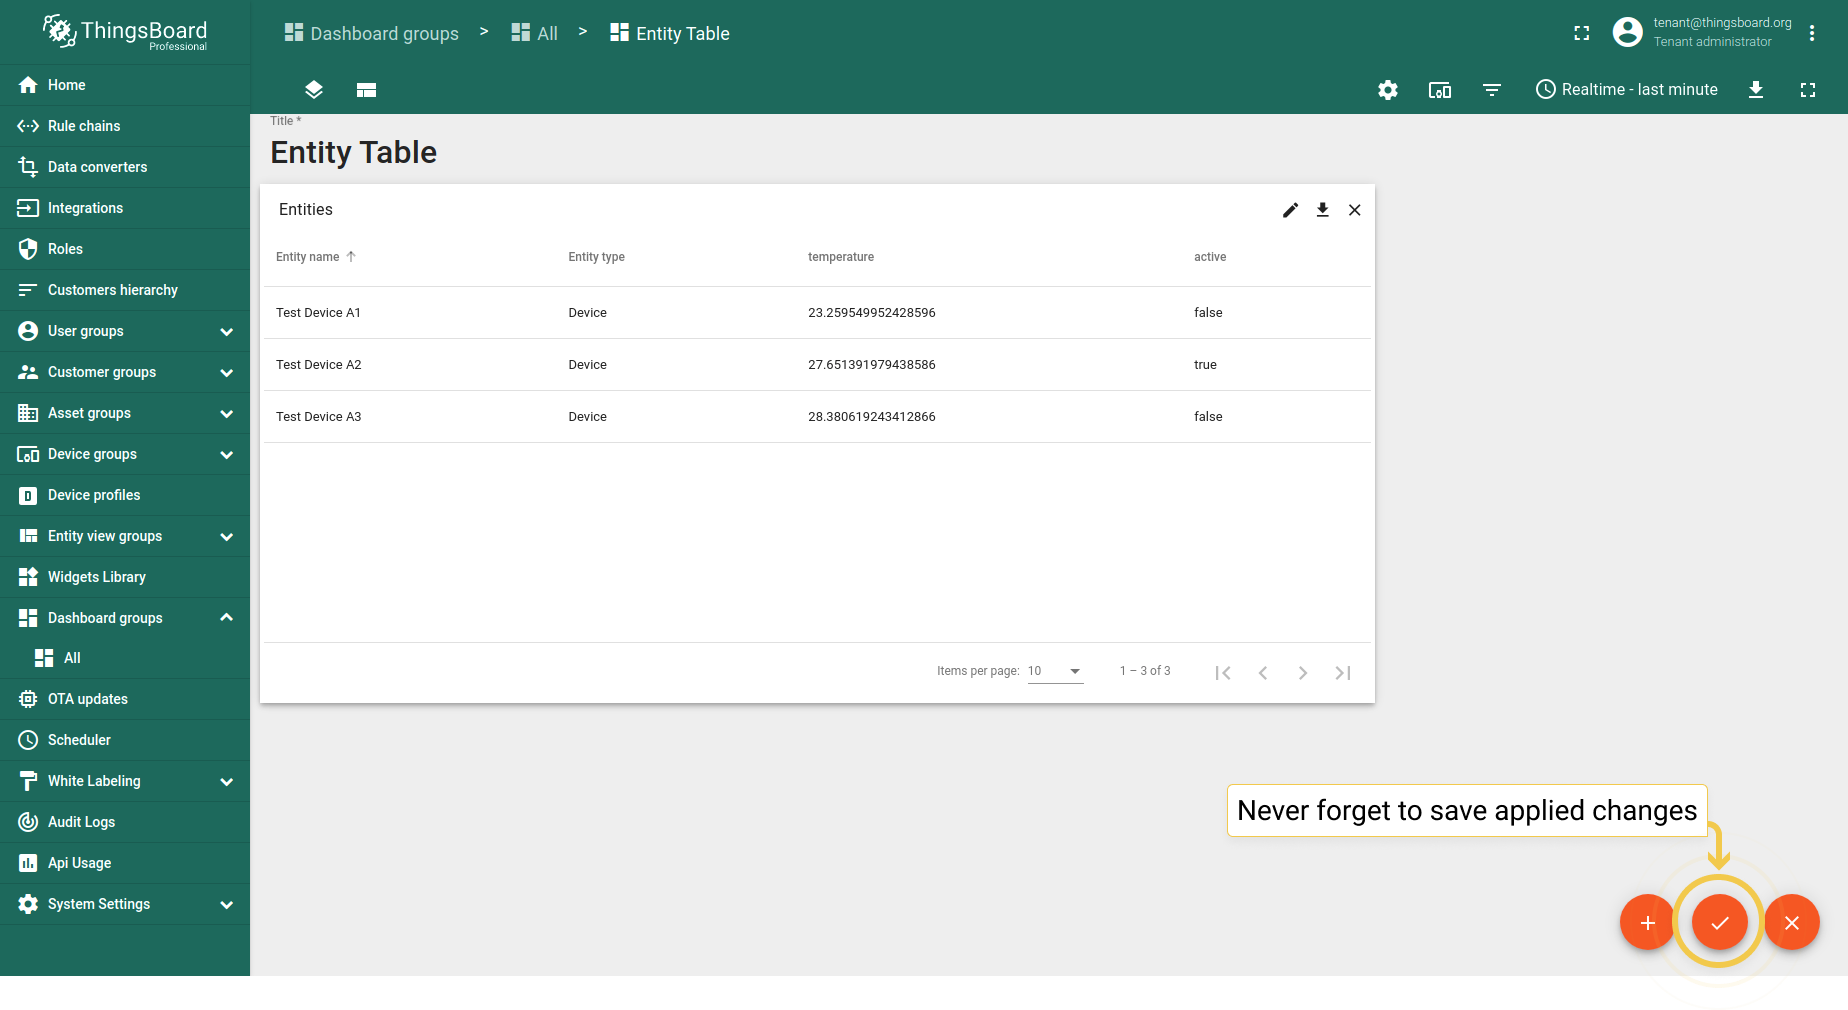
保存更改
要使更改生效并保存,需点击仪表板右下角的橙色勾选标记。
即可确认表格部件的更改已正确应用并保存。