简介
ThingsBoard支持配置多个自定义实体组。 可为设备、资产、实体视图、客户、用户、仪表板和Edge实例创建实体组。 每个实体可同时属于多个组。 特殊组“All”始终包含属于指定租户账户的所有实体。
针对每个实体组,ThingsBoard用户可配置不同列以可视化特定遥测或属性值。 用户也可为每个实体定义自定义操作:如打开仪表板、发送RPC调用等。 还支持批量删除实体、将实体加入组或从组中移除。
创建新实体组
本教程以创建设备实体组为例。 以下步骤适用于各类实体。
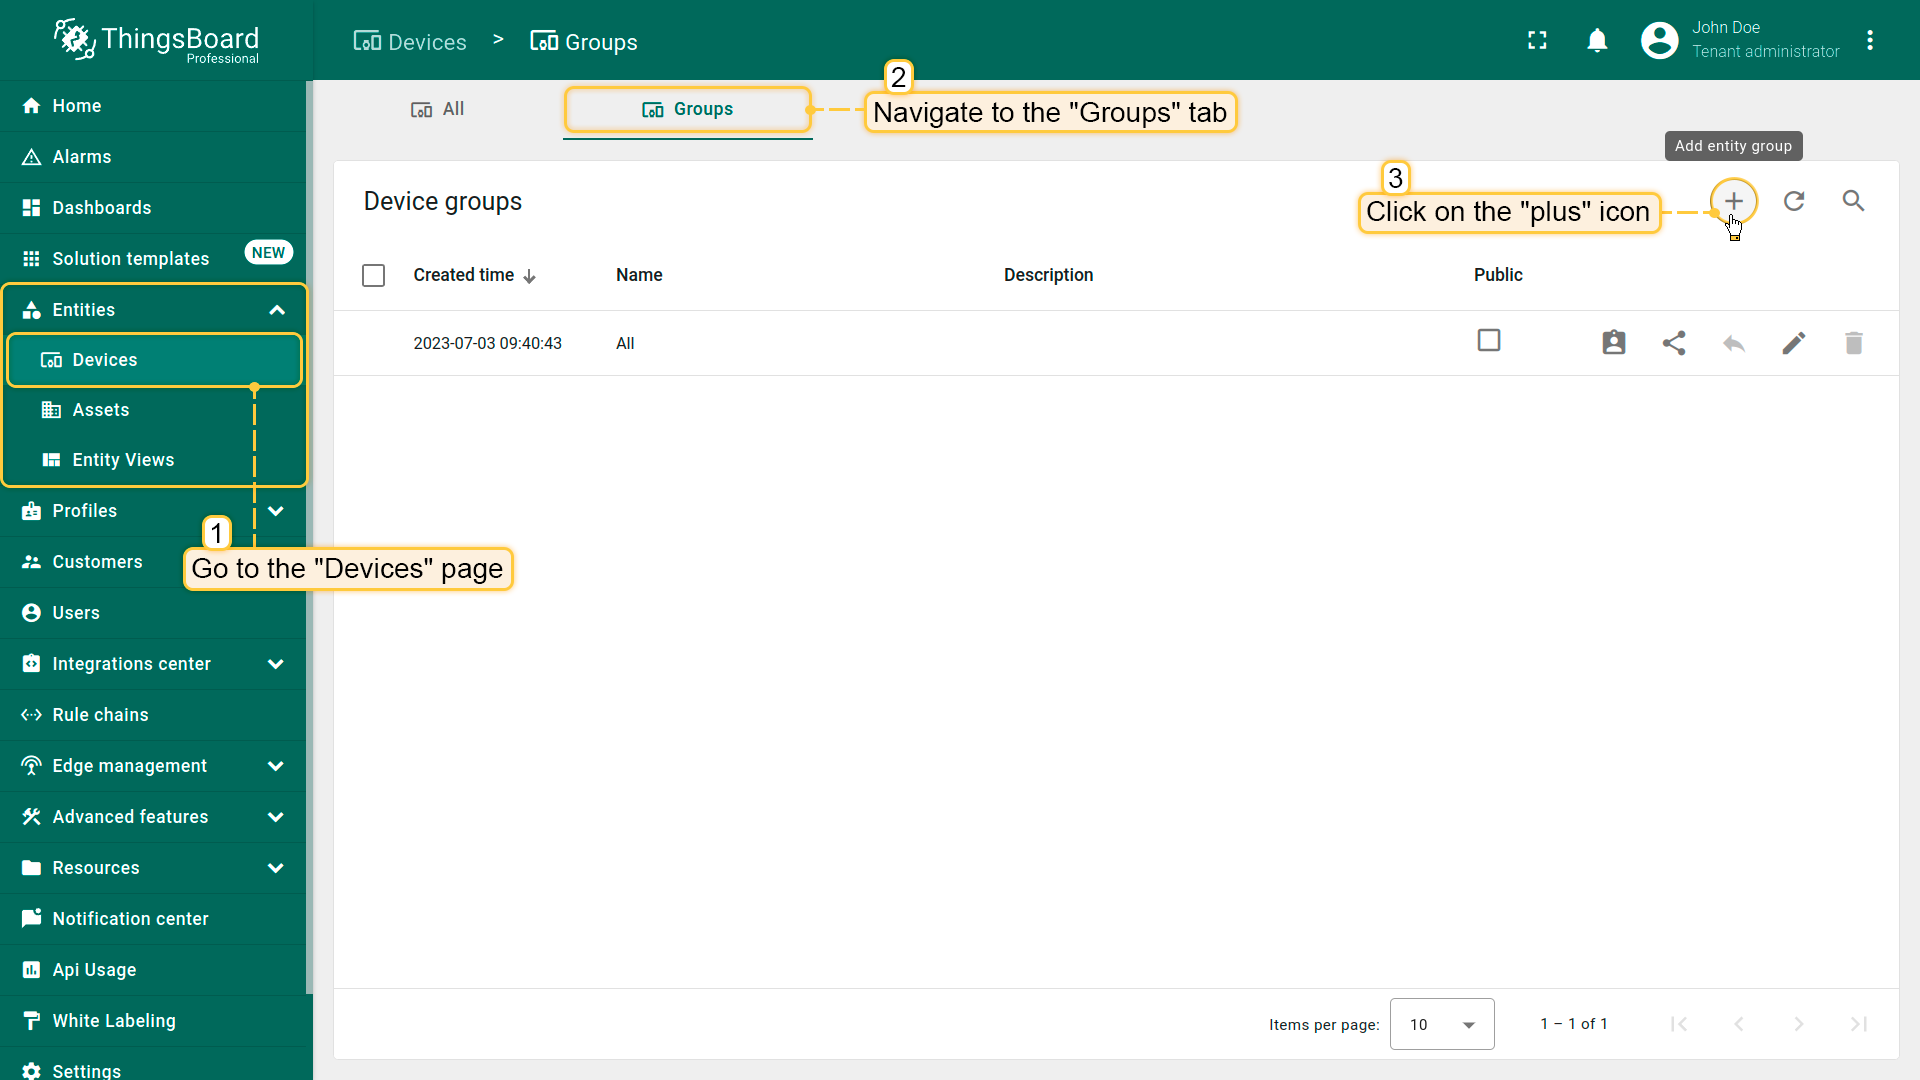
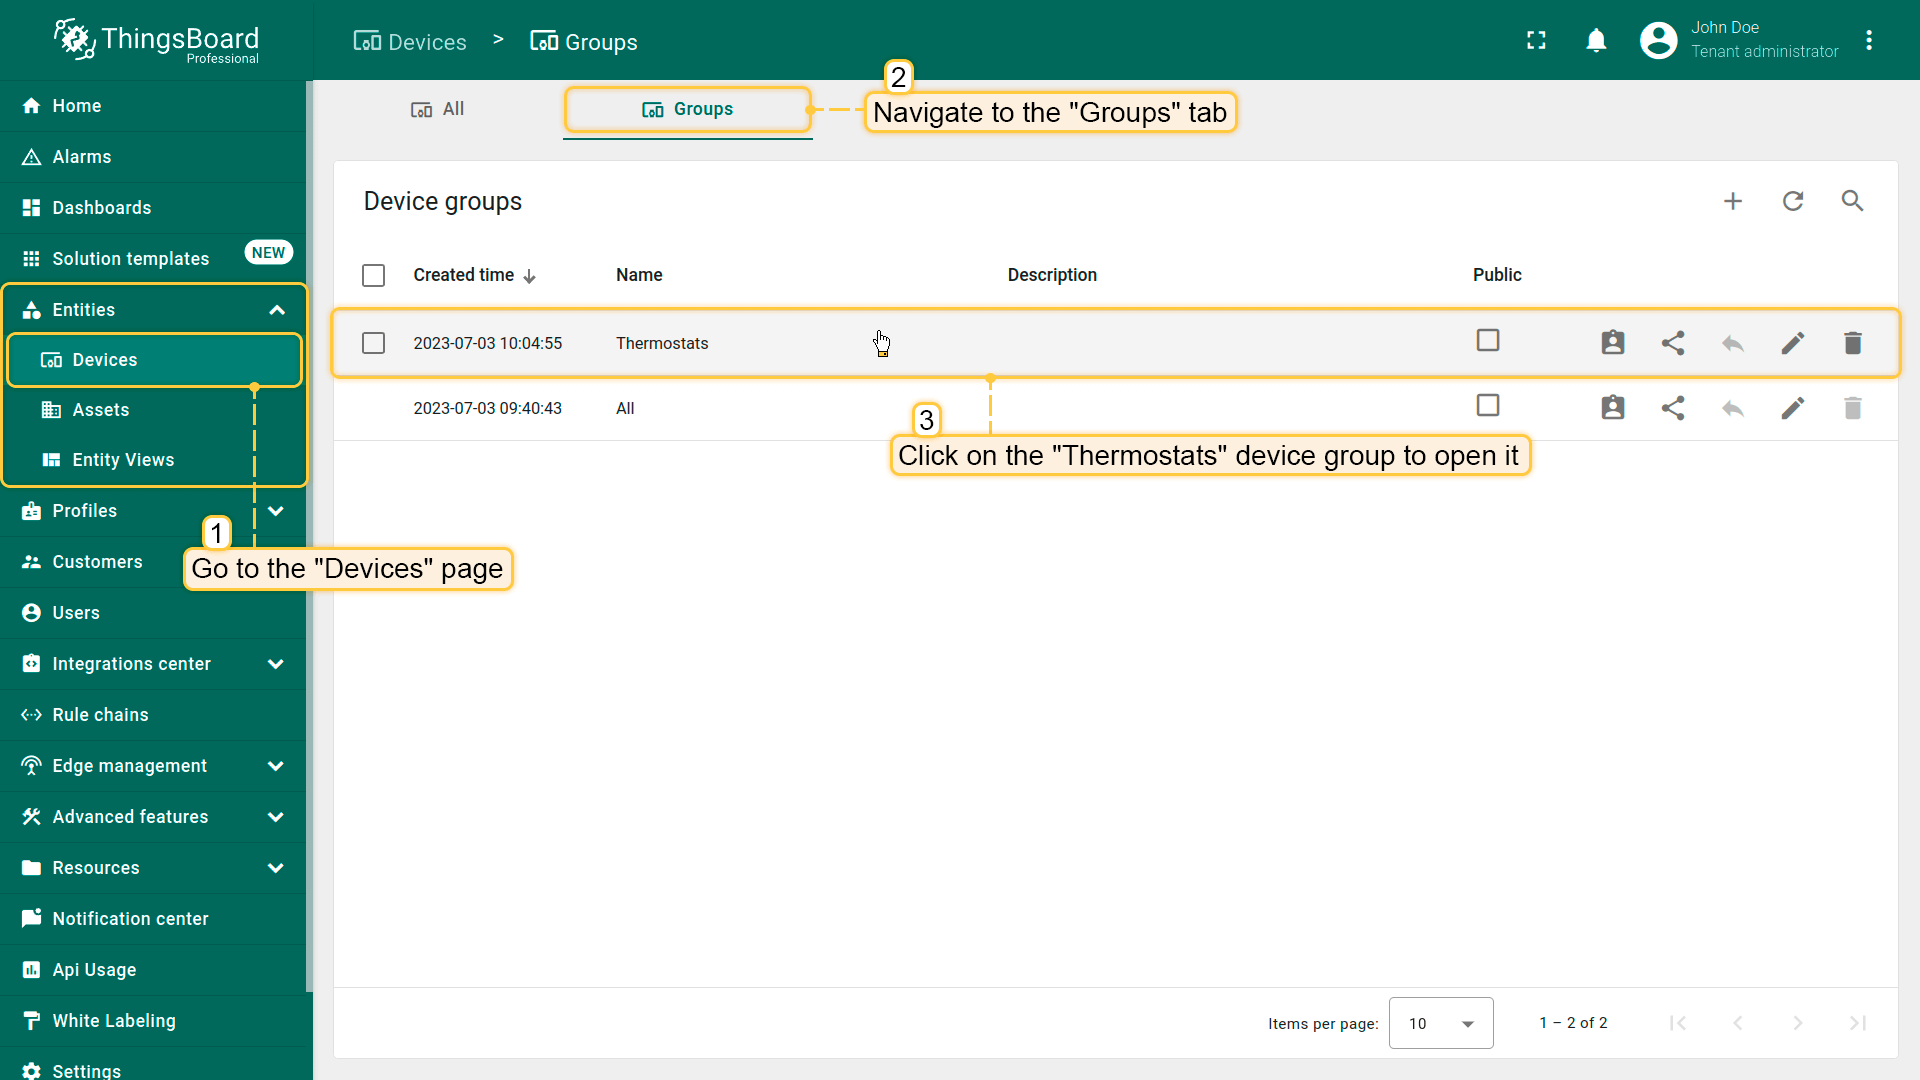
- Go to the "Entities" section - "Devices" page. By default, you navigate to the device group "All". Navigate to the "Groups" tab and click on the "plus" icon in the upper right corner;
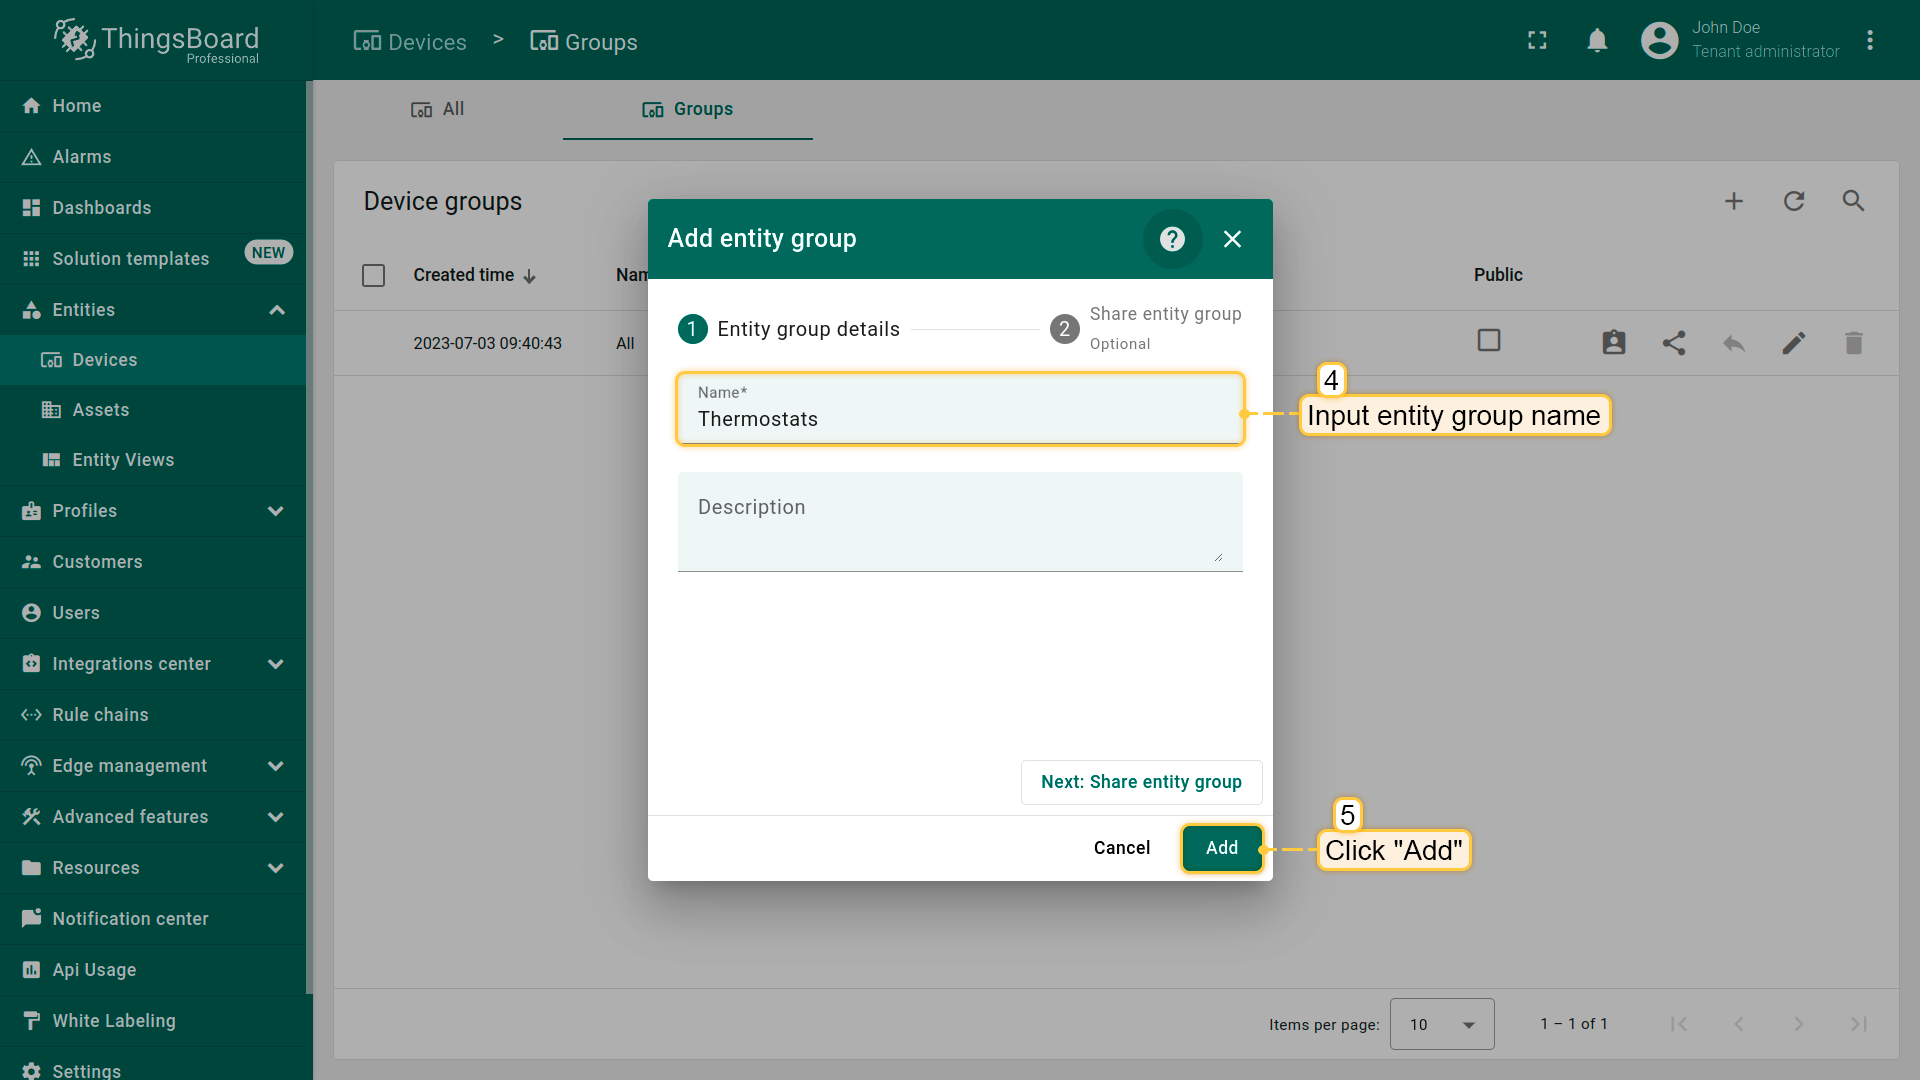
- Enter the name of the device group and click "Add";
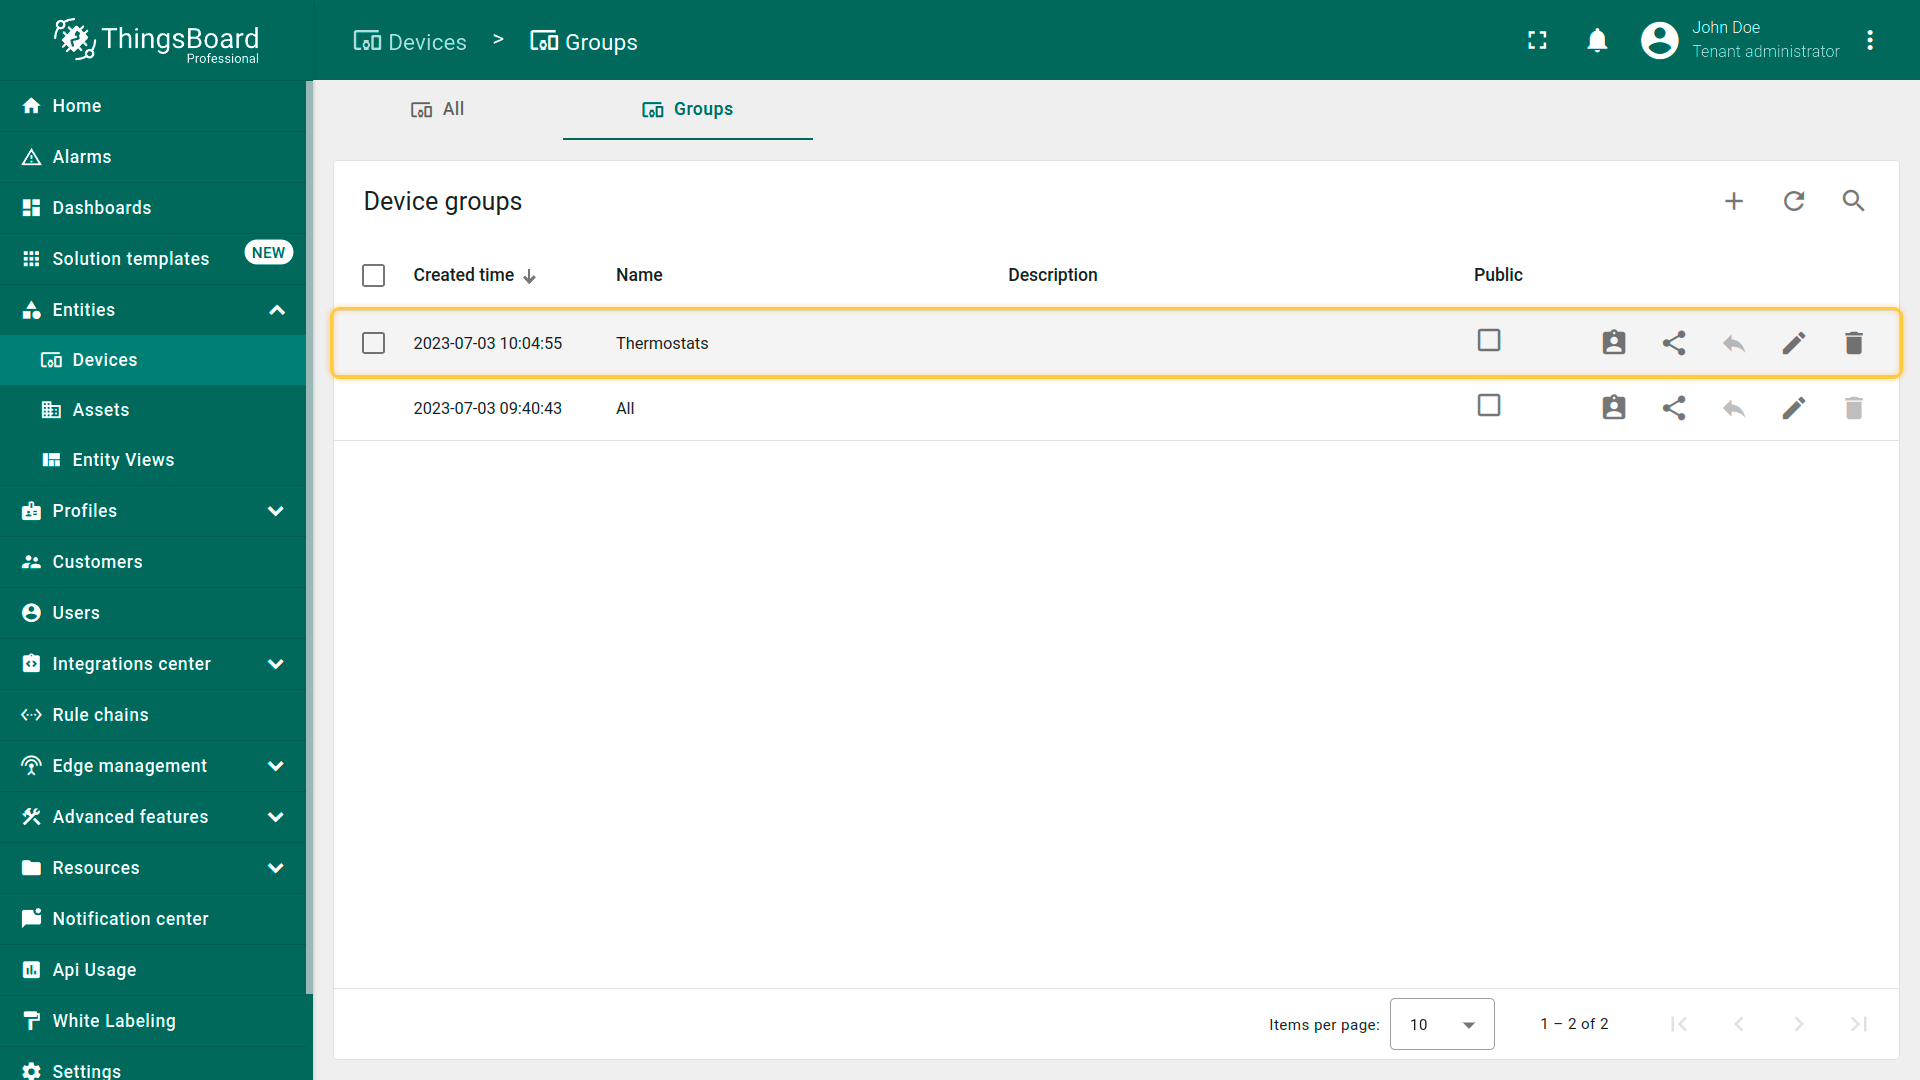
- The new device group is created.
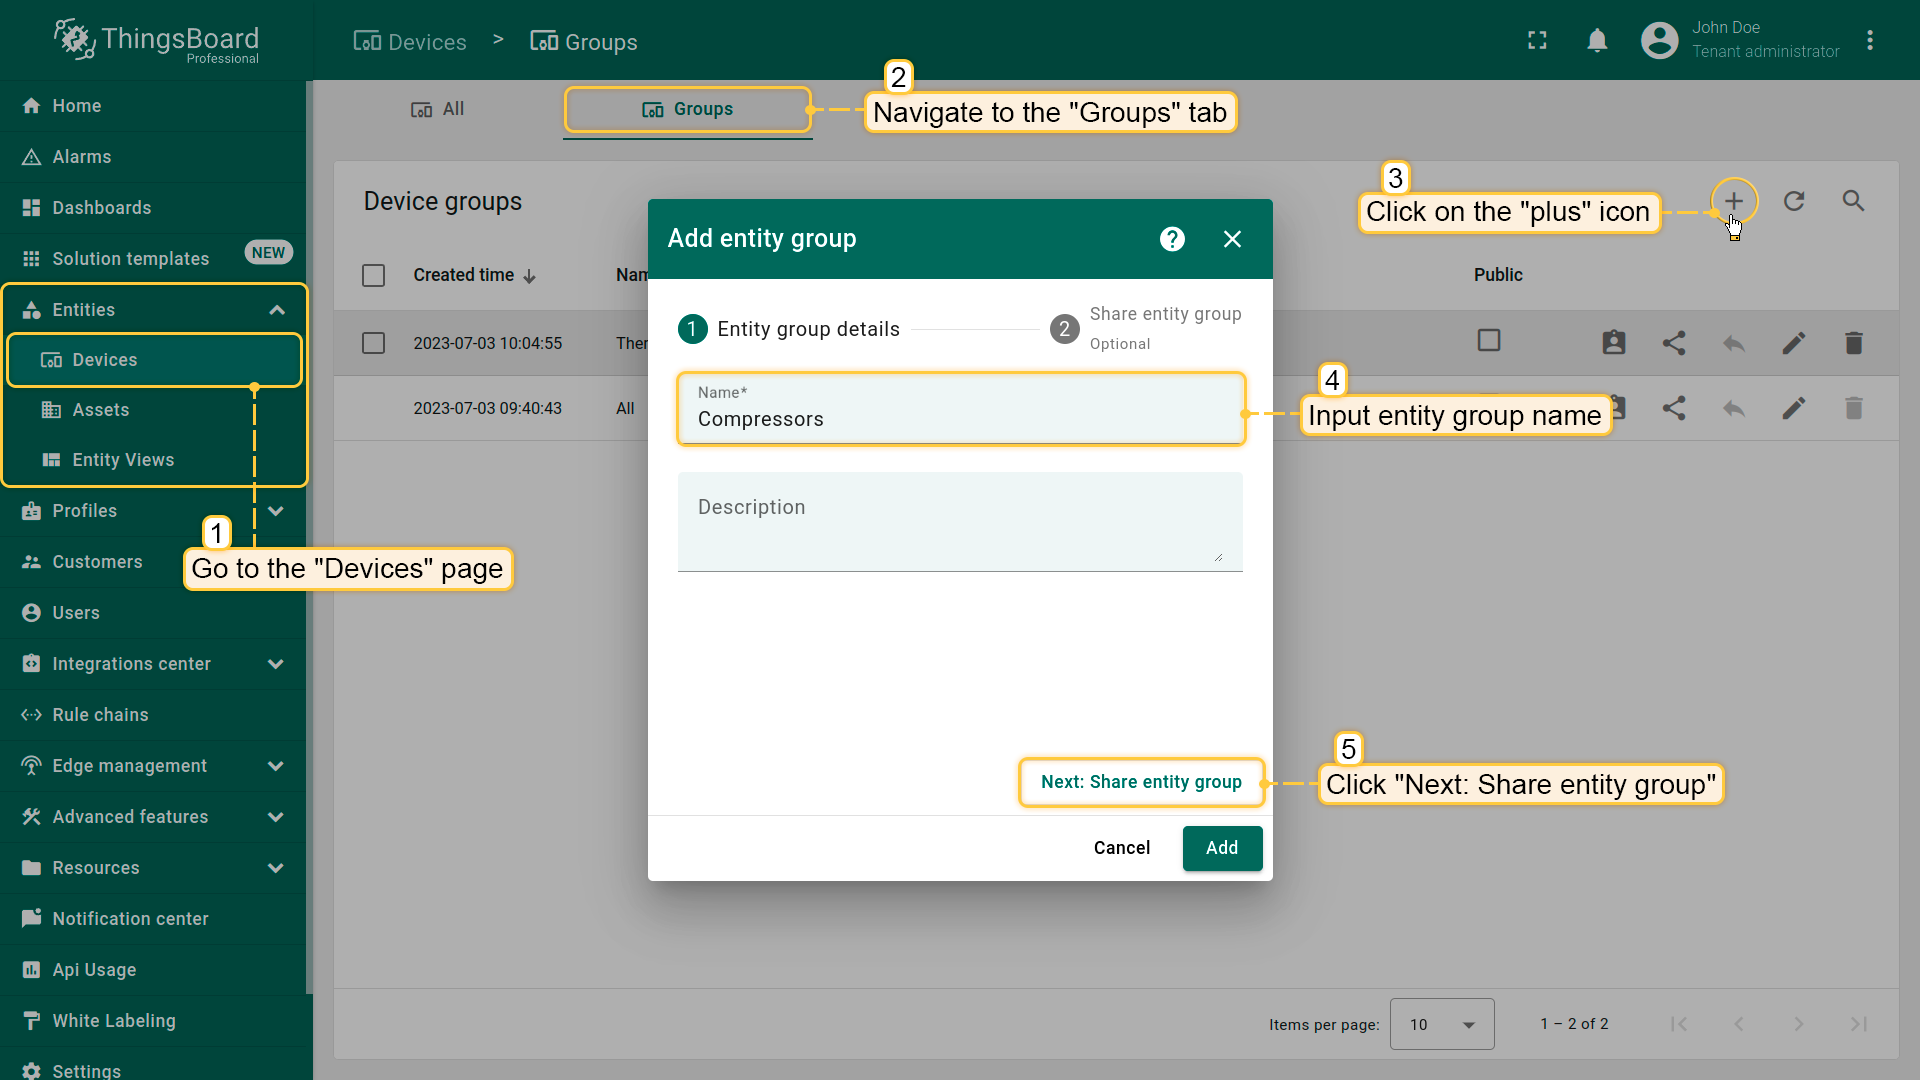
创建组的过程中可共享实体组。我们再创建一个组并共享给客户。
- Go to the "Entities" section - "Devices" page, then navigate to the "Groups" tab and click on the "plus" icon in the upper right corner. Enter the name of entity group and then click on the "Next: Share entity group" button;
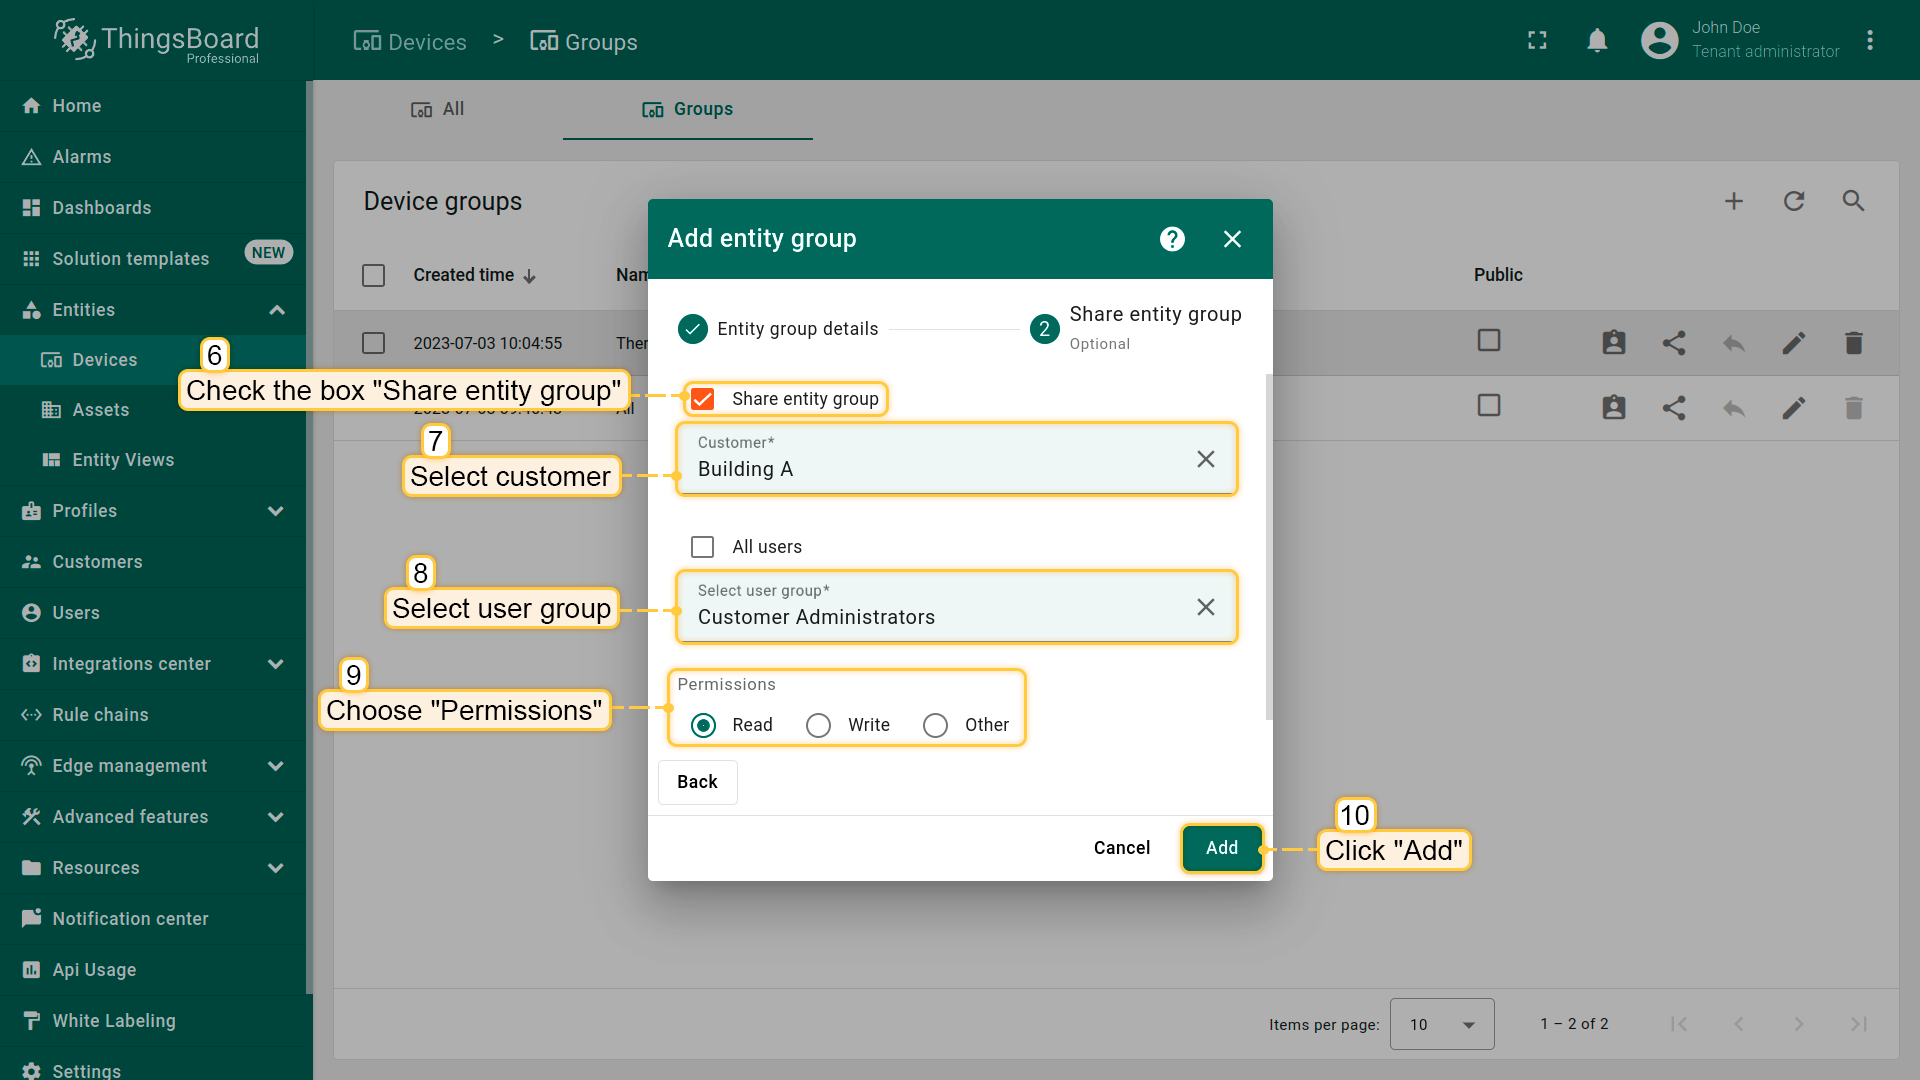
- Check the box "Share entity group", and select the customer we share entity group. Then select the user group and permission for it. Click "Add";
- The new device group is created.

实体组配置
编辑基本信息
可编辑实体组的基本信息,例如修改组名、固件和软件等。
操作步骤如下:
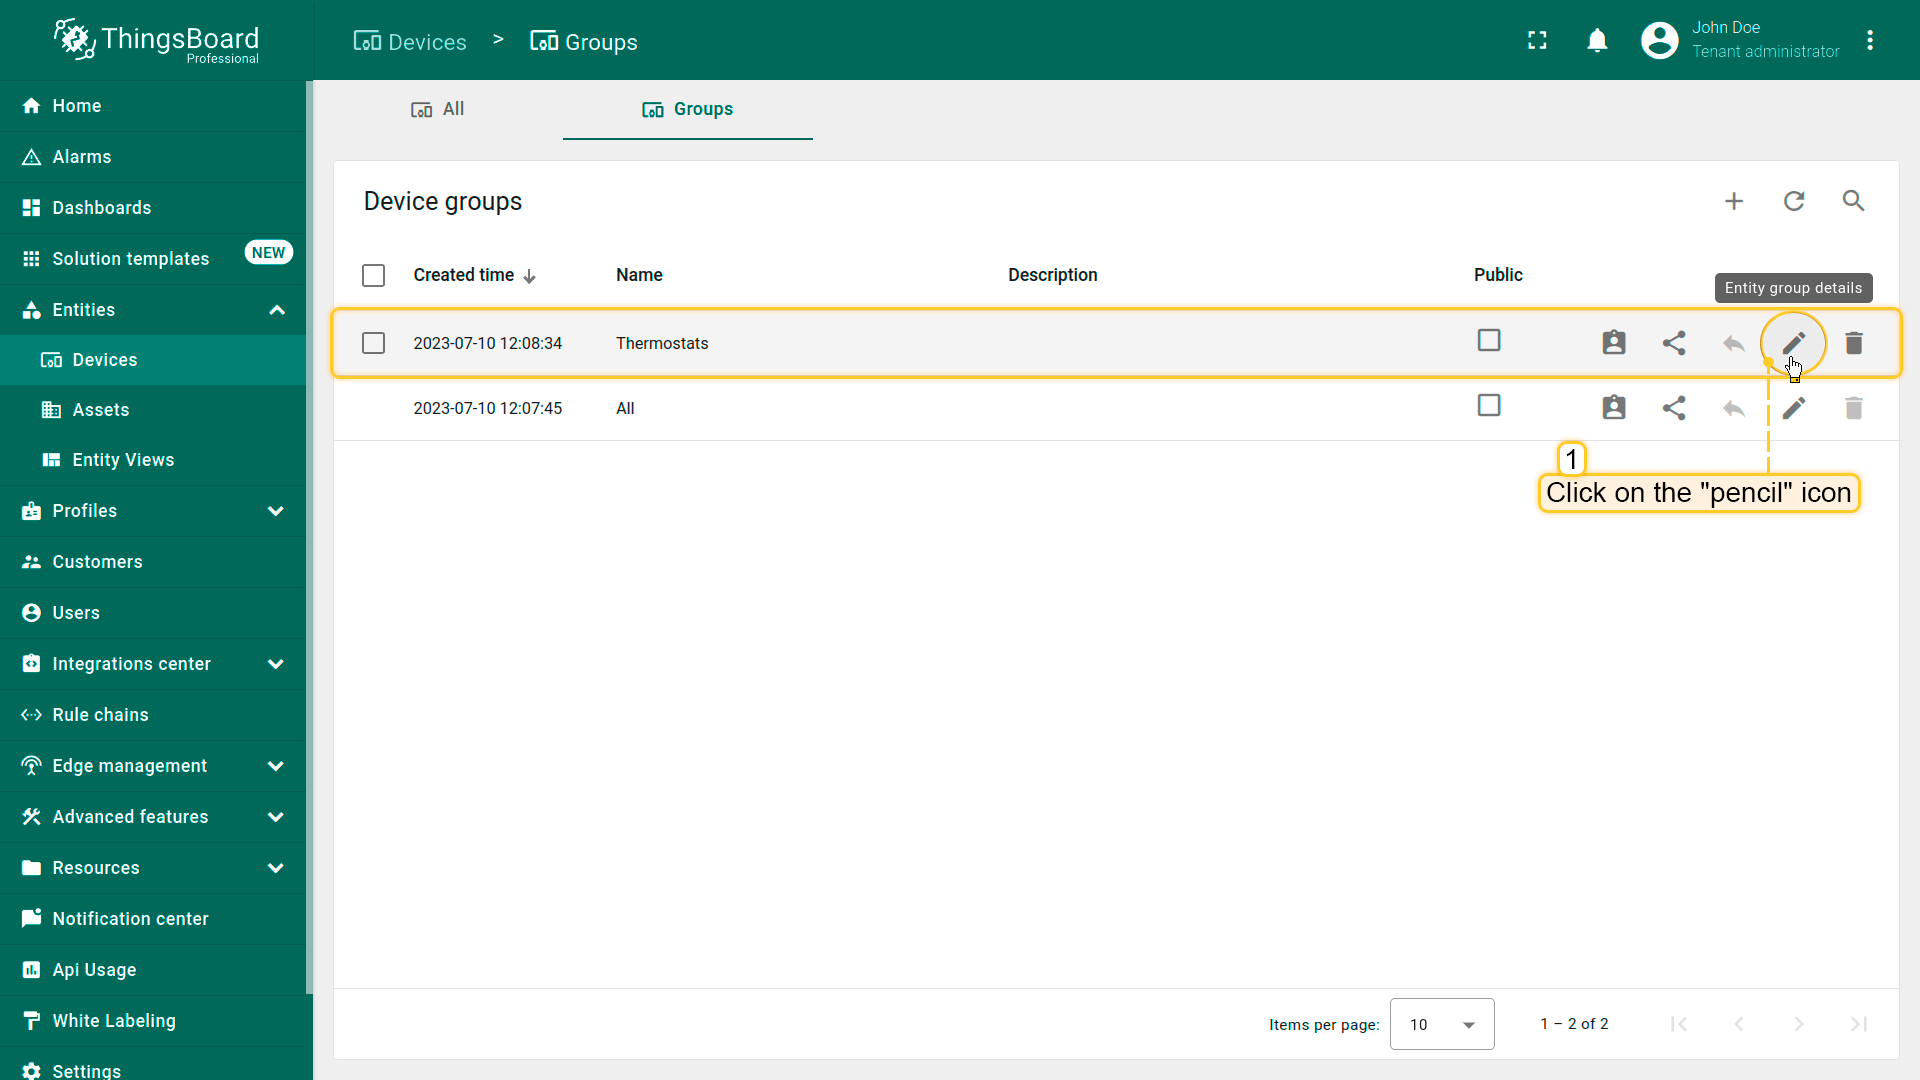
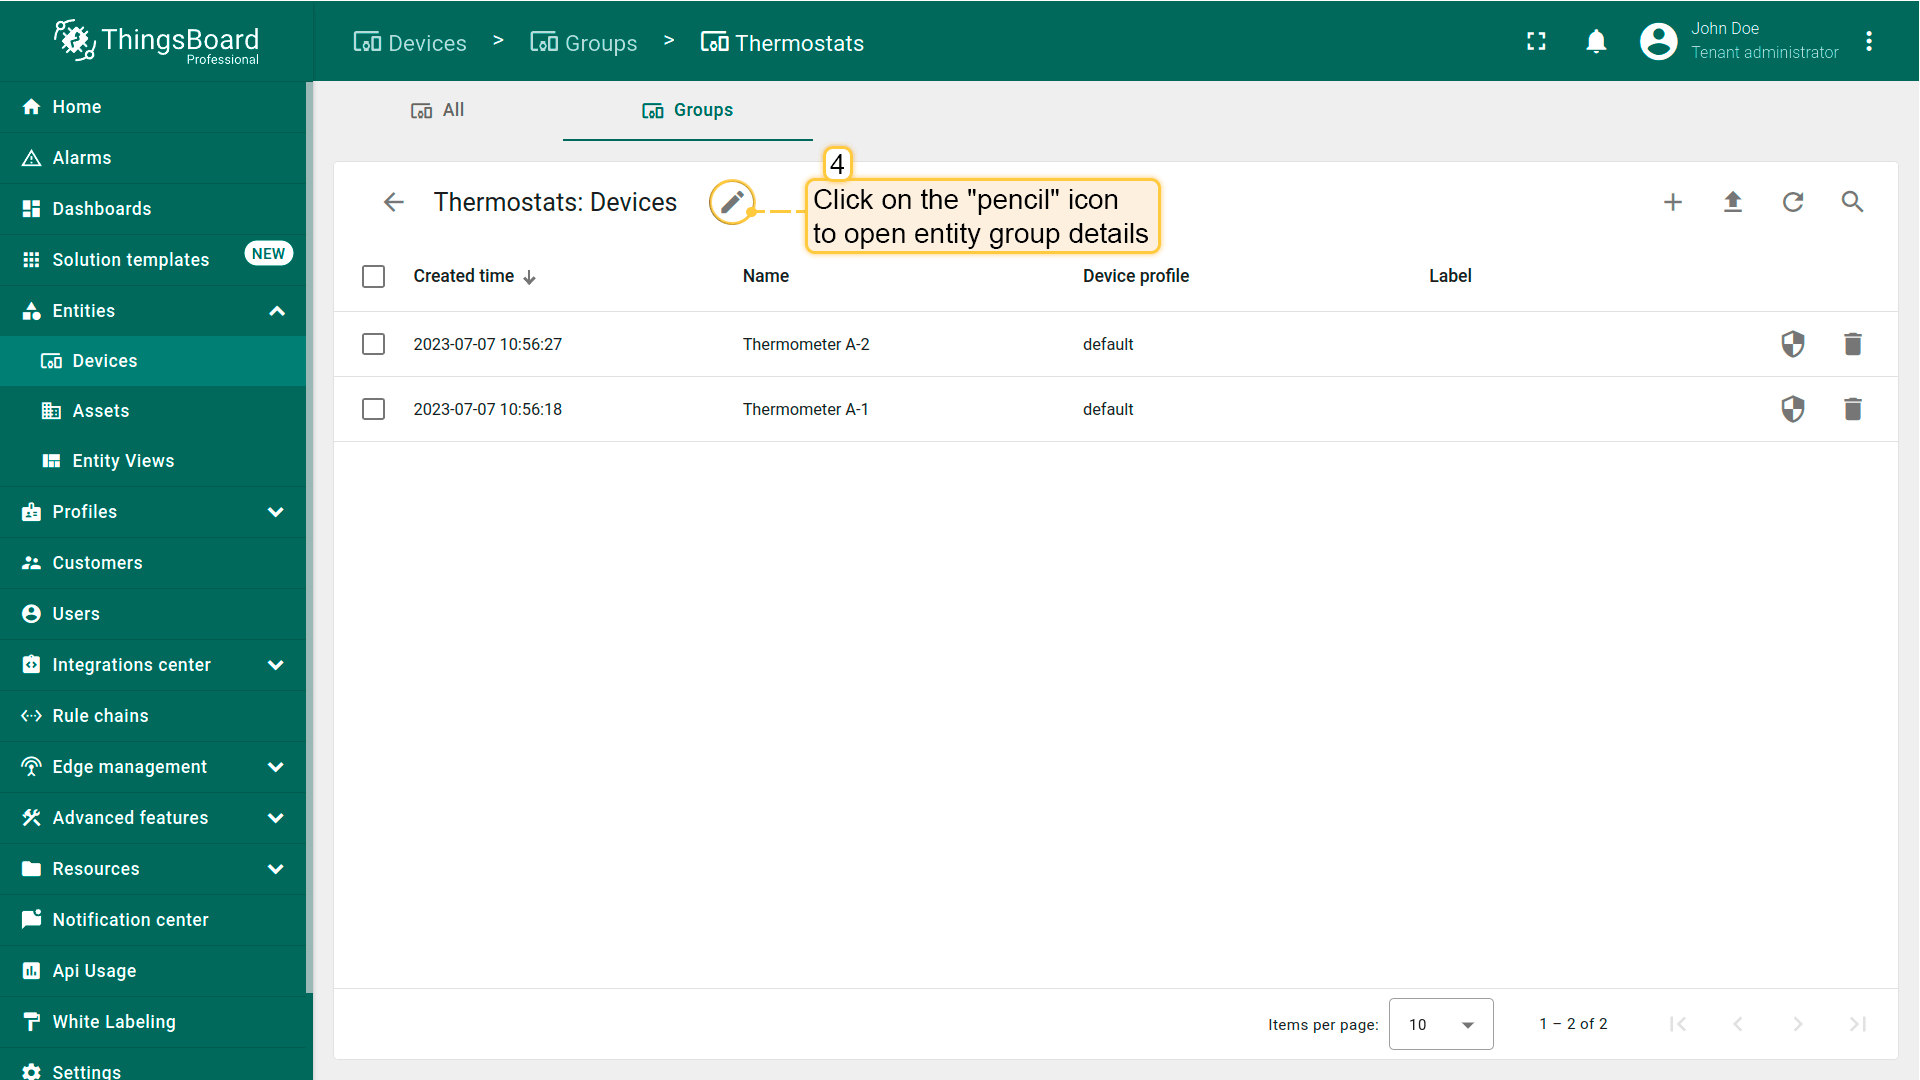
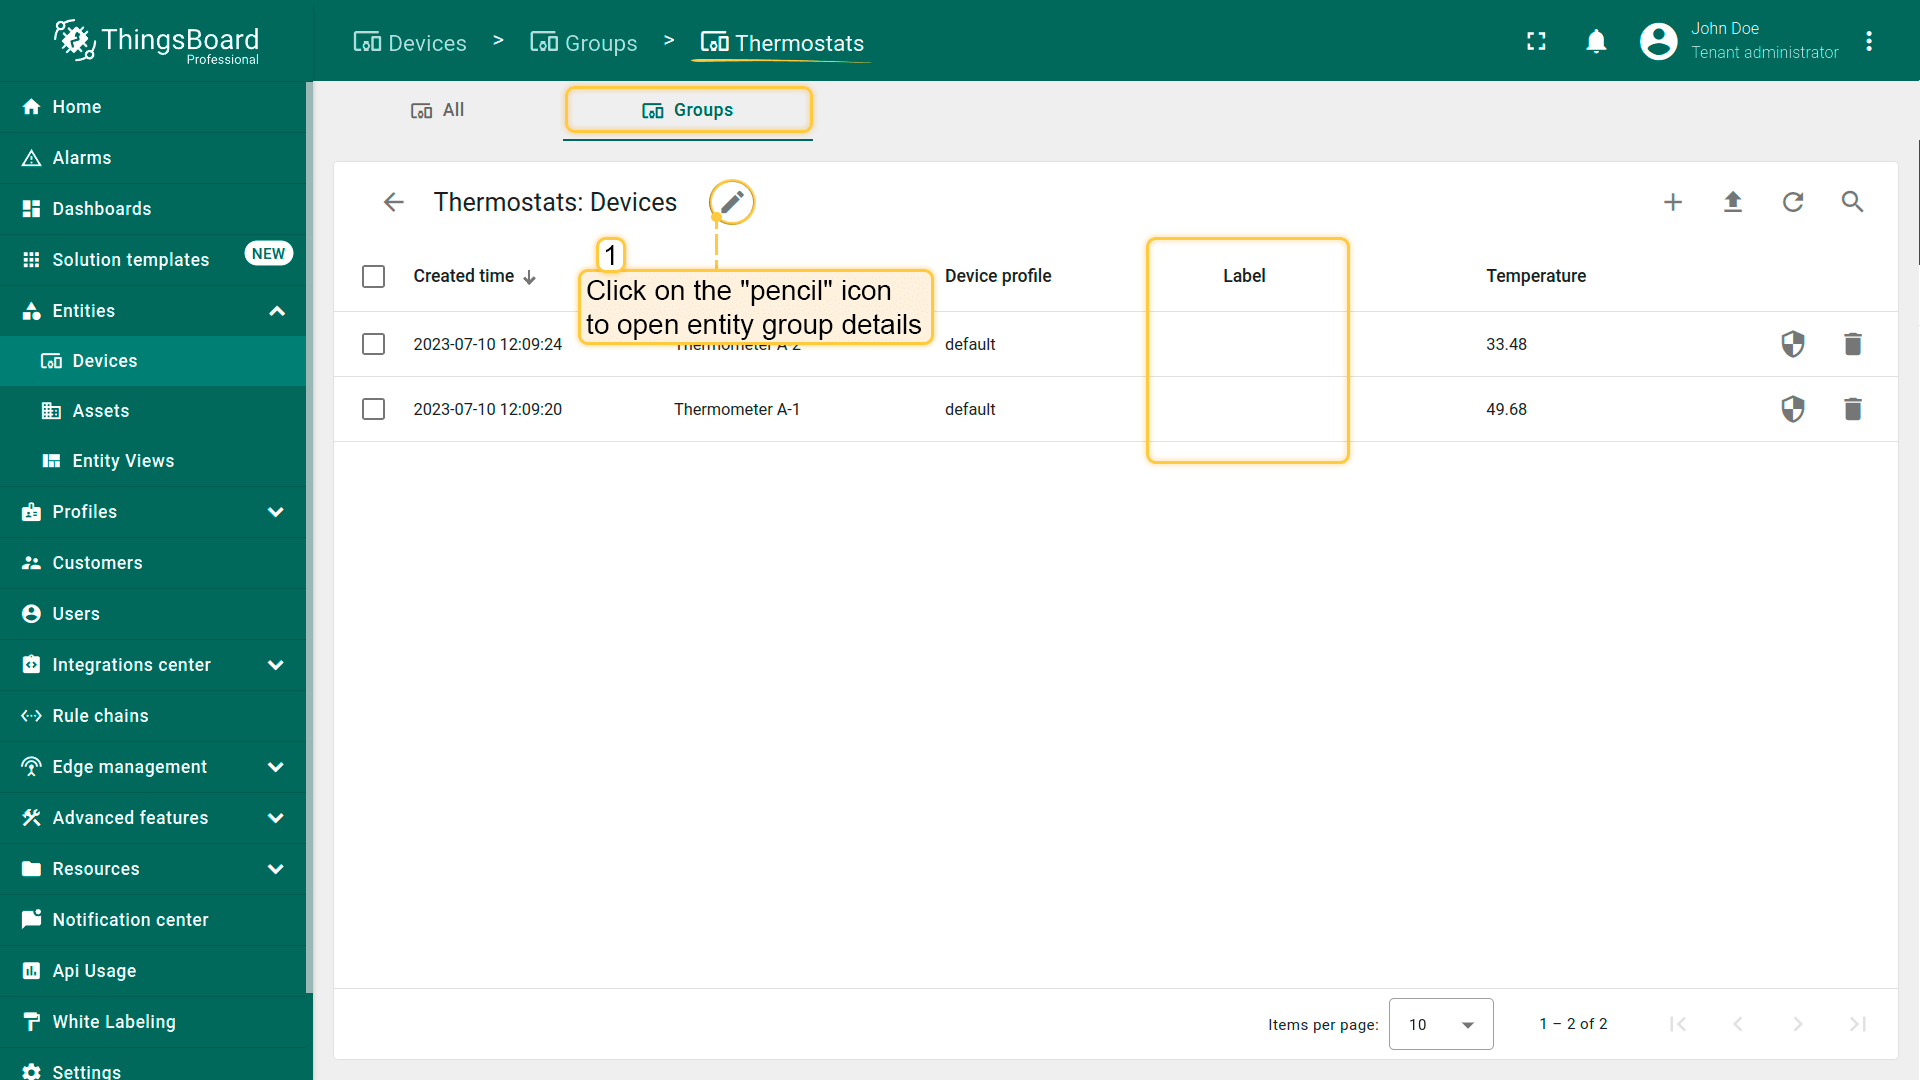
- Click the "pencil" icon located in the group's row to open entity group details;
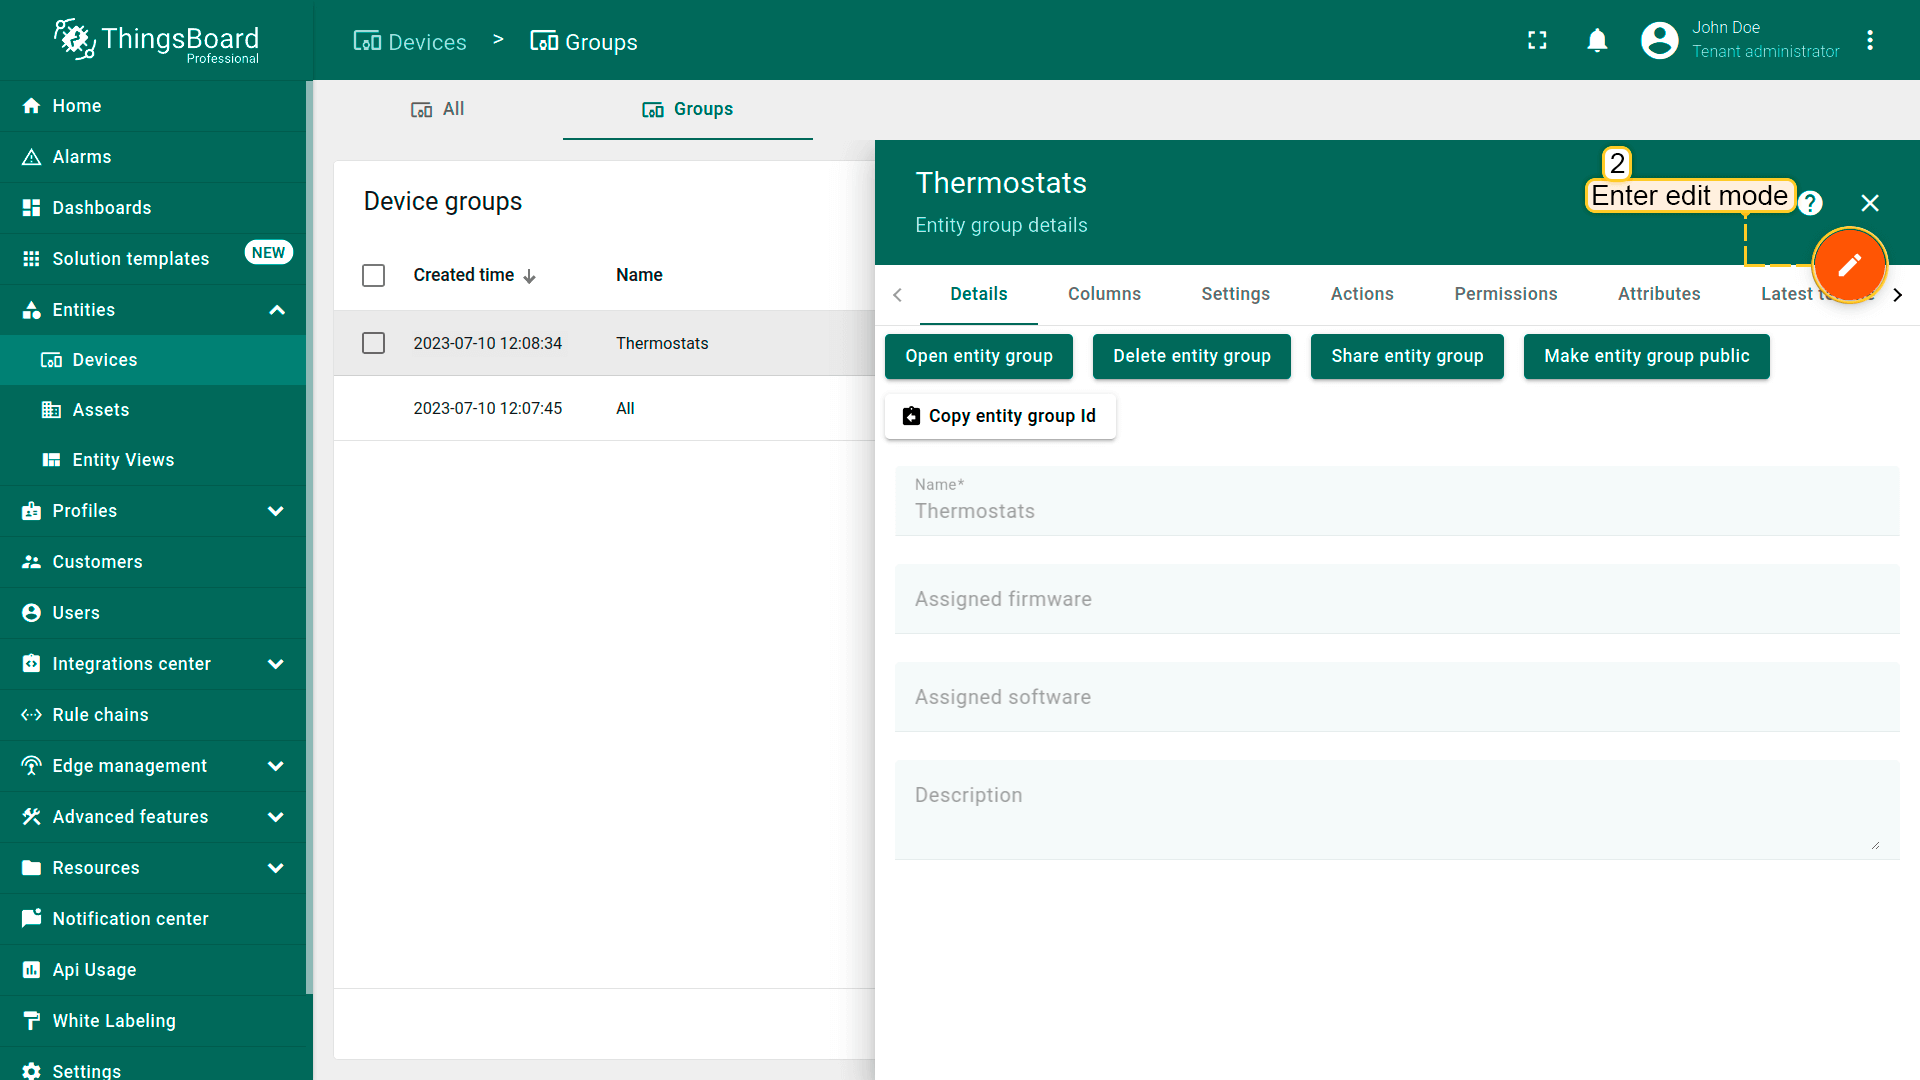
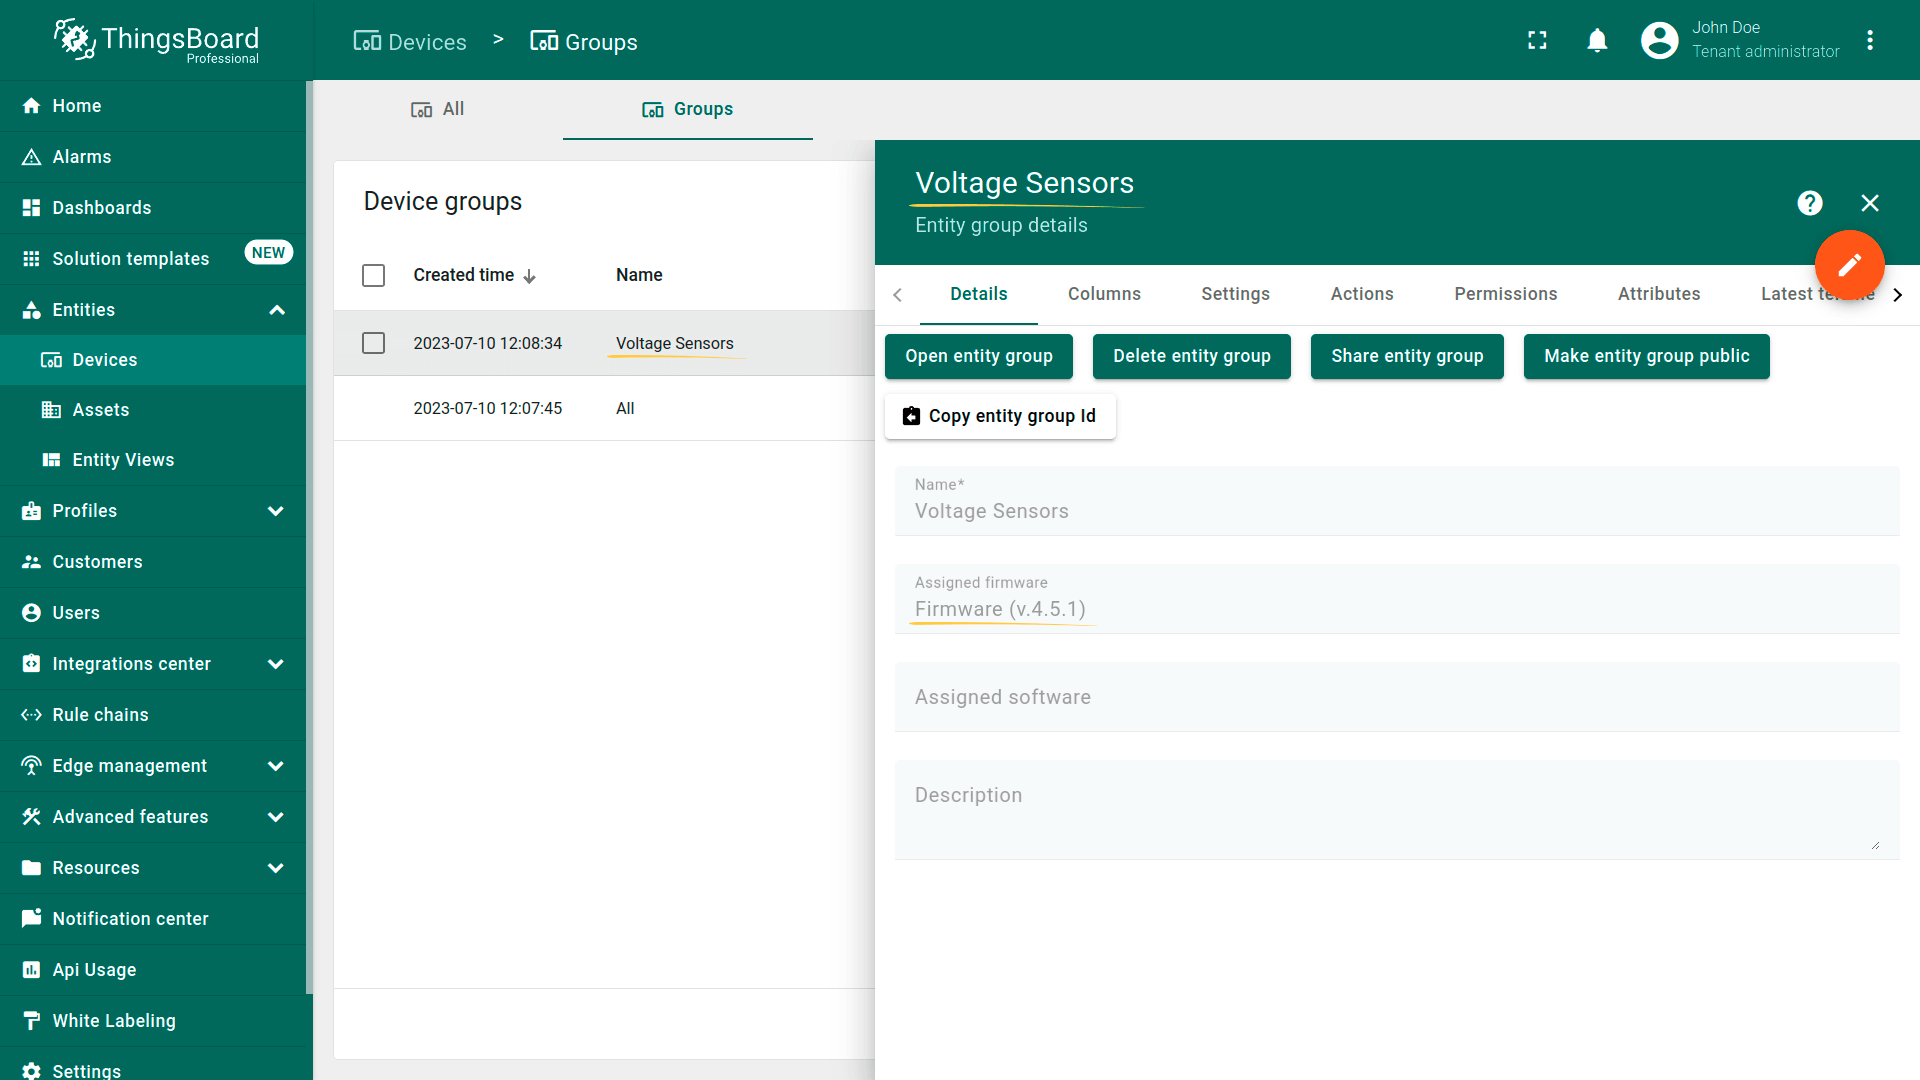
- Then click on the "pencil" icon to enter edit mode;
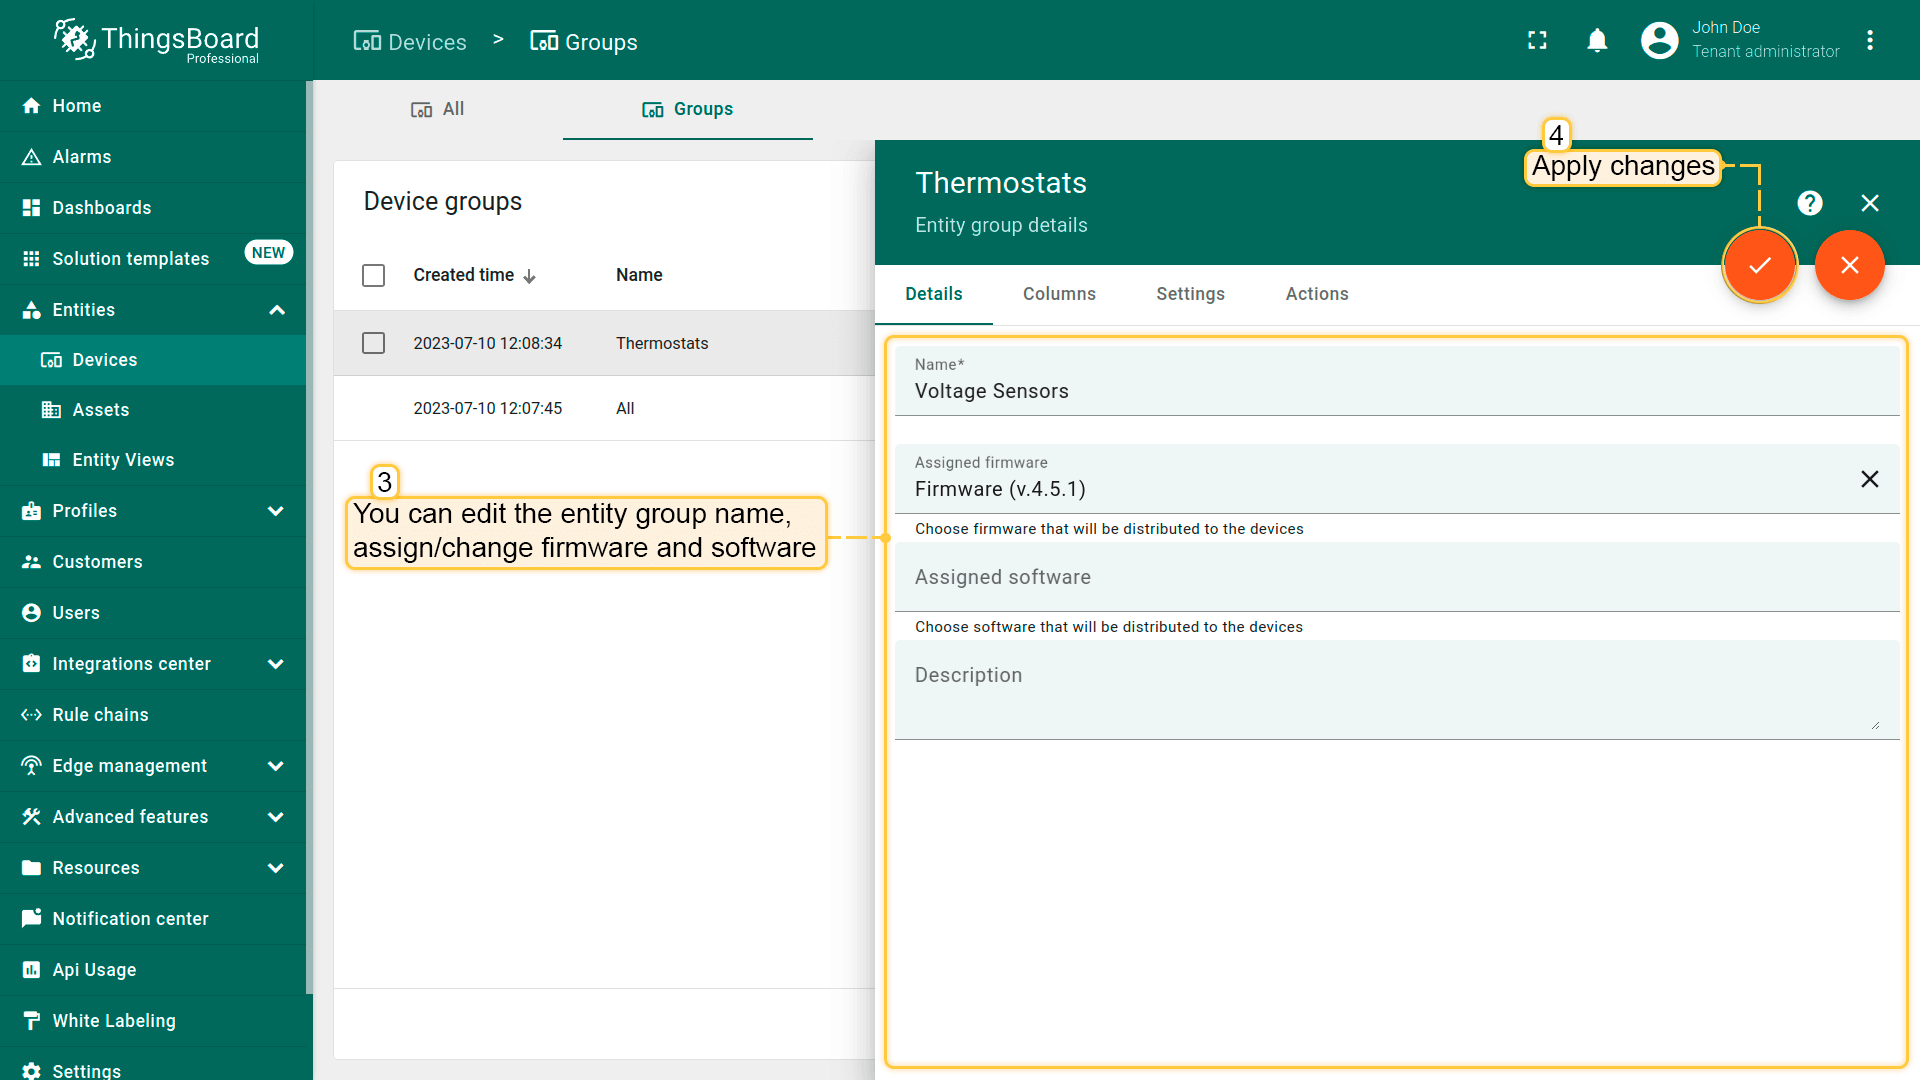
- On the "Details" tab, edit or fill in the fields. For example, change the group name and assign firmware. After that, save all changes;
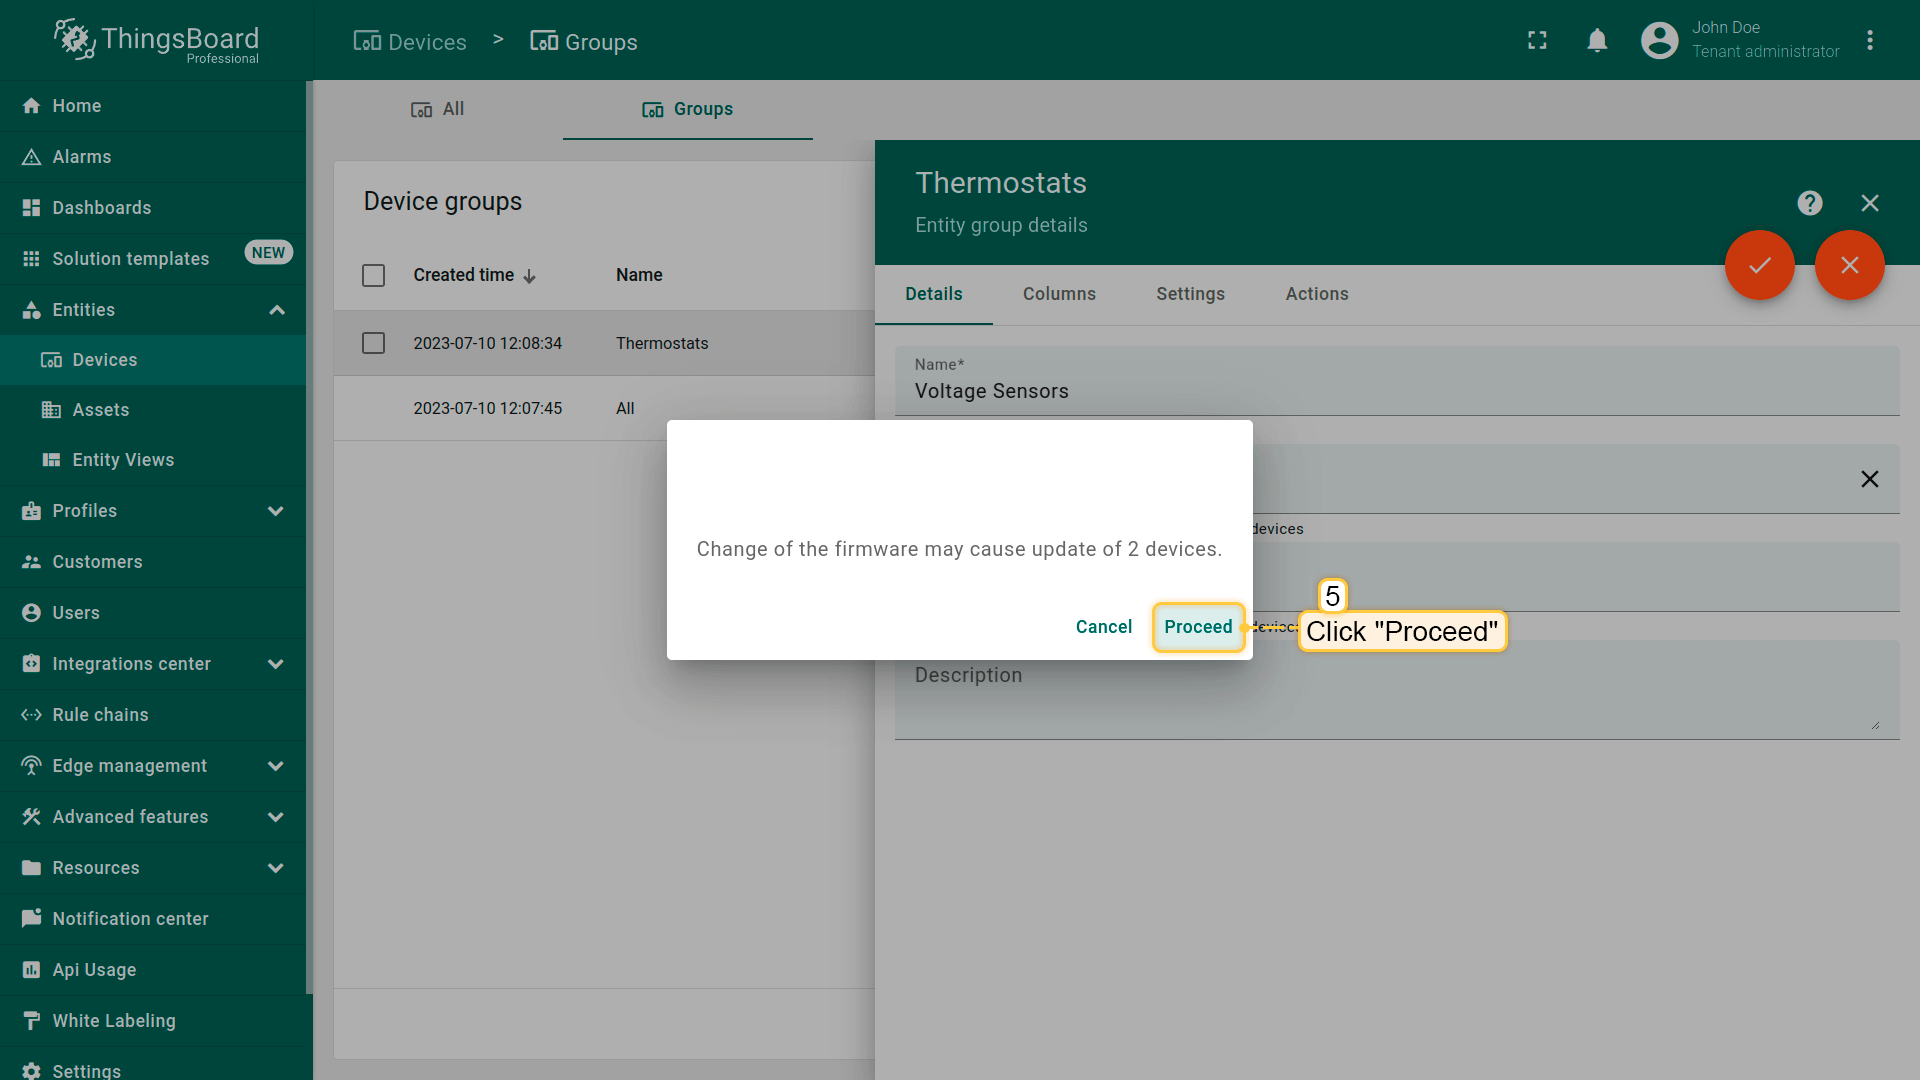
- Confirm firmware change for devices in this group;
- You have updated entity group information.
列配置
可添加、删除、移动列,并修改其标题和类型。 还可为列单元格使用样式函数和内容函数。
本示例中,设备组有两个上报温度值的设备。 该组有4列显示设备数据:“创建时间”“名称”“设备配置”“标签”。
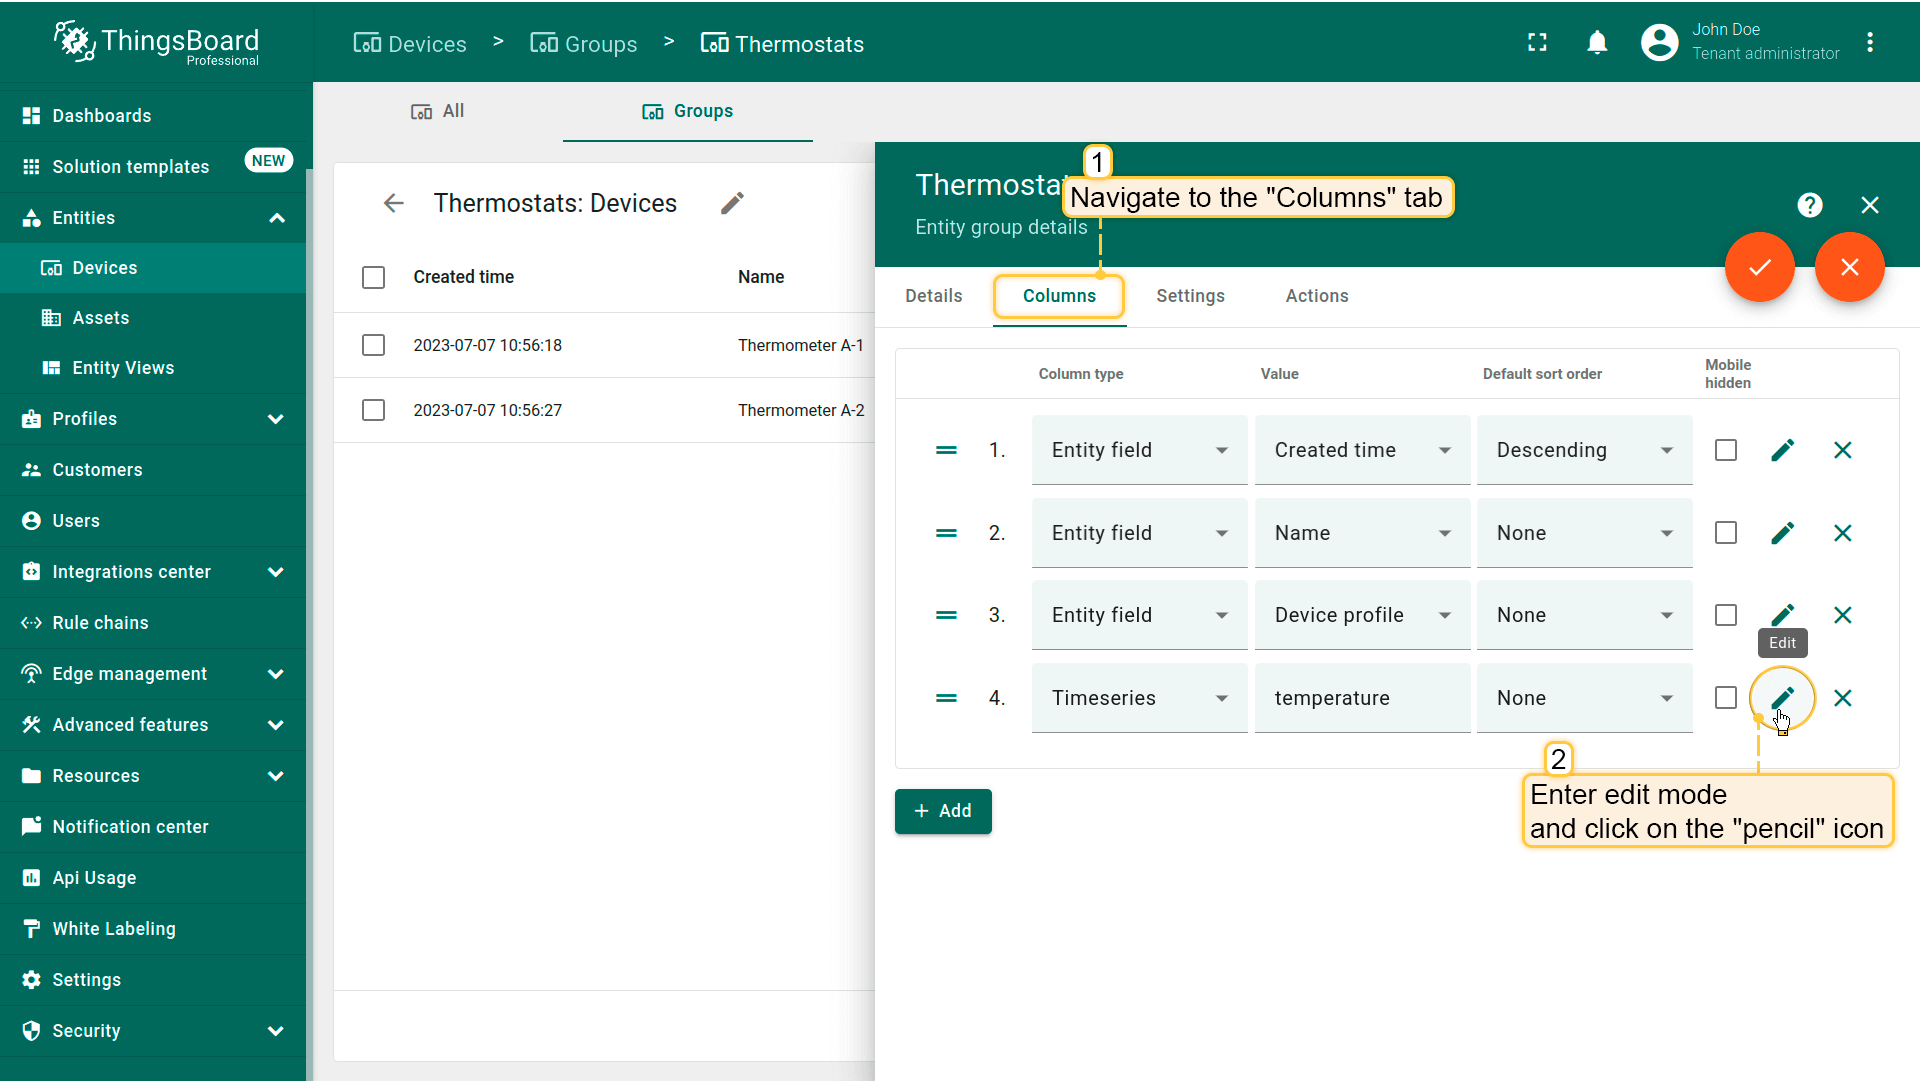
先添加一列显示每个设备的温度值。
- Go to the "Entities" section - "Devices" page, then navigate to the "Groups" tab and click on the "Thermostats" device group to open it;
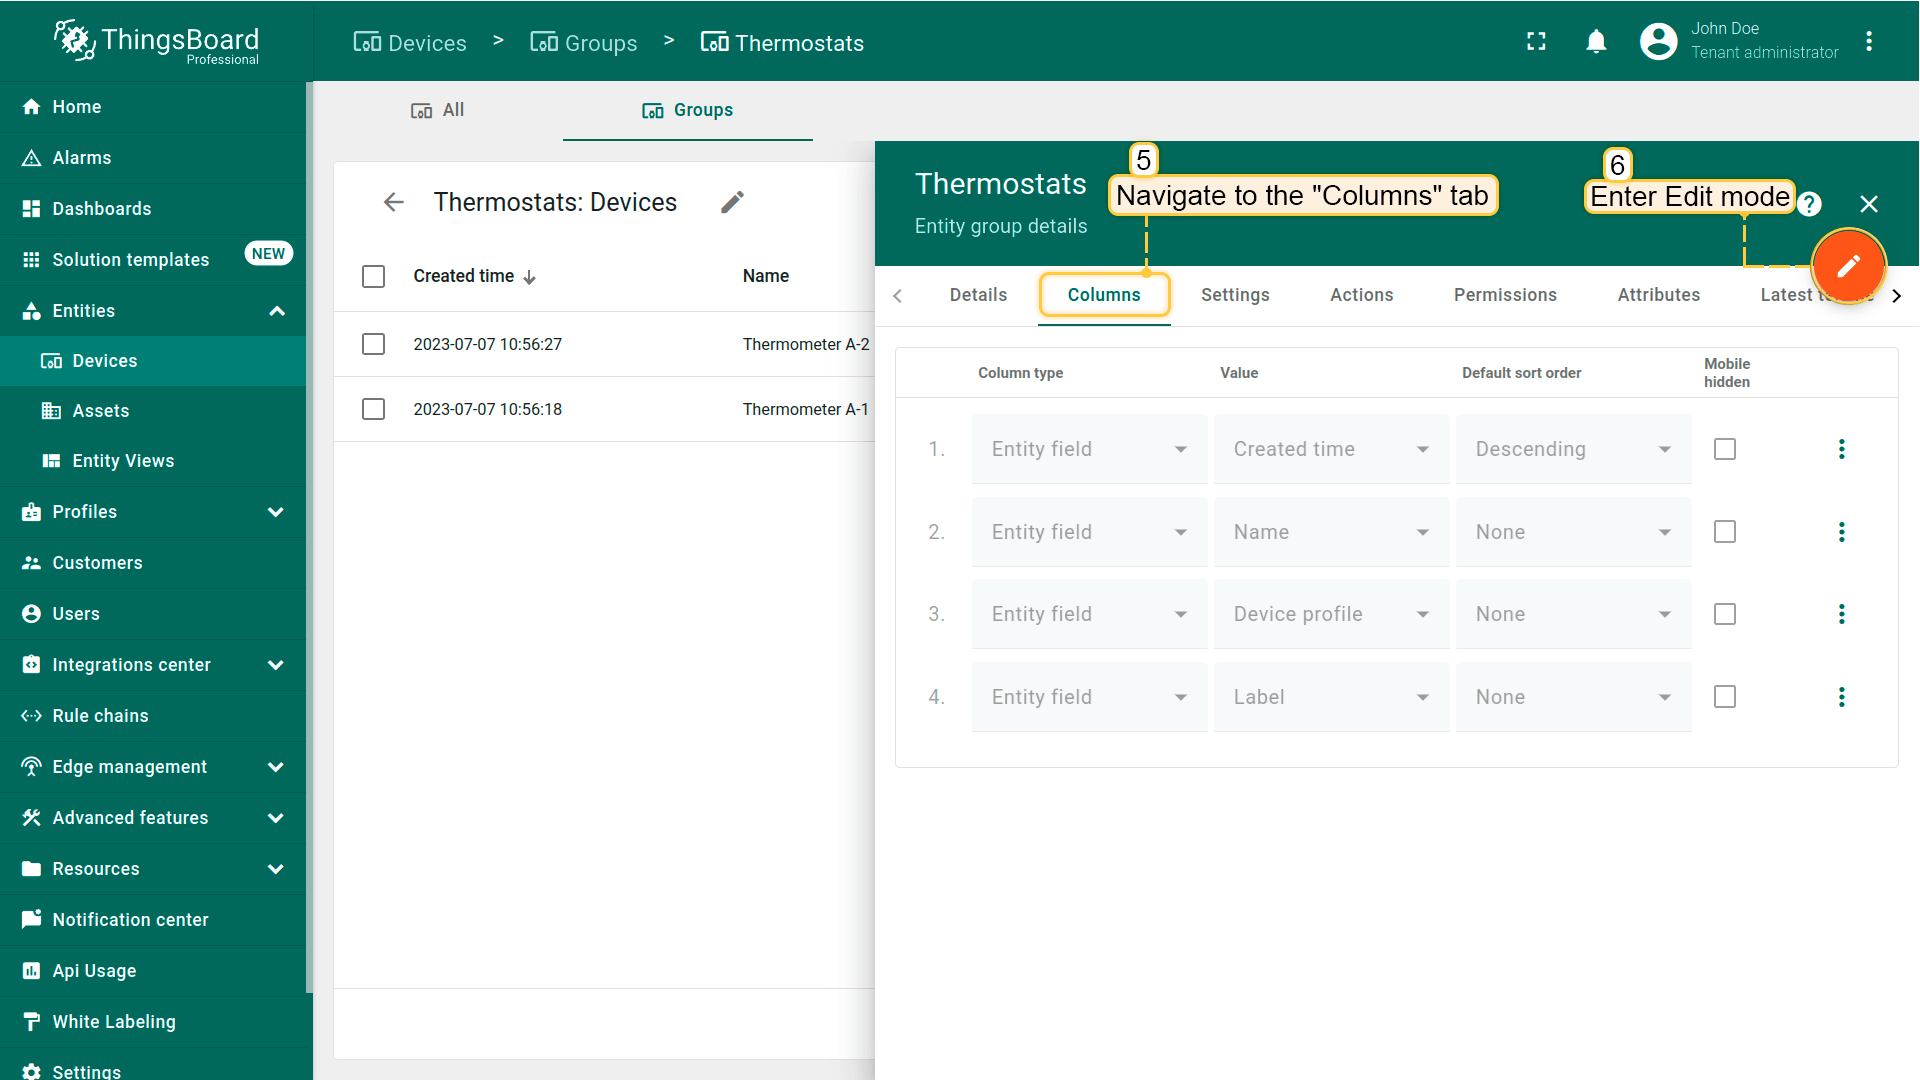
- Click on the "pencil" icon to open entity group details;
- Navigate to the "Columns" tab and click on the "pencil" icon to enter edit mode;
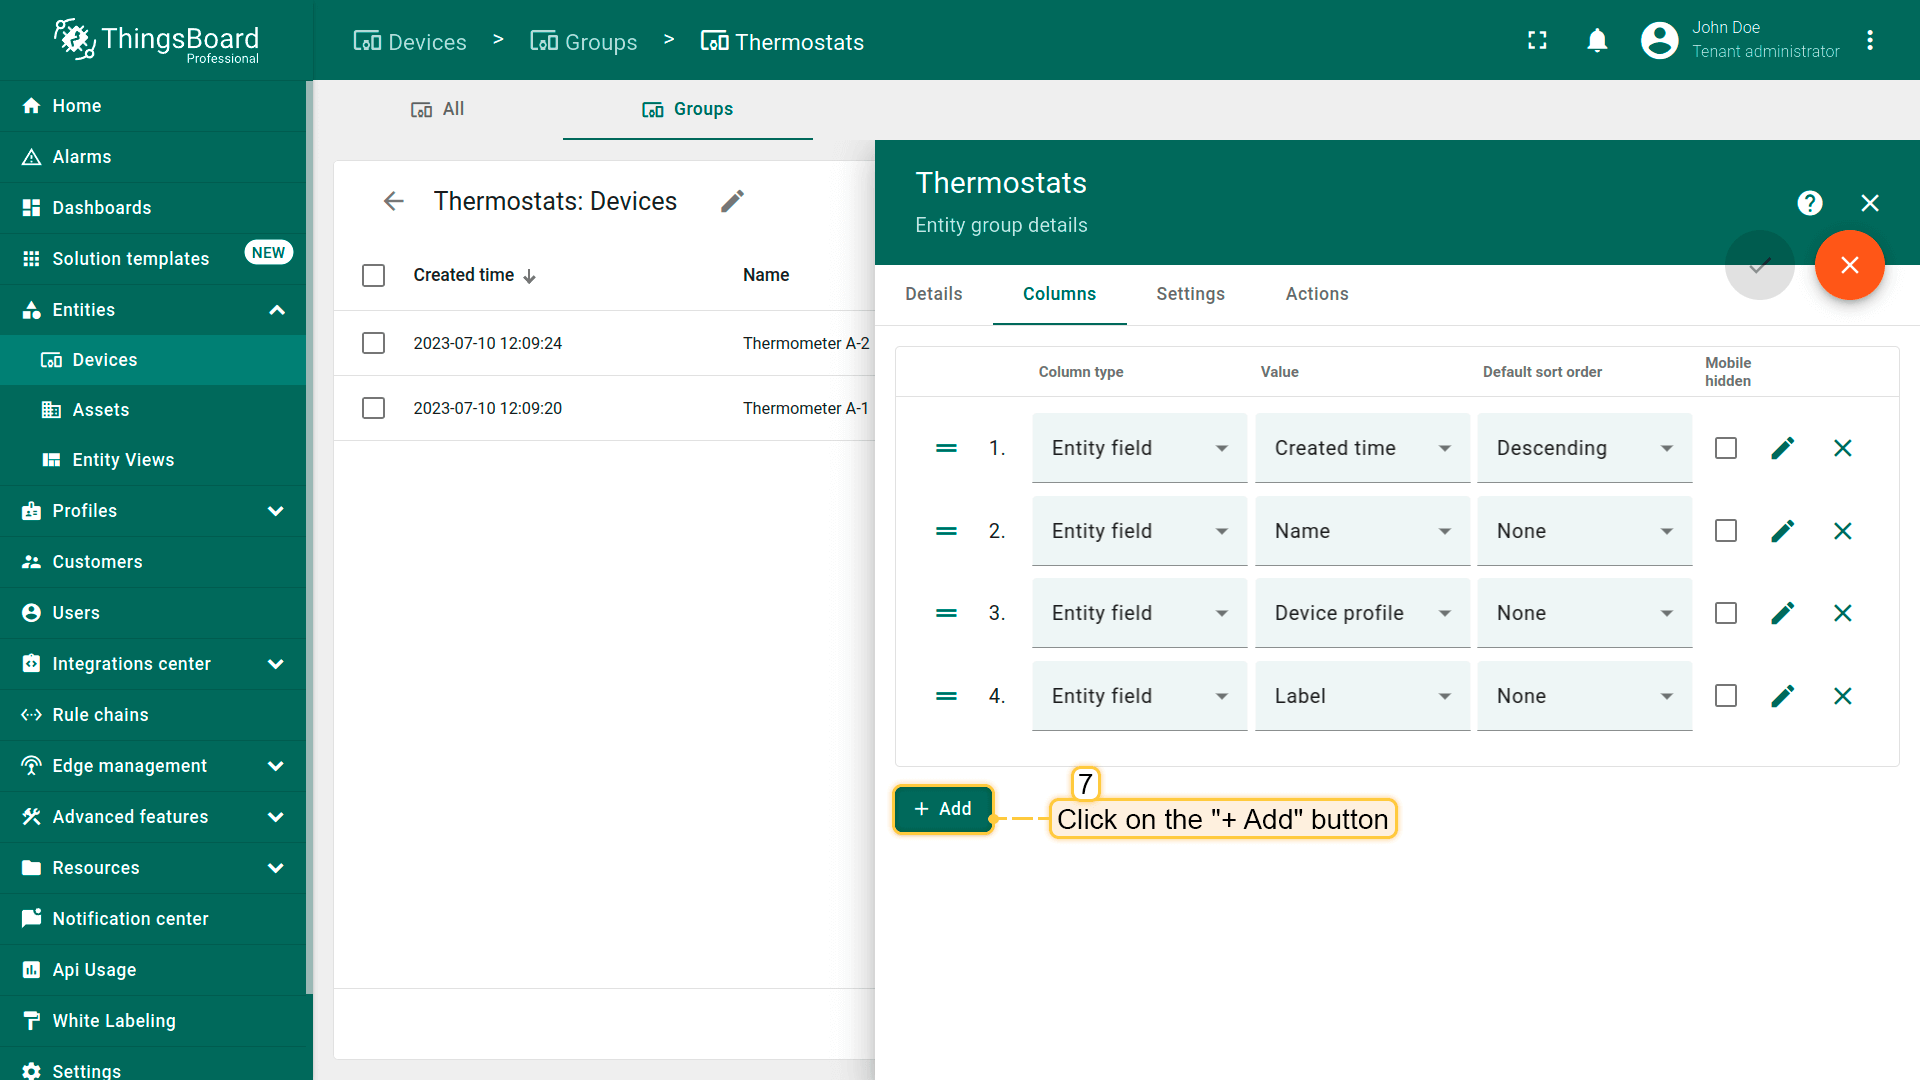
- Then click on the "+ Add" button;
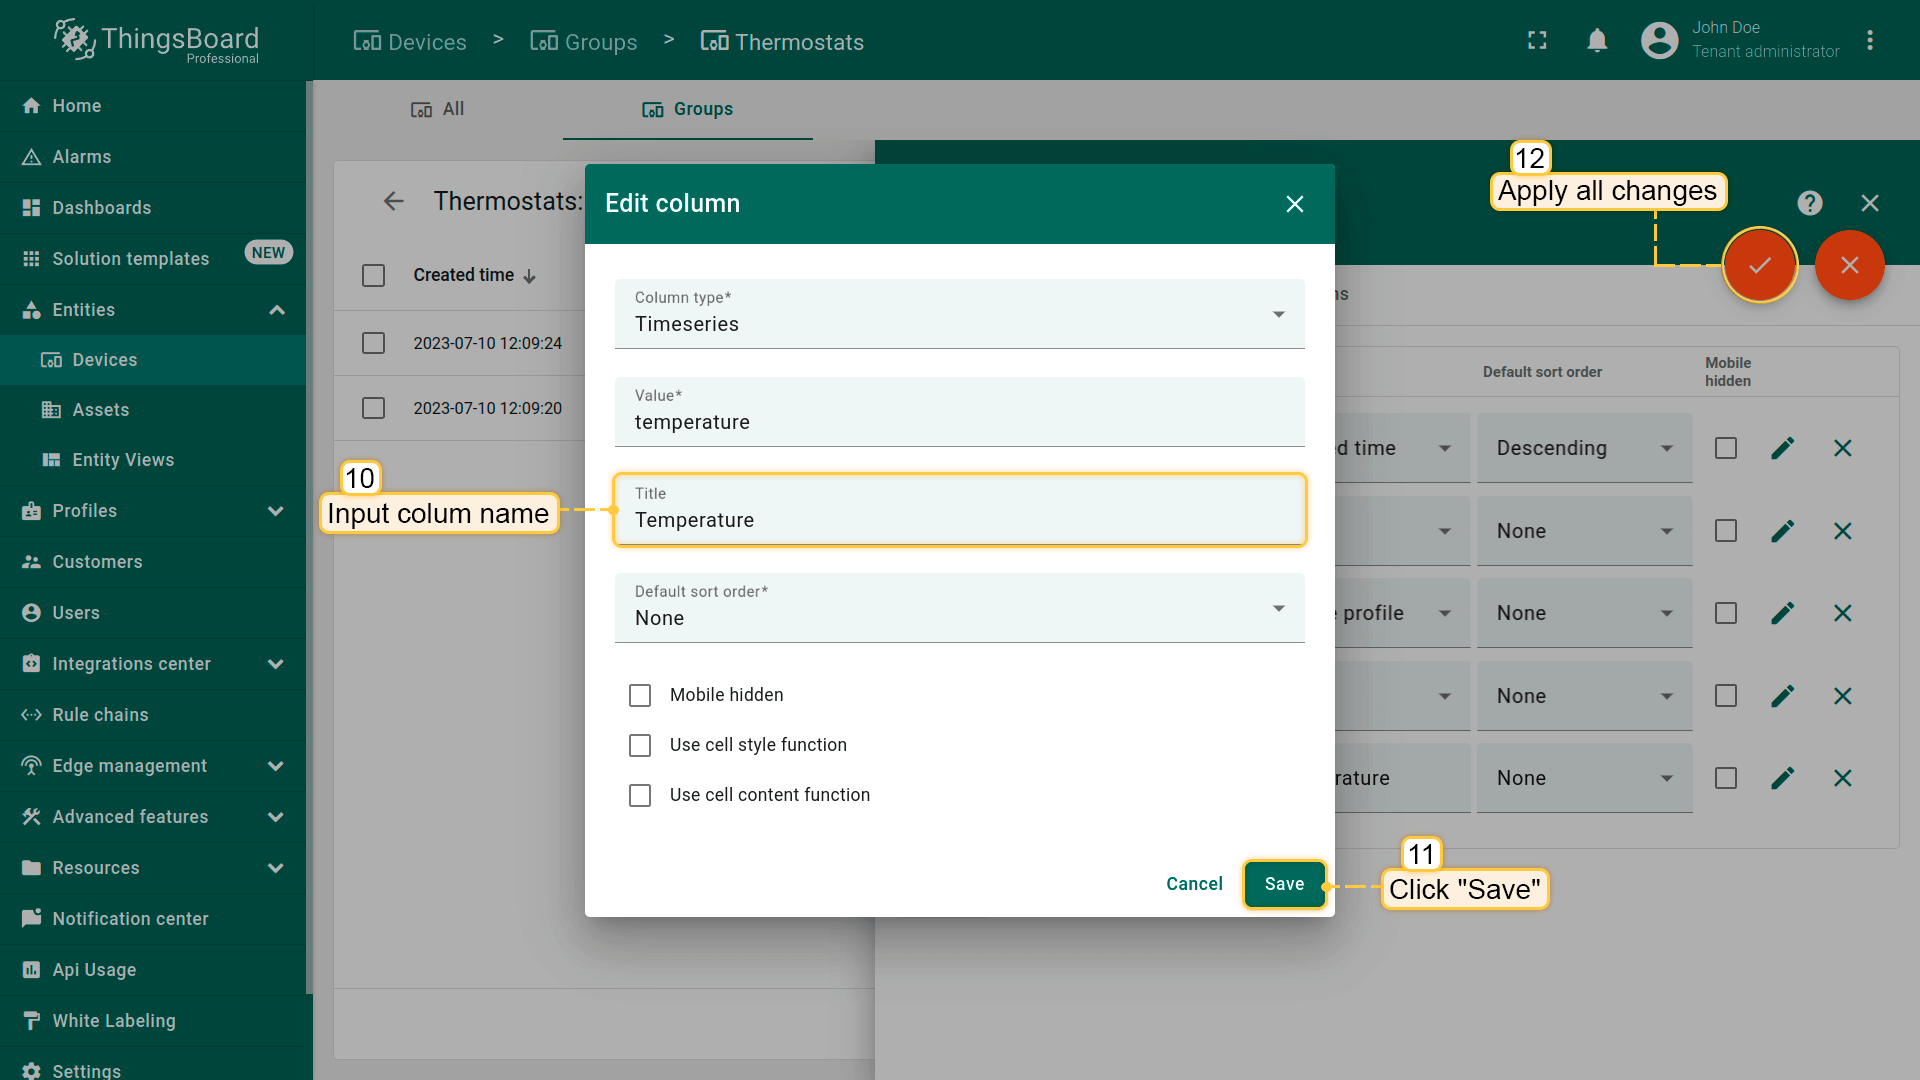
- We added new column. Now select column type - "Timeseries", specify value - "temperature". Then click "pencil" icon located in the column's row to open edit column window;
- Input column name in the "title" row. Click "Save" and then apply all changes. We added new column - "Temperature";
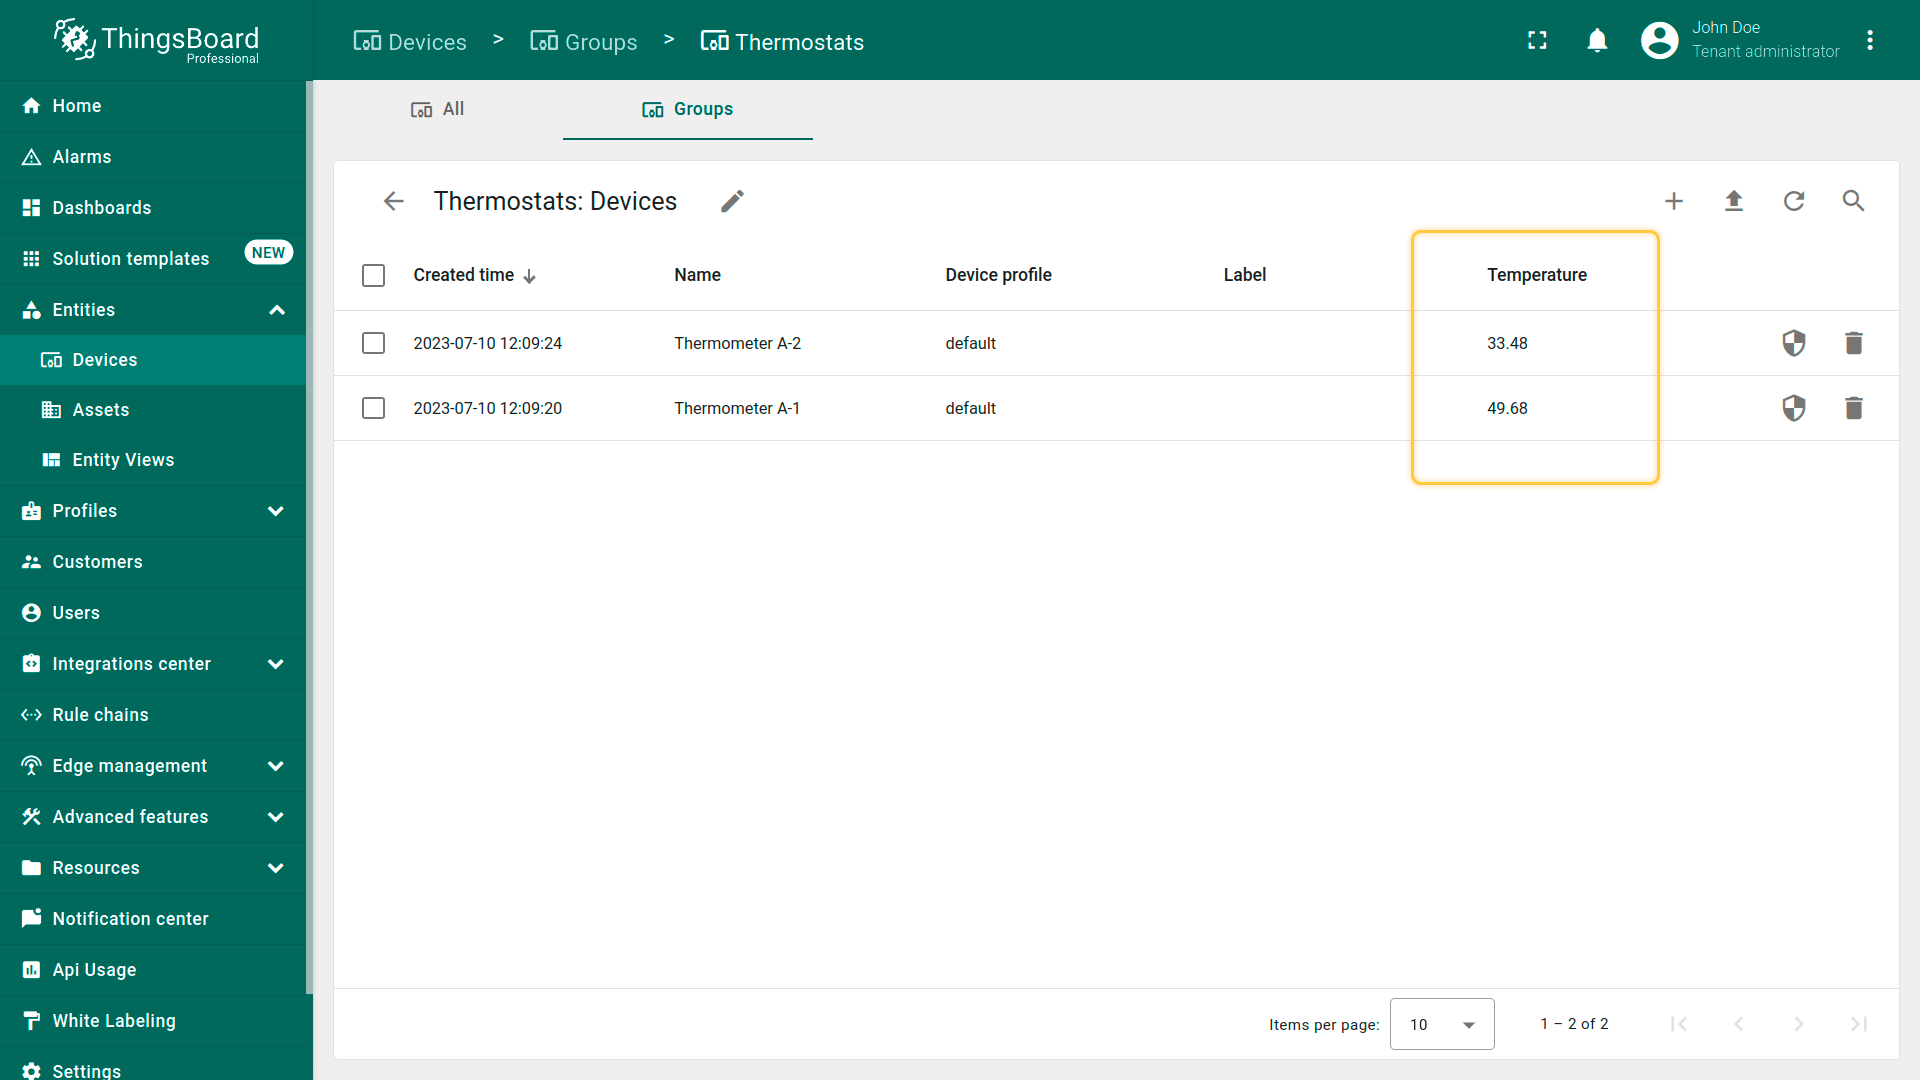
- It displays the current temperature value for each device.

接着删除该设备组中的“标签”列。
- In the device group click on the "pencil" icon to open entity group details;
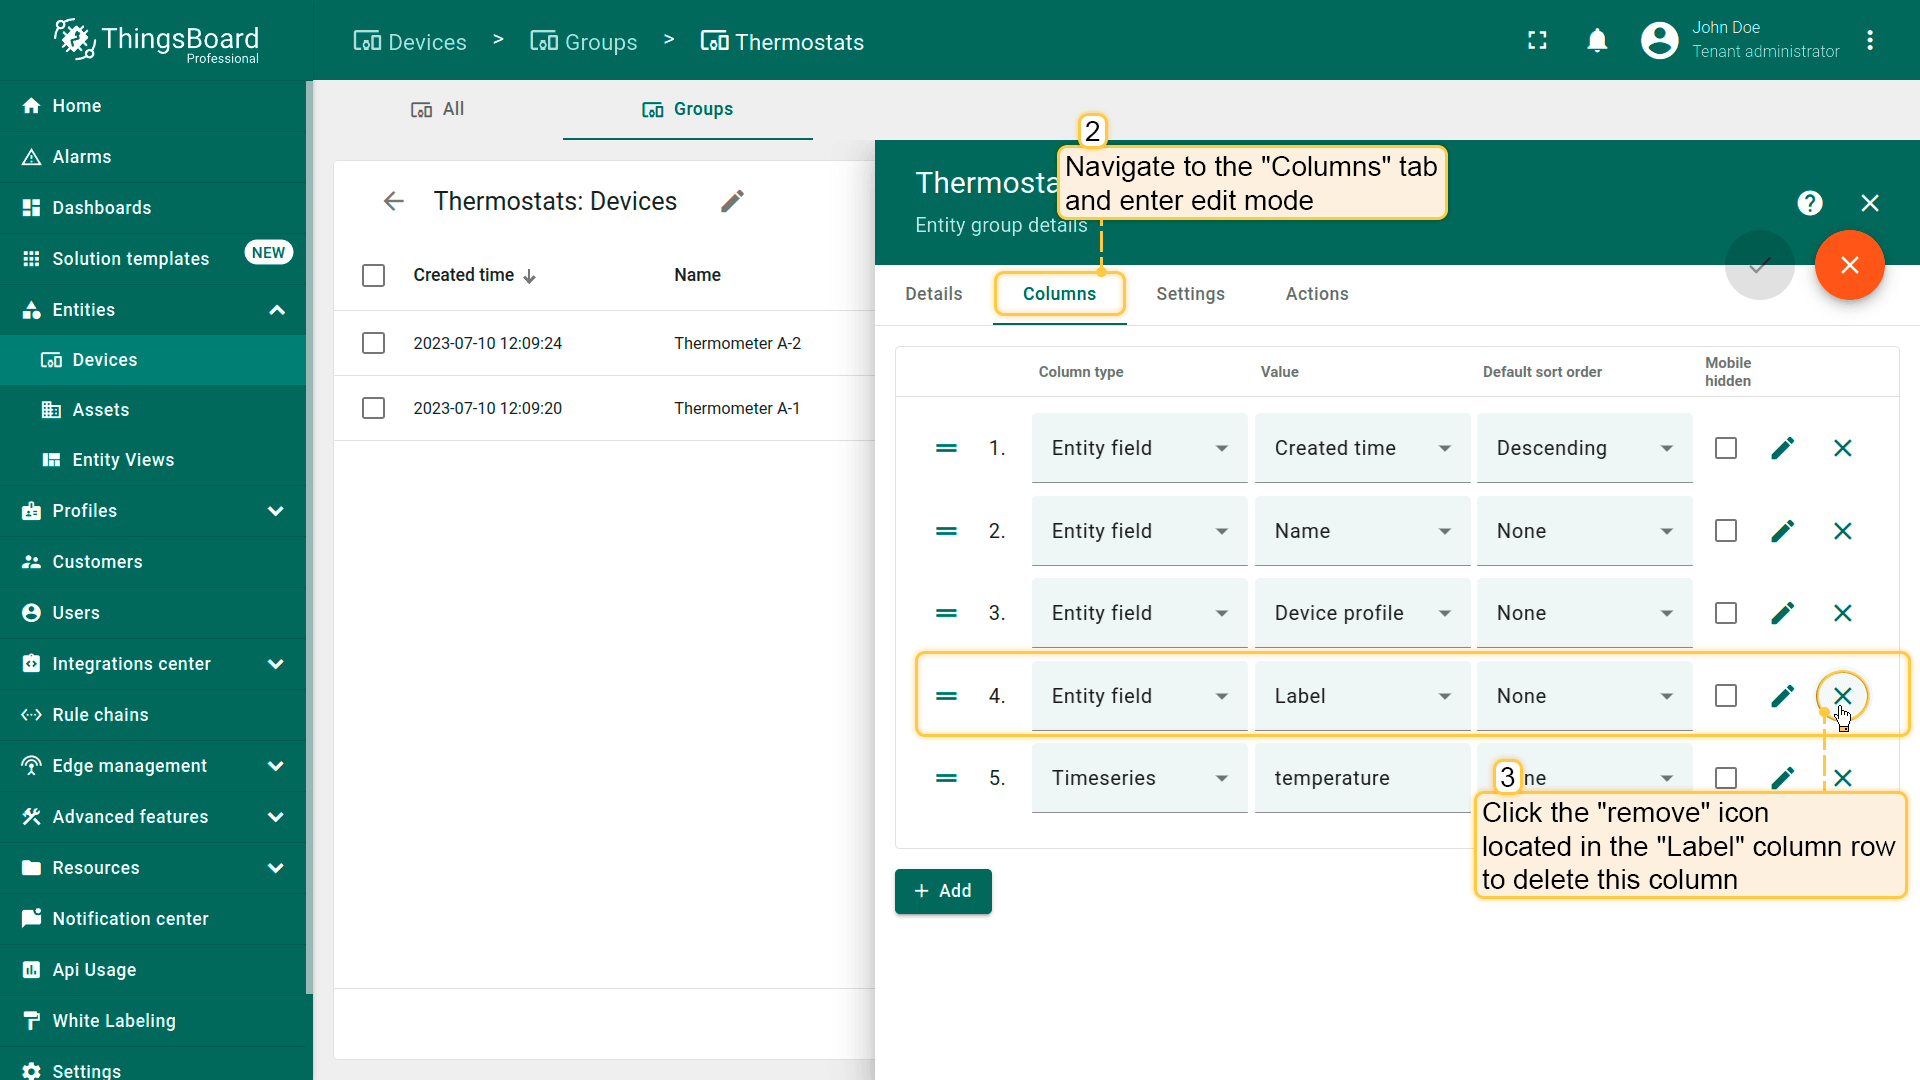
- Navigate to the "Columns" tab in the entity group details and enter edit mode. Click the "remove" icon located in the "Label" column row to delete this column;
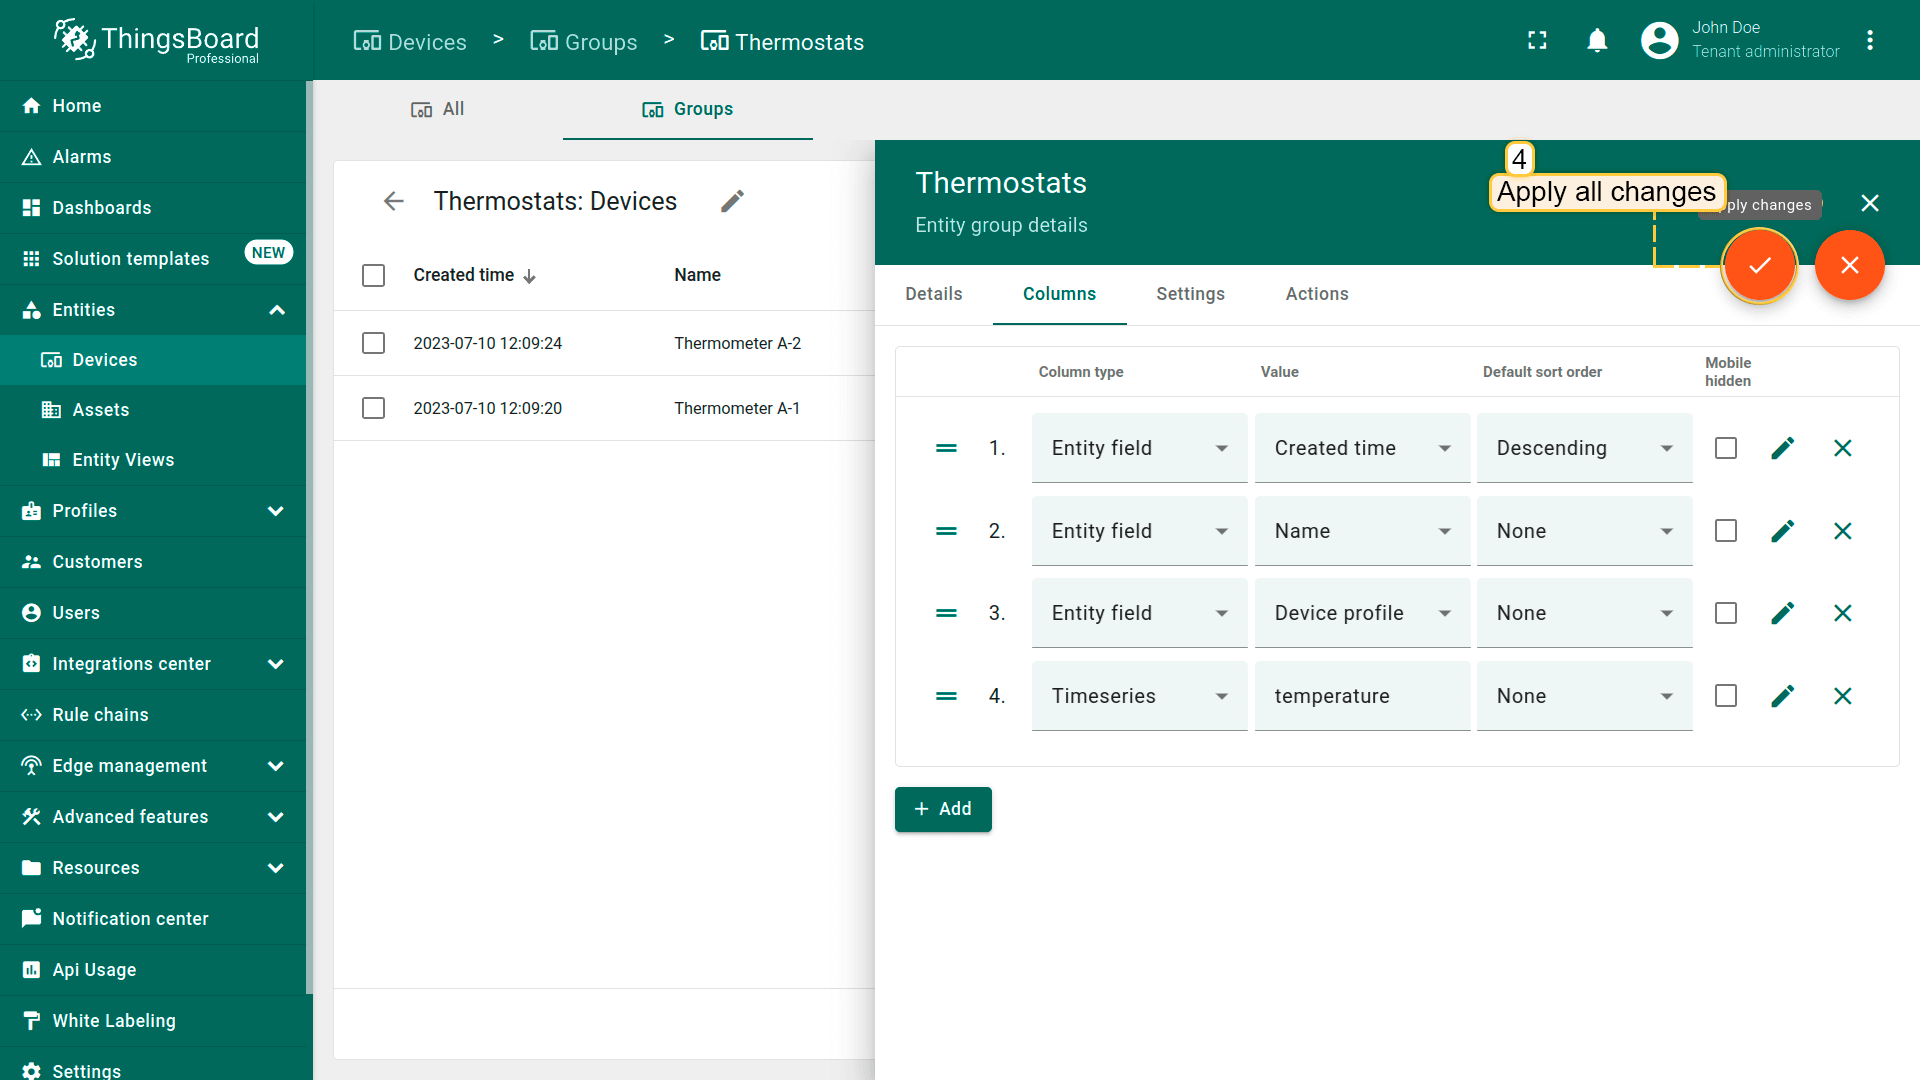
- After that, apply all changes;
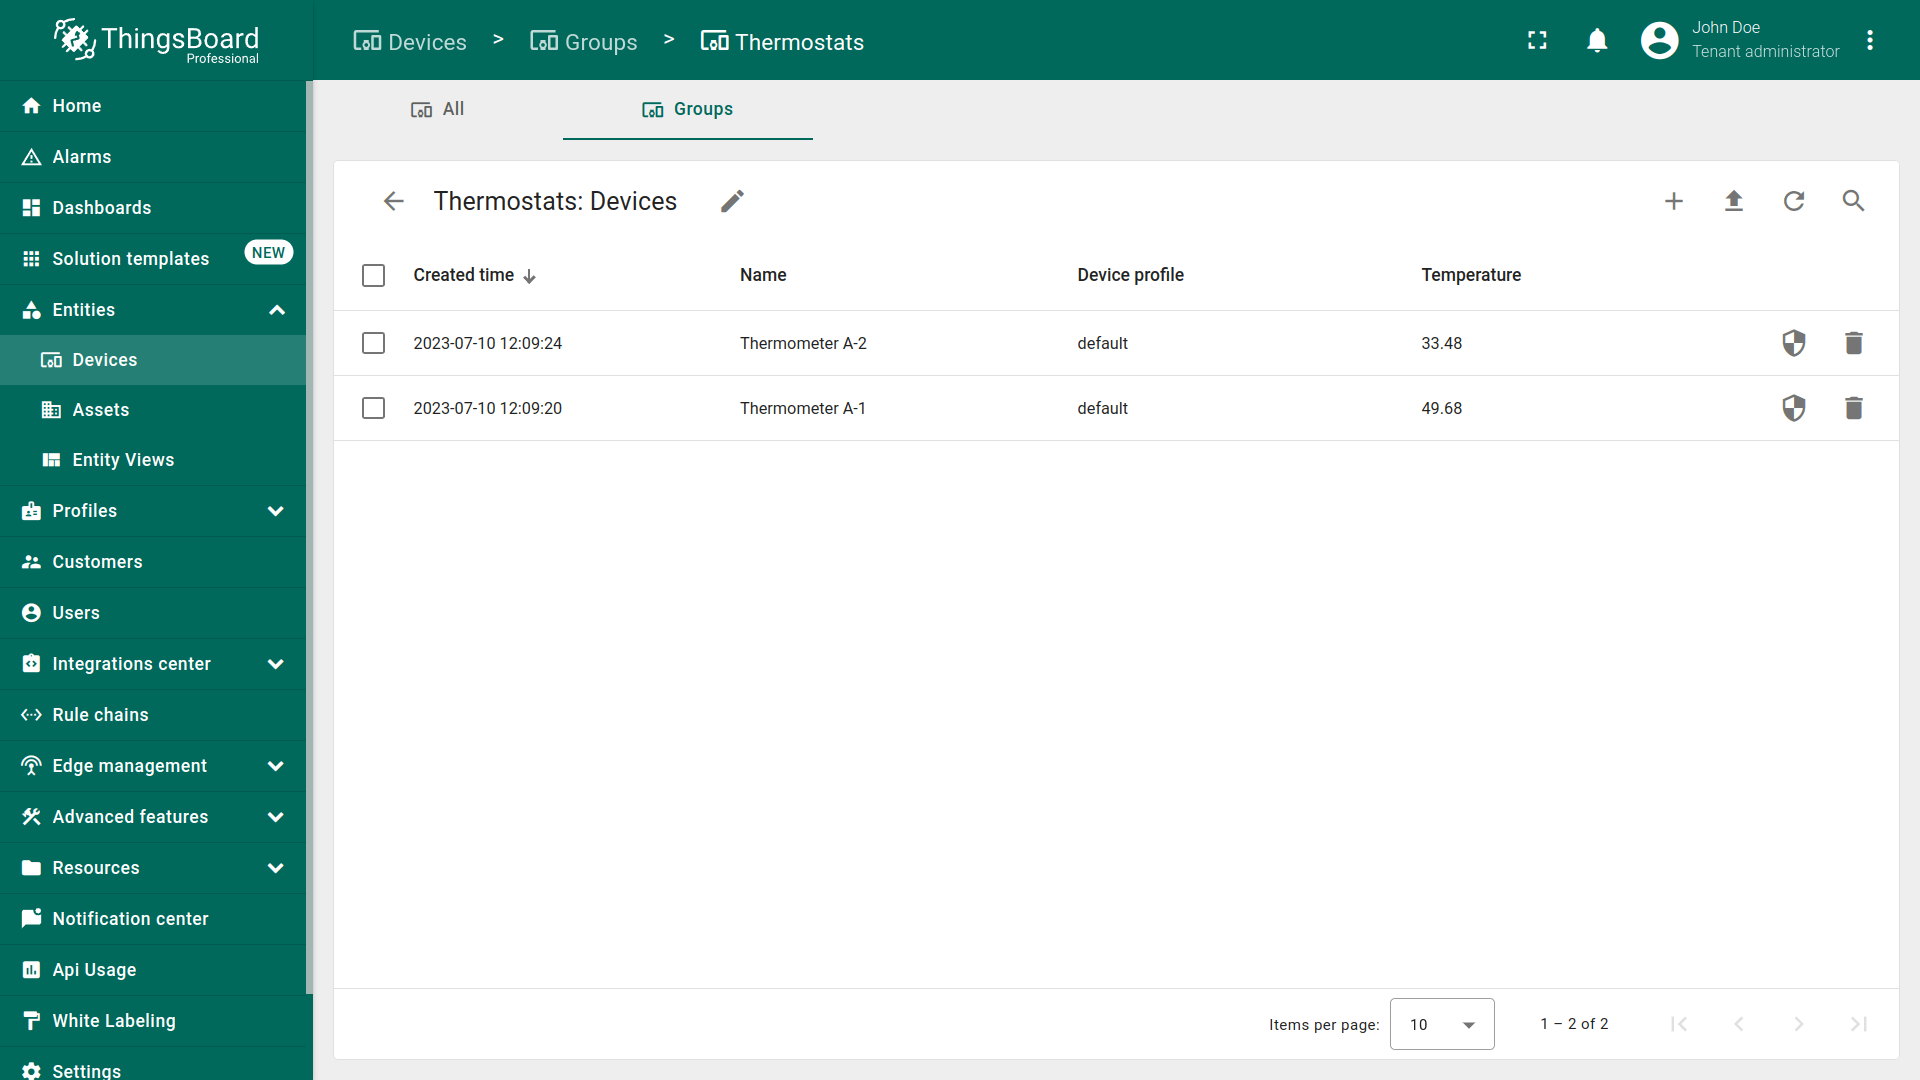
- The "Label" column is deleted from the device group.
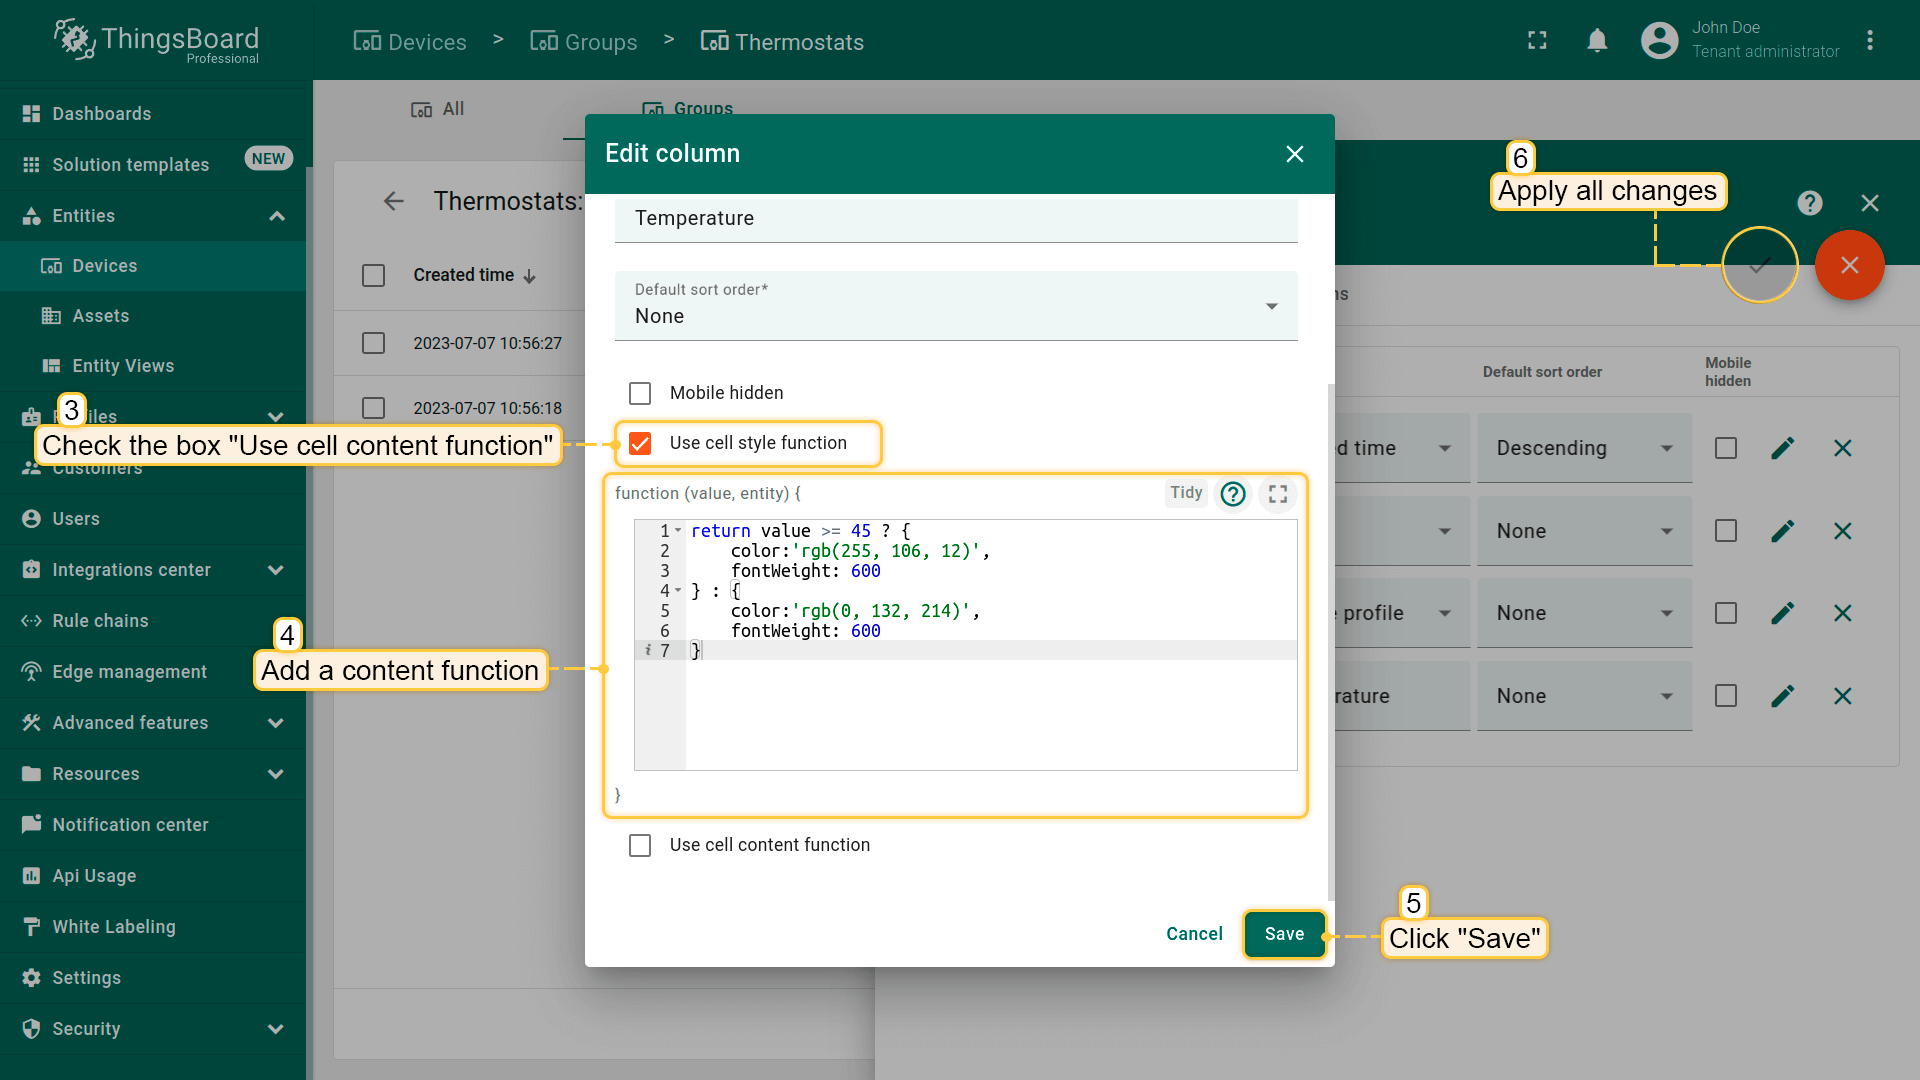
再为“温度”列设置样式函数:温度 ≥ 45显示橙色,< 45显示蓝色。
- Navigate to the "Columns" tab in the entity group details and enter edit mode. Then click "pencil" icon located in the column's row to open edit column window;
- Check the box "Use cell style function" and add a style function in the function window. Click "Save" and then apply all changes;
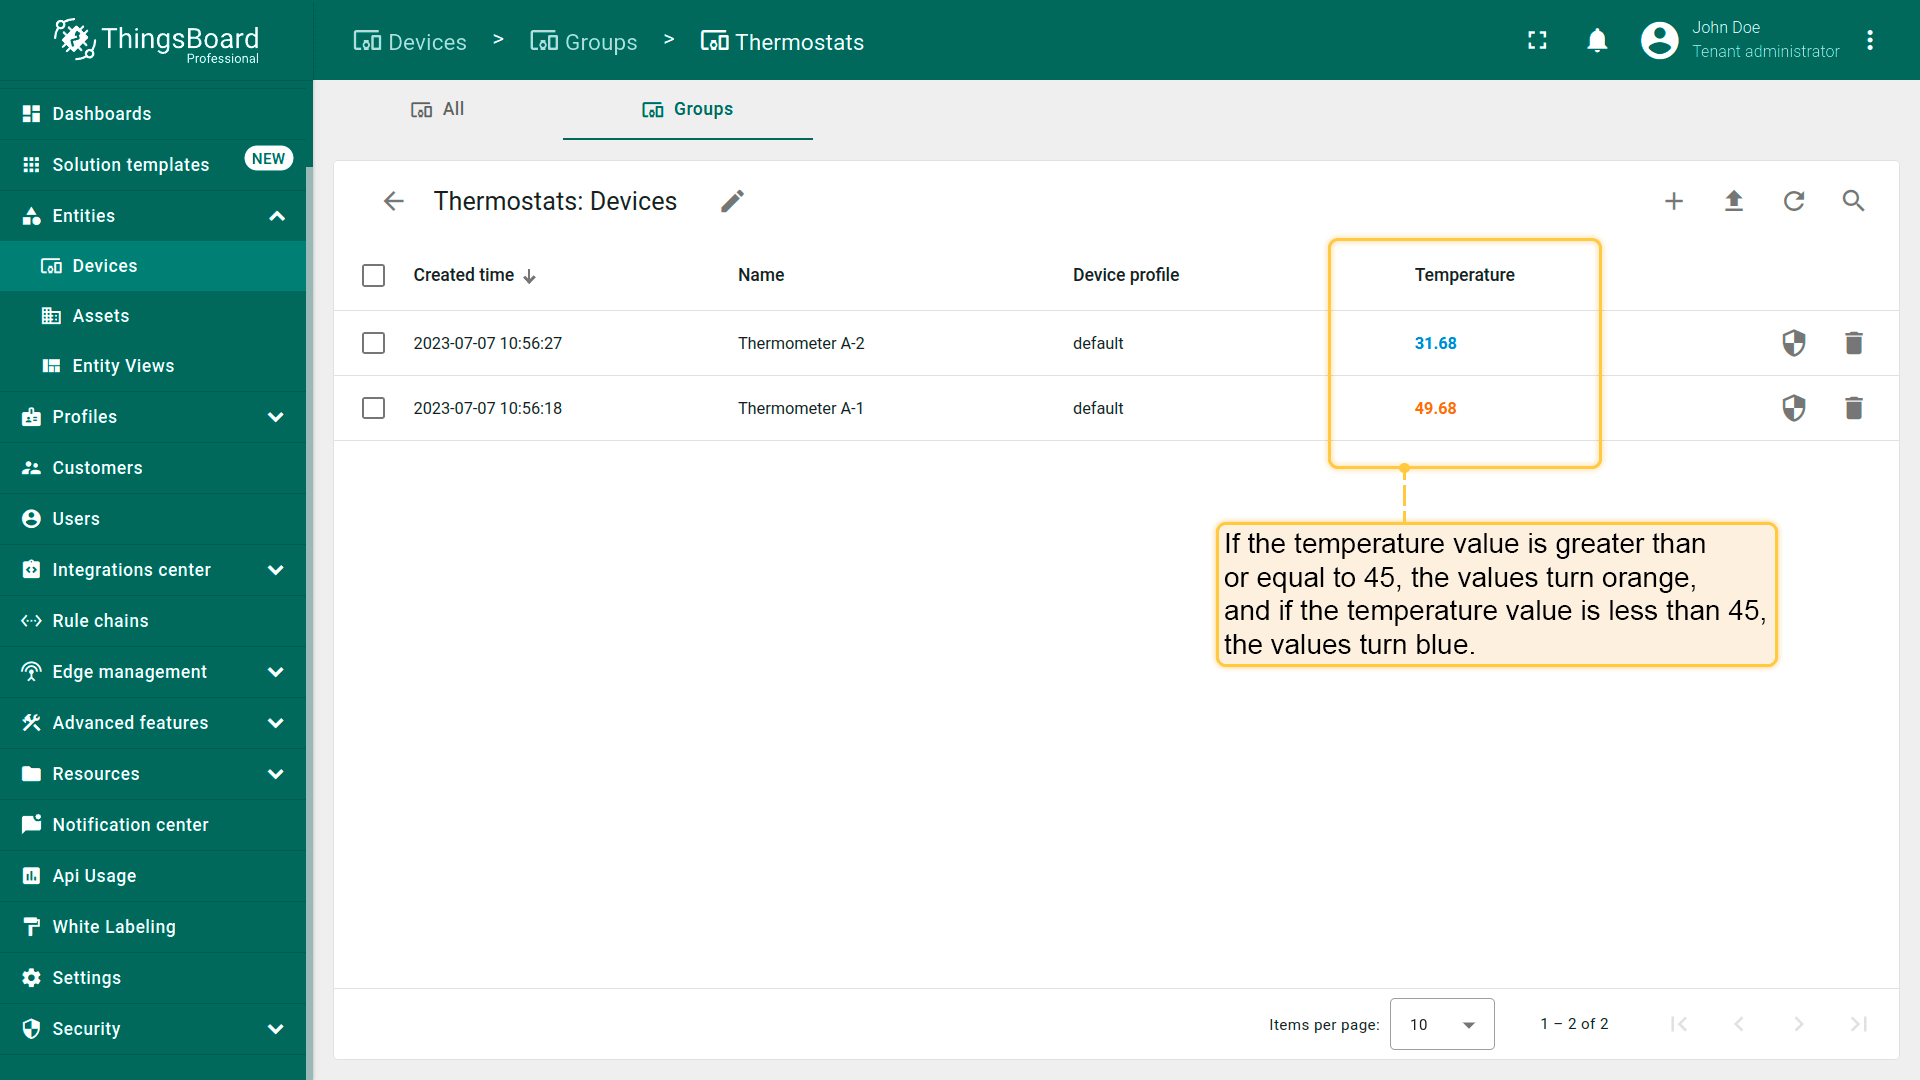
- The values in the "Temperature" column change their color according to the set function.
样式函数:
1
2
3
4
5
6
7
return value >= 45 ? {
    color:'rgb(255, 106, 12)',
    fontWeight: 600
} : {
    color:'rgb(0, 132, 214)',
    fontWeight: 600
}
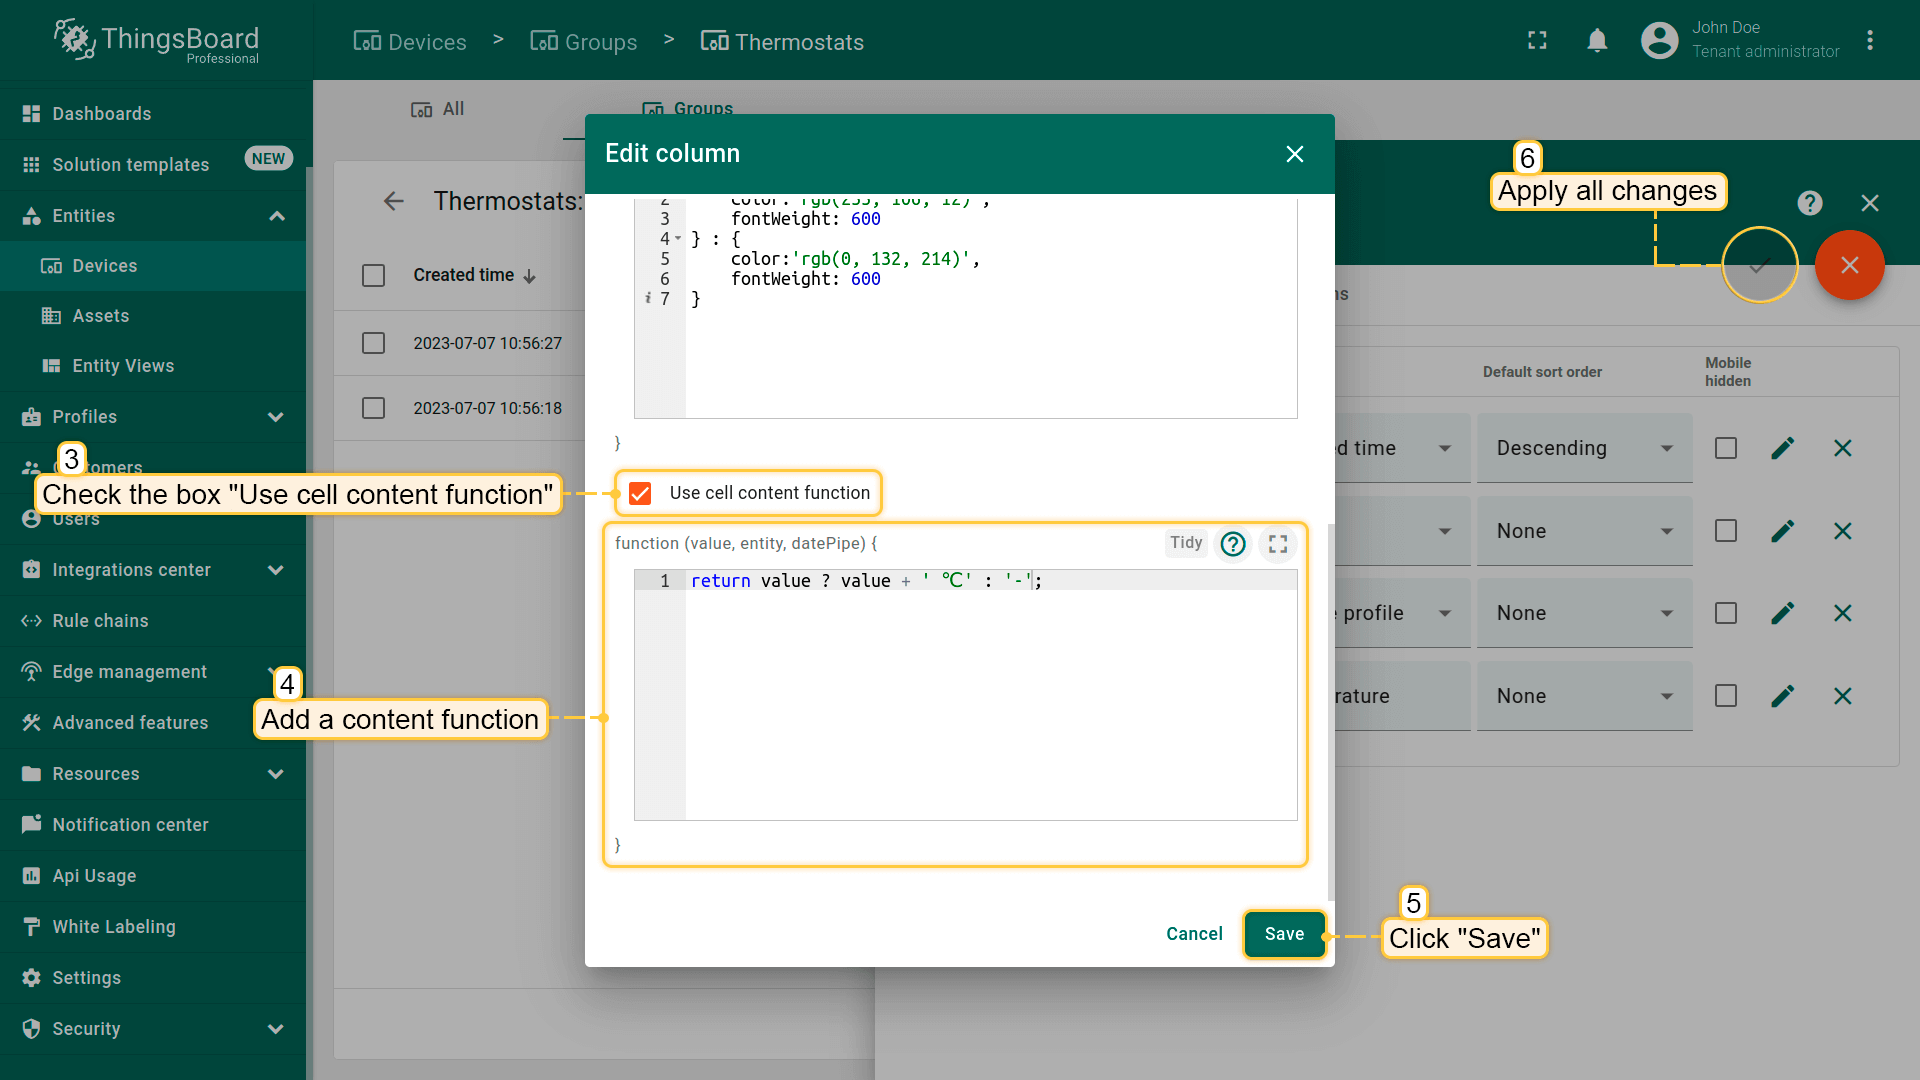
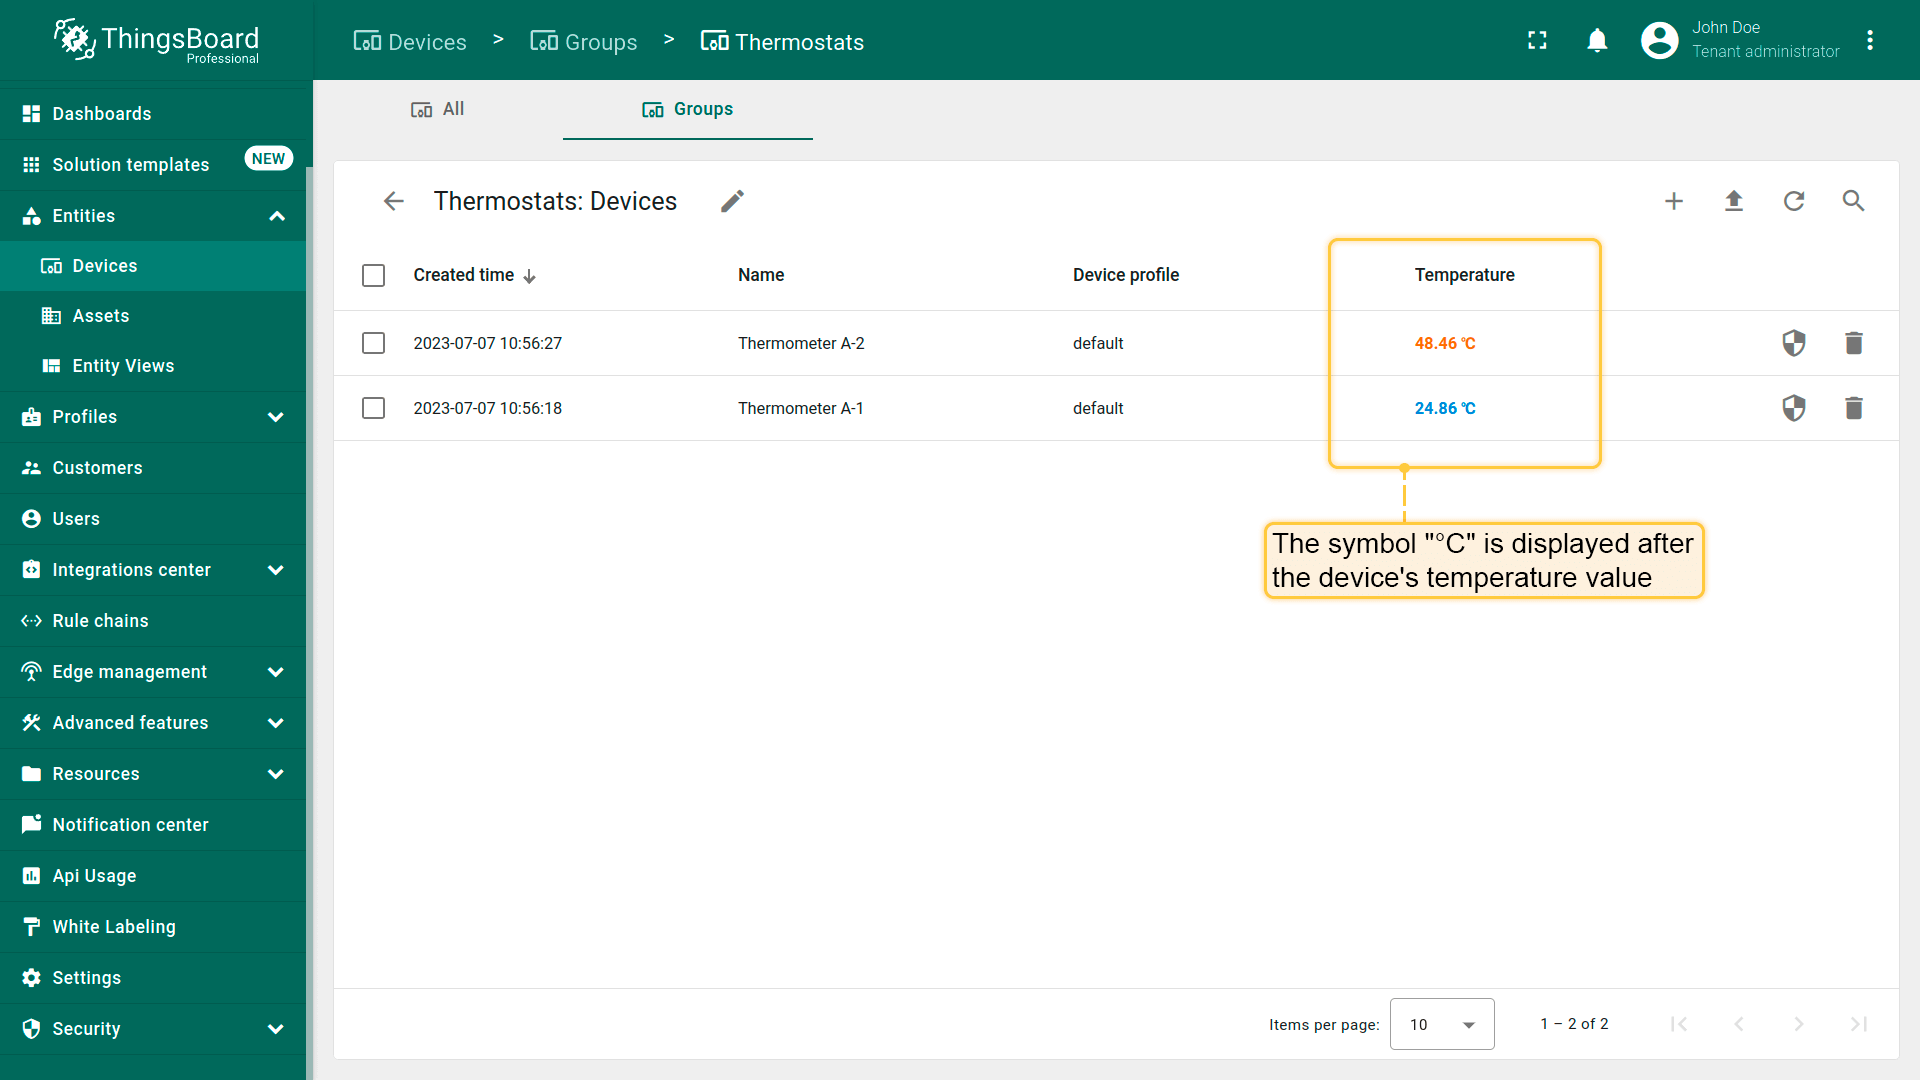
设置内容函数,在设备温度值后显示“℃”符号。
- Navigate to the "Columns" tab in the entity group details and enter edit mode. Then click on the "pencil" icon located in the column's row to open edit column window;
- Check the box "Use cell content function" and add a content function in the function window. Click "Save" and then apply all changes;
- The symbol "℃" is displayed after the device's temperature value.
内容函数:
1
return value ? value + ' ℃' : '-';
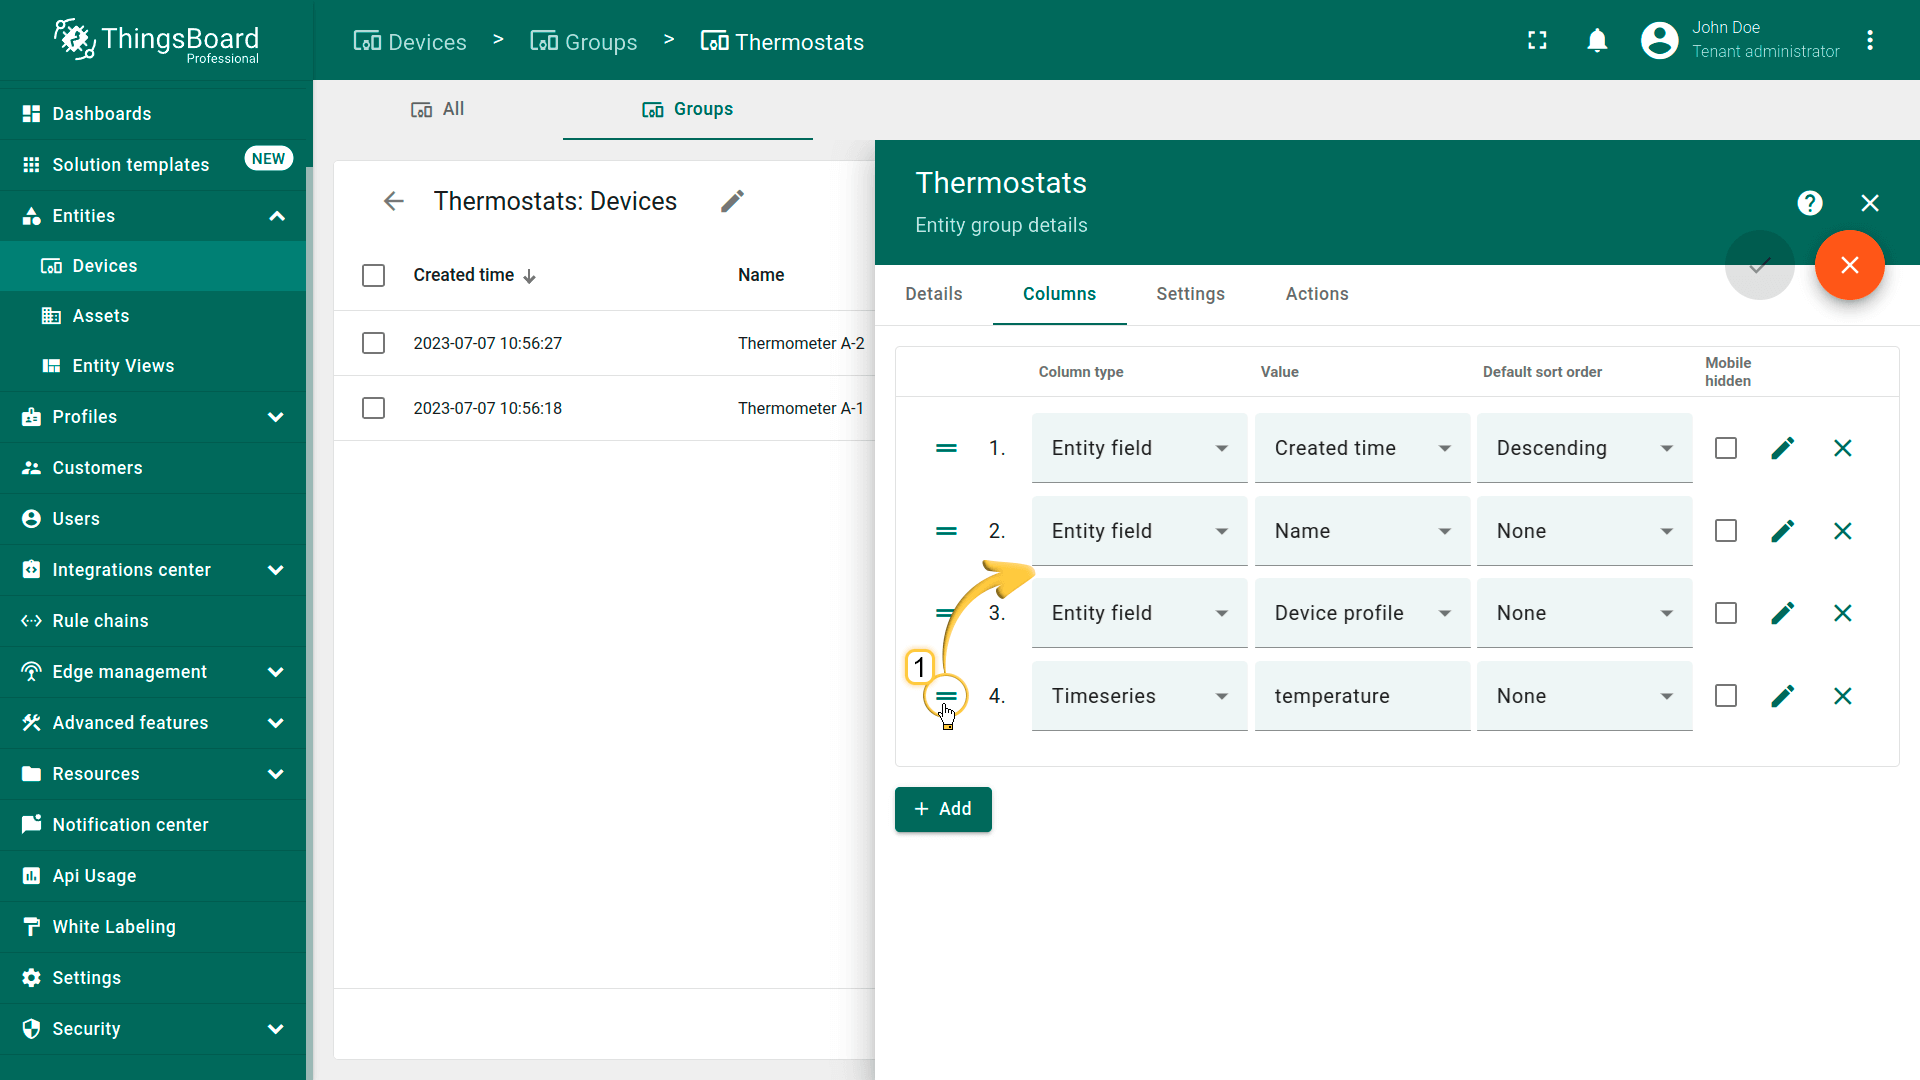
也可按需移动列。
- To move column, go to the "Columns" tab in the entity group details and enter edit mode. Press and hold the left mouse button on the "Drag" icon of the "Temperature" column and place it between the "Name" and "Device profile" columns;
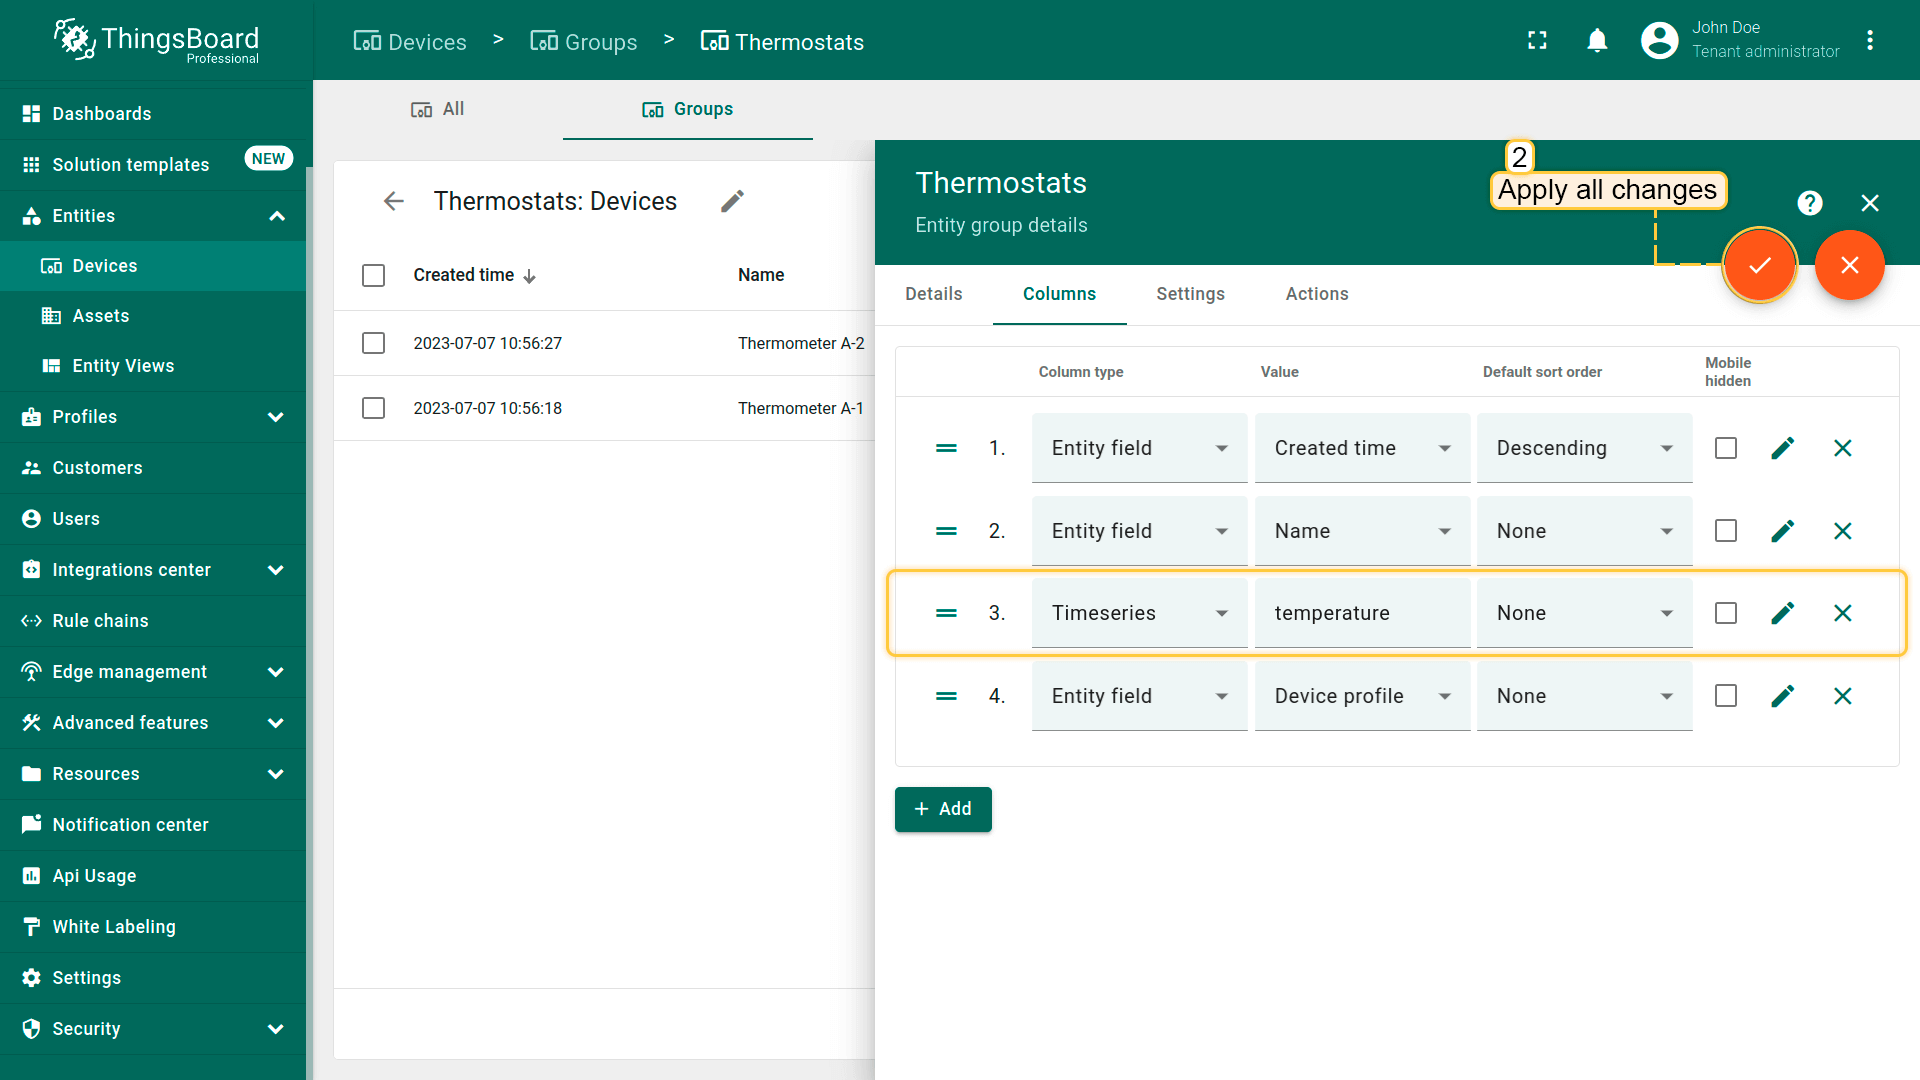
- After that, apply all changes;
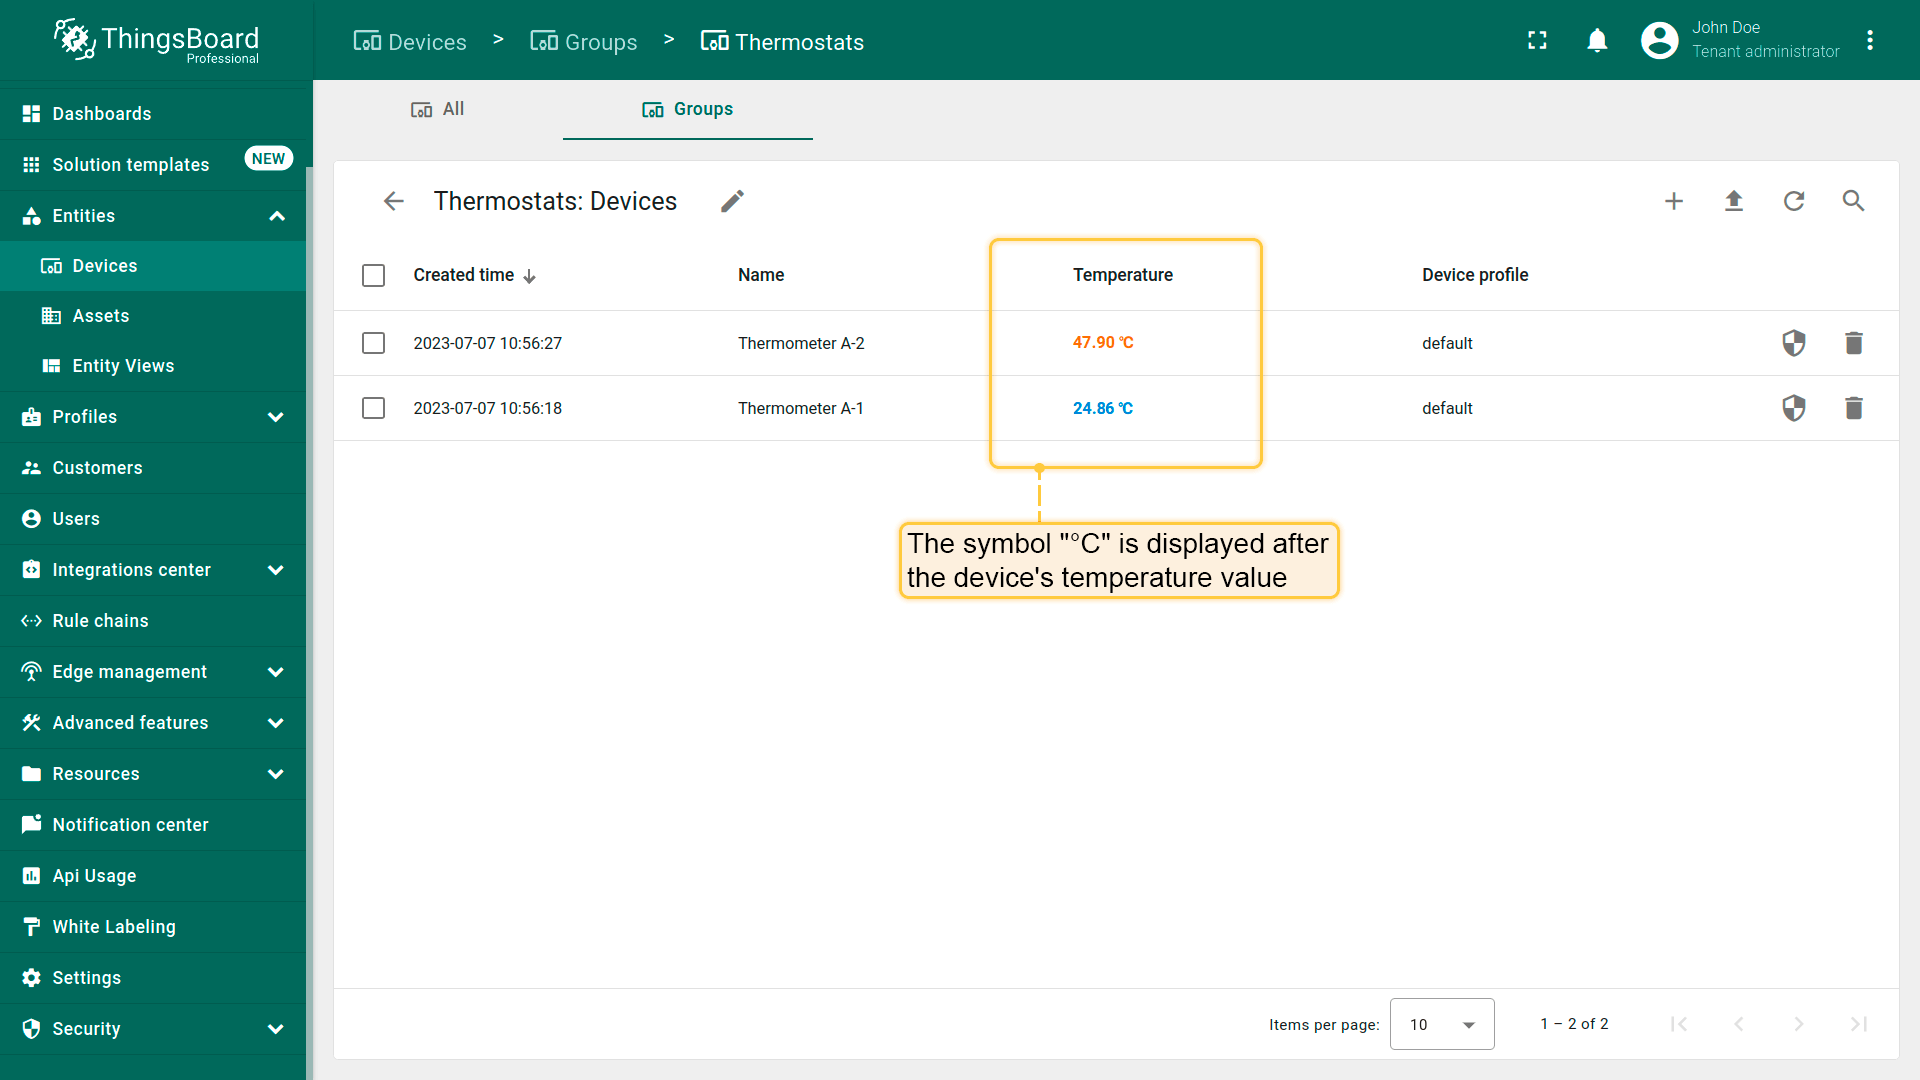
- The "Temperature" column is now located between the "Name" and "Device profile" columns.
实体组显示设置
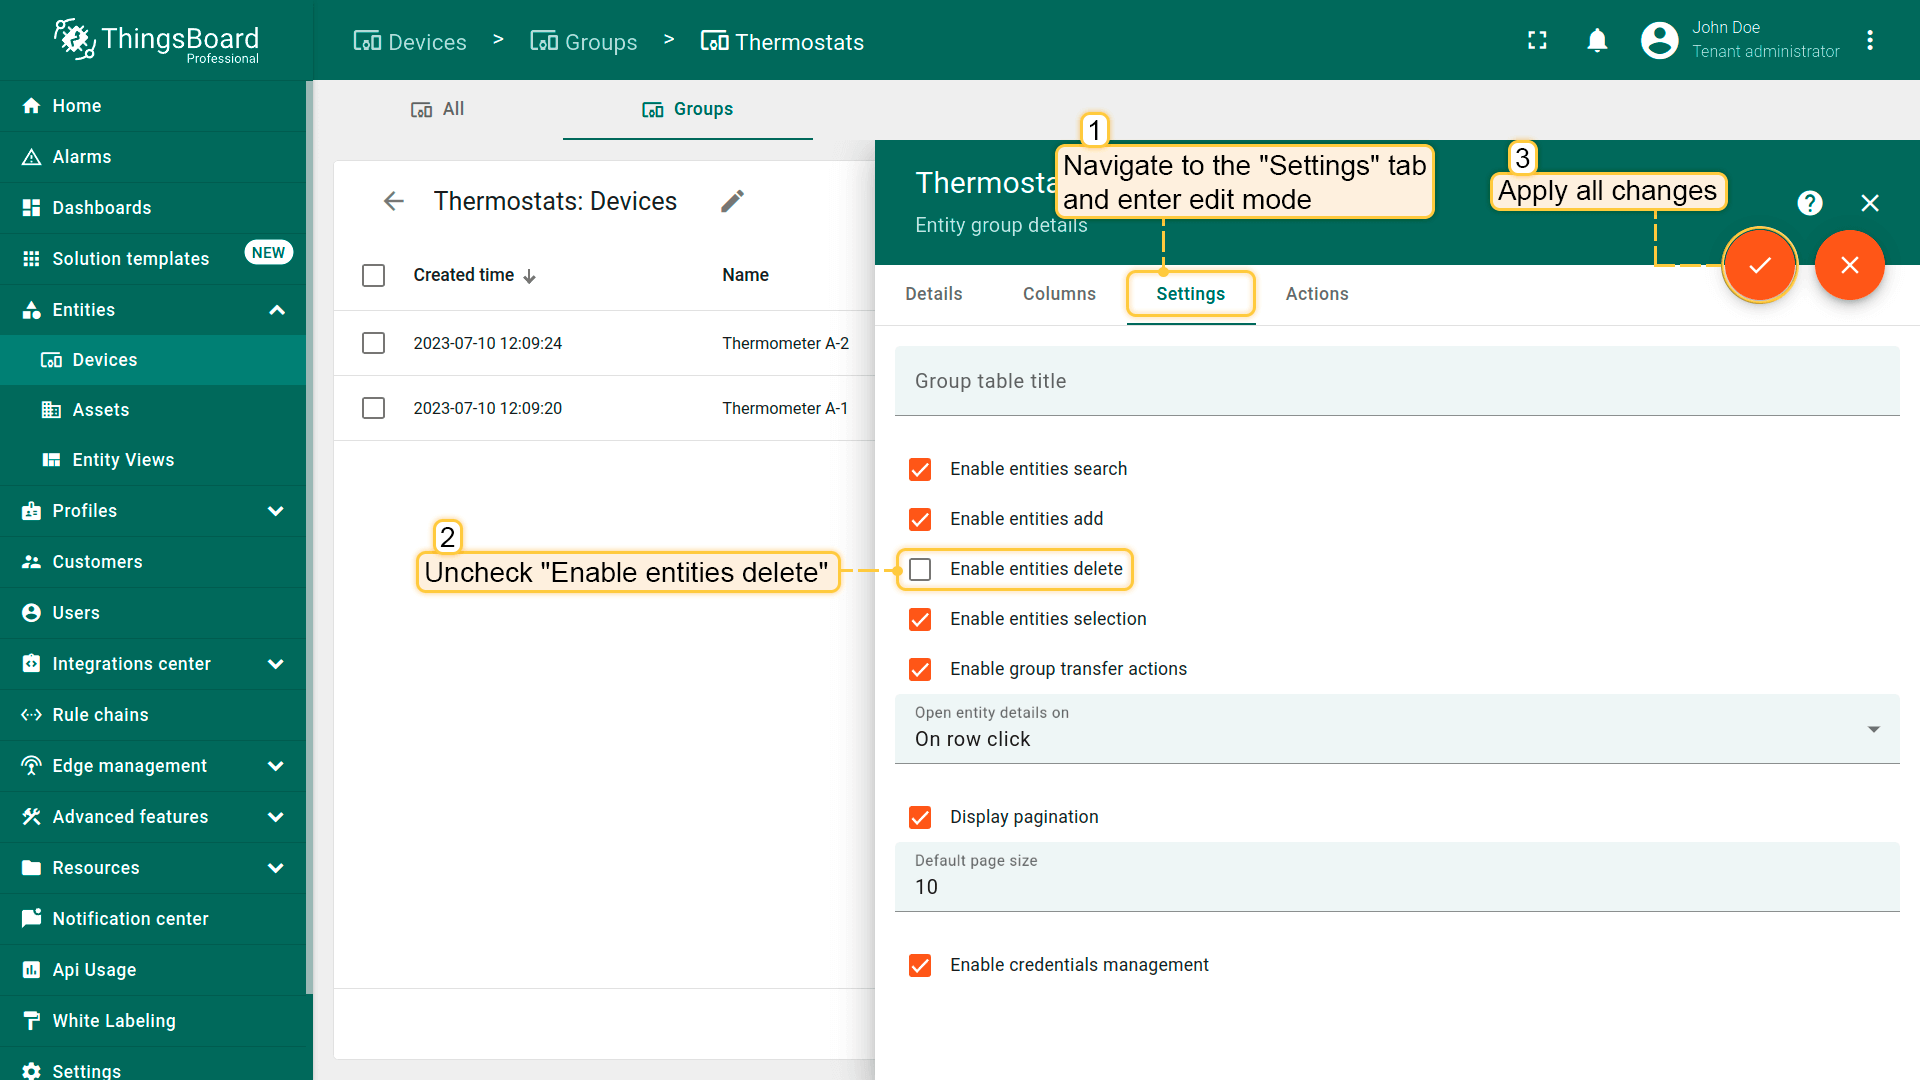
在“设置”选项卡中,可启用或禁用:搜索实体、添加新实体、删除实体、管理实体凭证。 还可配置分页,以及选择打开实体详情的操作。
进入组设置的方法:
- Navigate to the "Settings" tab in the entity group details and enter edit mode. Check/uncheck with selected parameters. For example, uncheck "Enable entities delete". Then apply all changes;
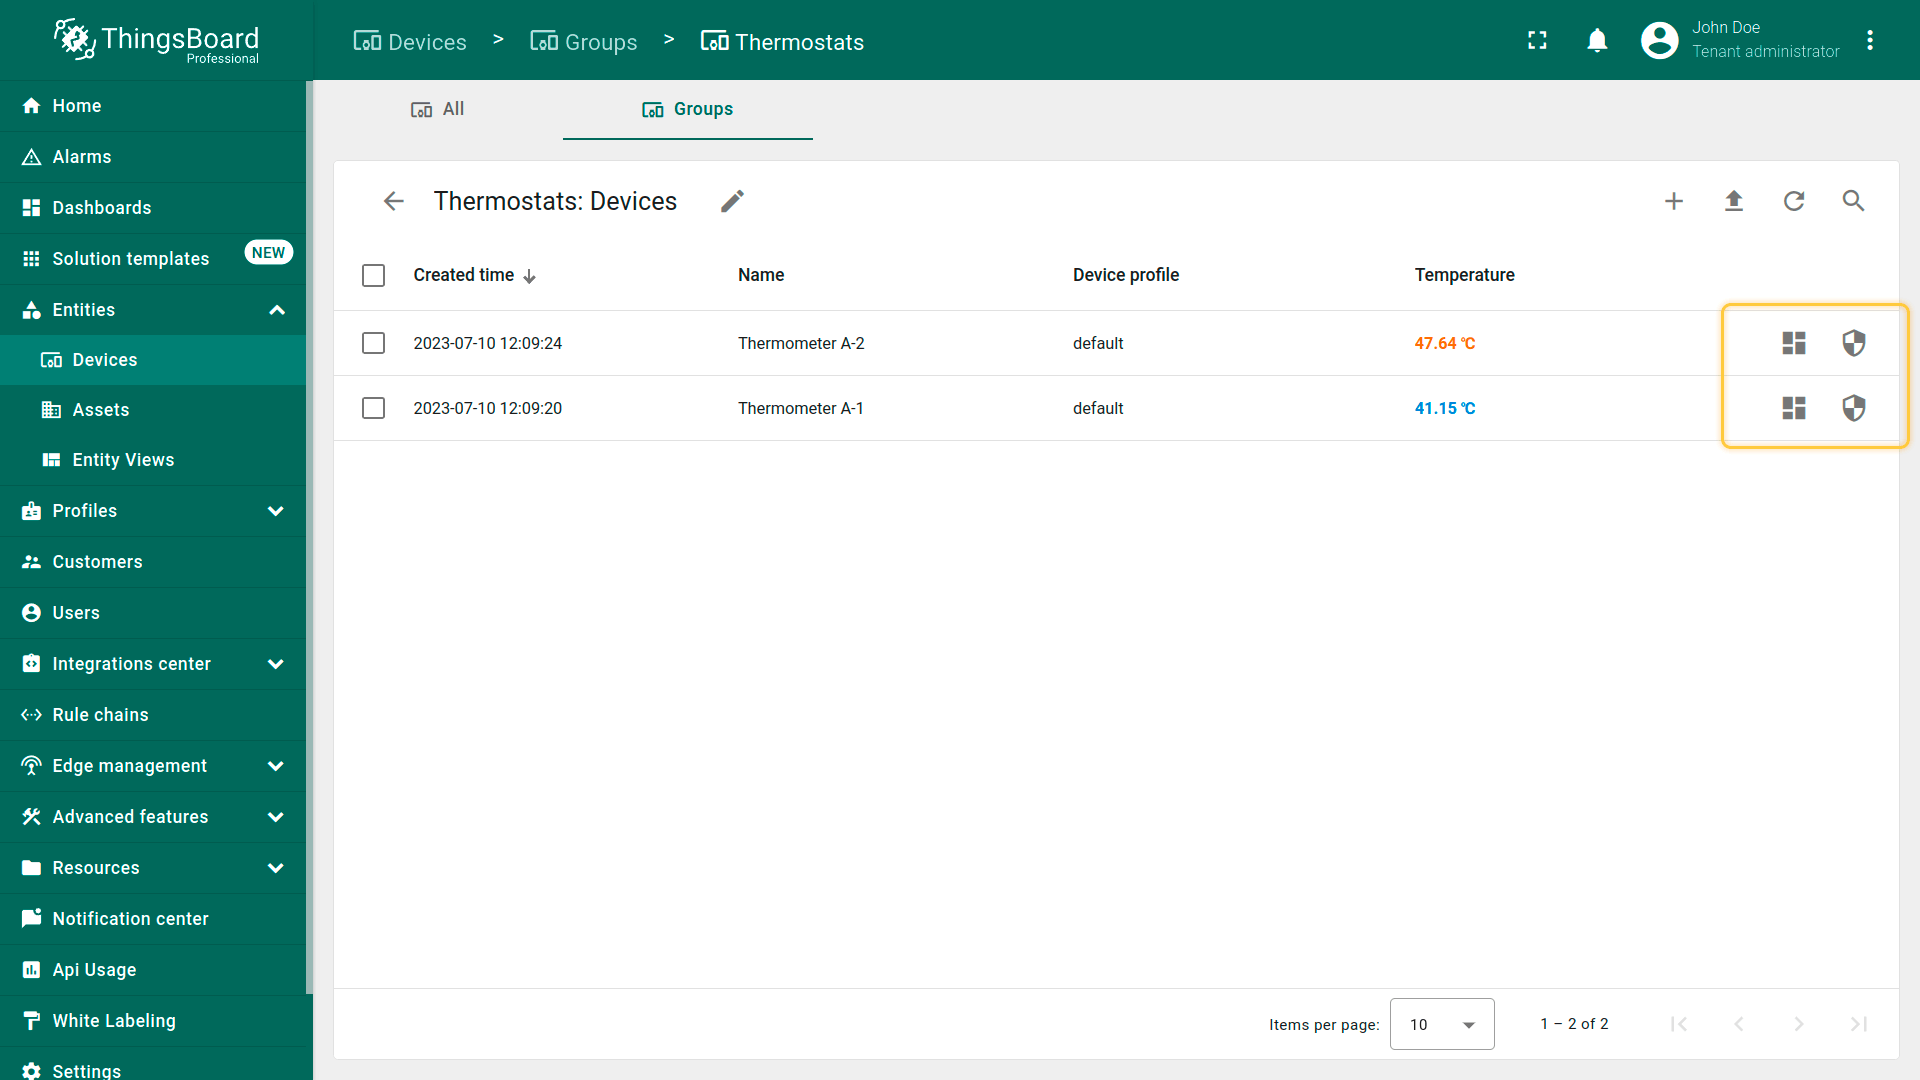
- Now the "trash" icon is not in the device line;
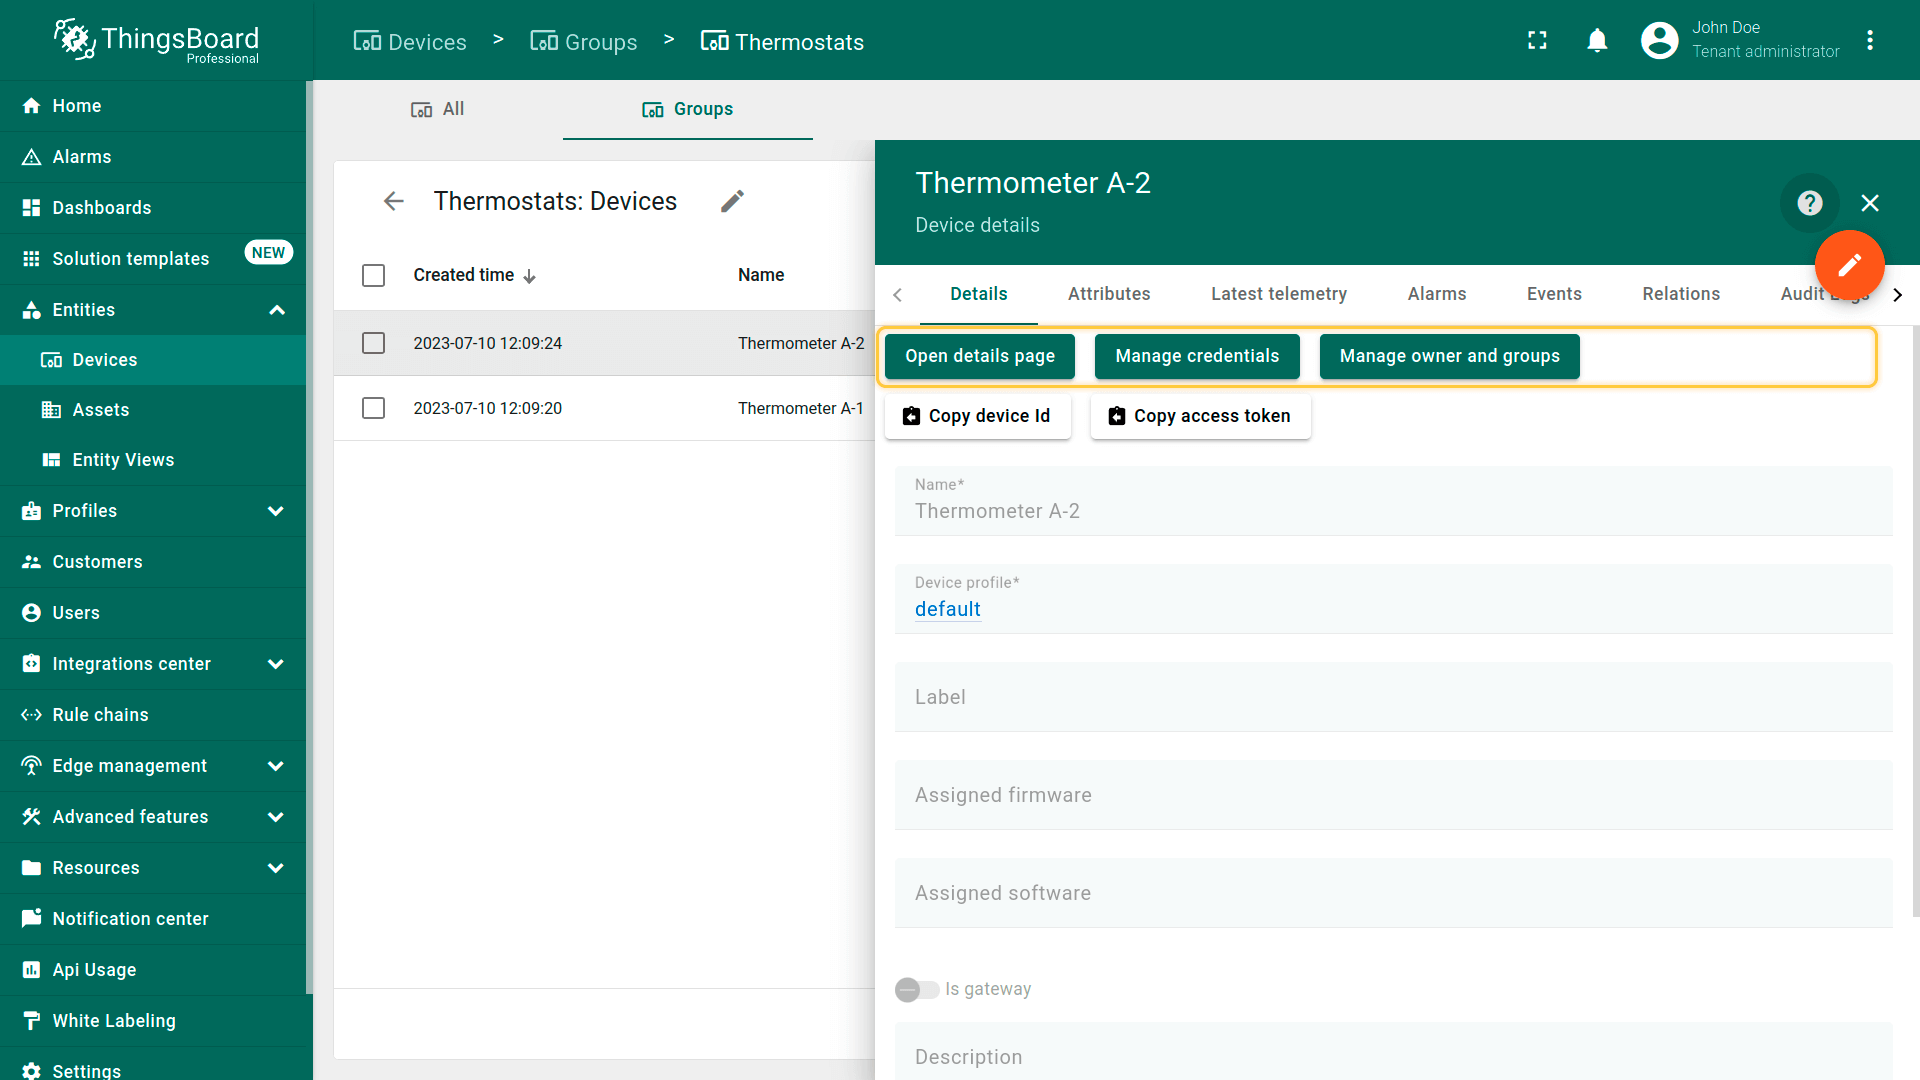
- There is also no "Delete device" button in the device details.
实体组操作配置
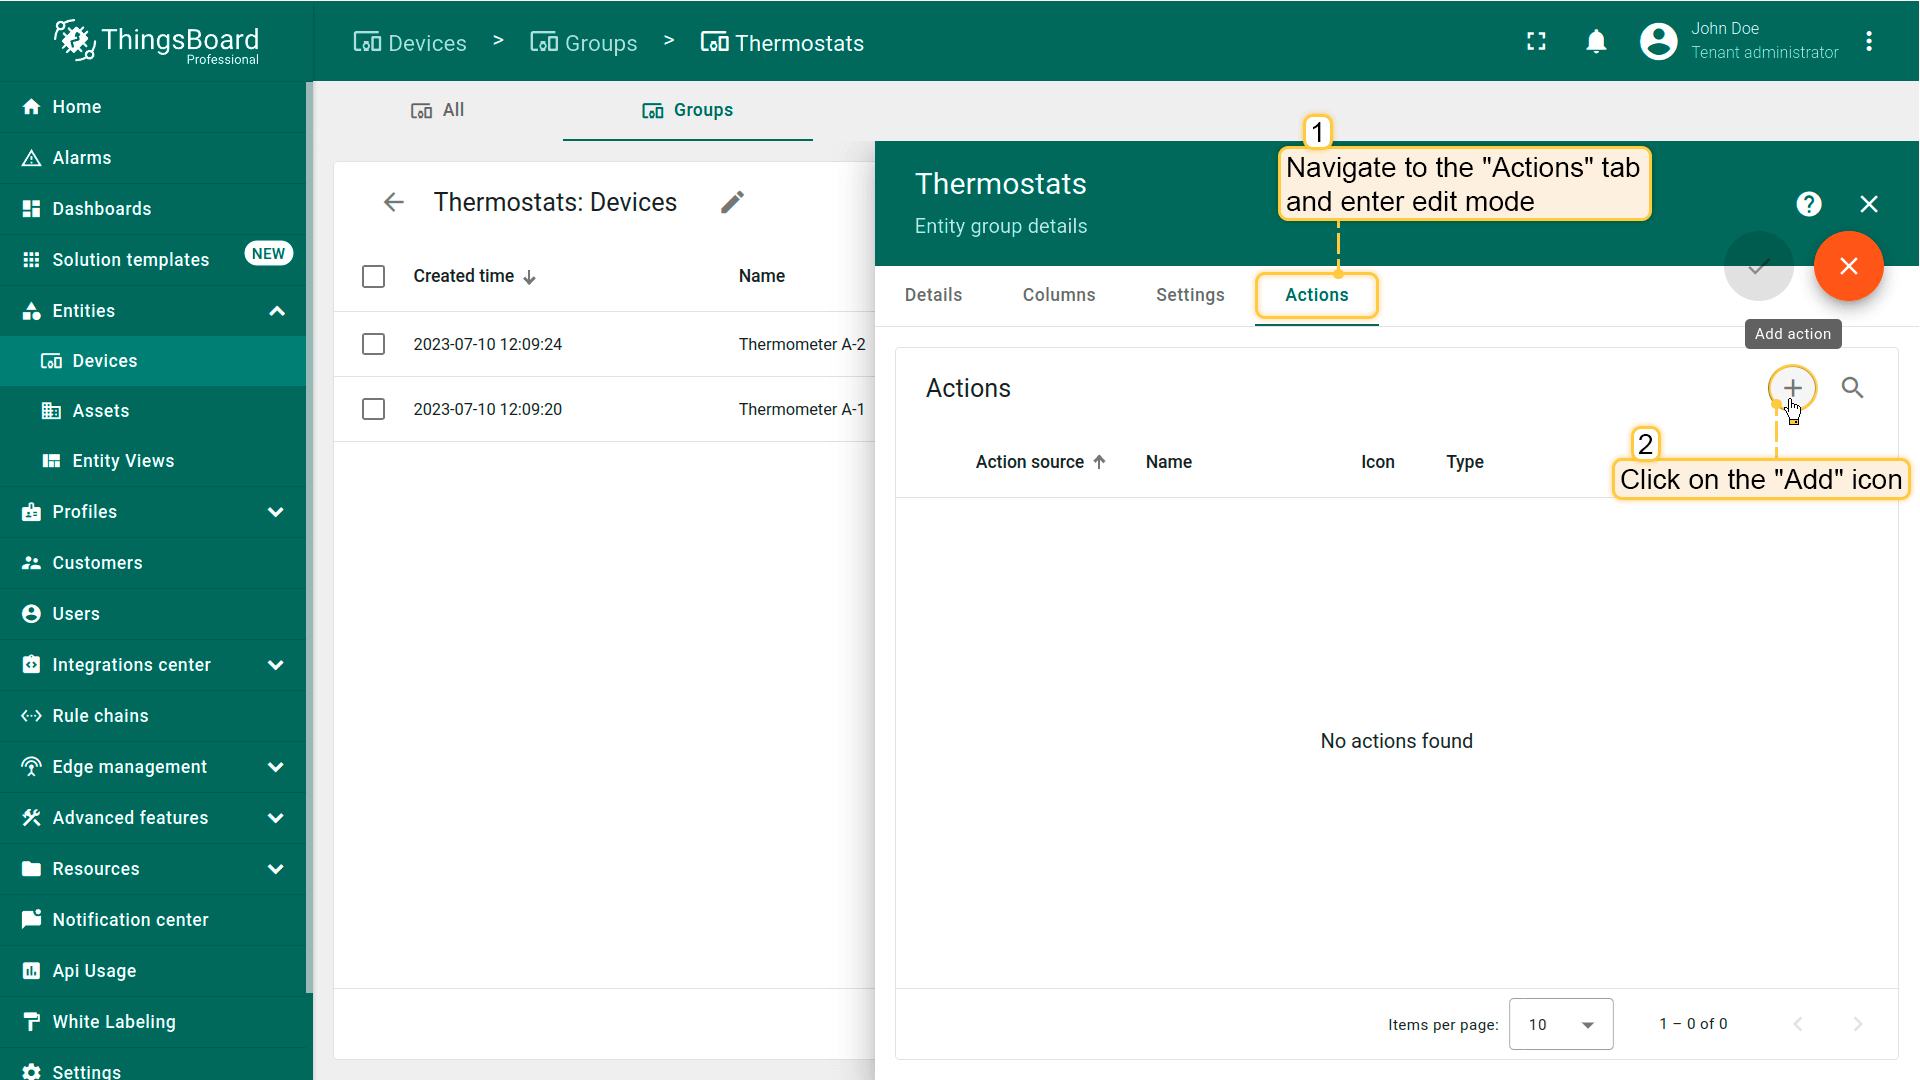
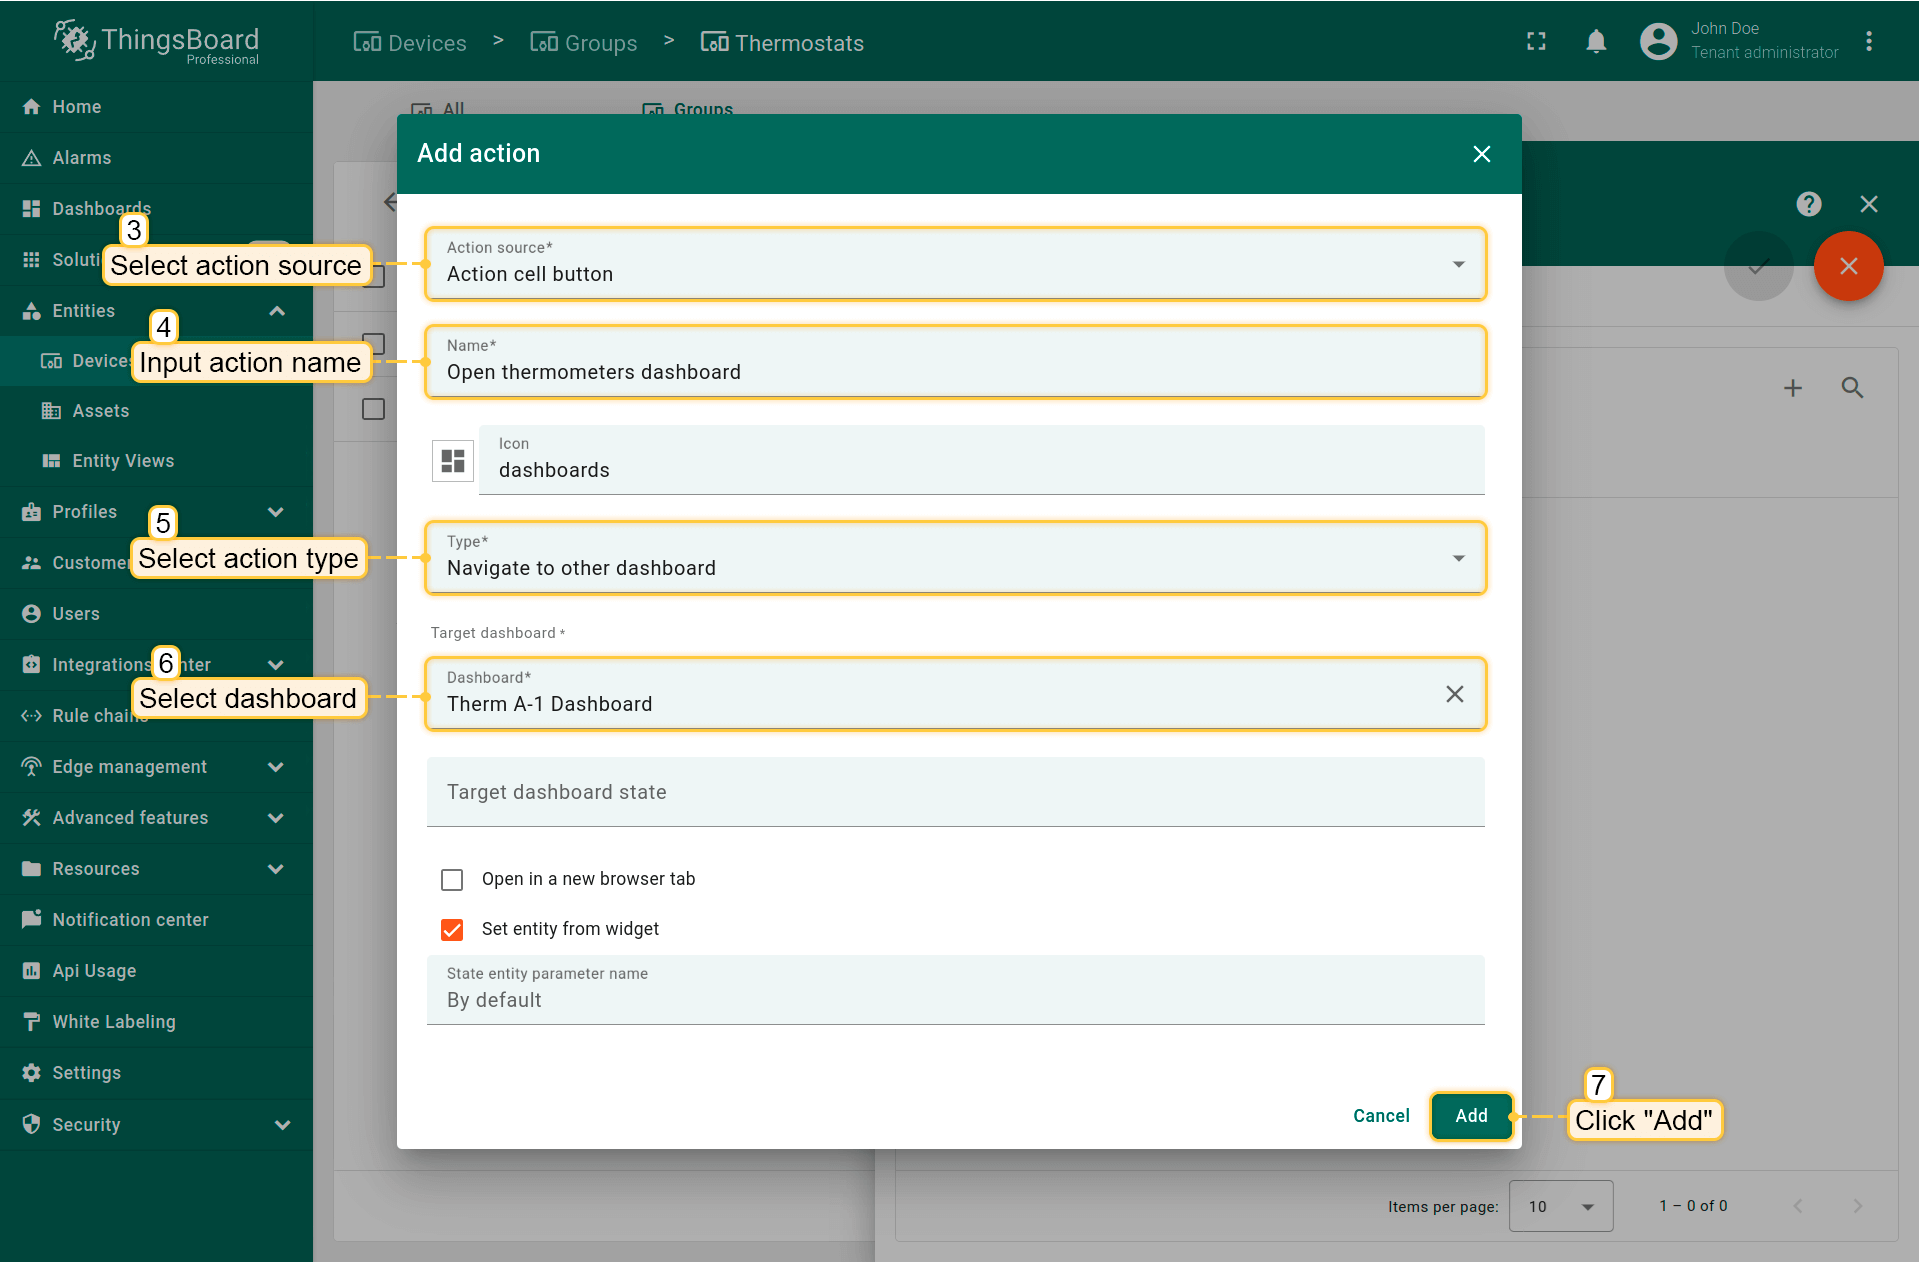
操作可快速配置跳转到指定仪表板,或创建自定义操作。 例如,创建一项操作以快速进入显示温度计完整信息的仪表板。
- Navigate to the "Actions" tab in the entity group details and enter edit mode. Then click on the "plus" icon to add new action;
- Fill in all required fields in the pop-up window according to your task. Click "Add";
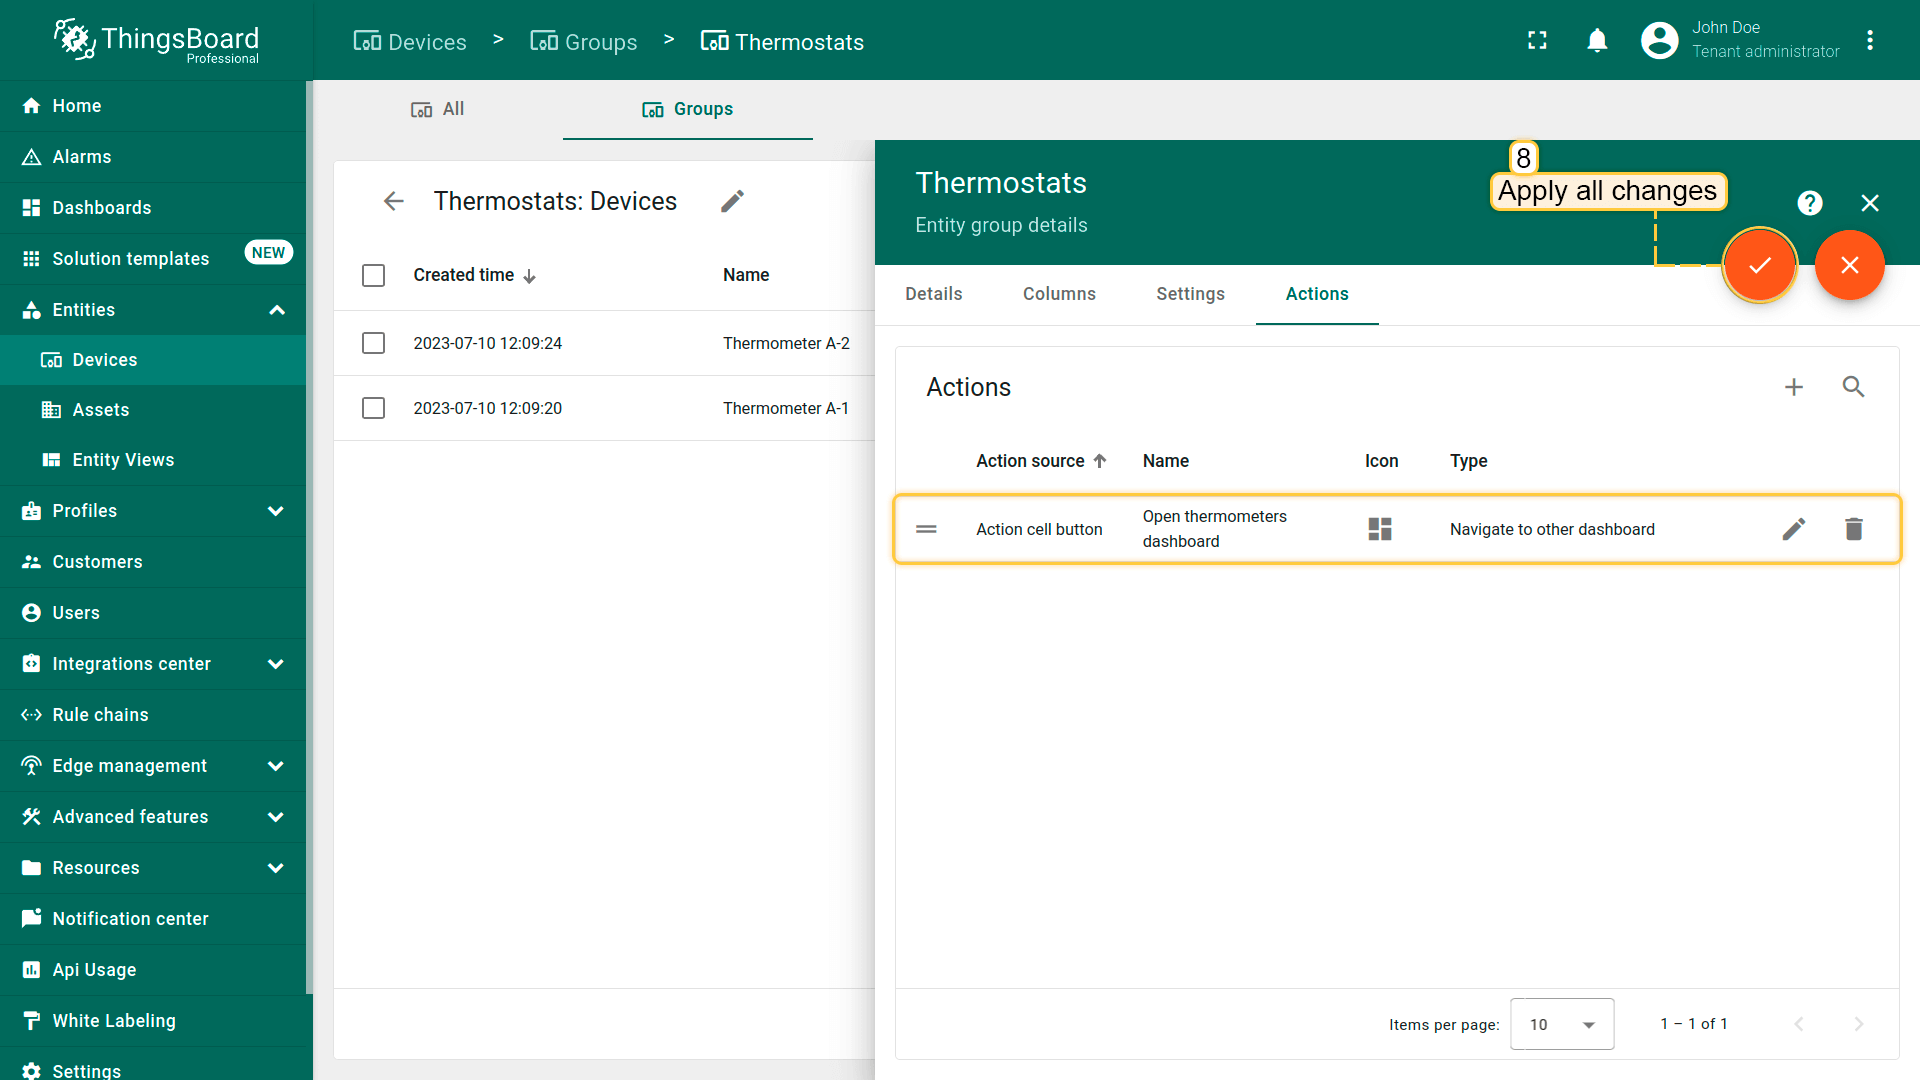
- We created new action. After that, apply all changes;
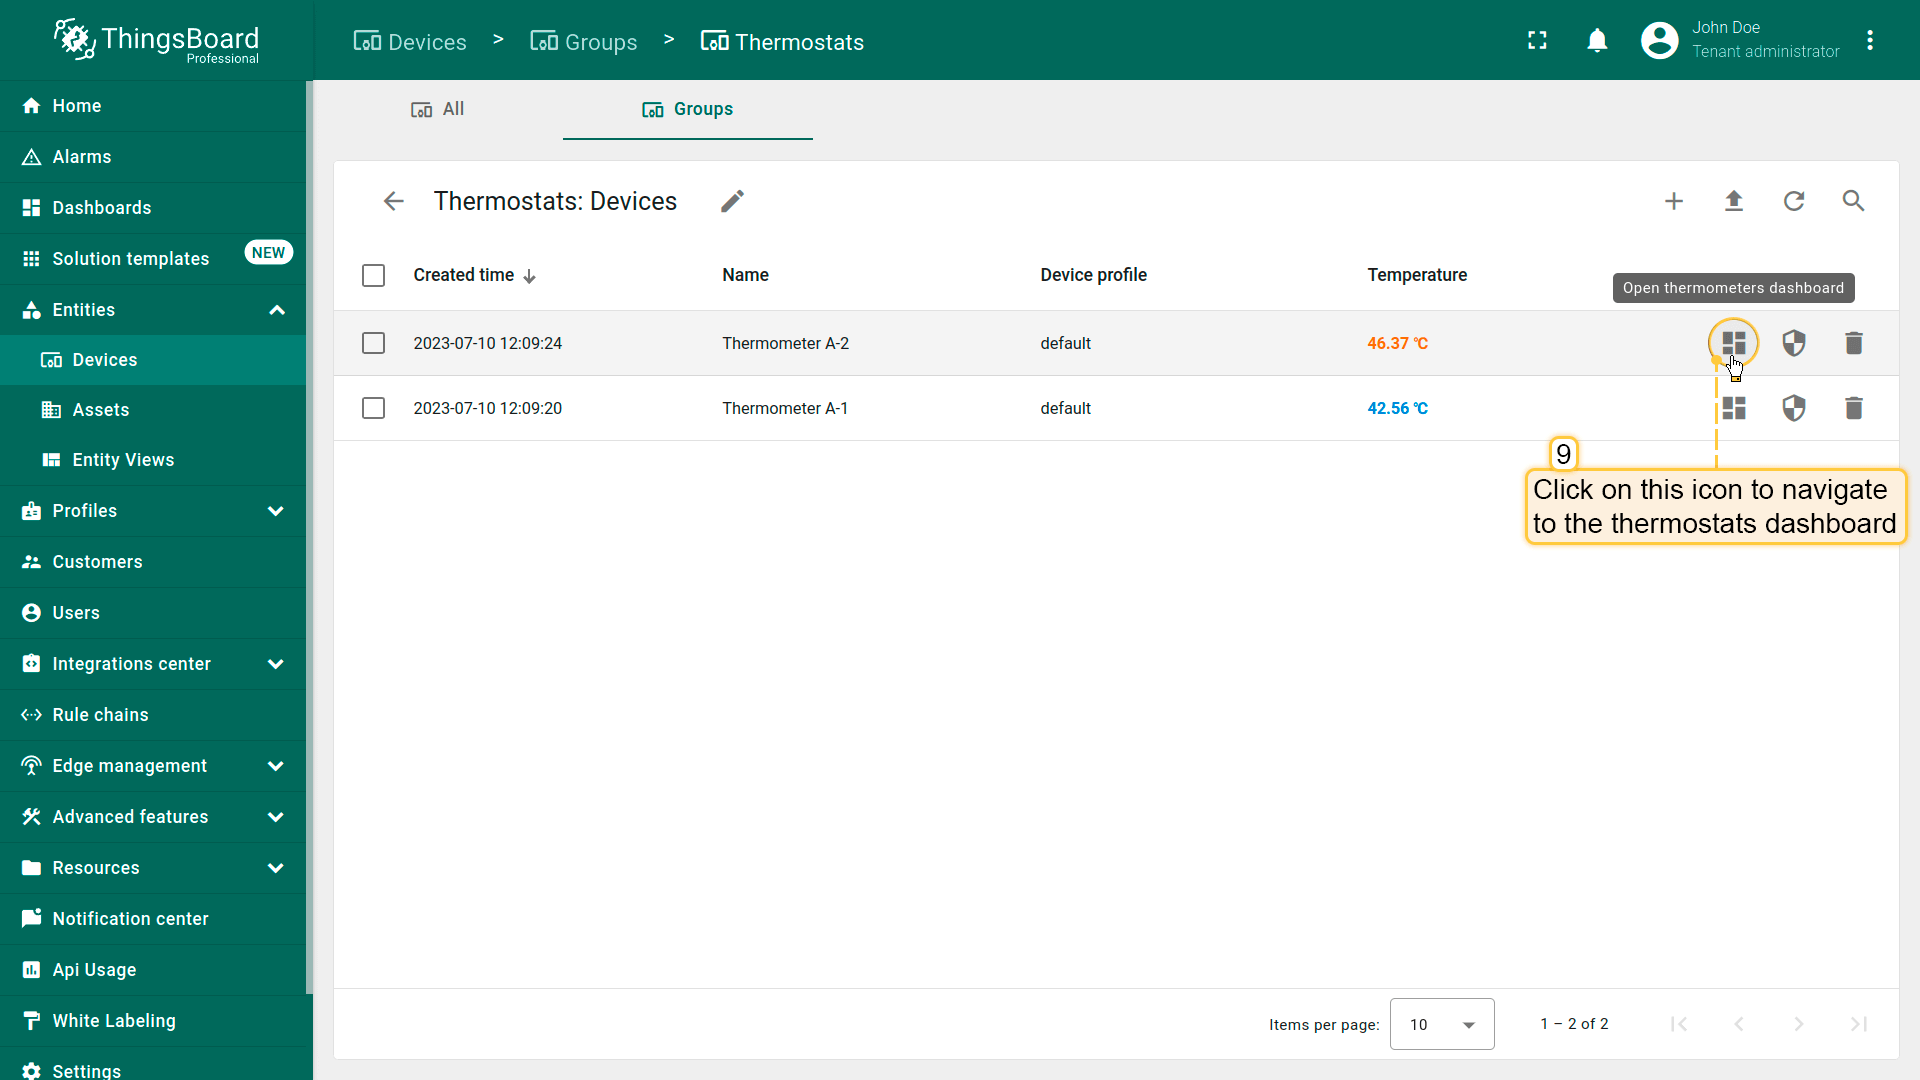
- A new icon appeared in the line of each of the devices, which is responsible for the created action. Click it;
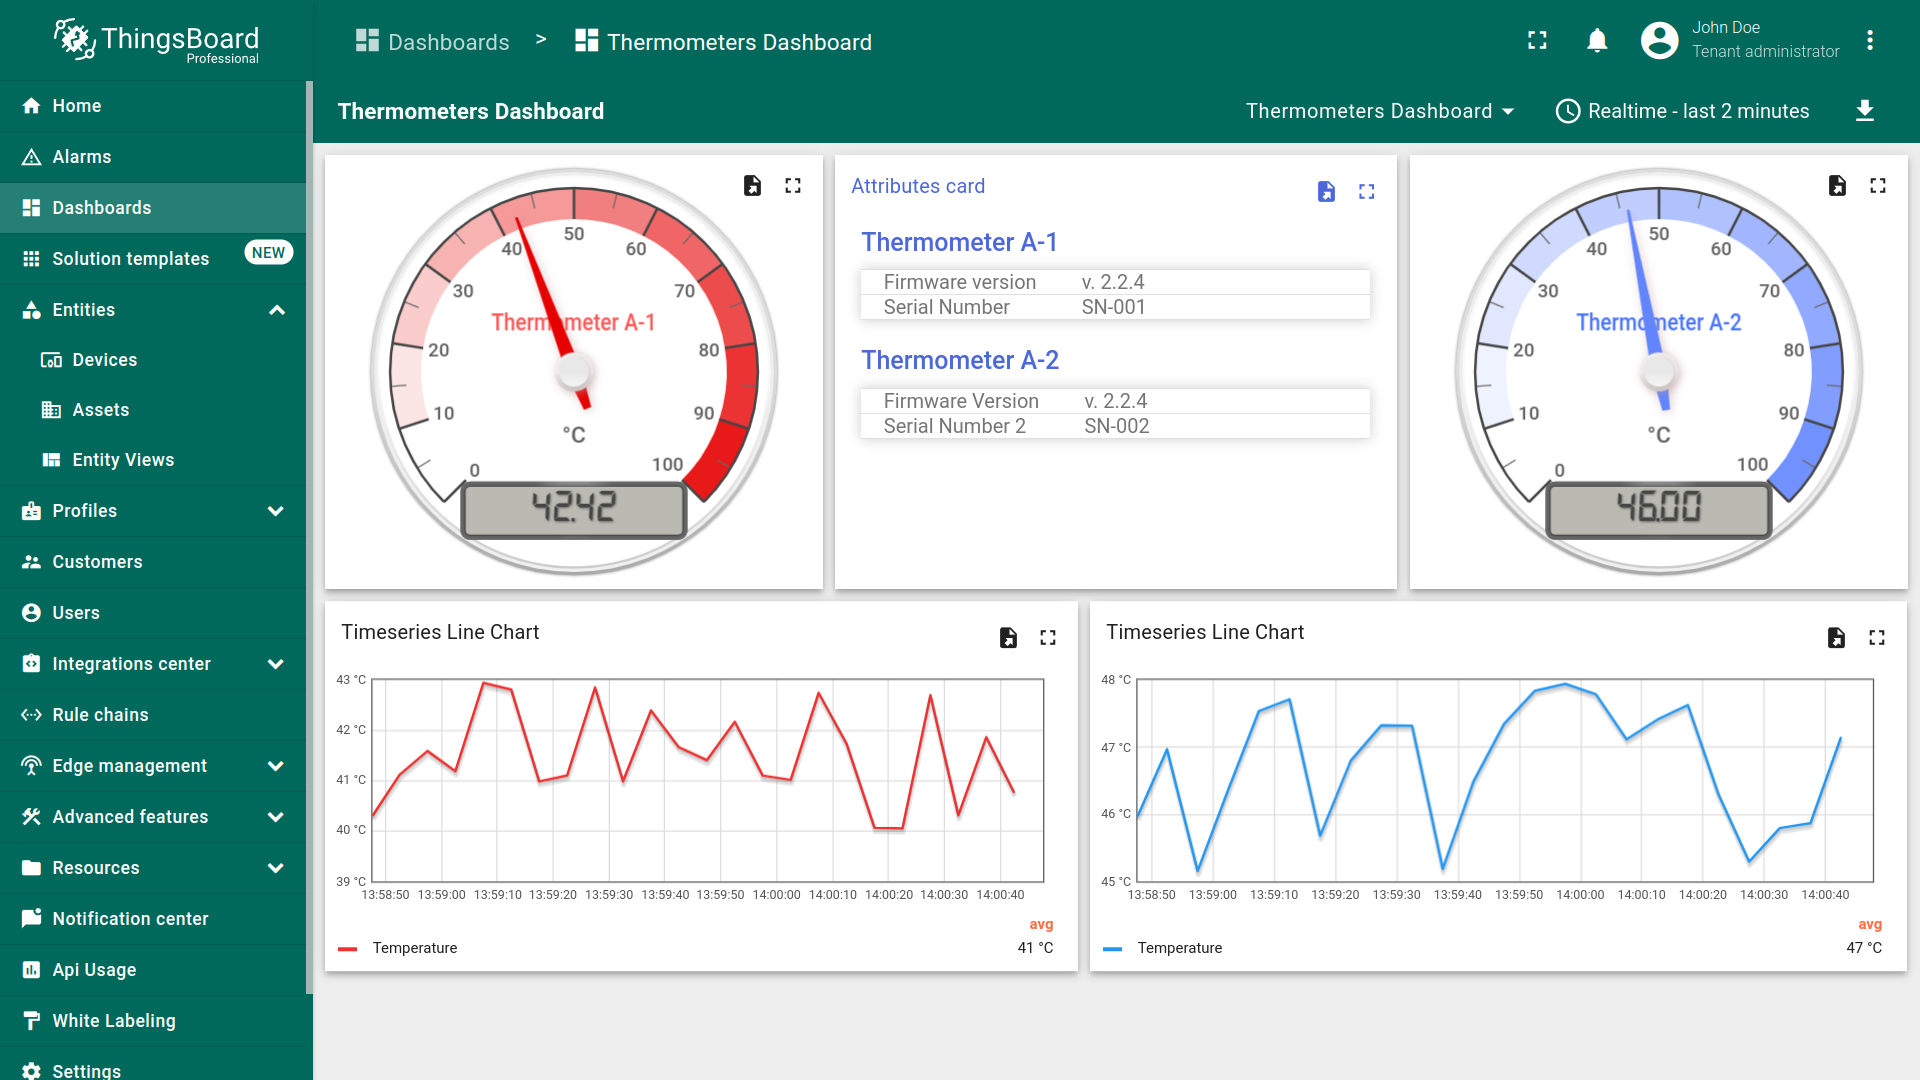
- We will move to the dashboard with full information about thermometers.
组权限
使用Permissions选项卡定义谁可访问此组内的实体,以及可执行的操作。 权限将组角色与用户组关联,仅作用于该组内实体。 组权限是对租户级RBAC的补充,不会覆盖全局限制。参见 RBAC中的组角色。
如何添加组权限:
- 打开实体组详情 → Permissions选项卡。
- 点击“+”(加号图标)添加组权限。
- 从下拉列表中选择角色(组角色)。
- 选择用户组所有者 Tenant 或指定 Customer,以及用户组。
- 点击“添加”保存。组权限会出现在列表中。
可在Permissions选项卡中随时编辑或删除已有组权限:
- 编辑:点击目标权限的“编辑”(铅笔图标)→ 修改字段 →“保存”。
- 删除:点击目标权限的“删除”(垃圾桶图标)→“确认”。
更改对可访问该组的所有成员立即生效。
从用户端查看已分配权限:打开用户组详情 → Roles选项卡。
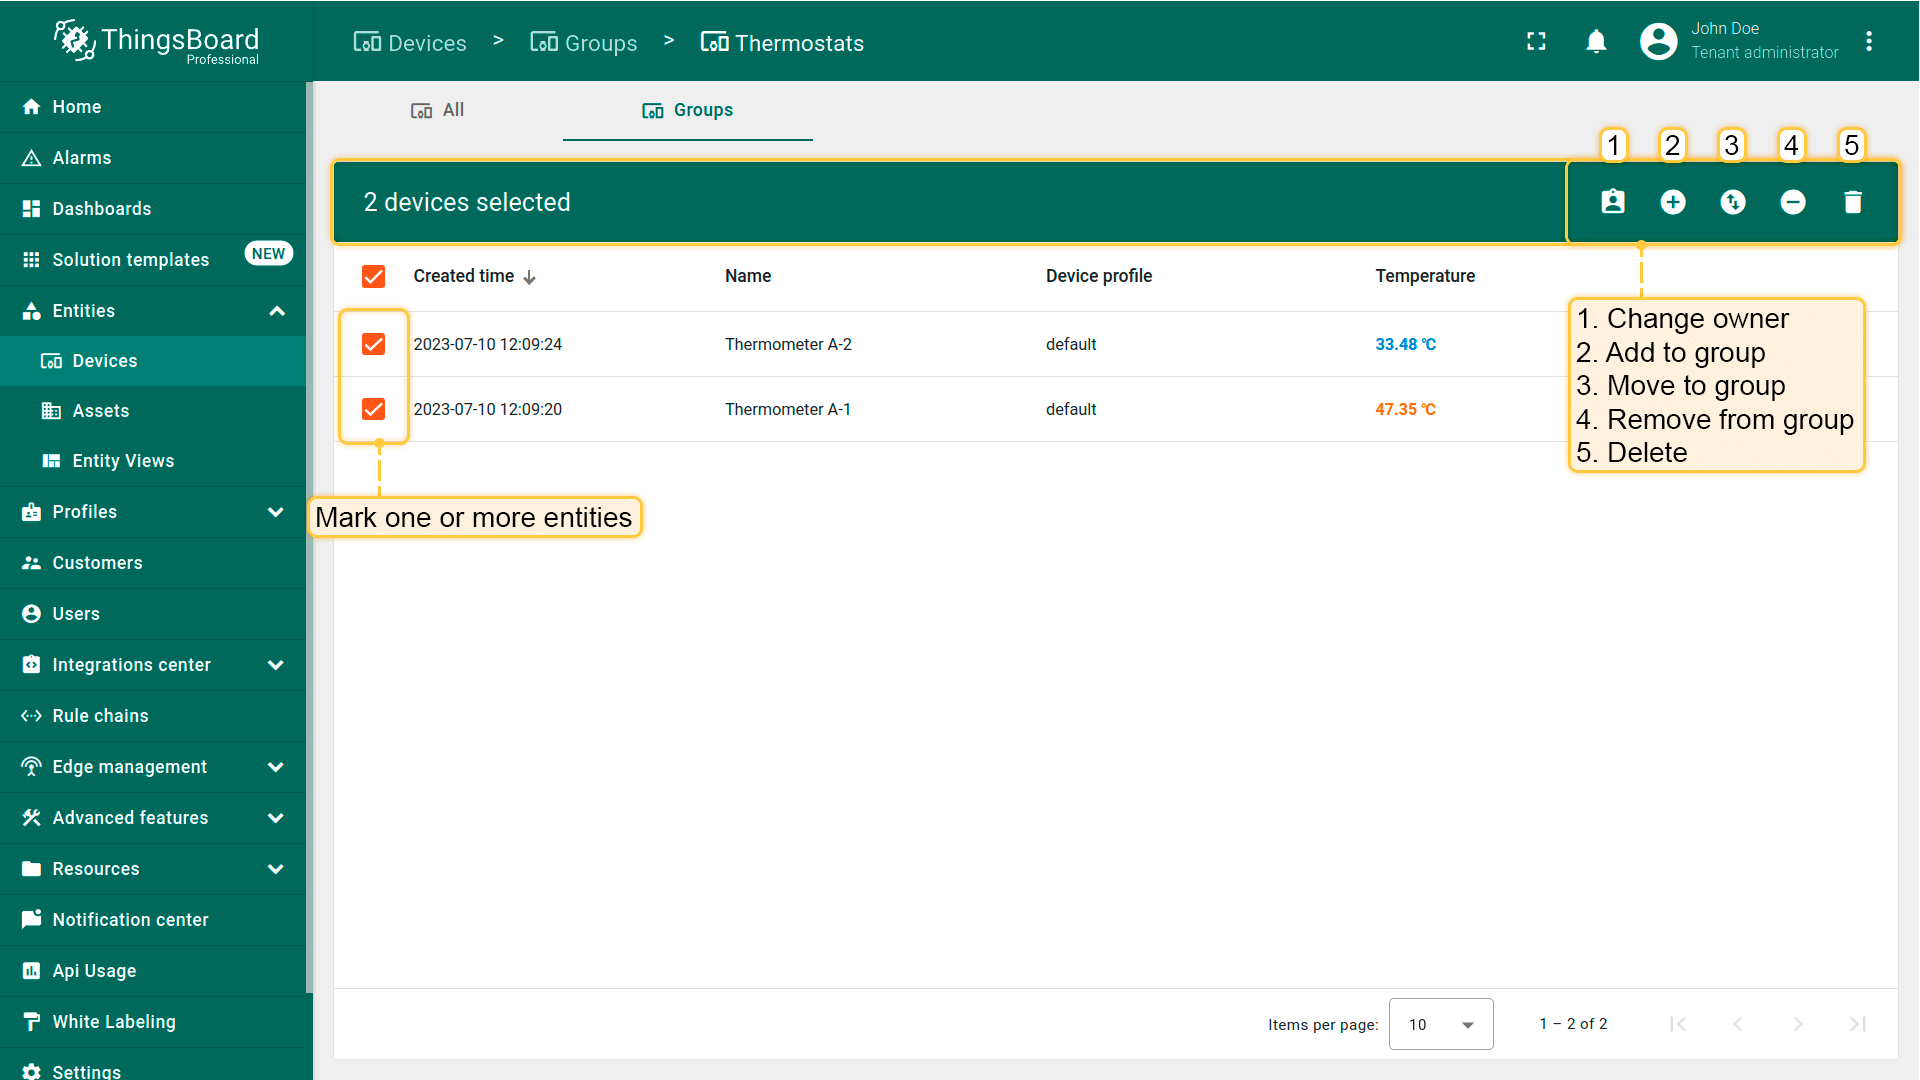
批量操作
对组内每个实体可执行:更改实体所有者、移至其他组、将实体加入或移出组等操作。
- Mark one or more entities, and select the operation you want to perform on the entity in the menu at the top of the window.
共享实体组
共享组可一次性授予组内所有实体的访问权限,并创建将该实体组与所选用户组关联的权限条目。
如何共享实体组:
- 在Groups选项卡中,点击目标组的“Share”图标。
- 从下拉列表选择 Customer。
- (可选)勾选All users以授予该客户下所有用户访问权限。
- 选择权限:Read、Write或Other(Roles)。
- 点击“Share”应用。访问权限将传递到组内所有实体。
要更新或撤销访问,打开组的 permissions选项卡并编辑/删除相应权限。
将组设为公开或私有
公开组向任何人(无需登录)提供只读访问。仅用于非敏感数据。将组设为公开时,平台会为该实体组添加面向Public客户的”Public users”用户组的权限。
设为公开:
-
在Groups选项卡中,点击目标组的“Make public”图标。
-
在对话框中确认。
该组的Public复选框将被启用。
注意:使用设备数据的公开仪表板,要求仪表板和相关设备组均为公开。
设为私有(撤销公开访问):
-
在Groups选项卡中,点击目标组的“Make private”图标。
-
在对话框中确认。公开访问将被移除。
若需为指定客户或用户提供受控访问,请使用 共享实体组 或在 Permissions选项卡中配置条目。
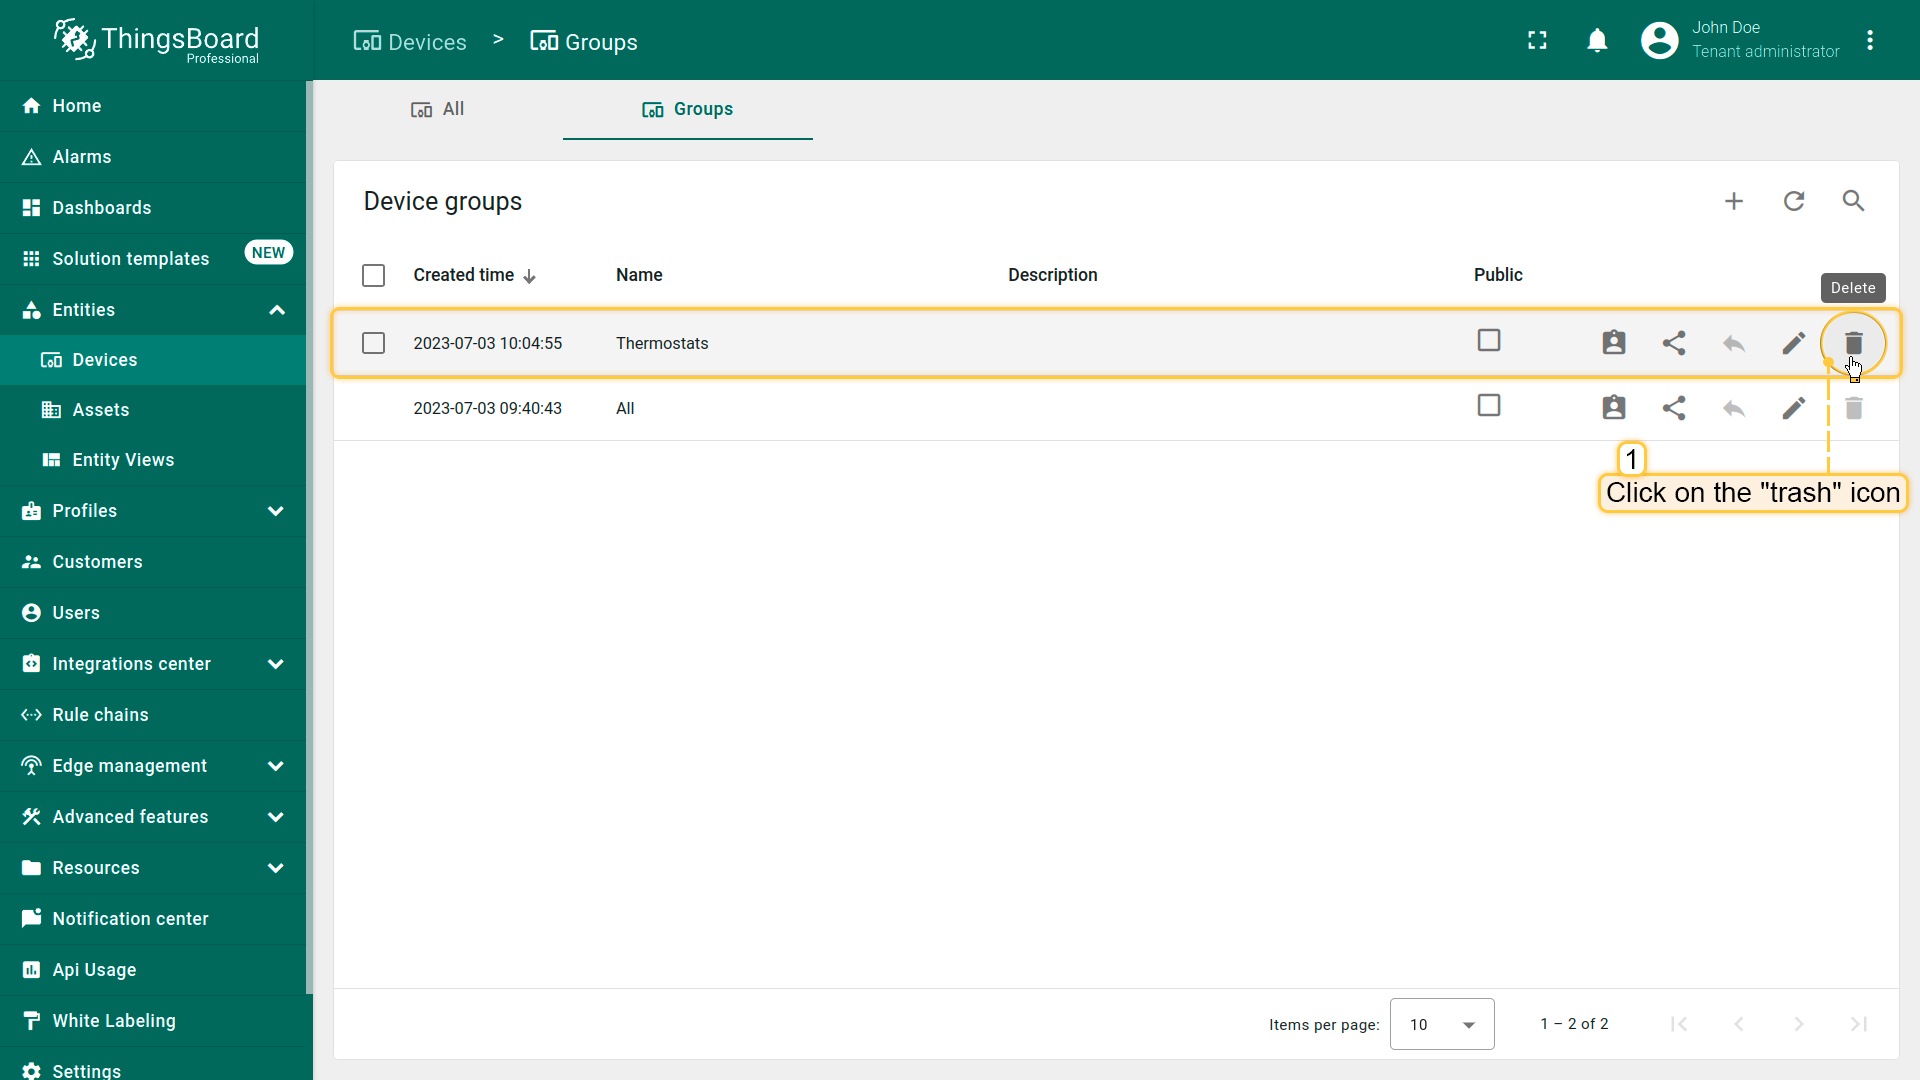
删除实体组
可通过以下任一方式删除实体组及其所有实体:
方式一:
- Click a "trash" icon can opposite the groups name you want to delete;
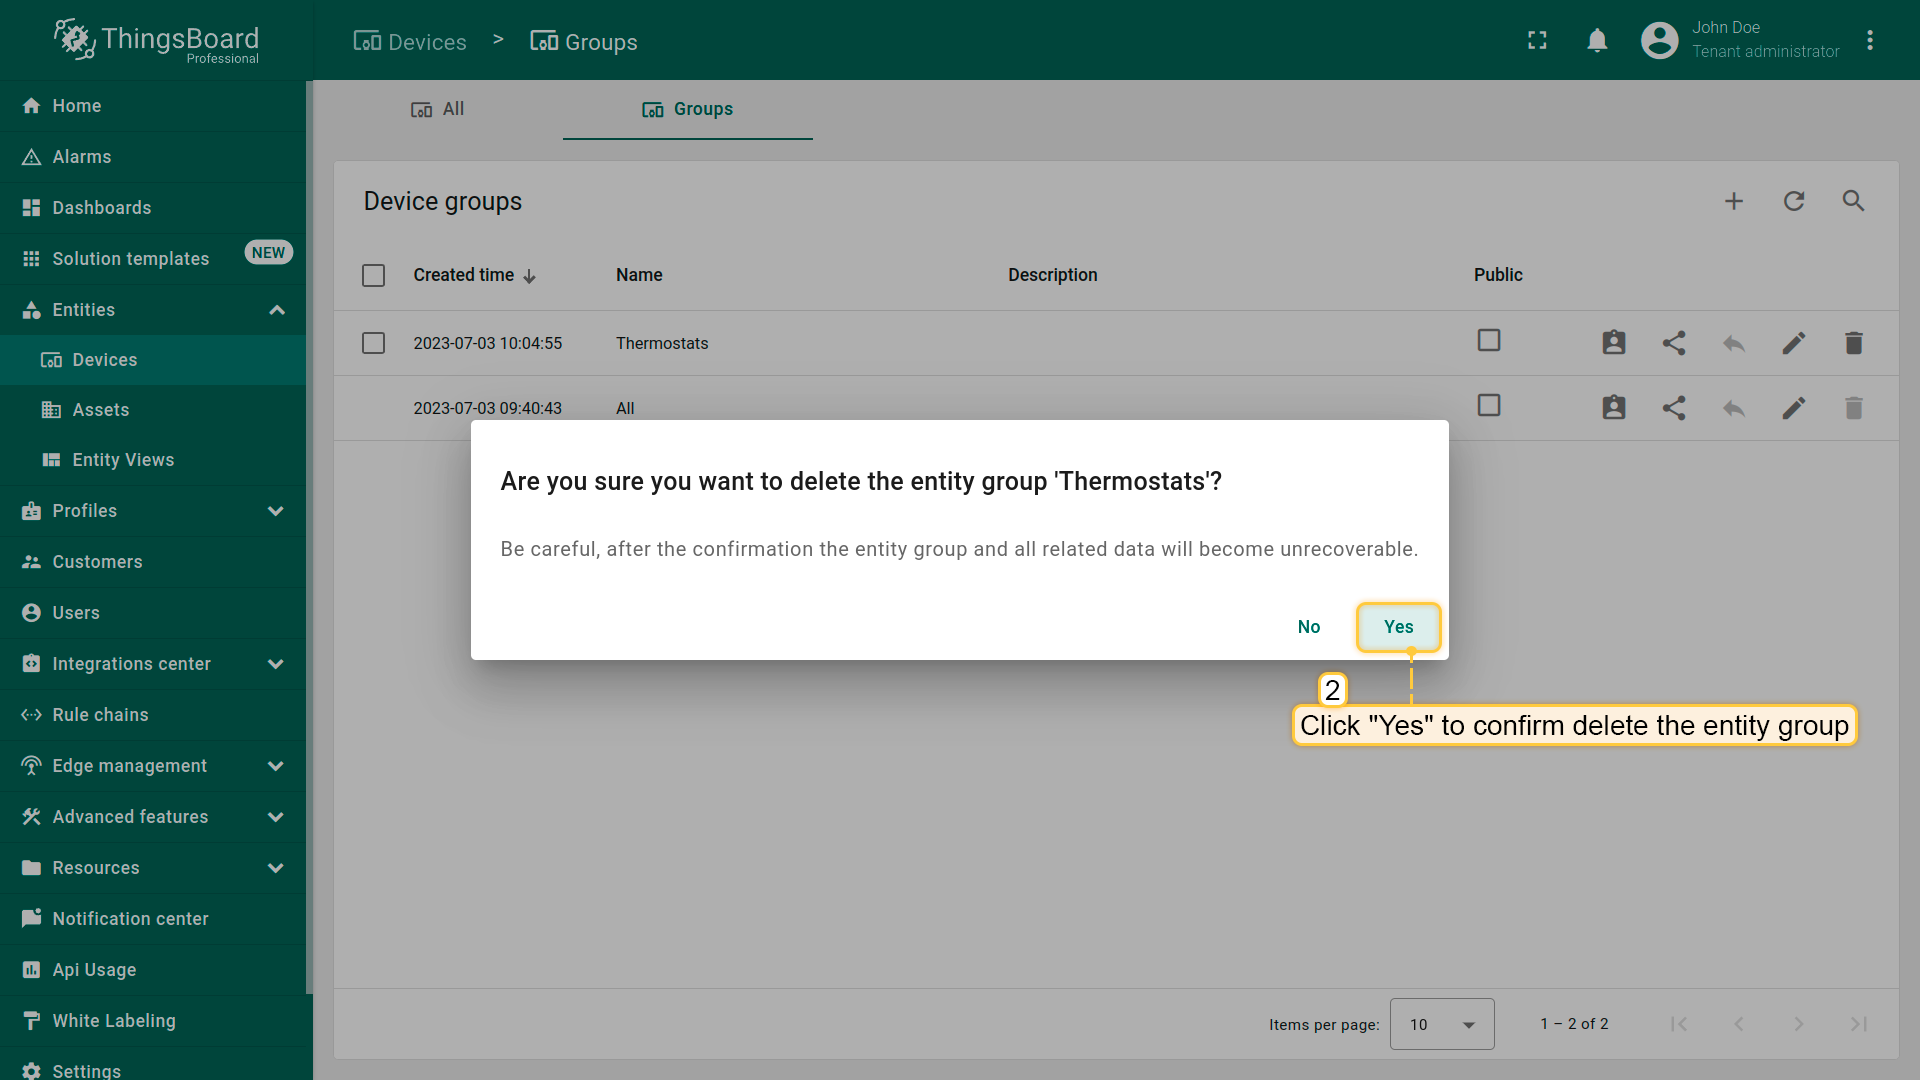
- Confirm deleting the entity group in the dialog box.
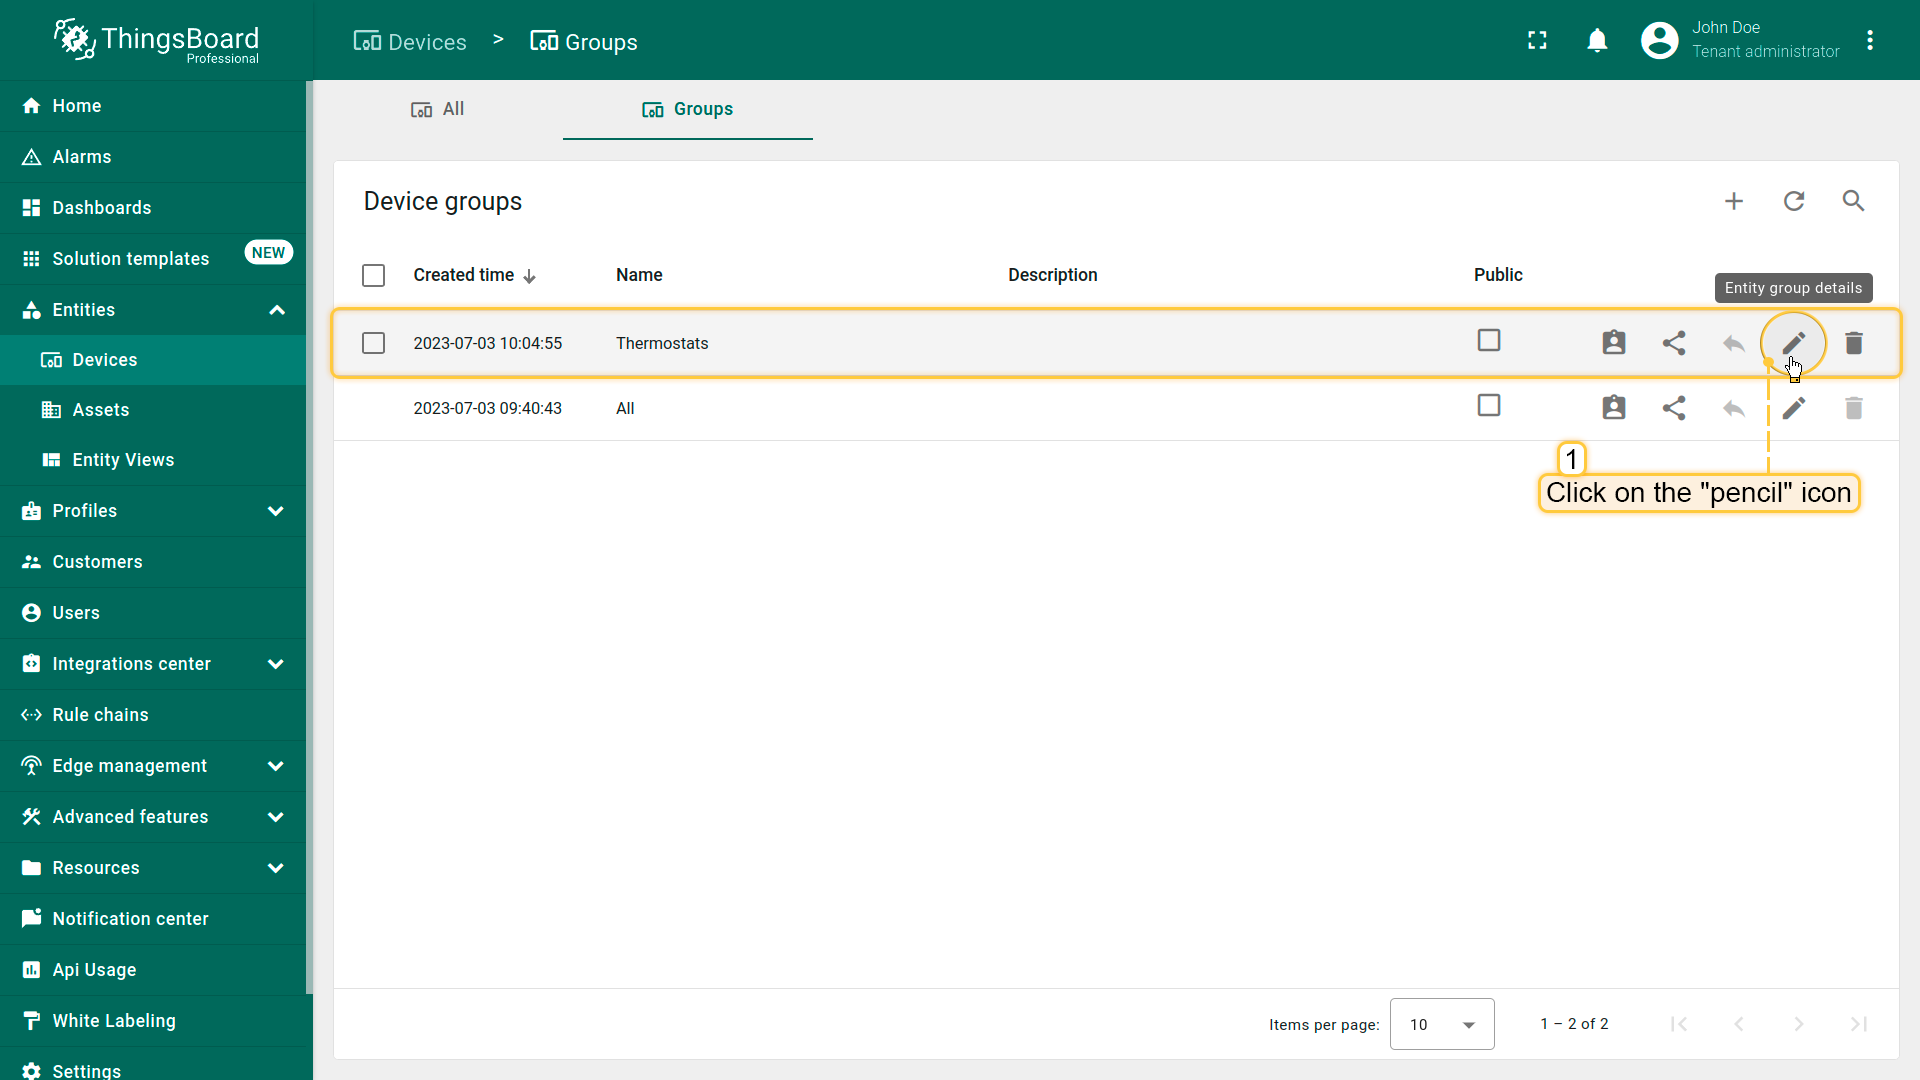
方式二:
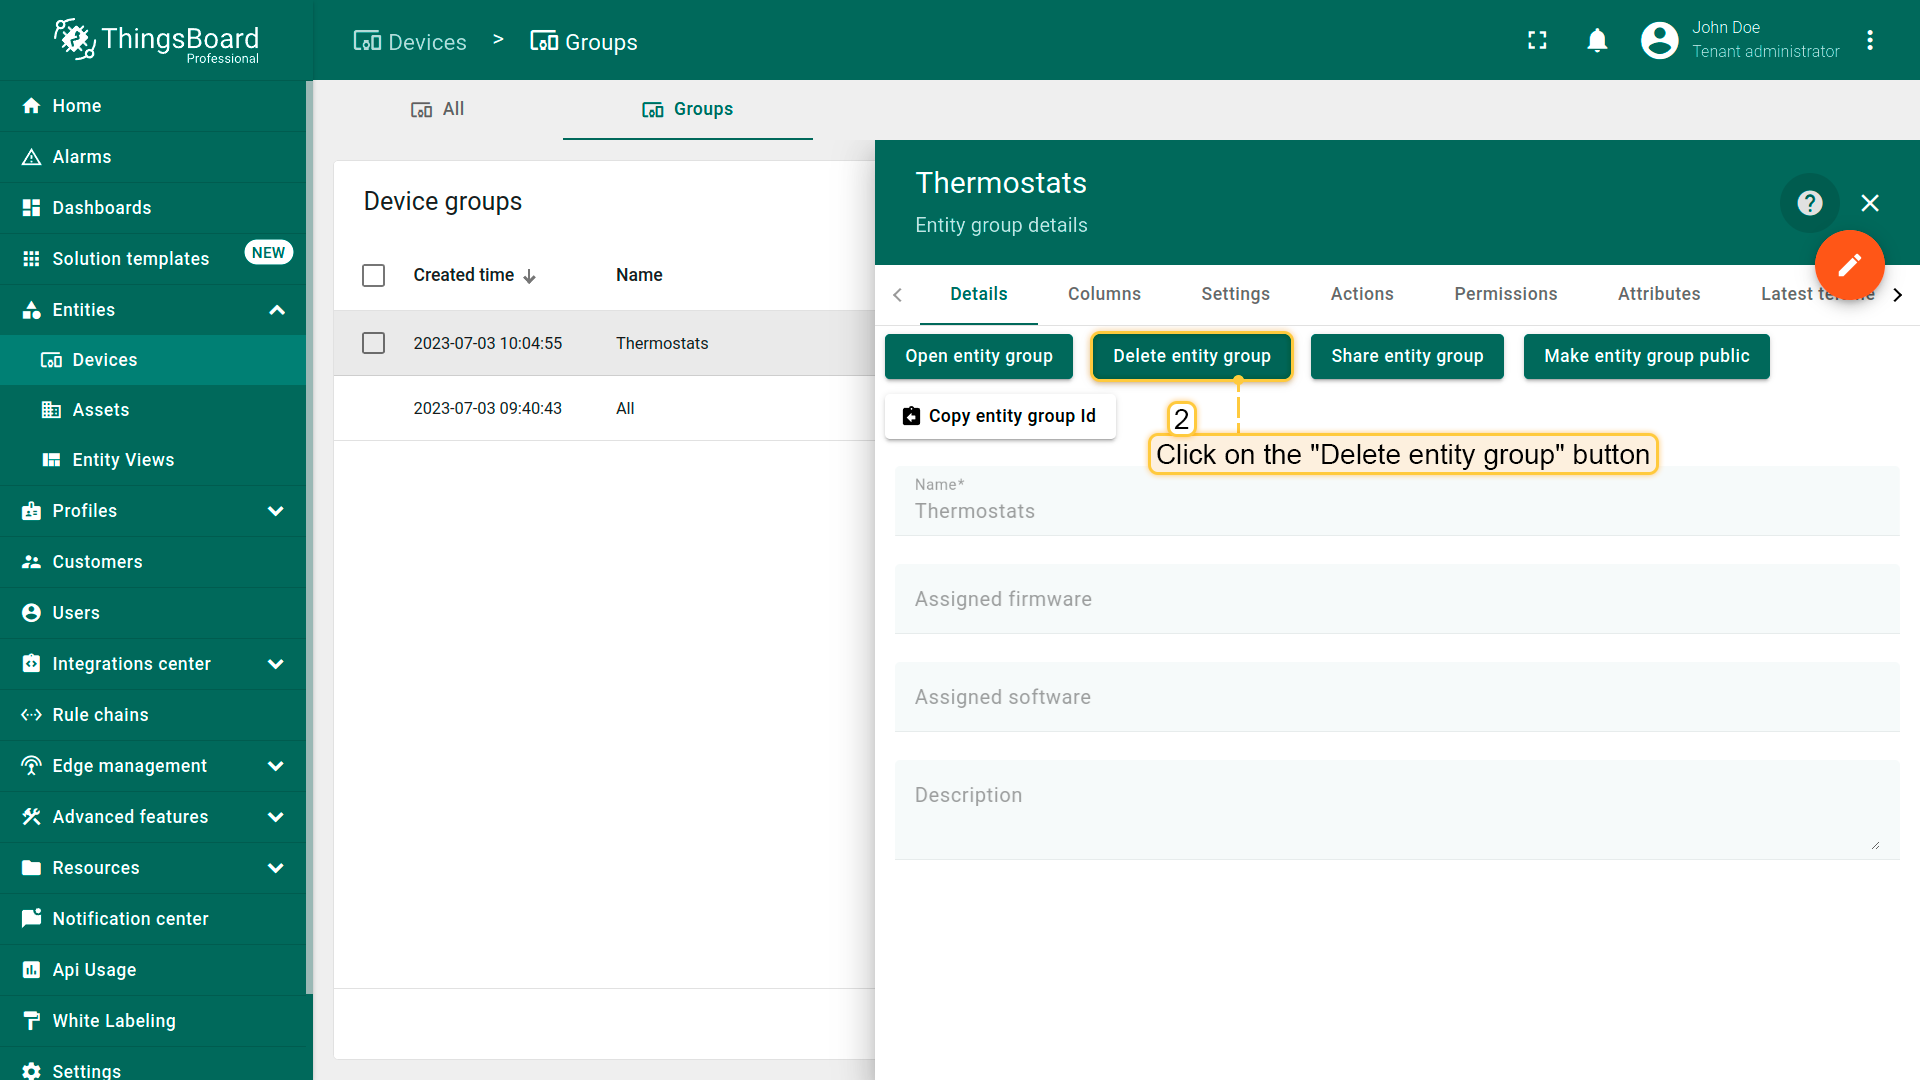
- Click the "pencil" icon located in the group's row to open entity group details;
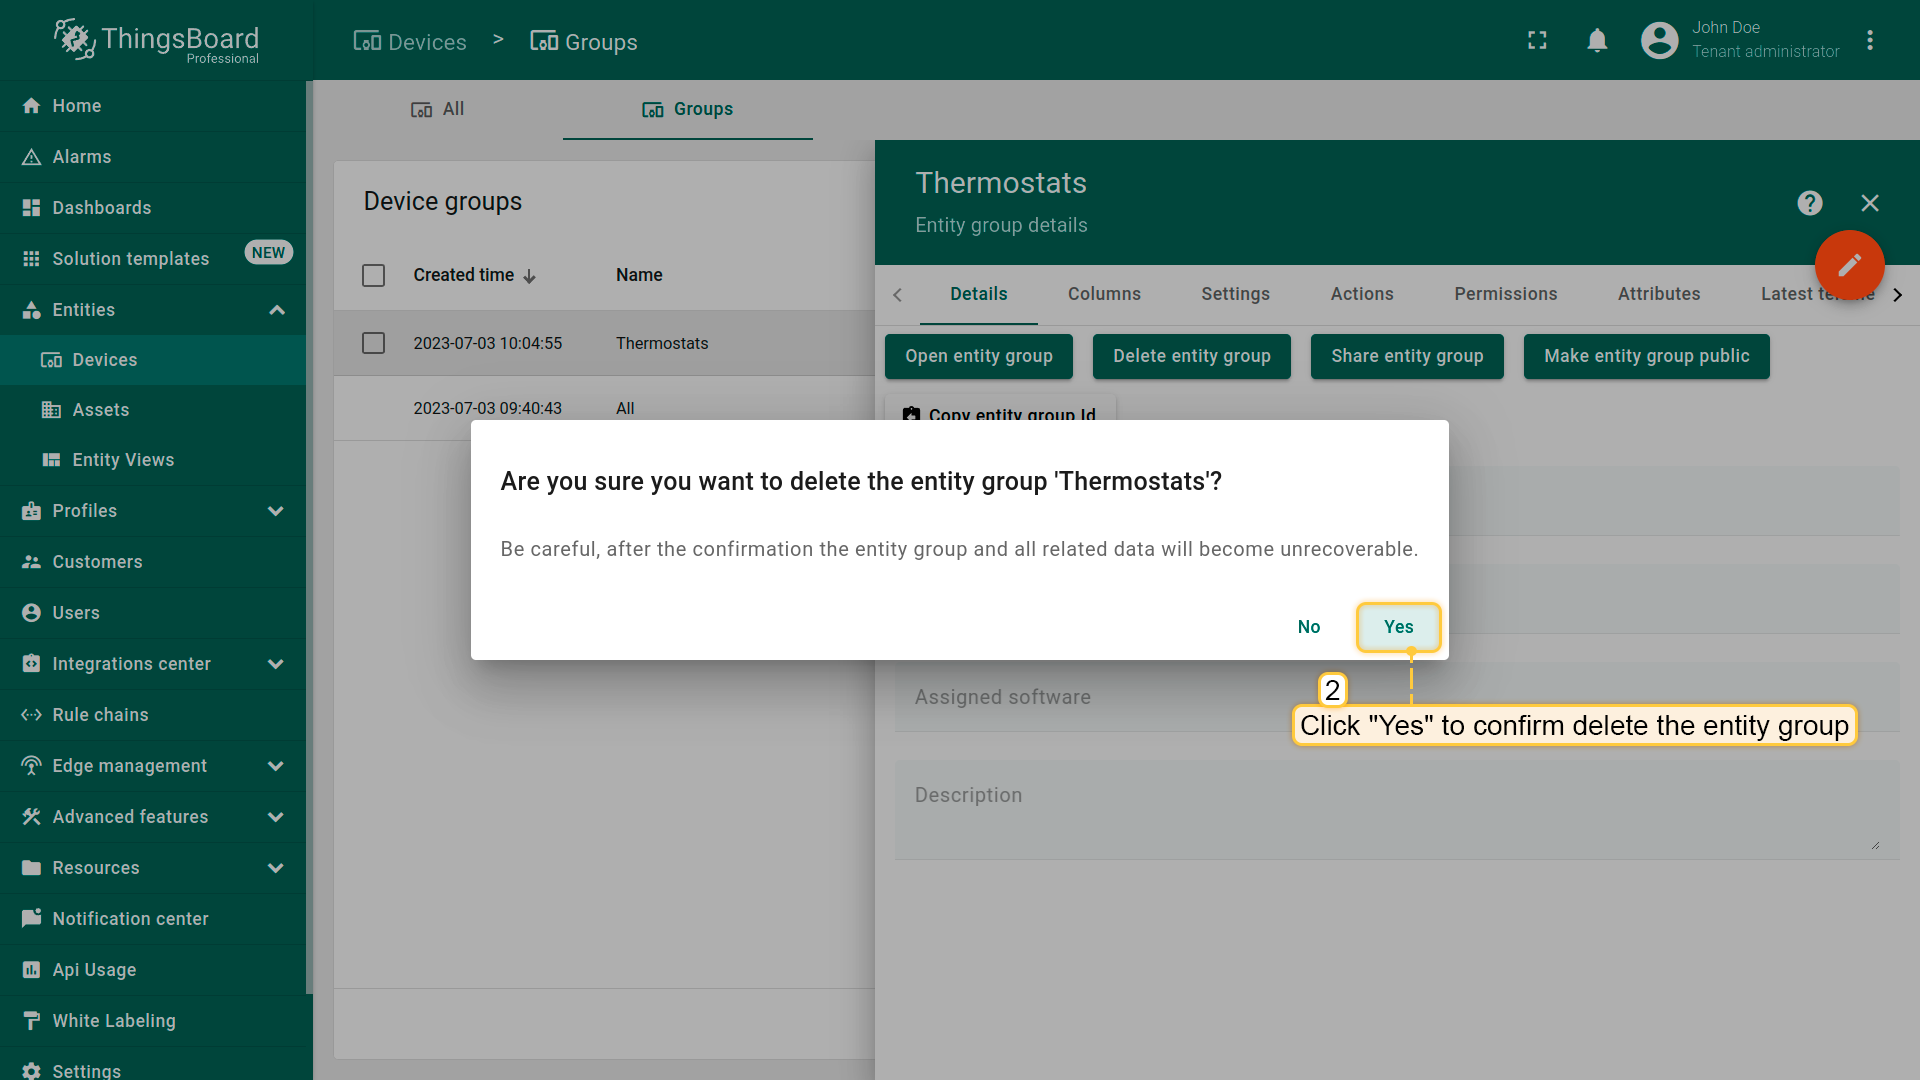
- Click on the "Delete entity group" button in the entity group details;
- Confirm deleting the entity group in the dialog box.
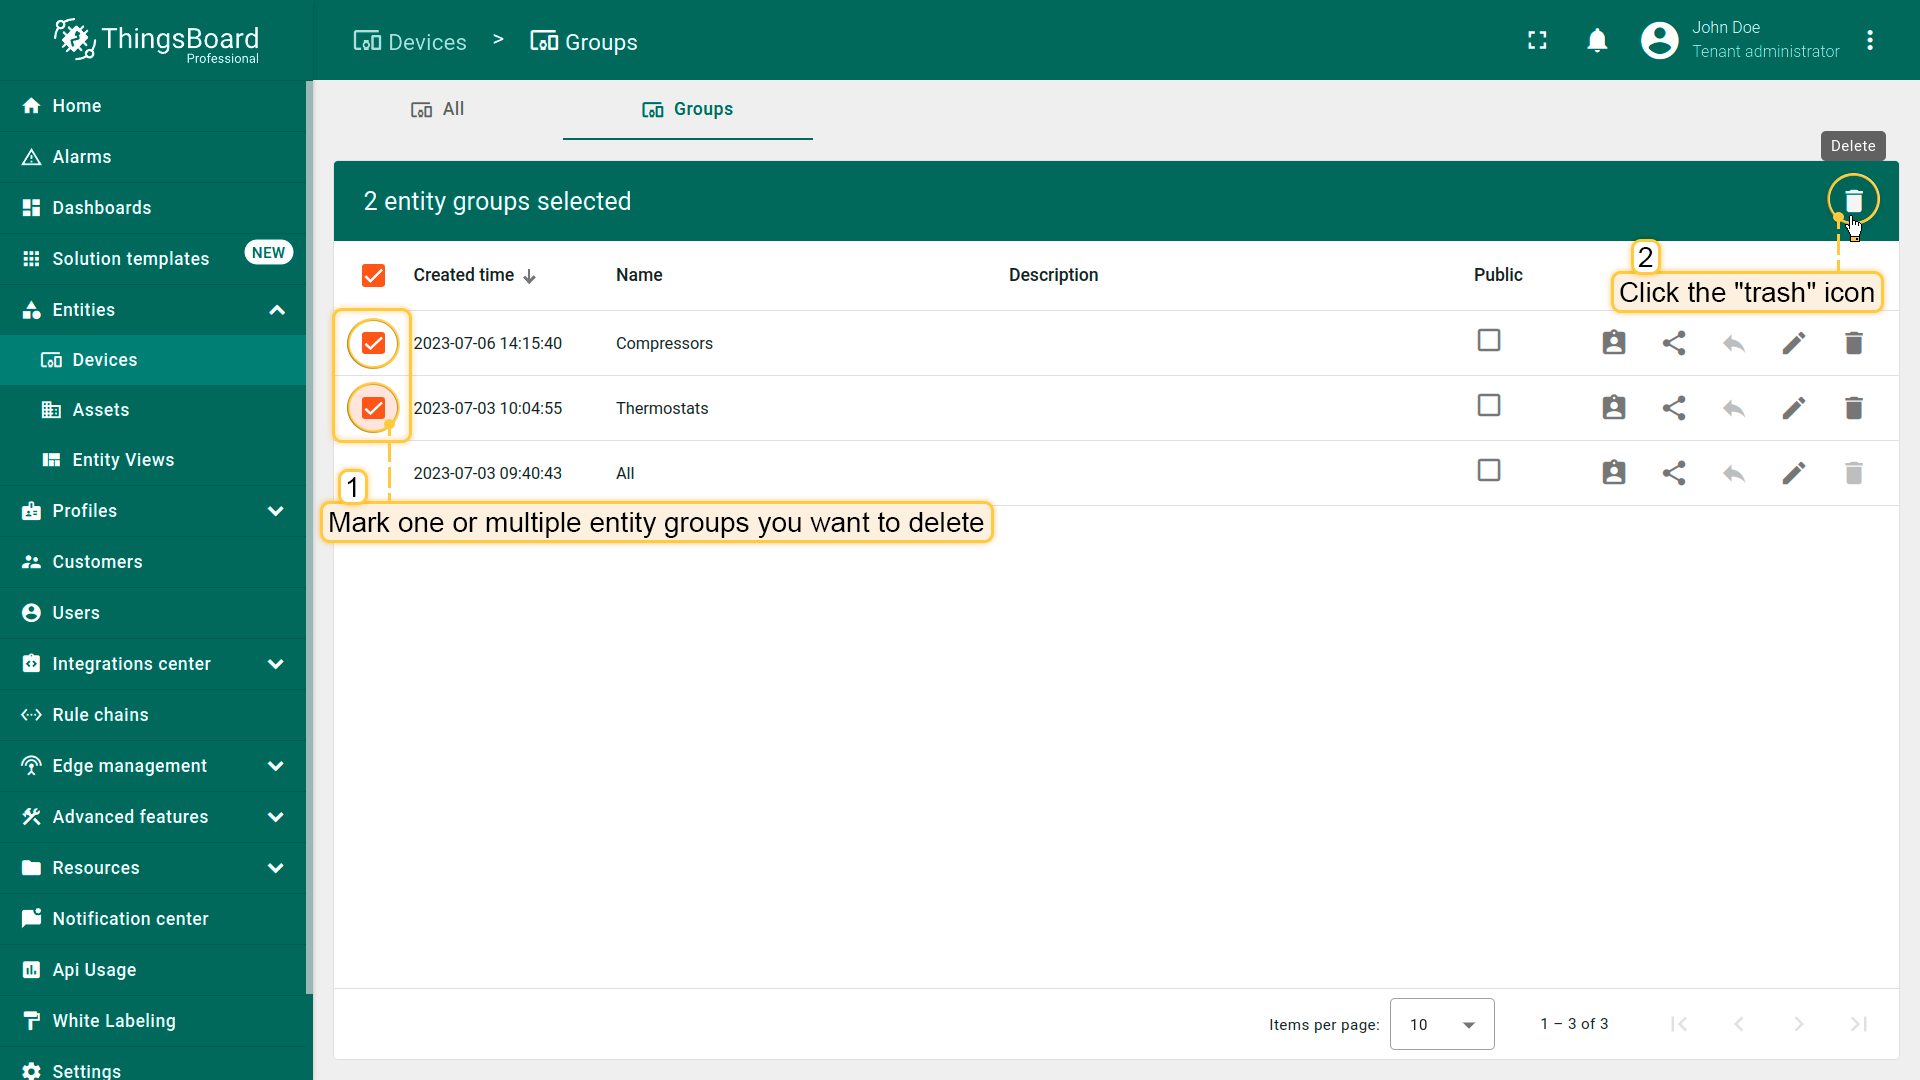
您和客户也可一次性删除多个实体组。
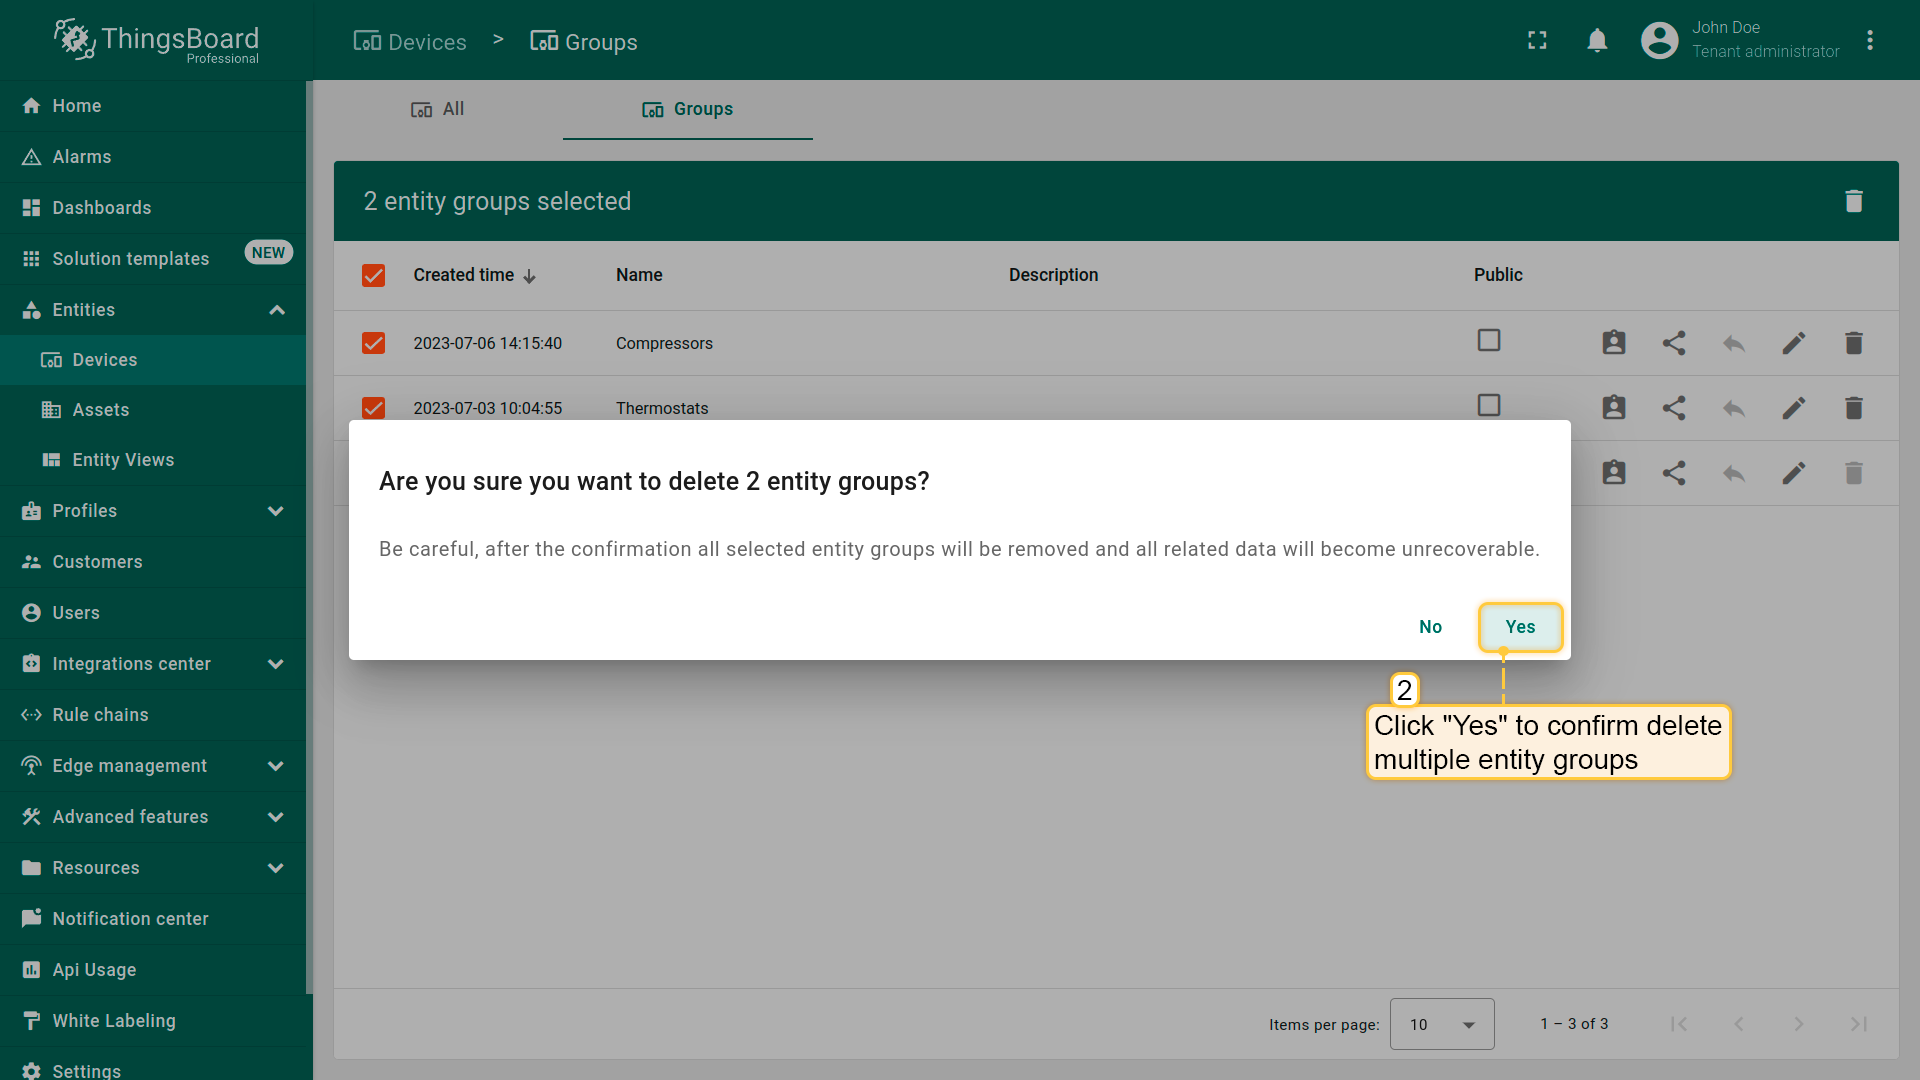
- Mark one or multiple groups you want to delete. Click on the trash bin icon in the top right corner;
- Confirm deleting entity groups in the dialog box.
视频教程
观看详细视频教程,了解如何按需配置实体组。