
Intro/Short summary
This article contains instructions on how to configure ThingsBoard PE platform and connect KERNEL devices. ThingsBoard PE platform is an open-source IoT platform for data collection, processing, visualization, and device management. It enables device connectivity via industry standard MQTT protocol. ThingsBoard combines scalability, fault-tolerance and performance so you will never lose your data.
Note
This procedure applies to all KERNEL PLCs with the ARM microprocessor equipped with an Ethernet port.
Integration flow:
Step 1 ThingsBoard : Device configuration
-
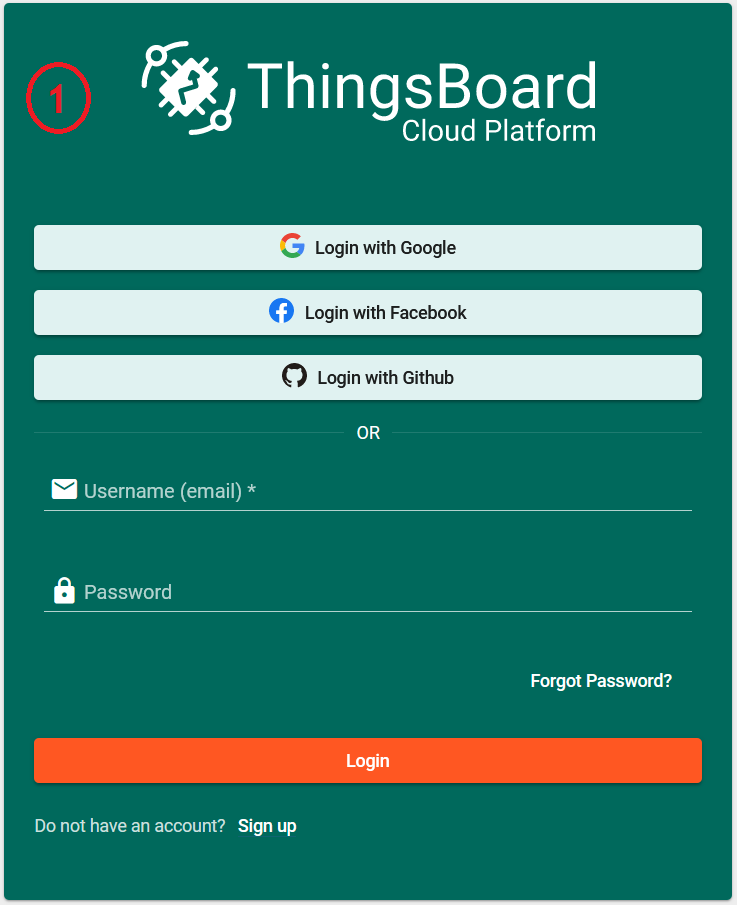
[Step 1.1] Login to your ThingsBoard instance.
-
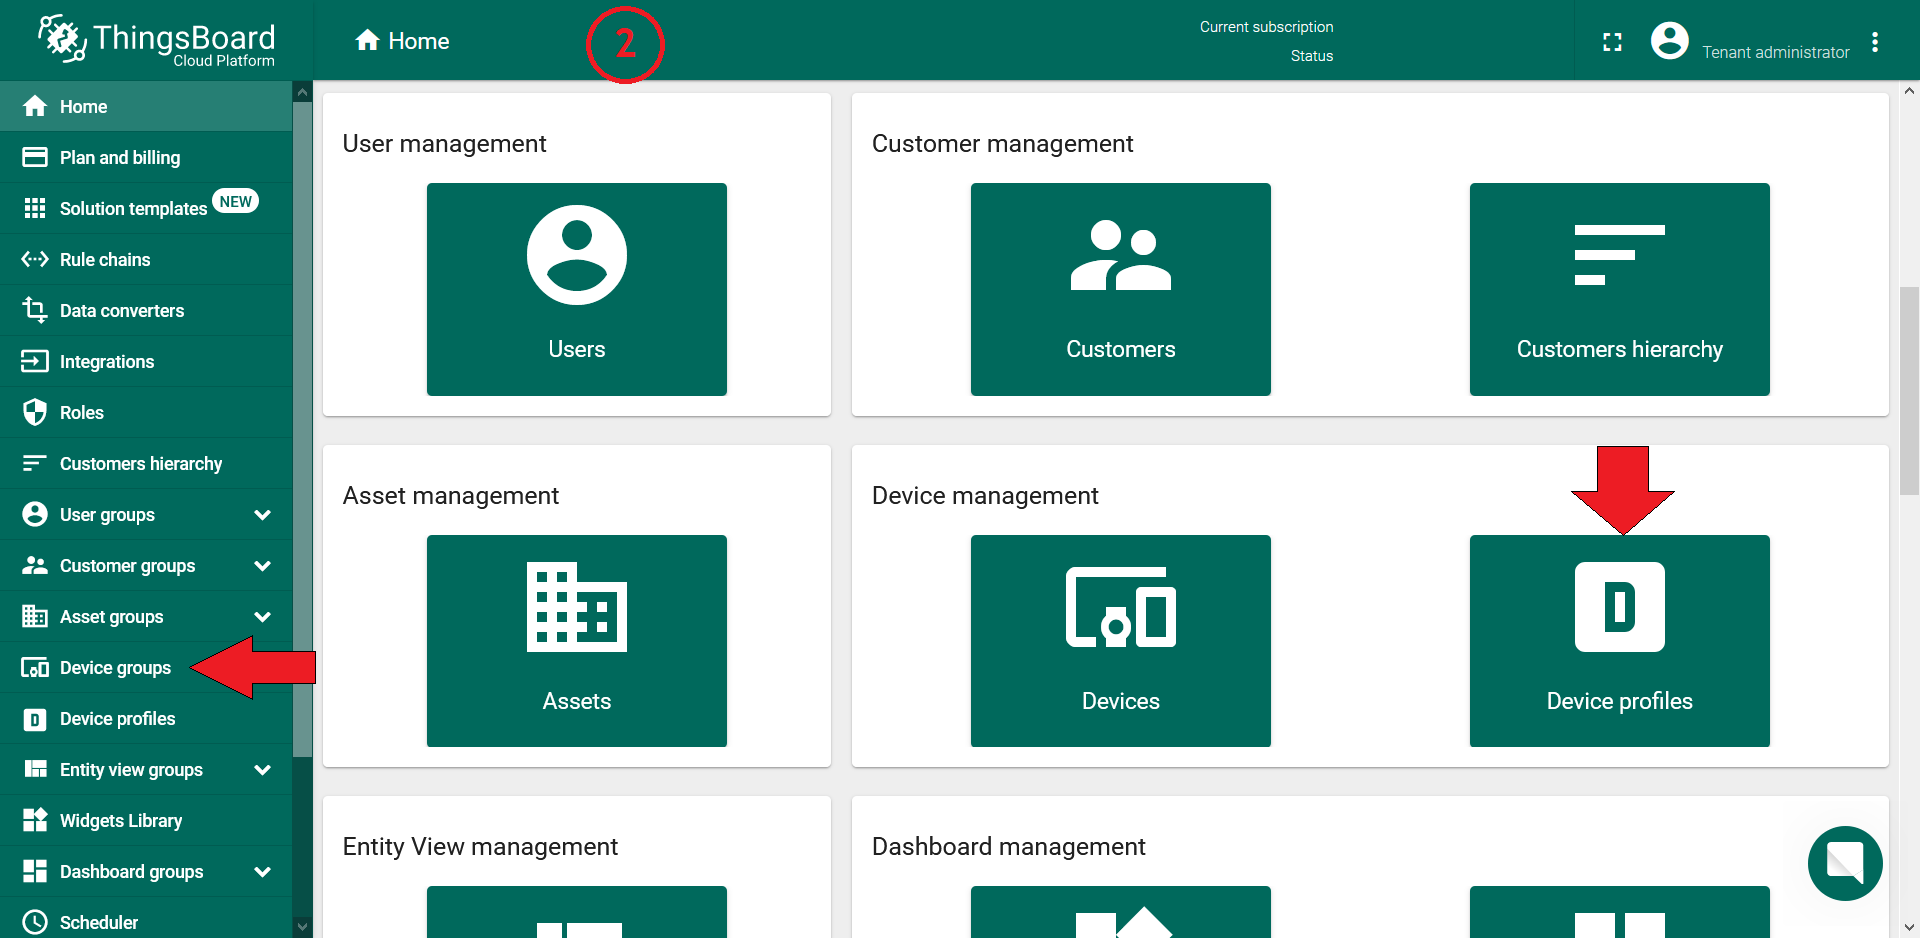
[Step 1.2] Open “Device Groups” page.
-
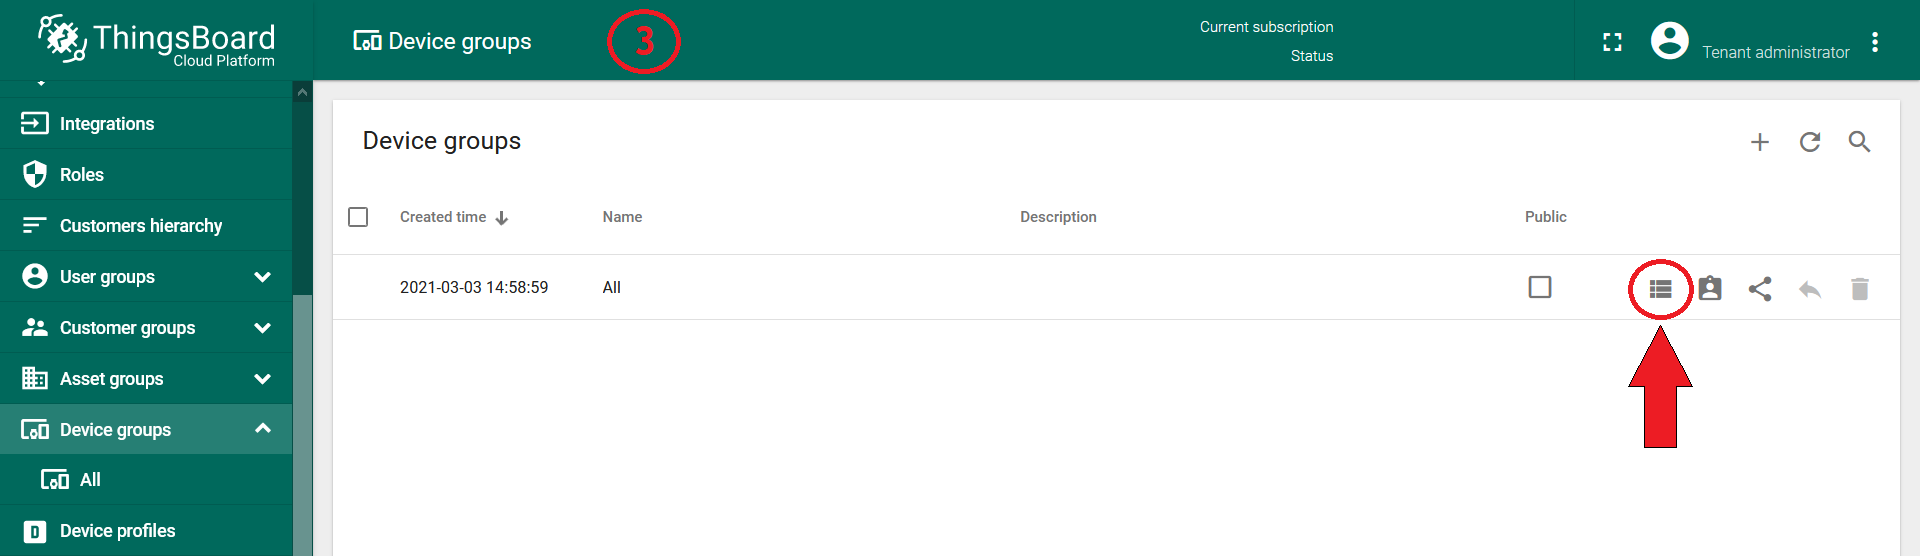
[Step 1.3] Navigate to default Device group “ALL”.
-
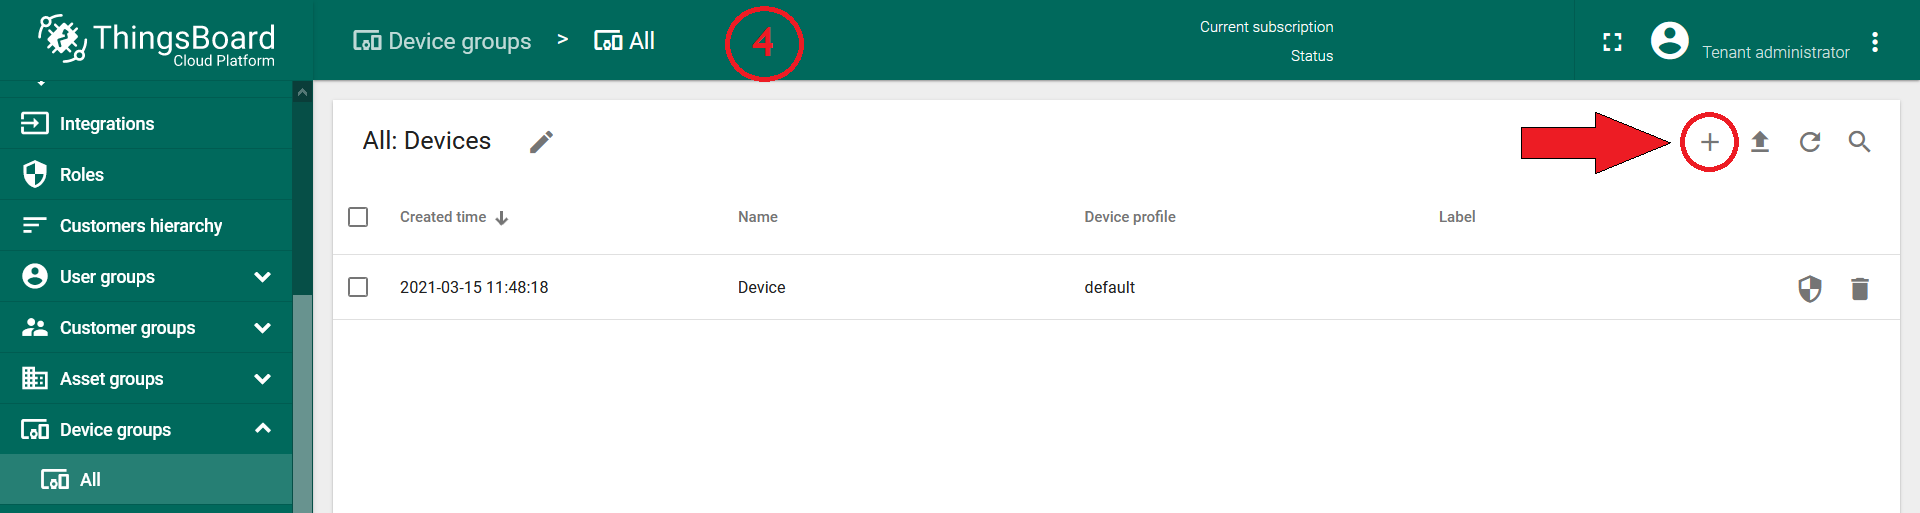
[Step 1.4] Click on the “+” icon in the top right corner of the table and then select “Add Device”.
-
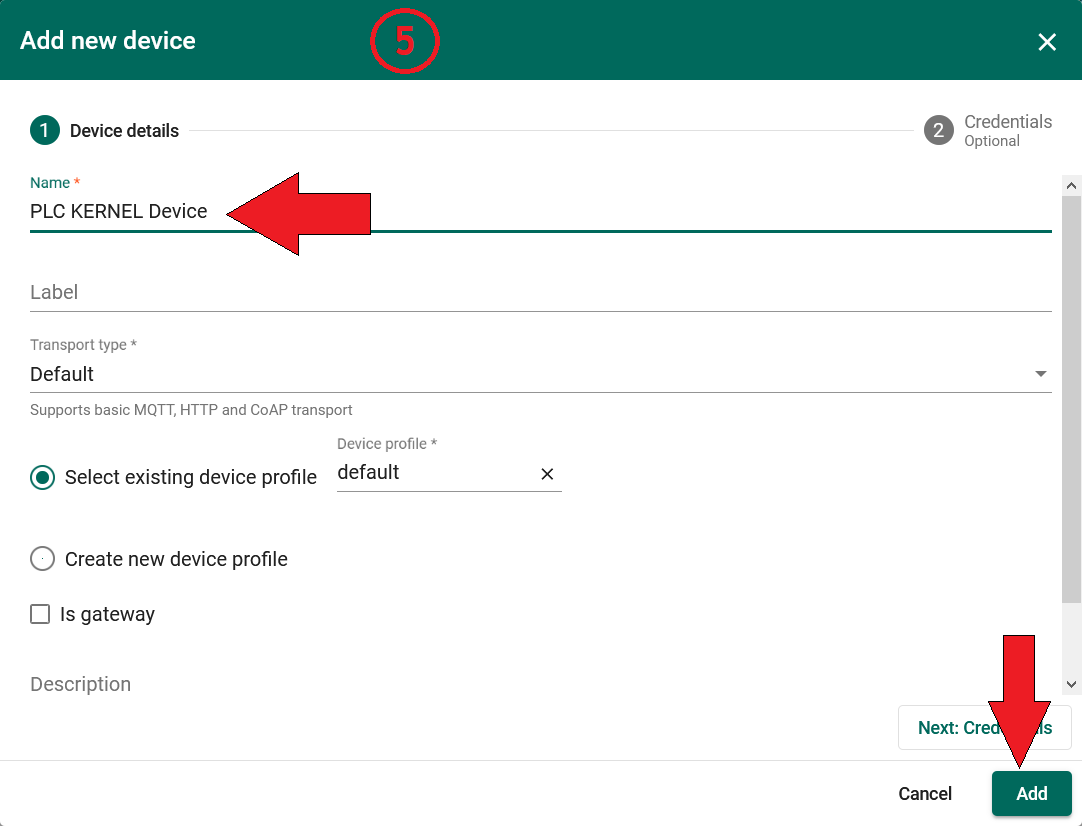
[Step 1.4a] Input device name. For example, “PLC KERNEL Device”. No other changes are required at this time. Click “Add” to add the device.
-
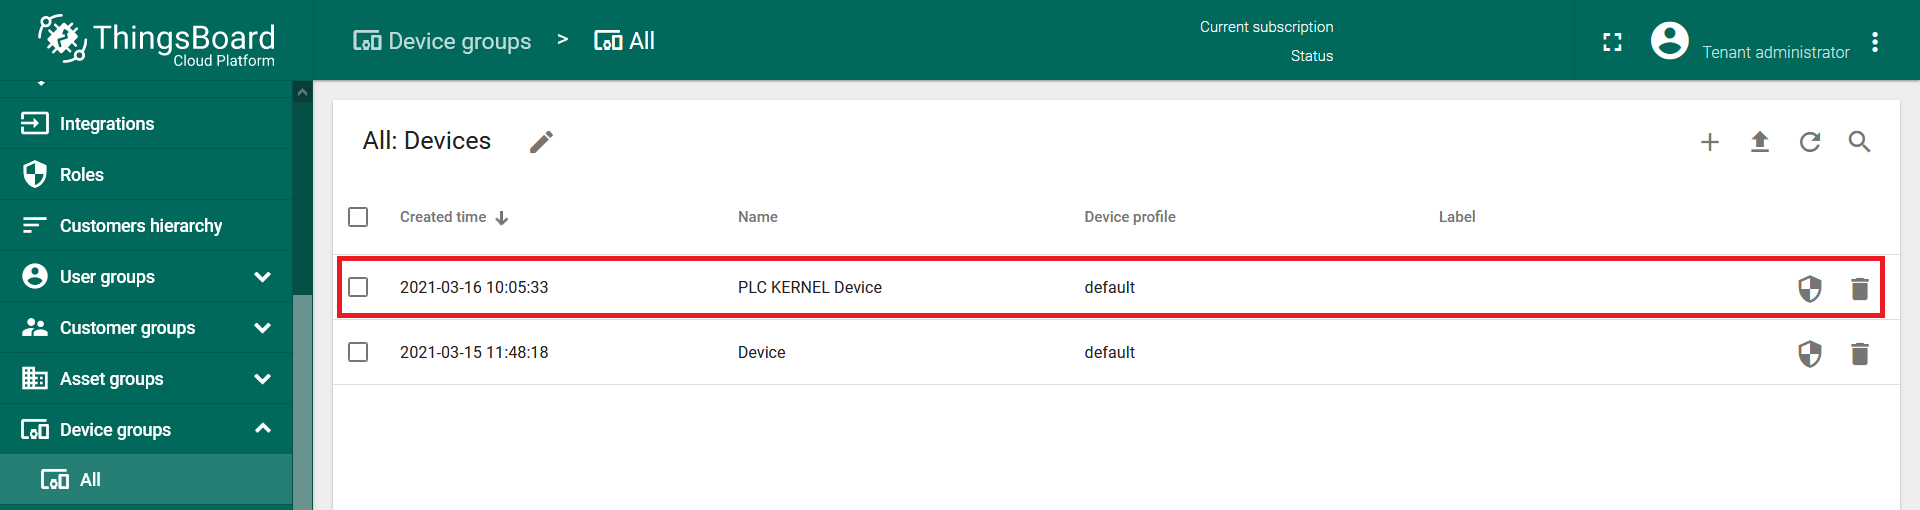
[Step 1.5] Now your device should be listed first, since the table sorts devices using the time of the creation by default.
Step 2 LogiPaint configuration
To connect the PLC KERNEL device you need to get the device credentials first. ThingsBoard supports various device credentials. We recommend using the default auto-generated credentials which is an access token for this guide.
-
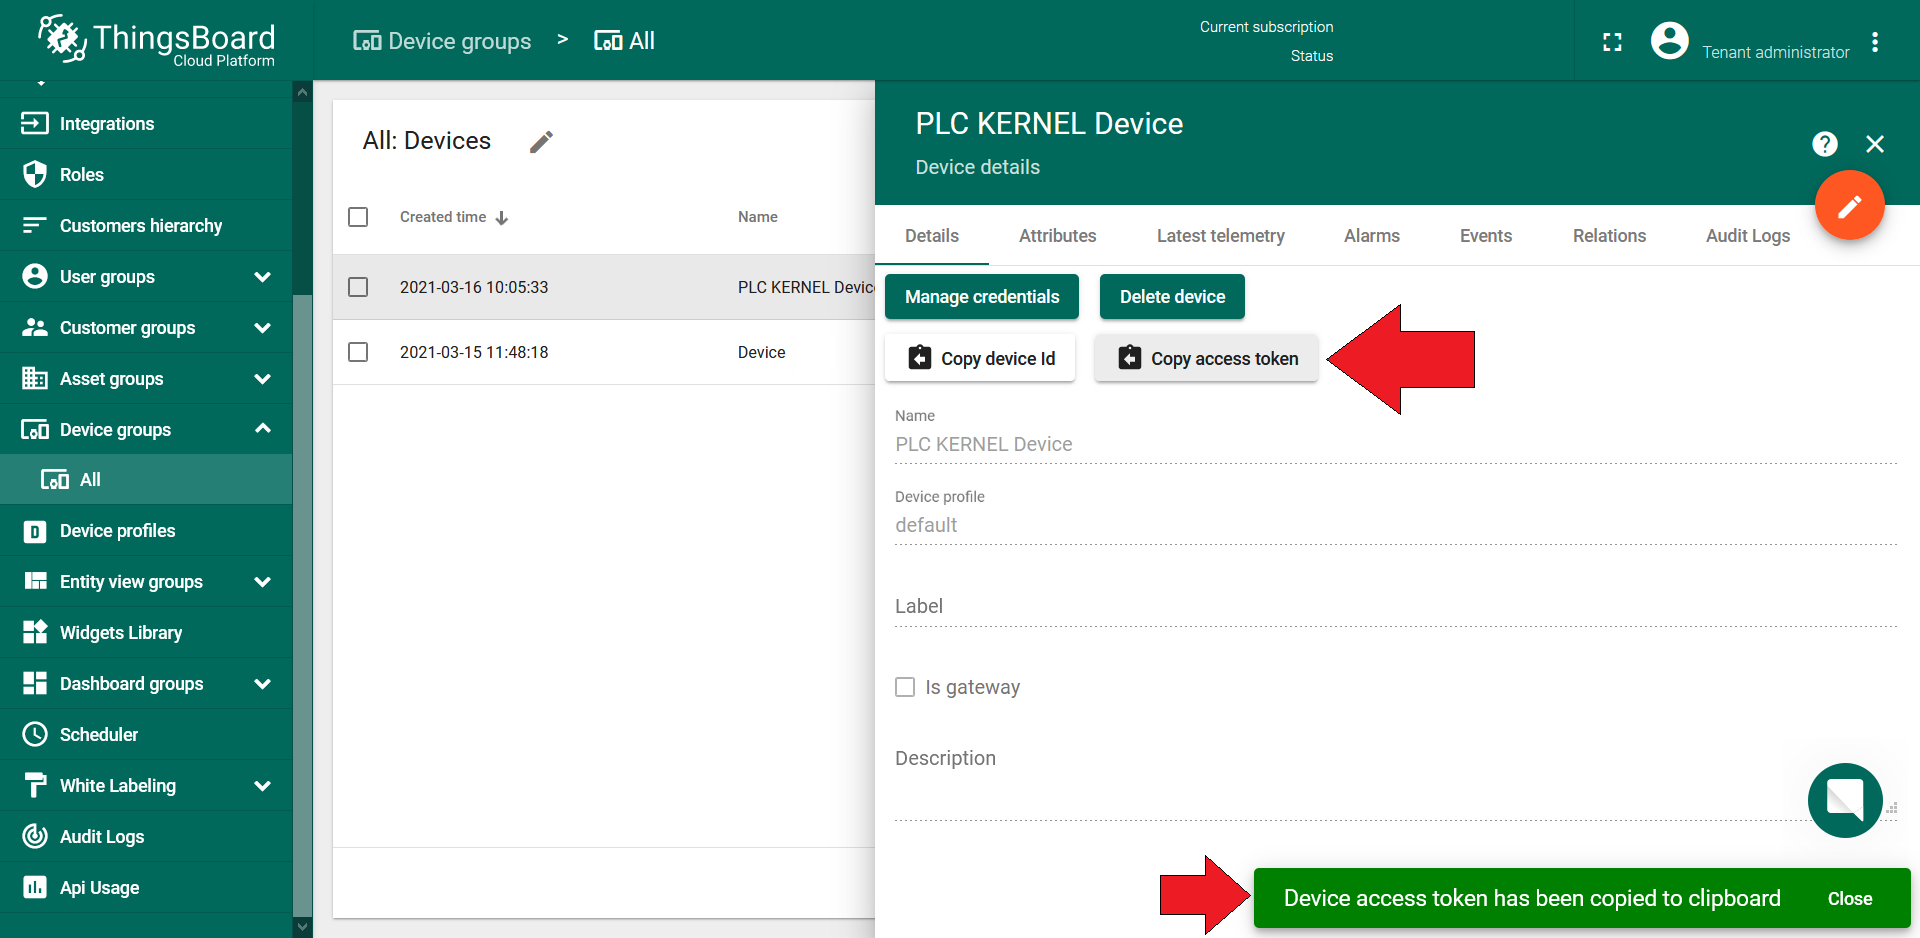
[Step 2.1] Click on the device row in the table to open device details.
-
[Step 2.2] Click “Copy access token”. Token will be copied to your clipboard. Save it to a safe place.
-
[Step 2.3] Open “LogicPaint”.

-
[Step 2.4] Connect PLC KERNEL to PC (via Serial).
-
[Step 2.5] Open menu “File” » “Show Ethernet Port Configuration”.

-
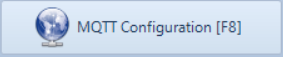
[Step 2.6] Press the button “MQTT Configuration” :
-
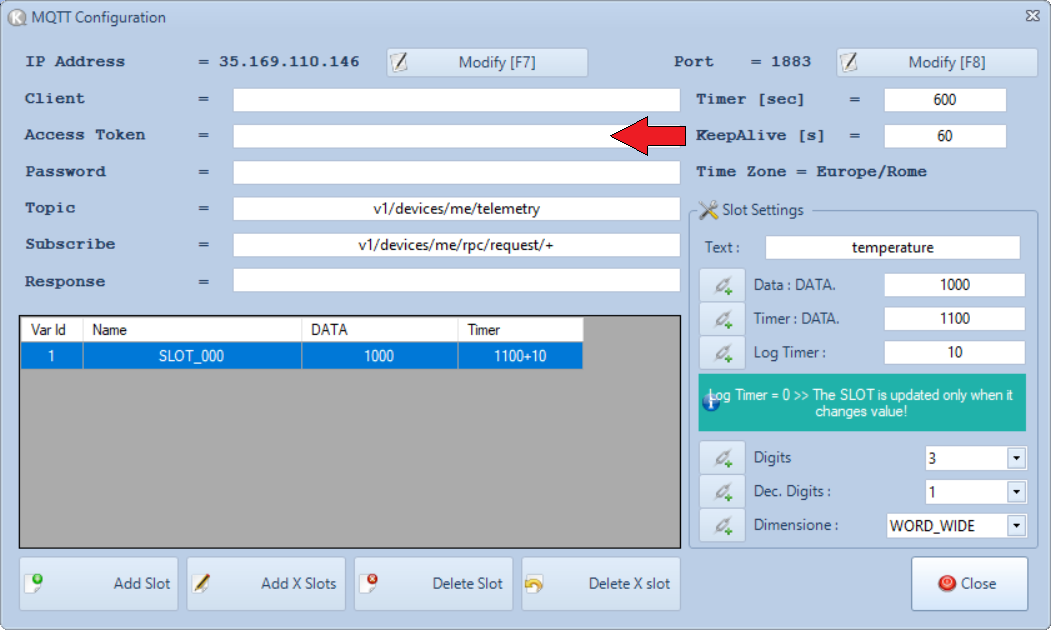
[Step 2.7] Paste the copied access token into the indicated box :
-
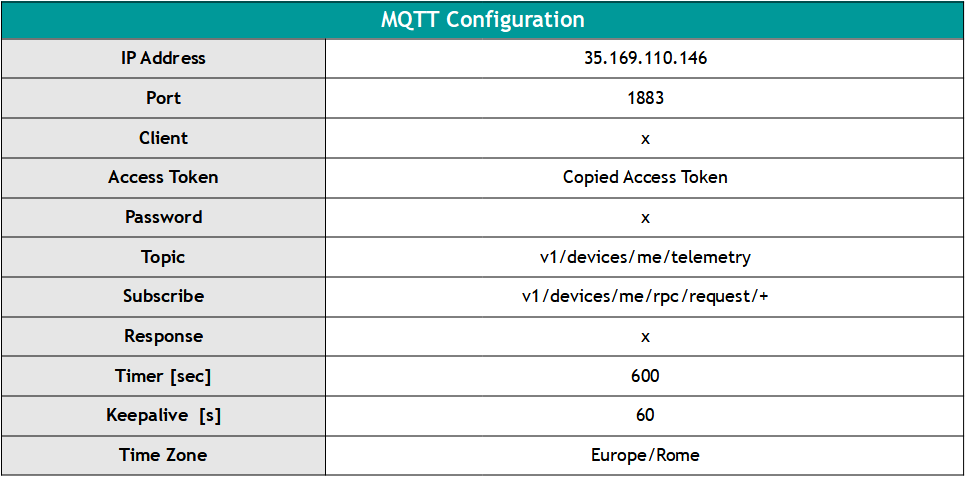
[Step 2.8] Enter the following fields :
-
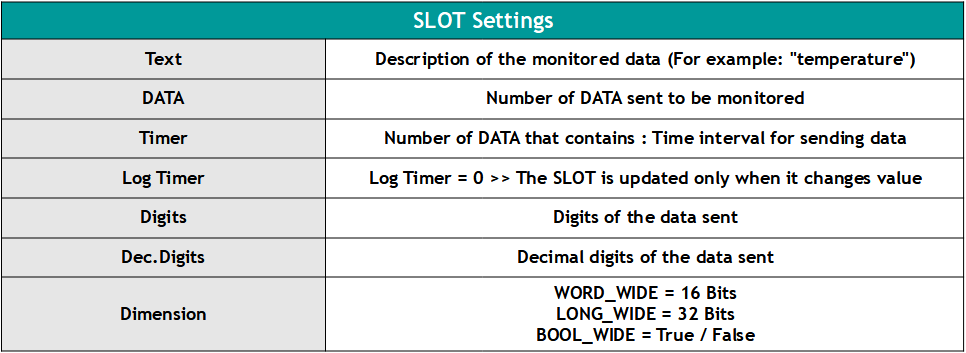
[Step 2.9] Add a slot for each value that needs to be monitored :
-
[Step 2.10] Close the 2 open windows with the CLOSE button.
-
[Step 2.11] Finally compile and send the application to the KERNEL PLC with the “Compile + Send Application” button.
-
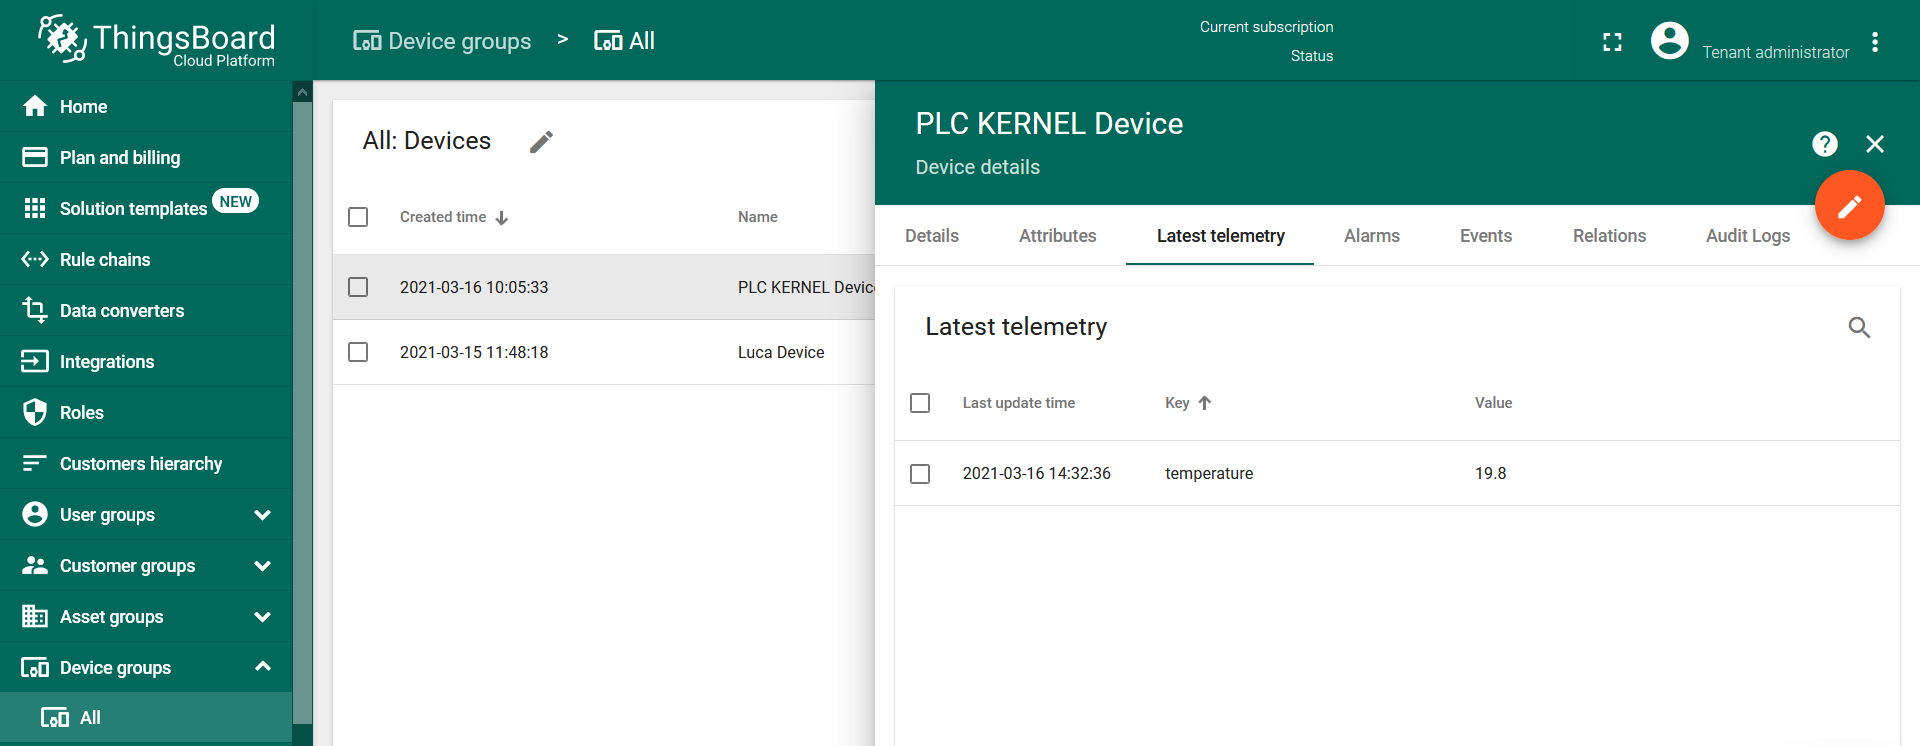
[Step 2.12] Once you have successfully published the “temperature” readings, you should immediately see them in the Device Telemetry Tab. Click on the device row in the table to open device details :
-
[Step 2.13] Navigate to the “Latest telemetry” tab :
Step 3 Create dashboard
Finally, the only thing left to do, is create a Dashboard according to your needs. Dashboards are used to collect and display the data set. Data visualization is achieved through a large variety of widgets. Explore guides related to main ThingsBoard features:
- Create Dashboard - how to create a new dashboard.
- Working with IoT dashboards - how to work with dashboards.
Next steps
-
入门指南 - 快速学习ThingsBoard相关功能。
-
安装指南 - 学习如何在各种操作系统上安装ThingsBoard。
-
连接设备 - 学习如何根据你的连接方式或解决方案连接设备。
-
可 视 化 - 学习如何配置复杂的ThingsBoard仪表板说明。
-
数据处理 - 学习如何使用ThingsBoard规则引擎。
-
数据分析 - 学习如何使用规则引擎执行基本的分析任务。
-
高级功能 - 学习高级ThingsBoard功能。
-
开发指南 - 学习ThingsBoard中的贡献和开发。
