Introduction
In this guide we show step-by-step an integration of Things On Edge - Cricket Wi-Fi module to ThingsBoard. In a few steps we make a Wi-Fi battery powered sensor and visualise its data in ThingsBoard without coding and programing. It can be any type of sensor but in this sample we make a Temperature sensor.
We walk through the following steps:
1) Making a battery powered Wi-Fi sensor
2) Connecting the sensor to WiFi network
3) Configuring the sensor to send data to ThingsBoard
Things On Edge
Things On Edge designs an easy to use, ultra-low power Cricket Wi-Fi modules. They are designed to make fast & easy IOT end nodes such as sensors, buttons, switches etc.; power them directly on batteries for a very long time; and integrate to a huge ecosystem of software and internet services. All this without writing a single line of code.


Prerequisites
Hardware
- Things On Edge - Cricket Wi-Fi module
- 2xAAA battery holder
- 2xAAA batteries
Make a battery powered Wi-Fi sensor
Cricket WiFi module comes with a built-in temperature sensor. In this example we do not need any other hardware peripherals. However, in order to get more accurate temperature readings it is highly recommended to use external sensors e.g. DS18B20/+
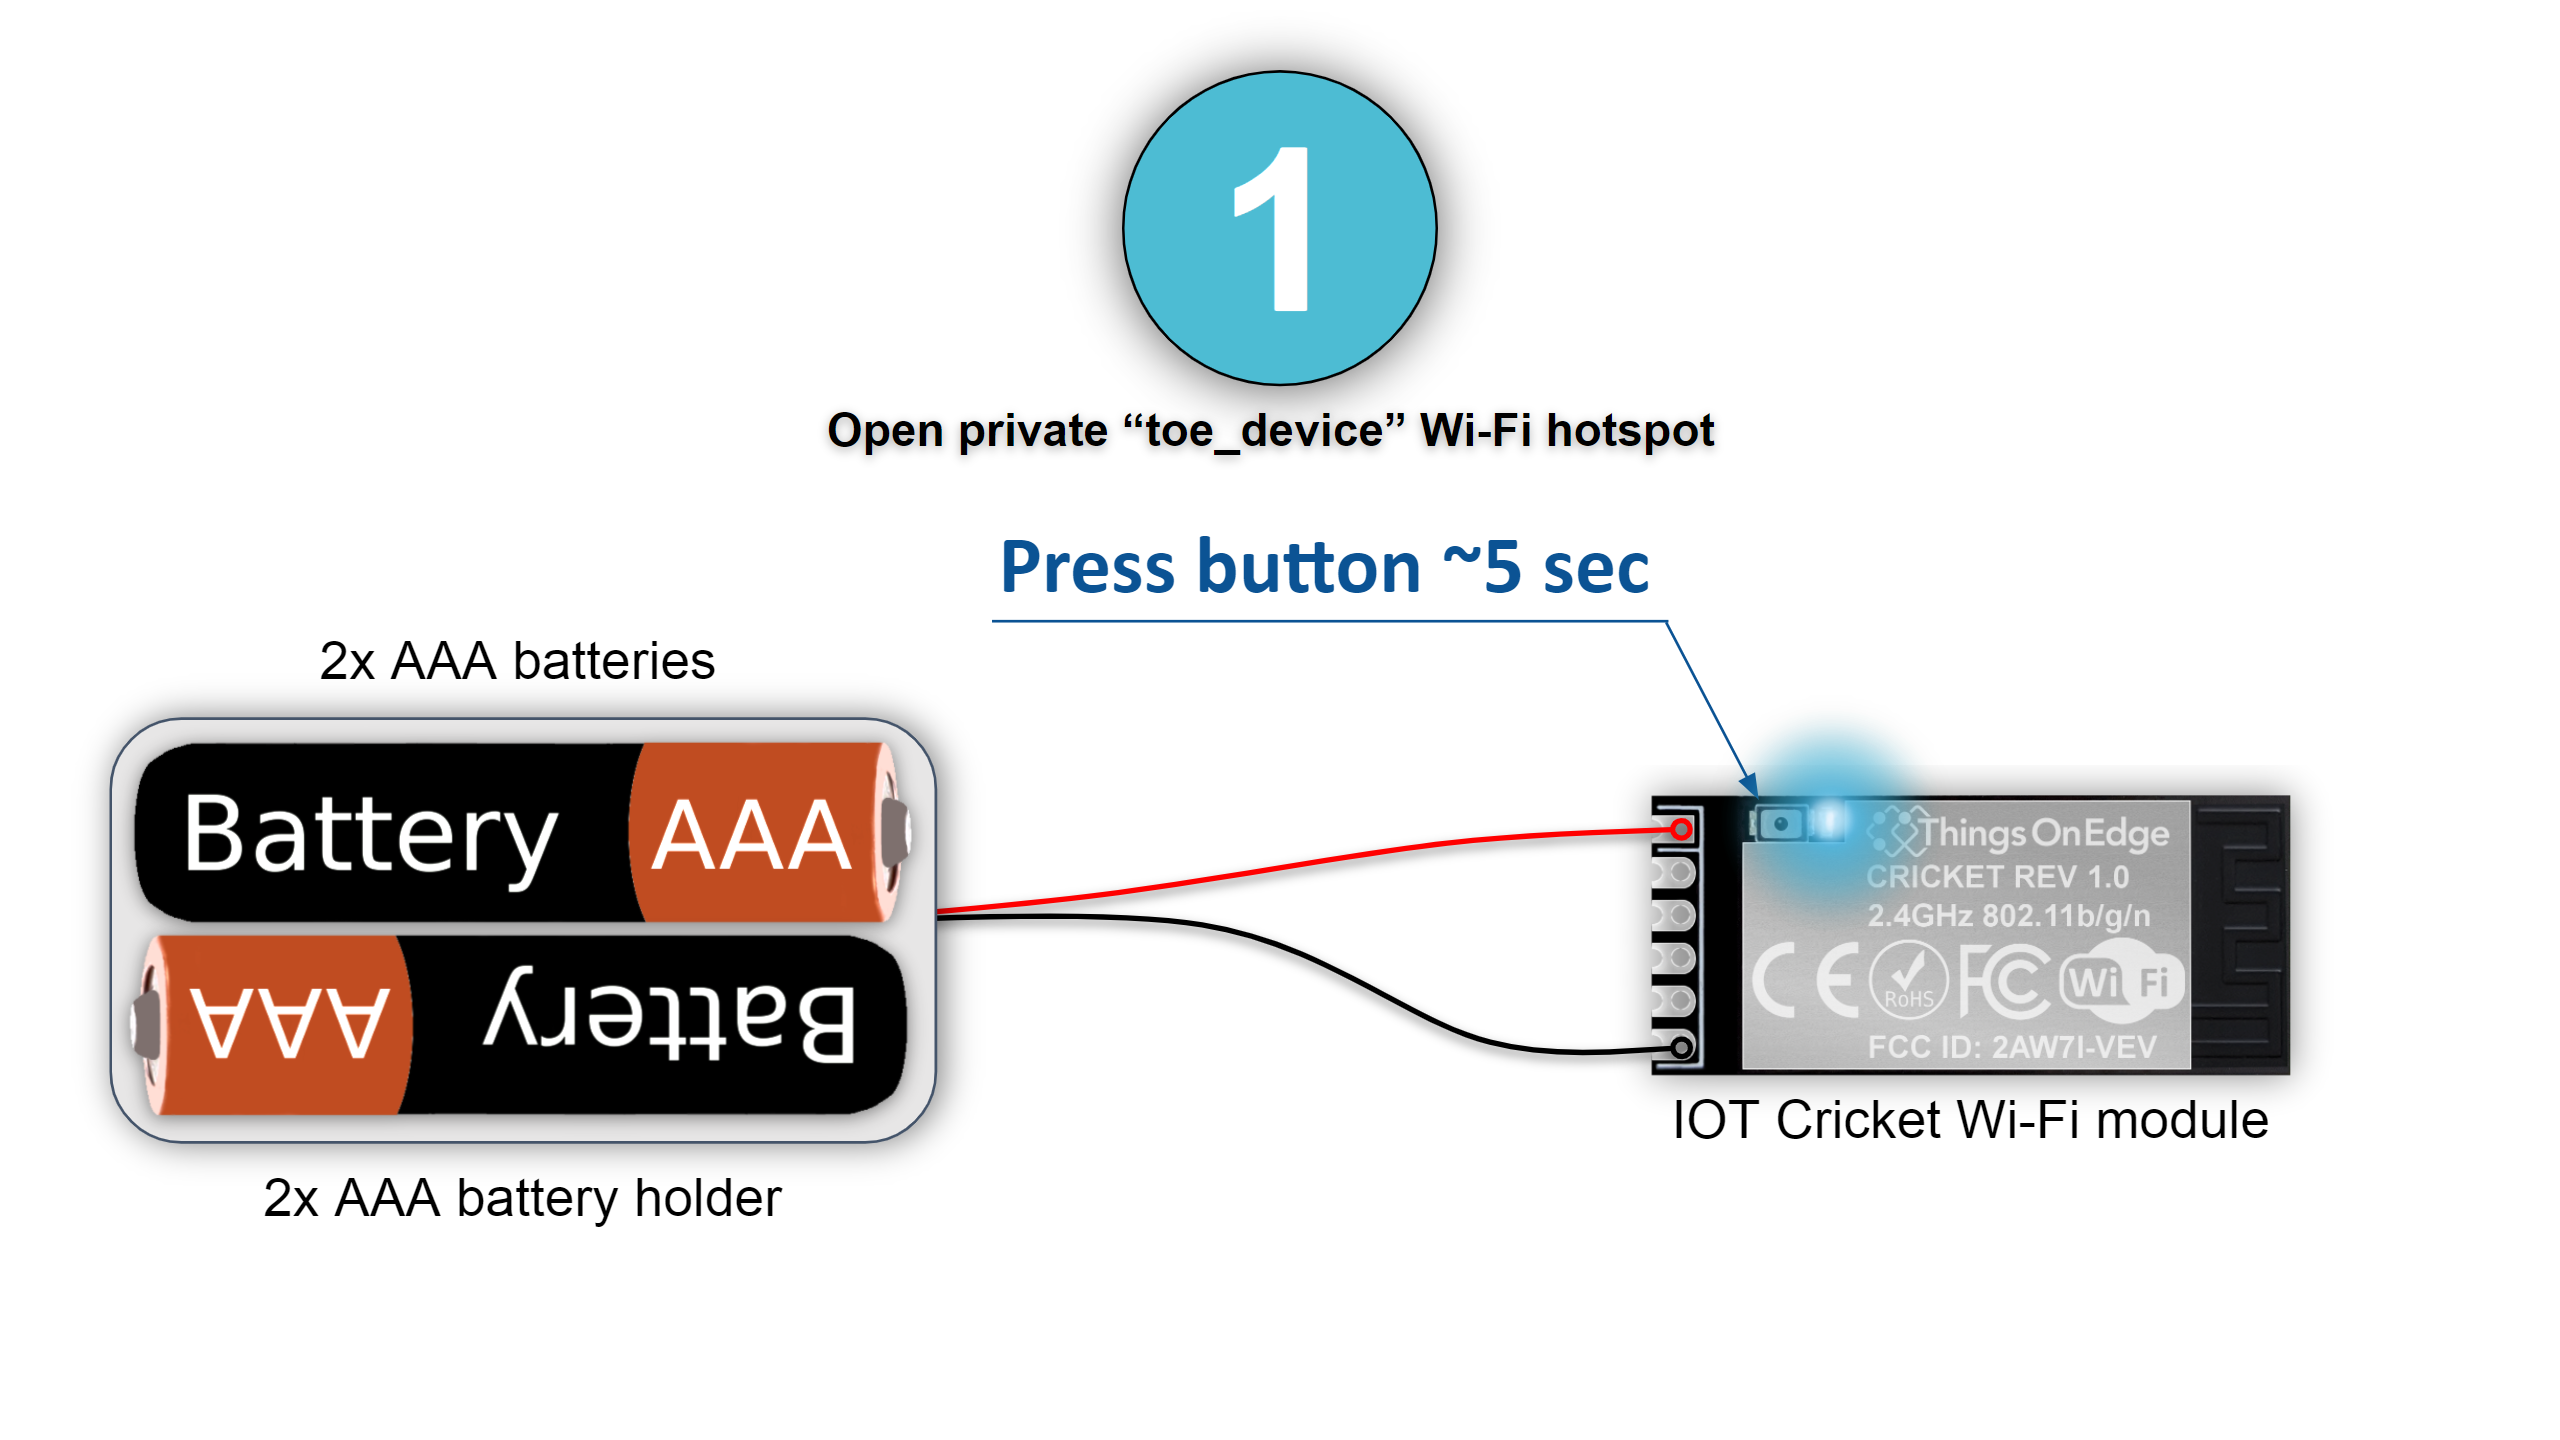
In this example we simply attach batteries to the Cricket Wi-Fi module and the device is ready to go. Note: please use fresh and good quality batteries e.g. Duracel, Energizer

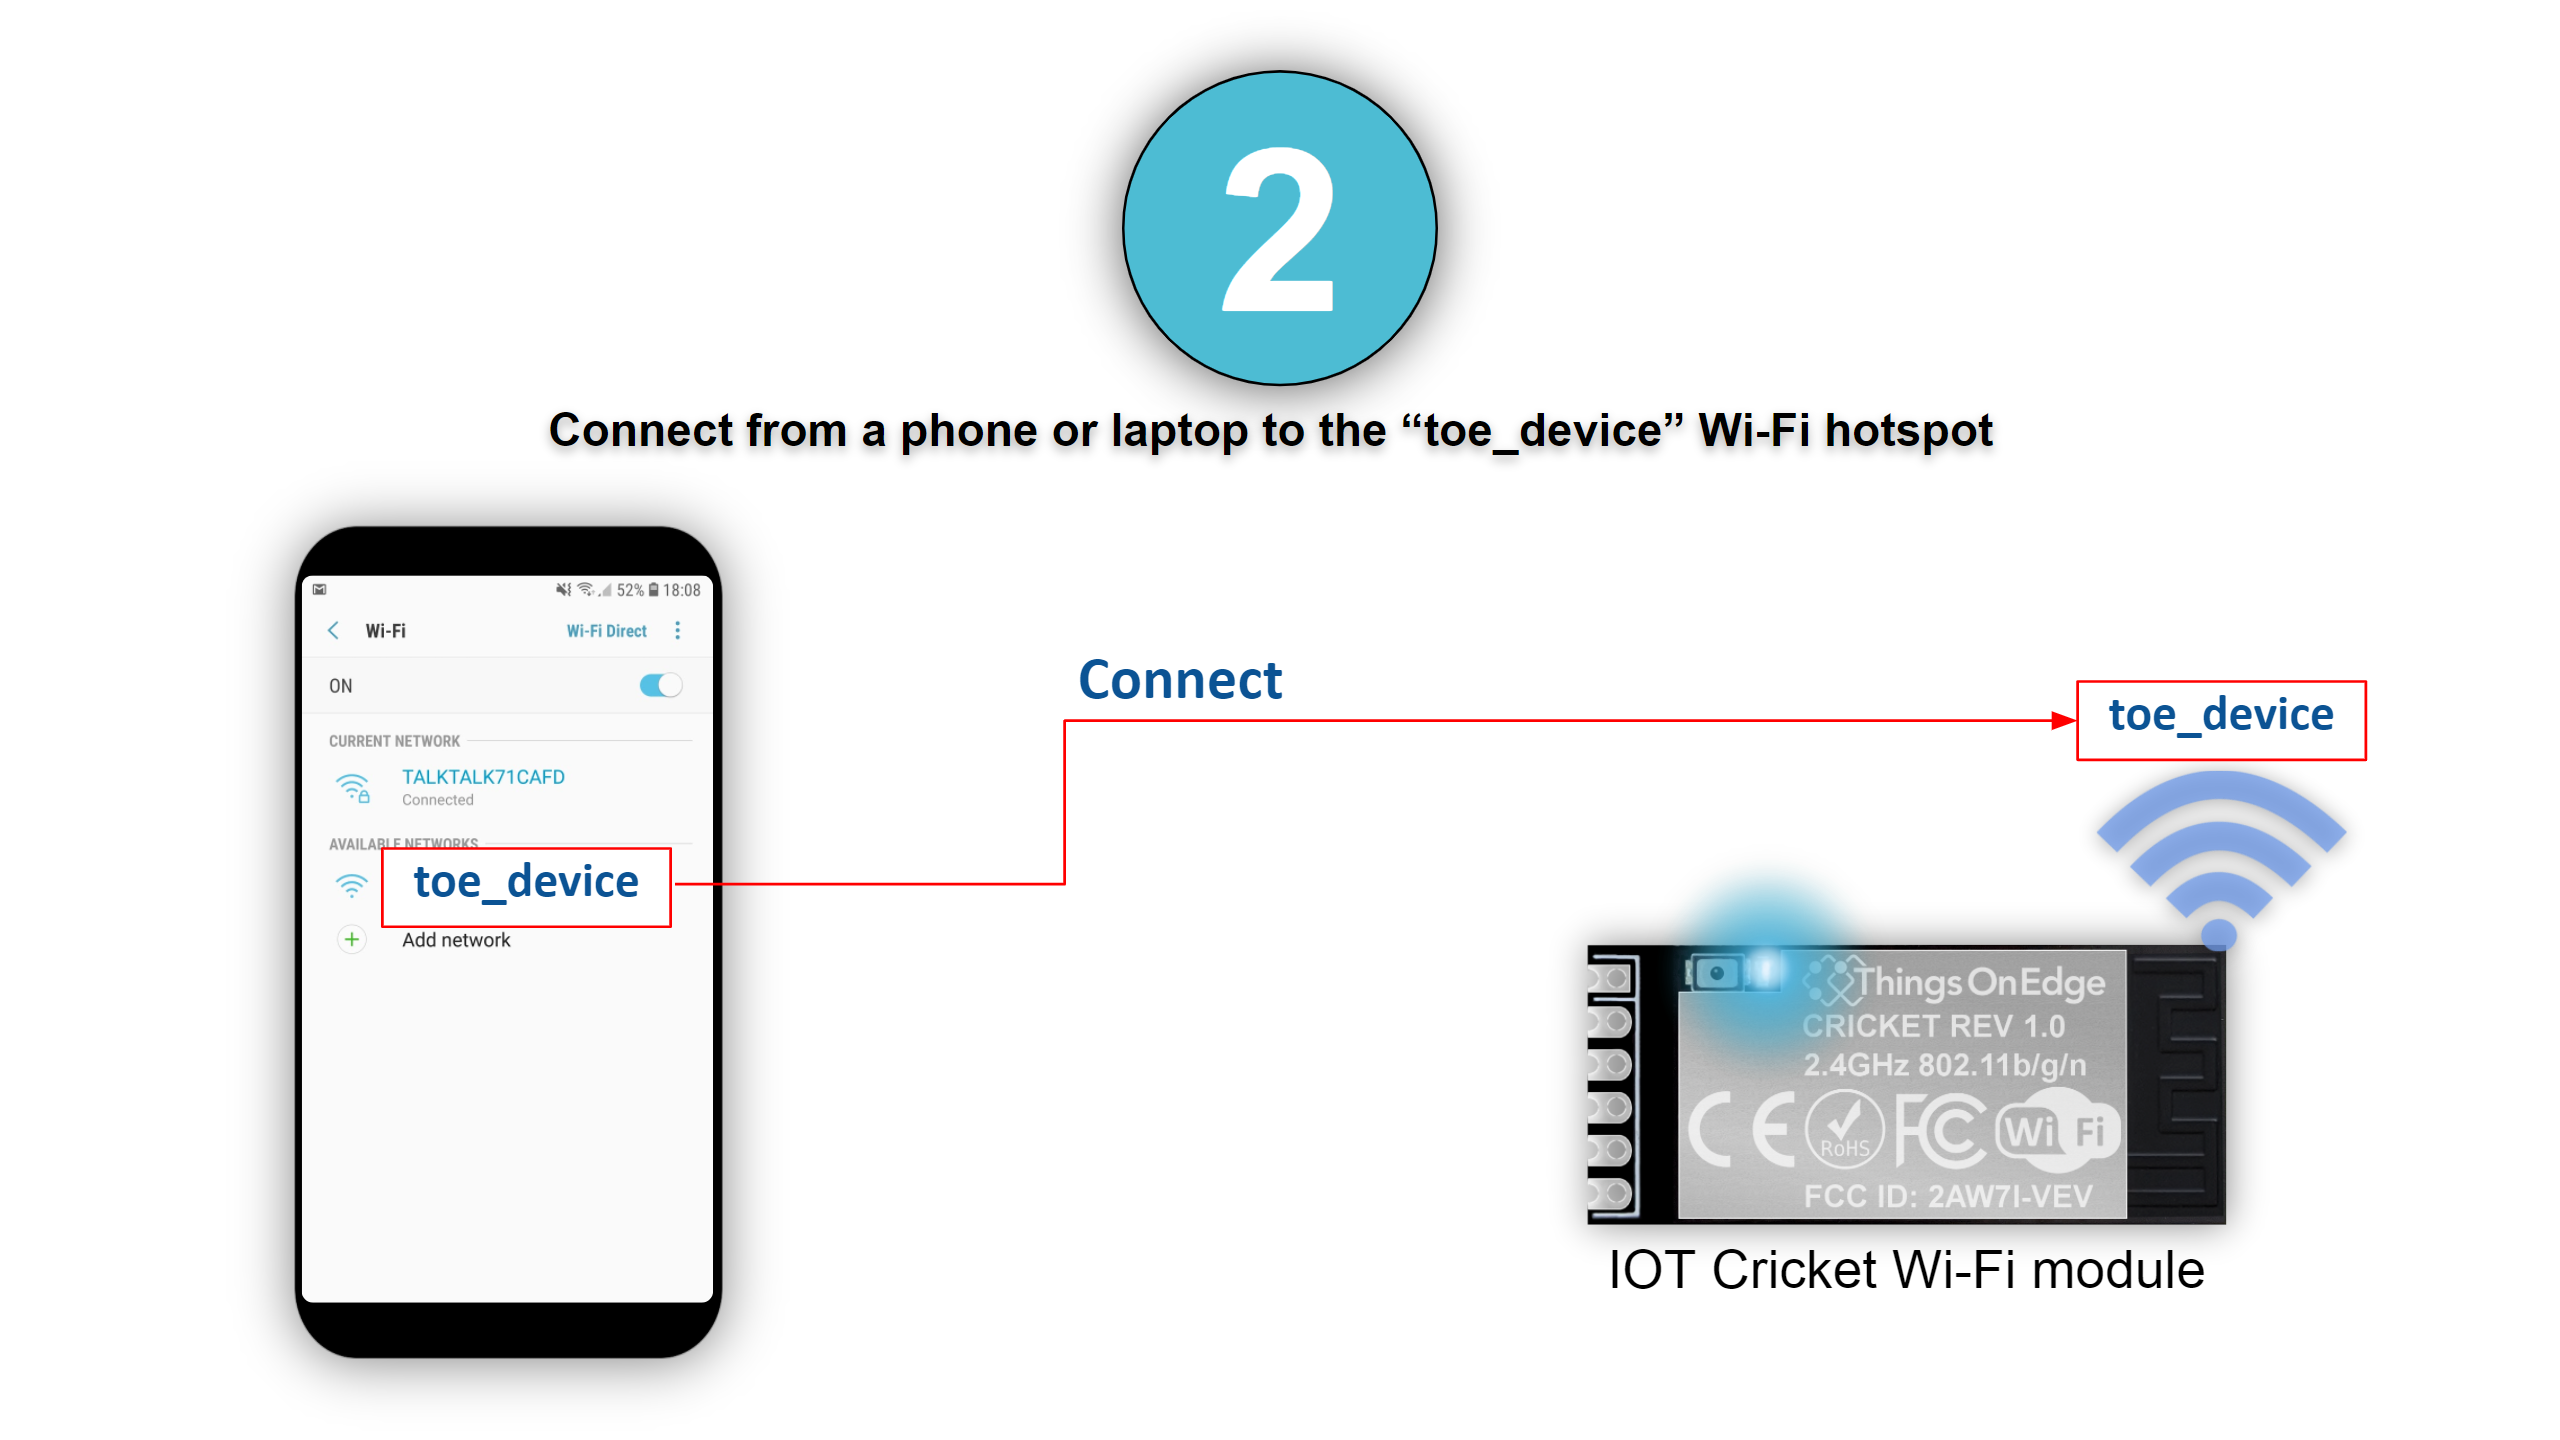
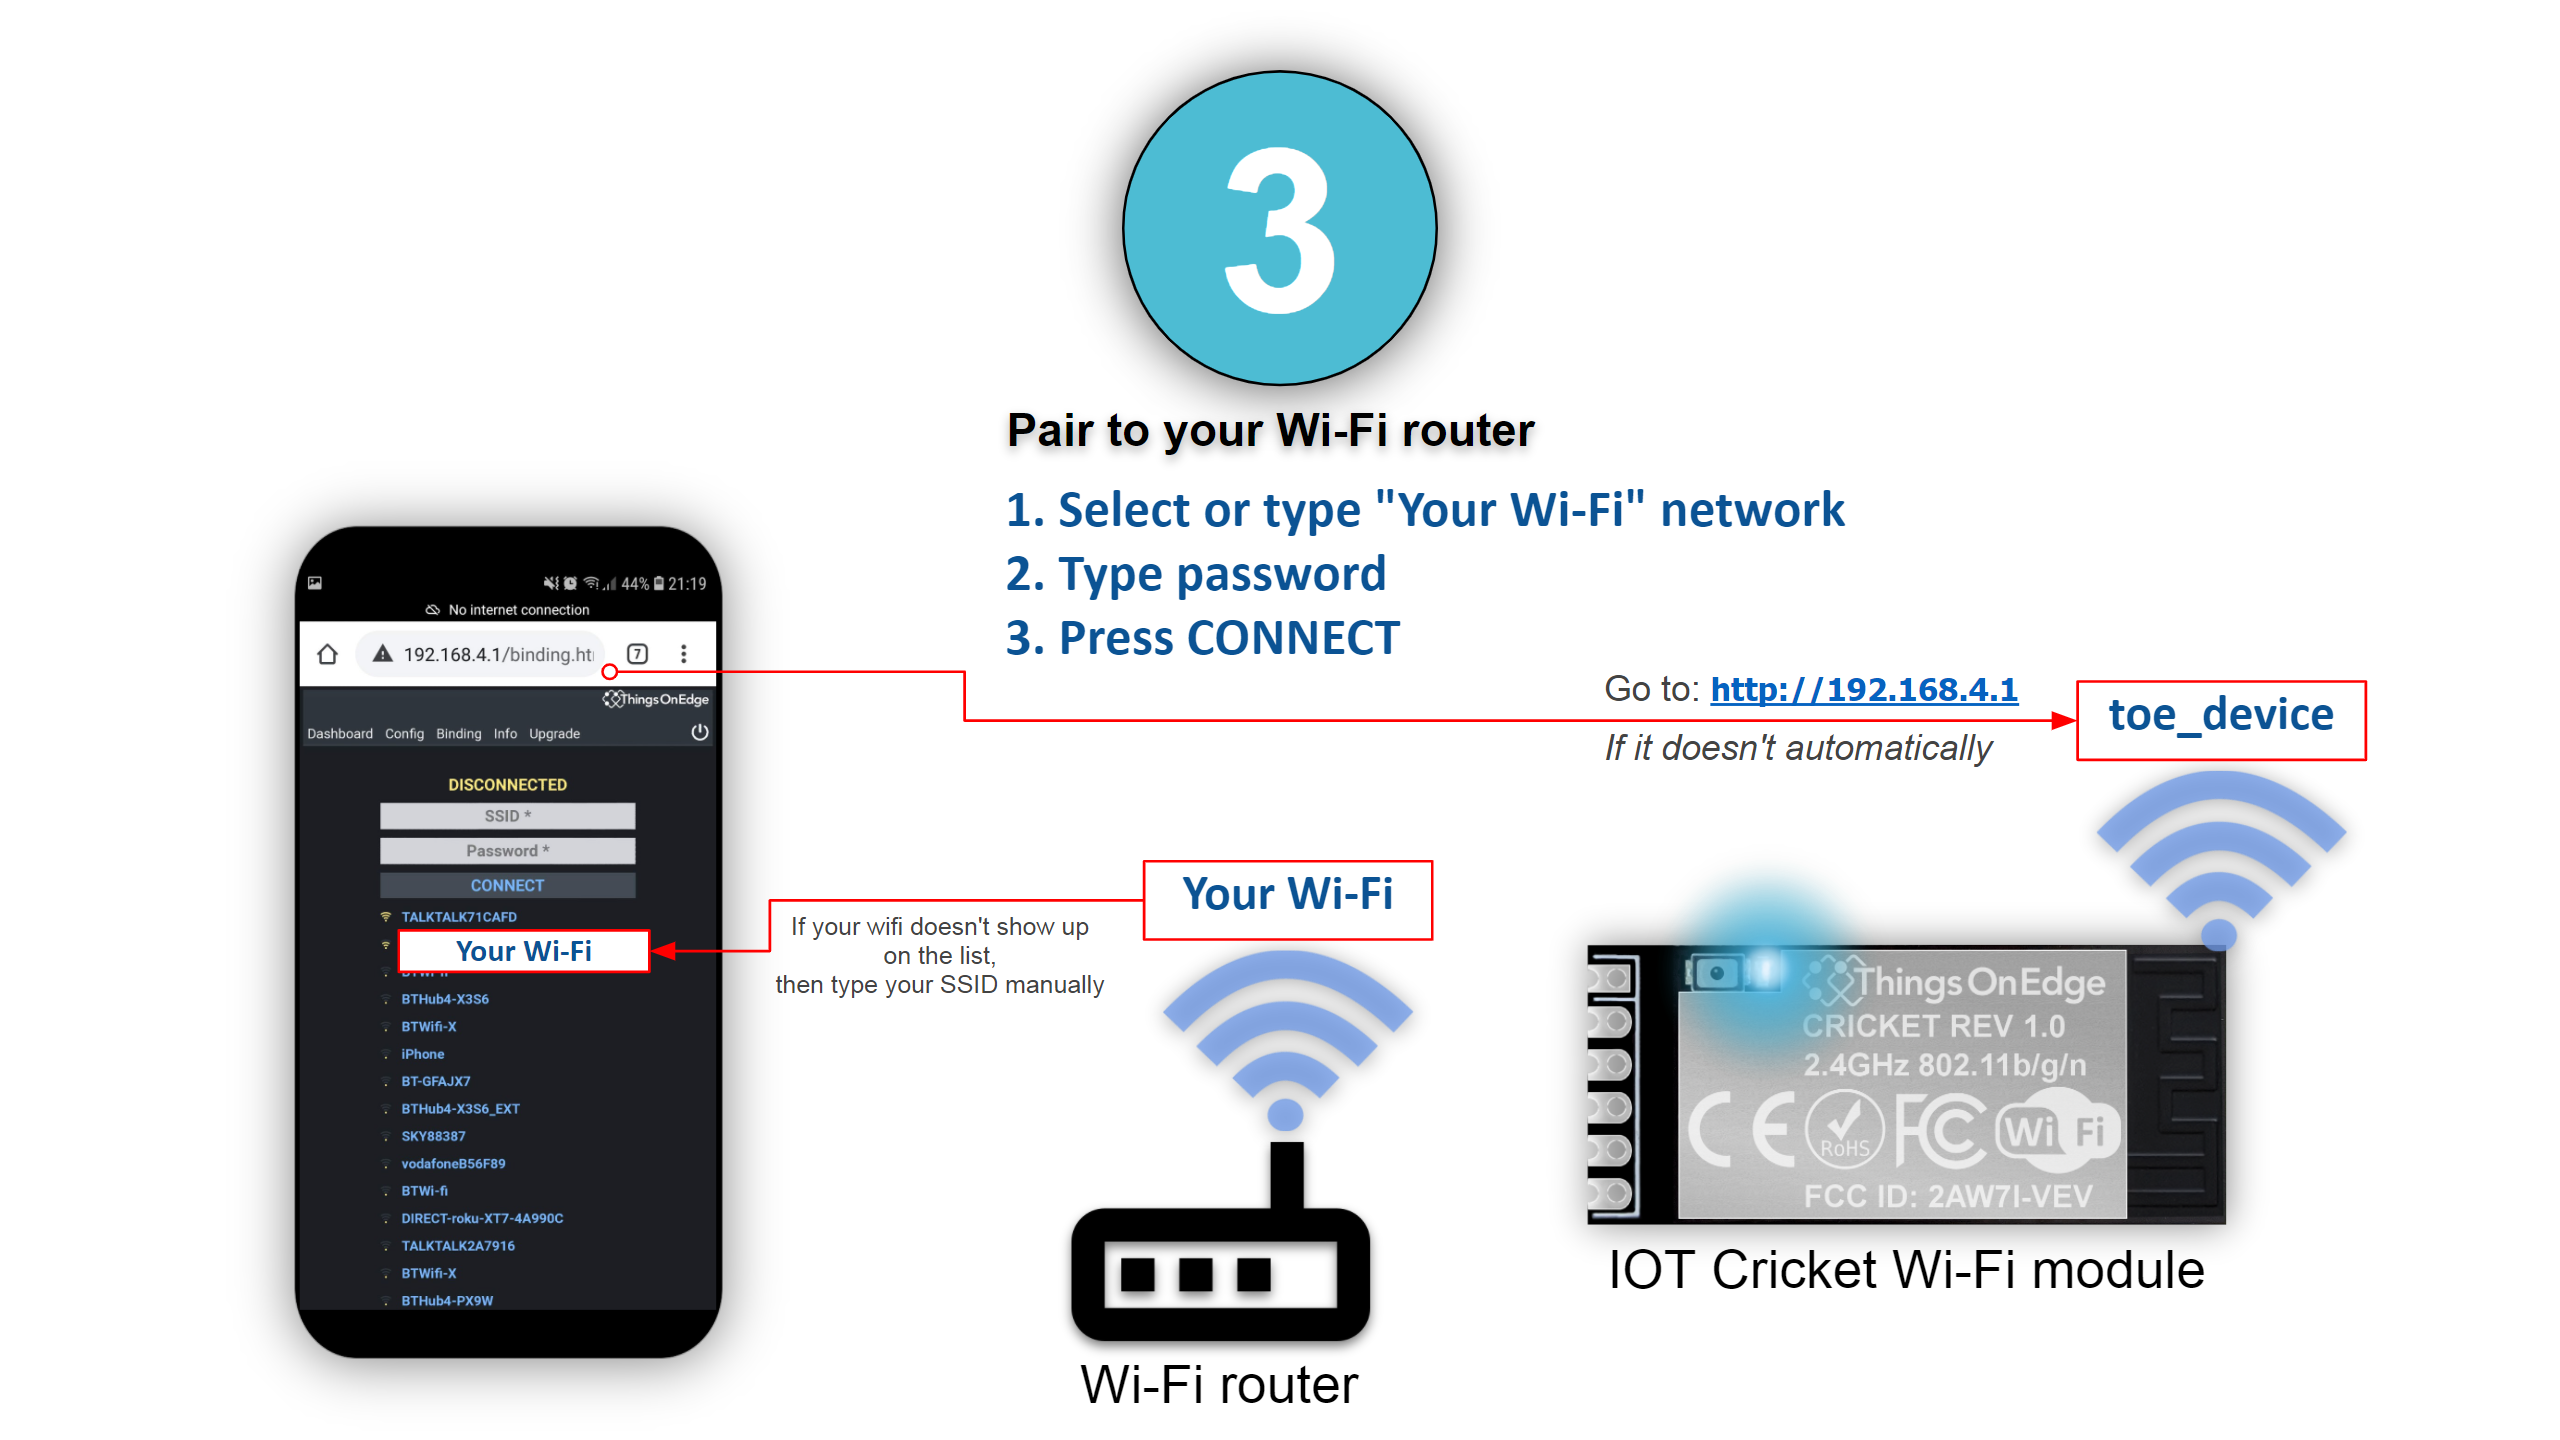
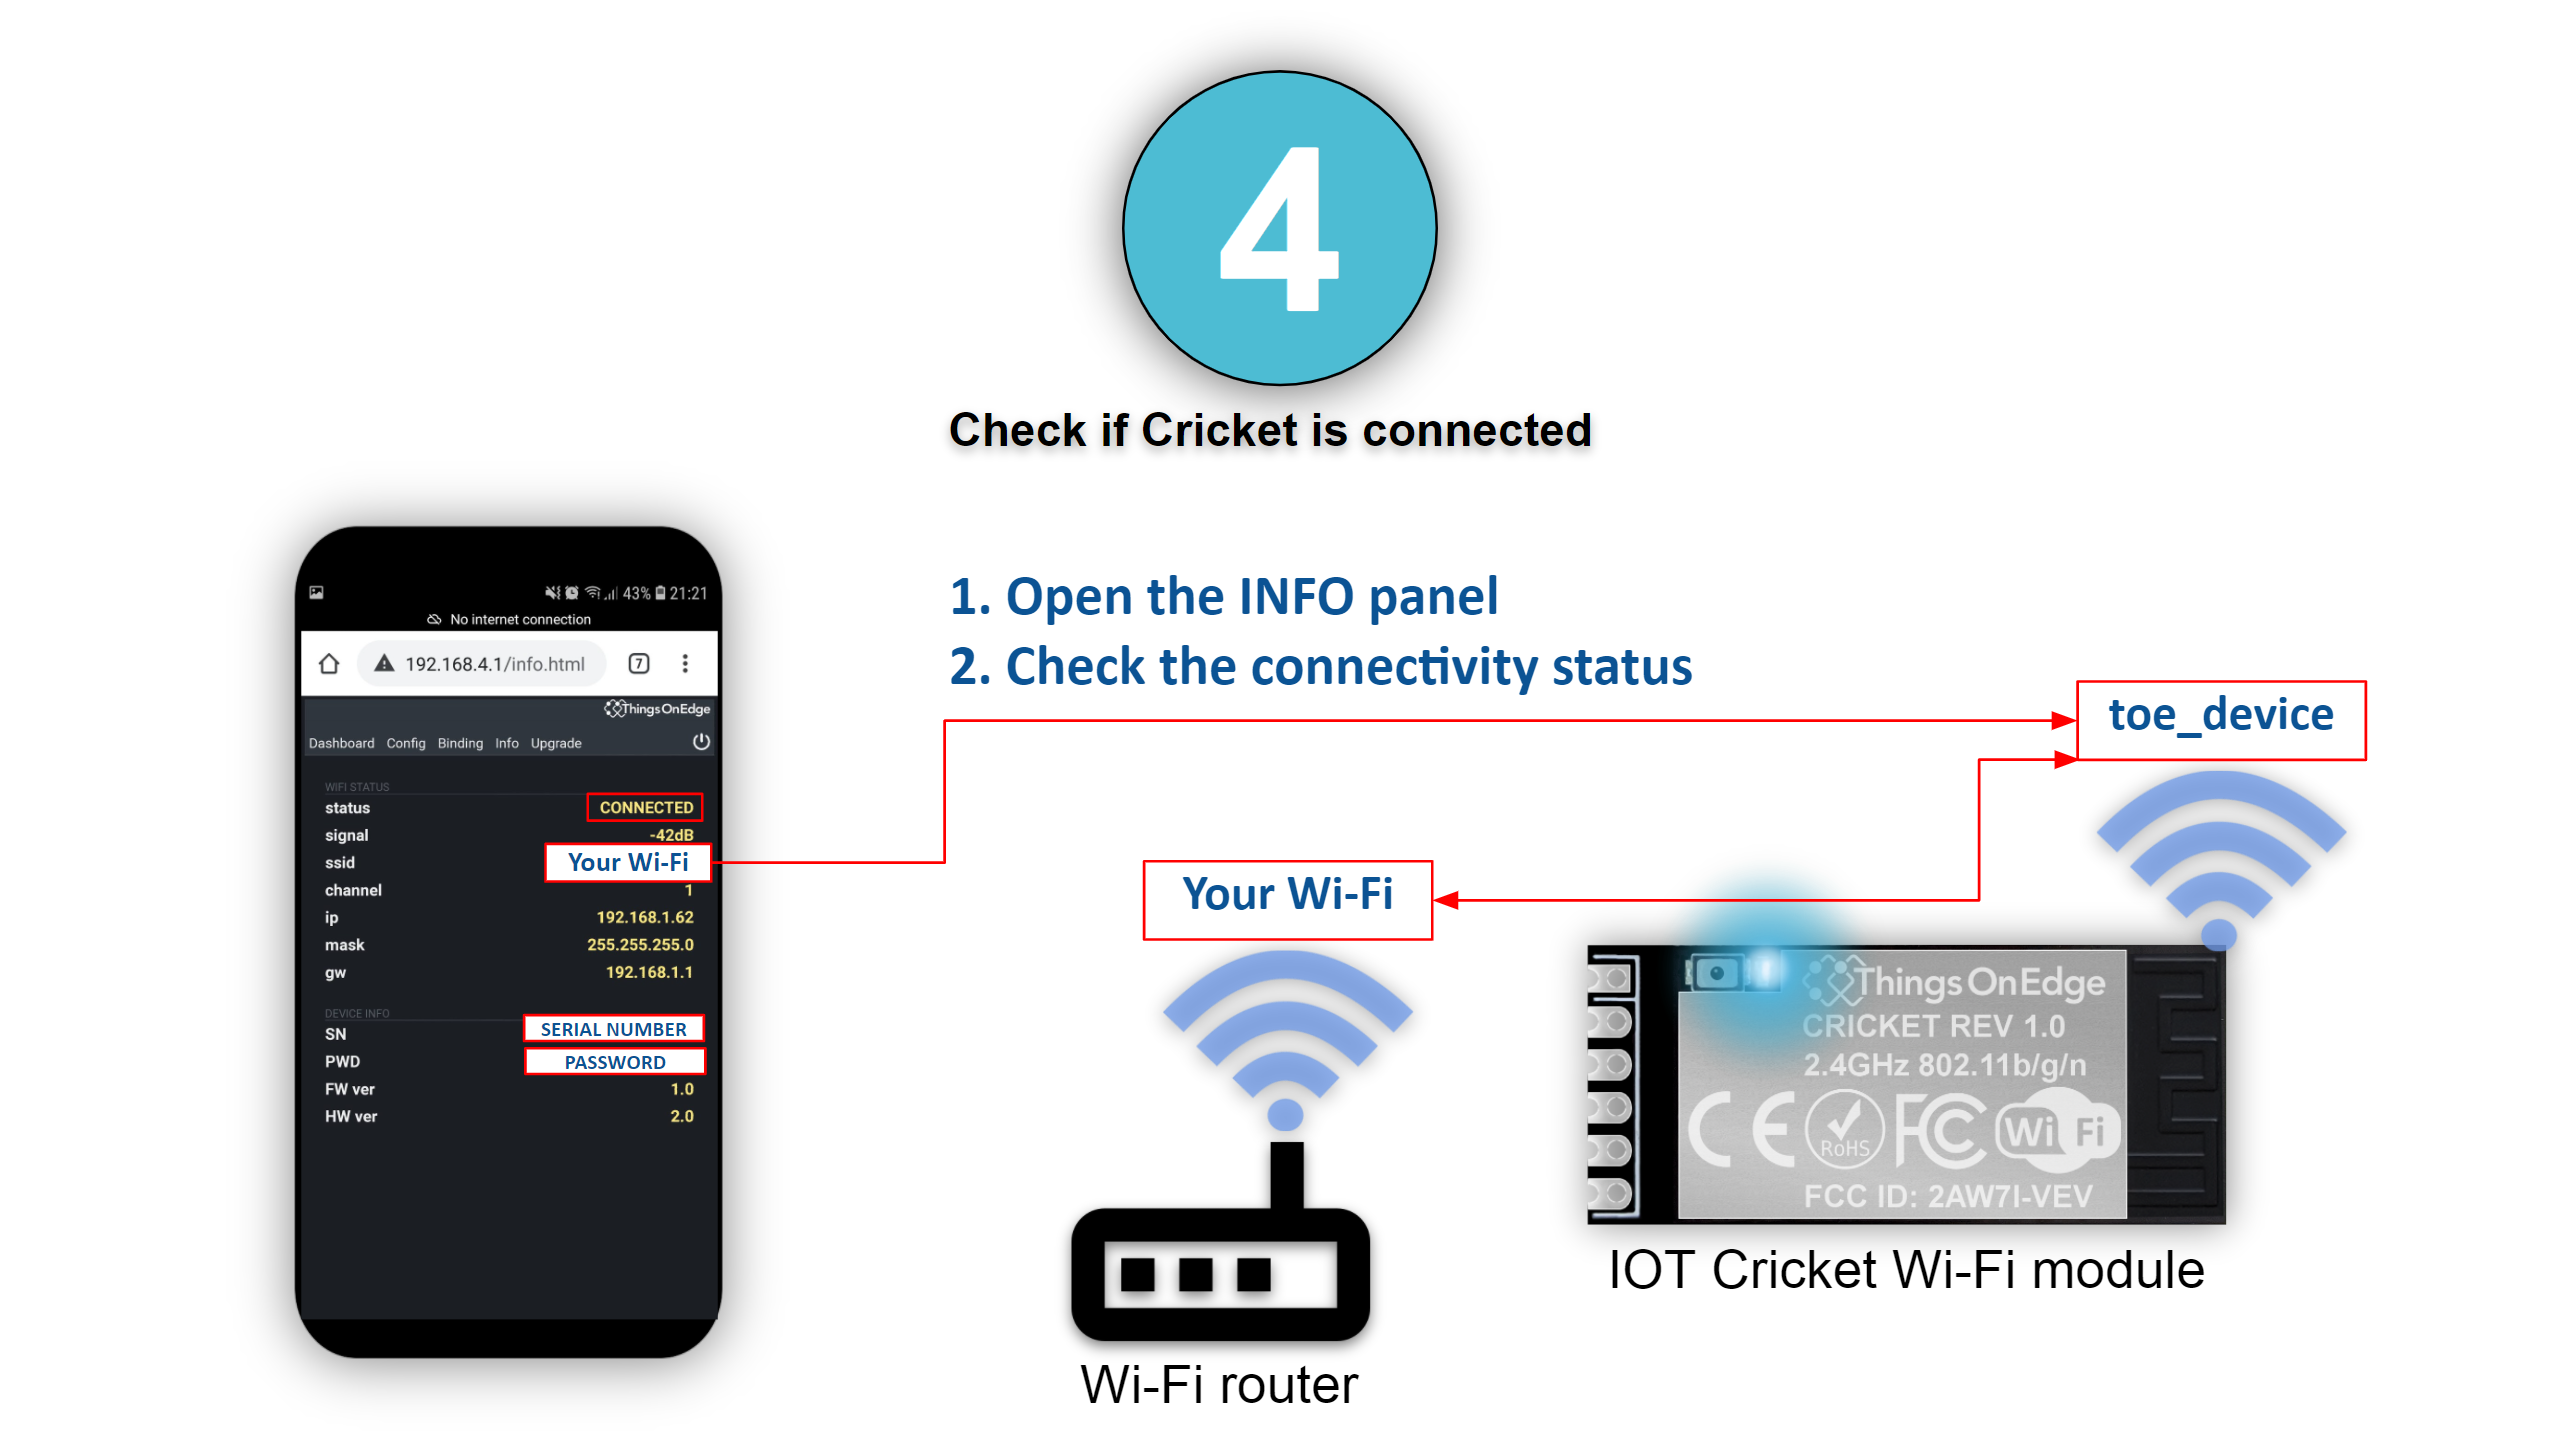
Connect Cricket to Wi-Fi network
Configure Cricket to send data to ThingsBoard
Now we can configure Cricket to transmit the temperature readings to ThingsBoard.
Cricket supports both MQTT and HTTP protocols and we are going to use the HTTP protocol for the integration. We have to make sure we have the Access Token from ThingsBoard as shown below:
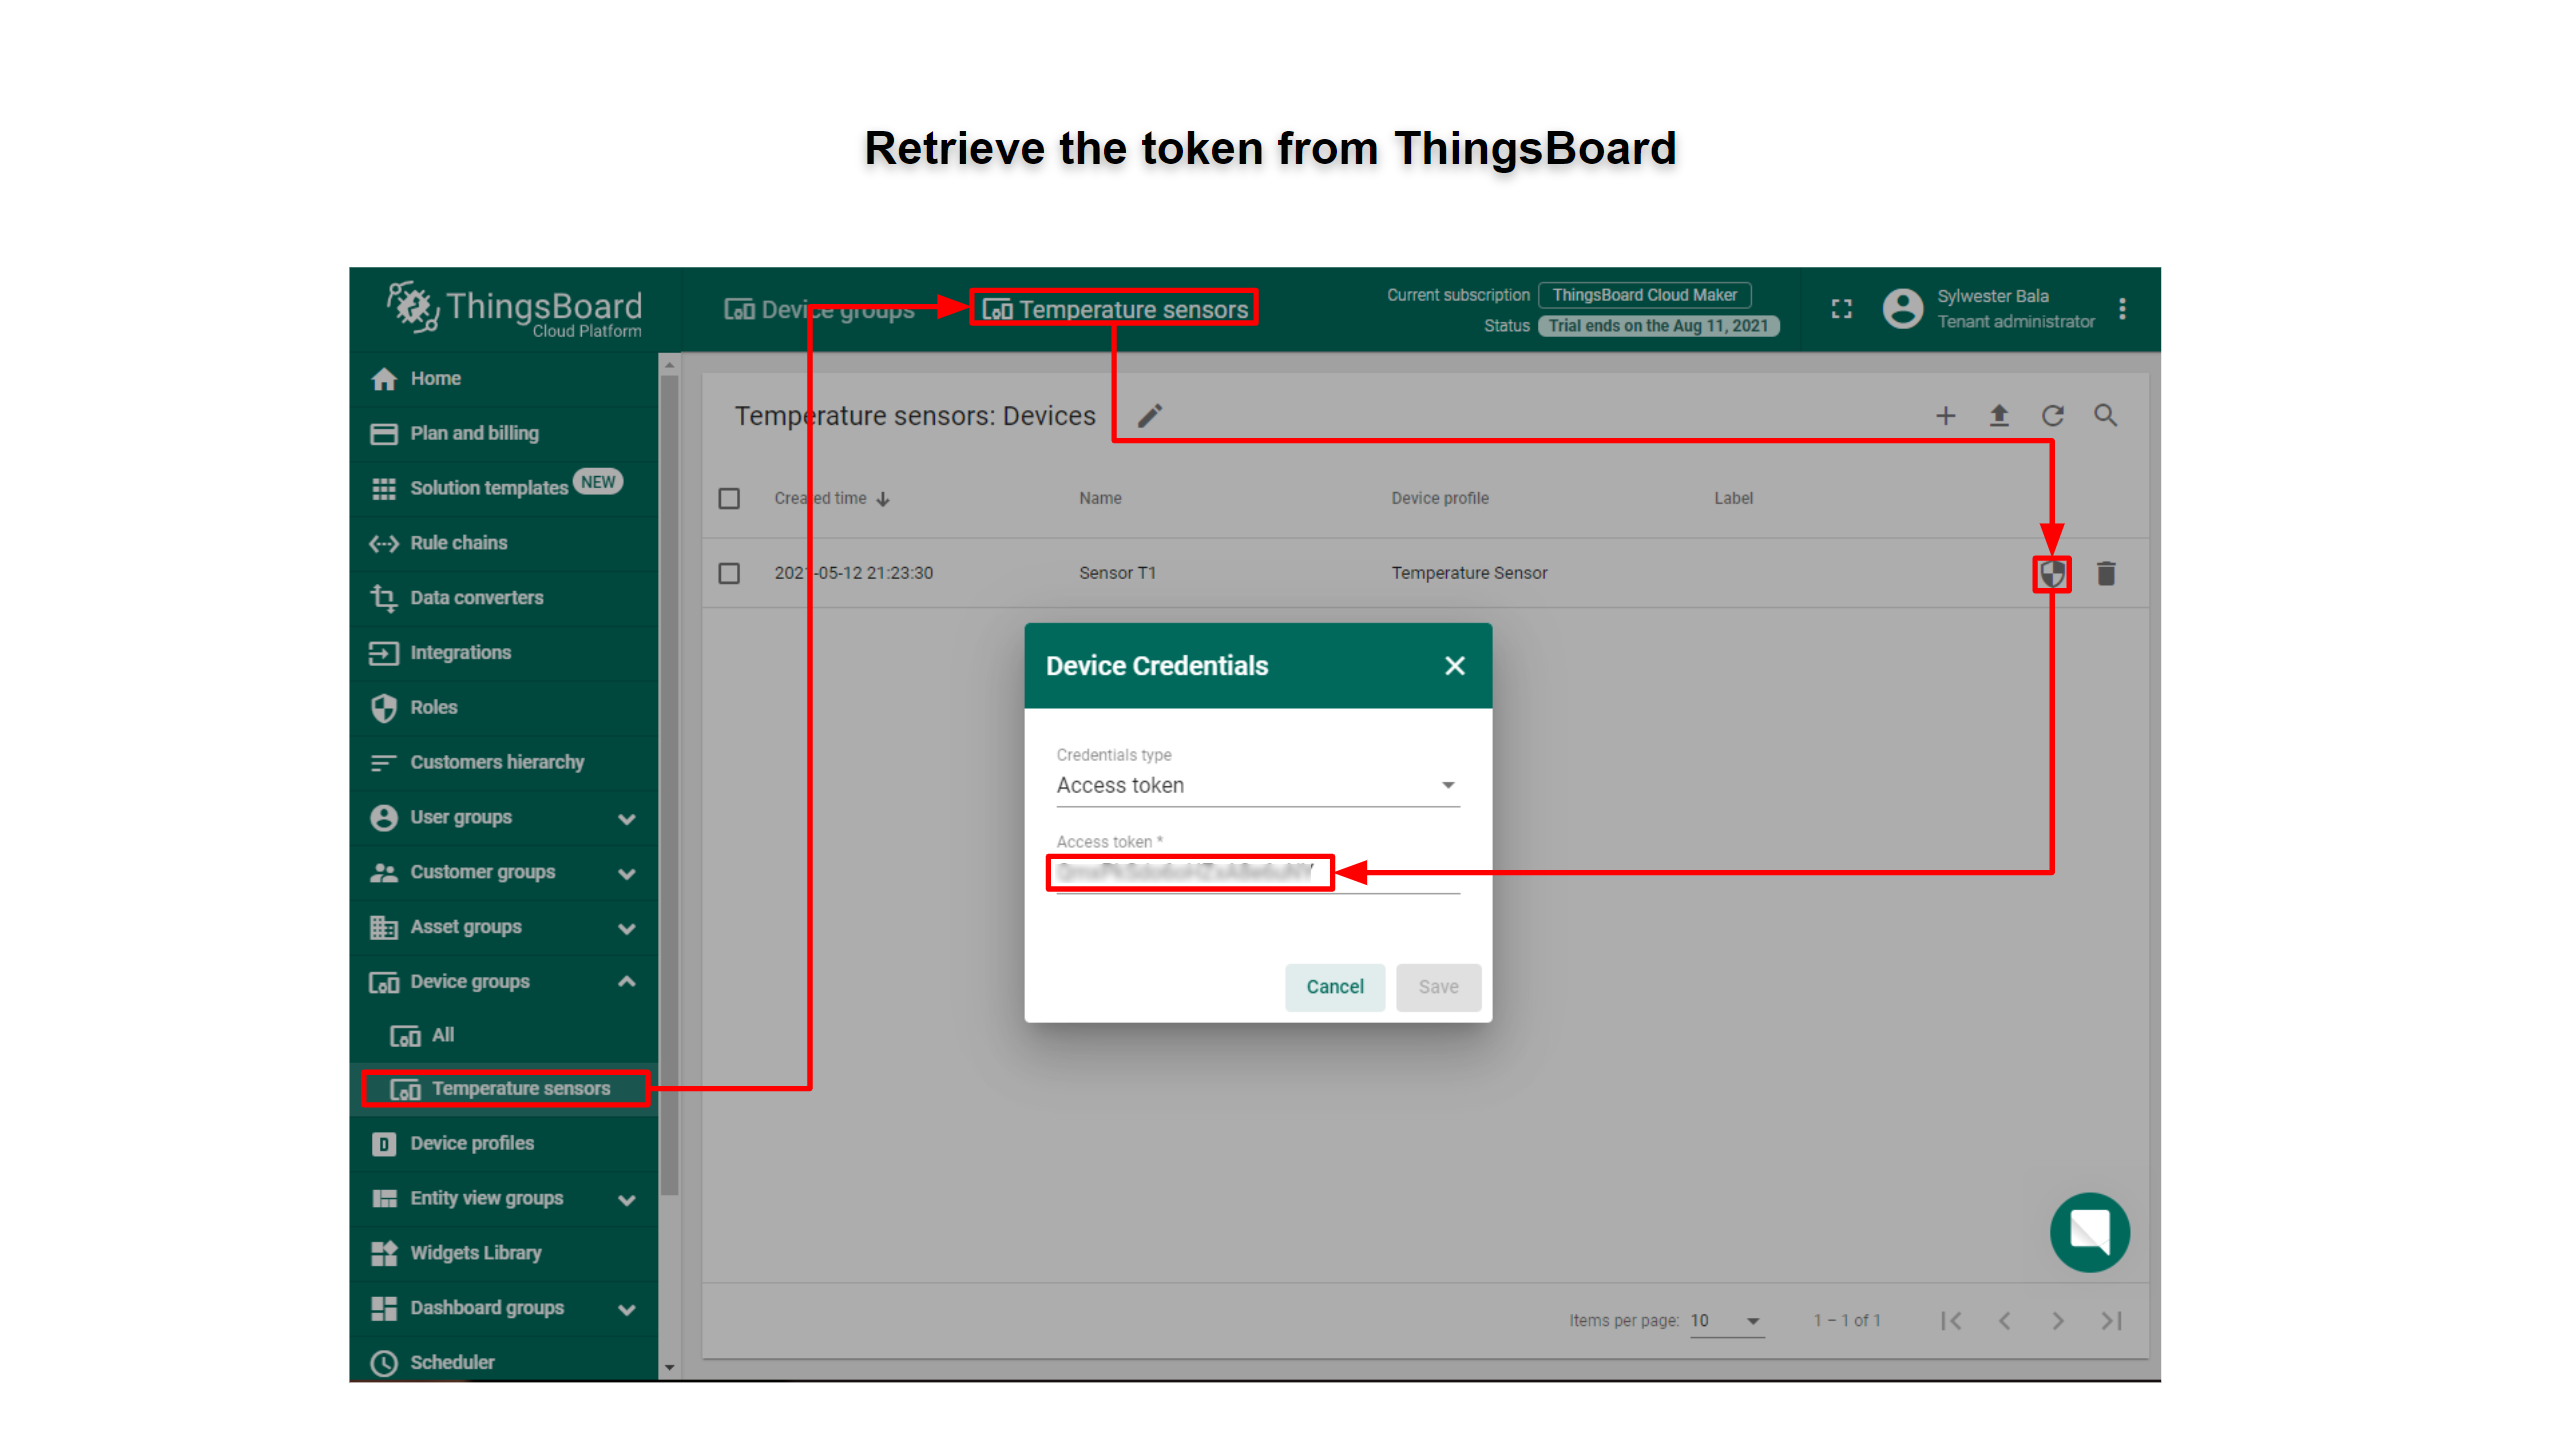
Now we can go back again to Cricket’s Config panel and complete the configuration.
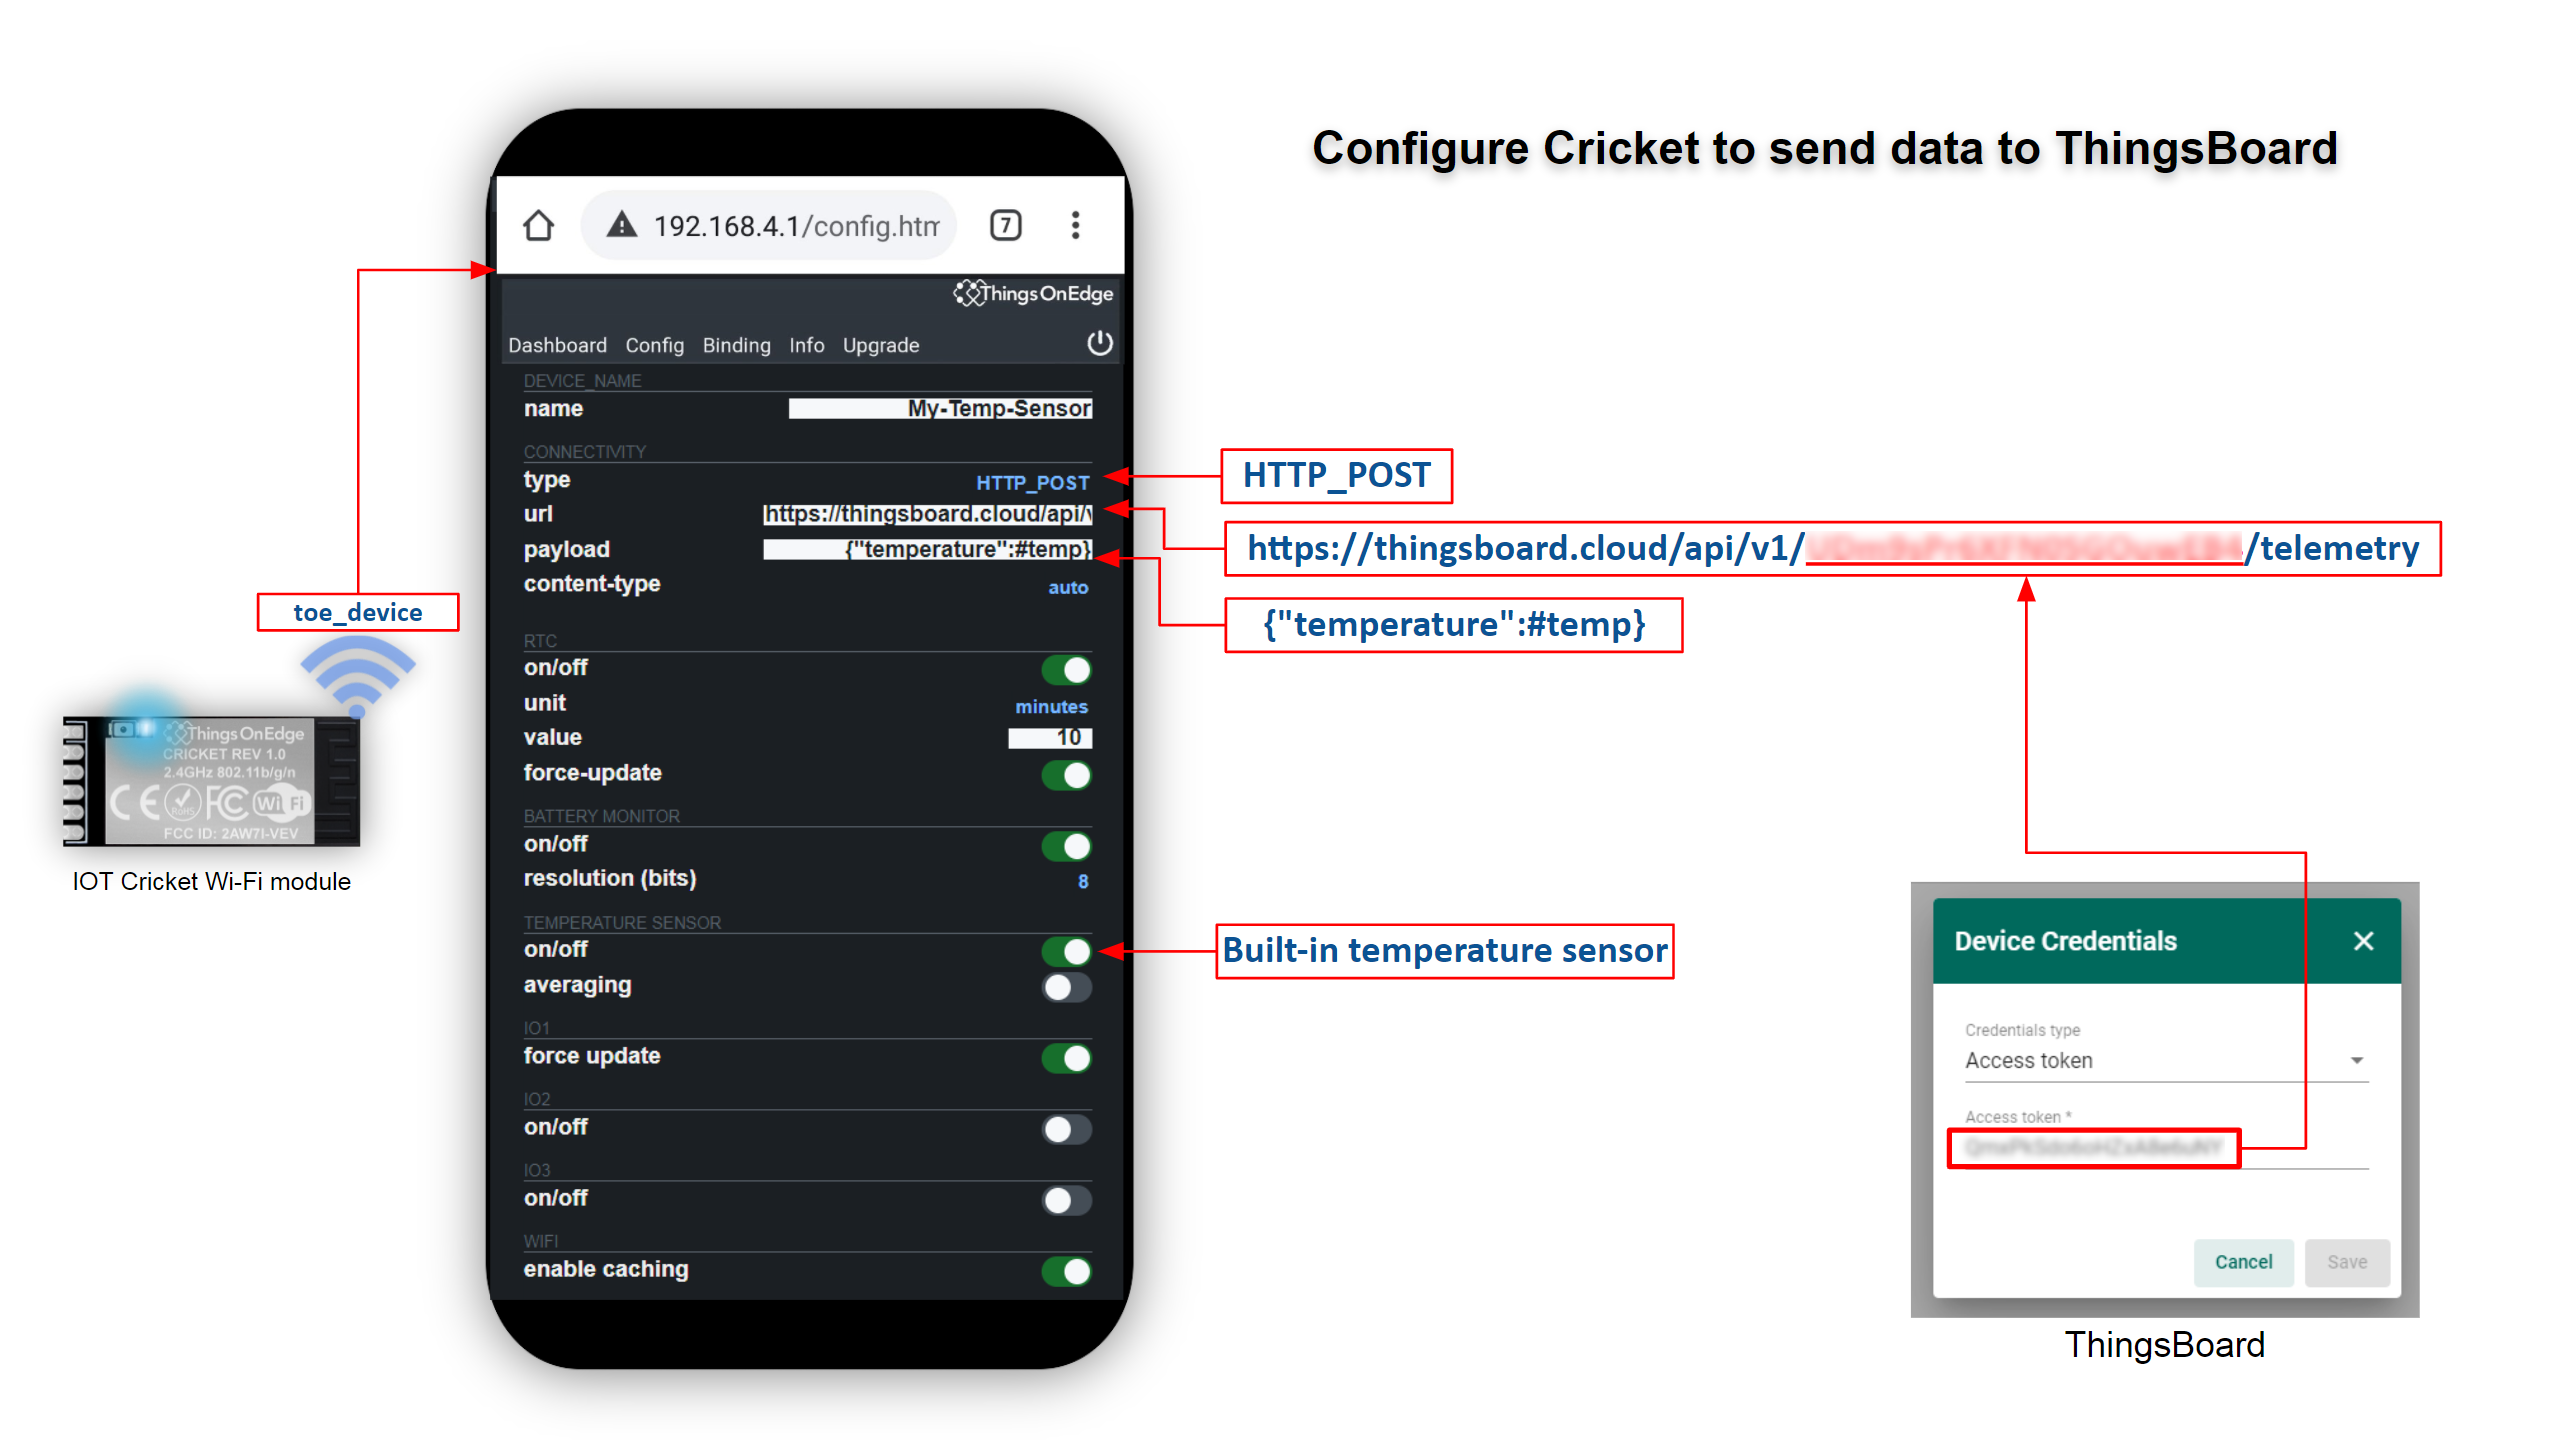
A complete URL, which we are going to use to send data to ThingsBoard should look like this:
https://thingsboard.cloud/api/v1/ADD YOUR TOKEN HERE/telemetry
We also define the following payload format:
{“temperature”:#temp}
Where #temp tag is automatically replaced with the temperature value prior it is sent out to ThingsBoard.
A complete Cricket’s configuration can look like below:
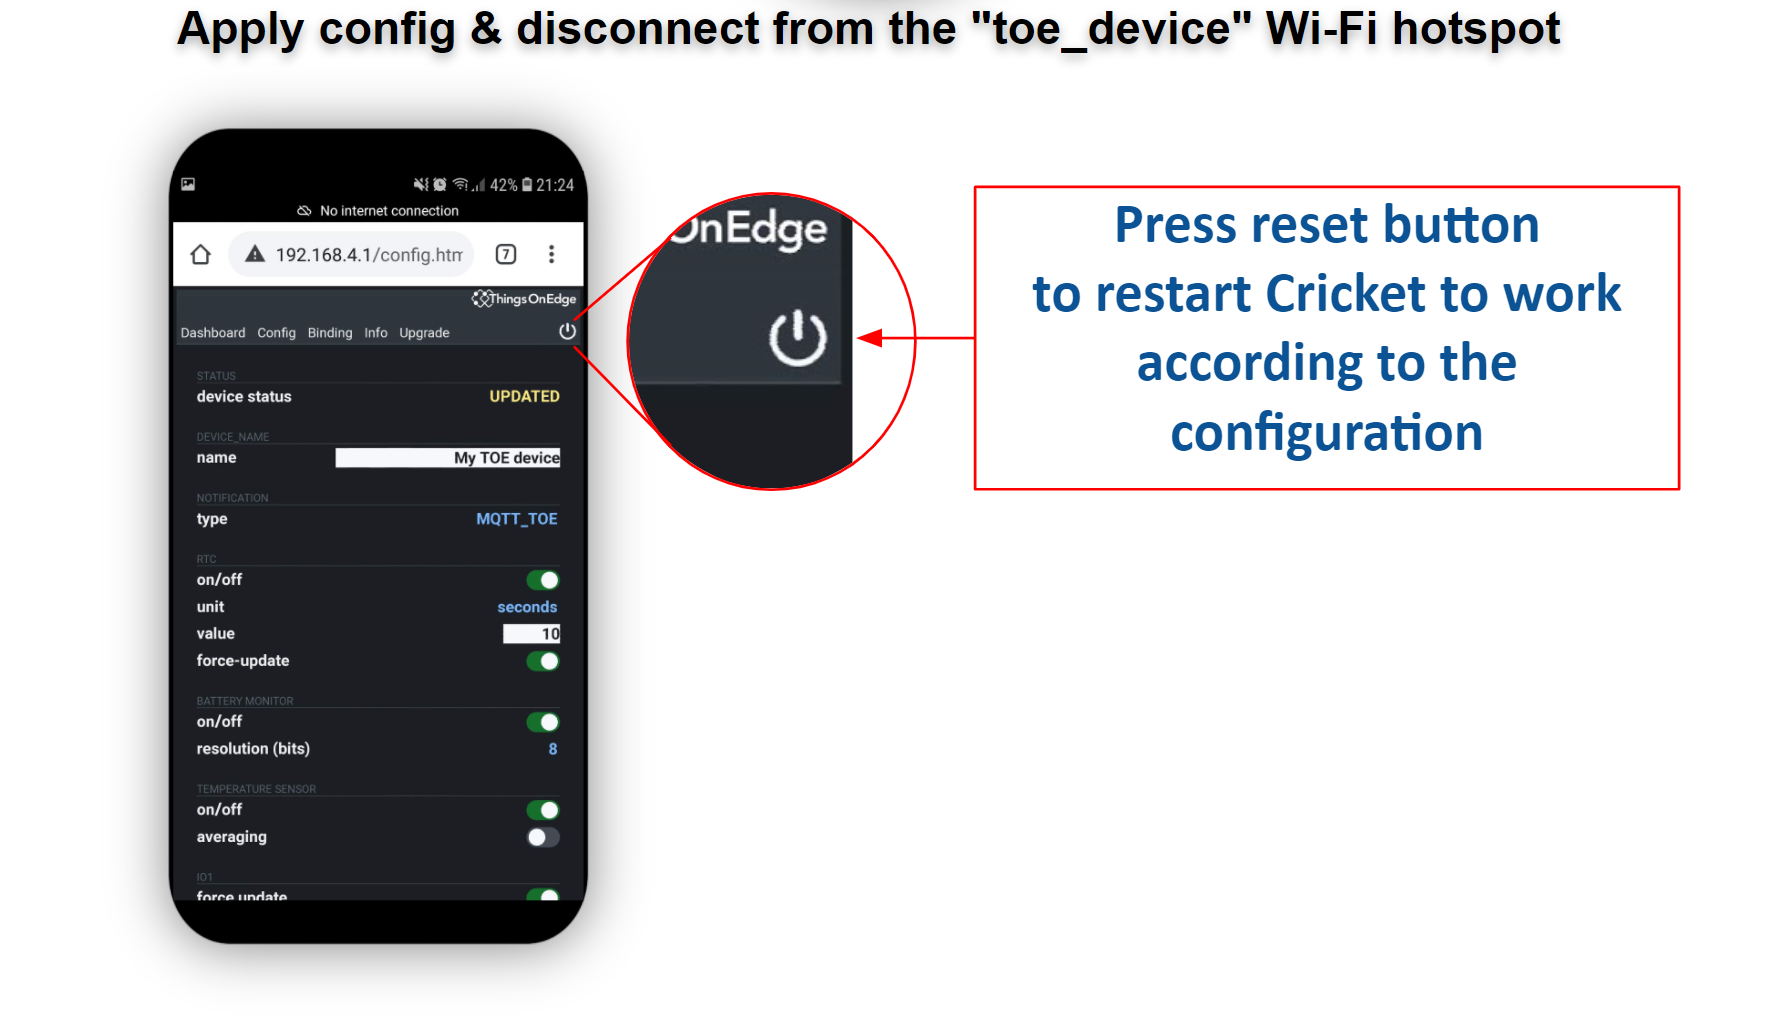
Once Cricket is configured we must exit from the Config panel by pressing the reset button in the top-right corner as shown on the image below.
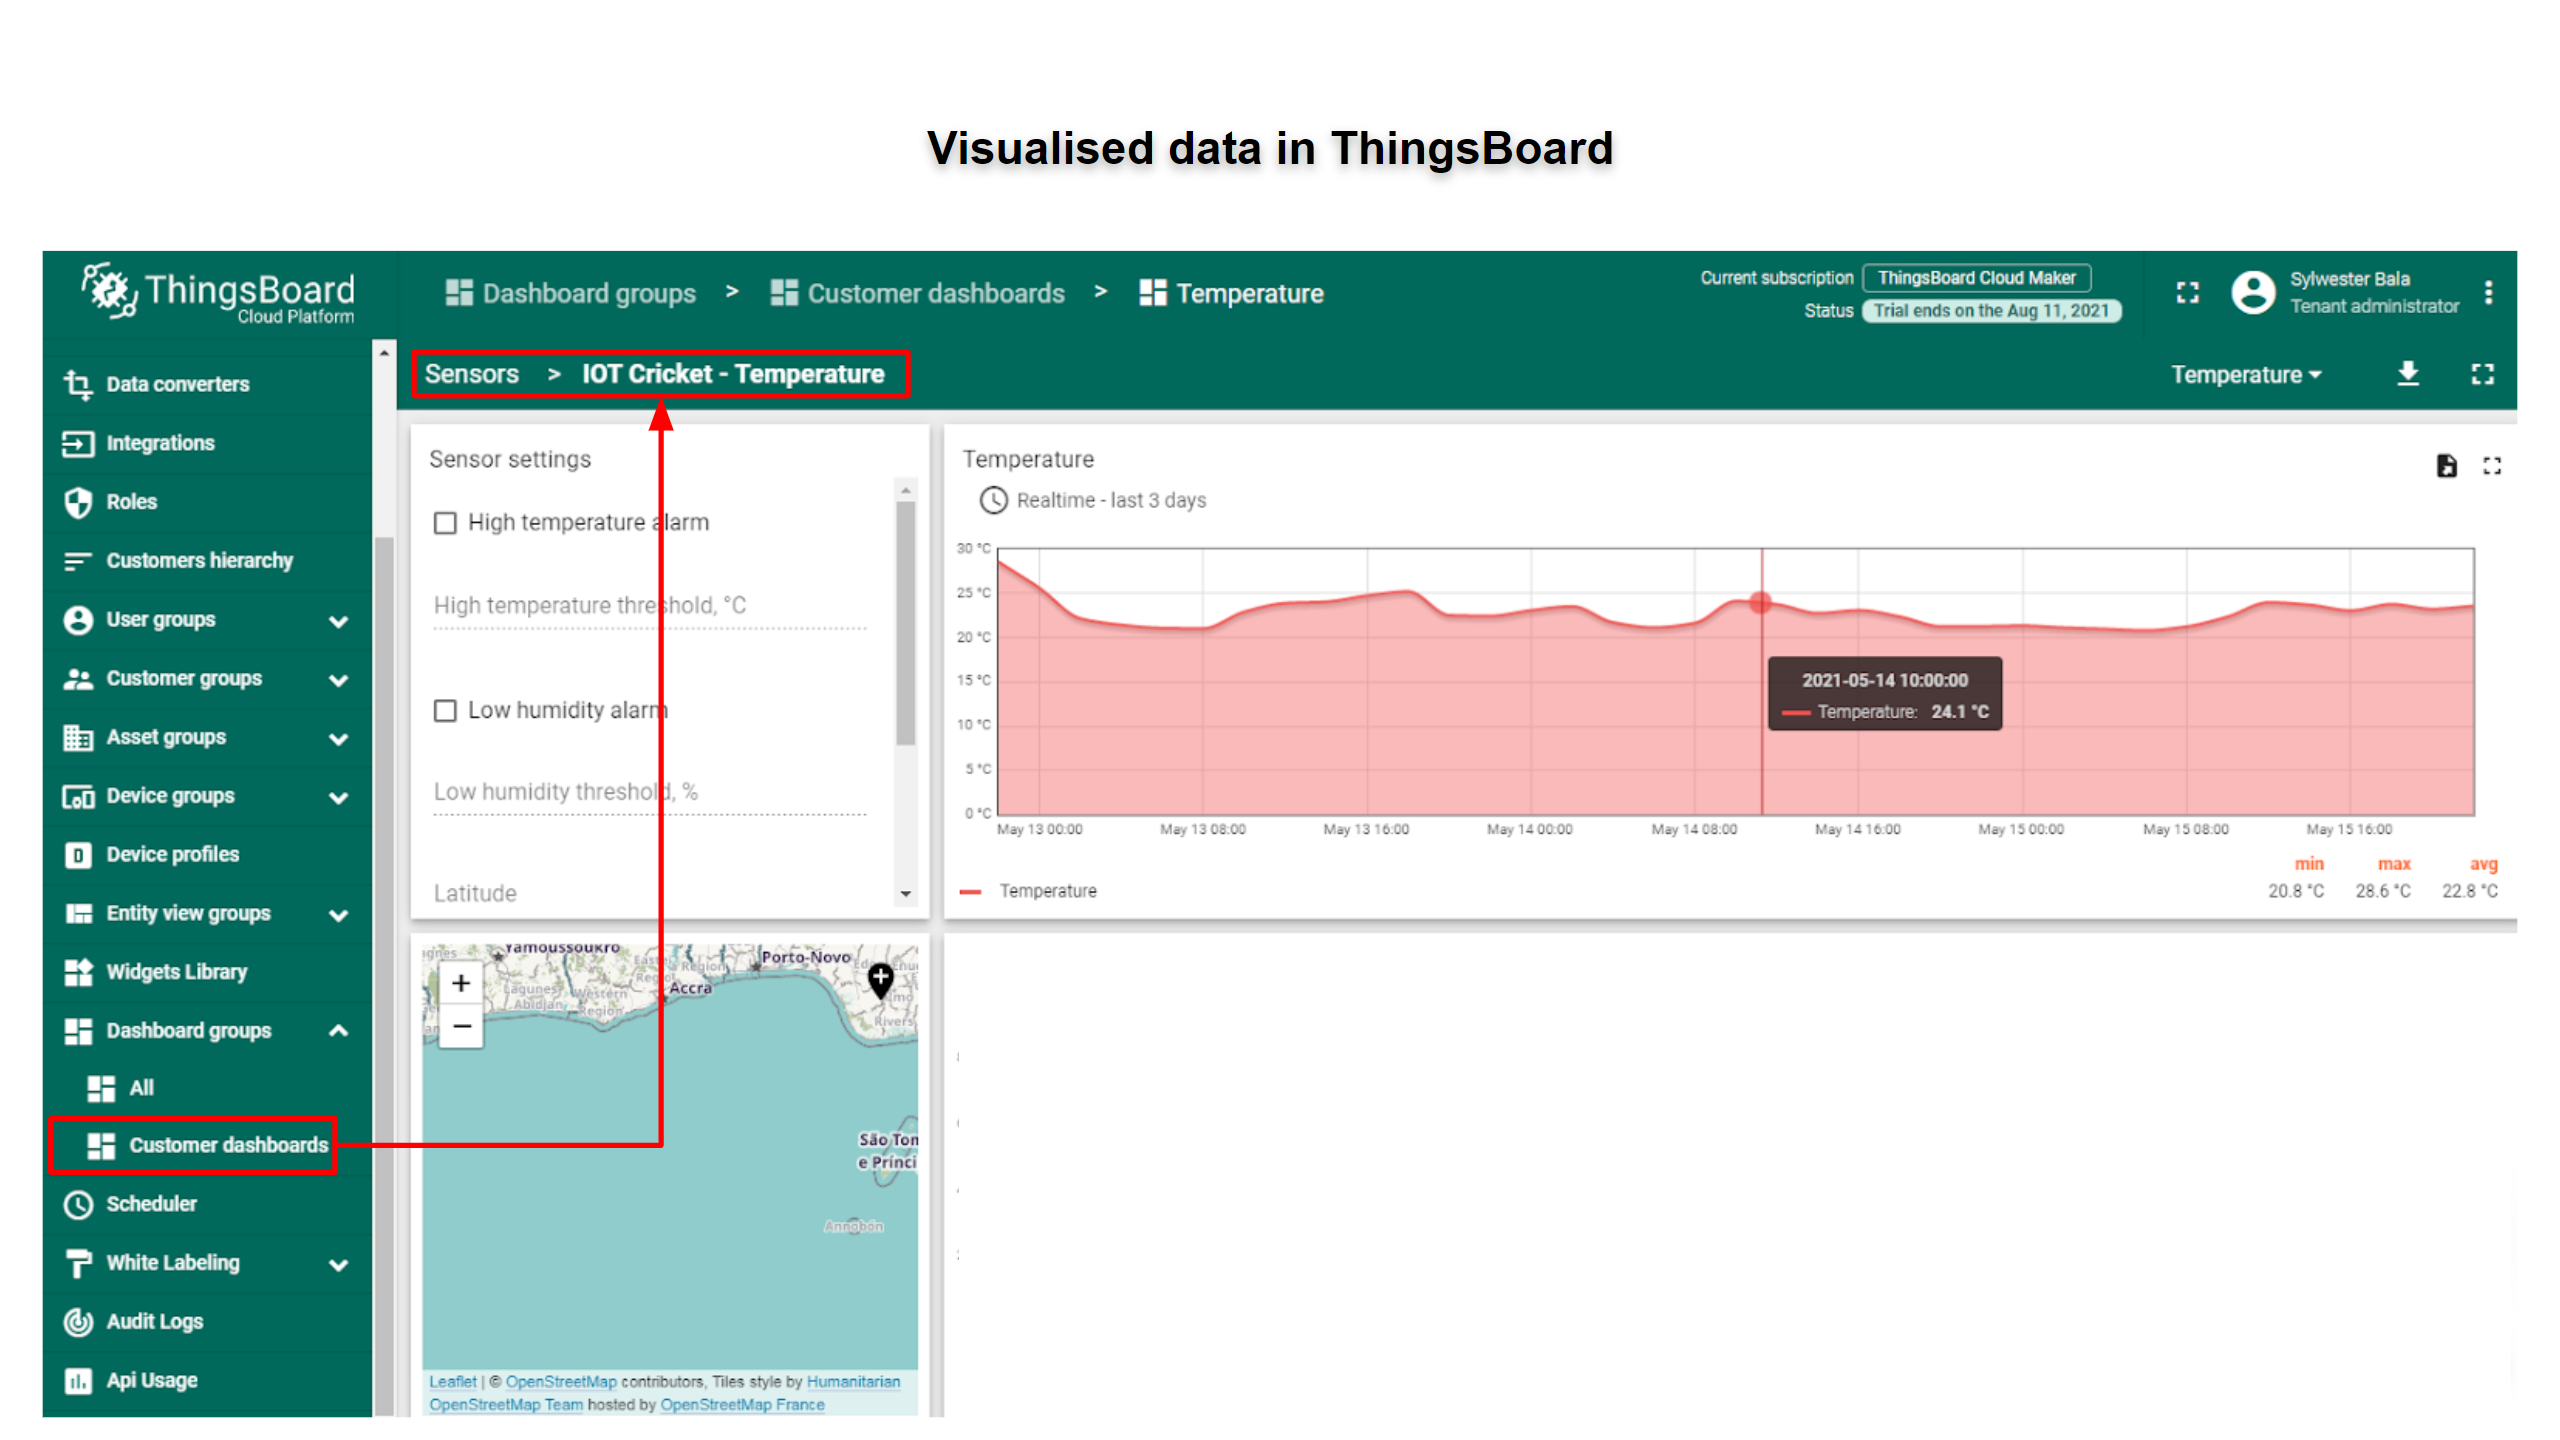
If we configured our device as shown above the device will be sending data to ThingsBoard every 10 minutes. The data is presented on the graph as shown below:
Additional information
Cricket Wi-Fi module - Documentation
Your feedback
Don’t hesitate to star ThingsBoard on github to help us spread the word. If you have any questions about this sample - post it on the issues.
Next steps
-
入门指南 - 快速学习ThingsBoard相关功能。
-
安装指南 - 学习如何在各种操作系统上安装ThingsBoard。
-
连接设备 - 学习如何根据你的连接方式或解决方案连接设备。
-
可 视 化 - 学习如何配置复杂的ThingsBoard仪表板说明。
-
数据处理 - 学习如何使用ThingsBoard规则引擎。
-
数据分析 - 学习如何使用规则引擎执行基本的分析任务。
-
高级功能 - 学习高级ThingsBoard功能。
-
开发指南 - 学习ThingsBoard中的贡献和开发。
