目录
在邮件中发送 HTML 或图片
本教程演示如何在邮件中发送 HTML 页面或图片。
前置条件
消息流
配置规则节点
配置 “to email” 节点
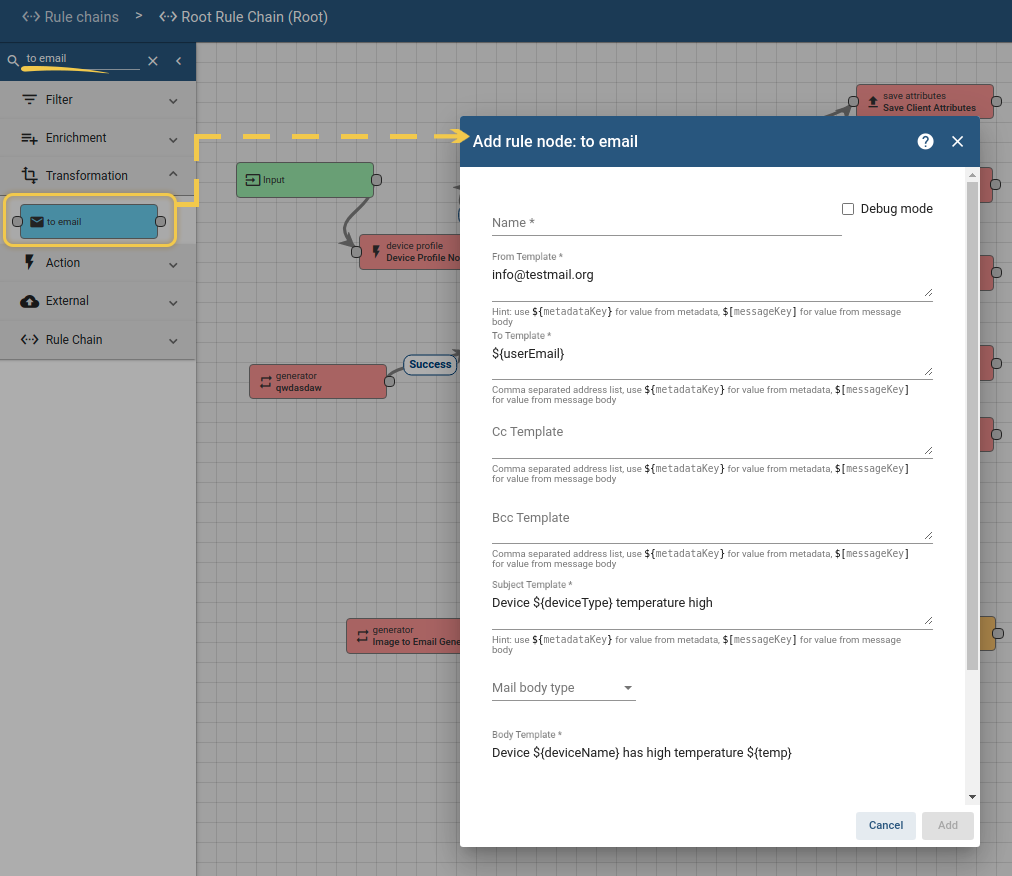
首先创建并配置 “to email” 节点。
- 进入 rule chain,找到
to email 节点并拖拽到画布。
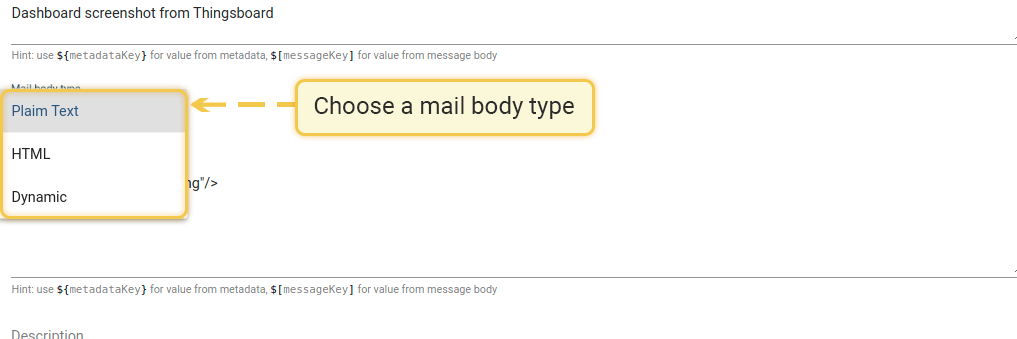
- 配置 Name、From Template、To Template(可用表达式从消息中提取邮箱)和 Subject Template。在 Mail Body Type 中选择
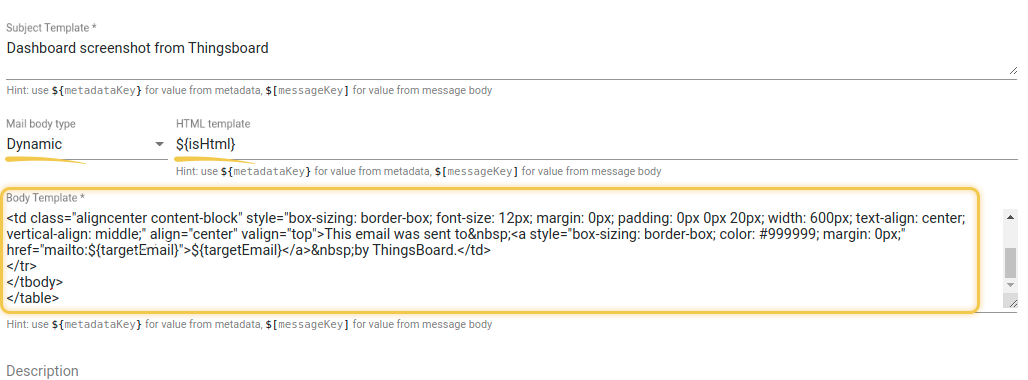
HTML 或 Dynamic,本示例使用 Dynamic。
- 在 Body Template 中填写 HTML(可直接使用示例模板)。
- 点击 Add。
|
HTML示例
1
2
3
4
5
6
7
8
9
10
11
12
13
14
15
16
17
18
19
20
21
22
23
24
| <table class="main" style="font-family: 'Helvetica Neue', Helvetica, Arial, sans-serif; font-size: 14px; box-sizing: border-box; border-radius: 3px; width: 100%; background-color: #f6f6f6; margin: 0px auto;" cellspacing="0" cellpadding="0" bgcolor="#f6f6f6">
<tbody>
<tr style="box-sizing: border-box; margin: 0px;">
<td class="content-wrap" style="box-sizing: border-box; vertical-align: top; margin: 0px; padding: 20px;" align="center" valign="top">
<table style="box-sizing: border-box; border: solid 1px #e9e9e9; border-radius: 3px; margin: 0px; height: 127px; padding: 20px; background-color: #ffffff; width: 600px; max-width: 600px !important;" width="600" cellspacing="0" cellpadding="0">
<tbody>
<tr style="box-sizing: border-box; margin: 0px;">
<td class="content-block" style="color: #348eda; box-sizing: border-box; border-radius: 6px; vertical-align: top; margin: 0px; padding: 0px 0px 20px; width: 839px;" valign="top">
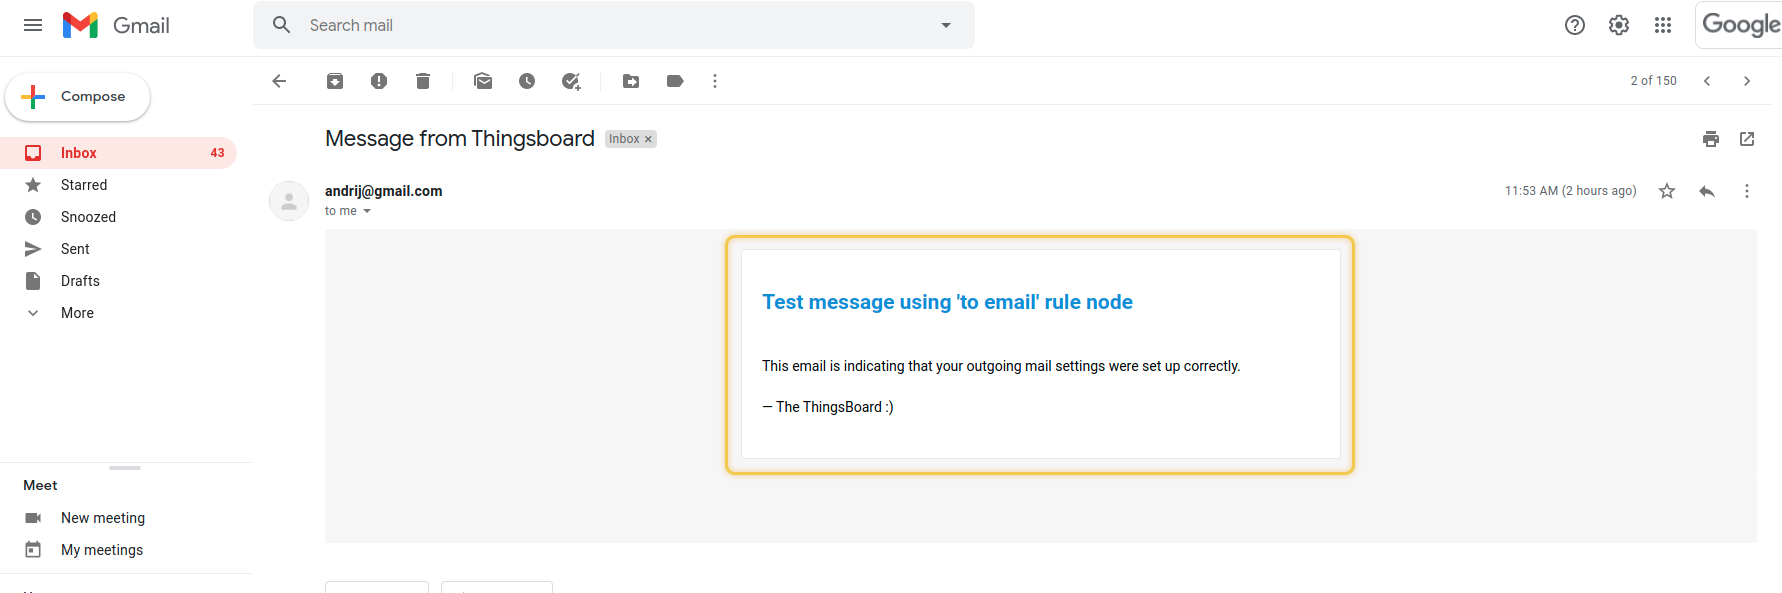
<h2>使用 'to email' rule node 的测试消息</h2>
</td>
</tr>
<tr style="box-sizing: border-box; margin: 0px;">
<td class="content-block" style="box-sizing: border-box; vertical-align: top; margin: 0px; padding: 0px 0px 20px; width: 600px;" valign="top"><span style="color: #000000;">此邮件表明您的发件配置已正确设置。</span></td>
</tr>
<tr style="box-sizing: border-box; margin: 0px;">
<td class="content-block" style="box-sizing: border-box; vertical-align: top; margin: 0px; padding: 0px 0px 20px; width: 600px;" valign="top"><span style="color: #000000;">— The ThingsBoard :)</span></td>
</tr>
</tbody>
</table>
</td>
</tr>
</tbody>
</table>
|
|
|
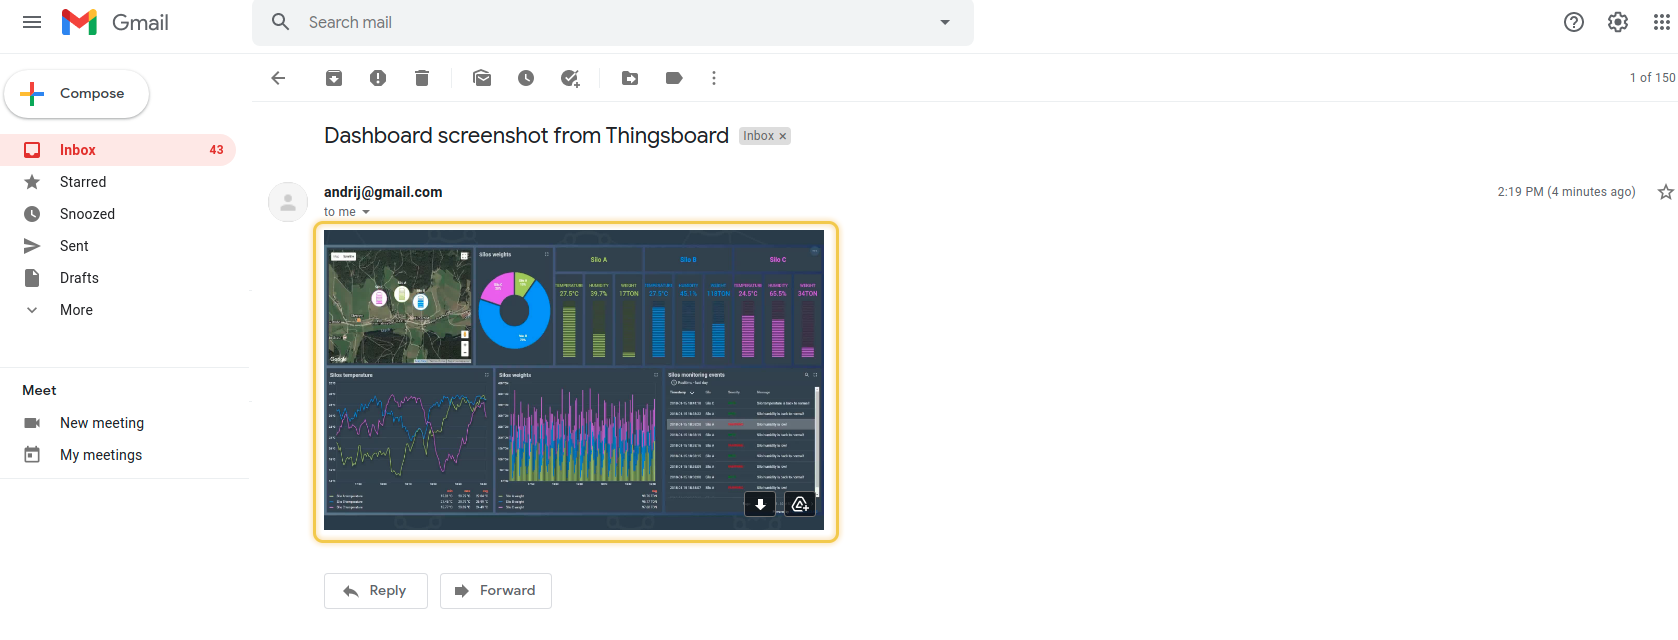
发送图片时,只需指定带扩展名的图片文件名即可。
带图片的HTML示例
1
| <img src="cid:tb.example.png" alt="Example image">
|
|
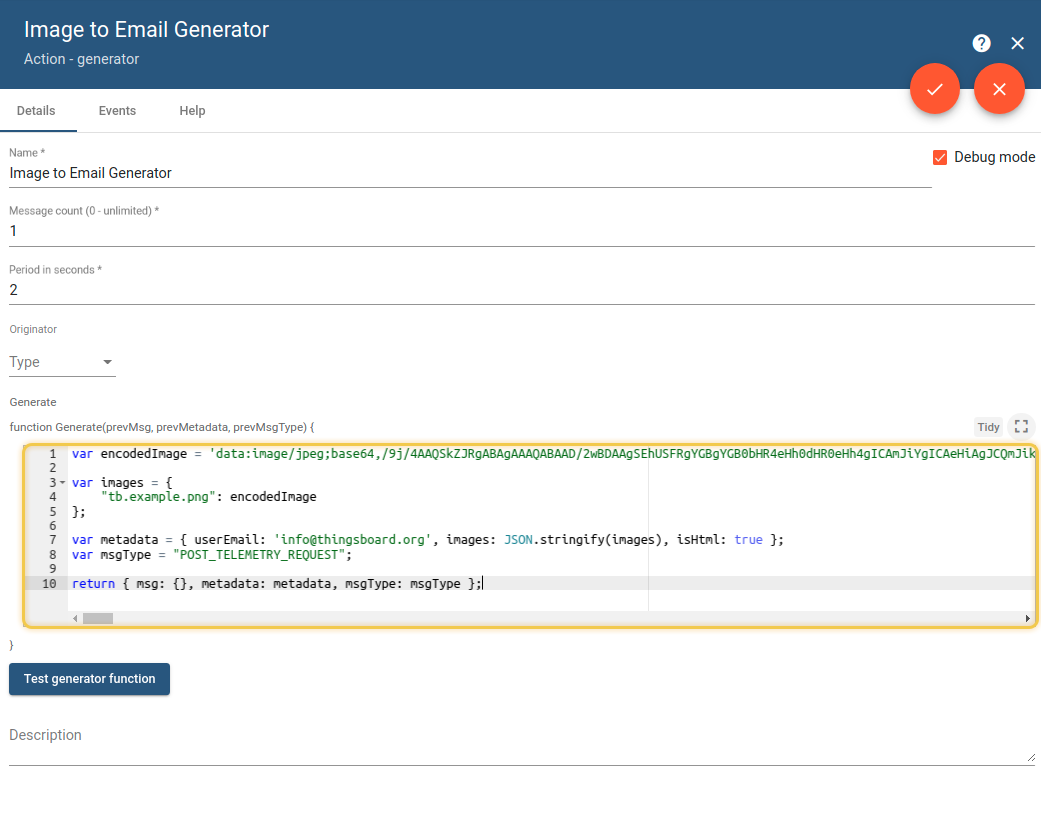
配置 generator
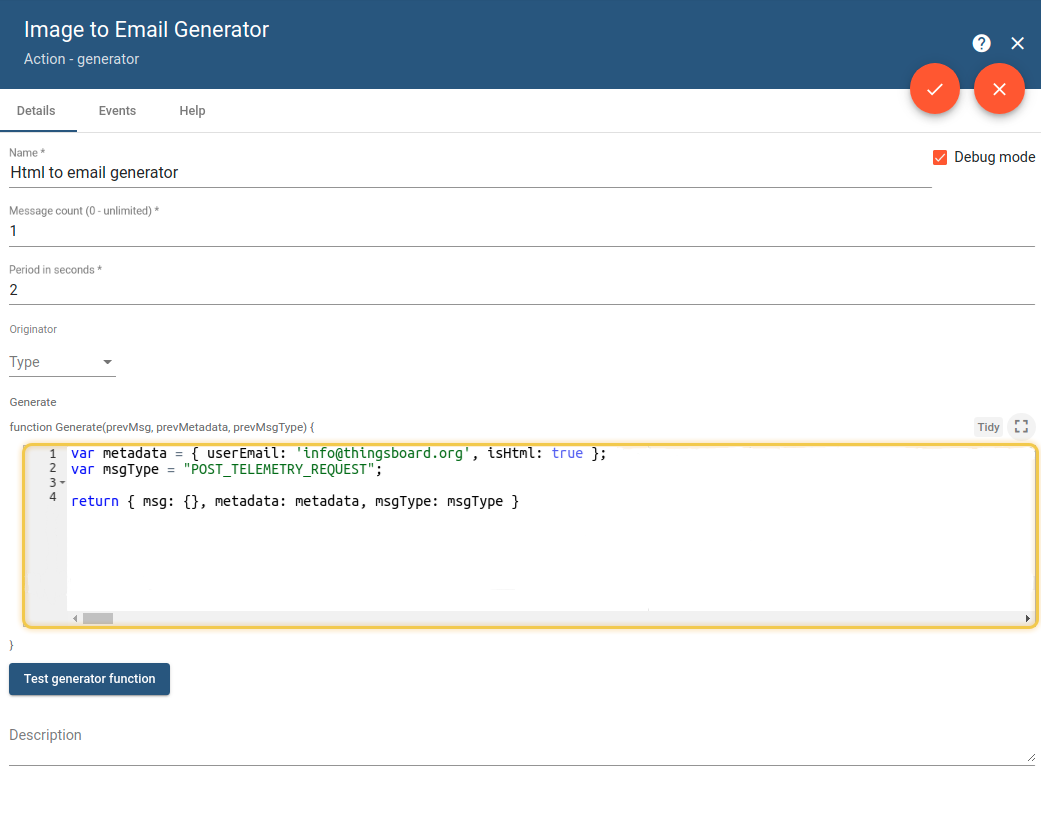
第二步配置 “generator” 节点:
- 在 Rule Chain 中找到
Generator 并拖到画布。
- 填写名称,message count 设为
1,Period in seconds 可设为 2。
- 配置 JS 代码(可直接使用示例代码)。
这里要在 metadata 中写入 “to email” 节点会用到的动态字段,本示例为 isHtml 和 userEmail。
generator JS 代码示例
1
2
3
| var metadata = { userEmail: 'info@thingsboard.org', isHtml: true };
var msgType = "POST_TELEMETRY_REQUEST";
return { msg: {}, metadata: metadata, msgType: msgType }
|
|
发送图片需将图片编码为Base64。可使用支持Base64编码的服务,并将结果字符串填入以下示例中的encodedImage。
generator JS 代码示例
1
2
3
4
5
6
7
8
9
10
11
| var encodedImage = 'HERE_YOU_BASE_64_ENCODED_IMAGE';
var images = {
"tb.example.png": encodedImage
};
var metadata = {
userEmail: 'info@thingsboard.org',
images: JSON.stringify(images),
isHtml: true
};
var msgType = "POST_TELEMETRY_REQUEST";
return { msg: {}, metadata: metadata, msgType: msgType }
|
|
配置 send email 并完成连接
添加并配置 send email 节点,按示意图连接所有节点。
最后保存 rule chain。
结果
检查收件邮箱即可查看 “to email” 节点的执行效果。
示例如下:
另请参阅
下一步
-
快速入门指南 - 快速了解ThingsBoard主要功能,约15-30分钟完成。
-
连接设备 - 根据连接技术或方案学习如何连接设备。
-
数据可视化 - 配置ThingsBoard复杂仪表盘的说明。
-
IoT数据分析 - 学习使用规则引擎执行基本分析任务。
-
高级功能 - 了解ThingsBoard高级功能。
-
贡献与开发 - 了解ThingsBoard贡献与开发。