- 前置条件
- 克隆TBMQ PE K8S仓库
- 配置并创建EKS集群
- 创建AWS负载均衡器控制器
- Amazon PostgreSQL DB Configuration
- Amazon MSK Configuration
- Amazon ElastiCache (Valkey) Configuration
- Configure links to the Kafka/Postgres/Valkey
- Installation
- 获取许可证密钥
- 配置许可证密钥
- Configure gp3 as the Default Storage Class in Your EKS Cluster
- Starting
- Configure Load Balancers
- Validate the setup
- Upgrading
- Cluster deletion
- 下一步
本指南将帮助您在AWS EKS上搭建TBMQ PE。
前置条件
安装并配置工具
要在 EKS 集群上部署 TBMQ,需安装 kubectl、 eksctl 和 awscli 工具。
此外,需配置 Access Key、Secret Key 和默认区域。 获取 Access Key 和 Secret Key 请参阅 此指南。 默认区域应为要部署集群的目标区域的 ID。
1
aws configure
克隆TBMQ PE K8S仓库
1
2
git clone -b release-2.2.0 https://github.com/thingsboard/tbmq-pe-k8s.git
cd tbmq-pe-k8s/aws
配置并创建EKS集群
在 cluster.yml 中可找到示例集群配置。
可根据需求调整以下字段:
-
region– 创建集群的AWS区域。 默认:us-east-1。 -
availabilityZones– 所选区域内的可用区。 默认:[us-east-1a, us-east-1b, us-east-1c]。 -
managedNodeGroups– 定义集群使用的节点组。 默认有两组:一组用于 TBMQ核心服务,另一组用于 TBMQ Integration Executors。 若需要,可将两者部署到同一节点组。 -
instanceType– TBMQ和TBMQ IE节点的EC2实例类型。 默认:m7a.large。
注意:若未修改 instanceType 和 desiredCapacity,EKS将部署4个m7a.large类型的节点。
创建AWS集群命令:
1
eksctl create cluster -f cluster.yml
创建AWS负载均衡器控制器
集群就绪后,需创建AWS负载均衡器控制器。 可参考此指南。 集群部署脚本将创建若干负载均衡器:
- tbmq-http-loadbalancer-AWS ALB that is responsible for the web UI and REST API;
- tbmq-mqtt-loadbalancer-AWS NLB that is responsible for the MQTT communication.
Provisioning of the AWS load-balancer controller is a very important step that is required for those load balancers to work properly.
Amazon PostgreSQL DB Configuration
You’ll need to provision a PostgreSQL database on Amazon RDS. One recommended way is to follow the official AWS RDS setup guide.
Recommendations:
- PostgreSQL version: Use version 17.x.
- Template: Use Production for real workloads. It enables important settings by default to improve resilience and reliability; reserve Dev/Test only for non-critical testing.
- Availability: Enable Multi-AZ deployment to ensure automatic failover and minimize downtime.
- Credentials: Change the default
usernameand set (or auto-generate) a securepassword. Be sure to store the password safely for future use. - Instance configuration: Use a small general-purpose Graviton instance (e.g., db.m7g.large) — TBMQ’s PostgreSQL load is modest; right-size first, optimize later.
- Scaling: Scale vertically (instance class/size) if sustained CPU >80% or active connections near limits; change type during a maintenance window.
- Storage: Choose gp3 or io1 volumes for production; avoid magnetic storage.
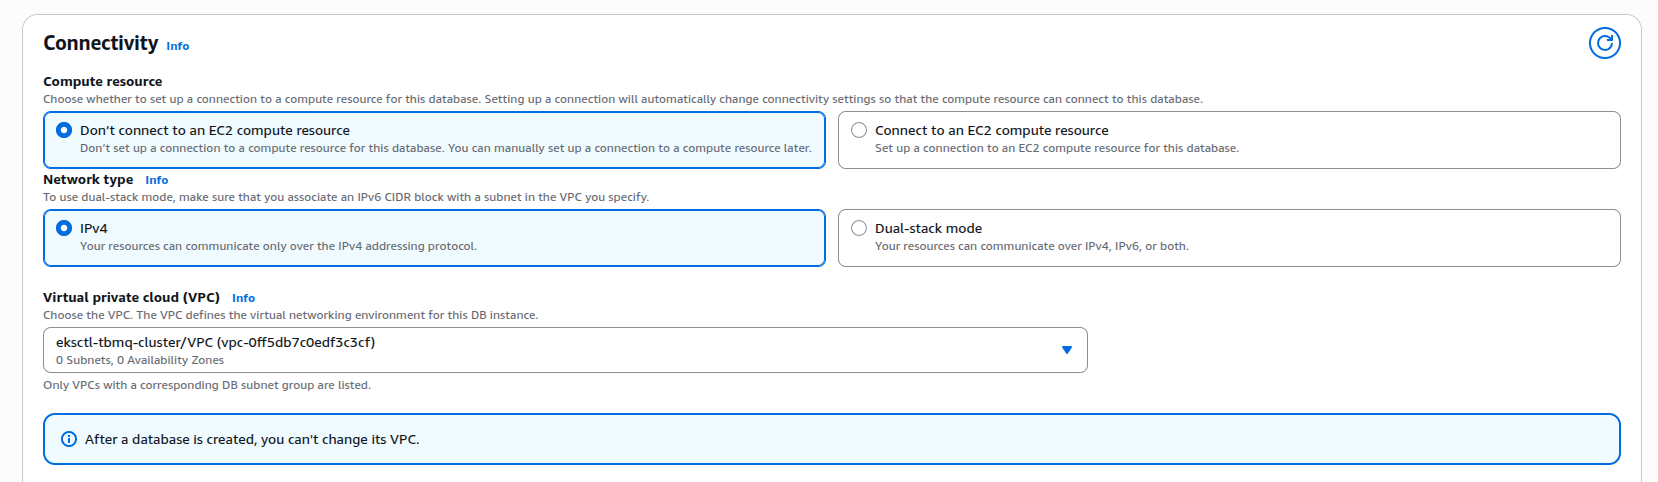
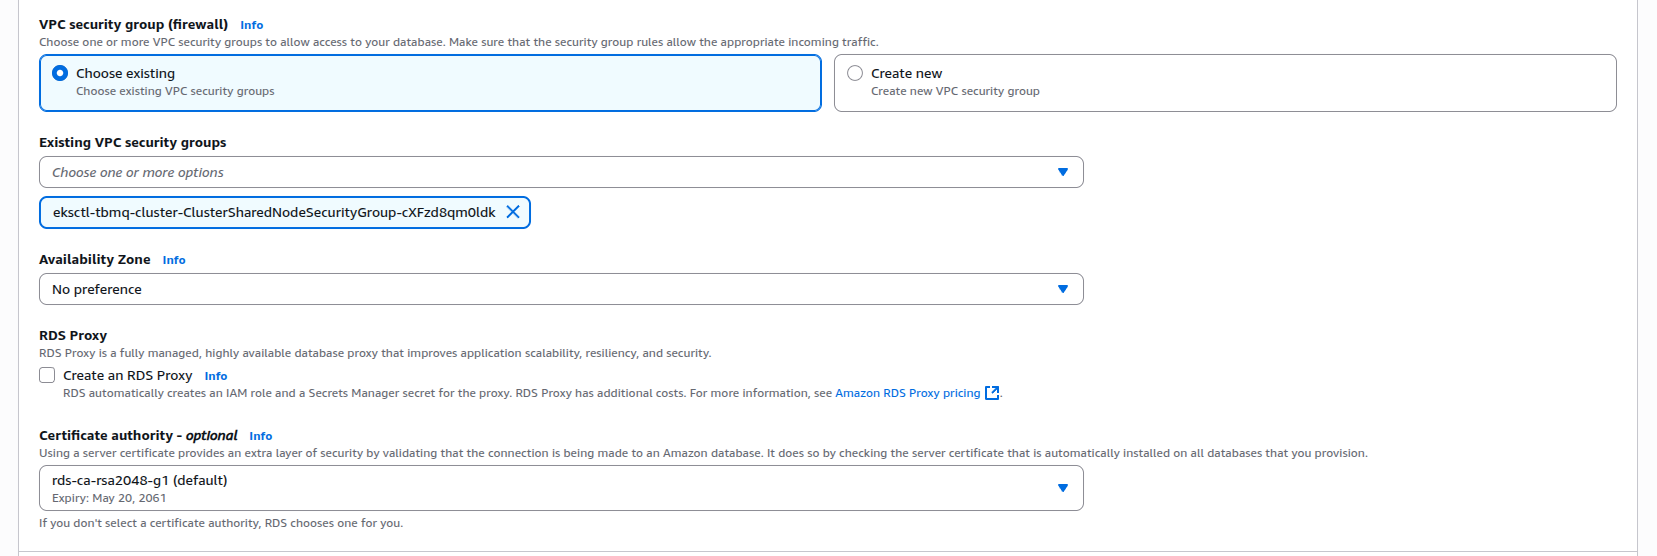
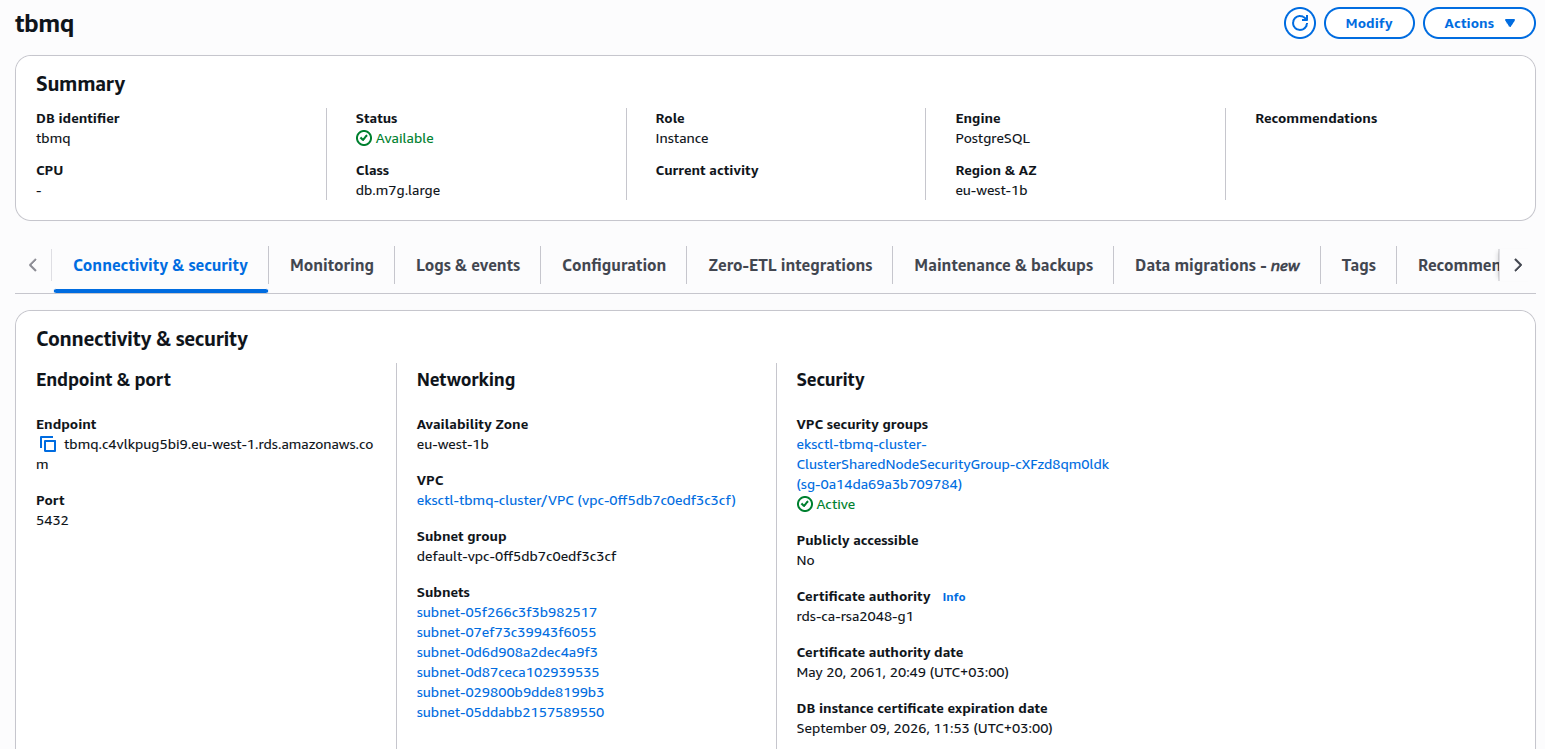
- Connectivity: Ensure your RDS database is accessible from your EKS cluster.
A straightforward approach is to create the database in the same VPC and subnets as your TBMQ cluster, and assign the
eksctl-tbmq-cluster-ClusterSharedNodeSecurityGroup-*security group to the RDS instance. See the screenshots below for guidance. - Parameter group: Create a custom parameter group for your instance. This makes it easier to adjust database parameters later without affecting other databases.
- Monitoring: Enable enhanced monitoring and set up CloudWatch alarms for key metrics.
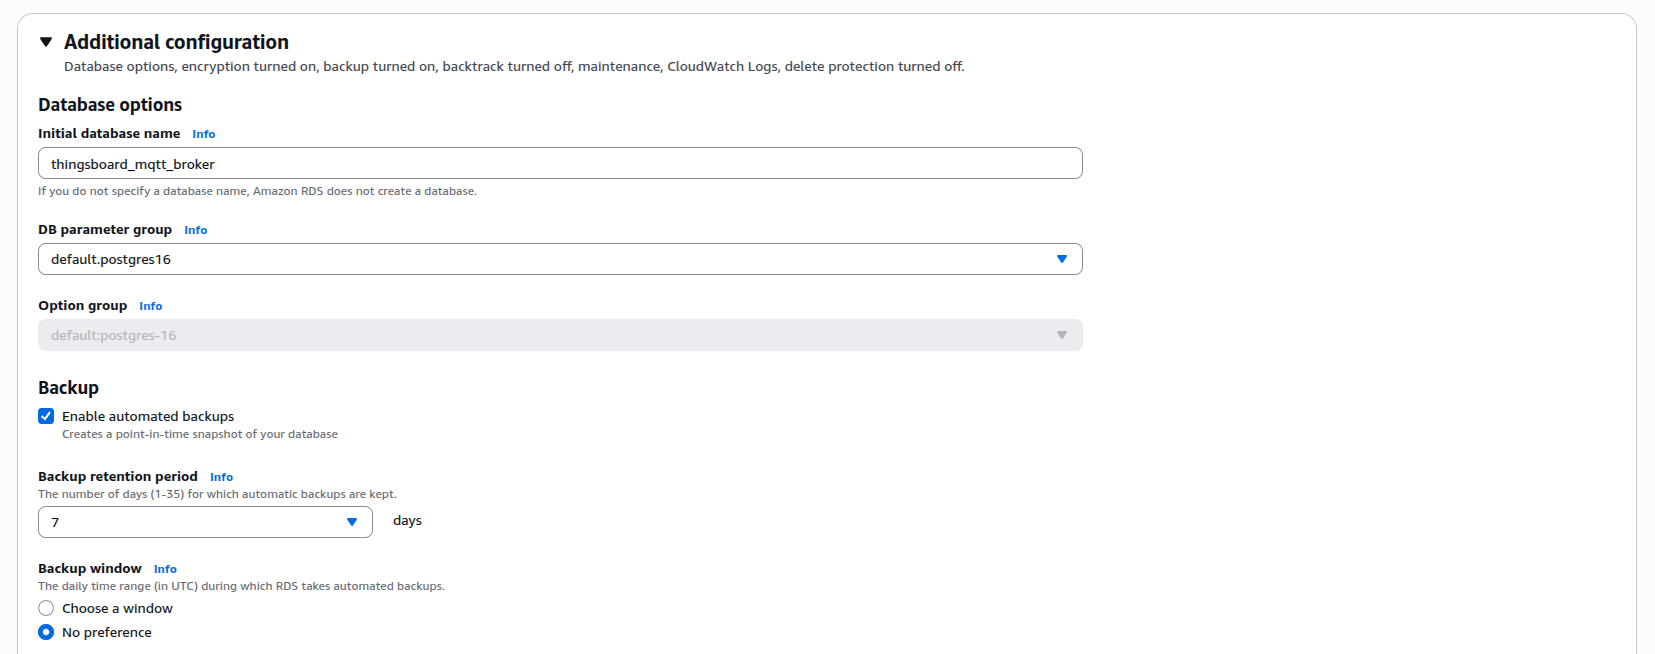
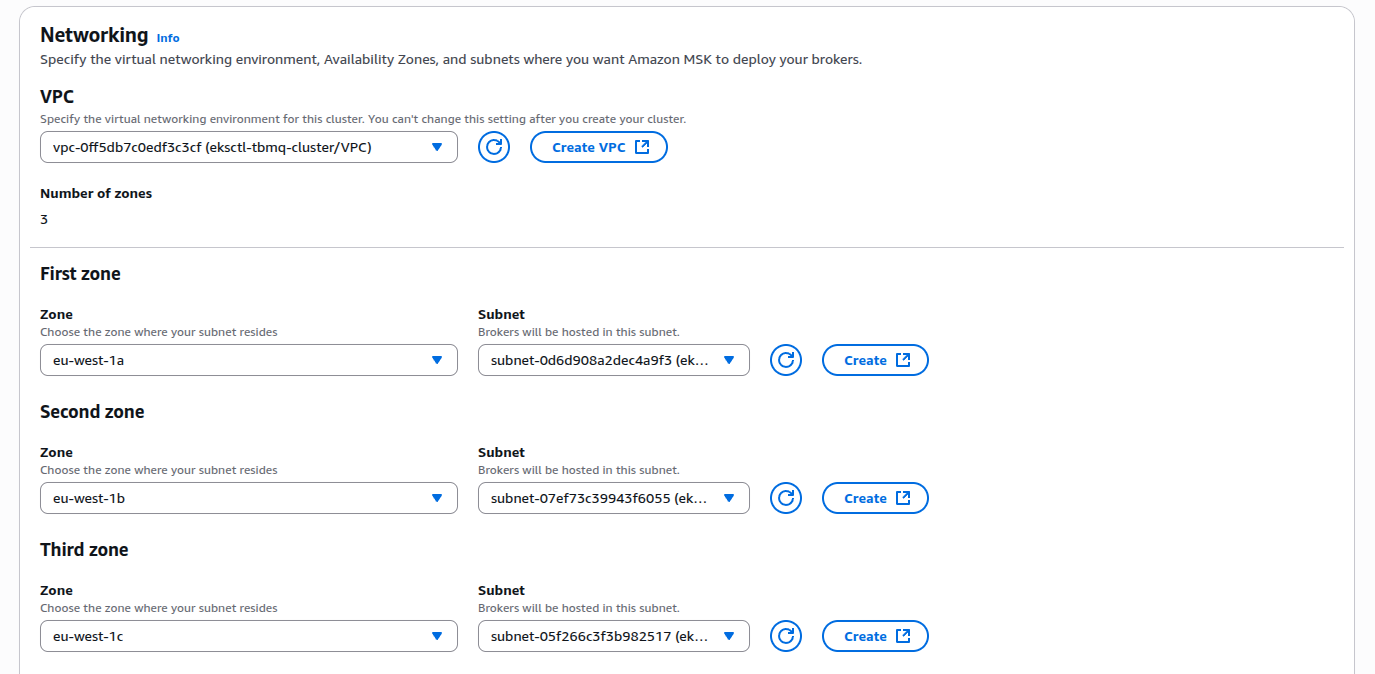
Amazon MSK Configuration
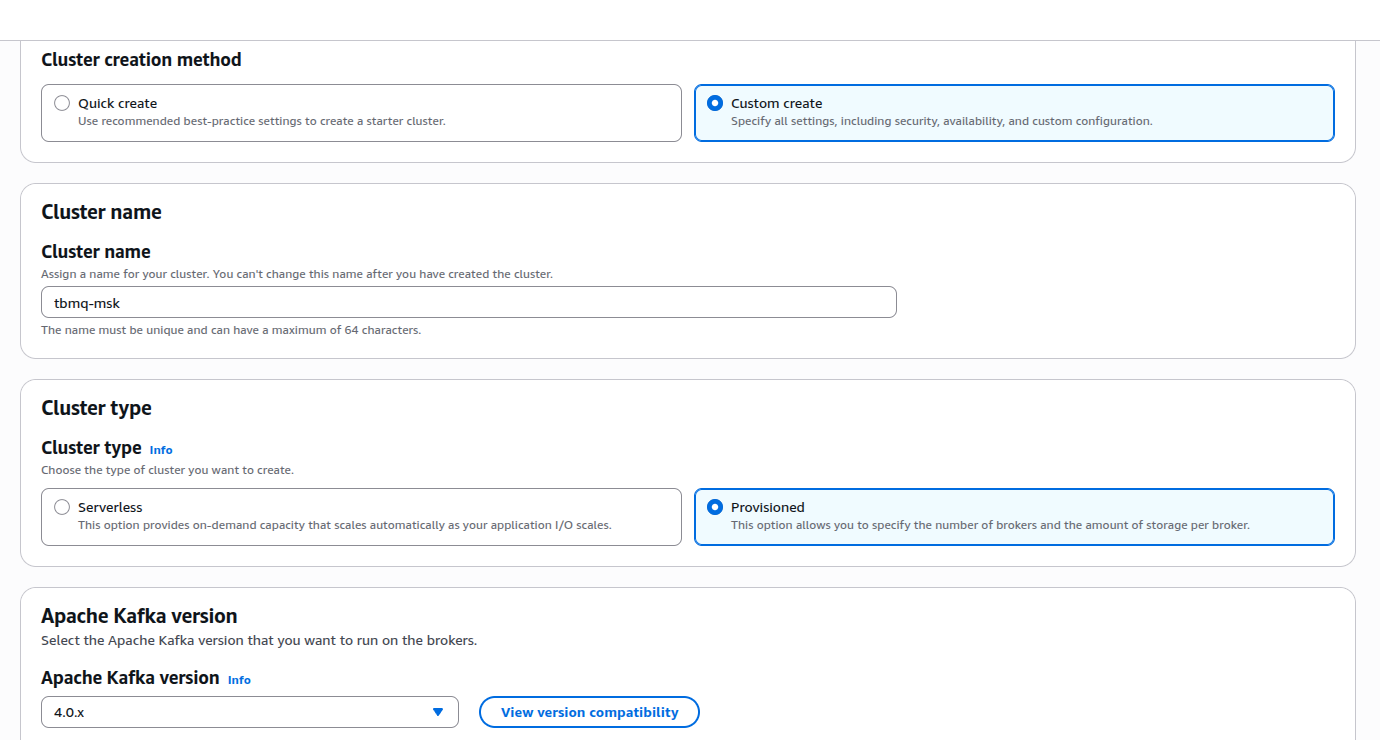
You’ll need to provision an Amazon MSK cluster. To do this, open the AWS Console, navigate to MSK, click Create cluster, and select Custom create mode. You should see a screen similar to this:
Recommendations:
- Cluster type: Select Provisioned for full control over broker capacity and configuration.
- Kafka version: Use Apache Kafka4.0.x — this version has been fully validated with TBMQ.
- Metadata mode: Choose KRaft (controller quorum) for simplified operations and improved resiliency compared to ZooKeeper.
- Instance type: Start with m7g.large brokers (or equivalent) for a good balance of performance and cost; scale up later if required.
- Cluster configuration: Create a custom configuration to simplify future parameter changes without needing to recreate the cluster.
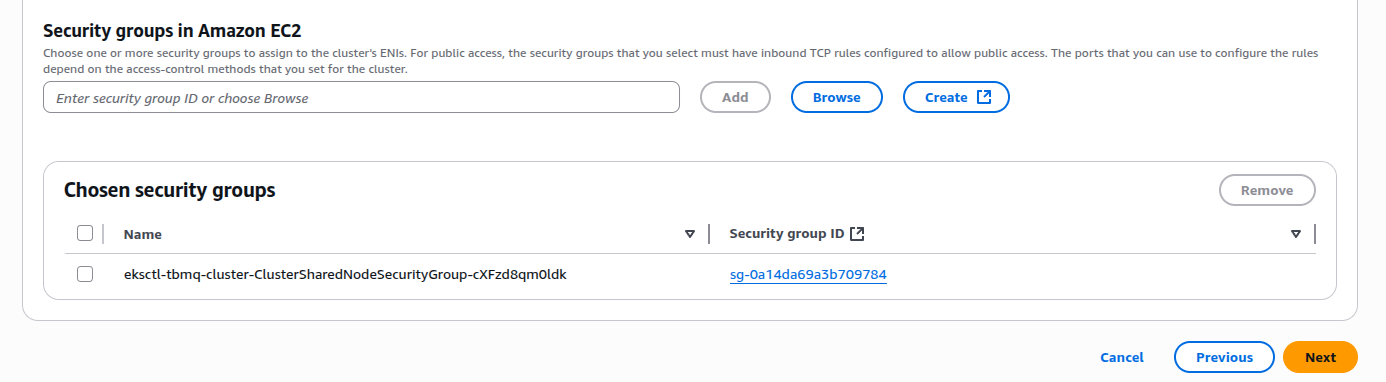
- Networking: Deploy the MSK cluster in the same VPC as your TBMQ cluster, using private subnets to minimize exposure.
Attach the security group
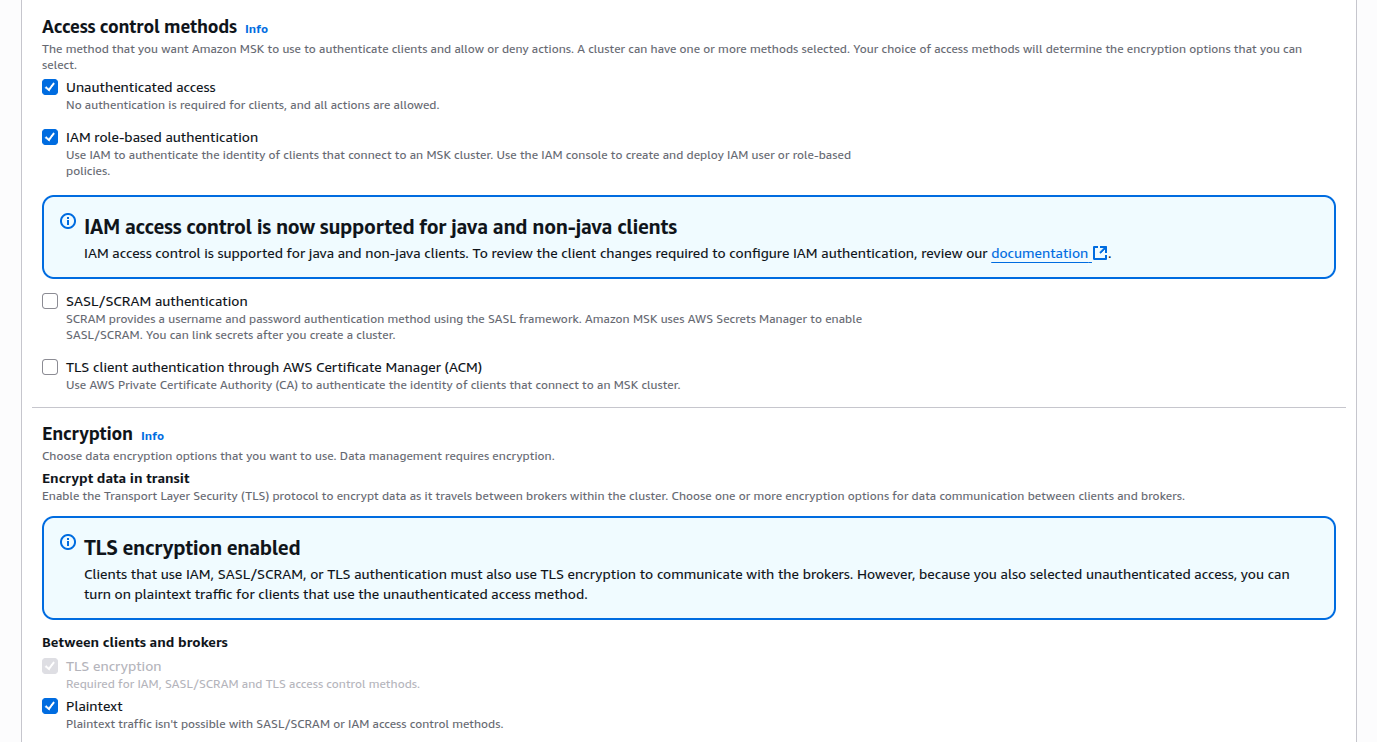
eksctl-tbmq-cluster-ClusterSharedNodeSecurityGroup-*to allow connectivity from EKS nodes. - Security: Allow Unauthenticated access and Plaintext communication. Adjust later if you need stricter security policies.
- Monitoring: Use the default monitoring options or enable enhanced topic-level monitoring for detailed Kafka metrics.
Carefully review the full cluster configuration, then proceed with cluster creation.
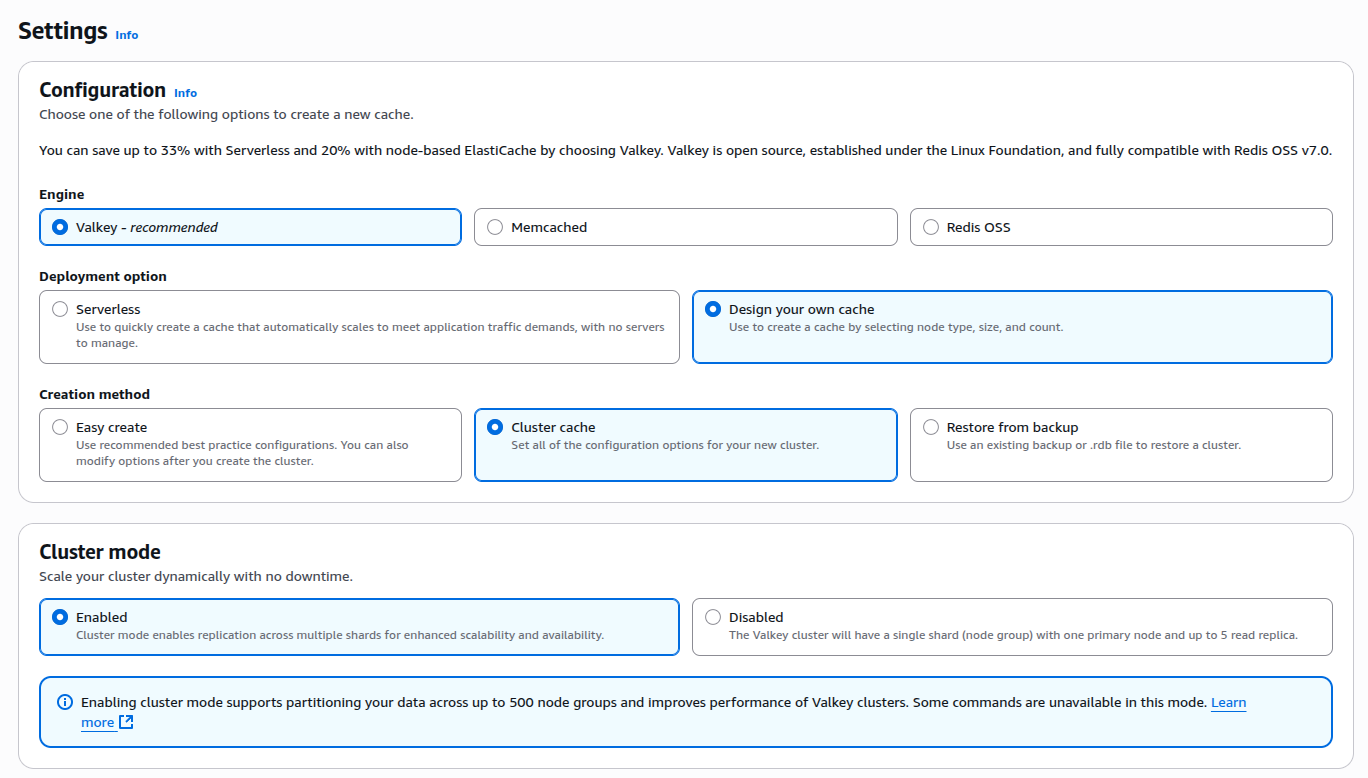
Amazon ElastiCache (Valkey) Configuration
TBMQ relies on Valkey to store messages for DEVICE persistent clients. The cache also improves performance by reducing the number of direct database reads, especially when authentication is enabled and multiple clients connect at once. Without caching, every new connection triggers a database query to validate MQTT client credentials, which can cause the unnecessary load under high connection rates.
To set up Valkey, open the AWS Console → ElastiCache → Valkey caches → Create cache.
Recommendations:
- Engine: Select Valkey (recommended) as the engine type.
- Deployment option: Choose Design your own cache → Cluster cache to customize node type, shard count, and replicas.
- Cluster mode:
- Set to Enabled if you configure TBMQ with
REDIS_CONNECTION_TYPE=cluster(in this guide, we follow this approach). - Set to Disabled if you configure TBMQ with
REDIS_CONNECTION_TYPE=standalone.
- Set to Enabled if you configure TBMQ with
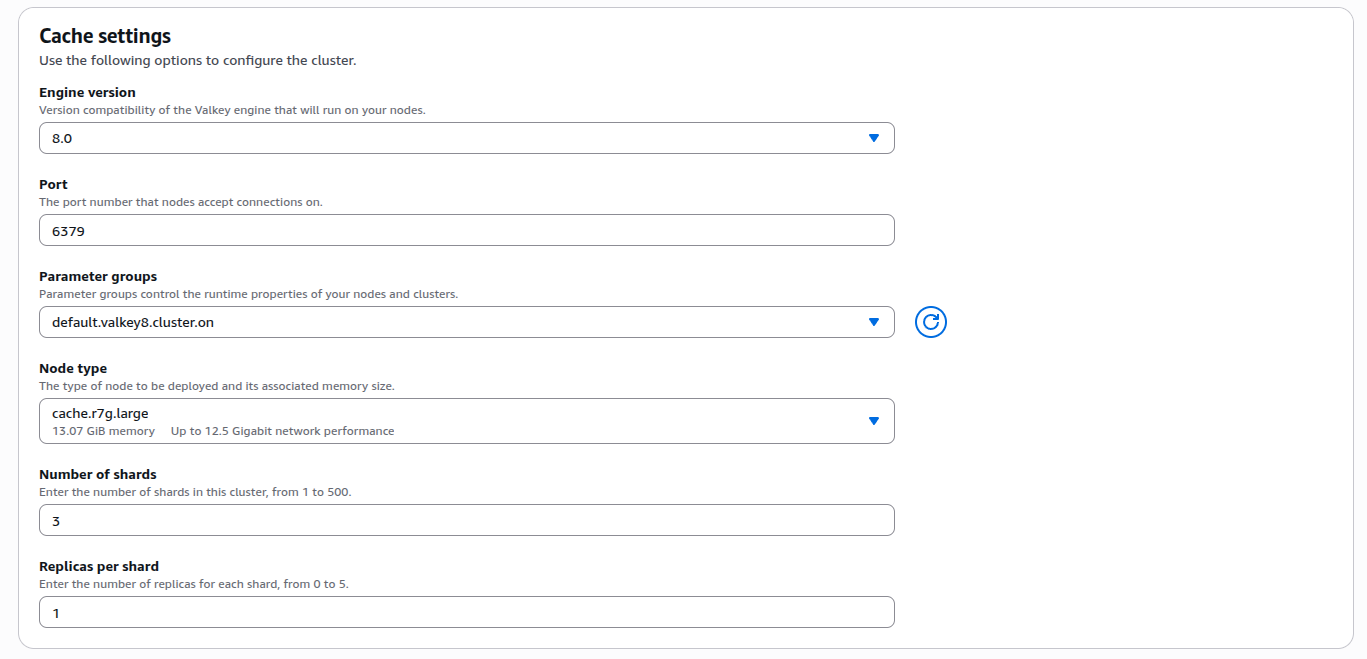
- Engine version: Use 8.x, fully supported and compatible with Redis OSS v7.
- Node type: Start with cache.r7g.large (13 GB memory, good network performance). A smaller type with at least 1 GB RAM can be used for dev/test environments.
- Shards: For production, configure 3 shards with 1 replica per shard to balance durability and scalability.
- Parameter groups: Use the default Valkey 8.x group or create a custom parameter group for easier tuning later.
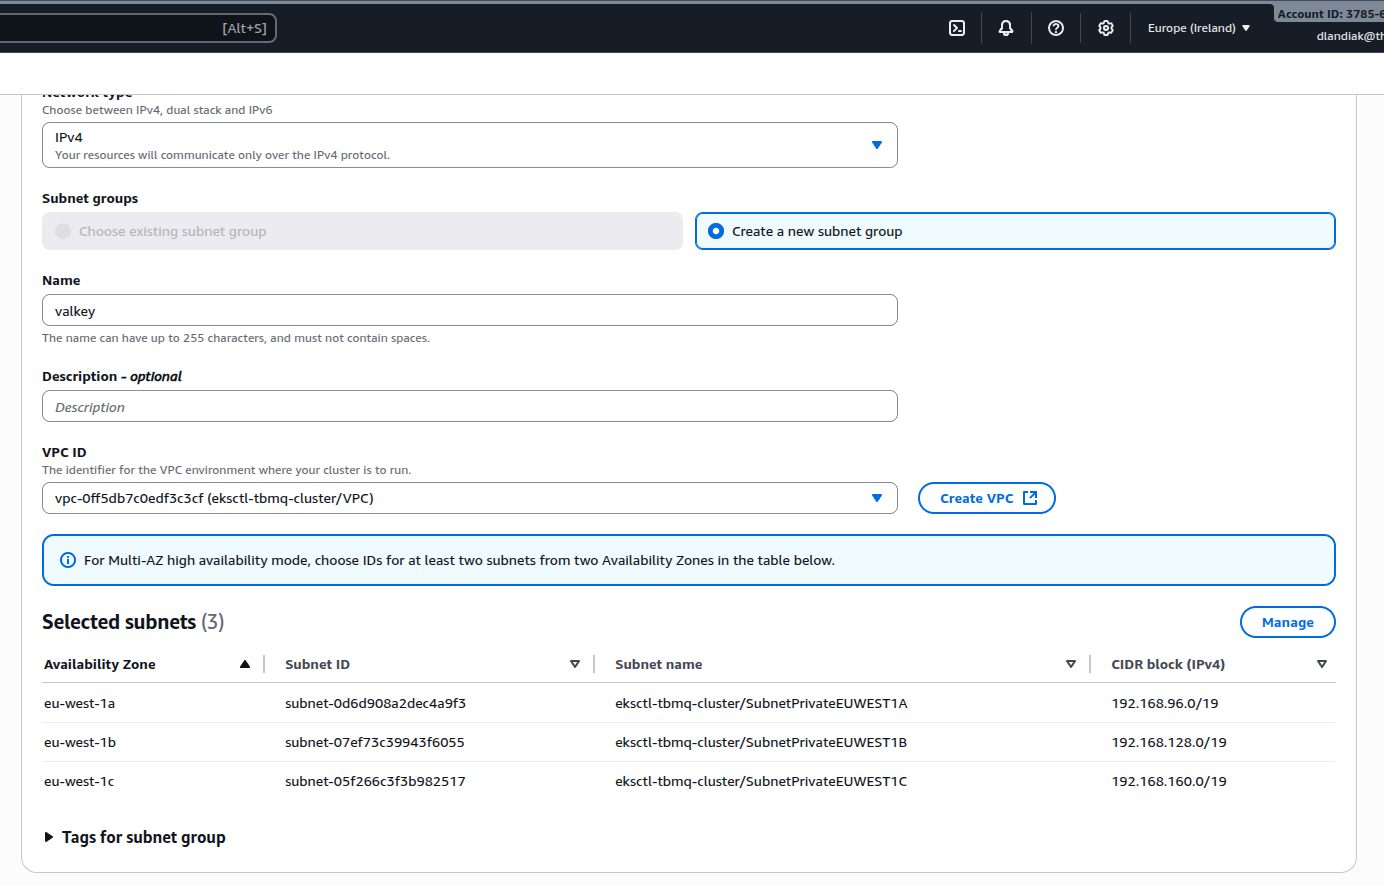
- Networking:
- Deploy into the same VPC as your TBMQ cluster.
- Use private subnets to avoid exposure to the internet.
- Assign the security group
eksctl-tbmq-cluster-ClusterSharedNodeSecurityGroup-*to allow secure communication between EKS nodes and Valkey.
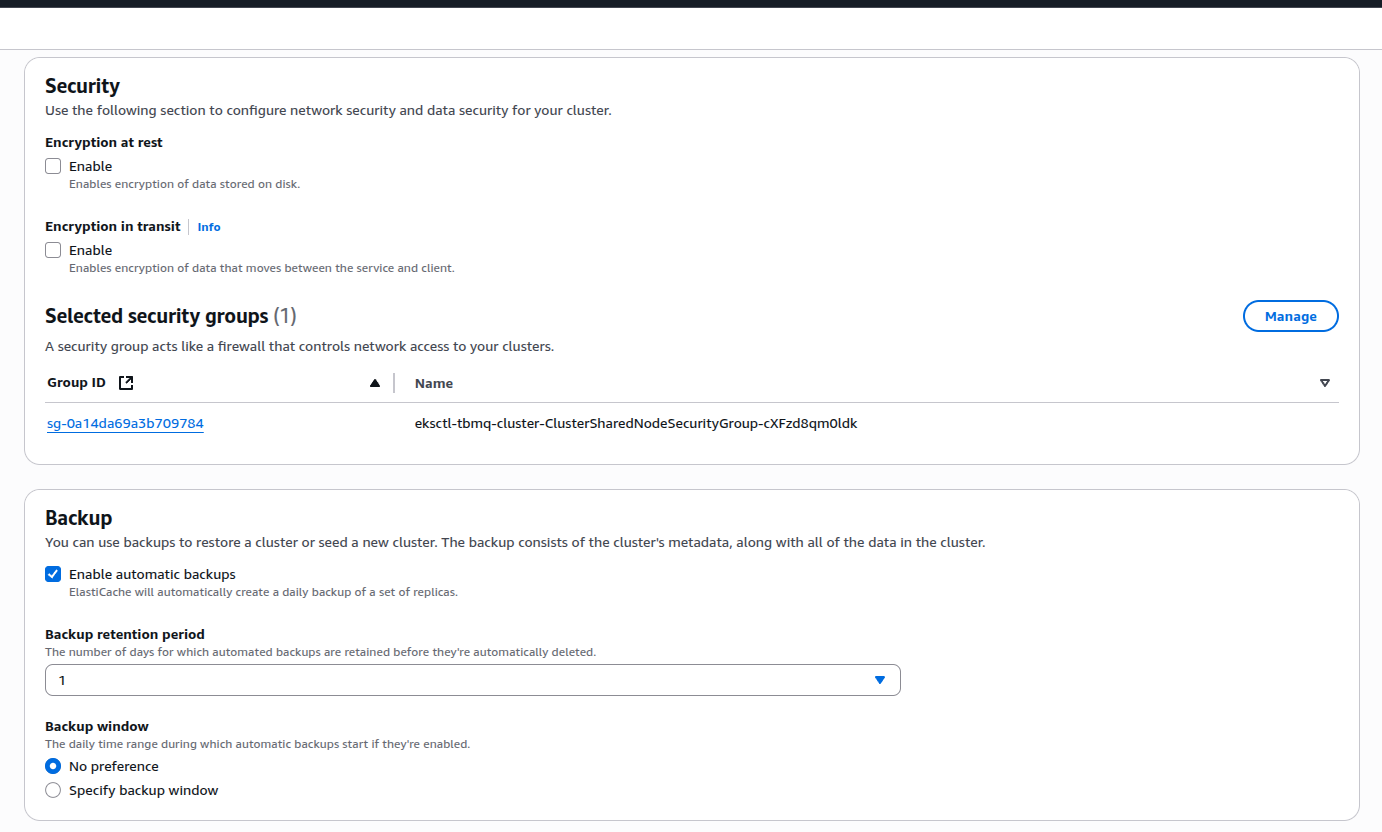
- Security: Disable encryption at rest and in transit if you plan to use plaintext/unauthenticated connections. Enable them if stricter security is required.
- Backups: Enable automatic backups to protect persistent cache data. Choose a retention period that matches your recovery needs (e.g., 1–7 days). This ensures you can restore the cache in case of accidental data loss or cluster issues.
Configure links to the Kafka/Postgres/Valkey
Amazon RDS (PostgreSQL)
When the RDS PostgreSQL instance switches to the Available state, open the AWS Console and copy its Endpoint.
Update the SPRING_DATASOURCE_URL field in tbmq-db-configmap.yml by replacing the placeholder RDS_URL_HERE with the copied endpoint.
Also, set the following environment variables with your RDS credentials:
SPRING_DATASOURCE_USERNAME→ your PostgreSQL usernameSPRING_DATASOURCE_PASSWORD→ your PostgreSQL password
Amazon MSK (Kafka)
When the MSK cluster becomes Active, retrieve the list of bootstrap brokers with:
1
aws kafka get-bootstrap-brokers --region us-east-1 --cluster-arn $CLUSTER_ARN
Here, $CLUSTER_ARN is the Amazon Resource Name of your MSK cluster.
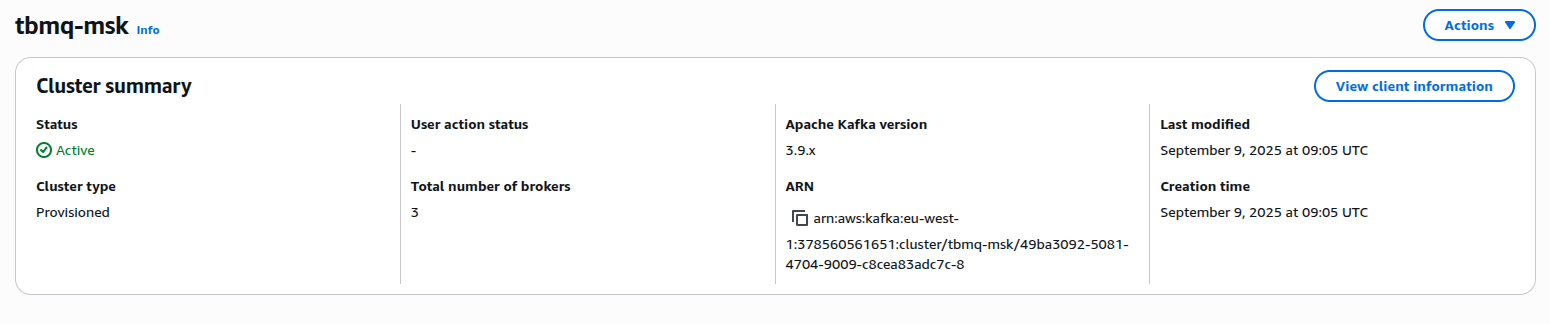
Copy the value from BootstrapBrokerString and set it as the TB_KAFKA_SERVERS environment variable in tbmq.yml and tbmq-ie.yml.
Alternatively, click View client information in the MSK Console and copy the plaintext bootstrap servers from the UI.
Amazon ElastiCache (Valkey)
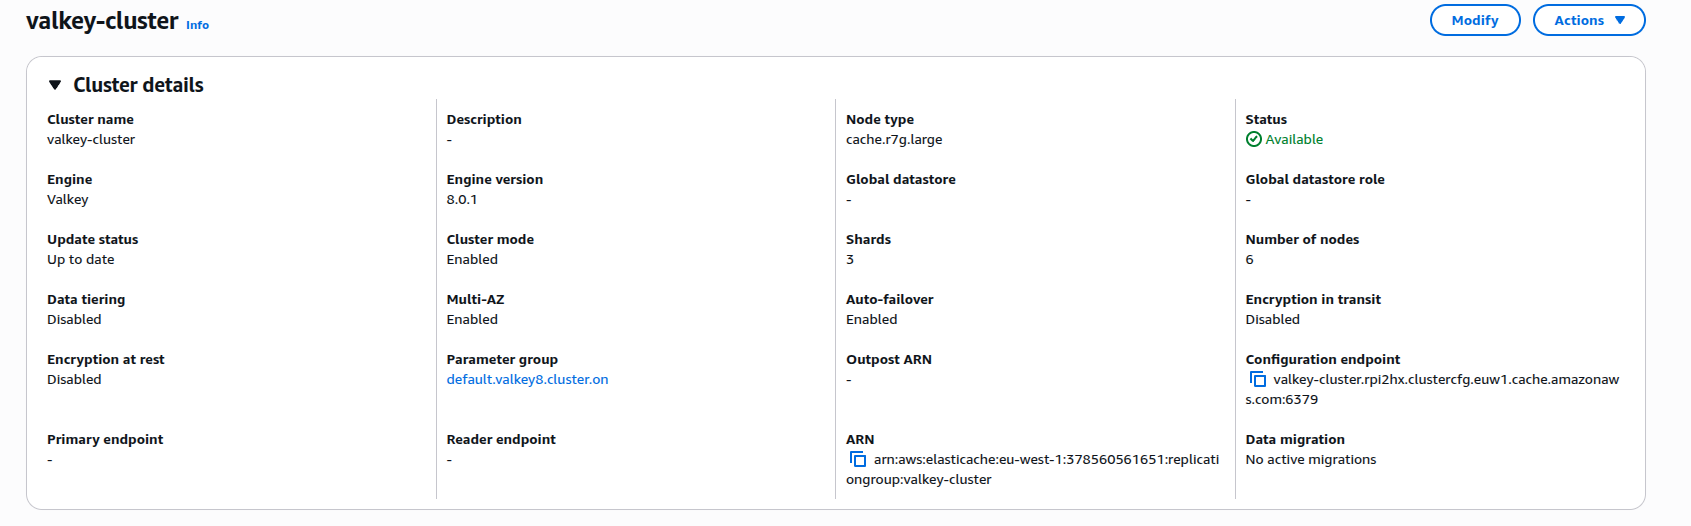
When the Valkey cluster reaches the Available state, open Cluster details and copy the connection endpoints:
- For standalone mode: use the Primary endpoint (without the
:6379port suffix) → YOUR_VALKEY_ENDPOINT_URL_WITHOUT_PORT. - For cluster mode: use the Cluster configuration endpoint → YOUR_VALKEY_CLUSTER_ENDPOINT_URL.
Next, edit tbmq-cache-configmap.yml:
-
If running standalone:
1
2
3
REDIS_CONNECTION_TYPE: "standalone"
REDIS_HOST: "YOUR_VALKEY_ENDPOINT_URL_WITHOUT_PORT"
#REDIS_PASSWORD: "YOUR_REDIS_PASSWORD"
-
If running cluster:
1
2
3
4
5
6
REDIS_CONNECTION_TYPE: "cluster"
REDIS_NODES: "YOUR_VALKEY_CLUSTER_ENDPOINT_URL"
#REDIS_PASSWORD: "YOUR_REDIS_PASSWORD"
# Recommended for Kubernetes clusters to handle dynamic IP changes and failover:
#REDIS_LETTUCE_CLUSTER_TOPOLOGY_REFRESH_ENABLED: "true"
#REDIS_JEDIS_CLUSTER_TOPOLOGY_REFRESH_ENABLED: "true"
Installation
Execute the following command to run the installation:
1
./k8s-install-tbmq.sh
After this command is finished, you should see the next line in the console:
1
INFO  o.t.m.b.i.ThingsboardMqttBrokerInstallService-Installation finished successfully!
Otherwise, please check if you set the PostgreSQL URL and PostgreSQL password in the tbmq-db-configmap.yml correctly.
获取许可证密钥
在继续之前,请确保已选择订阅计划或购买永久许可证。 若尚未完成,请访问定价页面比较可用选项 并获取许可证密钥。
注意: 本指南中,我们将用 YOUR_LICENSE_KEY_HERE 表示您的许可证密钥。
配置许可证密钥
使用许可证密钥创建 k8s 密钥:
1
2
export TBMQ_LICENSE_KEY=YOUR_LICENSE_KEY_HERE
kubectl create -n thingsboard-mqtt-broker secret generic tbmq-license --from-literal=license-key=$TBMQ_LICENSE_KEY
请勿忘记将 YOUR_LICENSE_KEY_HERE 替换为您的许可证密钥值。
Configure gp3 as the Default Storage Class in Your EKS Cluster
To ensure that all newly created PersistentVolumeClaims (PVCs) in your EKS cluster use gp3-backed Amazon EBS volumes, you must create the gp3 StorageClass and set it as the default.
This section walks you through applying the gp3 StorageClass manifest, disabling or removing the existing gp2 class if present, and verifying that gp3 is now the cluster’s default.
Before proceeding, follow the official AWS EBS CSI Driver instructions to install the driver on your EKS cluster. Once the add-on is successfully installed, you can configure gp3 as the default StorageClass.
gp3 EBS 卷类型是 Amazon EKS 的推荐默认选项,相比 gp2 具有更好的性能、成本效益和灵活性。
请下载存储类配置文件:
1
curl -o gp3-def-sc.yml https://raw.githubusercontent.com/thingsboard/tbmq/release-2.2.0/k8s/helm/aws/gp3-def-sc.yml
应用配置:
1
kubectl apply -f gp3-def-sc.yml
若存在 gp2 StorageClass,可能与 gp3 冲突。可将 gp2 存储类设为非默认:
1
kubectl patch storageclass gp2 -p '{"metadata": {"annotations":{"storageclass.kubernetes.io/is-default-class":"false"}}}'
或删除 gp2 StorageClass(若未使用):
1
kubectl delete storageclass gp2
检查 gp3 存储类是否可用并已标记为默认:
1
kubectl get sc
输出应类似:
1
2
NAME            PROVISIONER       RECLAIMPOLICY   VOLUMEBINDINGMODE      ALLOWVOLUMEEXPANSION   AGE
gp3 (default)   ebs.csi.aws.com   Delete          WaitForFirstConsumer   true                   30s
Starting
执行以下命令部署 broker:
1
./k8s-deploy-tbmq.sh
几分钟后,可执行以下命令检查所有 pod 状态。
1
kubectl get pods
若一切正常,应能看到 tbmq-0 和 tbmq-1 pod,且均处于 READY 状态。
Configure Load Balancers
Configure HTTP(S) Load Balancer
Configure HTTP(S) Load Balancer to access the web interface of your TBMQ PE instance. Basically, you have 2 possible options of configuration:
- http — Load Balancer without HTTPS support. Recommended for development. The only advantage is simple configuration and minimum costs. May be a good option for development server but definitely not suitable for production.
- https — Load Balancer with HTTPS support. Recommended for production. Acts as an SSL termination point. You may easily configure it to issue and maintain a valid SSL certificate. Automatically redirects all non-secure (HTTP) traffic to secure (HTTPS) port.
See links/instructions below on how to configure each of the suggested options.
HTTP Load Balancer
Execute the following command to deploy plain http load balancer:
1
kubectl apply -f receipts/http-load-balancer.yml
The process of load balancer provisioning may take some time. You may periodically check the status of the load balancer using the following command:
1
kubectl get ingress
Once provisioned, you should see a similar output:
1
2
NAME                     CLASS    HOSTS   ADDRESS                                                              PORTS   AGE
tbmq-http-loadbalancer   <none>   *       k8s-thingsbo-tbmq-000aba1305-222186756.eu-west-1.elb.amazonaws.com   80      3d1h
HTTPS Load Balancer
Use AWS Certificate Manager to create or import SSL certificate. Note your certificate ARN.
Edit the load balancer configuration and replace YOUR_HTTPS_CERTIFICATE_ARN with your certificate ARN:
1
nano receipts/https-load-balancer.yml
Execute the following command to deploy plain https load balancer:
1
kubectl apply -f receipts/https-load-balancer.yml
Configure MQTT Load Balancer
Configure MQTT load balancer to be able to use MQTT protocol to connect devices.
Create TCP load balancer using the following command:
1
kubectl apply -f receipts/mqtt-load-balancer.yml
The load balancer will forward all TCP traffic for ports 1883 and 8883.
One-way TLS
The simplest way to configure MQTTS is to make your MQTT load balancer (AWS NLB) to act as a TLS termination point. This way we set up the one-way TLS connection, where the traffic between your devices and load balancers is encrypted, and the traffic between your load balancer and TBMQ is not encrypted. There should be no security issues, since the ALB/NLB is running in your VPC. The only major disadvantage of this option is that you can’t use “X.509 certificate” MQTT client credentials, since information about the client certificate is not transferred from the load balancer to the TBMQ.
To enable the one-way TLS:
Use AWS Certificate Manager to create or import SSL certificate. Note your certificate ARN.
Edit the load balancer configuration and replace YOUR_MQTTS_CERTIFICATE_ARN with your certificate ARN:
1
nano receipts/mqtts-load-balancer.yml
Execute the following command to deploy plain MQTTS load balancer:
1
kubectl apply -f receipts/mqtts-load-balancer.yml
Two-way TLS
The more complex way to enable MQTTS is to obtain valid (signed) TLS certificate and configure it in the TBMQ. The main advantage of this option is that you may use it in combination with “X.509 certificate” MQTT client credentials.
To enable the two-way TLS:
Follow this guide to create a .pem file with the SSL certificate. Store the file as server.pem in the working directory.
You’ll need to create a config-map with your PEM file, you can do it by calling command:
1
2
3
4
5
6
7
8
9
10
11
12
13
14
15
kubectl create configmap tbmq-mqtts-config \
 --from-file=server.pem=YOUR_PEM_FILENAME \
 --from-file=mqttserver_key.pem=YOUR_PEM_KEY_FILENAME \
 -o yaml --dry-run=client | kubectl apply -f-```
{: .copy-code}

* where **YOUR_PEM_FILENAME** is the name of your **server certificate file**.
* where **YOUR_PEM_KEY_FILENAME** is the name of your **server certificate private key file**.

Then, uncomment all sections in the ‘tbmq.yml’ file that are marked with “Uncomment the following lines to enable two-way MQTTS”.

Execute command to apply changes:

```bash
kubectl apply -f tbmq.yml
Finally, deploy the “transparent” load balancer:
1
kubectl apply -f receipts/mqtt-load-balancer.yml
Validate the setup
Now you can open the TBMQ web interface in your browser using the DNS name of the load balancer.
You can get the DNS name of the load-balancers using the next command:
1
kubectl get ingress
You should see the similar picture:
1
2
NAME                     CLASS    HOSTS   ADDRESS                                                              PORTS   AGE
tbmq-http-loadbalancer   <none>   *       k8s-thingsbo-tbmq-000aba1305-222186756.eu-west-1.elb.amazonaws.com   80      3d1h
Use ADDRESS field of the tbmq-http-loadbalancer to connect to the cluster.
您将看到TBMQ登录页面。请使用以下 System Administrator(系统管理员)默认凭据:
用户名:
1
sysadmin@thingsboard.org
密码:
1
sysadmin
首次登录时,系统将要求您将默认密码修改为自定义密码,然后使用新凭据重新登录。
Validate MQTT access
To connect to the cluster via MQTT, you will need to get the corresponding service IP. You can do this with the command:
1
kubectl get services
You should see the similar picture:
1
2
NAME                     TYPE           CLUSTER-IP       EXTERNAL-IP                                                                 PORT(S)                         AGE
tbmq-mqtt-loadbalancer   LoadBalancer   10.100.119.170   k8s-thingsbo-tbmq-b9f99d1ab6-1049a98ba4e28403.elb.eu-west-1.amazonaws.com   1883:30308/TCP,8883:31609/TCP6m58s
Use EXTERNAL-IP field of the load-balancer to connect to the cluster via MQTT protocol.
故障排查
In case of any issues, you can examine service logs for errors. For example, to see TBMQ logs, execute the following command:
1
kubectl logs -f tbmq-0
Use the next command to see the state of all statefulsets.
1
kubectl get statefulsets
See kubectl Cheat Sheet command reference for more details.
Upgrading
查看 release notes 和 升级说明 了解最新变更详情。
若文档未涵盖您的升级场景,请联系我们以获取进一步指导。
Backup and restore (Optional)
While backing up your PostgreSQL database is highly recommended, it is optional before proceeding with the upgrade. For further guidance, follow the next instructions.
从 TBMQ CE 升级到 TBMQ PE(v2.2.0)
要将现有 TBMQ 社区版 (CE) 升级到 TBMQ 专业版 (PE),请确保在开始前已运行最新的 TBMQ CE 2.2.0 版本。 将当前配置与最新的 TBMQ PE K8S 脚本 合并。 请勿忘记配置许可证密钥。
运行以下命令(包含升级脚本)以迁移 PostgreSQL 数据库数据(从 CE 到 PE):
1
2
3
./k8s-delete-tbmq.sh
./k8s-upgrade-tbmq.sh --fromVersion=ce
./k8s-deploy-tbmq.sh
Cluster deletion
Execute the following command to delete TBMQ nodes:
1
./k8s-delete-tbmq.sh
Execute the following command to delete all TBMQ nodes and configmaps:
1
./k8s-delete-all.sh
Execute the following command to delete the EKS cluster (you should change the name of the cluster and the region if those differ):
1
eksctl delete cluster -r us-east-1 -n tbmq -w
下一步
-
快速入门指南 - 本指南提供 TBMQ 的快速概览。
-
安全指南 - 学习如何为 MQTT 客户端启用认证与授权。
-
配置指南 - 了解 TBMQ 配置文件和参数。
-
MQTT 客户端类型指南 - 了解 TBMQ 客户端类型。
-
与 ThingsBoard 集成 - 了解如何将 TBMQ 与 ThingsBoard 集成。