- Hardware type: Sensors
- Connectivity: LoRaWAN
- Industry: Smart Buildings, Smart Cities, Environmental Monitoring
- Use cases: Environment Monitoring, Smart Office, Smart Farming, Health Care
- Platforms: Community Edition, Professional Edition, Cloud
概述
LRS20100 LoRa环境温湿度传感器是一款高性能多参数传感器,用于监测和报告室内环境的关键指标。 适用于办公室、教室、医院和公共空间,可全面展示空气质量数据,帮助打造舒适、健康的室内环境。
该传感器在紧凑的尺寸内集成了先进的感知技术、灵活的供电方式和远距离无线通信能力。
主要特性
- 多传感器监测:可测量温度、湿度、二氧化碳 (CO2)、总挥发性有机化合物 (TVOC)、颜粒物 (PM1.0, PM2.5, PM10)。
- LoRaWAN连接:
- 远距离、低功耗无线通信。
- 非常适合智能建筑和IoT集成。
- 优秀的平台兼容性:
- 与ThingsBoard、ChirpStack、The Things Stack和LORIOT等主流LoRaWAN网络服务器和平台良好配合。
- 彩色LED空气质量指示灯:可即时直观反馈空气质量等级,无需仪表板即可快速评估。
- 灵活供电:支持电池或直流电源供电。
前置条件
继续本指南前,需准备以下内容:
将设备添加到网络服务器
LRS10701使用LoRaWAN技术向ThingsBoard平台发送数据。首先需要配置LoRaWAN网关和网络服务器,确保传感器数据能够达到网络服务器。本指南使用ChirpStack开源LoRaWAN网络服务器。
本指南以OTAA配置的传感器为例。要将设备添加到网络服务器,需要以下信息:
- Device EUI
- Application EUI
- Application Key
这些信息在购买传感器时提供。如需要,请联系您的销售或分销商获取。
首先,您需要将设备添加到ChirpStack:
-
Login to the network server.
-
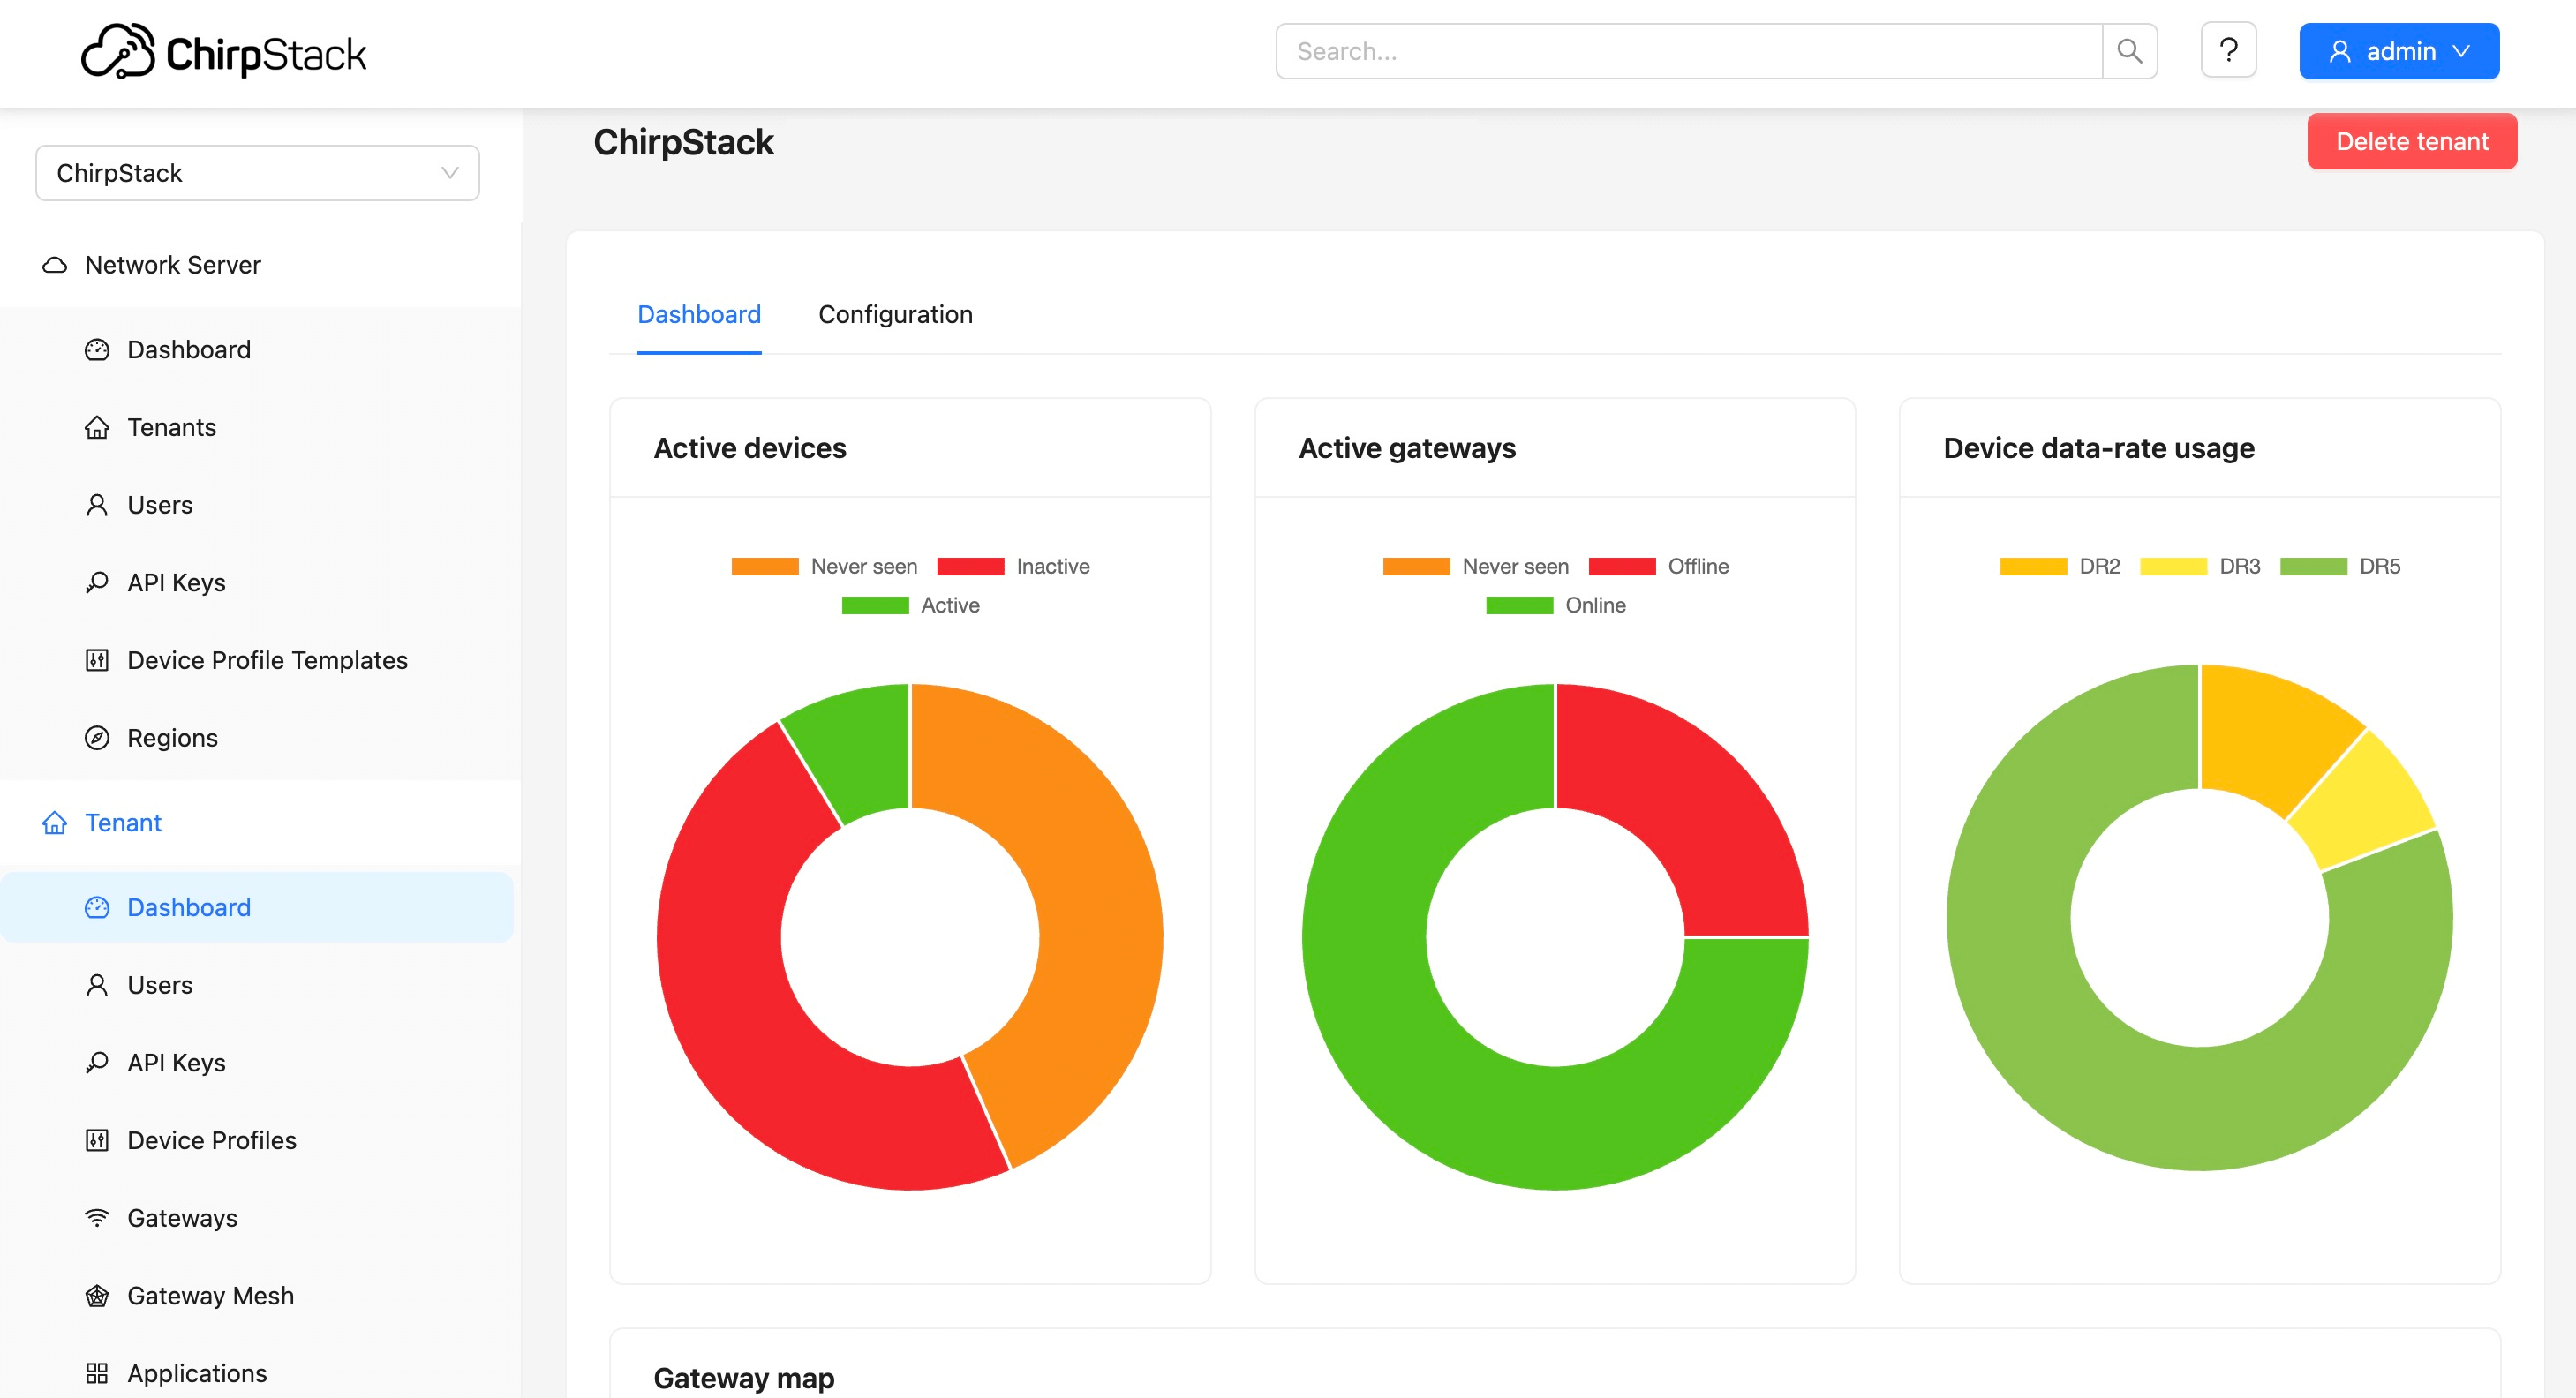
Go to the “Device profiles” and click “Add device profile”.
-
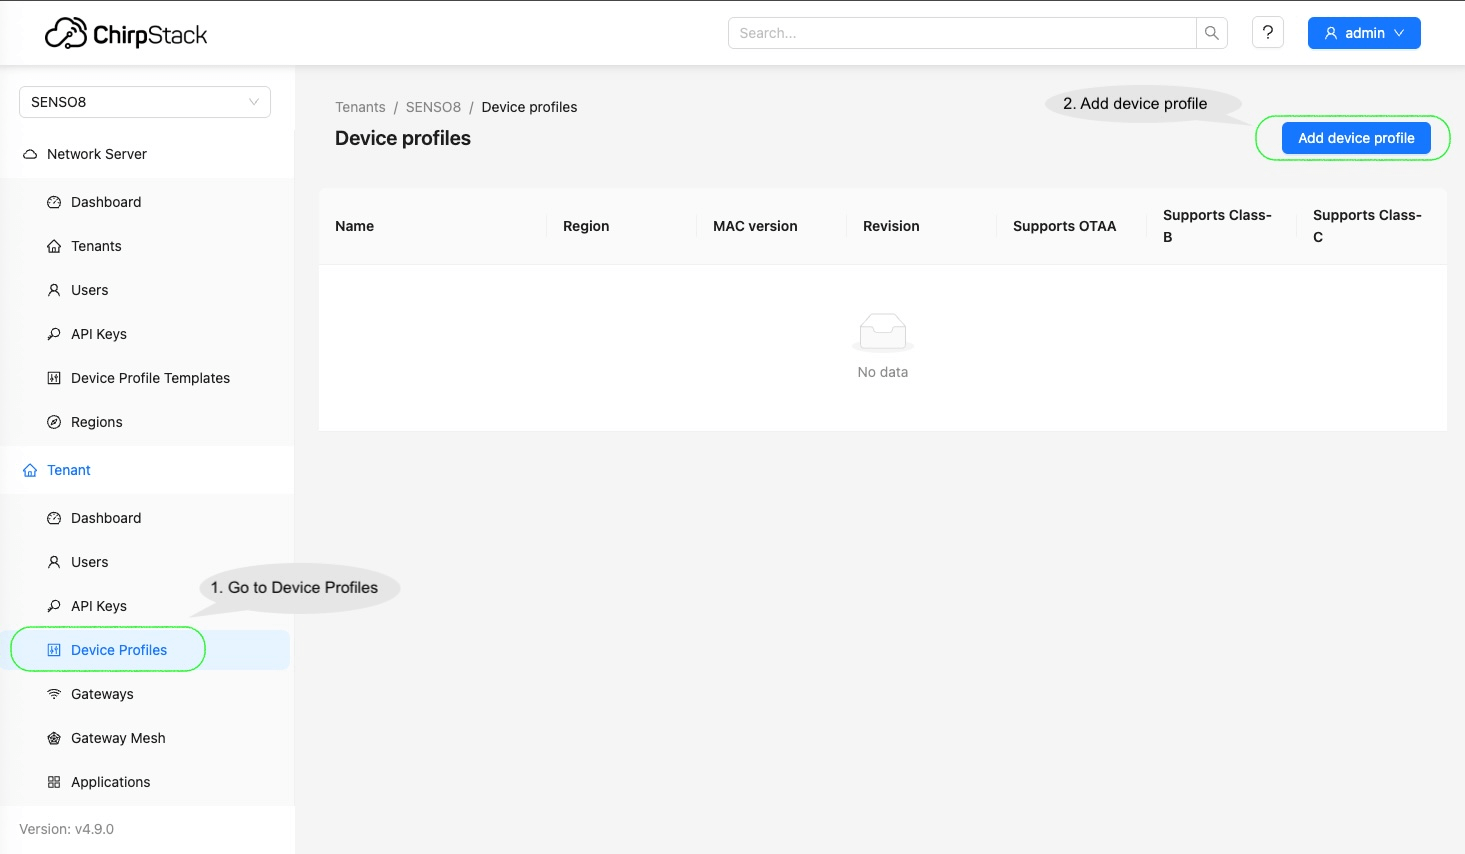
Input the parameters on the Device Profile page and click Save. For Profile name, input ‘LRS10701-OTAA’ or ‘LRS10701-ABP’ depending on the sensor activation mode configured. It will be used on the data converter to determine the sensor model.
-
Make sure the Payload codec under Codec for the Device Profiles is selected as “None”.
-
Go to Applications, select an existing application or Add application.
-
Click Add device to add the new device.
-
Input the sensor information and click Submit to add the sensor.
-
It will then jump to the OTAA keys page. Input the Application Key of the sensor and click Submit.
Login to the network server.
Go to the “Device profiles” and click “Add device profile”.
Input the parameters on the Device Profile page and click Save. For Profile name, input ‘LRS10701-OTAA’ or ‘LRS10701-ABP’ depending on the sensor activation mode configured. It will be used on the data converter to determine the sensor model.
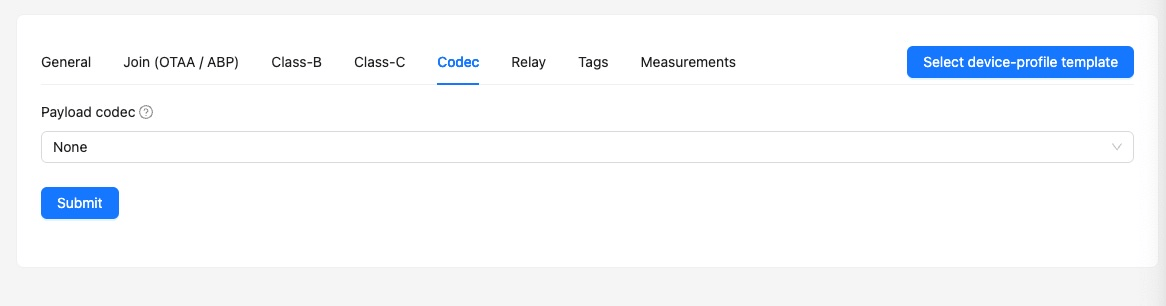
Make sure the Payload codec under Codec for the Device Profiles is selected as “None”.
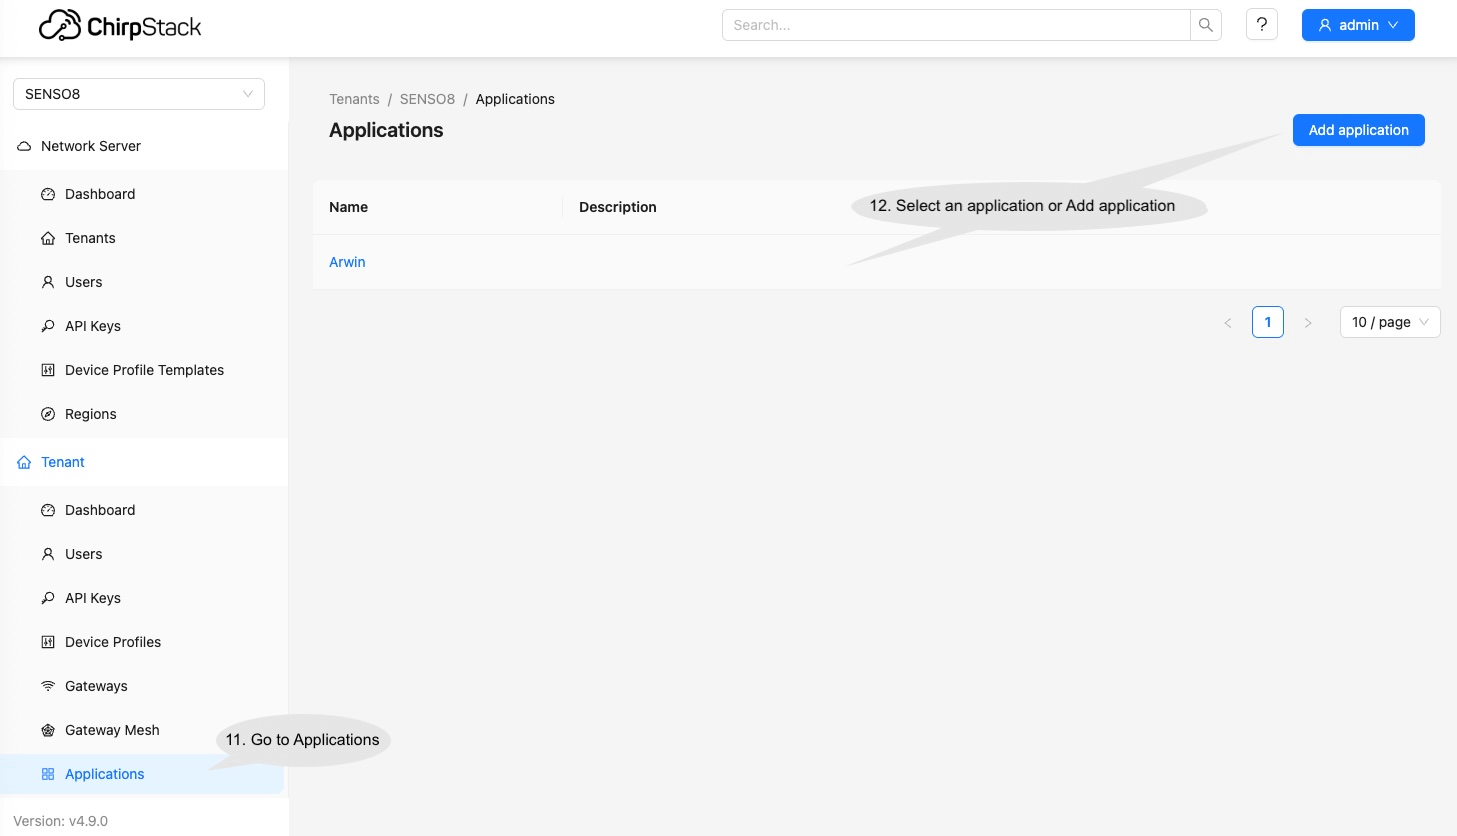
Go to Applications, select an existing application or Add application.
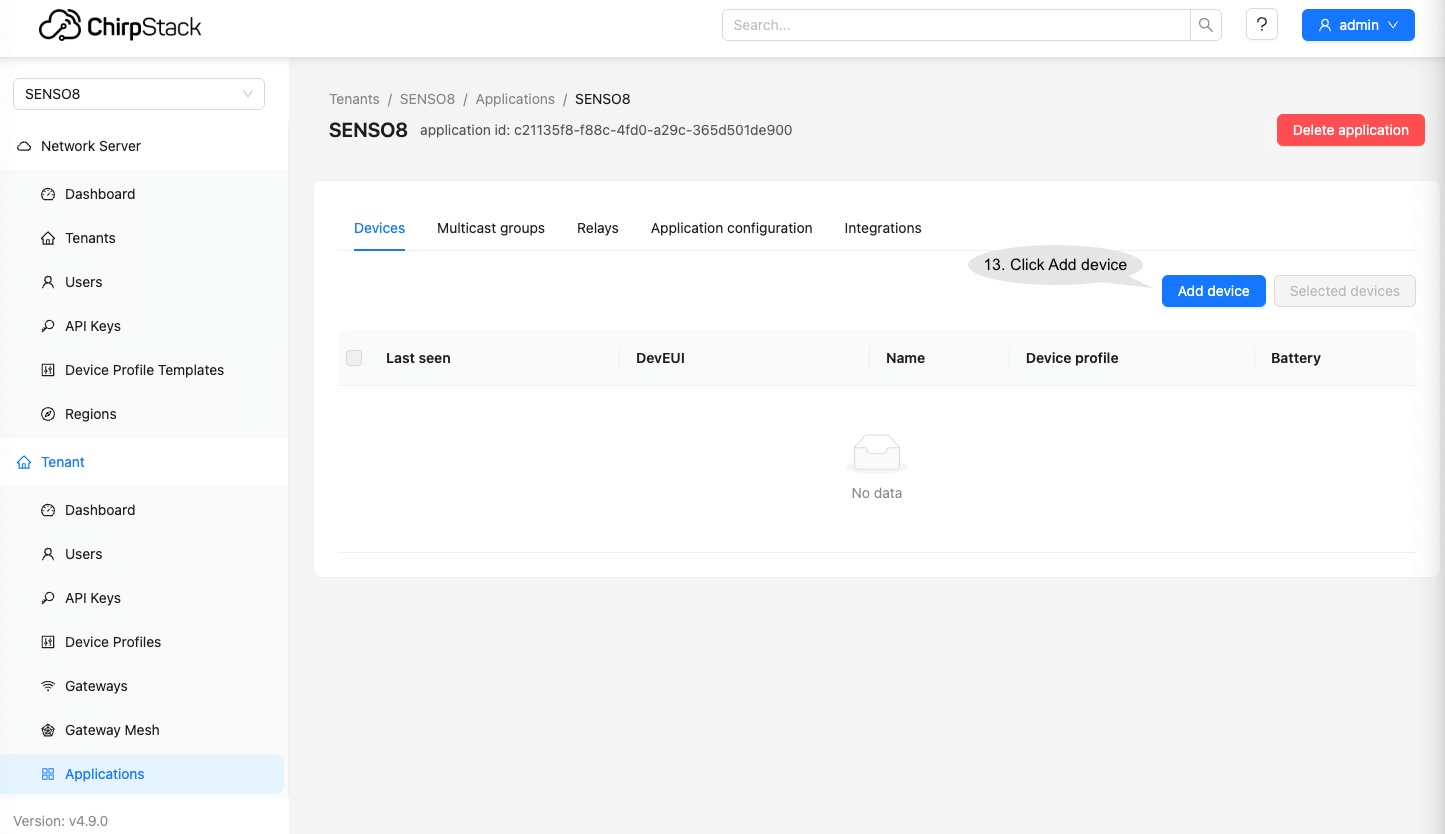
Click Add device to add the new device.
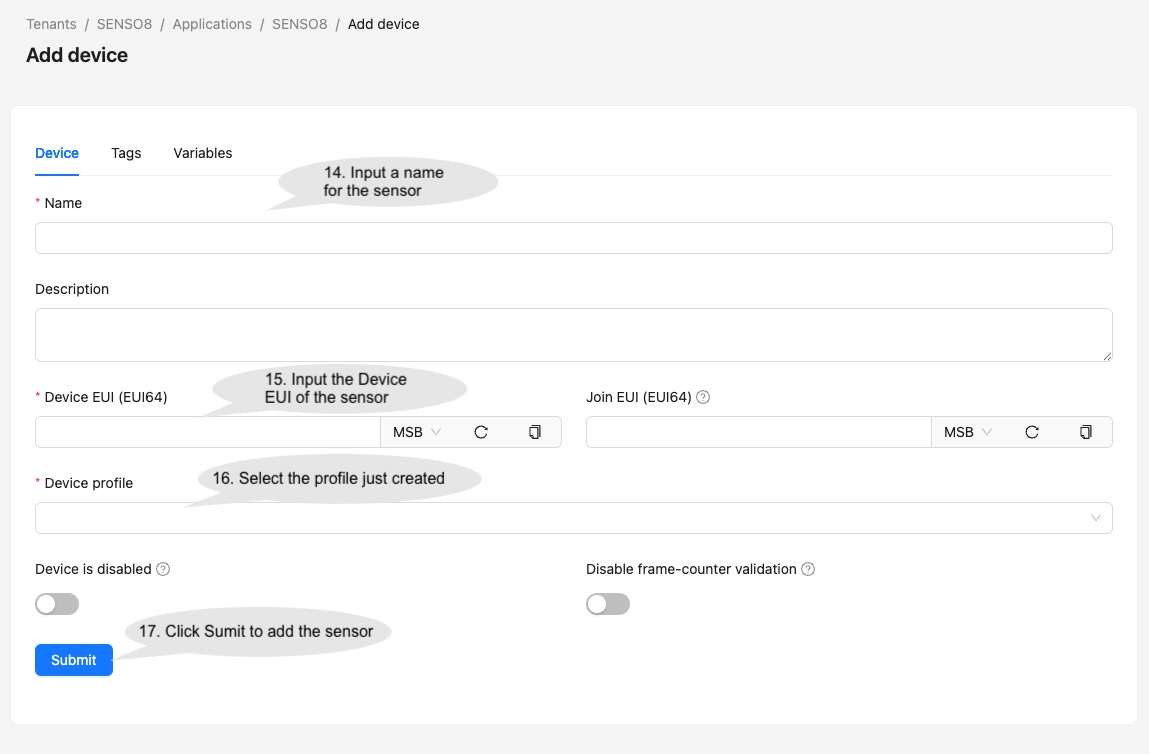
Input the sensor information and click Submit to add the sensor.
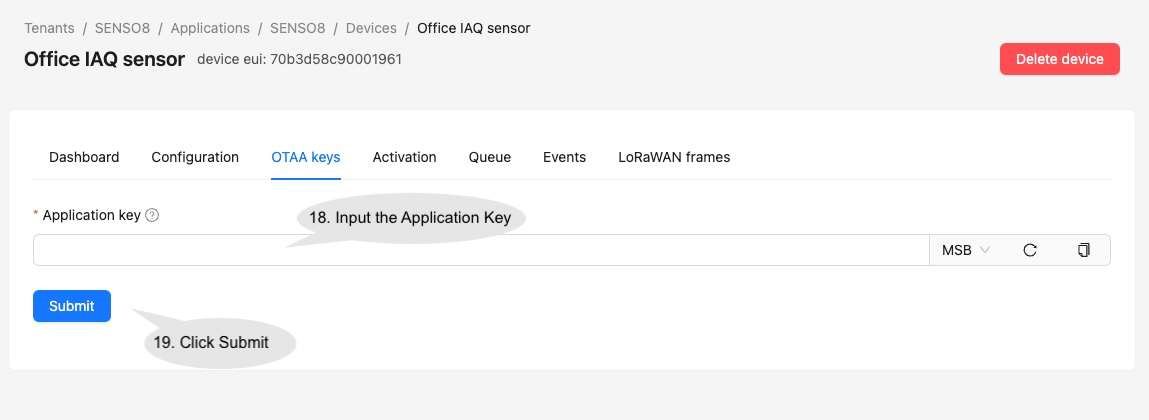
It will then jump to the OTAA keys page. Input the Application Key of the sensor and click Submit.
在ThingsBoard中创建设备
请参考此页面的指南,在ThingsBoard账户中创建ChirpStack集成,并在ChirpStack应用中配置集成。
导入JSON文件SENSO8_data_converter_for_chirpstack_integration.json,或复制以下payloadDecoder函数代码。
有关高级解码参数,请参考以下截图。
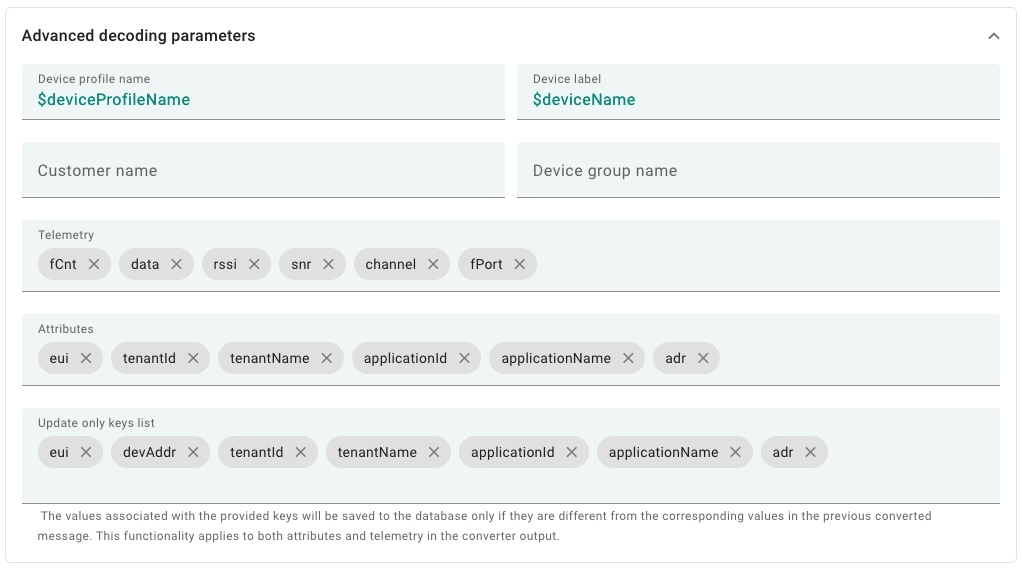
将设备添加到ChirpStack并在ThingsBoard和ChirpStack上都完成集成配置后,当设备发送任何数据时,ThingsBoard界面上将自动出现新设备。
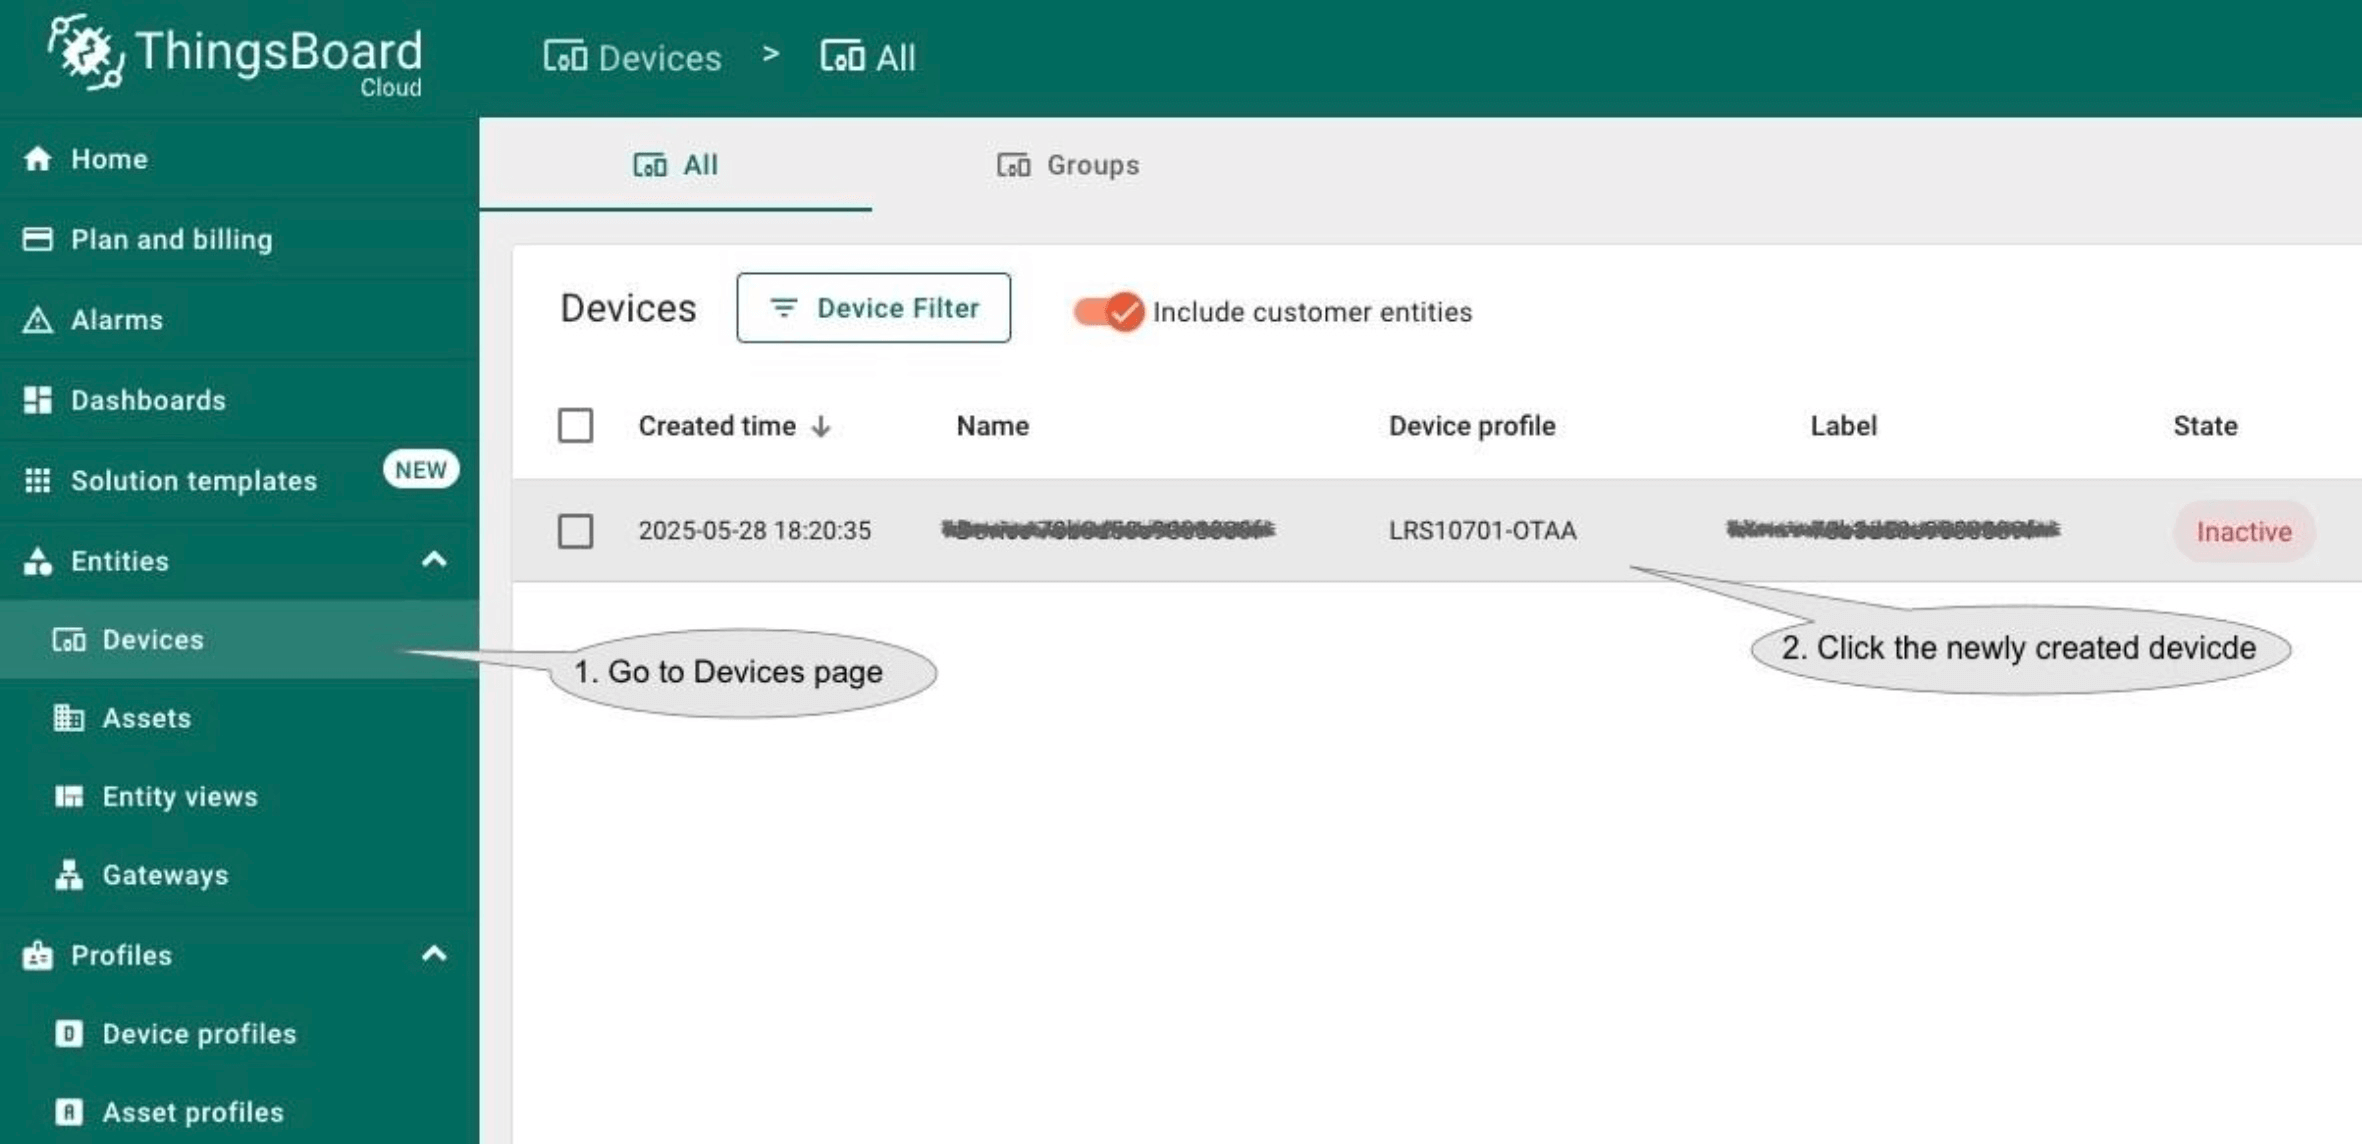
在ThingsBoard上查看数据
要查看接收到的数据,可前往“实体”下的“设备”页面,然后从设备列表中选择新创建的设备。
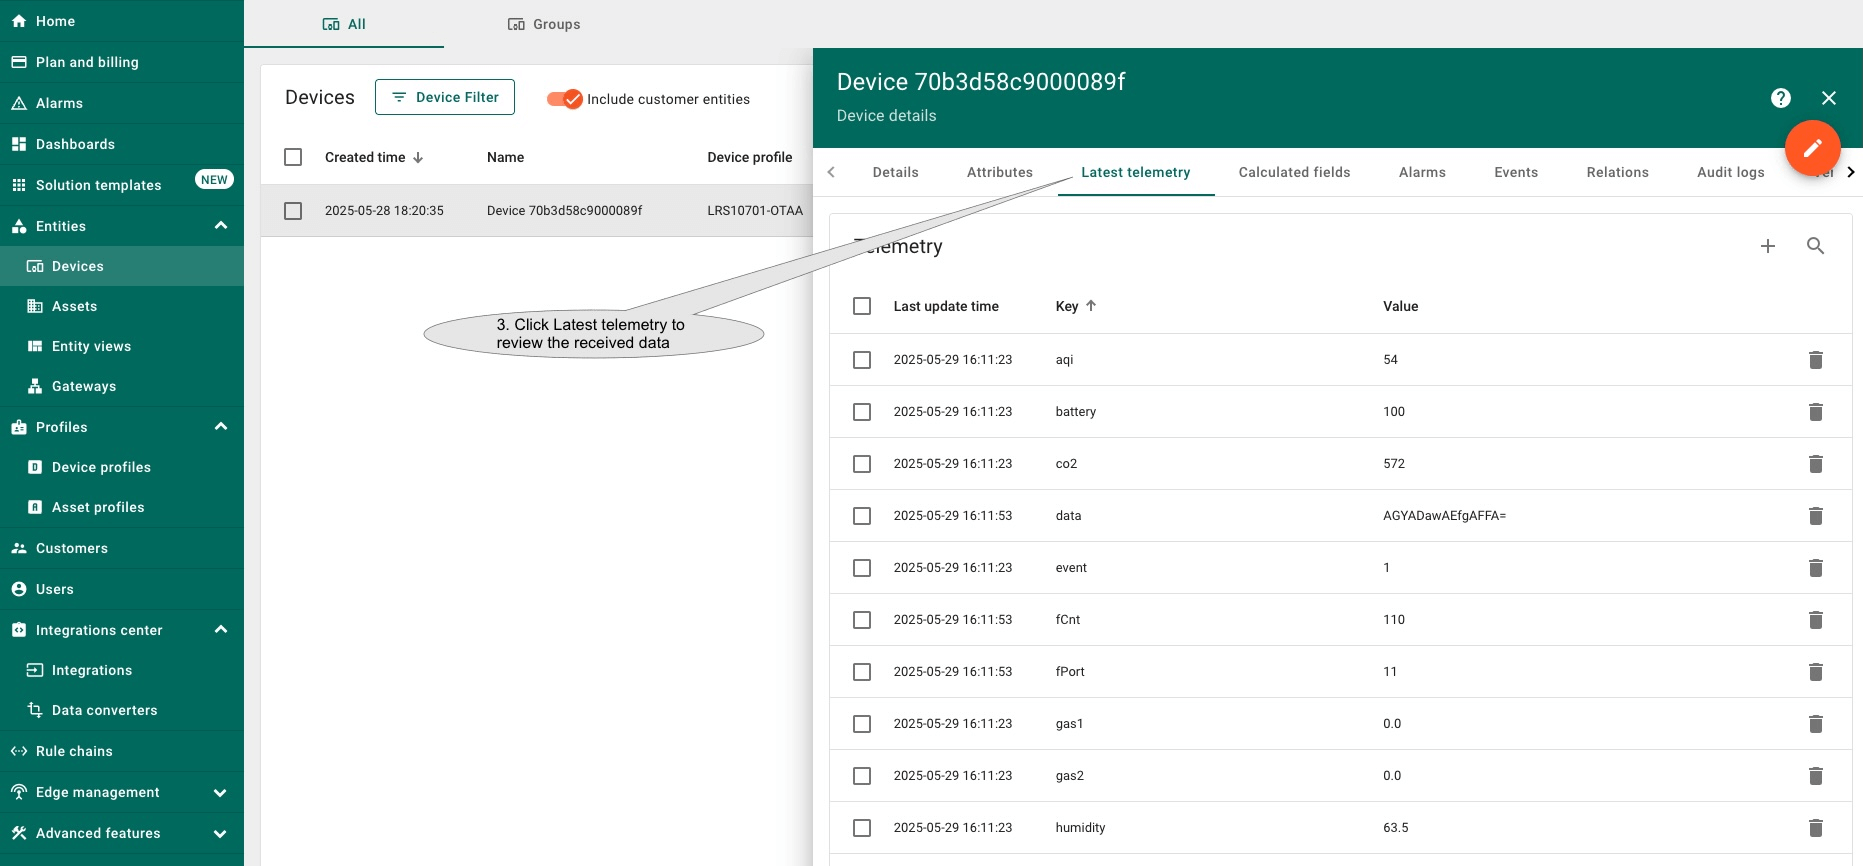
接收到的数据可在“属性”和“最新遥测”页面中查看。
ThingsBoard提供更友好的仪表板方式来可视化您的数据。
ThingsBoard允许您创建和自定义仪表板以满足需求。
如果您想快速体验仪表板,可以下载此文件并导入到ThingsBoard中。
要导入仪表板,请按以下步骤操作:
-
进入 “仪表板” 页面,点击右上角的 + 按钮。
-
从下拉菜单中选择 “导入仪表板“。
-
选择下载的文件或将文件拖拽到对话框中,点击 “Import“。
-
导入仪表板后将返回仪表板列表,点击选择并打开导入的仪表板。
-
点击编辑模式更新仪表板。
-
将鼠标悬停在部件上,右上角会显示控件,点击 铅笔 图标进行编辑。
-
弹出部件属性设置对话框。点击 Datasource 下的 Device 选择要监控的设备,然后点击 Apply。
-
对其他部件重复以上步骤。最后点击 Save 保存更改,仪表板即可用于监控新设备。

进入 “仪表板” 页面,点击右上角的 + 按钮。
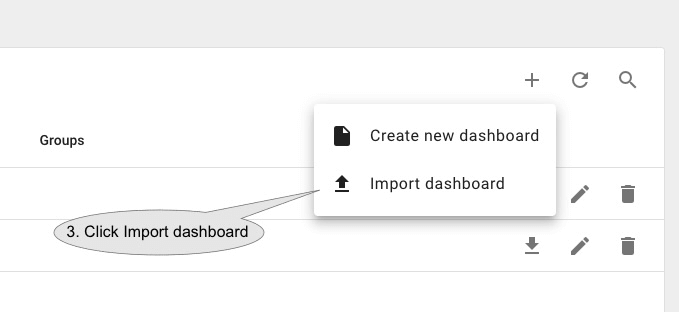
从下拉菜单中选择 “导入仪表板“。

选择下载的文件或将文件拖拽到对话框中,点击 “Import“。
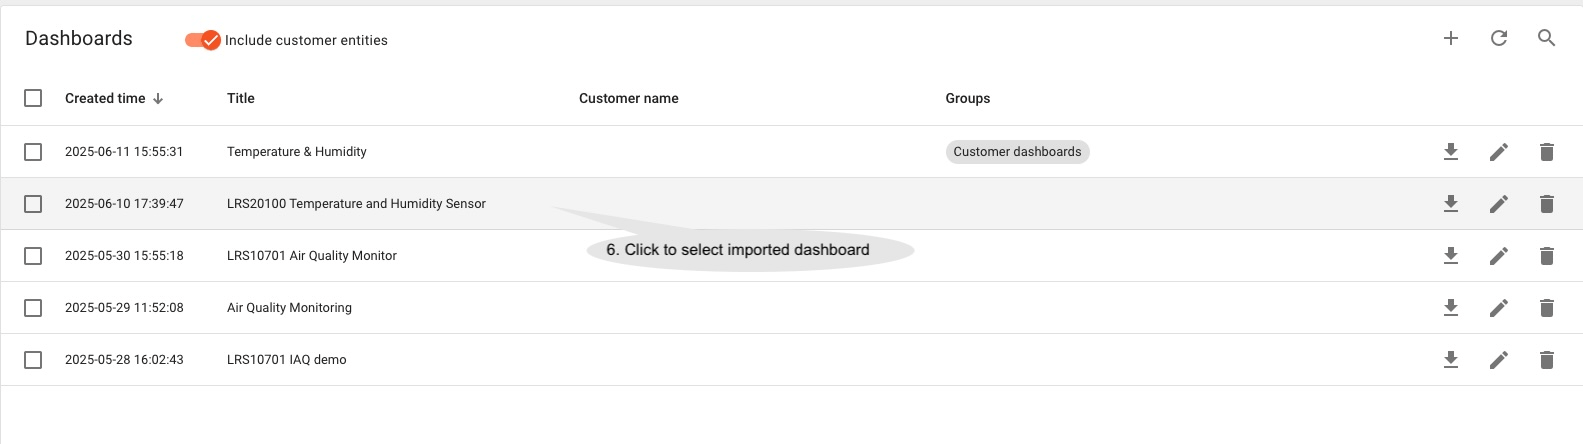
导入仪表板后将返回仪表板列表,点击选择并打开导入的仪表板。
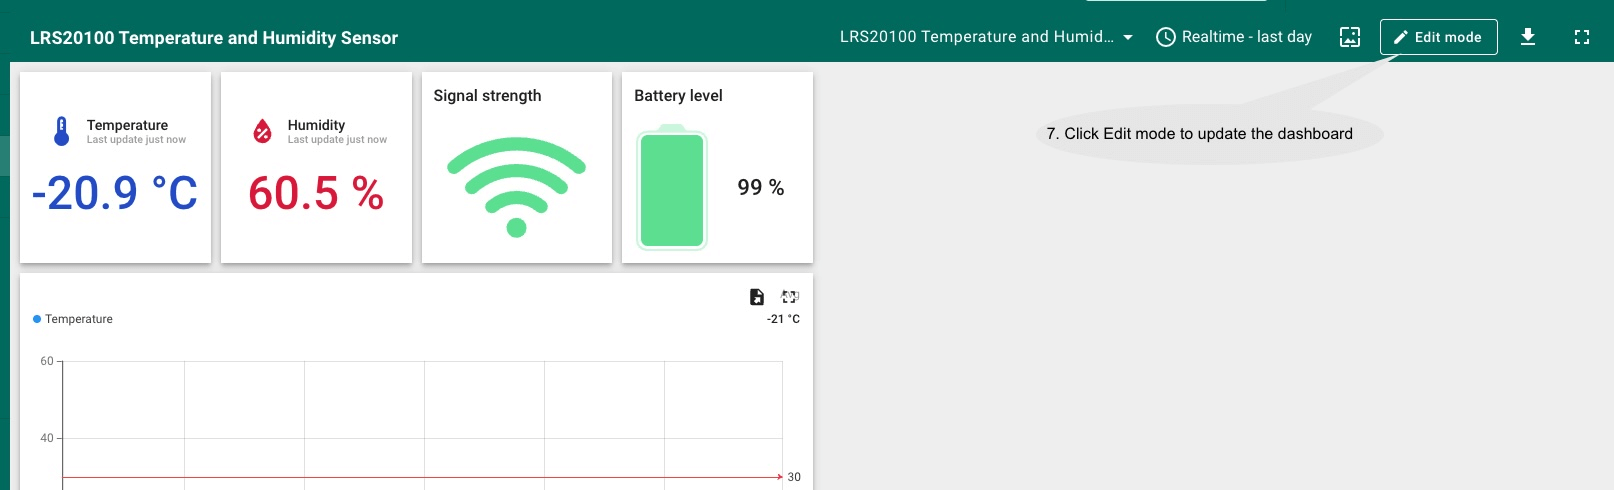
点击编辑模式更新仪表板。
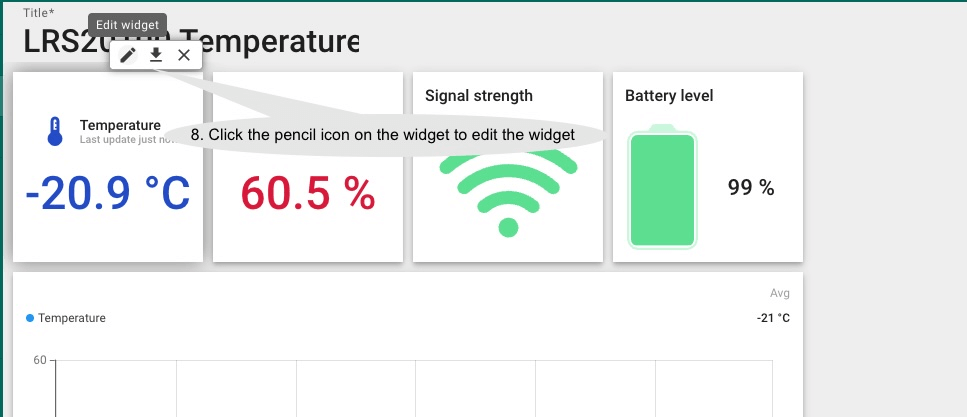
将鼠标悬停在部件上,右上角会显示控件,点击 铅笔 图标进行编辑。
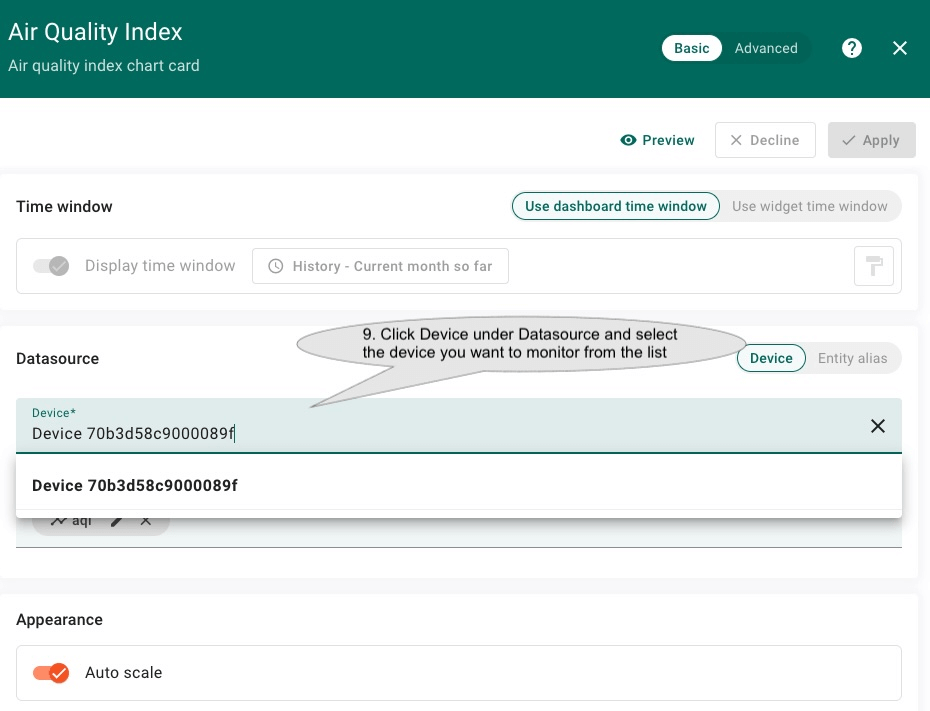
弹出部件属性设置对话框。点击 Datasource 下的 Device 选择要监控的设备,然后点击 Apply。
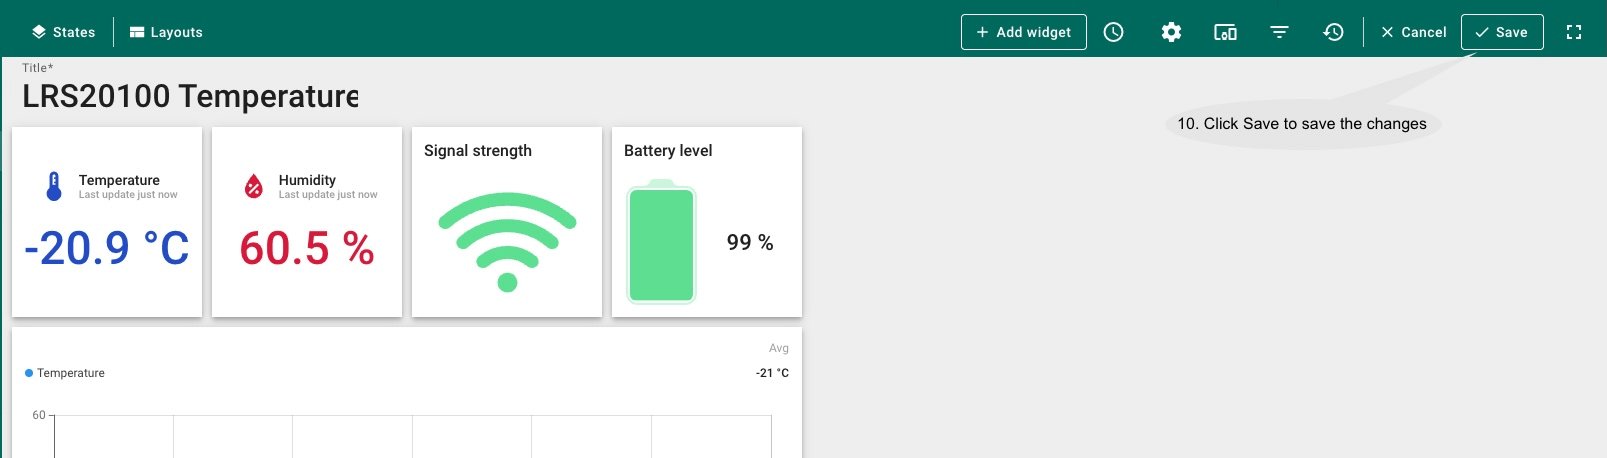
对其他部件重复以上步骤。最后点击 Save 保存更改,仪表板即可用于监控新设备。
总结
通过本指南的介绍,您可以轻松连接LRS10701 LoRaWAN IAQ传感器并在ThingsBoard上可视化数据。
请探索平台文档,了解更多ThingsBoard的核心概念和功能,如配置告警规则或仪表板。