- Hardware type: Sensors
- Connectivity: LoRaWAN
- Industry: Smart Cities, Smart Buildings, Environmental Monitoring, Industrial Manufacturing, Healthcare
- Use cases: Environment Monitoring, Smart Office, Smart Farming, Health Care, Air Quality Monitoring, Smart Irrigation, Waste Management
- Platforms: Community Edition, Professional Edition, Cloud
概述
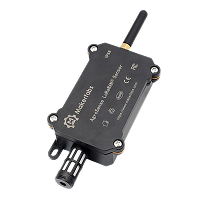
AgroSense LoRaWAN® Temperature & Humidity Sensor uses the AHT20 sensor, to measures temperature and humidity in the atmosphere at the range of -40℃ to 85℃ and 0 to 100 %RH with accuracy ±0.2℃ and ±0.2%RH respectively, also with highly waterproof performance tested to IP68, making it widely applicable in agricultural environmental sensing scenarios to support the smart agricultural production.
The sensor benefits from LoRaWAN , which ensures stability and reliability. It is capable of covering a long transmission range while maintaining low power consumption. Unlike wireline devices, it is battery-powered, reducing the workload and complexity of deployment, design and development for end-users that can work via powering it , and setting the configuration in the cloud server, for LoRaWAN® remote monitoring. It monitors the air temperature and humidity and report them every 1 hour.
仅专业版支持Platform Integrations功能。
请使用ThingsBoard Cloud或自行安装平台实例。
前置条件
继续本指南前,需准备以下内容:
- AgroSense Air Temperature and Humidity Sensor
- LoRaWAN® gateway (in our case UG56 LoRaWAN® Gateway)
- Configured integration on networks server and ThingsBoard
- ThingsBoard 账户
设备连接
Device configuration
连接并发送数据前,需配置设备和网络服务器。
First, we are going to configure the device and save the required information for the network server configuration.
要将设备加入网络服务器并从中获取数据,需准备以下设备参数:
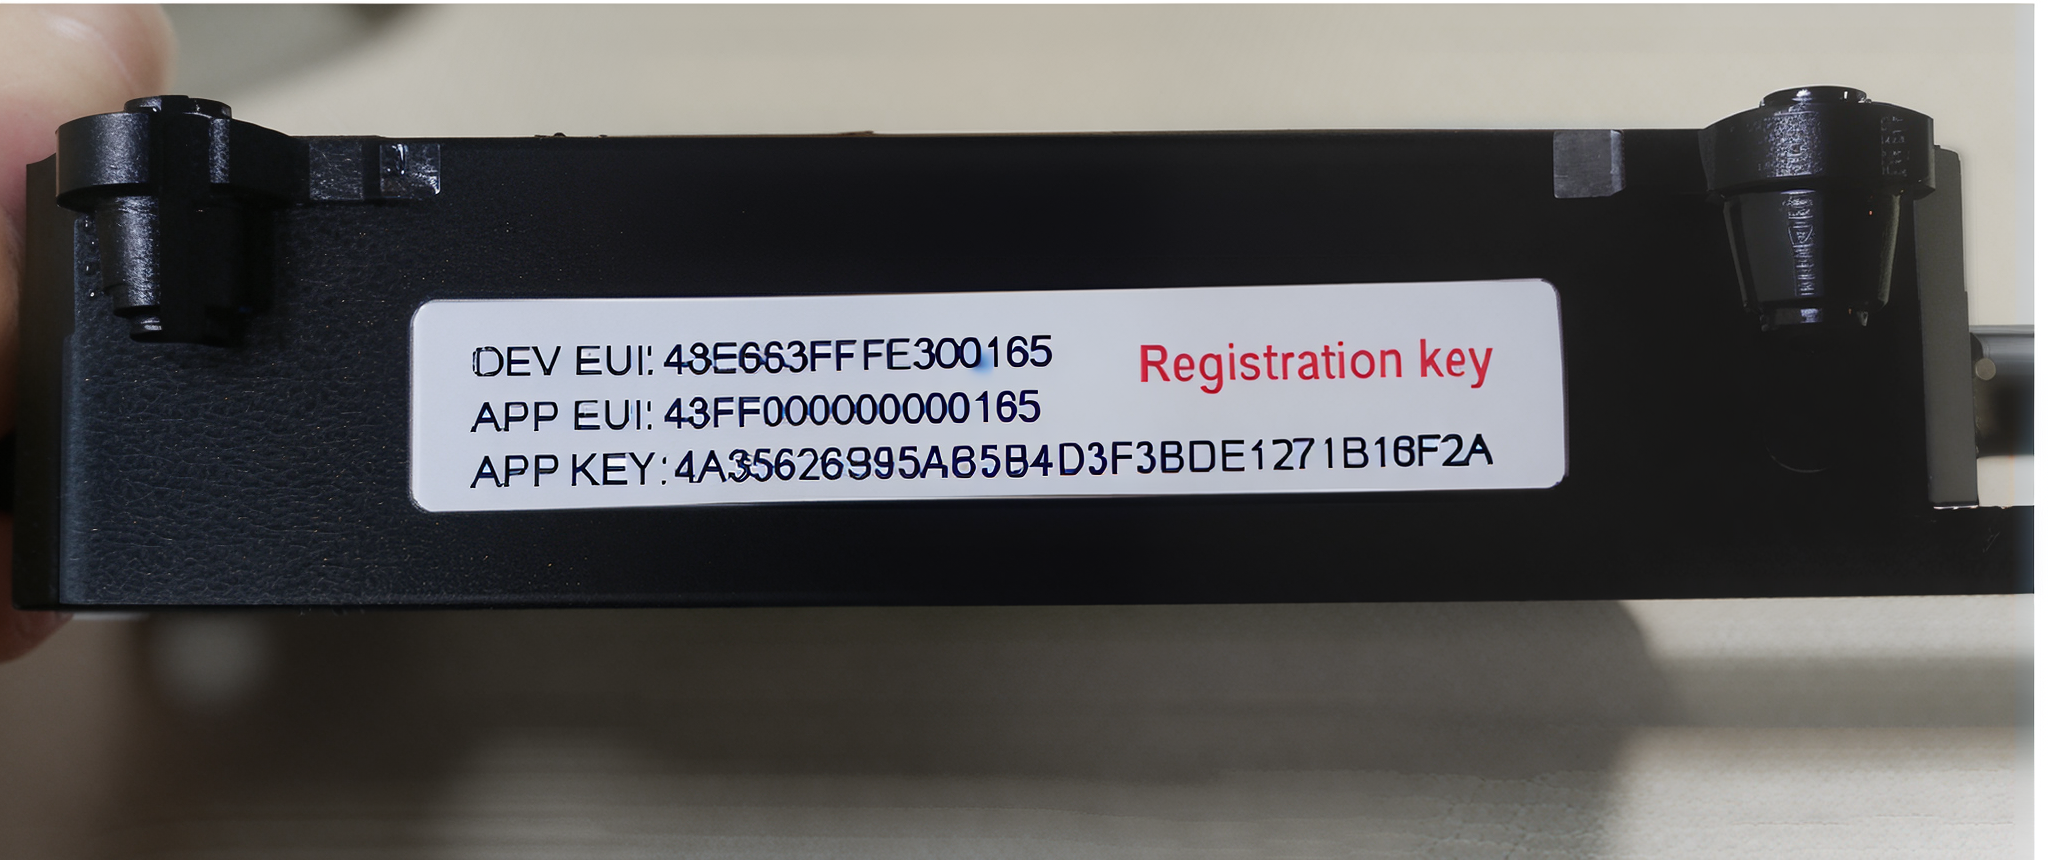
- Device EUI – Device identifier
- Application EUI – Application identifier
- Application Key – Application key for device authentication
Note: You can find the values of these keys on the label located on the side of the device (see example image below).
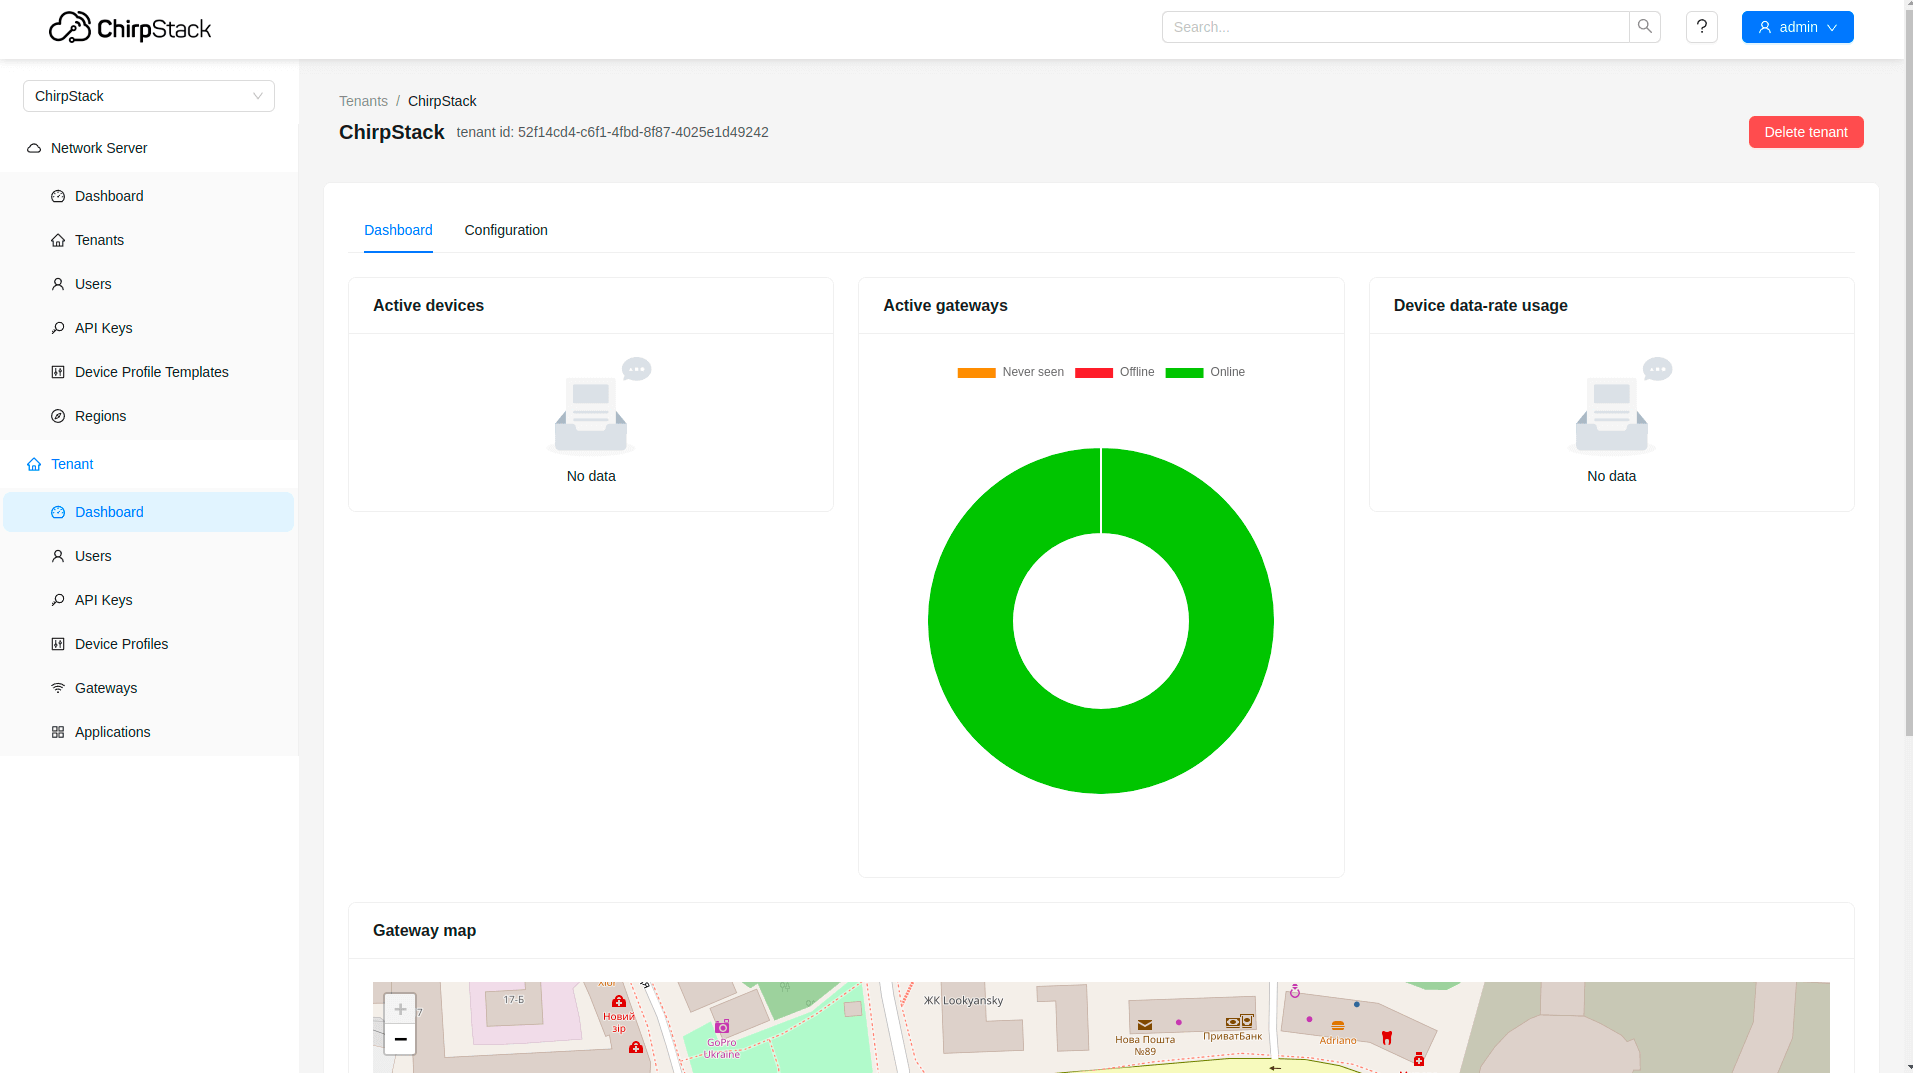
To configure the device we also need to add it to a network server, so select the network server your gateway is connected to:
在ChirpStack上添加设备我们需要在 ChirpStack 上添加设备。 要添加设备,请按以下步骤操作:
 登录ChirpStack服务器。 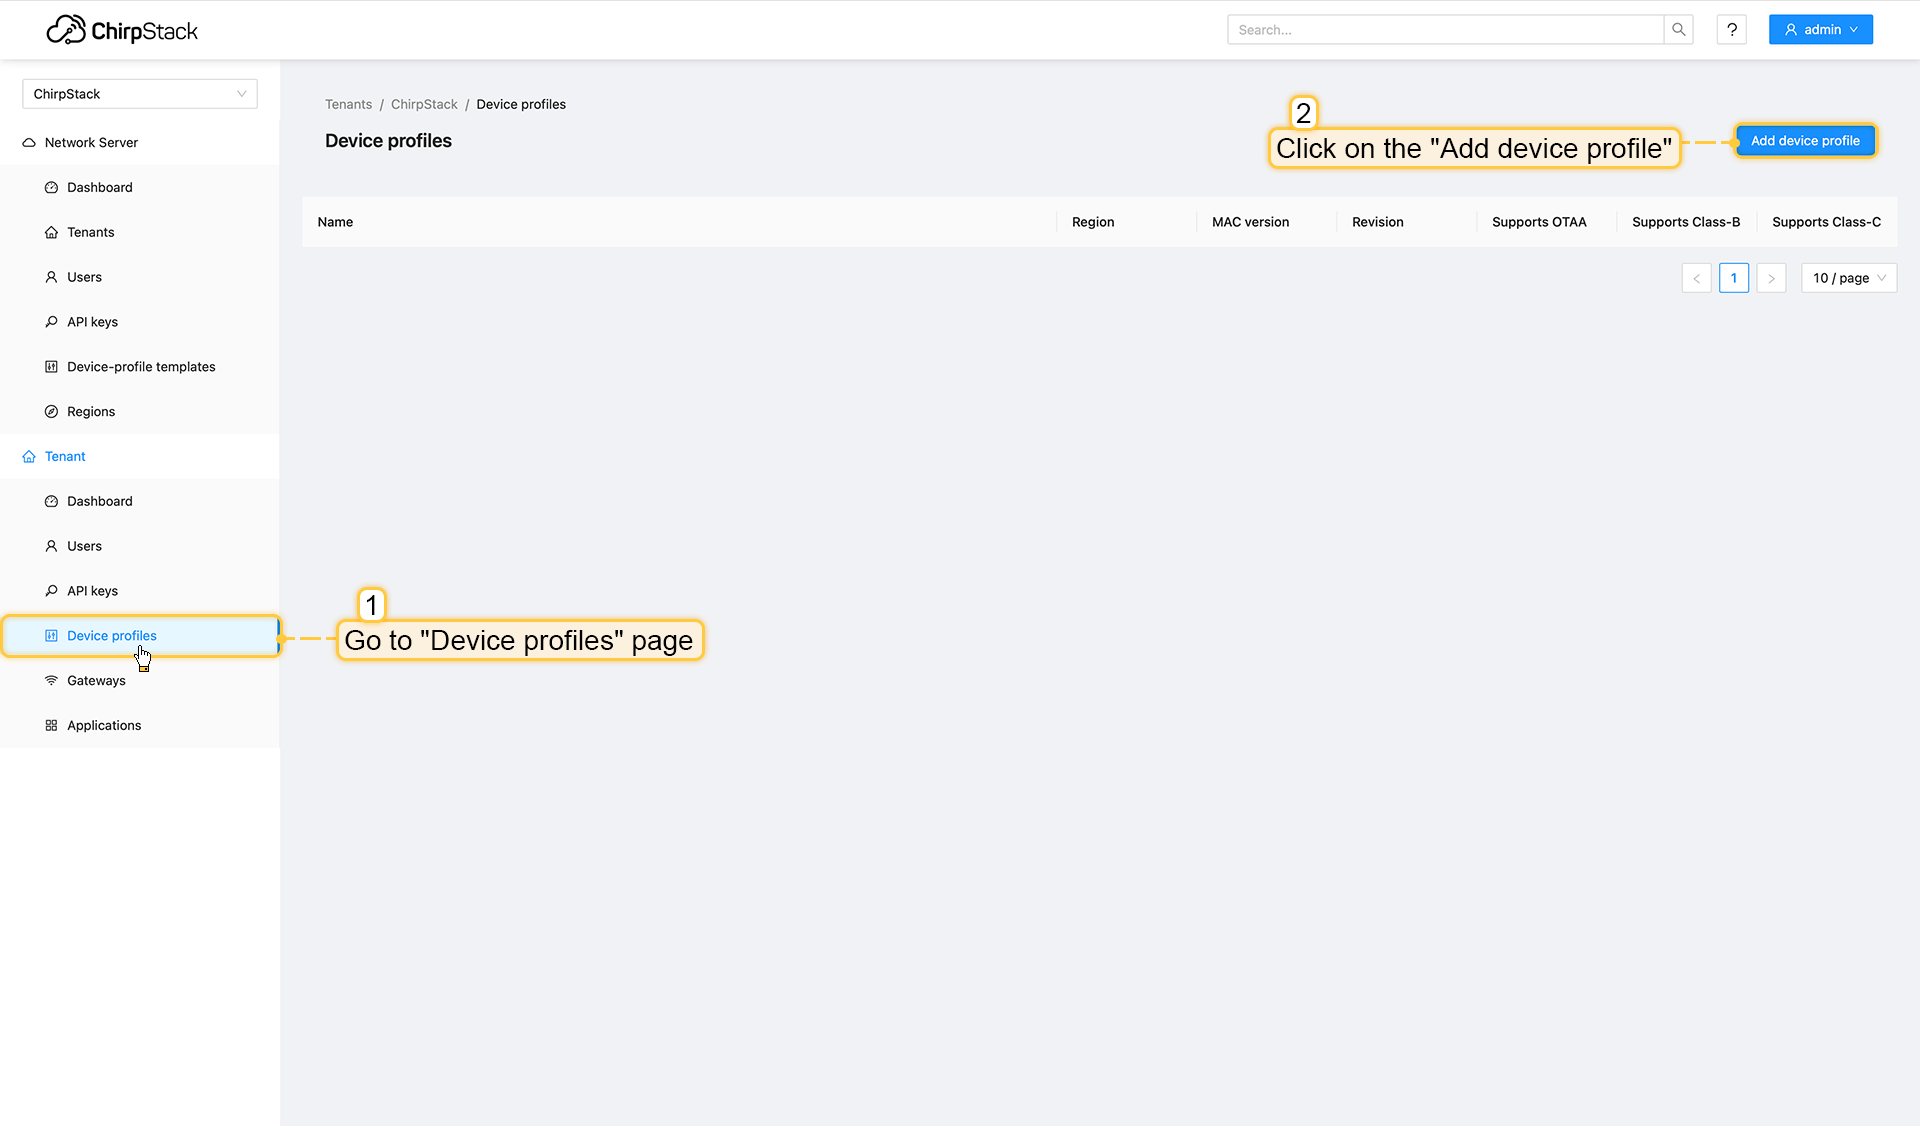 进入设备配置页面,点击添加设备配置按钮。 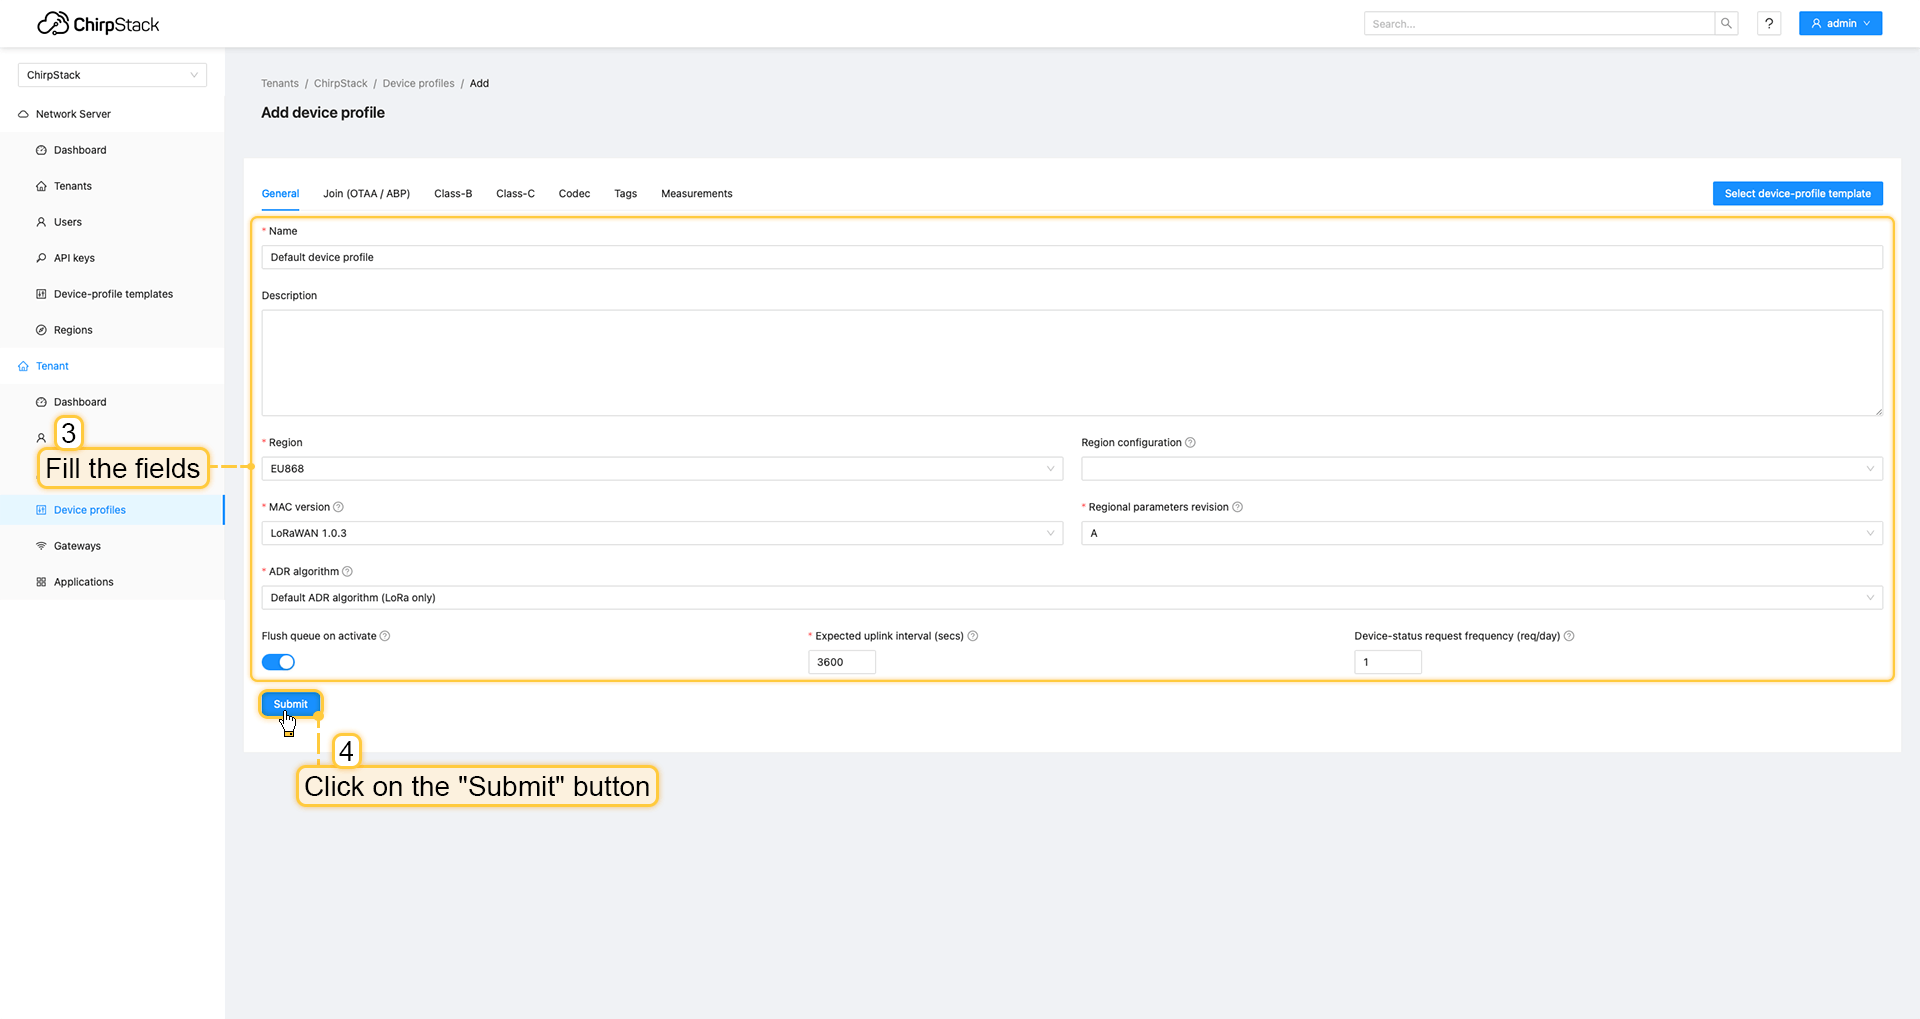 填写字段并点击提交按钮。 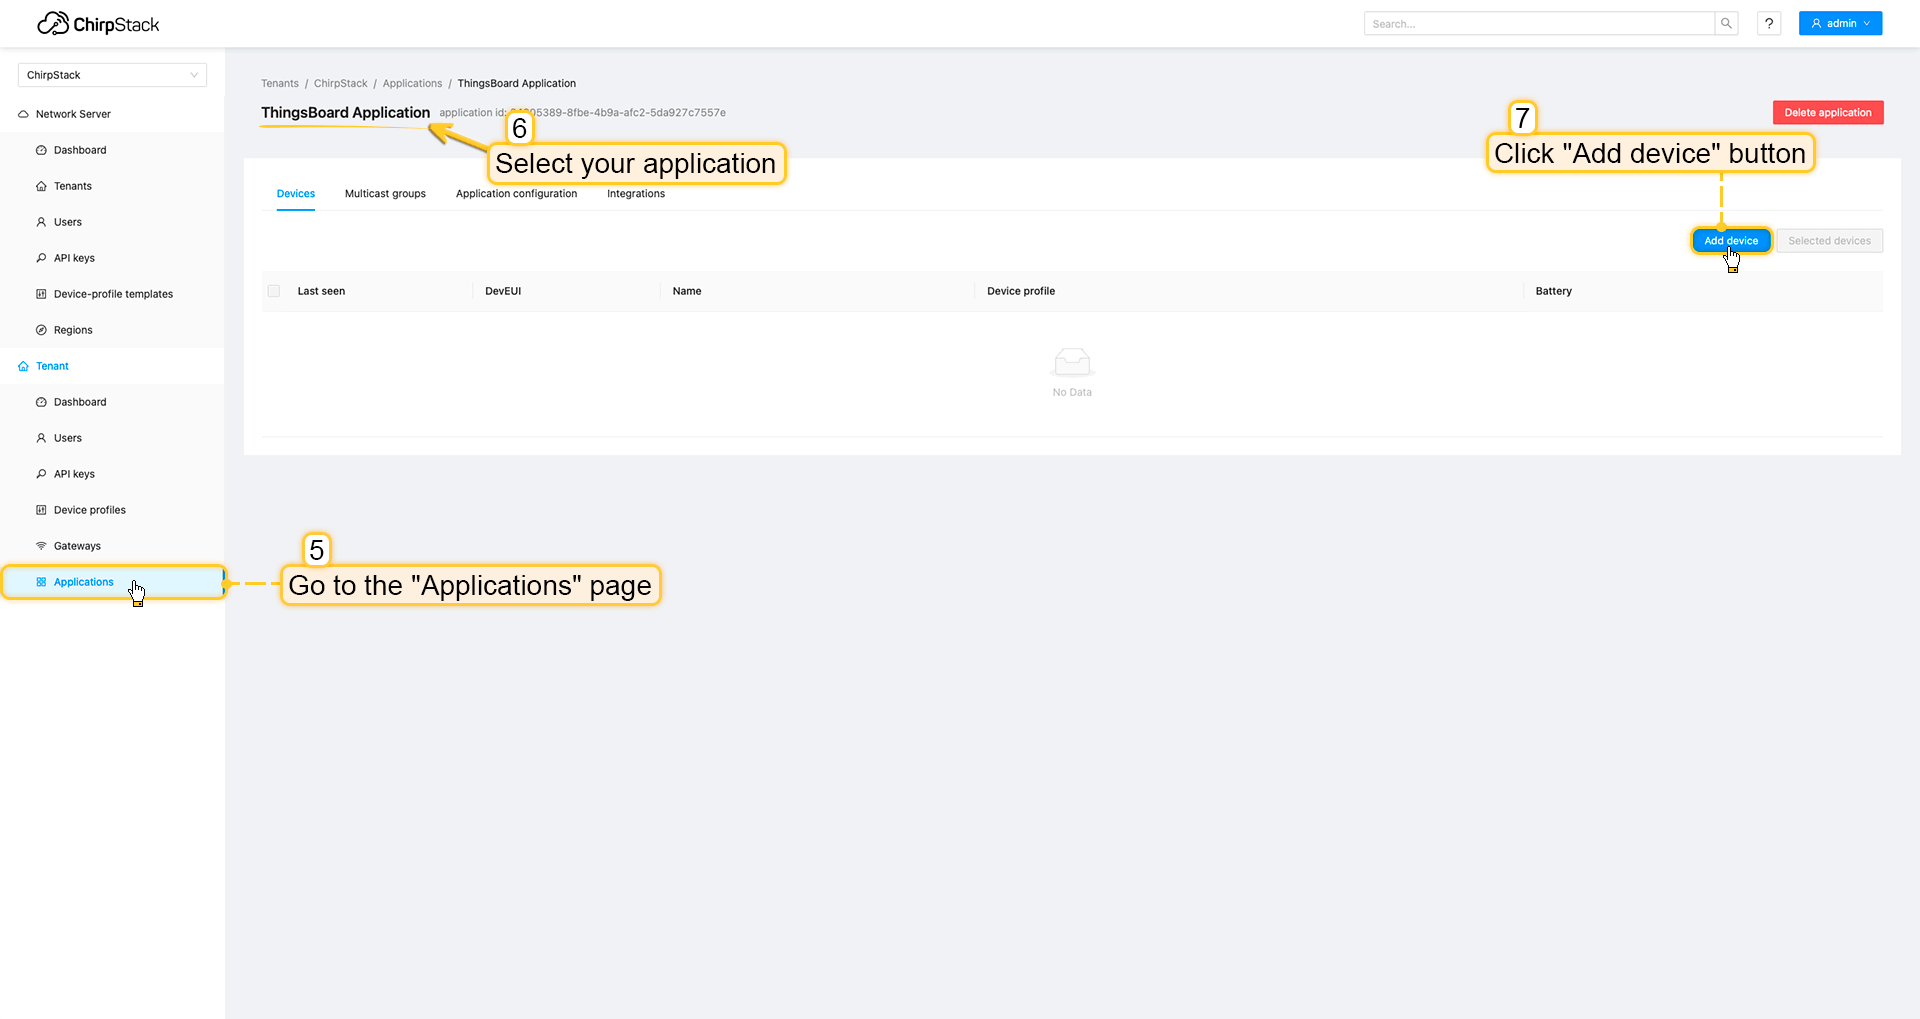 进入应用页面,点击您的应用后按添加设备按钮。 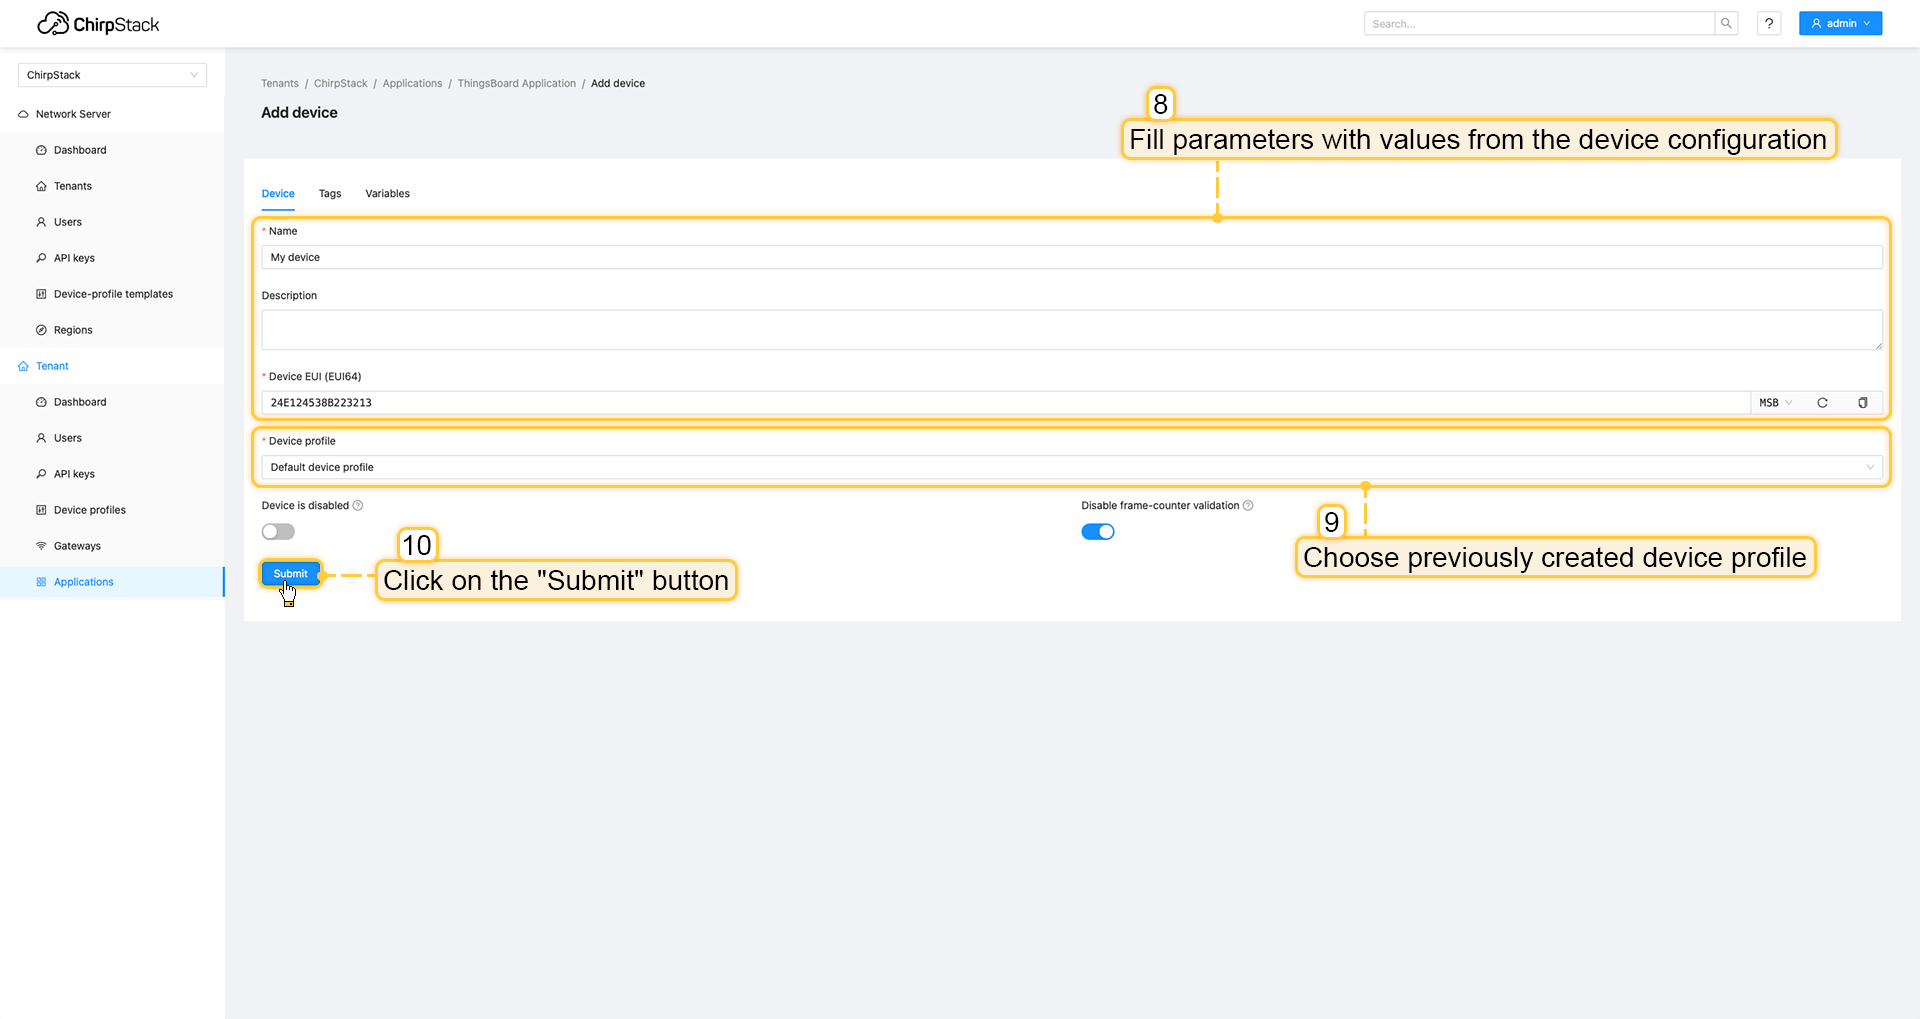 使用设备配置中的值填写参数。然后选择之前创建设备配置并点击提交按钮。 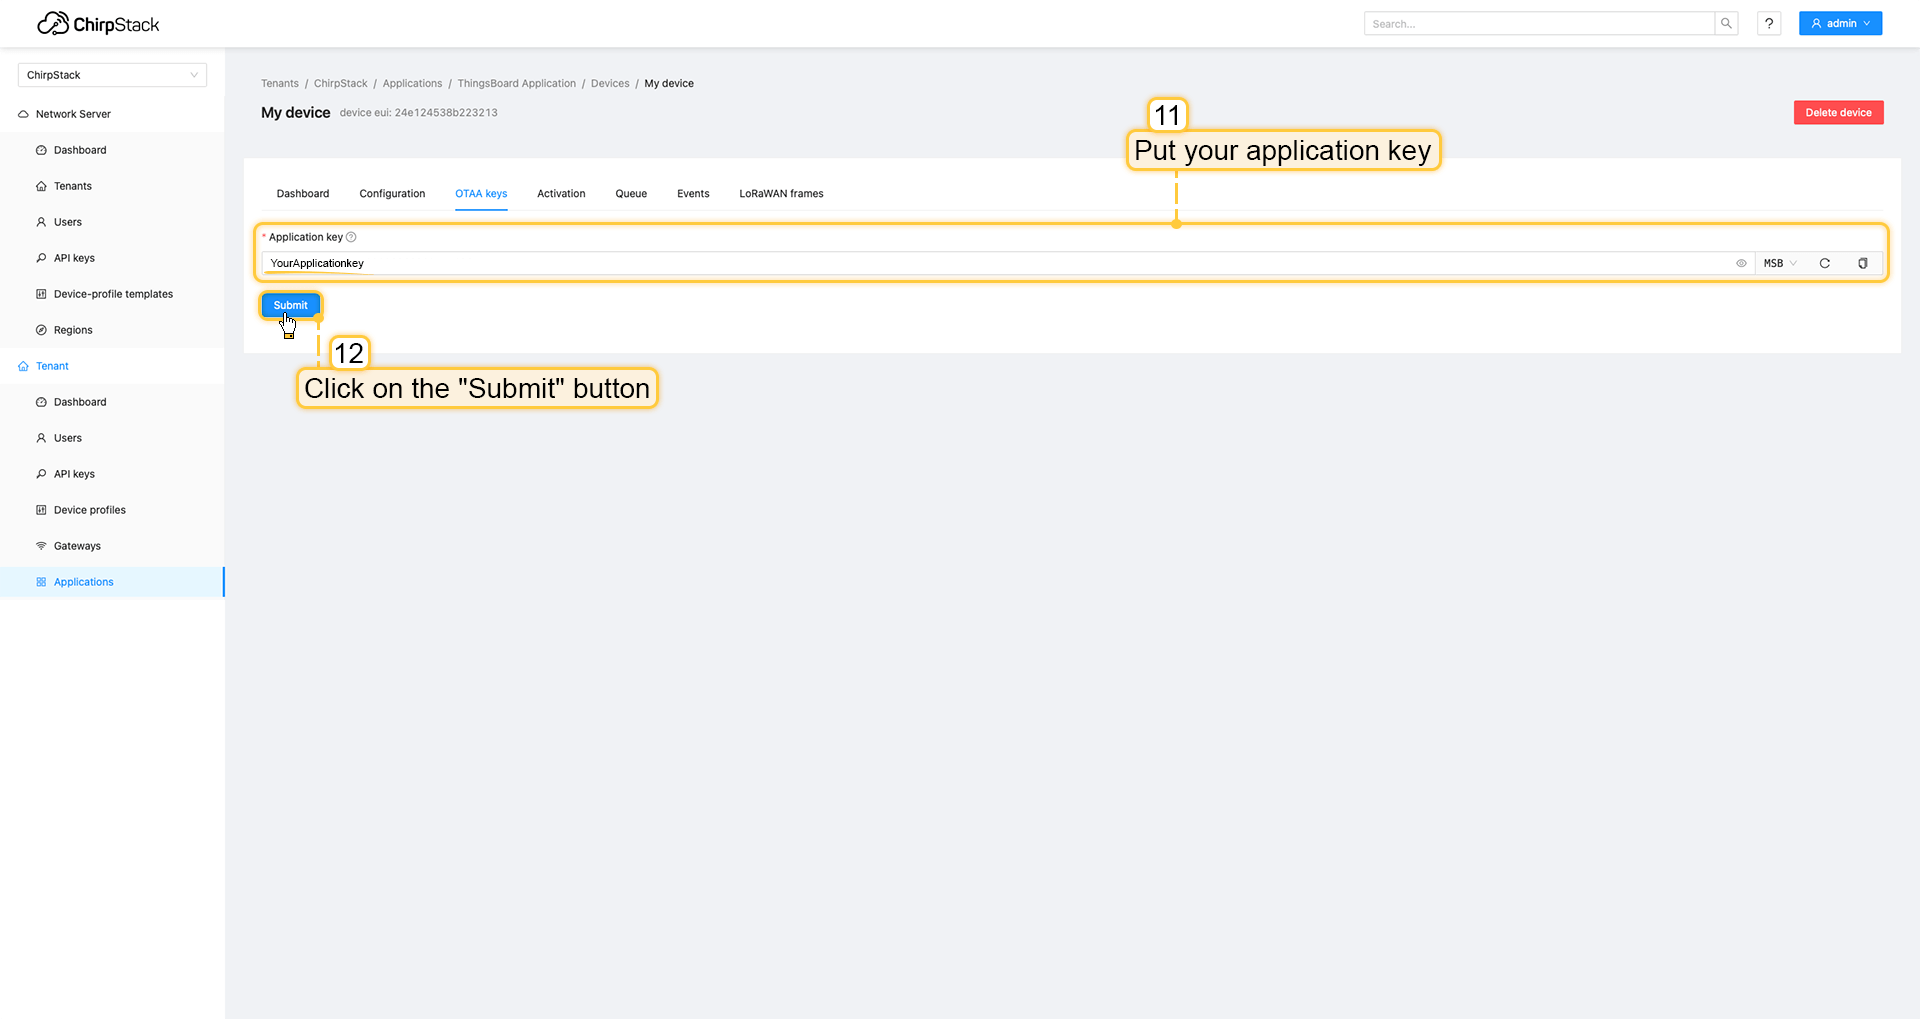 将应用密钥填入相应字段并点击提交按钮保存设备。 ThingsBoard集成中的上行数据转换器步骤1:下载JSON文件 点击下方按钮下载包含上行数据转换器配置的JSON文件。
下载包含上行数据转换器配置的文件后,将其导入ThingsBoard:
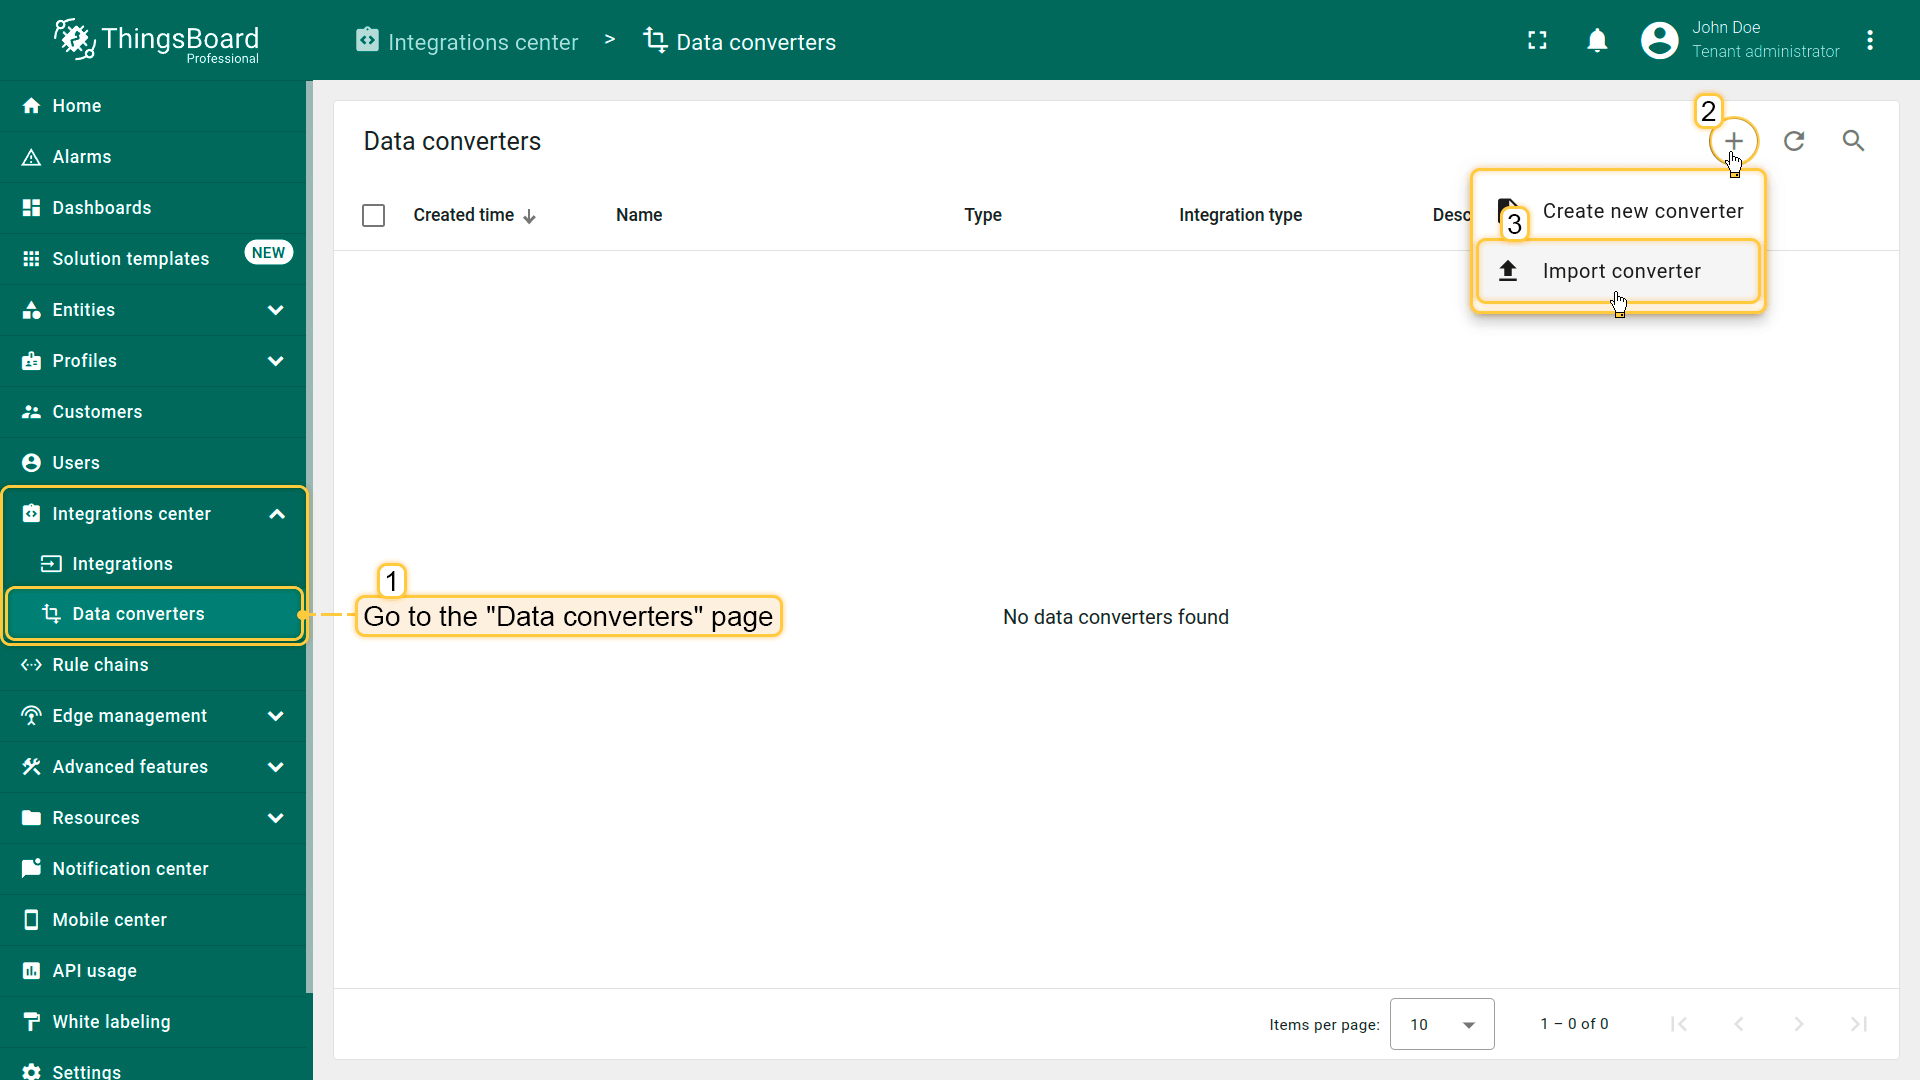 在集成中心部分的数据转换器页面中操作。点击页面右上角的+图标,从下拉菜单选择导入转换器。 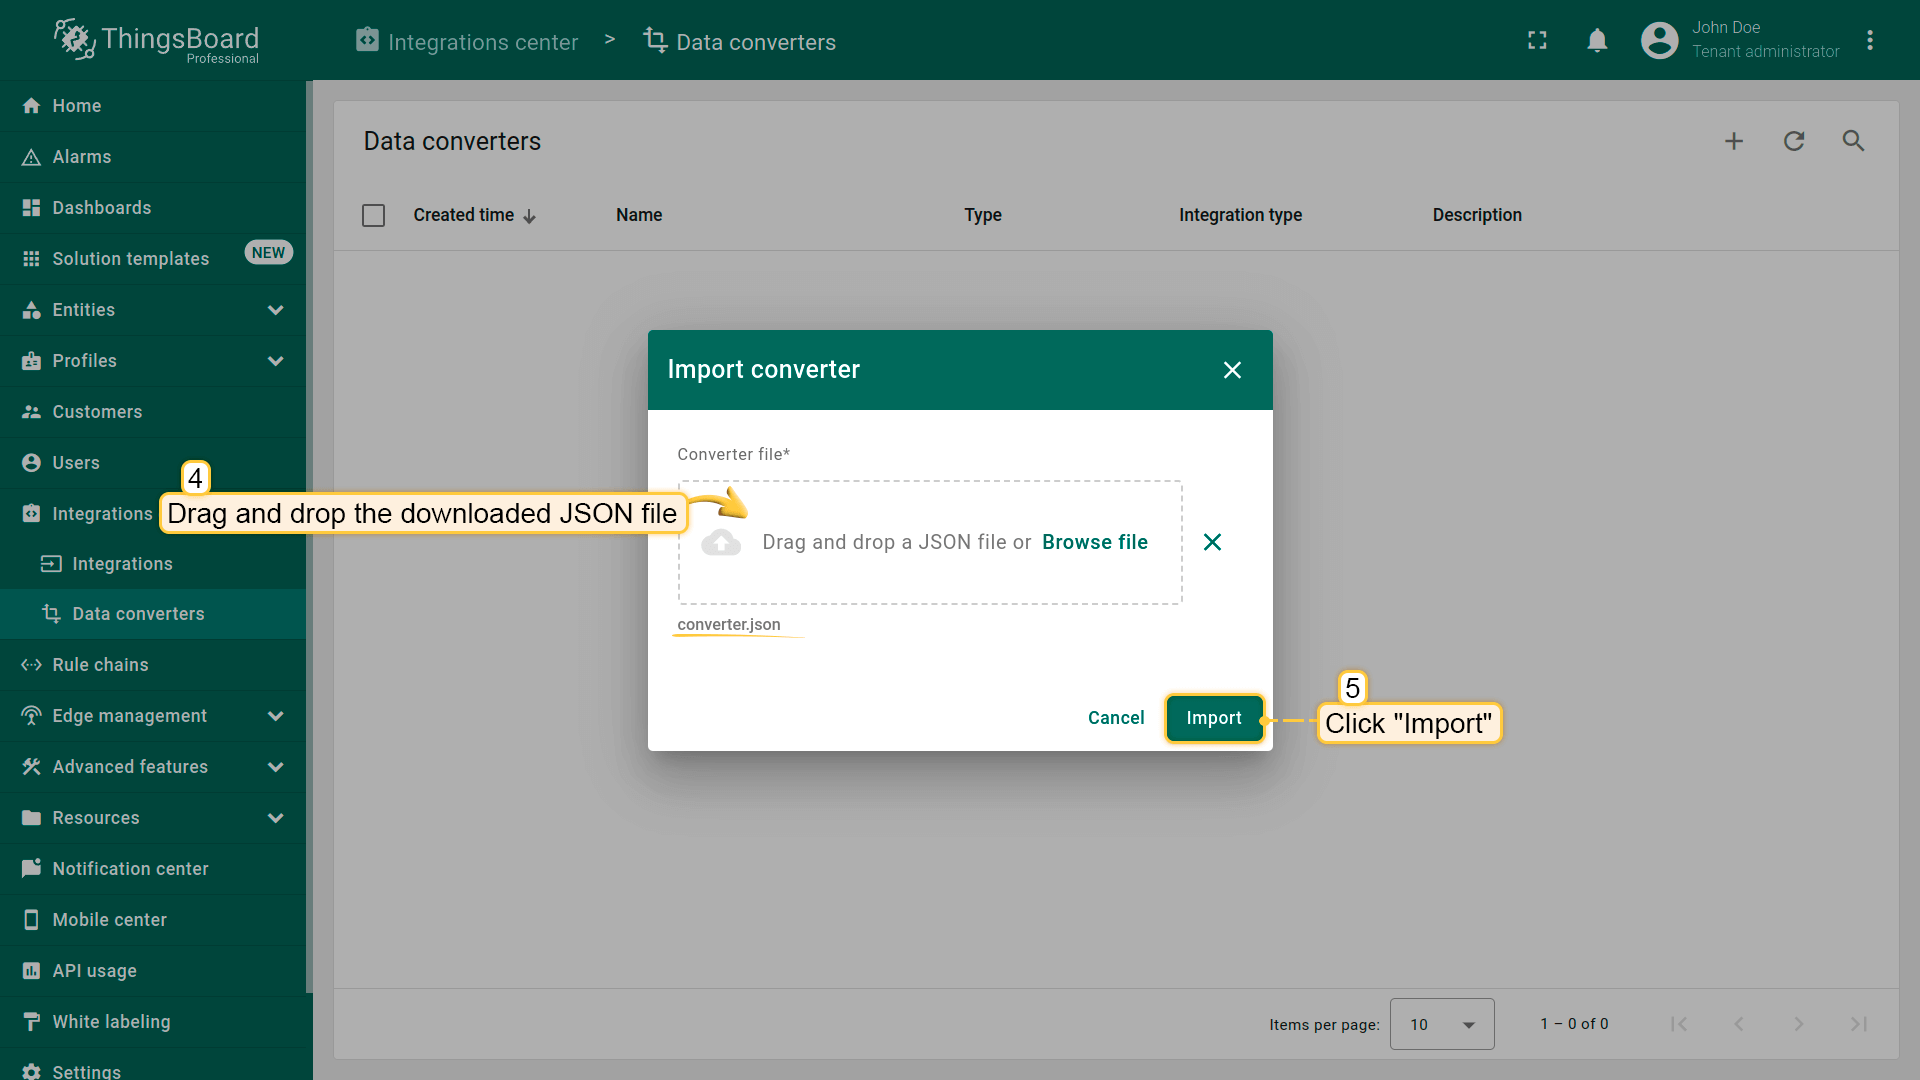 将下载的JSON文件(包含上行数据转换器配置)拖放到导入窗口,然后点击导入。 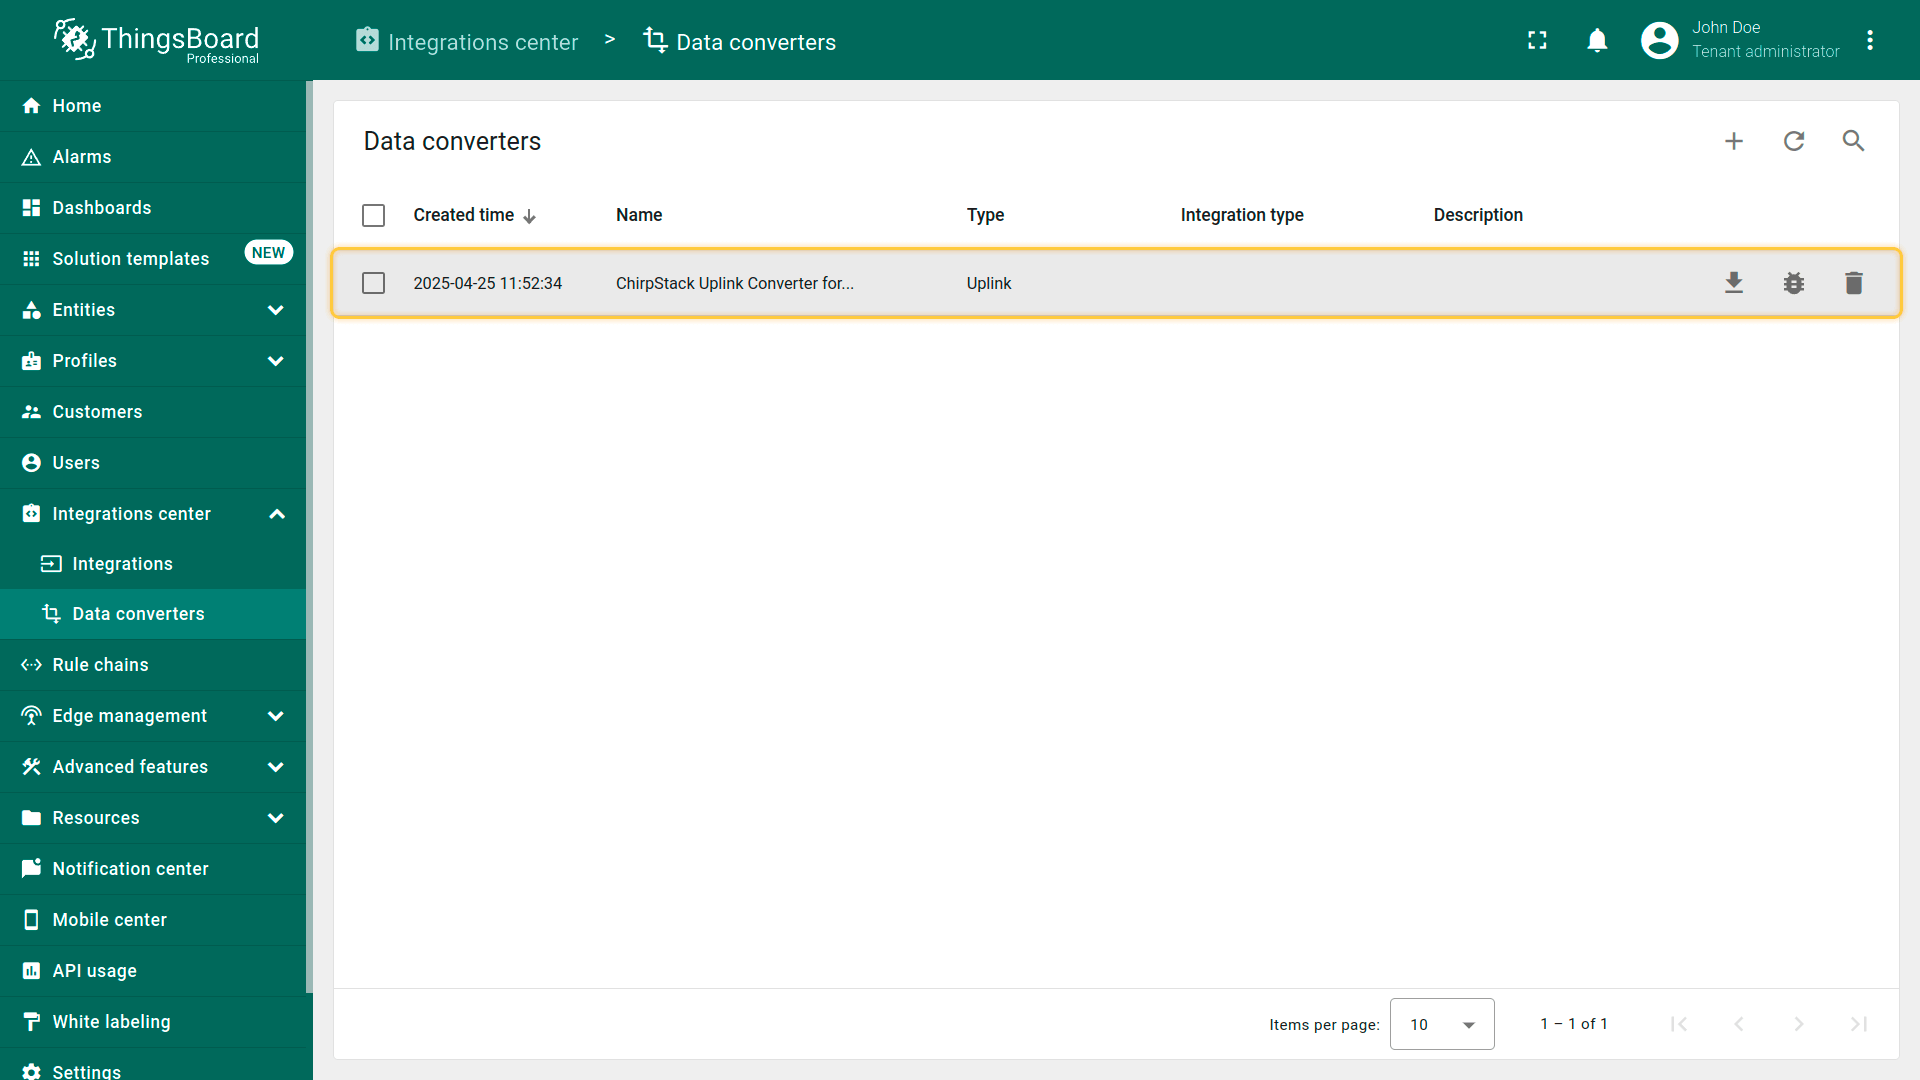 上行数据转换器现已成功导入。
现在,将您的 ChirpStack 集成更新为使用新的上行数据转换器:
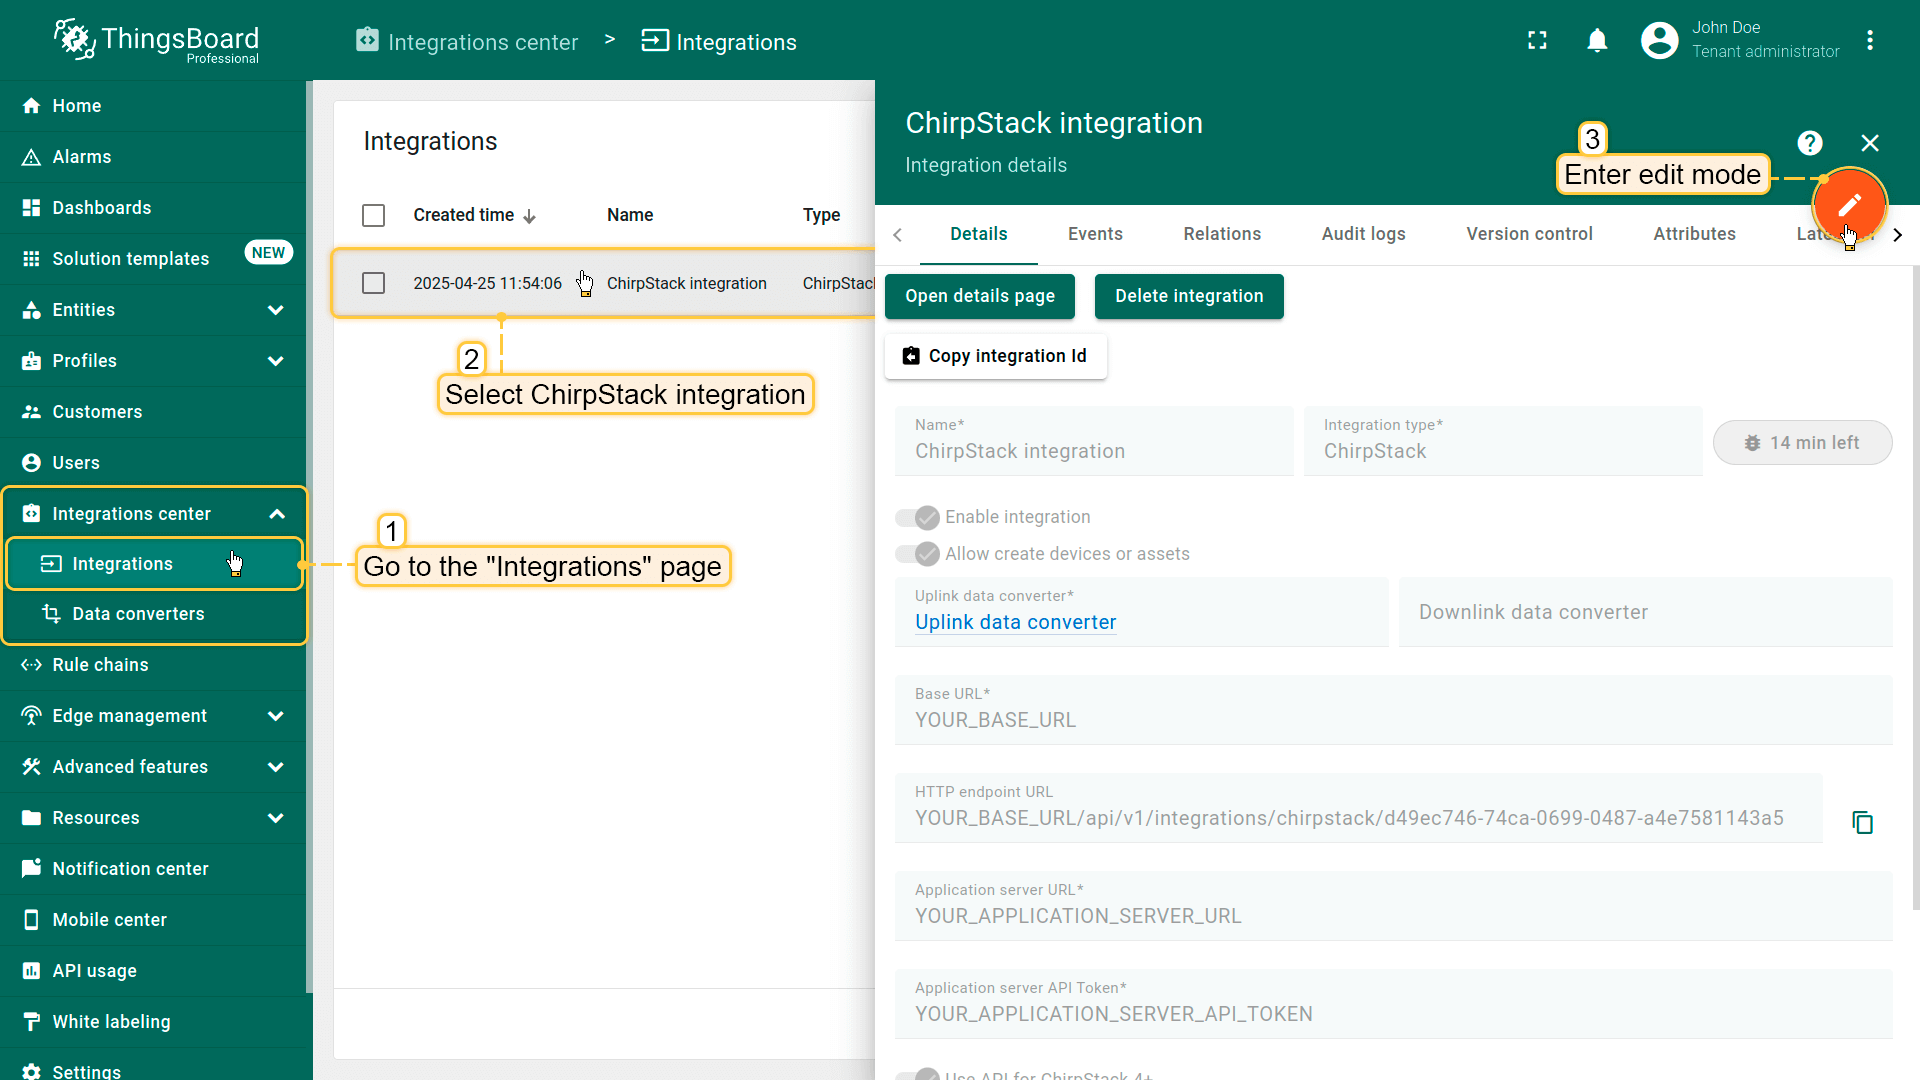 进入集成中心部分的集成页面。点击您的ChirpStack集成以打开详情窗口。点击右上角的橙色铅笔按钮进入编辑模式。 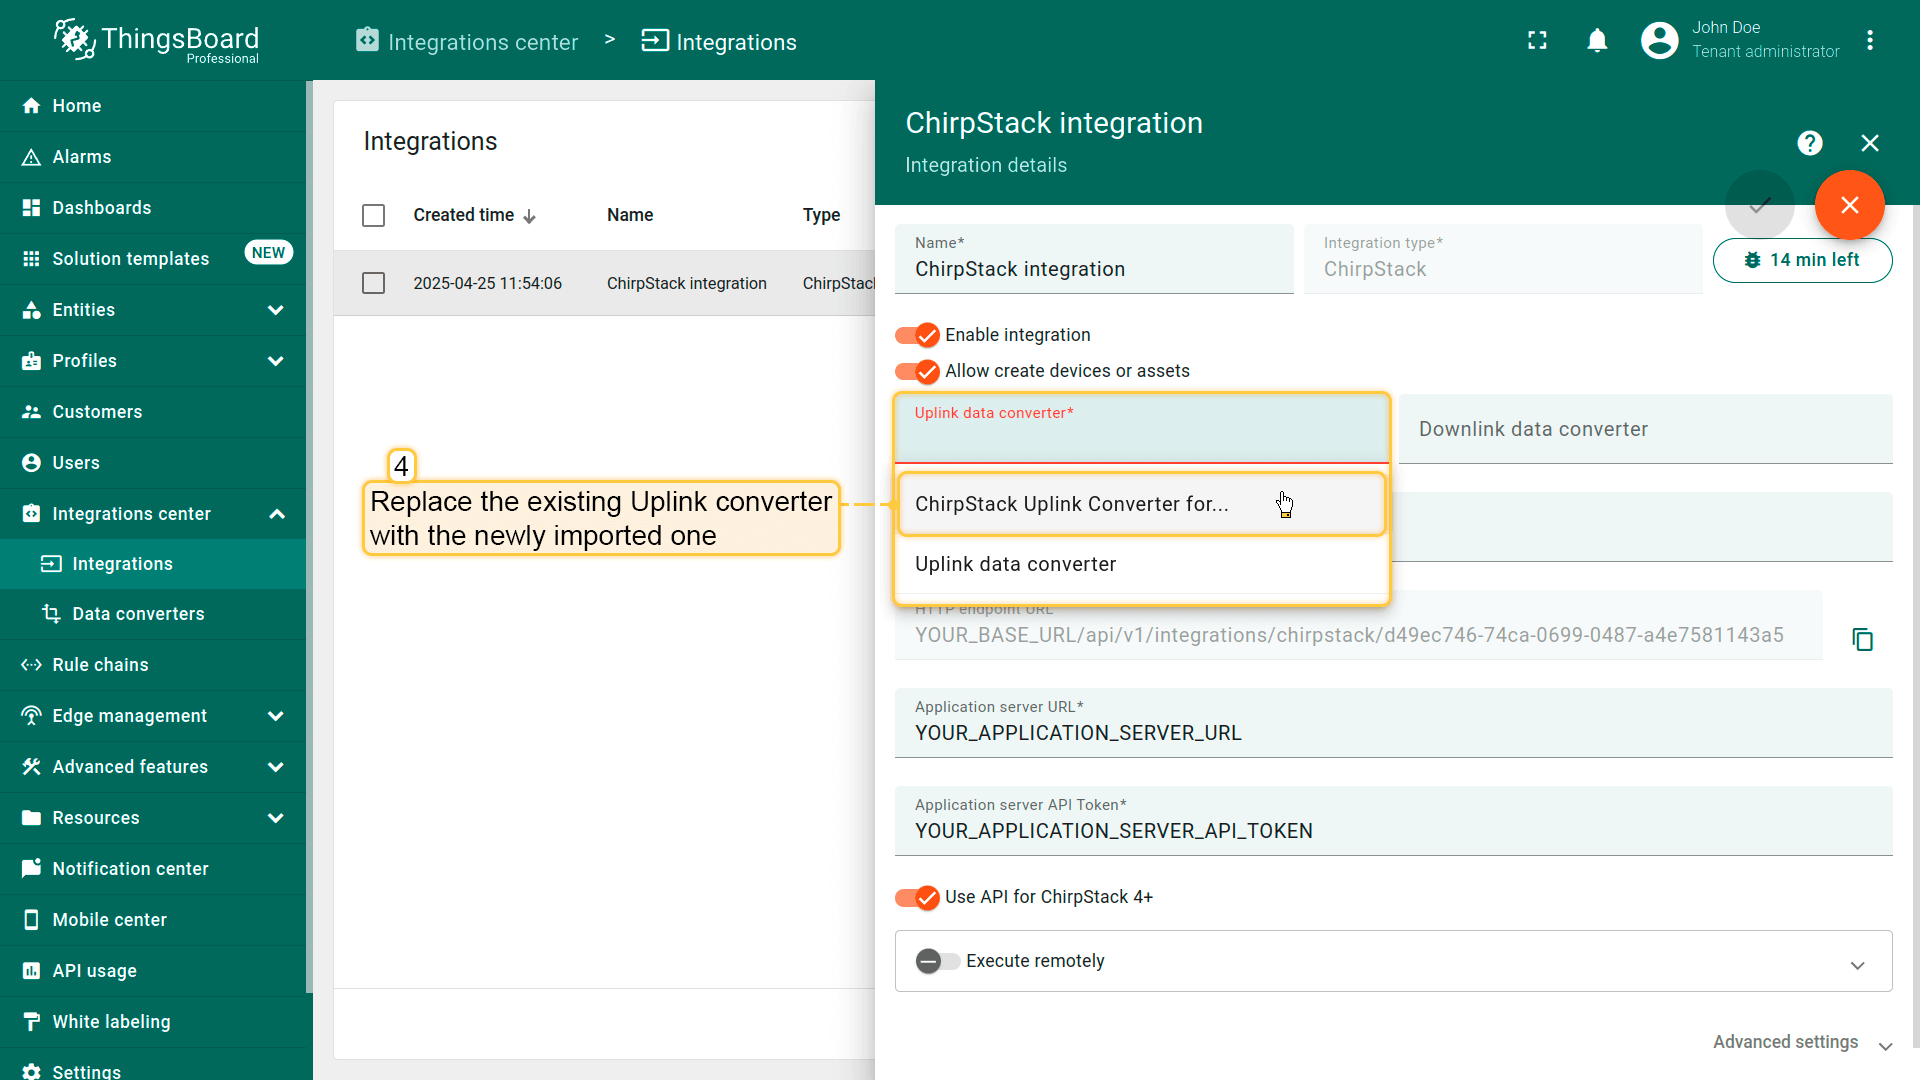 使用导入的转换器替换现有上行数据转换器。  别忘了保存更改! |
在The Things Stack社区版上添加设备我们需要在 The Things Stack社区版 上添加设备。 要添加设备,请按以下步骤操作:
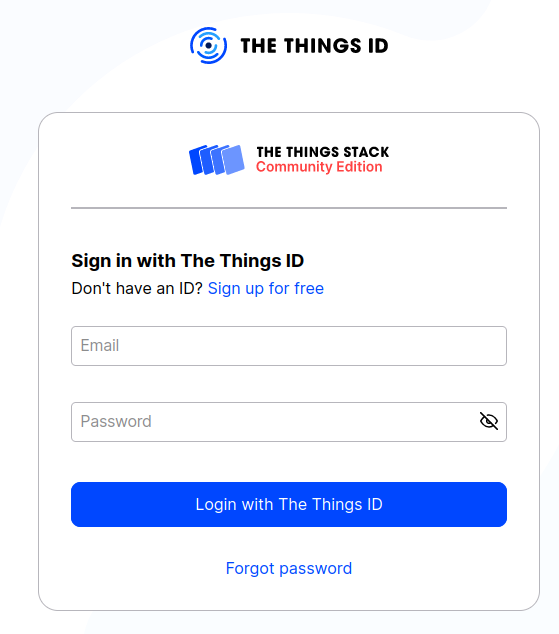 登录云端并打开控制台。 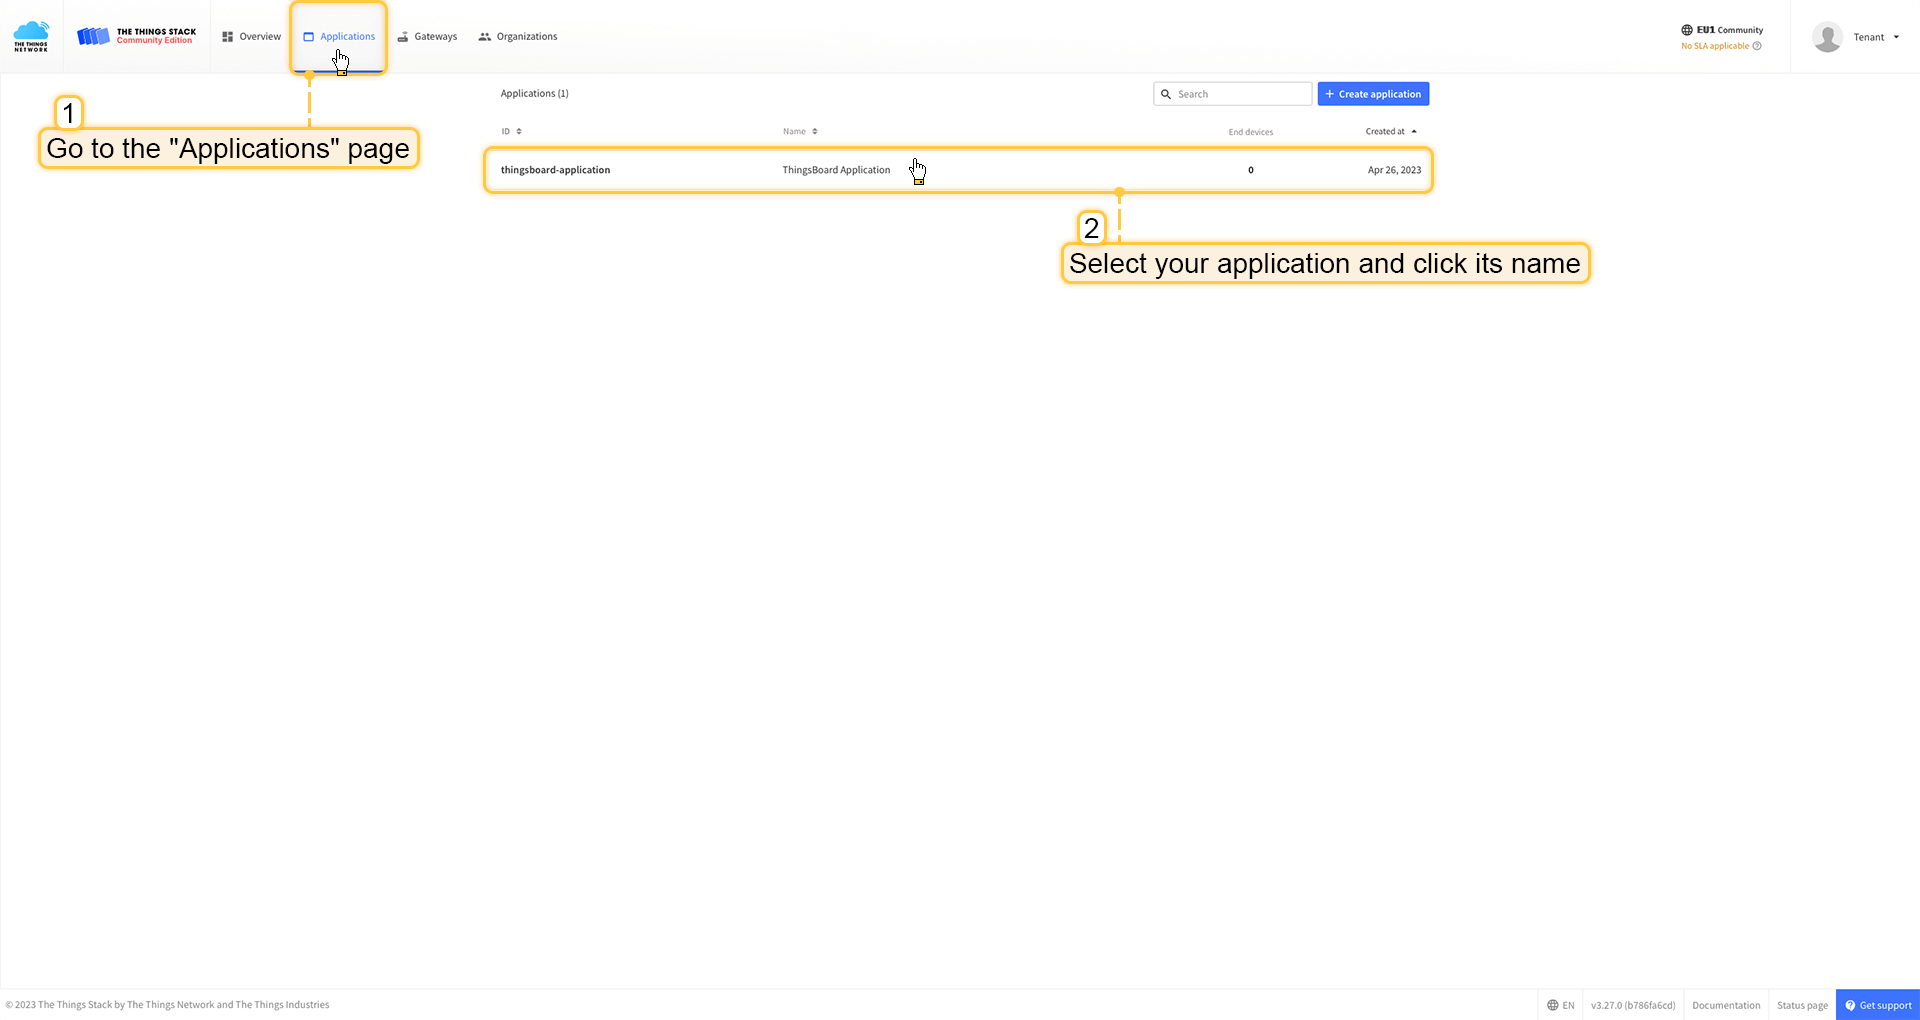 进入 应用 页面。然后选择您的应用并点击应用名称。 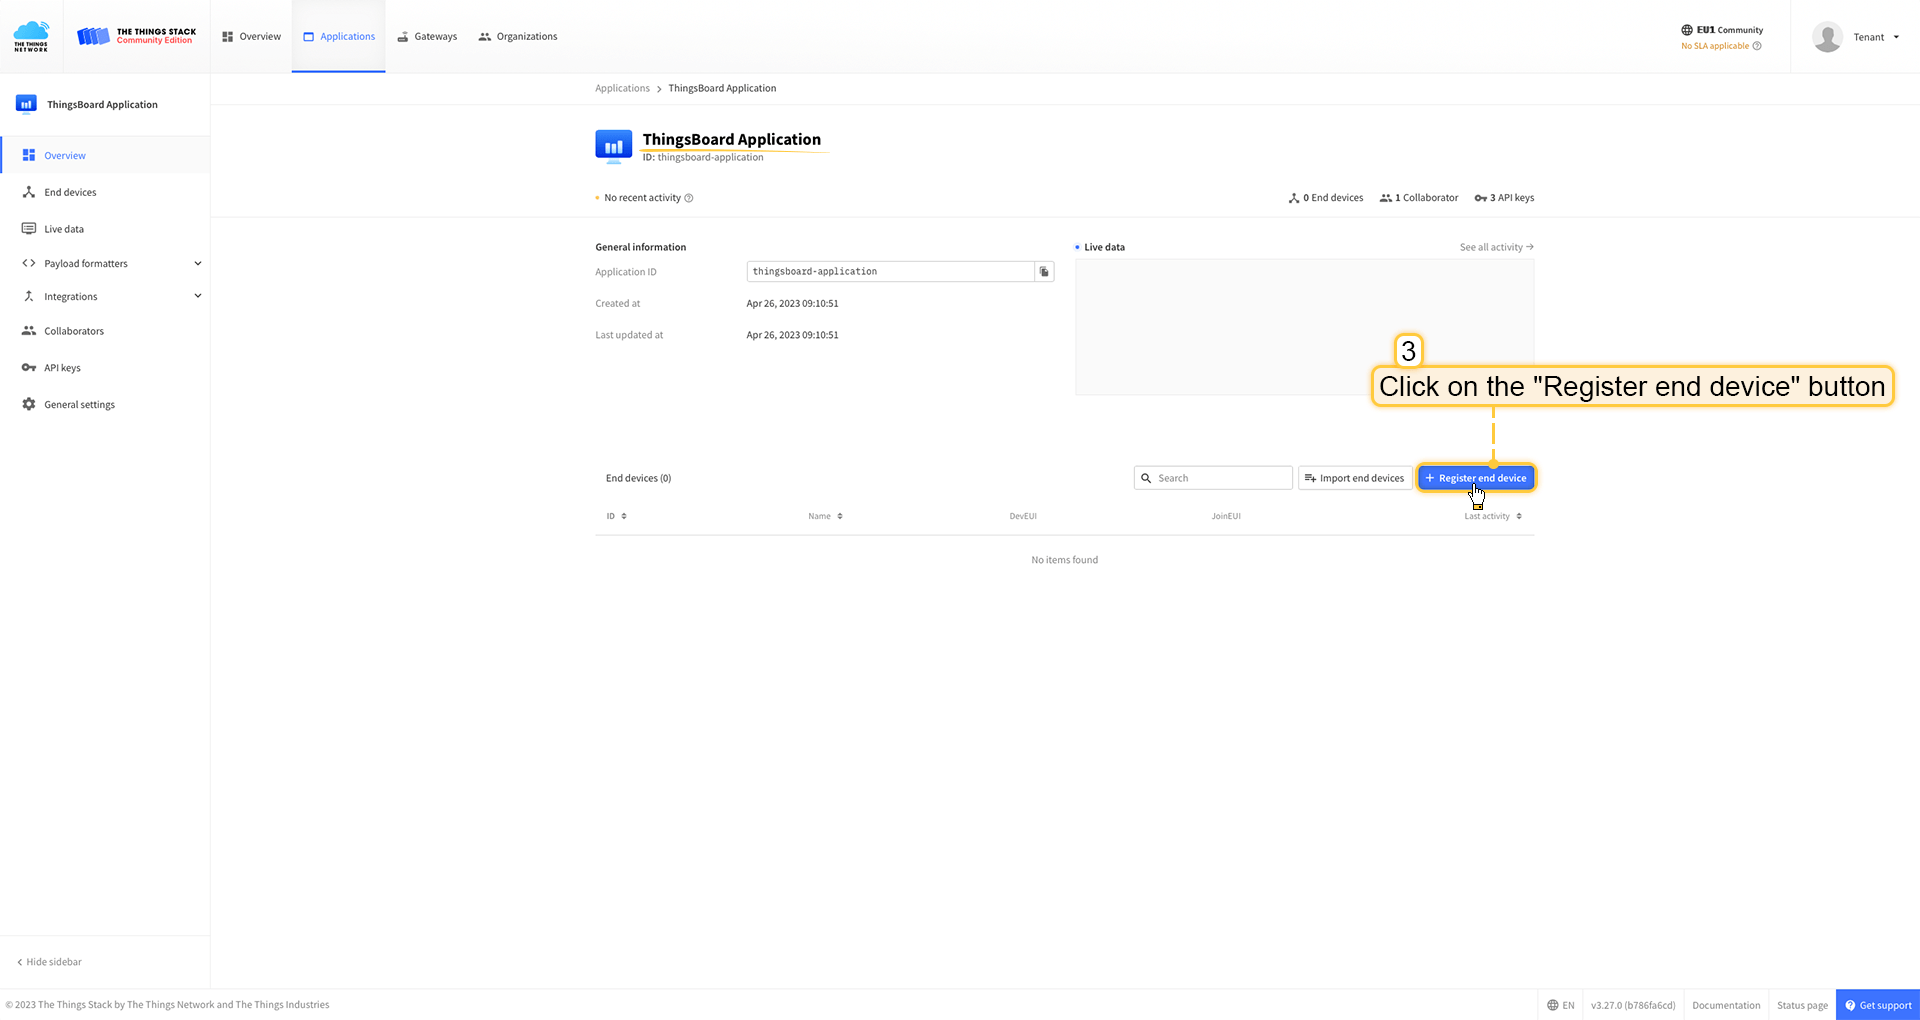 点击 注册终端设备 按钮。 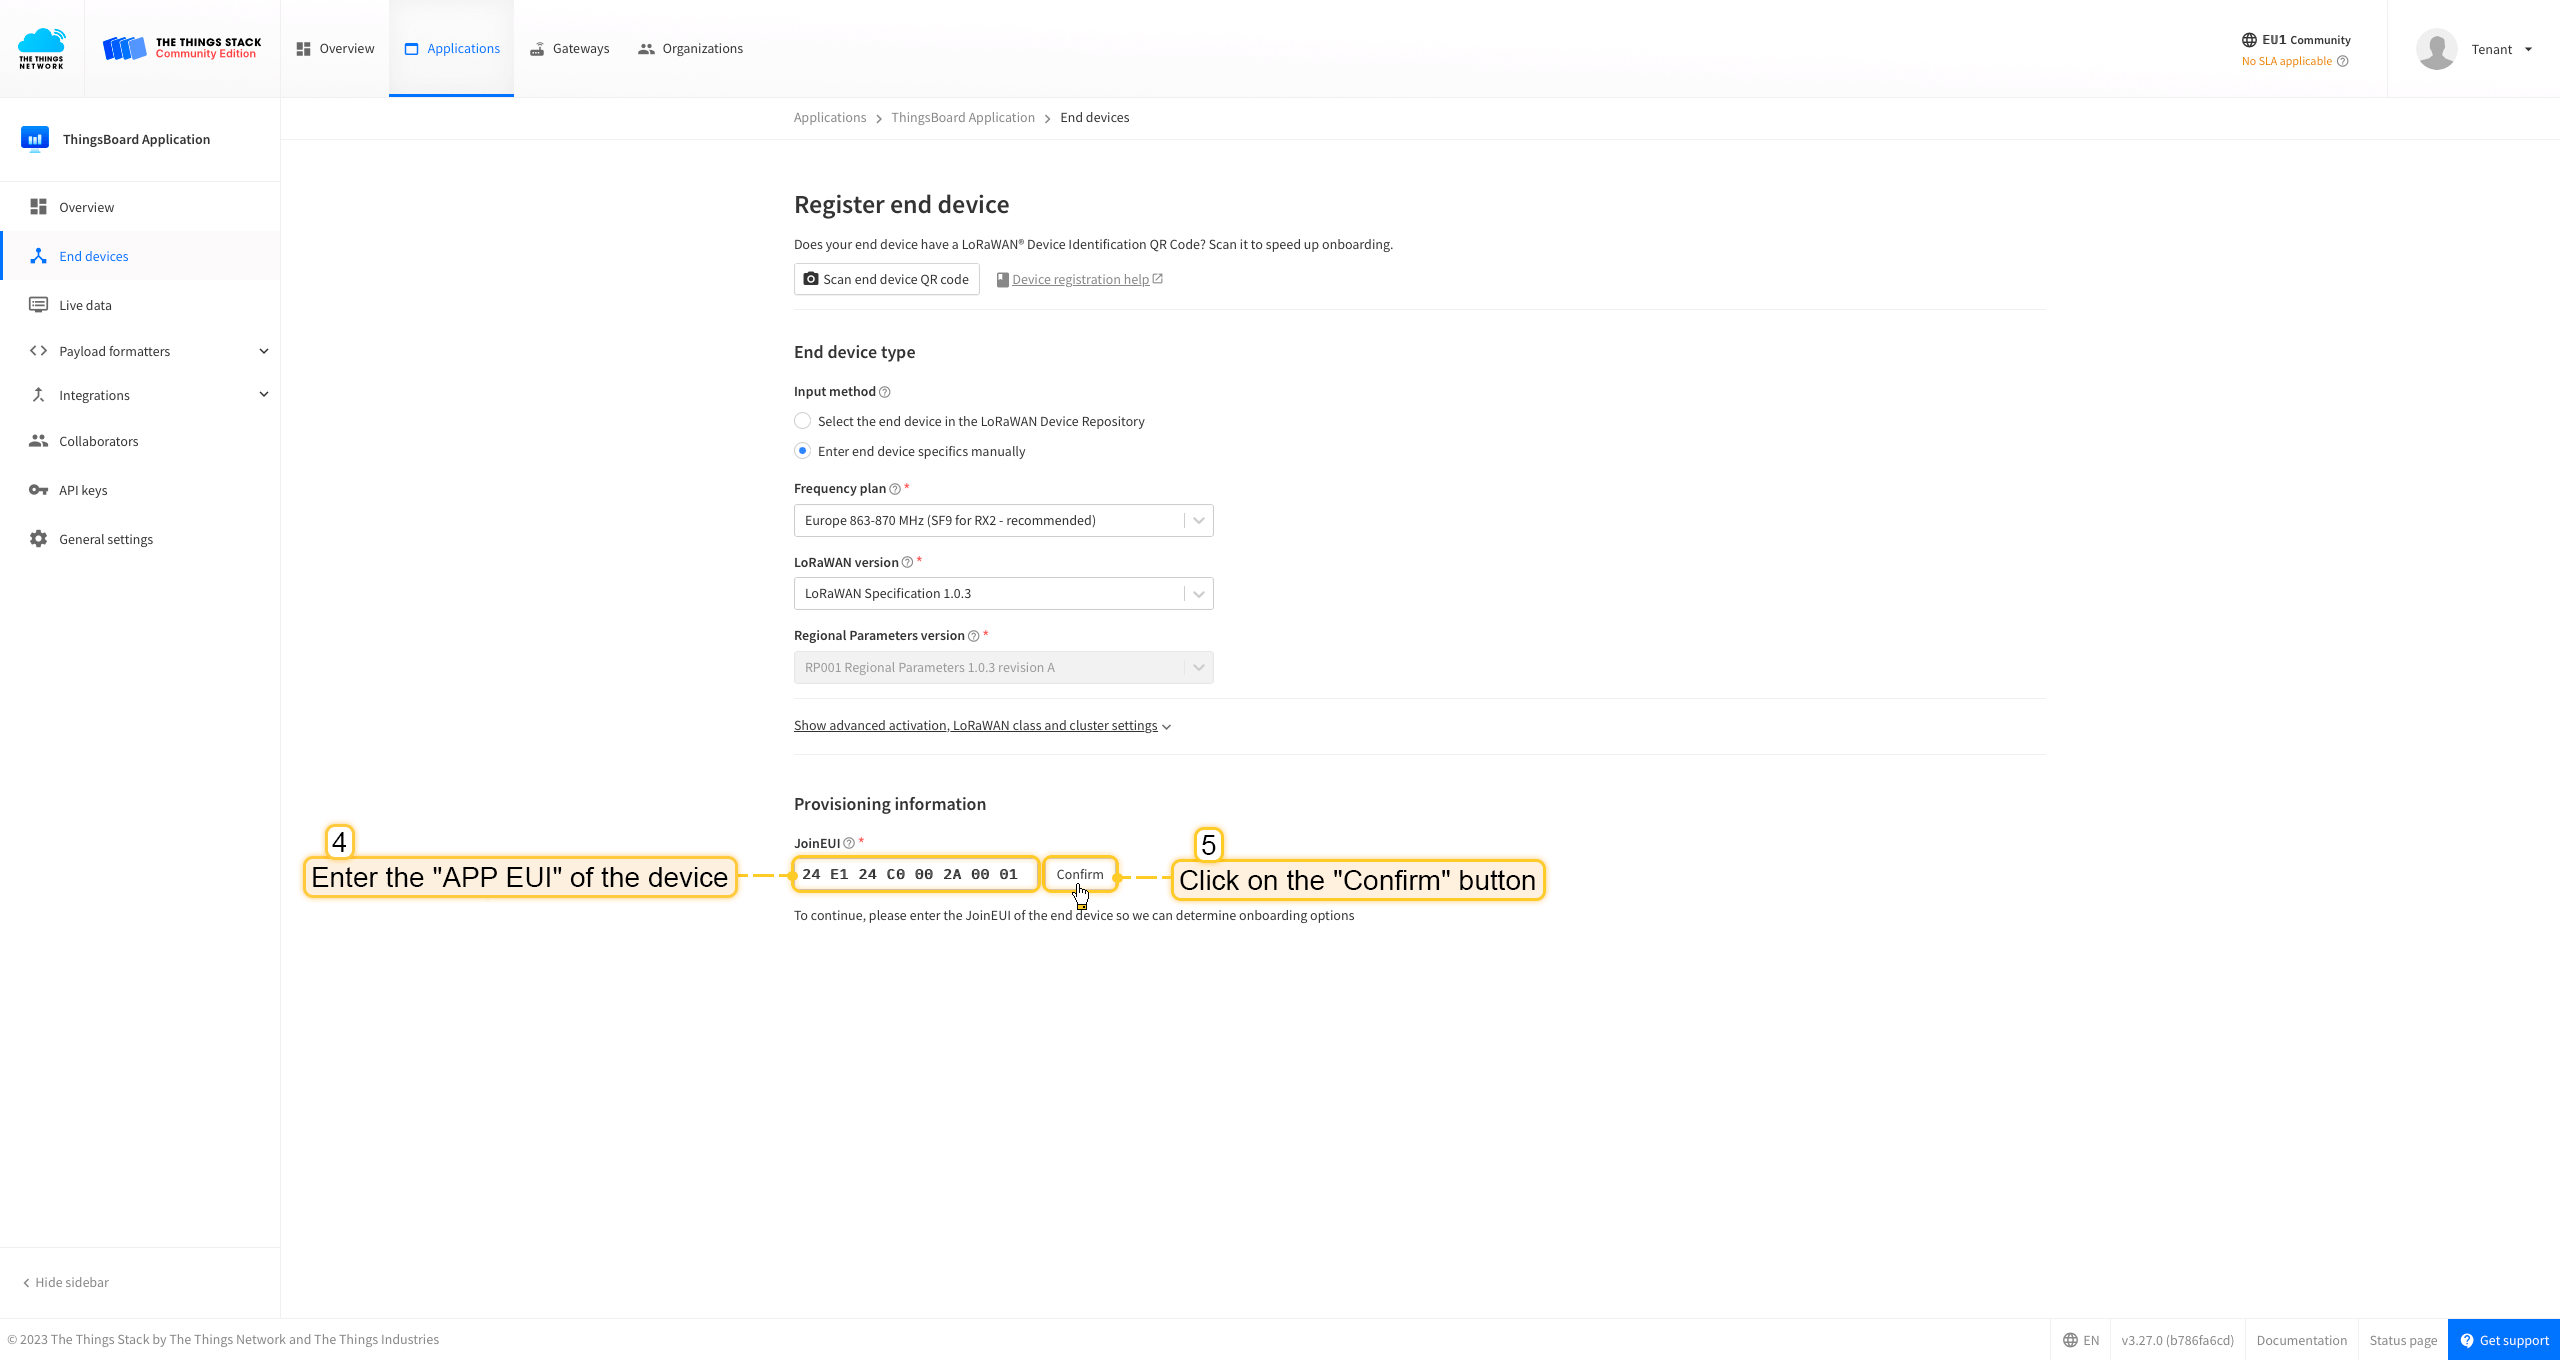 将 APP EUI 值填入 JoinEUI 字段。点击 确认 按钮。 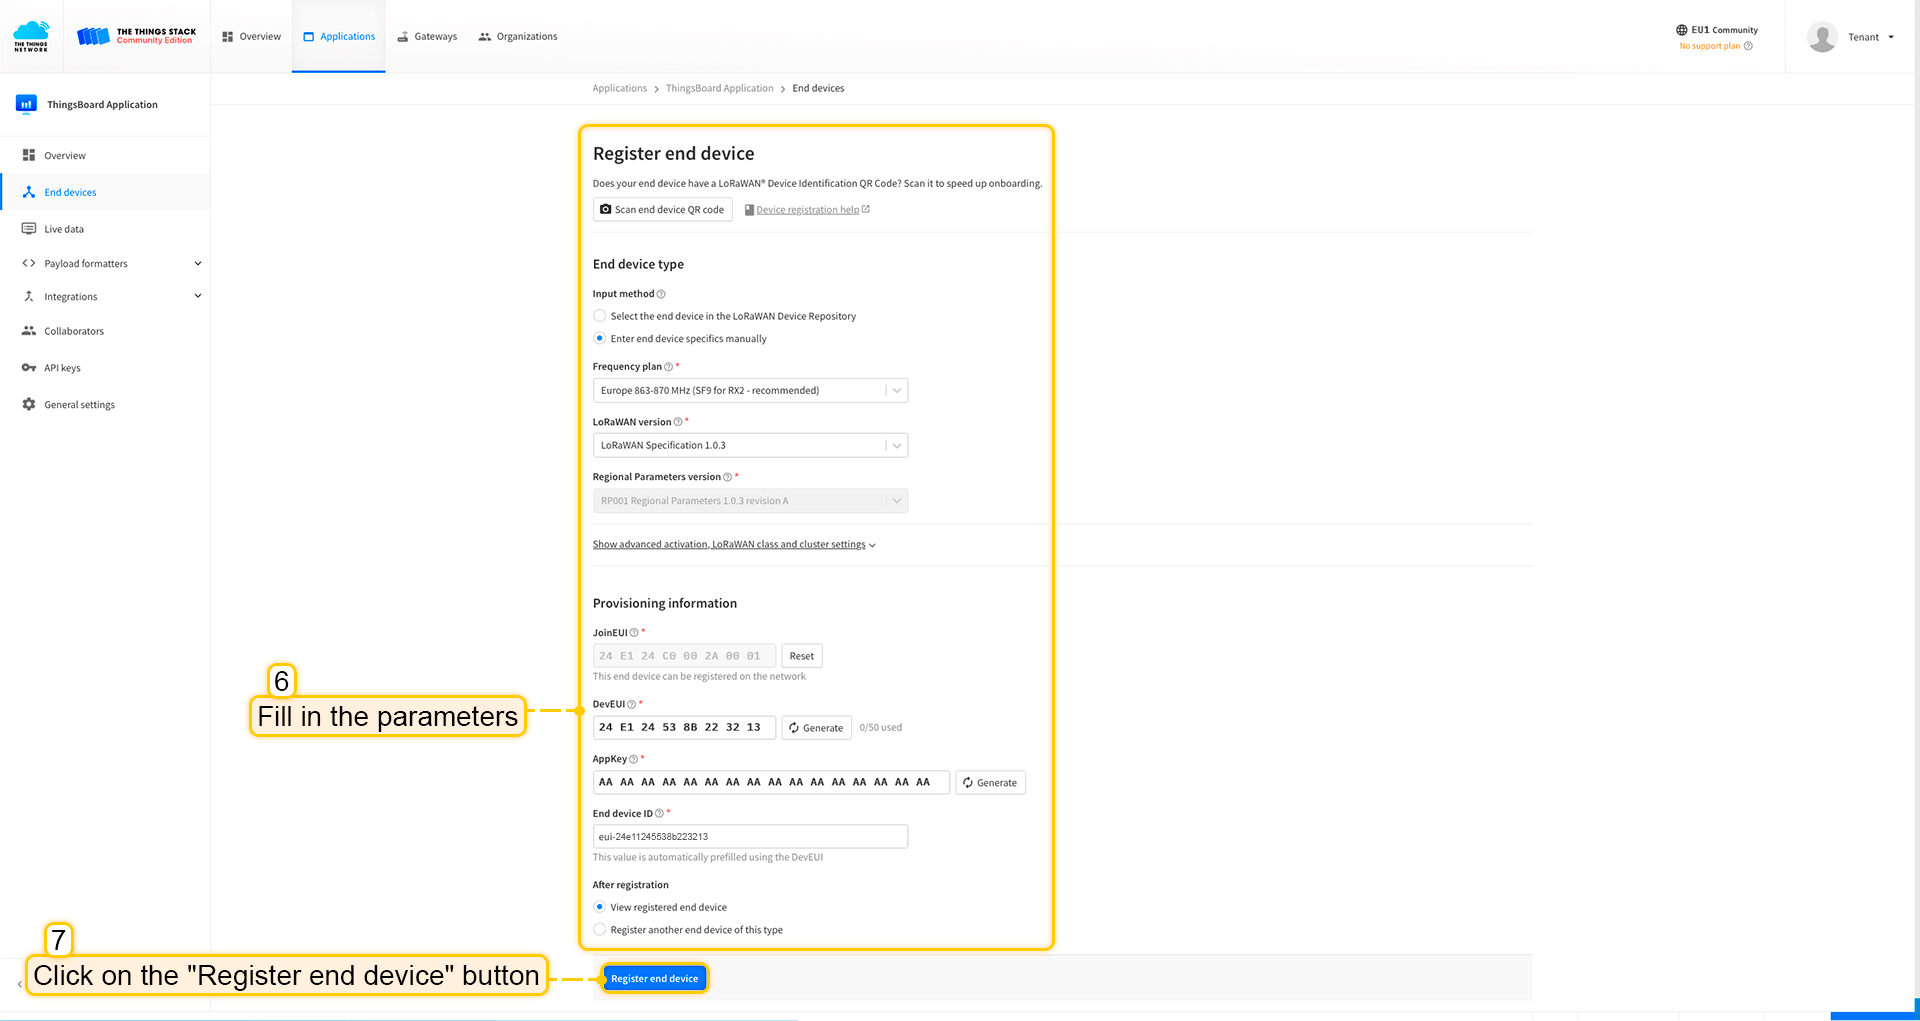 填写其余参数并点击 注册终端设备 按钮。 ThingsBoard集成中的上行数据转换器步骤1:下载JSON文件 点击下方按钮下载包含上行数据转换器配置的JSON文件。 下载 The Things Stack 集成的上行数据转换器。
下载包含上行数据转换器配置的文件后,将其导入ThingsBoard:
在集成中心部分的数据转换器页面中操作。点击页面右上角的+图标,从下拉菜单选择导入转换器。 将下载的JSON文件(包含上行数据转换器配置)拖放到导入窗口,然后点击导入。  上行数据转换器现已成功导入。
现在,将您的 The Things Stack 集成更新为使用新的上行数据转换器:
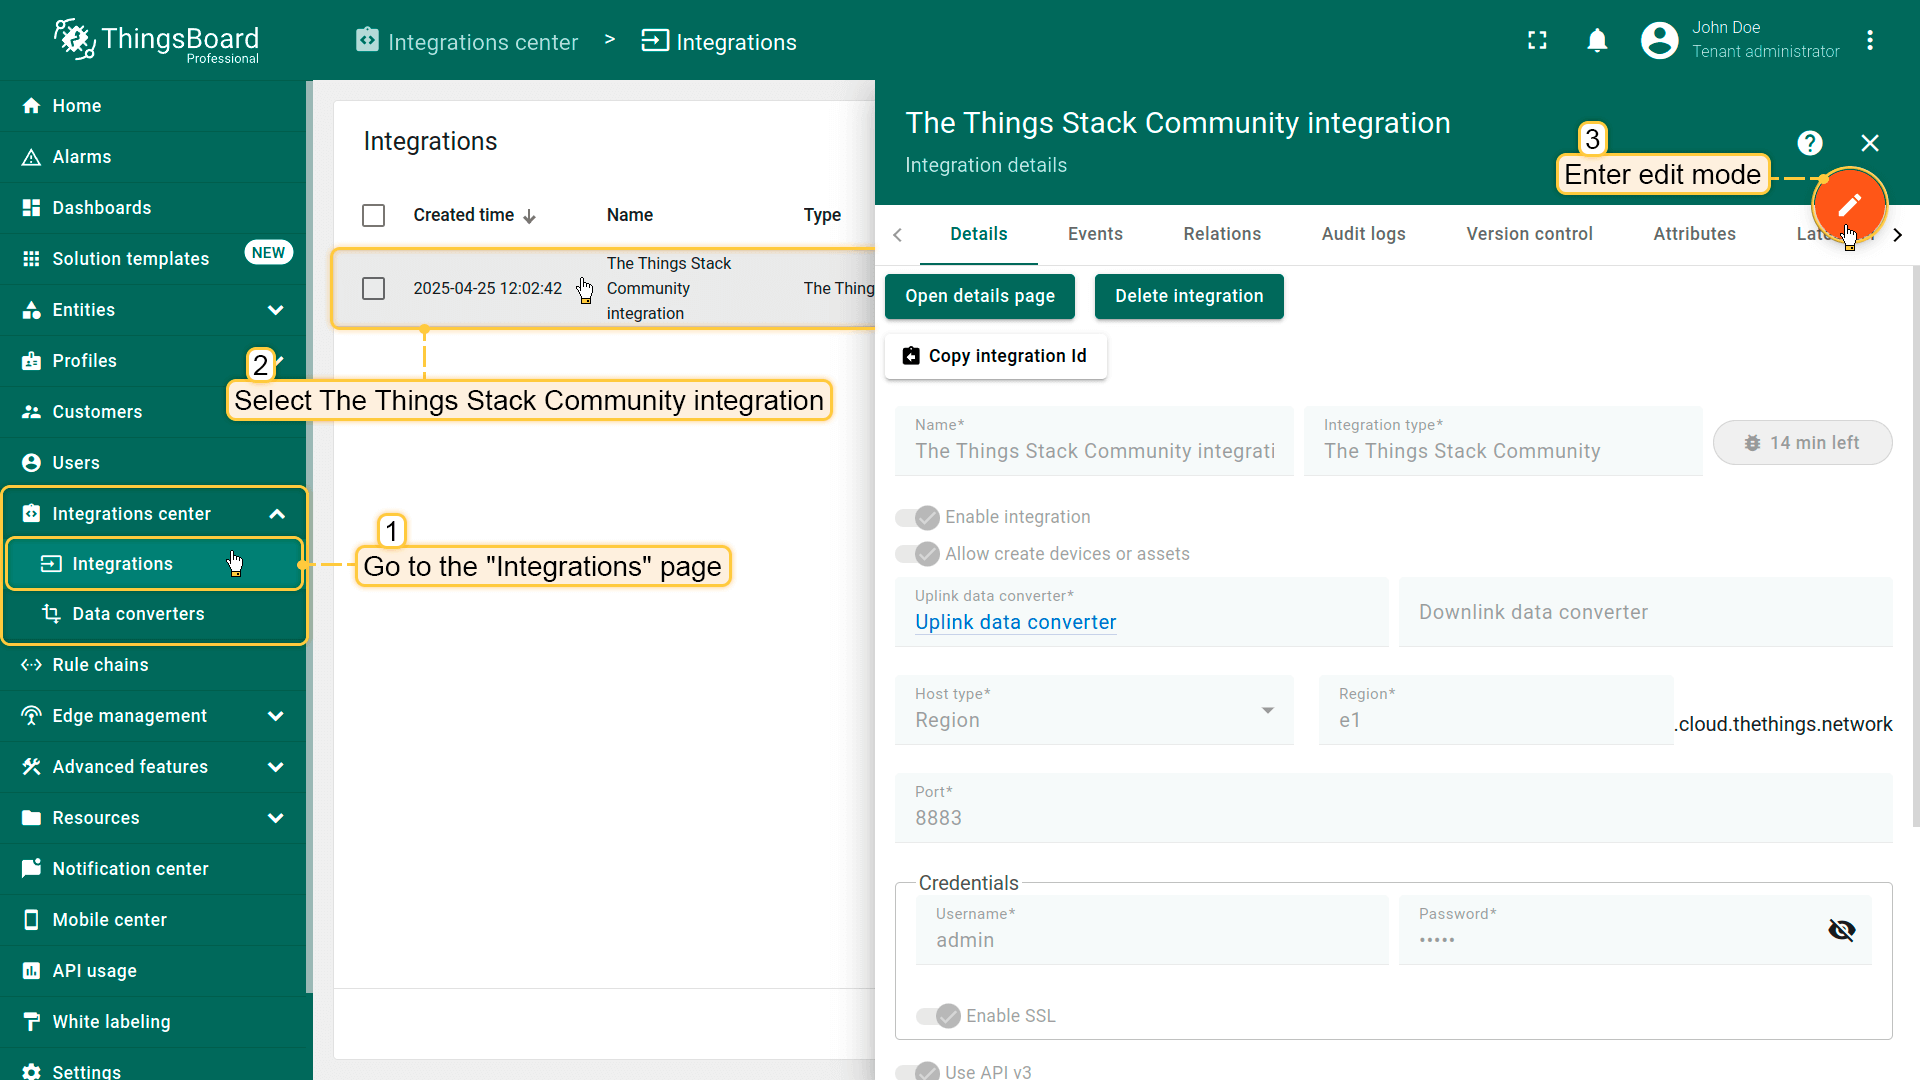 进入集成中心部分的集成页面。点击您的The Things Stack集成以打开详情窗口。点击右上角的橙色铅笔按钮进入编辑模式。 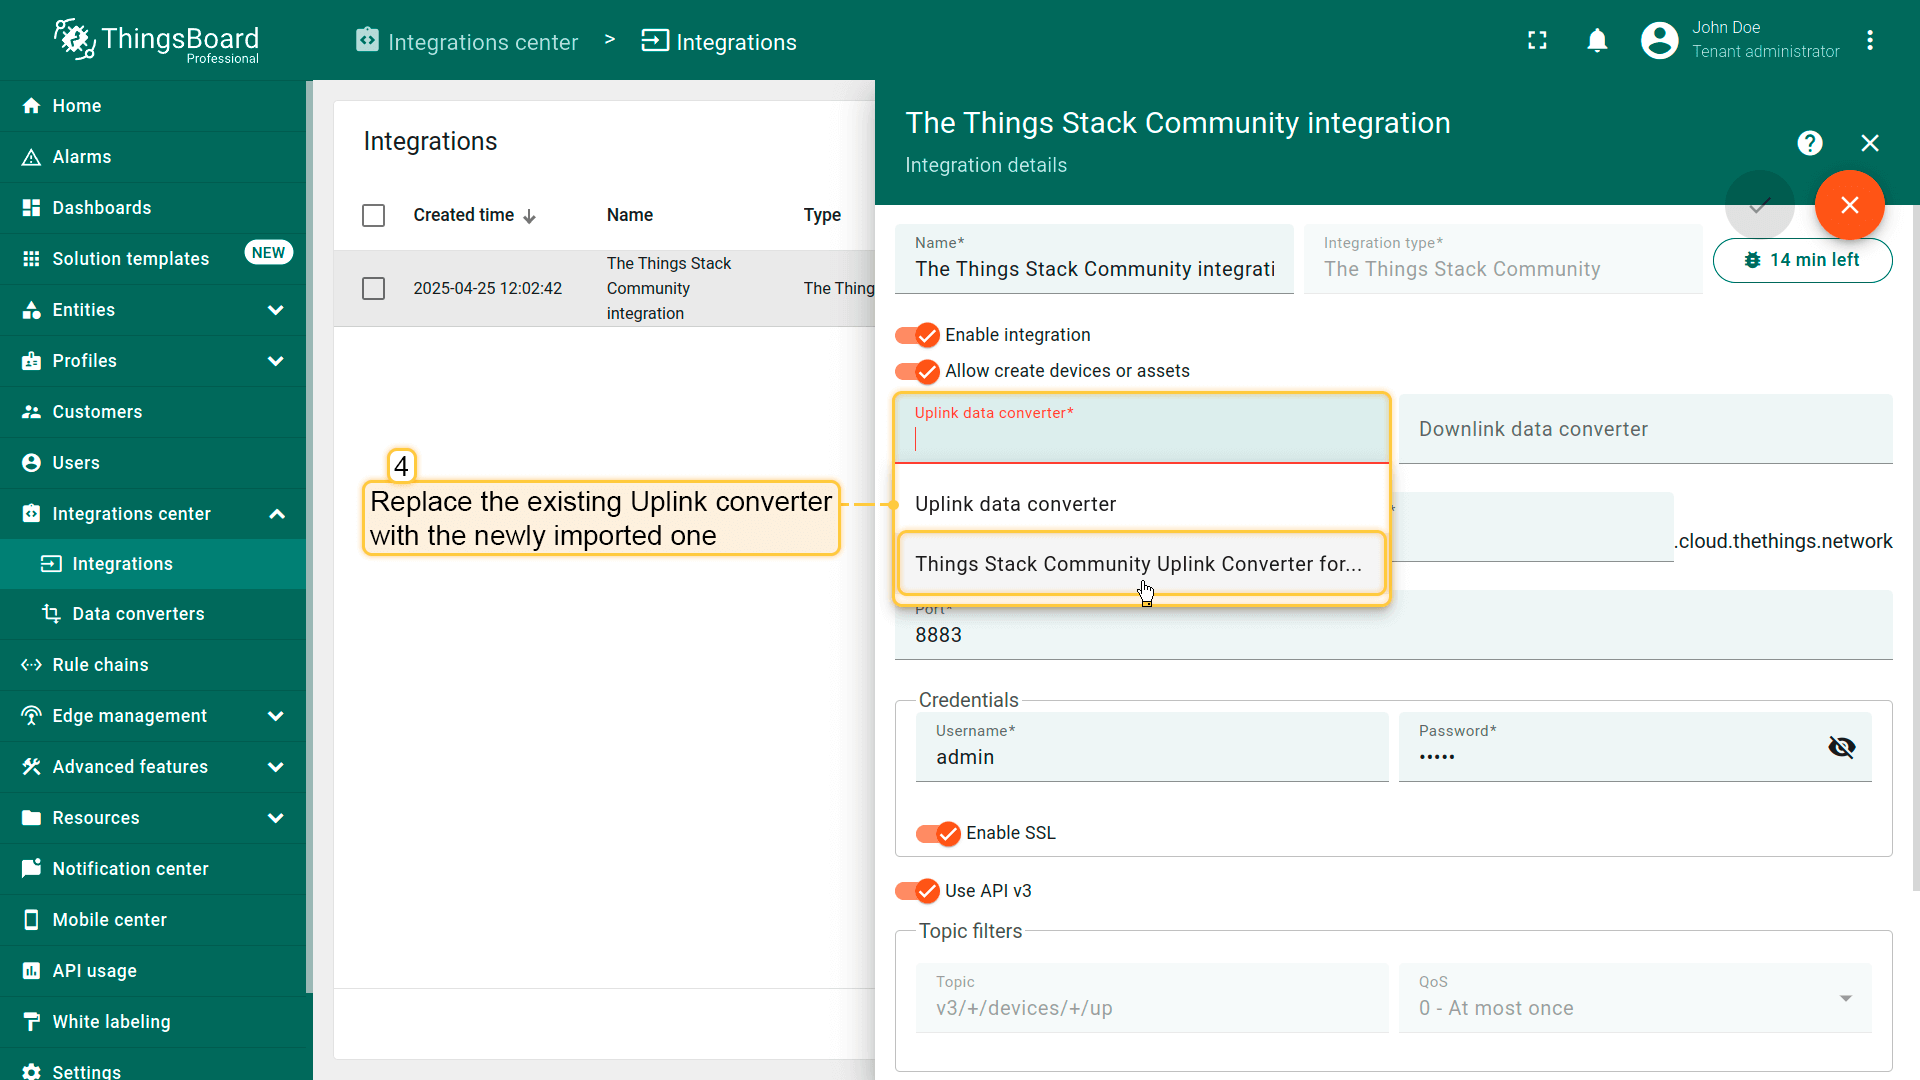 使用导入的转换器替换现有上行数据转换器。  别忘了保存更改! |
在The Things Industries上添加设备我们需要在 The Things Industries云 上添加设备。 要添加设备,请按以下步骤操作:
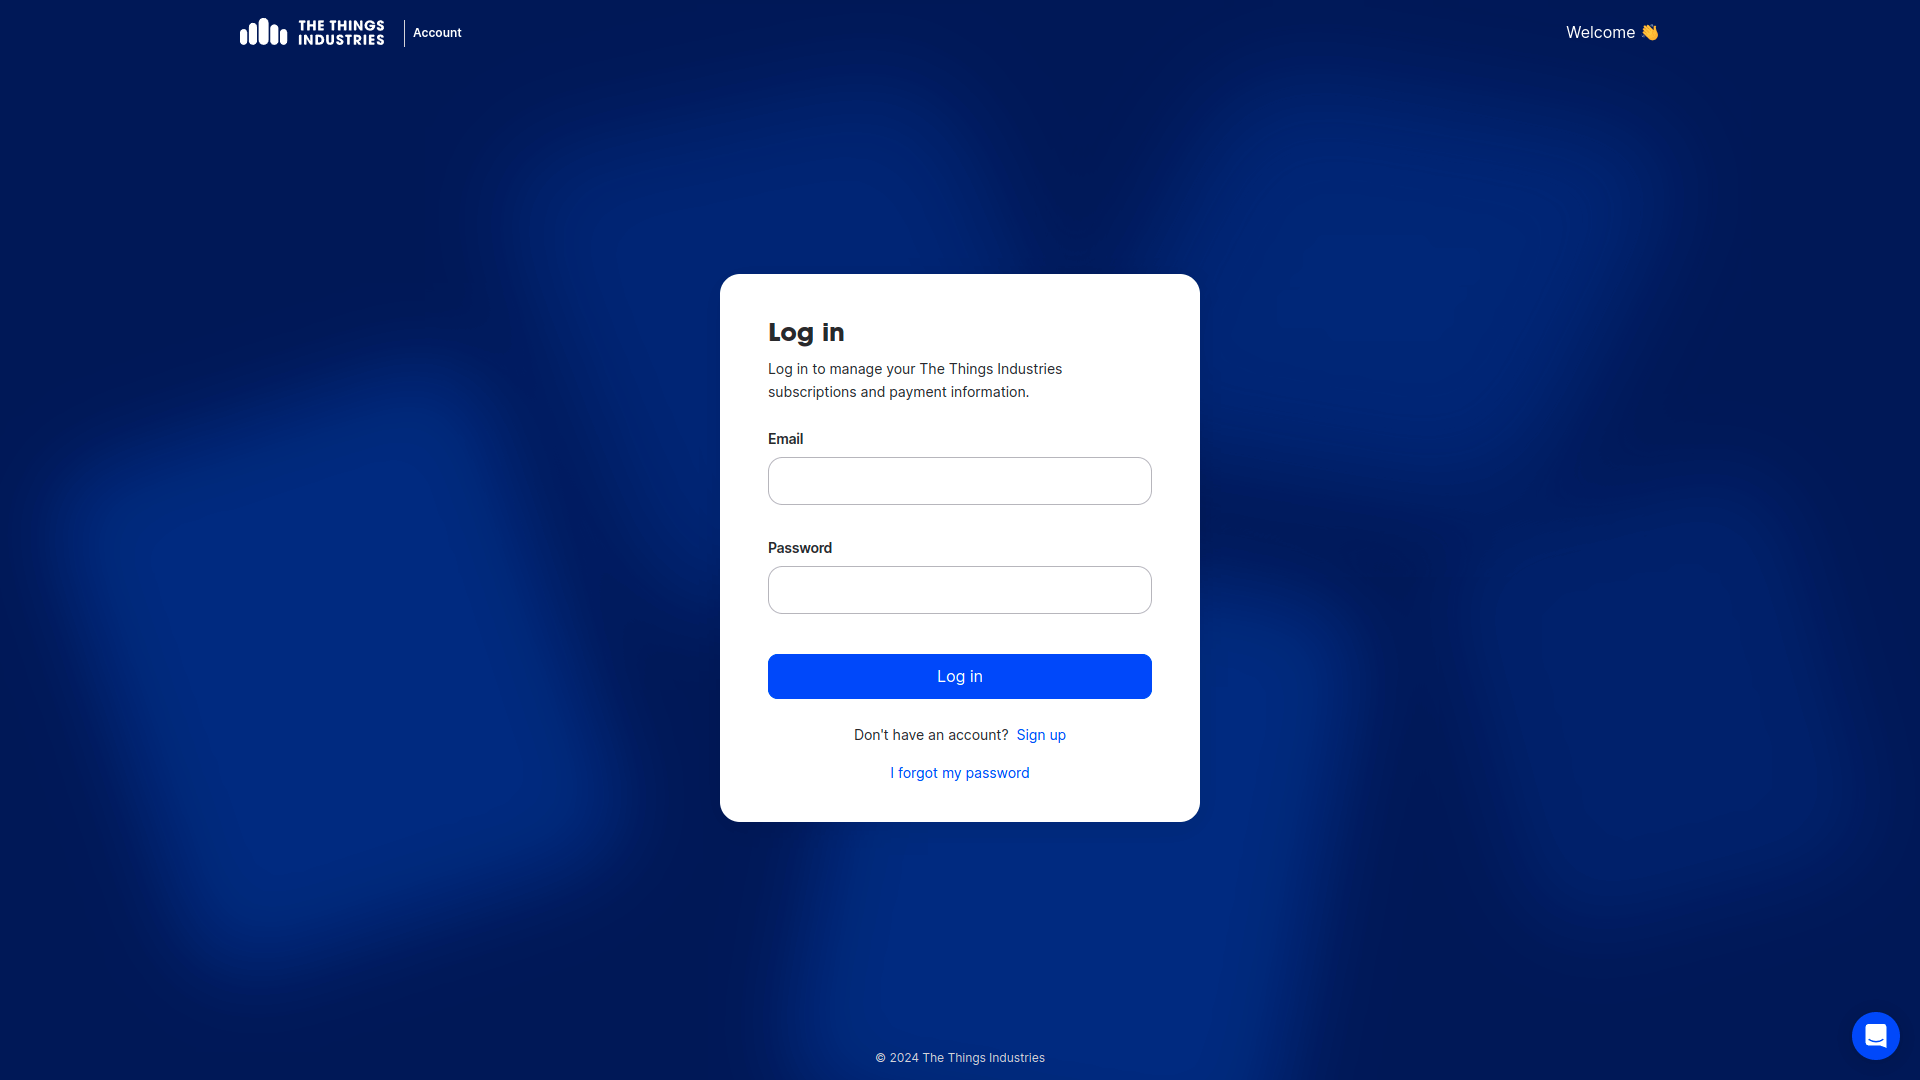 登录云端并打开控制台。  进入 应用 页面。然后选择您的应用并点击应用名称。 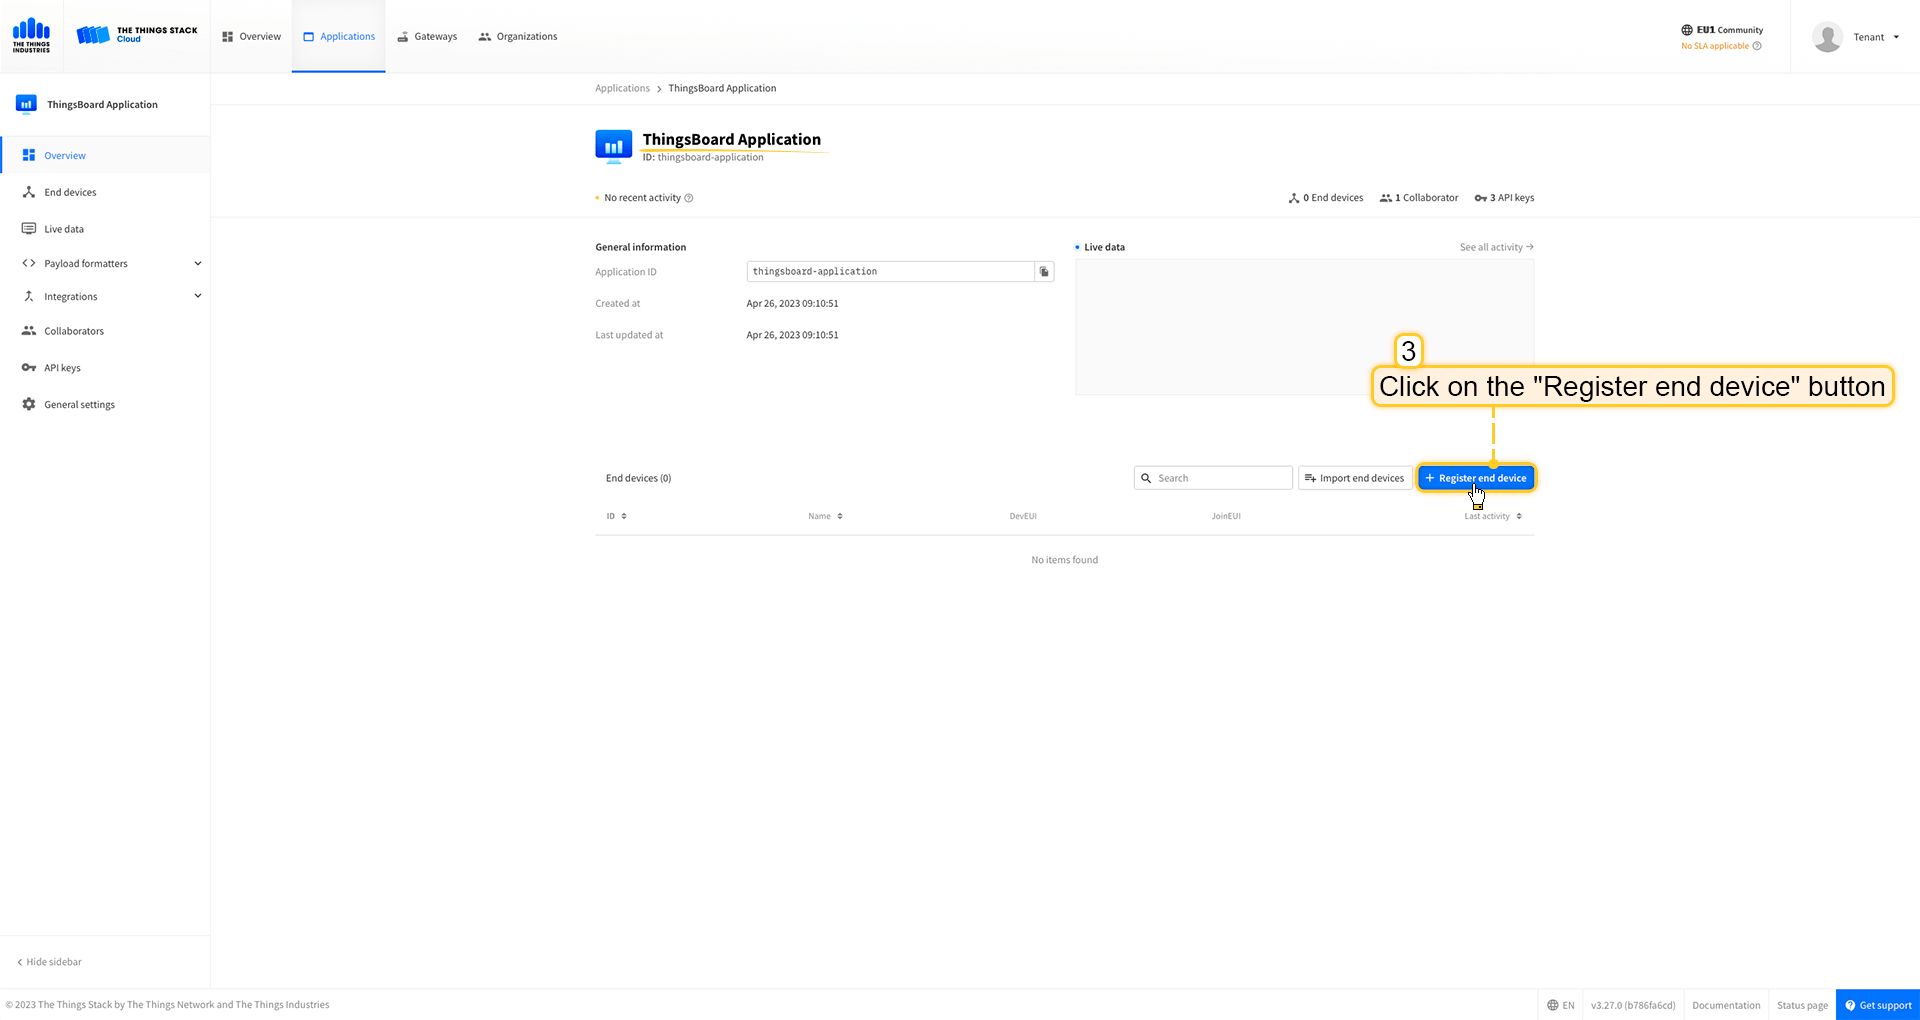 点击 注册终端设备 按钮。  将 APP EUI 值填入 JoinEUI 字段。点击 确认 按钮。  填写其余参数并点击 注册终端设备 按钮。 ThingsBoard集成中的上行数据转换器步骤1:下载JSON文件 点击下方按钮下载包含上行数据转换器配置的JSON文件。 下载 The Things Industries 集成的上行数据转换器。
下载包含上行数据转换器配置的文件后,将其导入ThingsBoard:
在集成中心部分的数据转换器页面中操作。点击页面右上角的+图标,从下拉菜单选择导入转换器。 将下载的JSON文件(包含上行数据转换器配置)拖放到导入窗口,然后点击导入。  上行数据转换器现已成功导入。
现在,将您的 The Things Industries 集成更新为使用新的上行数据转换器:
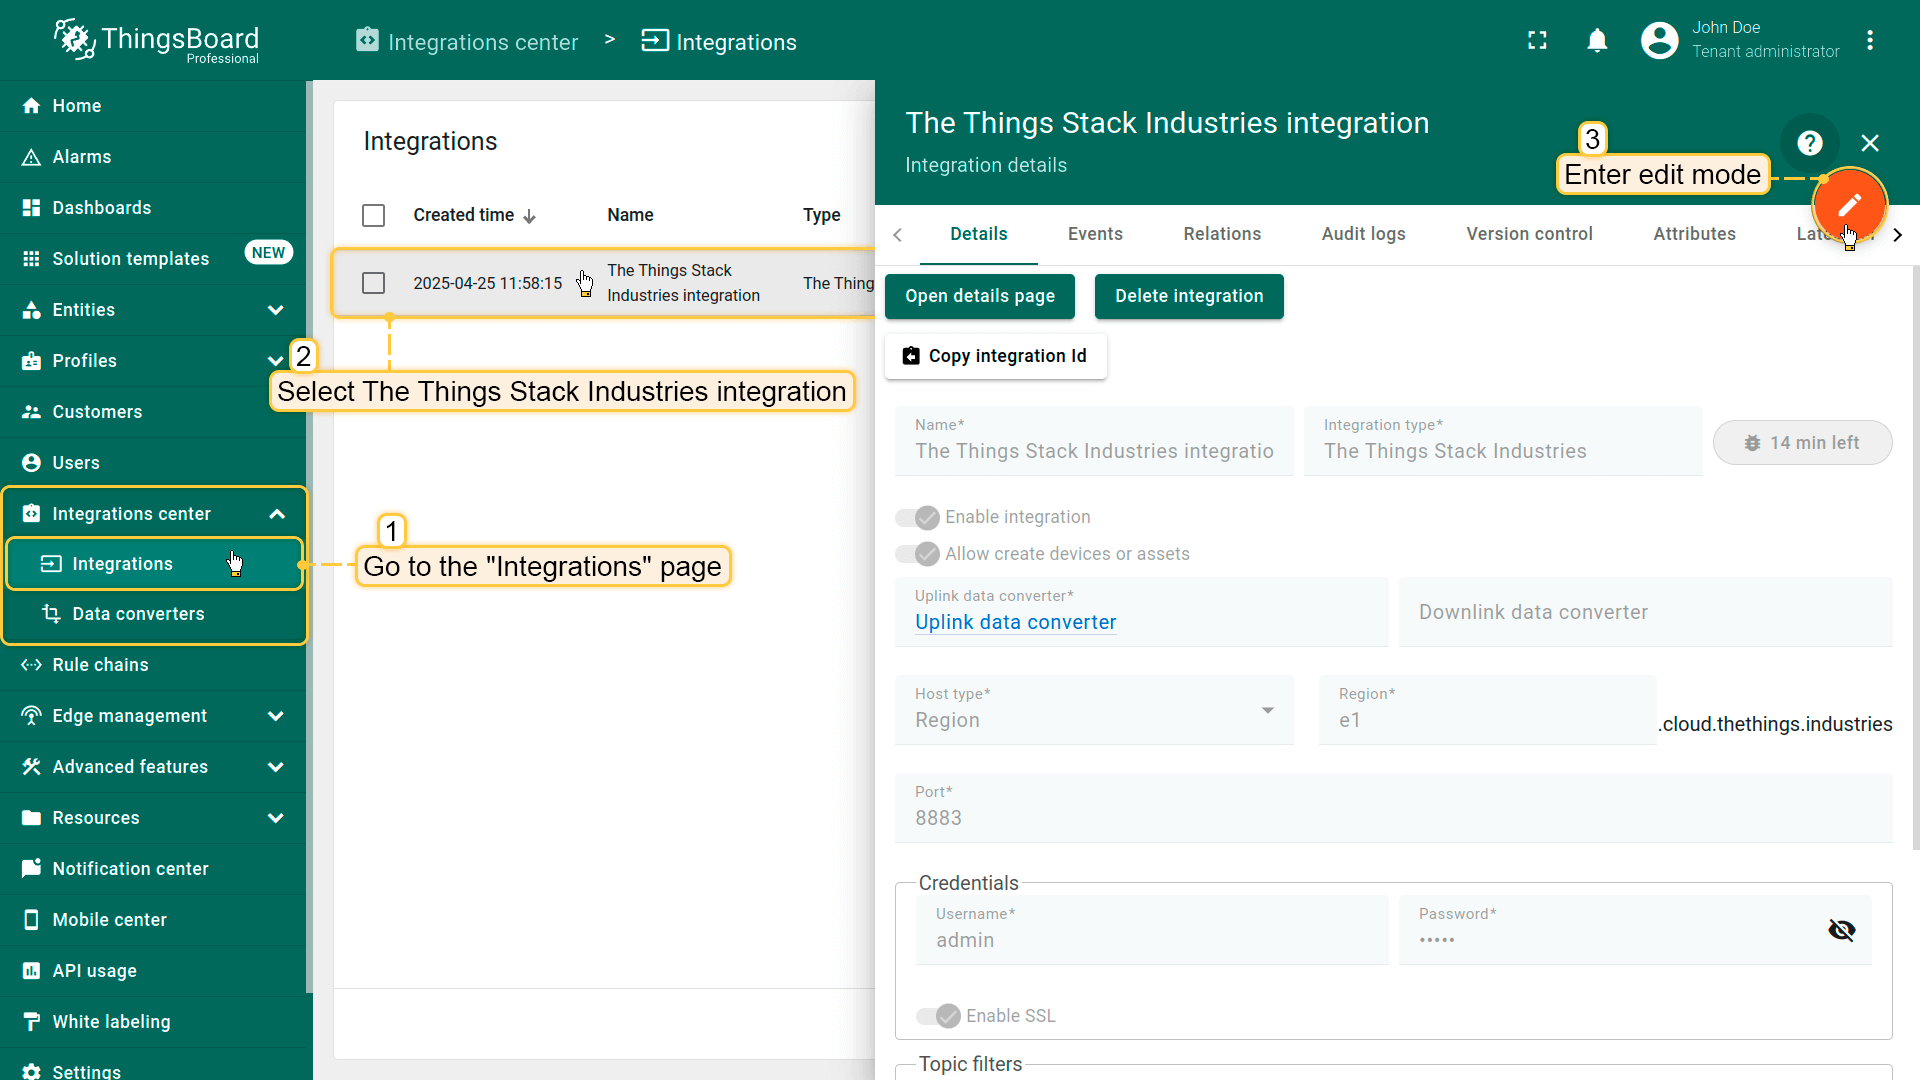 进入集成中心部分的集成页面。点击您的The Things Industries集成以打开详情窗口。点击右上角的橙色铅笔按钮进入编辑模式。 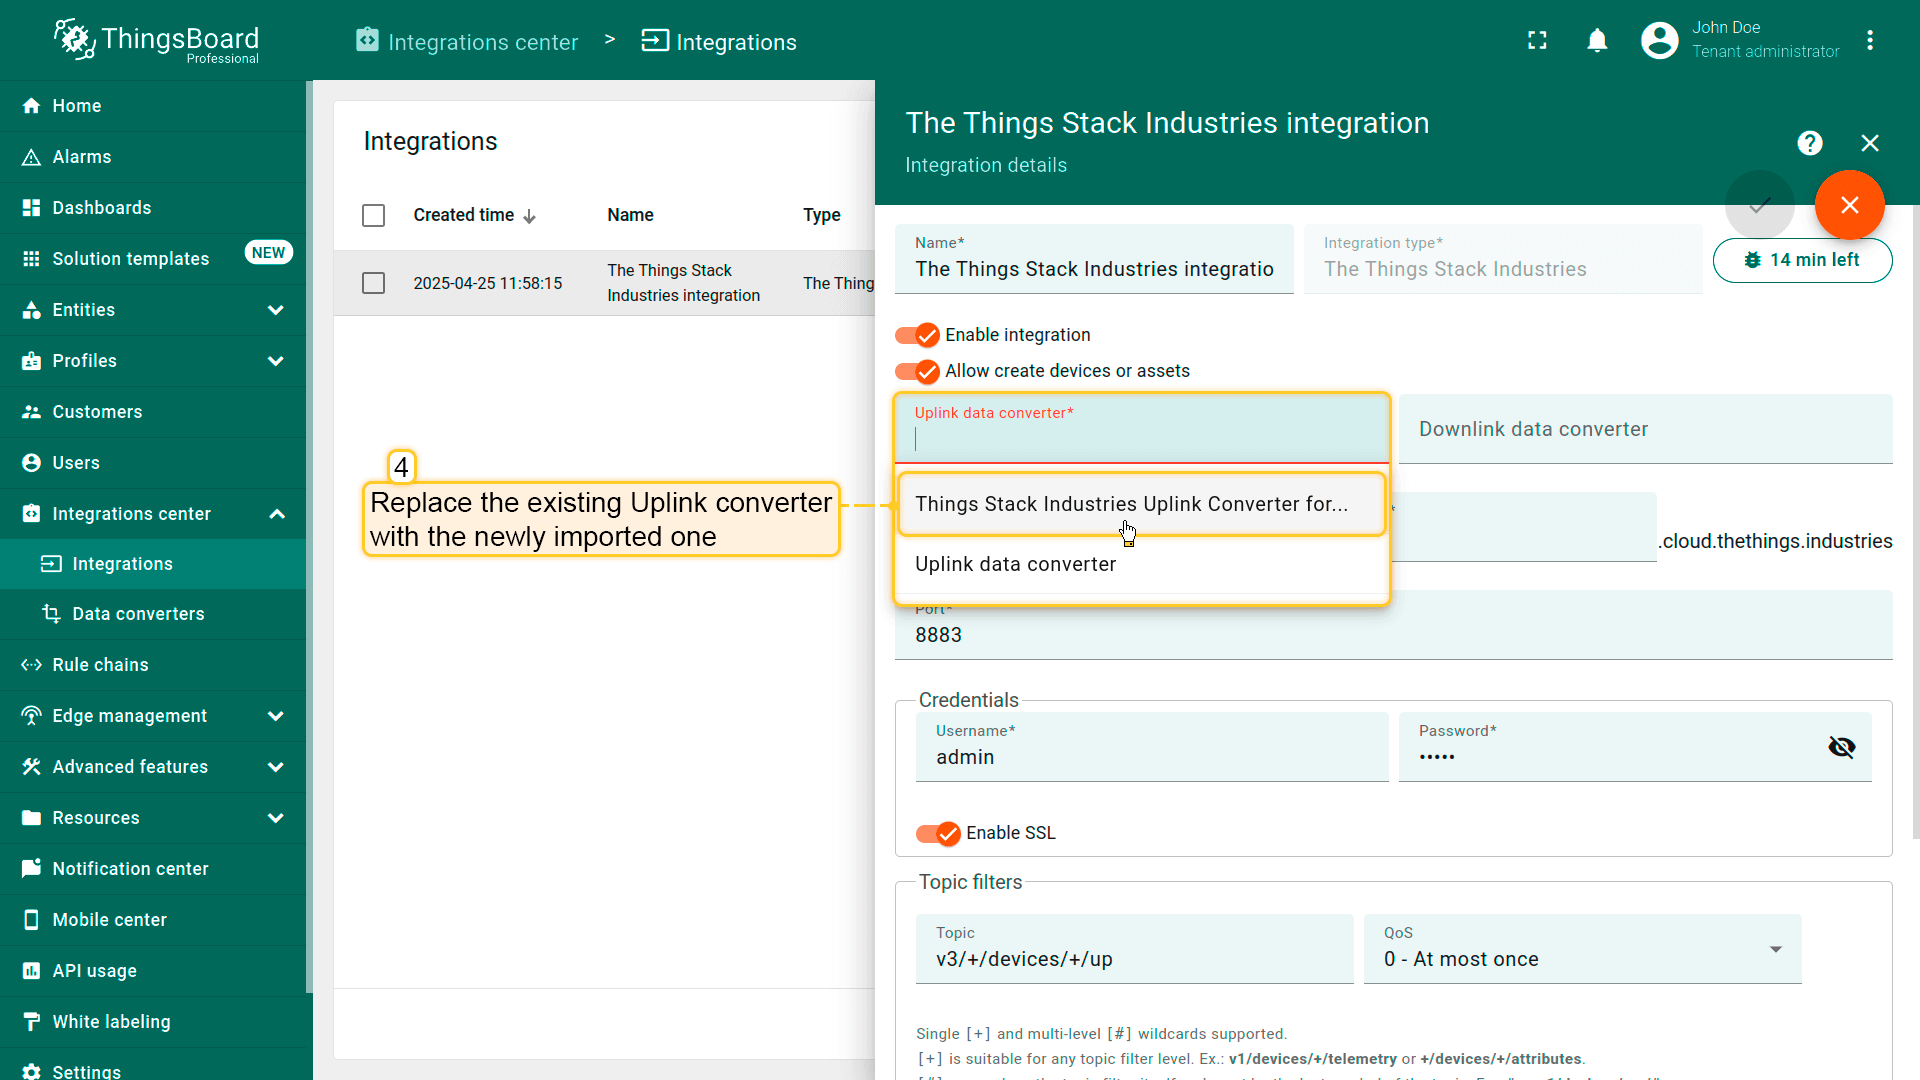 使用导入的转换器替换现有上行数据转换器。 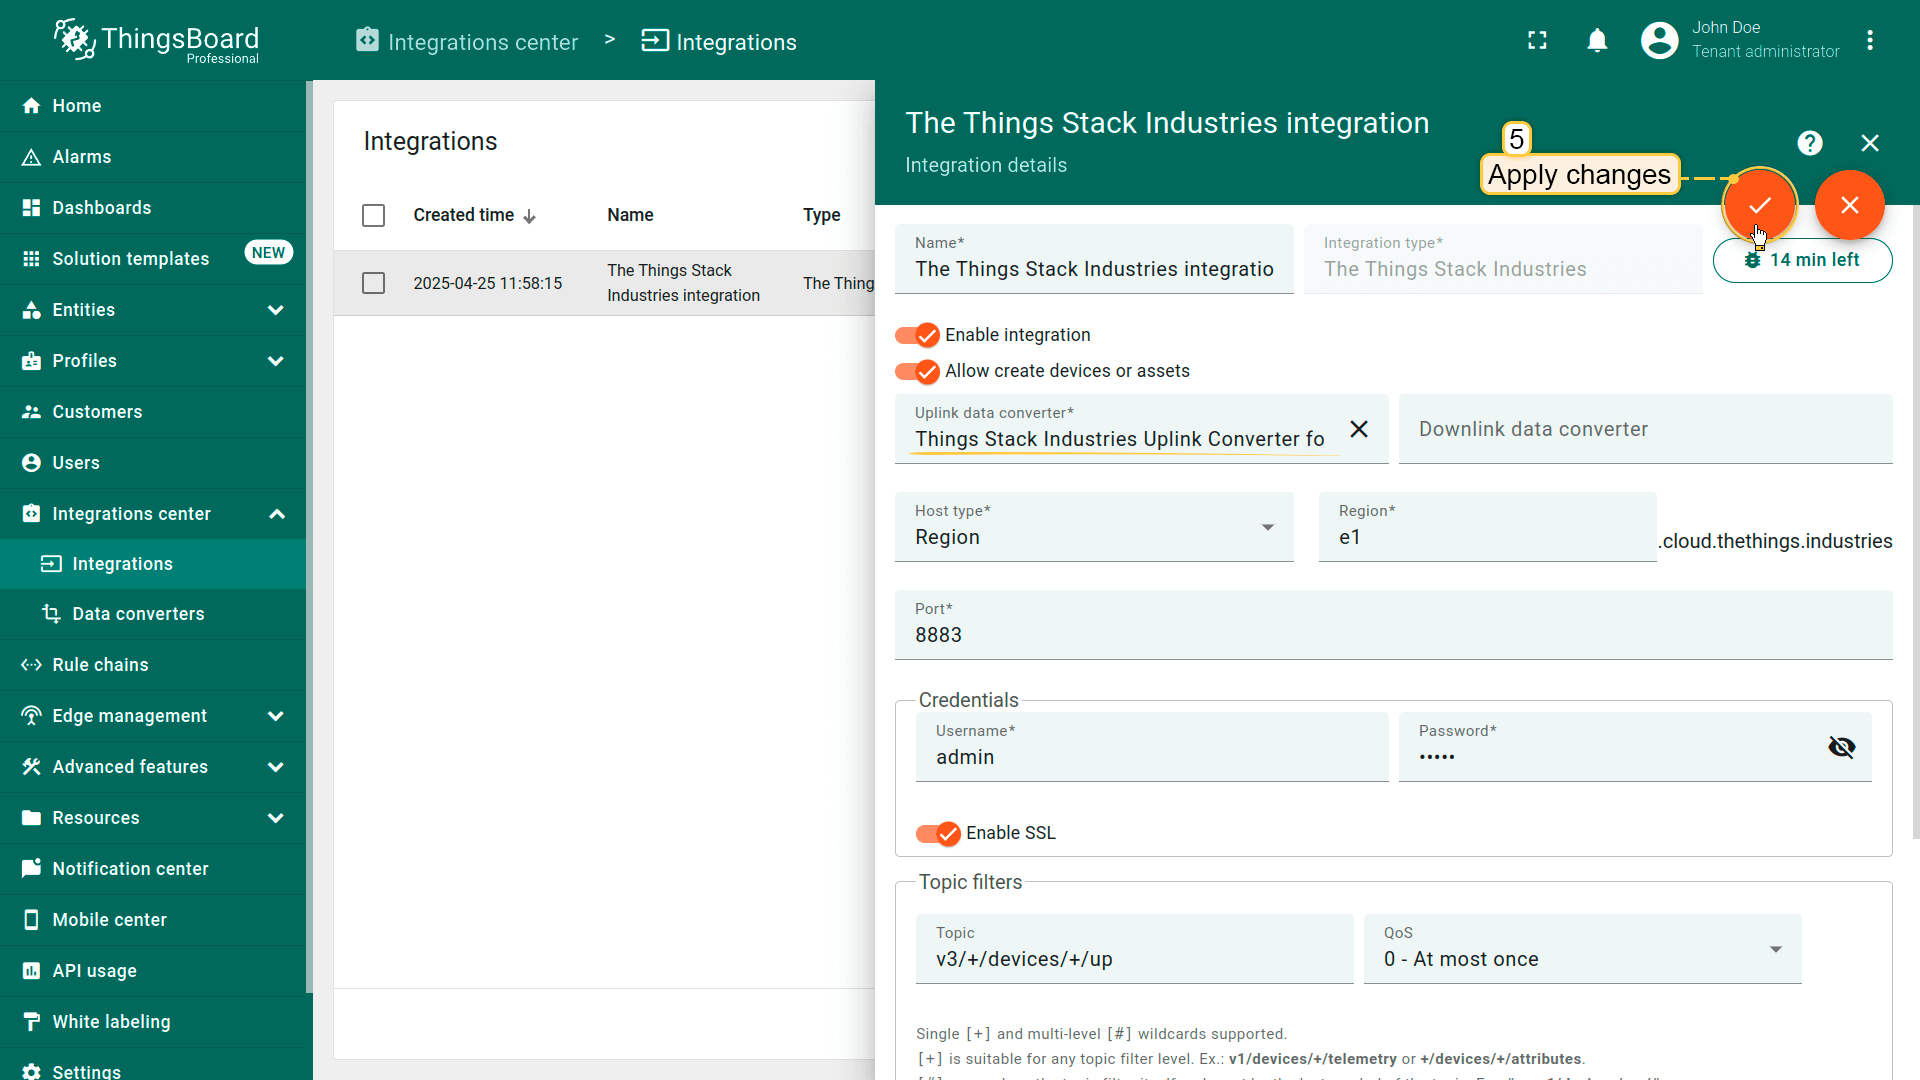 别忘了保存更改! |
在Loriot上添加设备我们需要在 Loriot 上添加设备。 要添加设备,请按以下步骤操作:
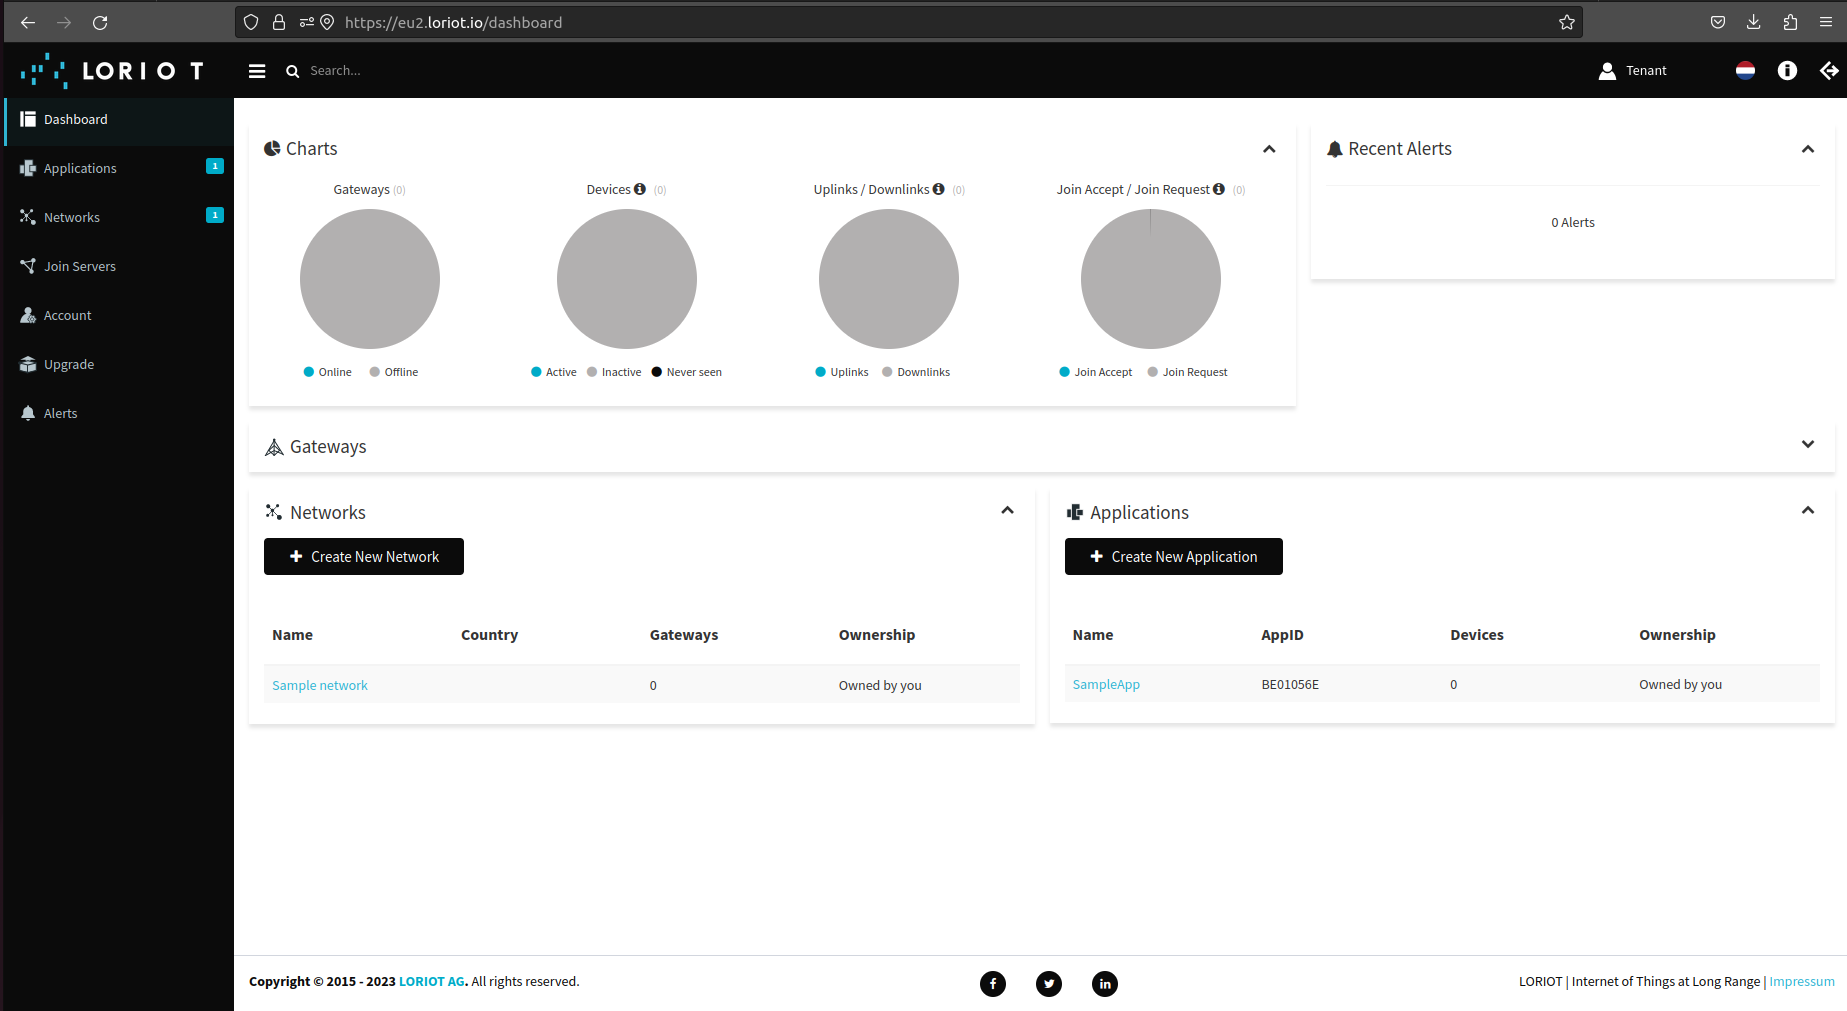 登录Loriot服务器。我们使用 eu2.loriot.io,具体取决于注册时选择的区域。 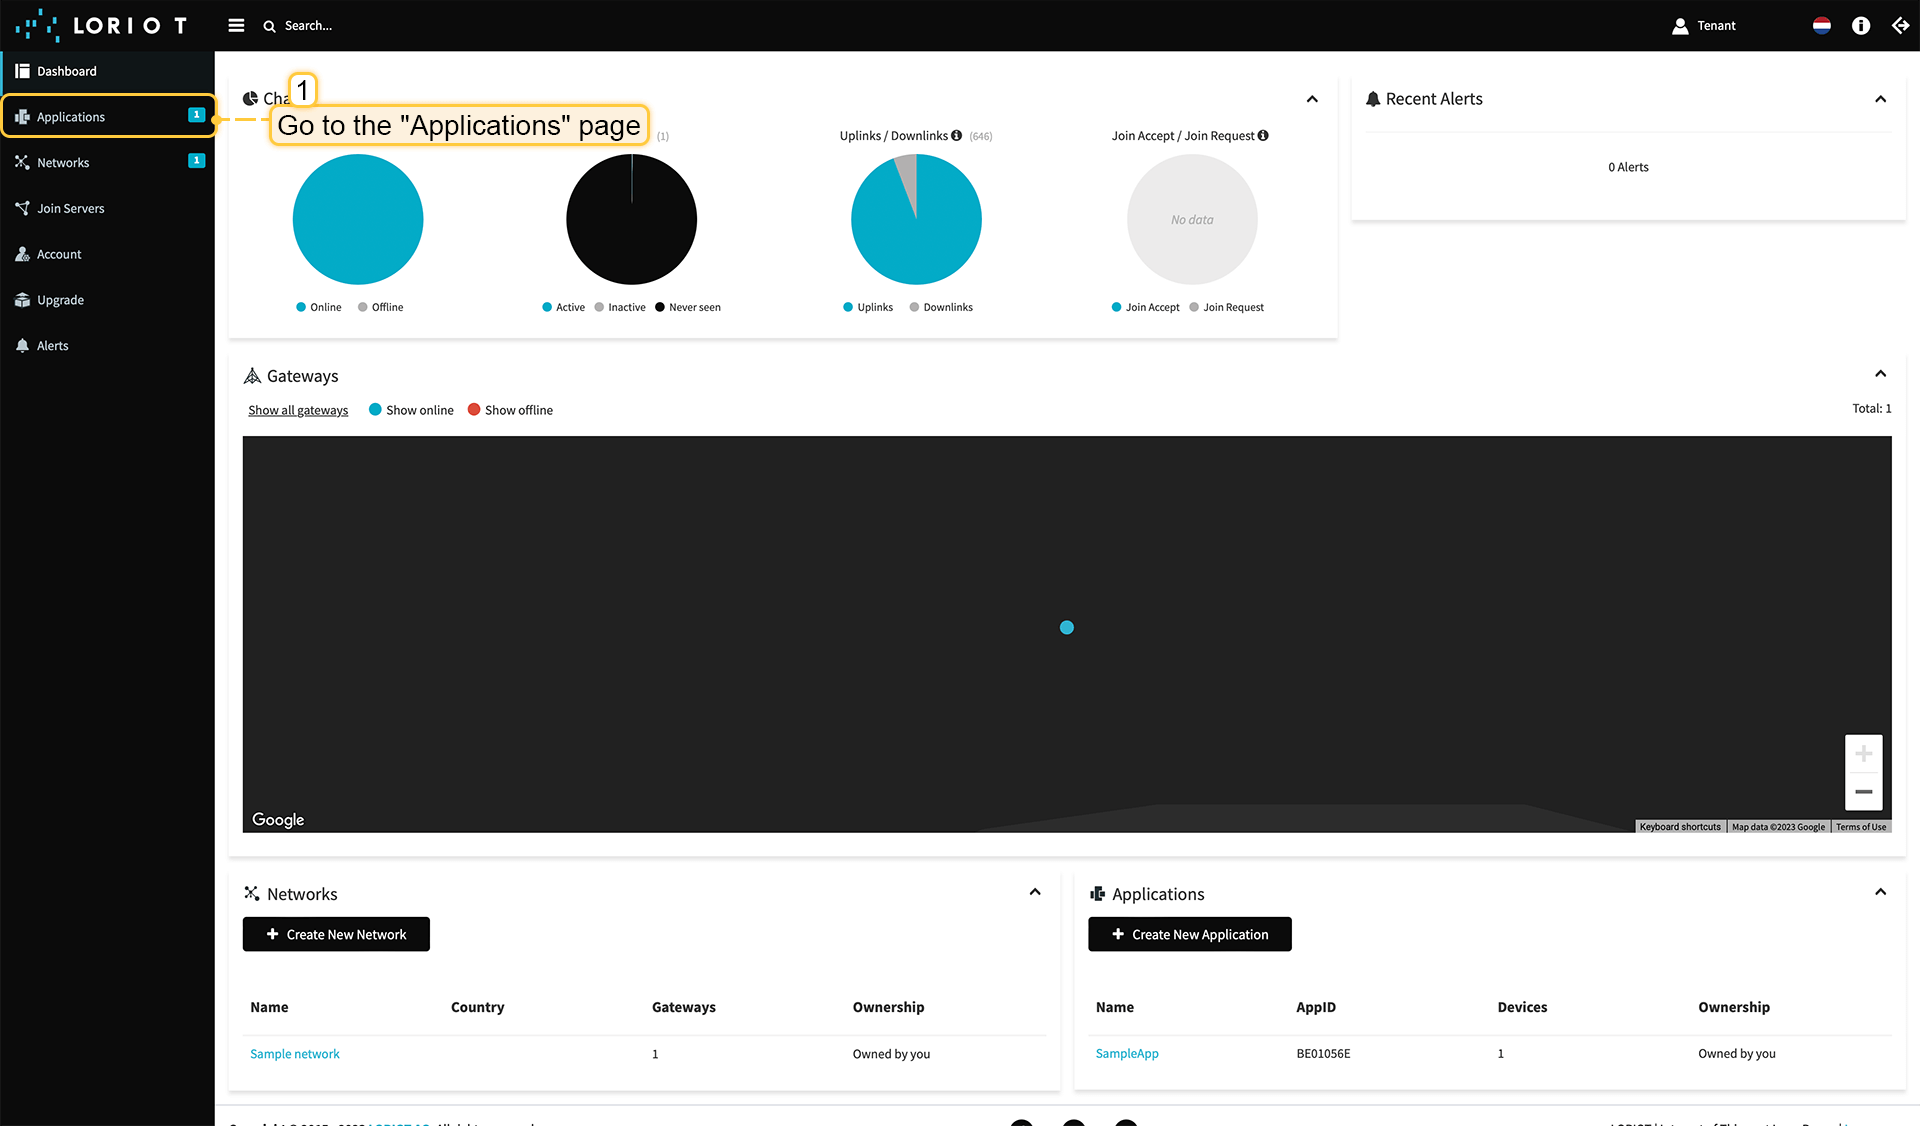 在左侧菜单中进入“应用”页面。 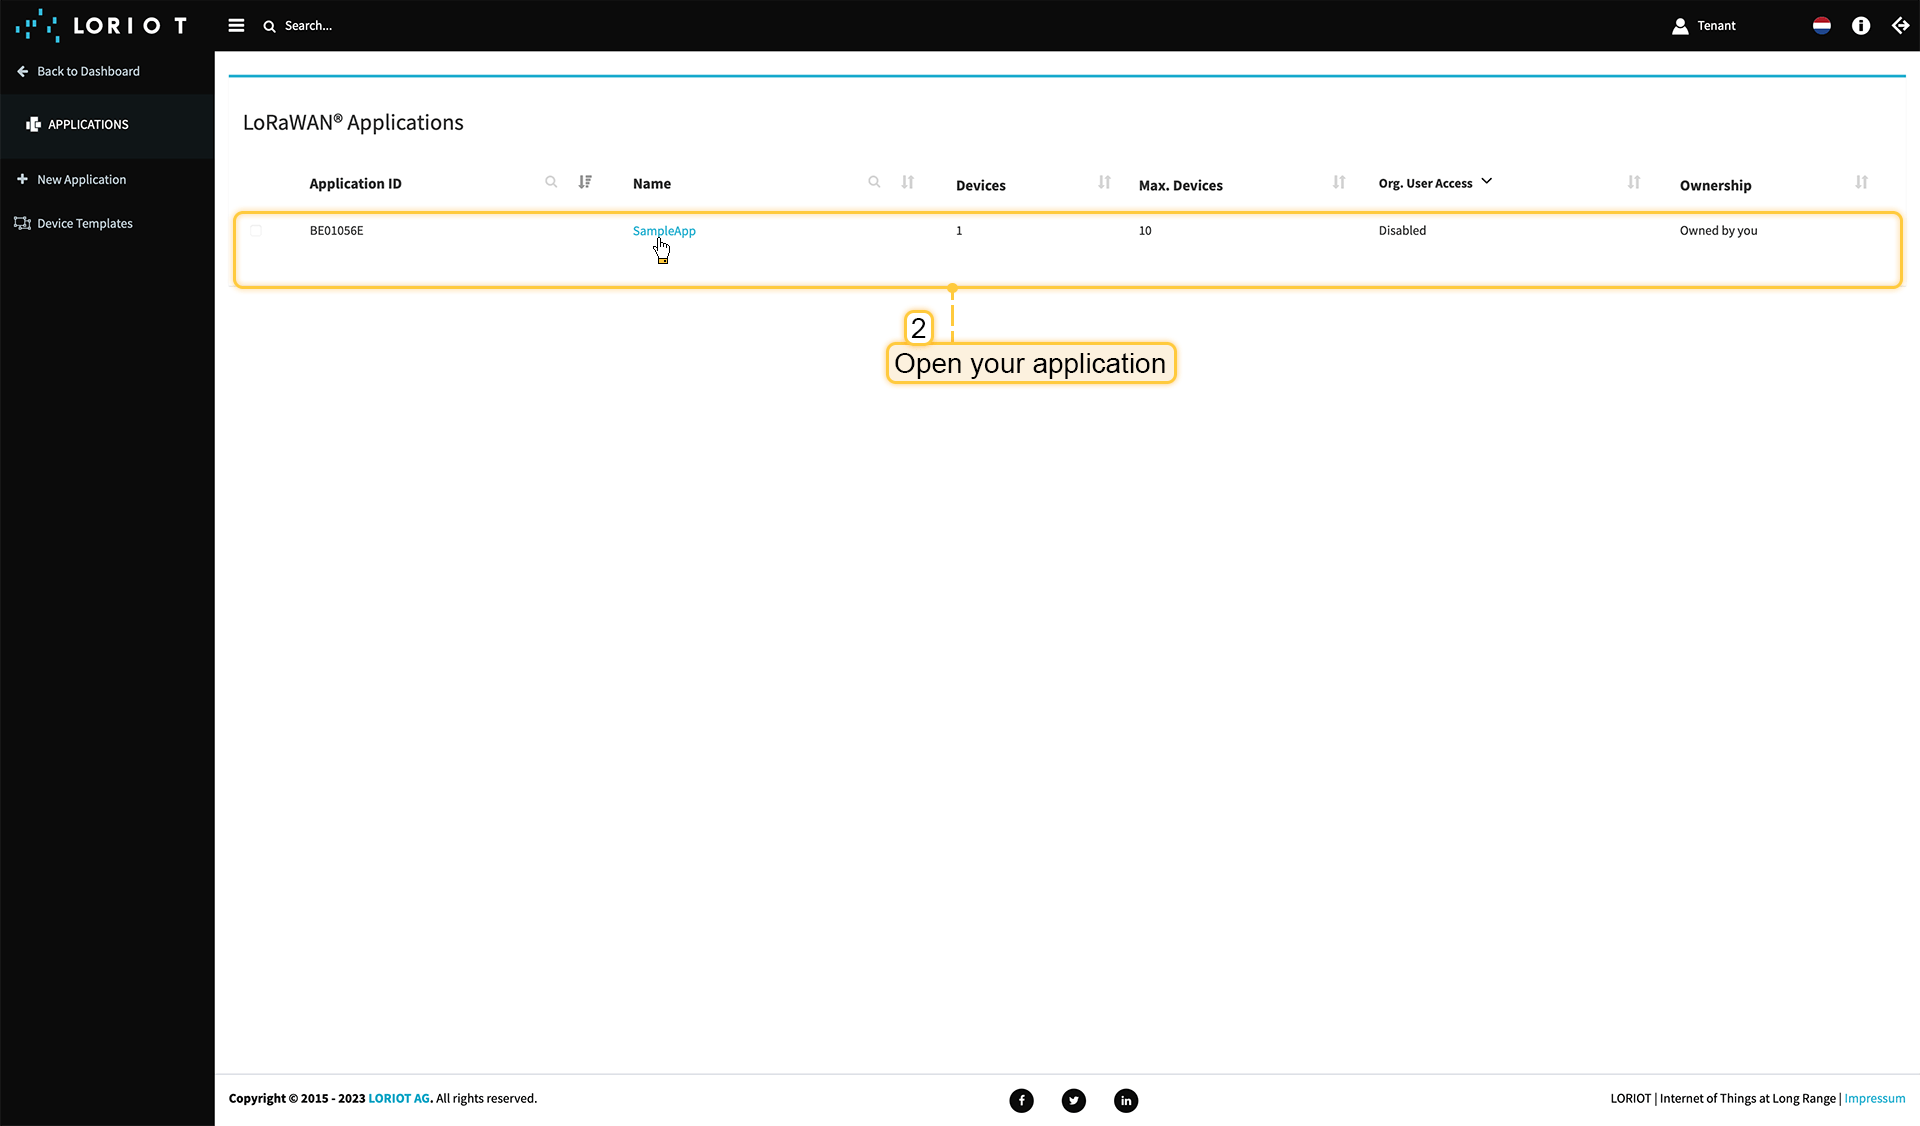 打开您的应用,我们的示例为“SampleApp”。 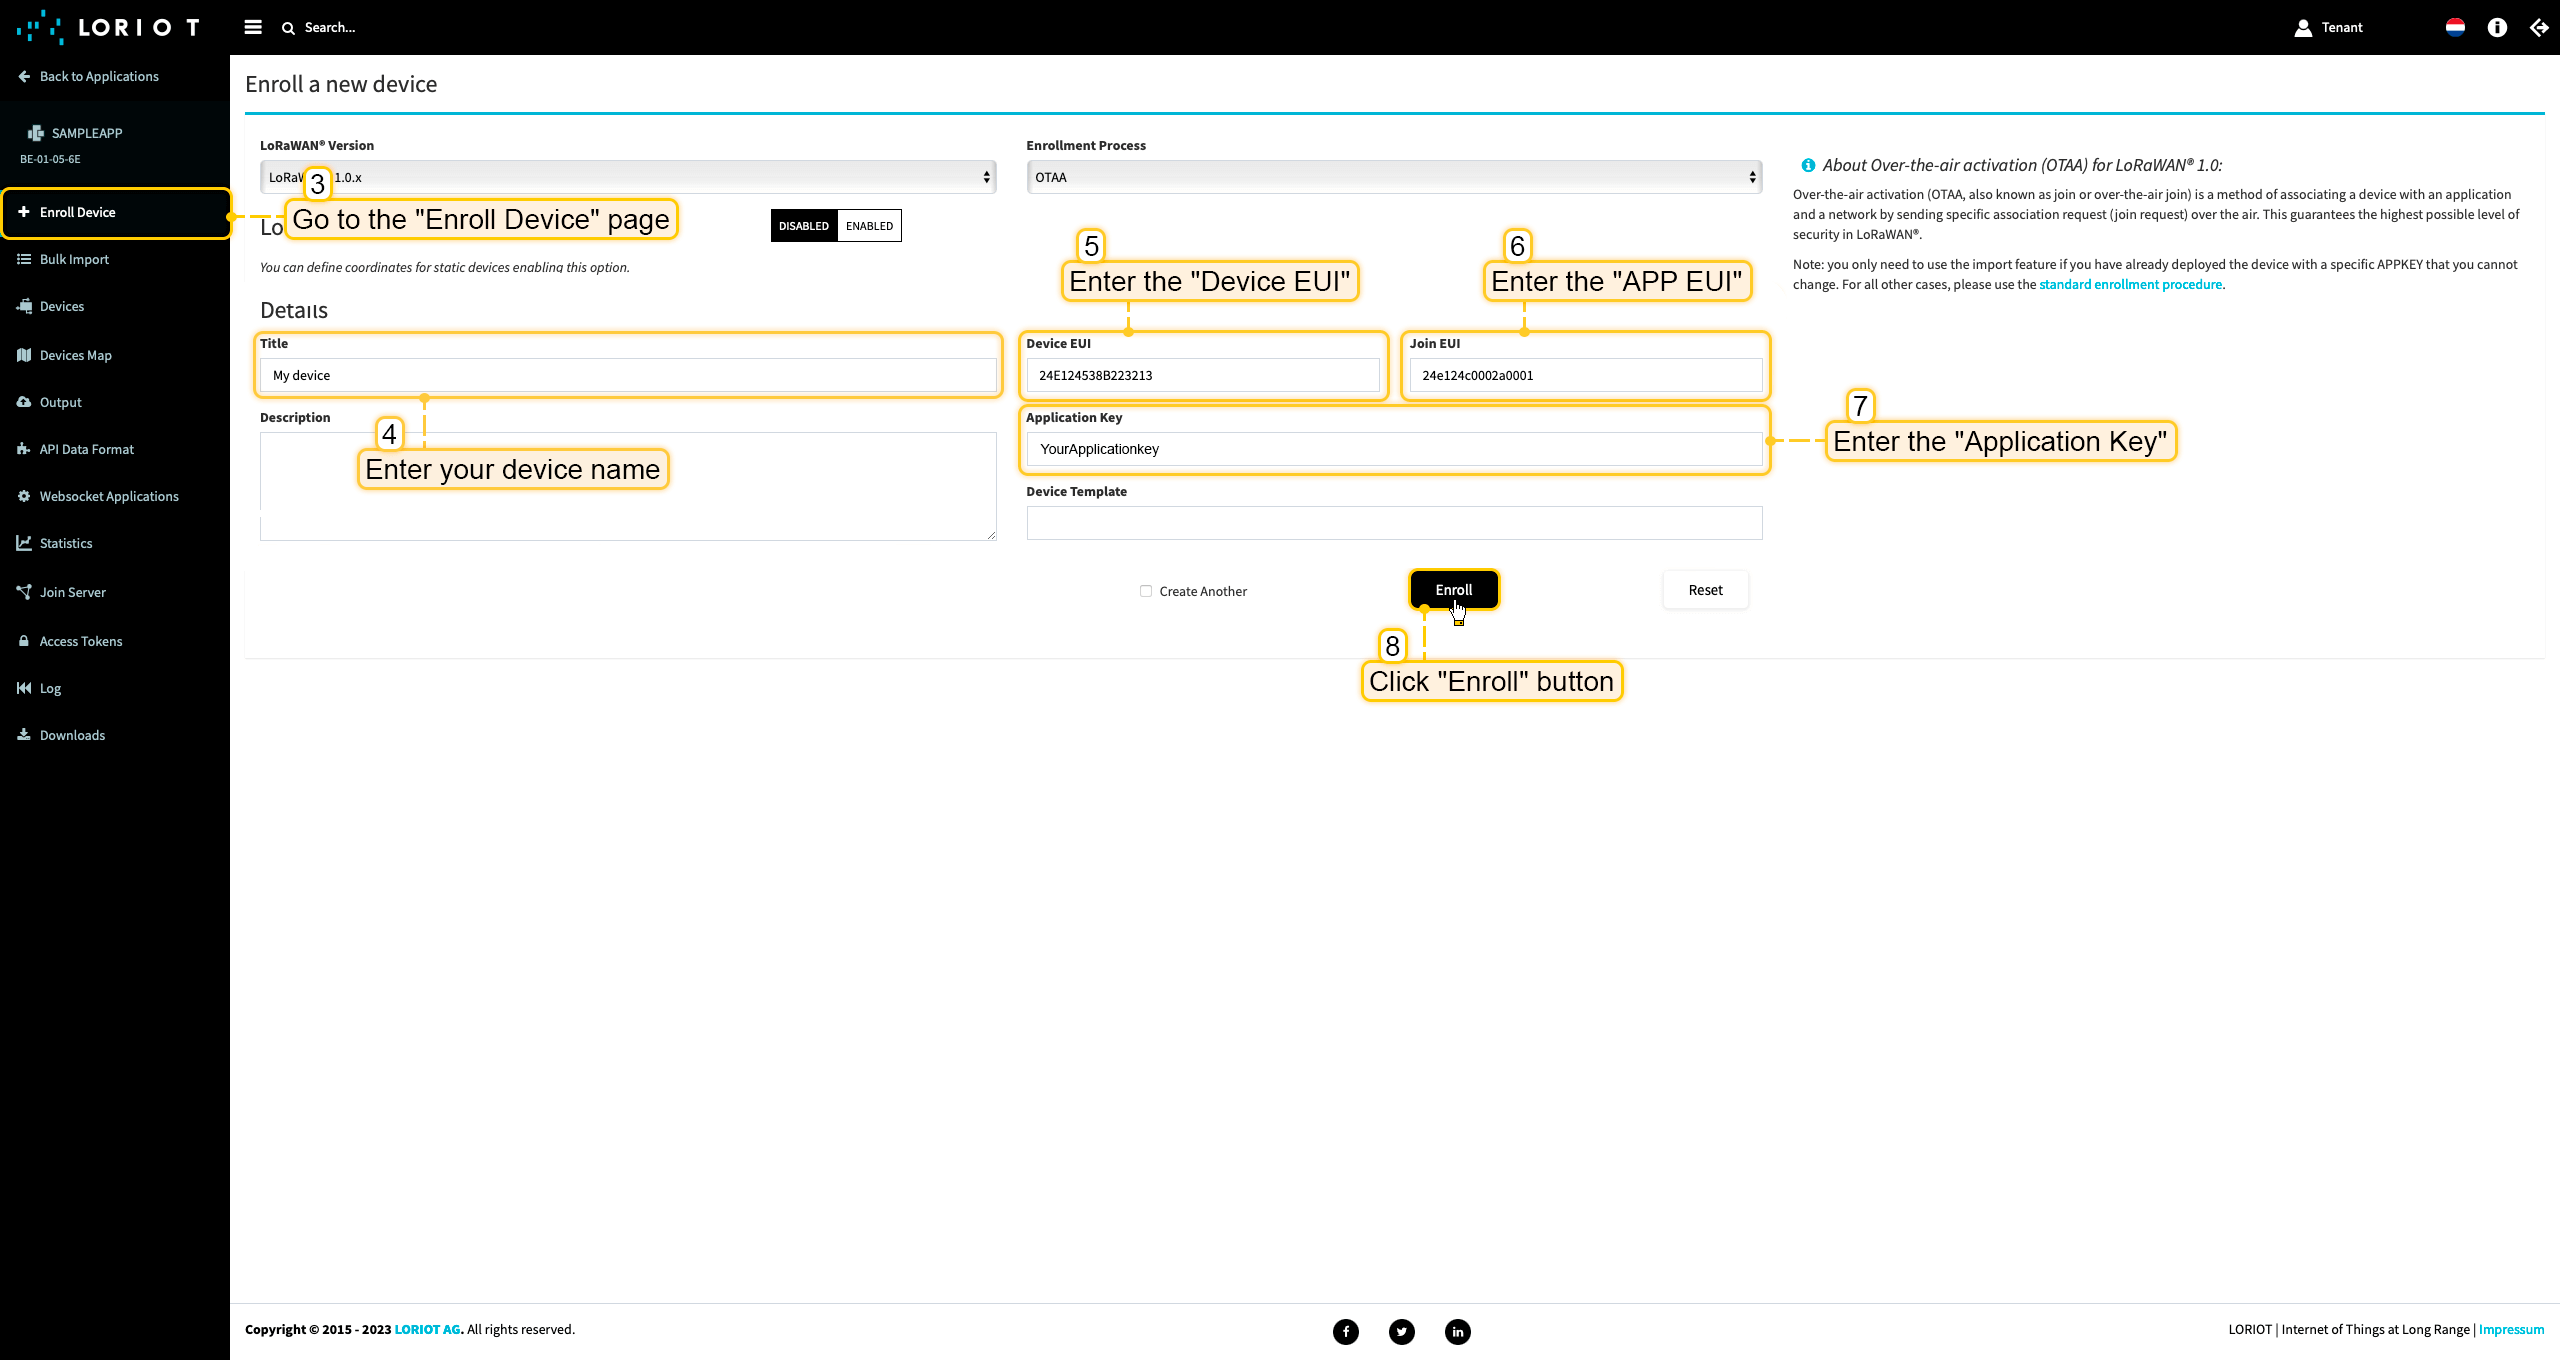 进入“注册设备”页面。使用设备配置中的值填写字段,然后点击“注册”按钮。 ThingsBoard集成中的上行数据转换器步骤1:下载JSON文件 点击下方按钮下载包含上行数据转换器配置的JSON文件。
下载包含上行数据转换器配置的文件后,将其导入ThingsBoard:
在集成中心部分的数据转换器页面中操作。点击页面右上角的+图标,从下拉菜单选择导入转换器。 将下载的JSON文件(包含上行数据转换器配置)拖放到导入窗口,然后点击导入。  上行数据转换器现已成功导入。
现在,将您的 Loriot 集成更新为使用新的上行数据转换器:
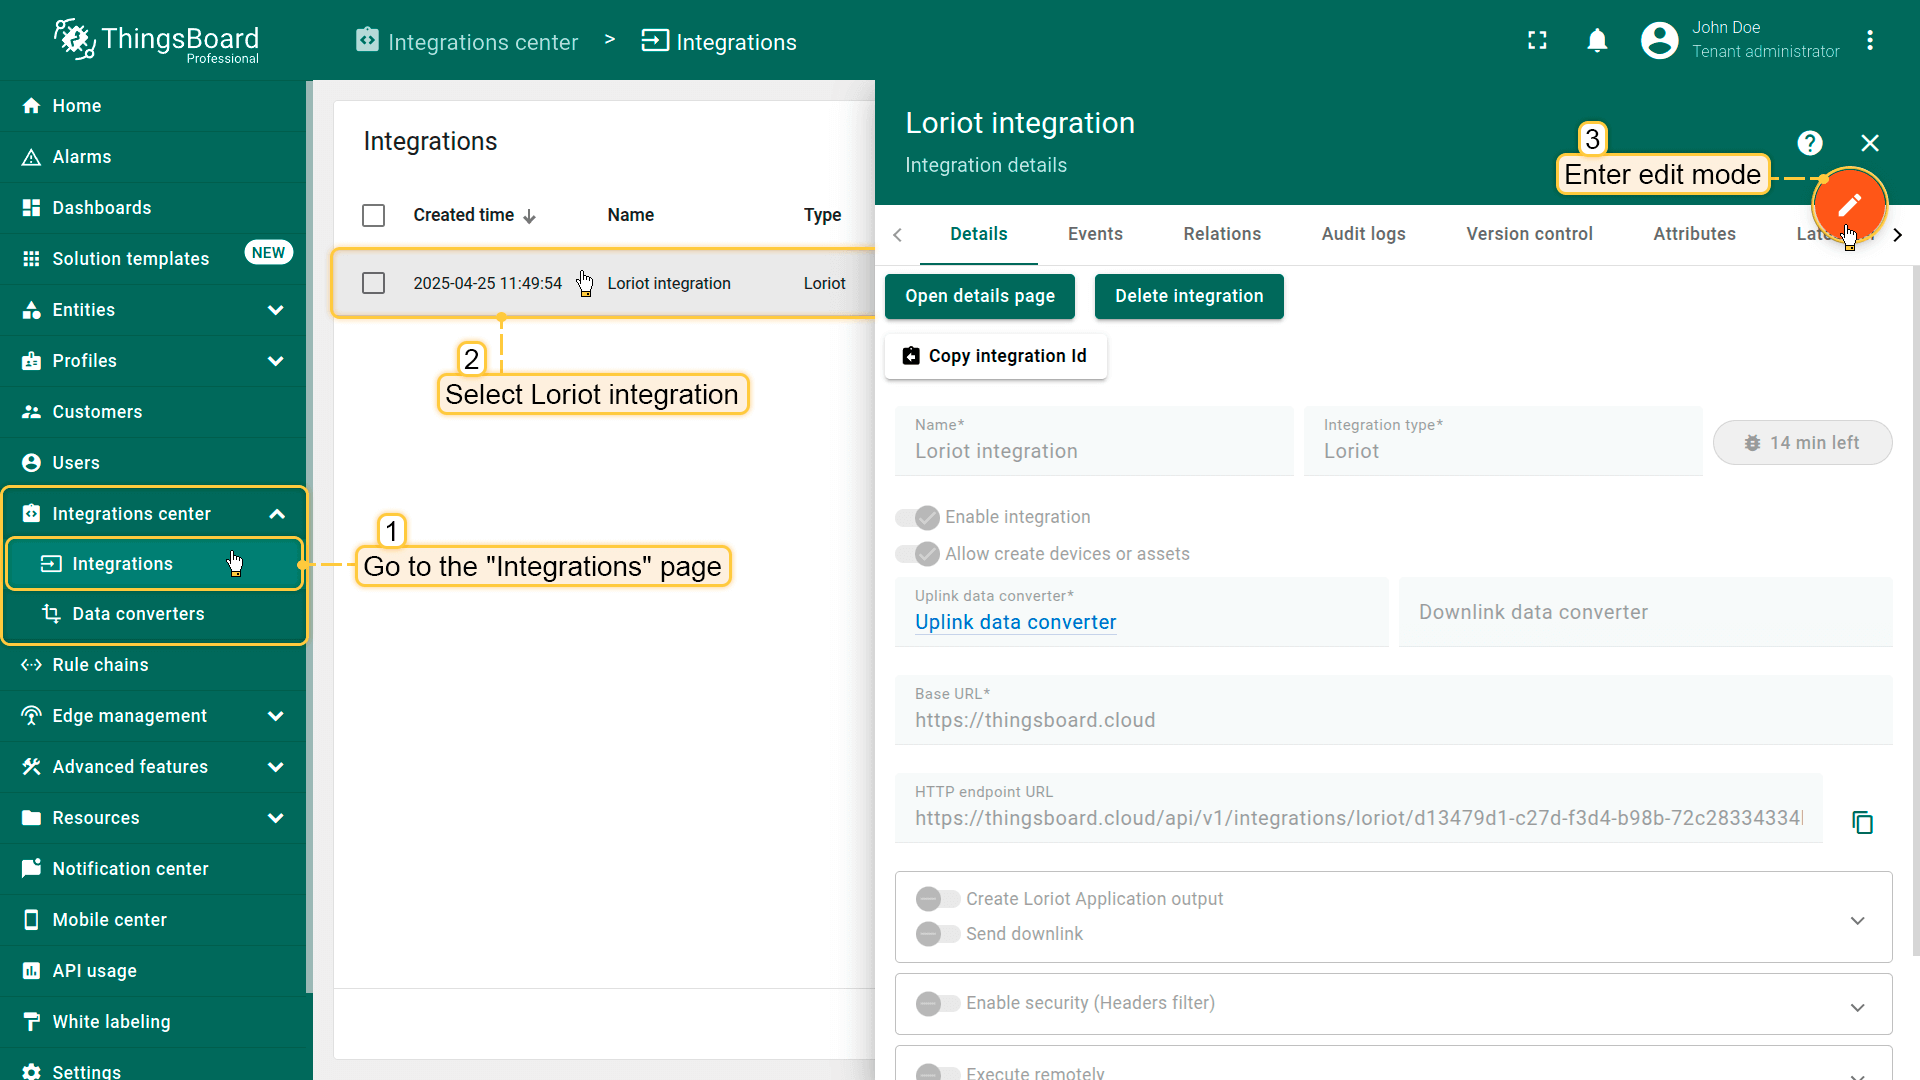 进入集成中心部分的集成页面。点击您的Loriot集成以打开详情窗口。点击右上角的橙色铅笔按钮进入编辑模式。 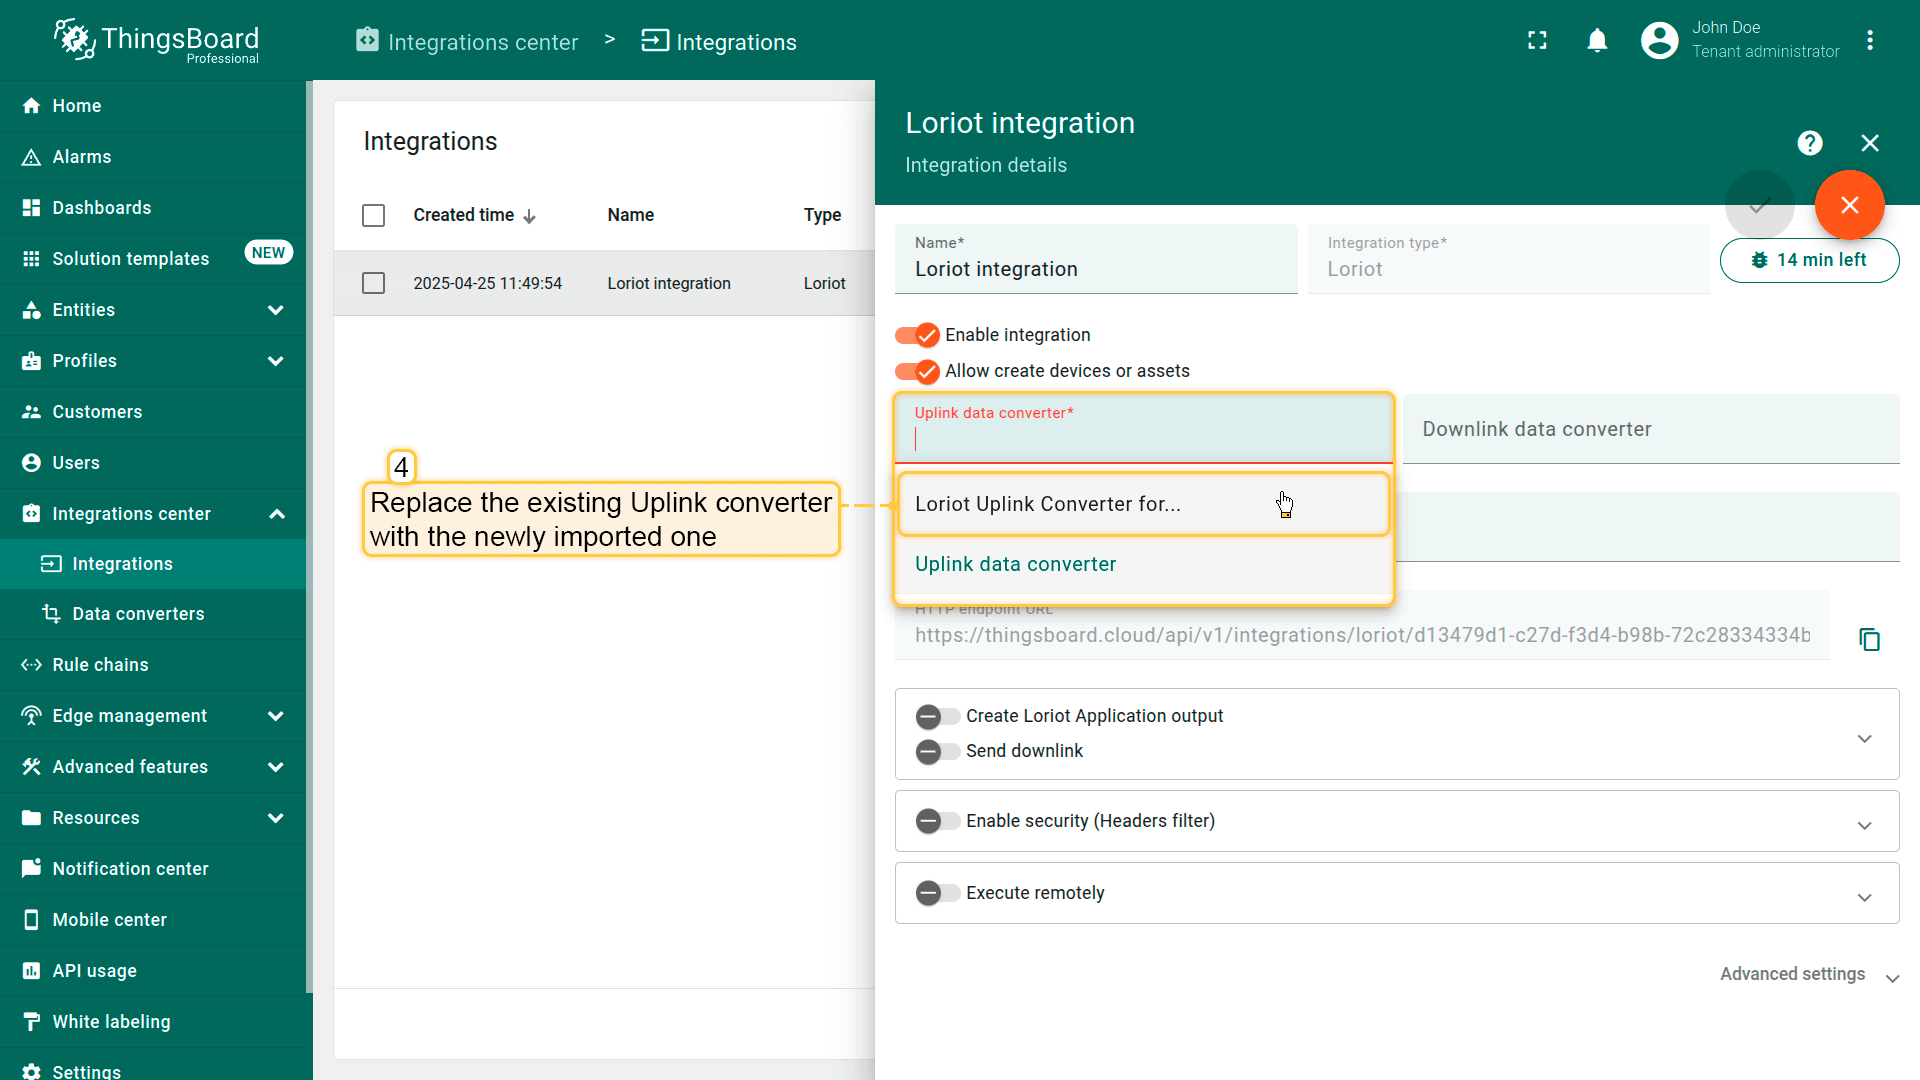 使用导入的转换器替换现有上行数据转换器。 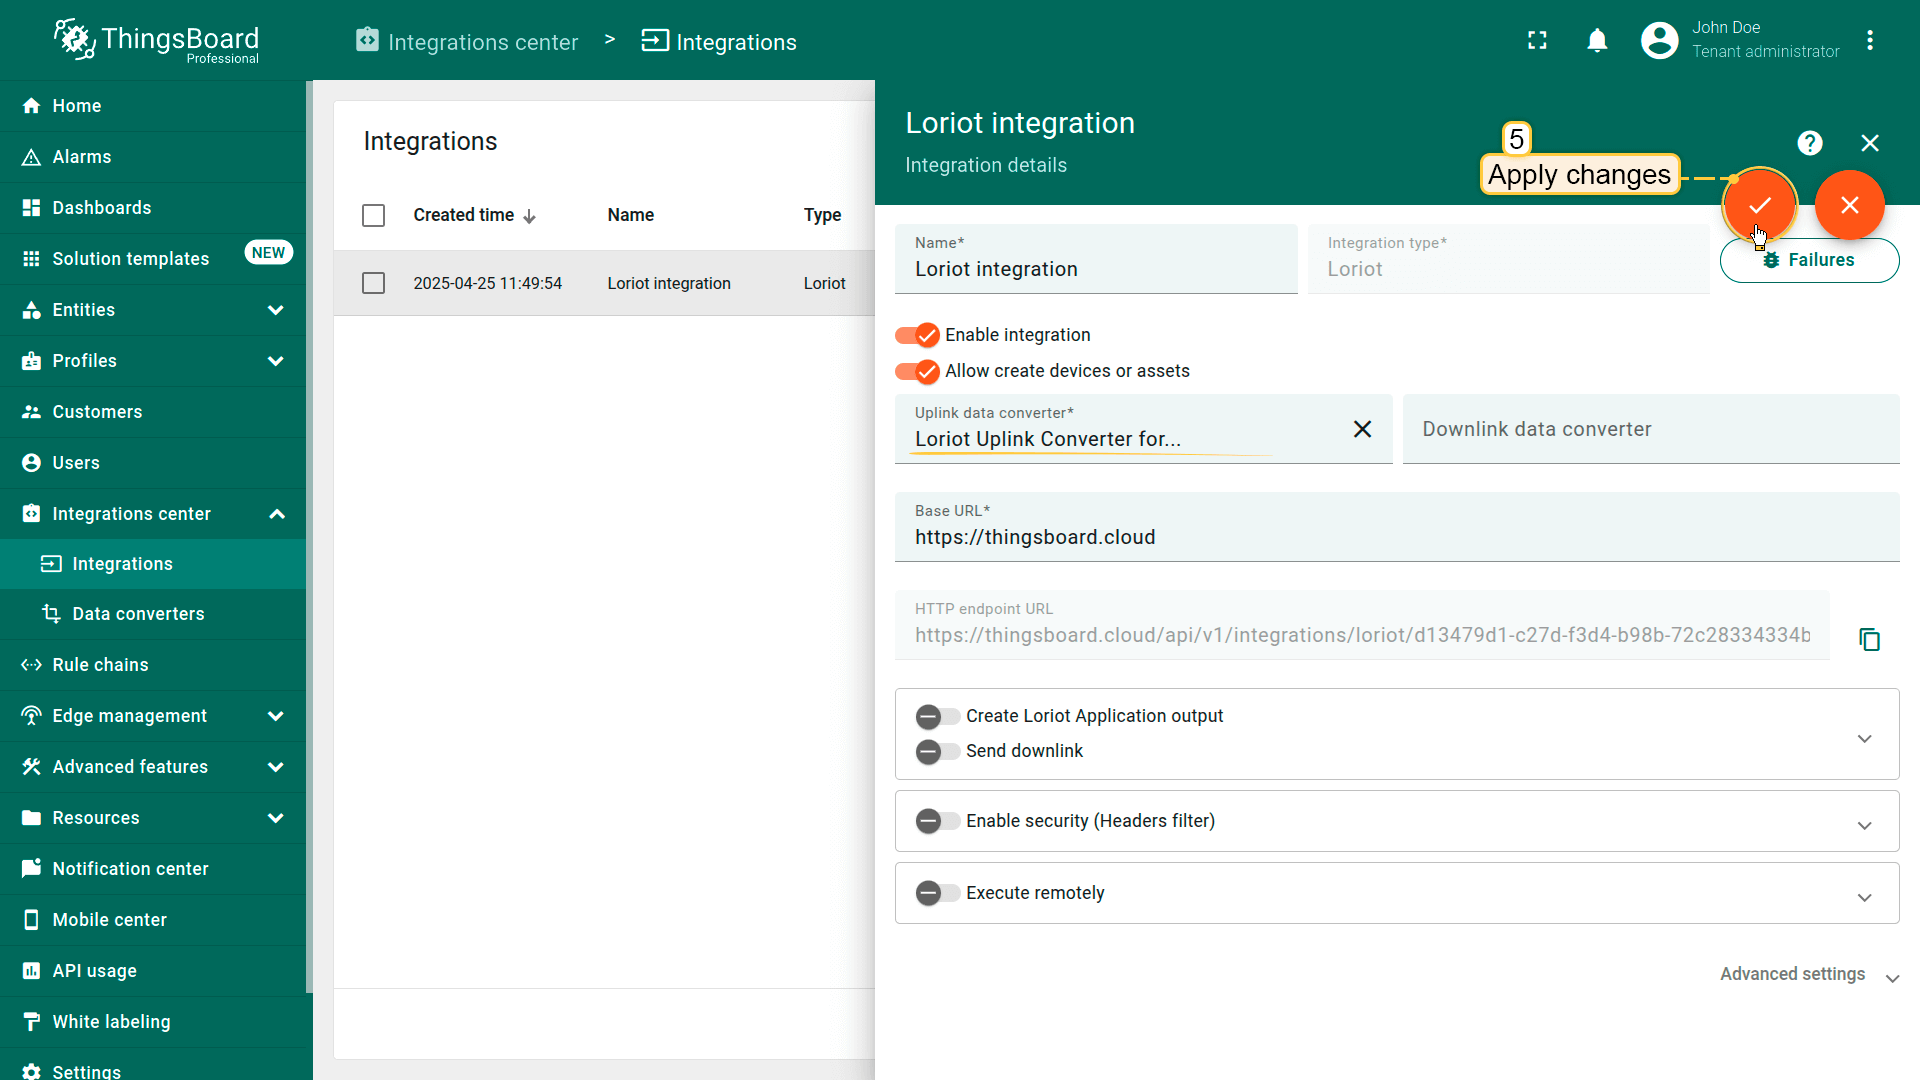 别忘了保存更改! |
在ThingsBoard上查看数据
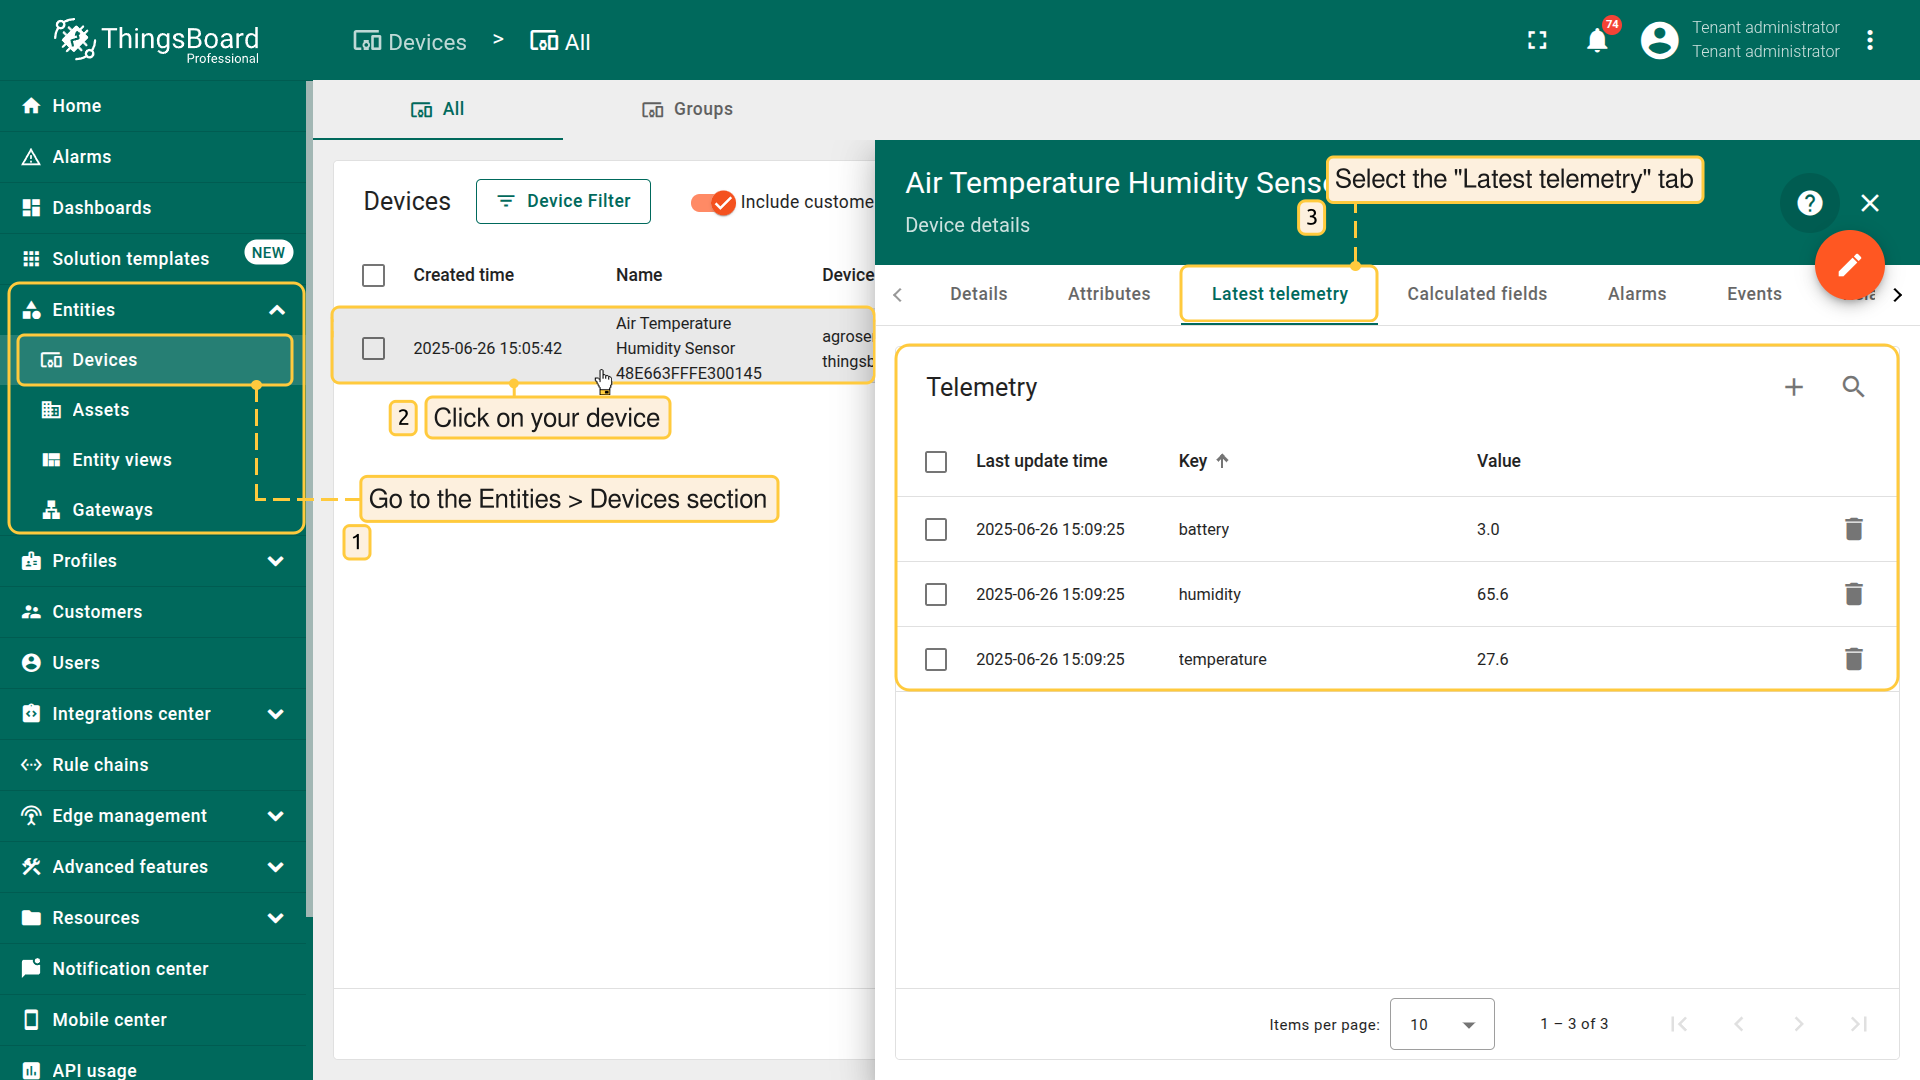
After the device is connected to the network server and ThingsBoard, you can check received and converted data on the platform for this device.
To do this, open Entities menu section and select Devices.
Click on the device name to open the device details page.
Go to the Latest telemetry tab to see the latest telemetry data received from the device.
总结
现在您可以轻松将AgroSense Air Temperature and Humidity Sensor连接到ThingsBoard并开始发送数据。
进一步了解可查阅ThingsBoard文档, 学习创建仪表板可视化遥测、 配置告警规则实时监控设备行为等核心功能。