目录
ThingsBoard设备库
如何将 RN-320 BTH LoRaWAN Temperature and Humidity sensor 连接至 ThingsBoard?
如何将 RN-320 BTH LoRaWAN Temperature and Humidity sensor 连接至 ThingsBoard?
概述
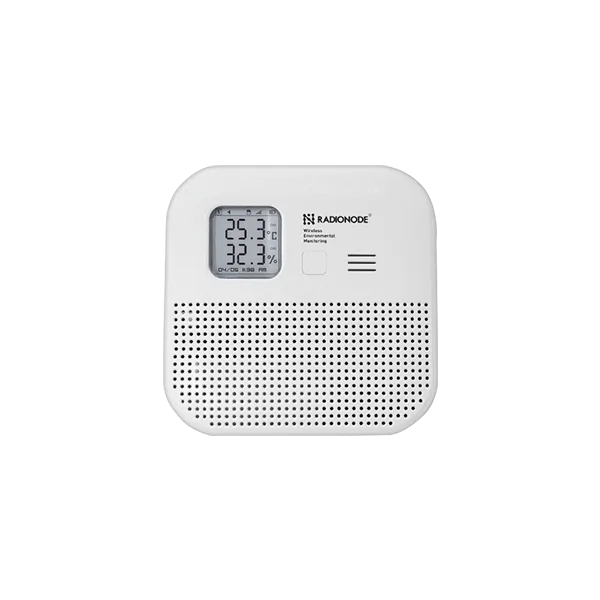
Radionode RN320 系列 是一款电池供电的LoRaWAN® 环境传感器,面向长期、低维护部署。
设备集成高精度温湿度传感器,支持重传等数据可靠性机制以避免采样丢失。
通过E-paper显示屏、蜂鸣器与LED状态灯进行人机交互。
RN-320 BTH设备特性
LoRaWAN® 远距离无线通信
高精度温湿度传感器
E-paper显示屏
蜂鸣器(97 dBA)
三色LED指示灯(优/中/差)
长续航(17,000 mAh,最长约10年)
microSD卡本地数据存储
磁吸与壁挂安装
前置条件
开始前请确保满足以下要求:
硬件
Accounts & Access
设备信息
DevEUI(见设备标签)
JoinEUI和AppKey(用于OTAA激活)
LoRaWAN频段(如EU868、US915)
The Things Stack配置
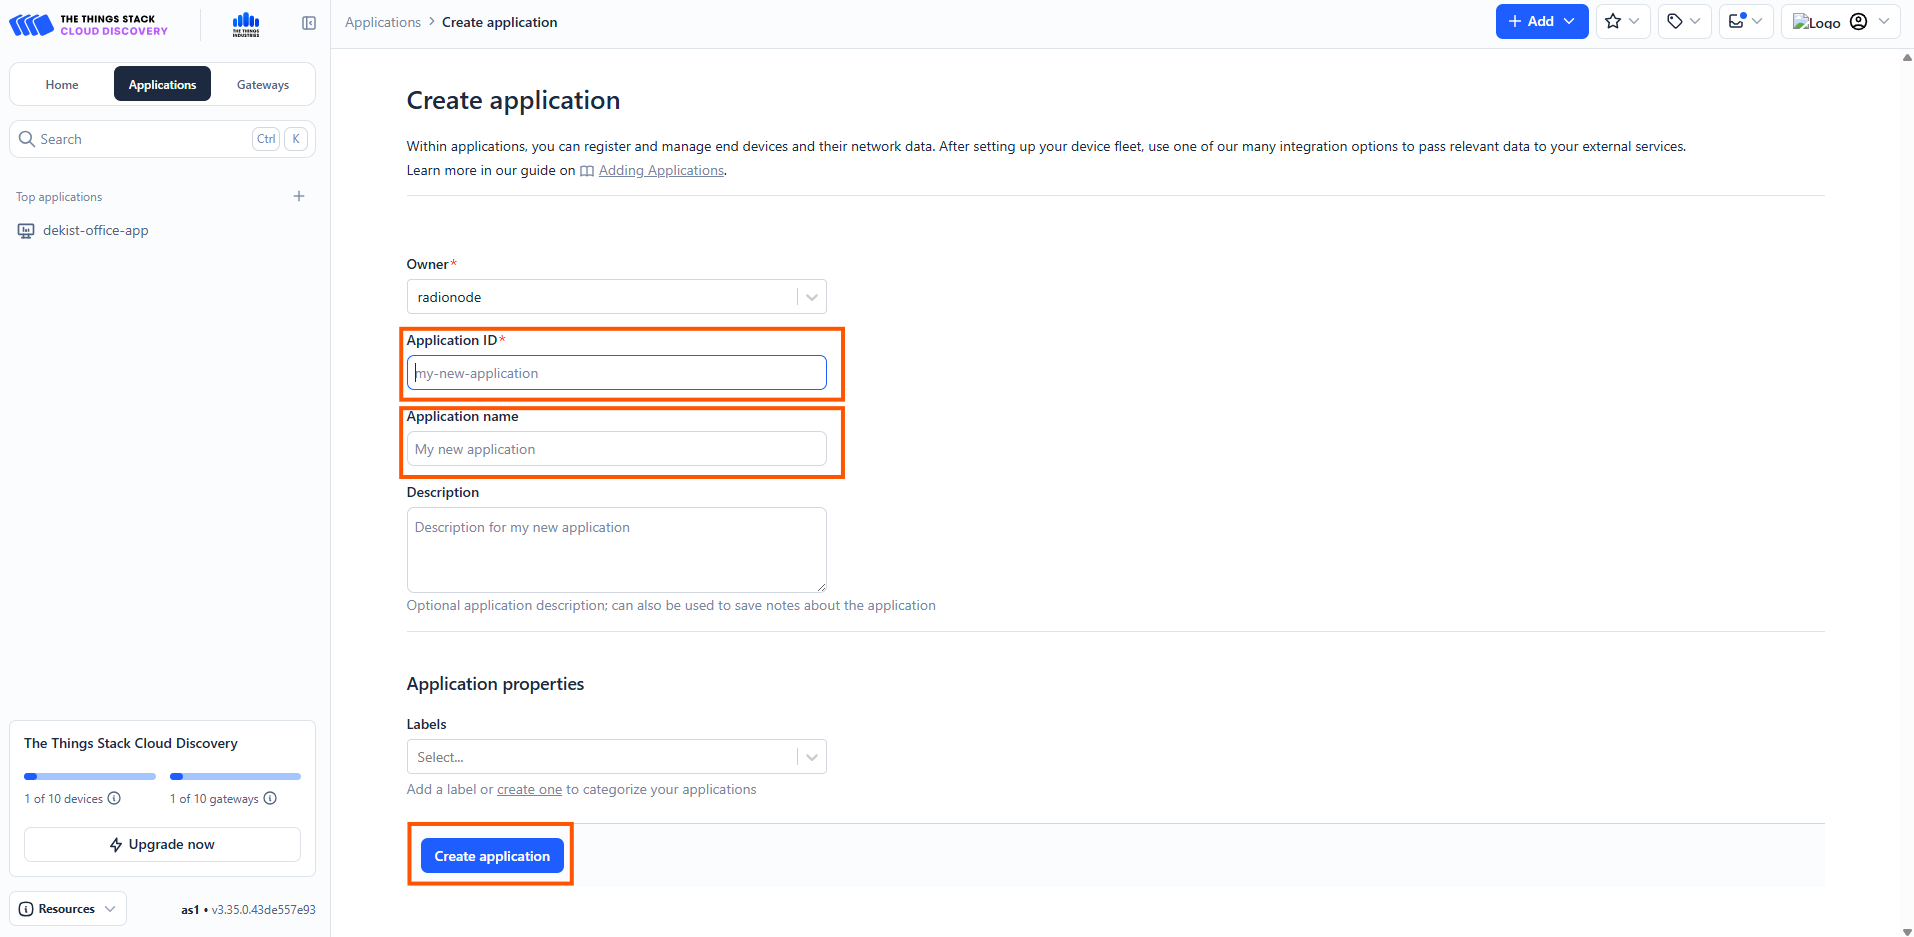
创建应用
登录 The Things Stack控制台 。
在The Things Stack控制台中创建应用。
进入控制台,打开Applications 部分,点击Add application 选项卡。
填写application ID 和application name 。
点击create the application 。
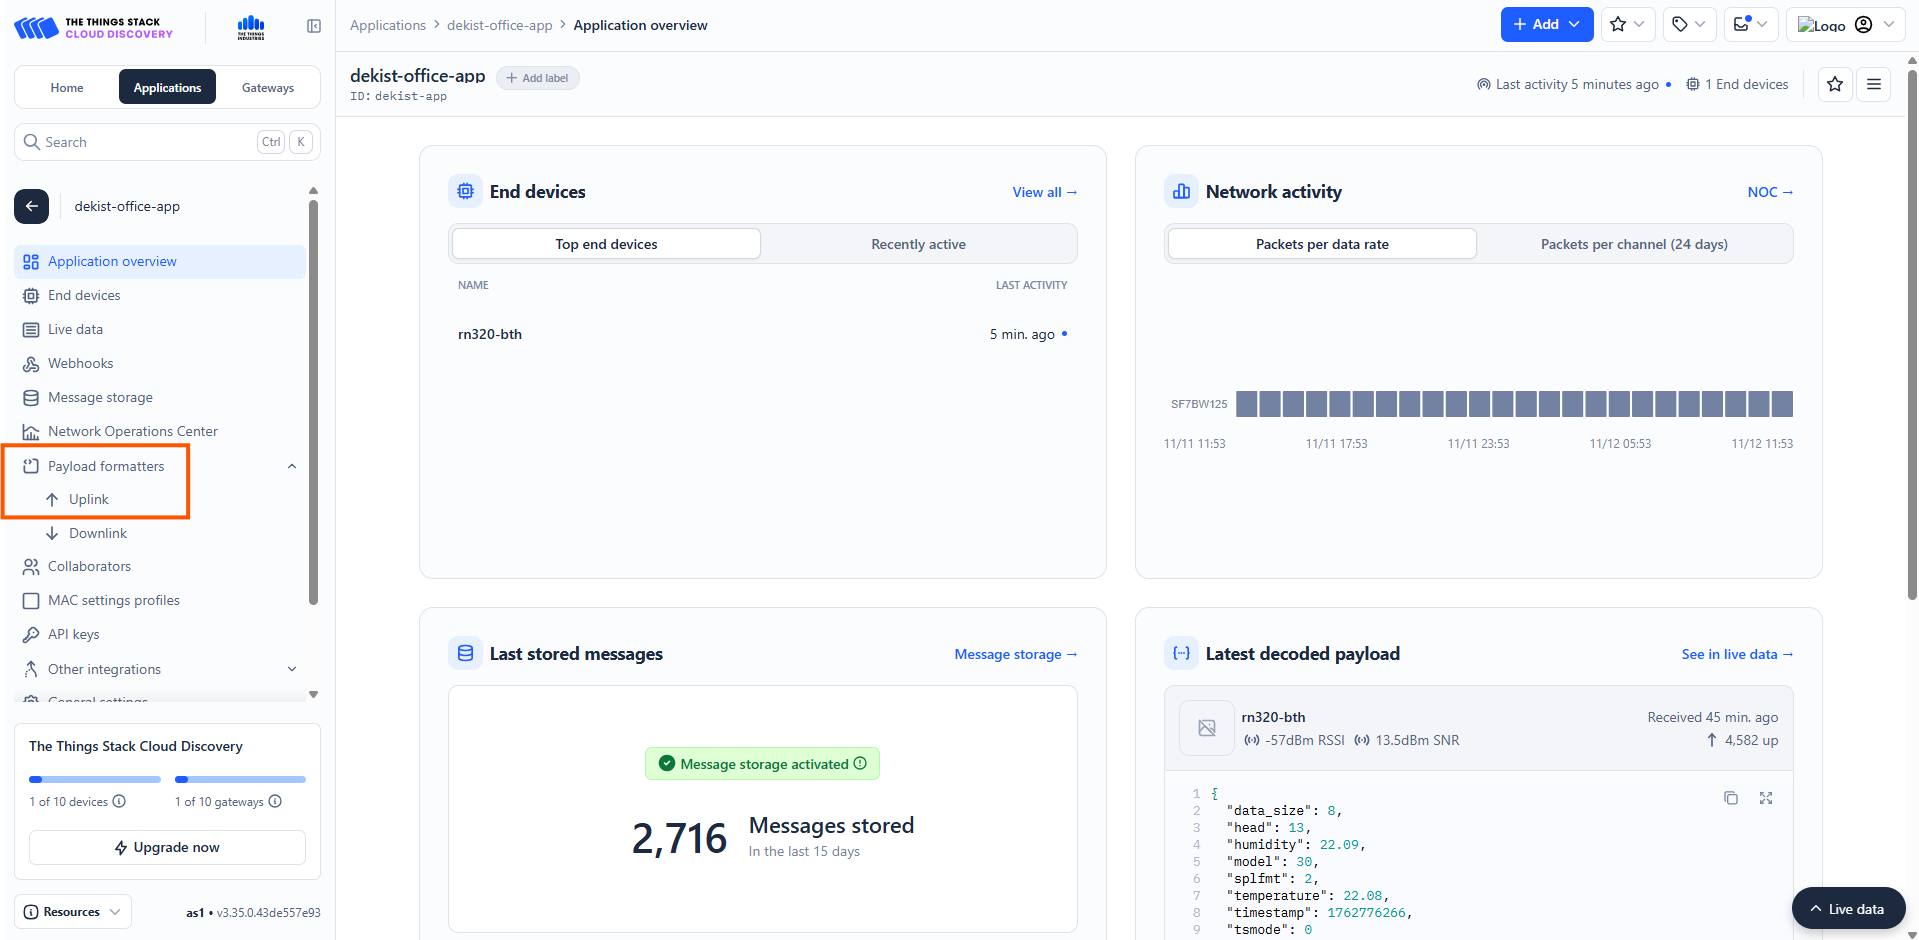
配置Payload解析器(上行解码器)
RN320-BTH以二进制格式传输传感器数据。在将数据转发到ThingsBoard之前需要进行解码。
在TTS中打开您的应用。
导航到Payload formatters → Uplink。
粘贴以下解码器代码:
1
2
3
4
5
6
7
8
9
10
11
12
13
14
15
16
17
18
19
20
21
22
23
24
25
26
27
28
29
30
31
32
33
34
35
36
37
38
39
40
41
42
43
44
45
46
47
48
49
50
51
52
53
54
55
56
57
58
59
60
61
62
63
64
65
66
67
68
69
70
71
72
73
74
75
76
77
78
79
80
81
82
83
84
85
86
87
88
89
90
91
92
93
94
95
96
97
98
99
100
101
102
103
function decodeUplink ( input ) {
const res = Decoder ( input . bytes , input . fPort );
if ( res . error ) {
return { errors : [ res . error ] };
}
return { data : res };
}
function Decoder ( bytes , port ) {
const readUInt8 = b => b & 0xFF ;
const readUInt16LE = b => ( b [ 1 ] << 8 ) + b [ 0 ];
const readInt16LE = b => {
const ret = readUInt16LE ( b );
return ( ret > 0x7ffff ) ? ret - 0x10000 : ret ;
}
const readUInt32LE = b => ( b [ 3 ] << 24 ) + ( b [ 2 ] << 16 ) + ( b [ 1 ] << 8 ) + b [ 0 ];
const readInt32LE = b => {
const ret = readUInt32LE ( b );
return ( ret > 0x7FFFFFFF ) ? ret - 0x100000000 : ret ;
}
const readFloatLE = b => {
const buf = new ArrayBuffer ( 4 );
const view = new DataView ( buf );
for ( let i = 0 ; i < 4 ; i ++ ) view . setUint8 ( i , b [ i ]);
return view . getFloat32 ( 0 , true ); // ieee754 float
};
const head = readUInt8 ( bytes [ 0 ]);
const model = readUInt8 ( bytes [ 1 ]);
if ( head === 11 ) {
// Check-in frame
const timestamp = readUInt32LE ( bytes . slice ( 2 , 6 ));
const date = new Date ( timestamp * 1000 );
const yyyy = date . getUTCFullYear ();
const mm = ( date . getUTCMonth () + 1 ). toString (). padStart ( 2 , ' 0 ' );
const dd = date . getUTCDate (). toString (). padStart ( 2 , ' 0 ' );
const verFormatted = parseInt ( ` ${ yyyy }${ mm }${ dd } ` );
const interval = readUInt16LE ( bytes . slice ( 6 , 8 ));
const splrate = interval ;
const bat = readUInt8 ( bytes [ 8 ]);
const millivolt = readUInt16LE ( bytes . slice ( 9 , 11 ));
const volt = ( millivolt / 1000 ). toFixed ( 3 );
const freqband = readUInt8 ( bytes [ 11 ]);
const subband = readUInt8 ( bytes [ 12 ]);
return {
head ,
ver : verFormatted ,
interval ,
splrate ,
bat ,
volt ,
freqband ,
subband
};
}
else if ( head === 12 || head === 13 ) {
// Sensor / Hold
const tsmode = readUInt8 ( bytes [ 2 ]);
const timestamp = readUInt32LE ( bytes . slice ( 3 , 7 ));
const splfmt = readUInt8 ( bytes [ 7 ]);
if ( splfmt !== 2 ) {
return { error : " Unsupported Sensor Data Format: " + splfmt };
}
const raw_size = 4 ;
const data = bytes . slice ( 8 );
const ch_count = data . length / raw_size ;
const data_size = data . length ;
let offset = 0 ;
let temperature = null , humidity = null ;
if ( ch_count < 2 ) {
return { error : " Unsupported Sensor Data Size: " + ch_count };
}
temperature = parseFloat ( readFloatLE ( data . slice ( offset , offset + raw_size )). toFixed ( 2 ));
if ( temperature <= - 9999.0 ) temperature = null ;
offset += raw_size ;
humidity = parseFloat ( readFloatLE ( data . slice ( offset , offset + raw_size )). toFixed ( 2 ));
if ( humidity <= - 9999.0 ) humidity = null ;
return {
head ,
model ,
tsmode ,
timestamp ,
splfmt ,
data_size ,
temperature ,
humidity
};
}
return { error : " Unsupported head frame: " + head };
}
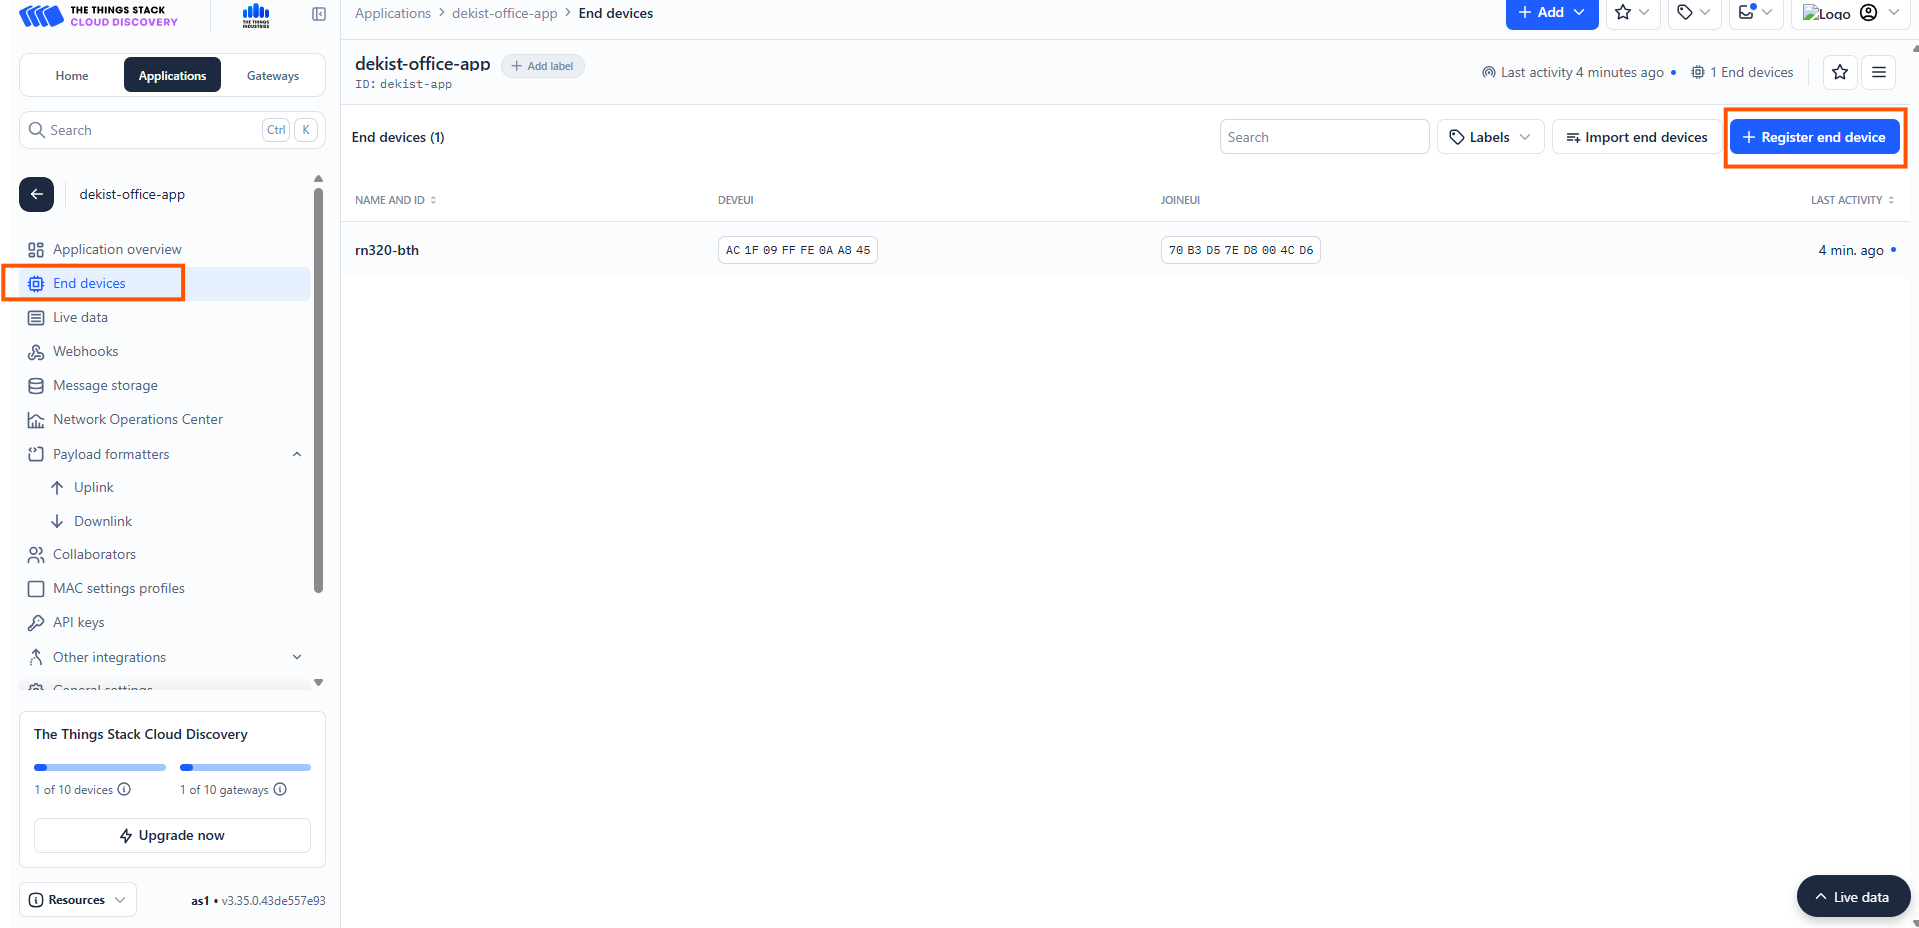
注册终端设备
下一步是在TTS中创建终端设备。导航到End devices → Register end device 。
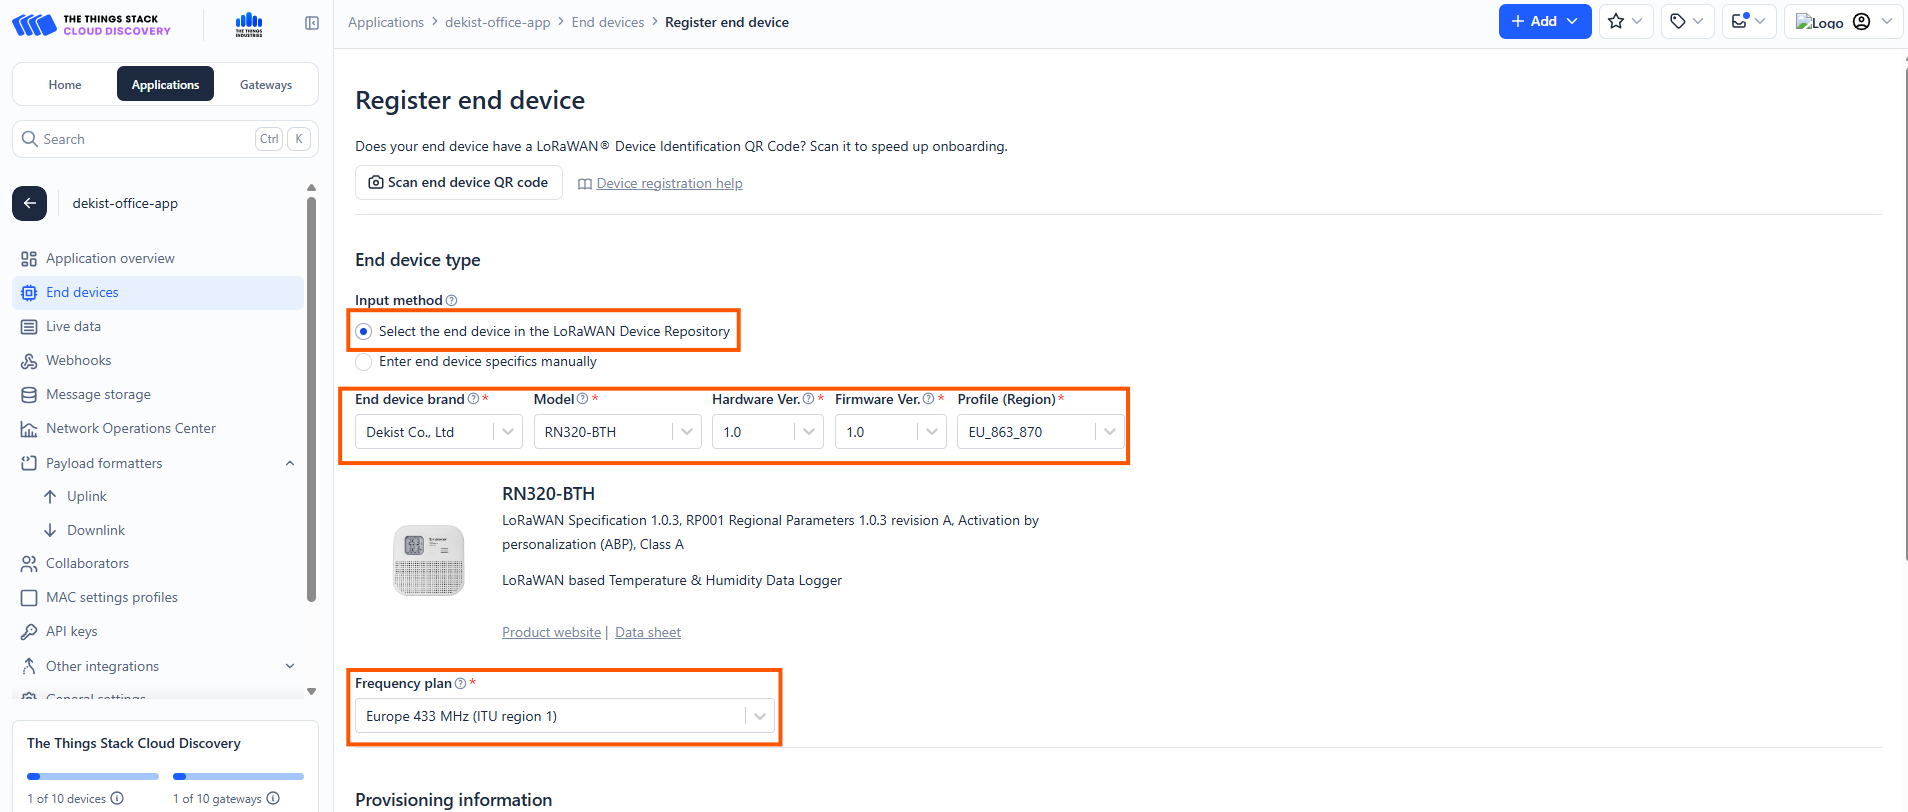
按照下图所示输入以下信息以注册终端设备:
选择“From The LoRaWAN Device Repository”。
输入方式: 在LoRaWAN设备库中选择终端设备(Radionode设备已在Things Stack平台注册)。终端设备品牌: 选择:
Brand: Dekist Co., LtdModel: RN320-BTH
选择正确的频率计划 。
在对应位置正确输入DevEUI 。您可以在设备侧面的标签上找到DevEUI。
在给定位置添加End device ID 。
点击Register end device 完成终端设备注册。
Navigate to End devices → Register end device .
To register the end Device enter these details as shown in the image.
Enter the DevEUI correctly in the slot provided there. You can find DevEUI on the sticker on the side of the device.End device ID in the slot given.Register end device to complete the end device registration.
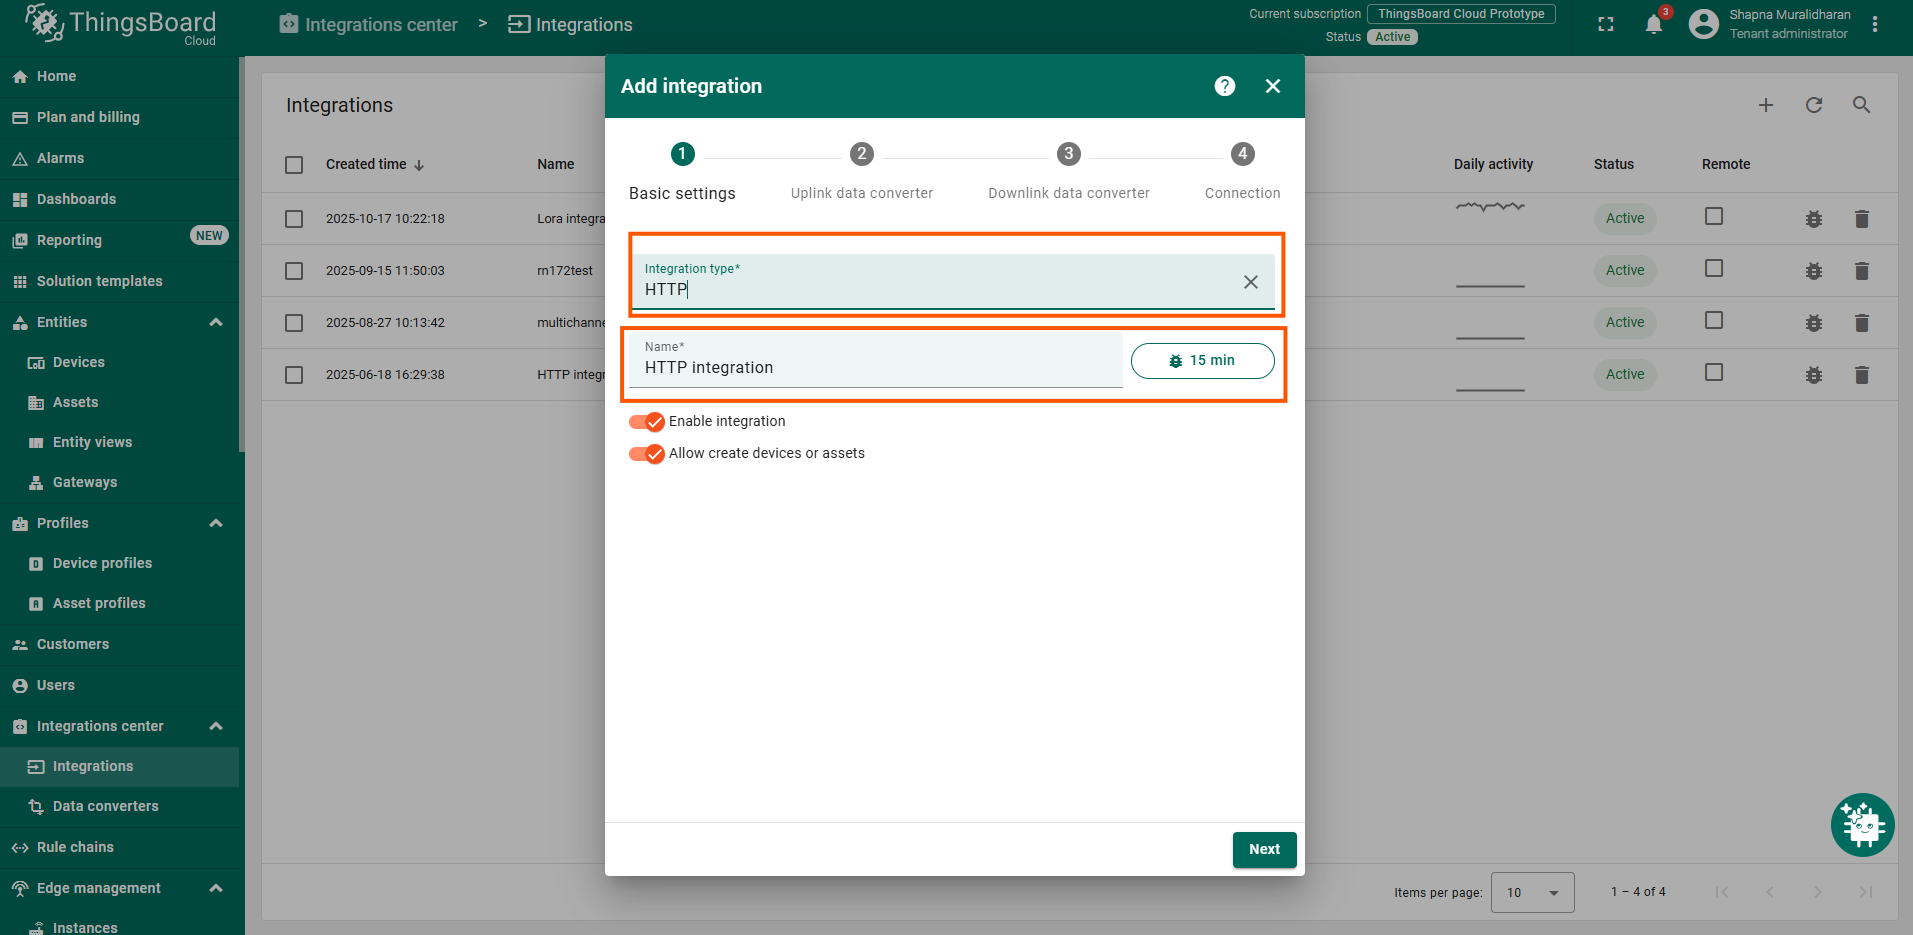
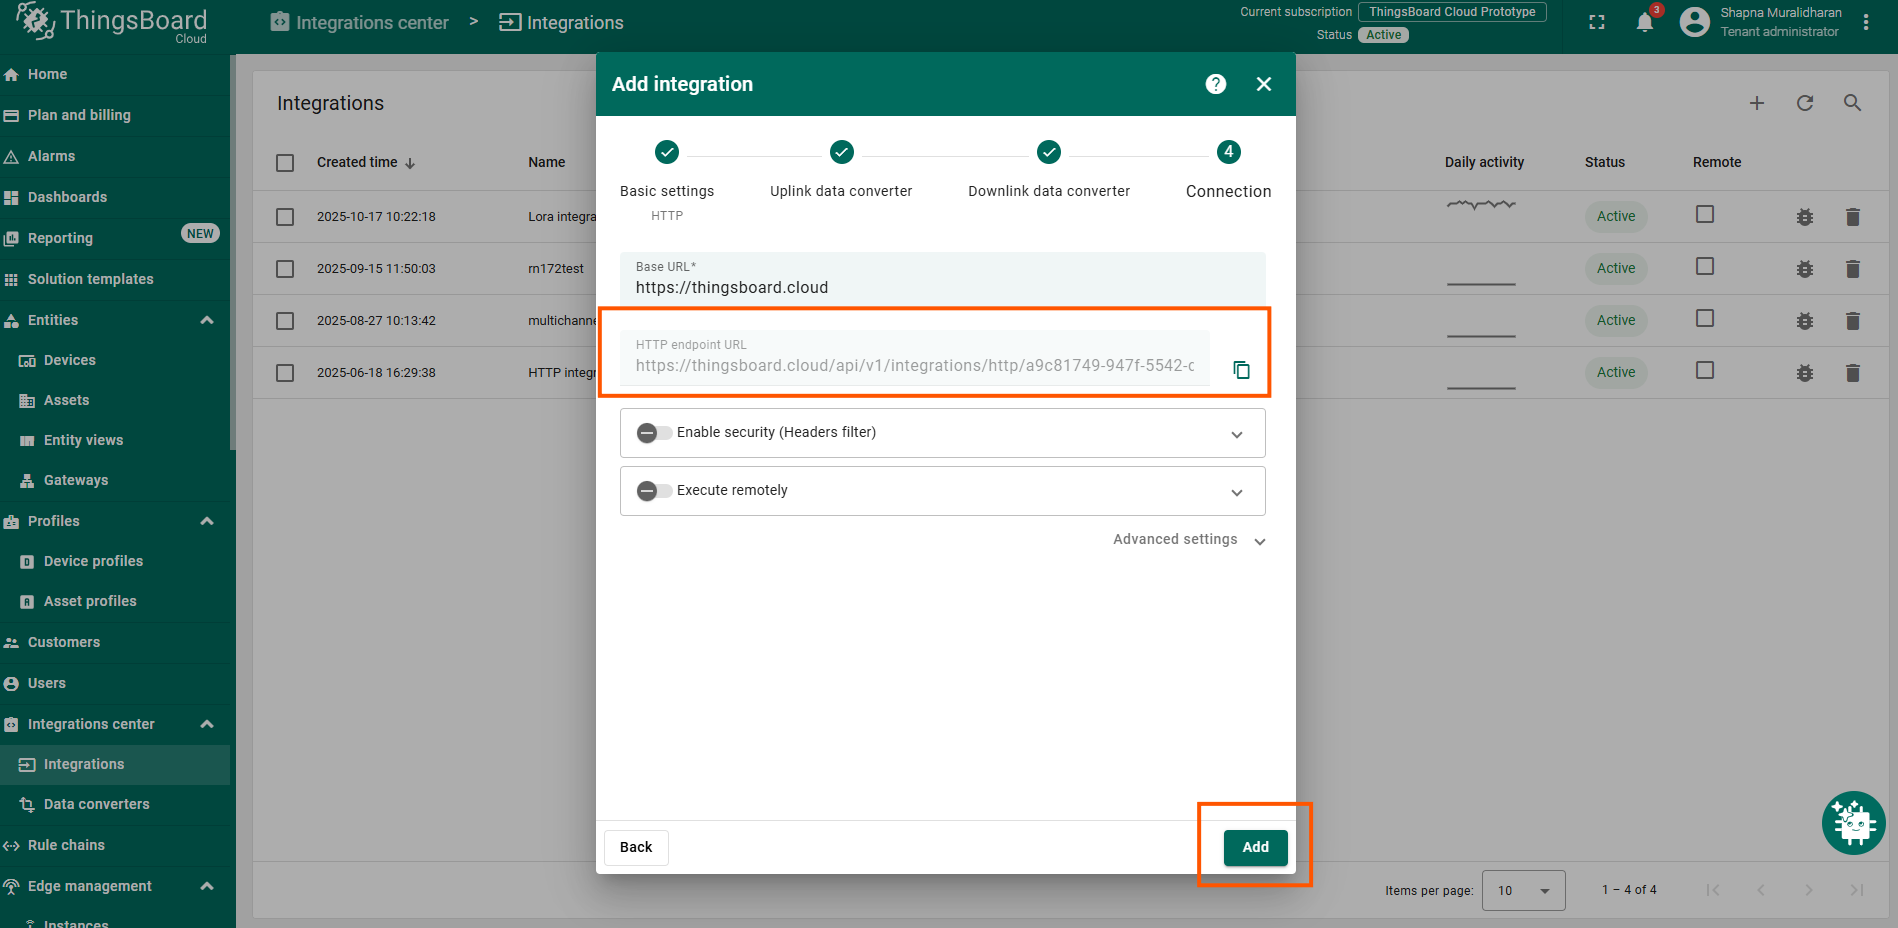
ThingsBoard配置
登录ThingsBoard。
导航到集成 → 添加集成 。
选择HTTP 集成,因为我们将通过TTS中创建的Webhook接收数据(Webhook配置将在后文说明)。
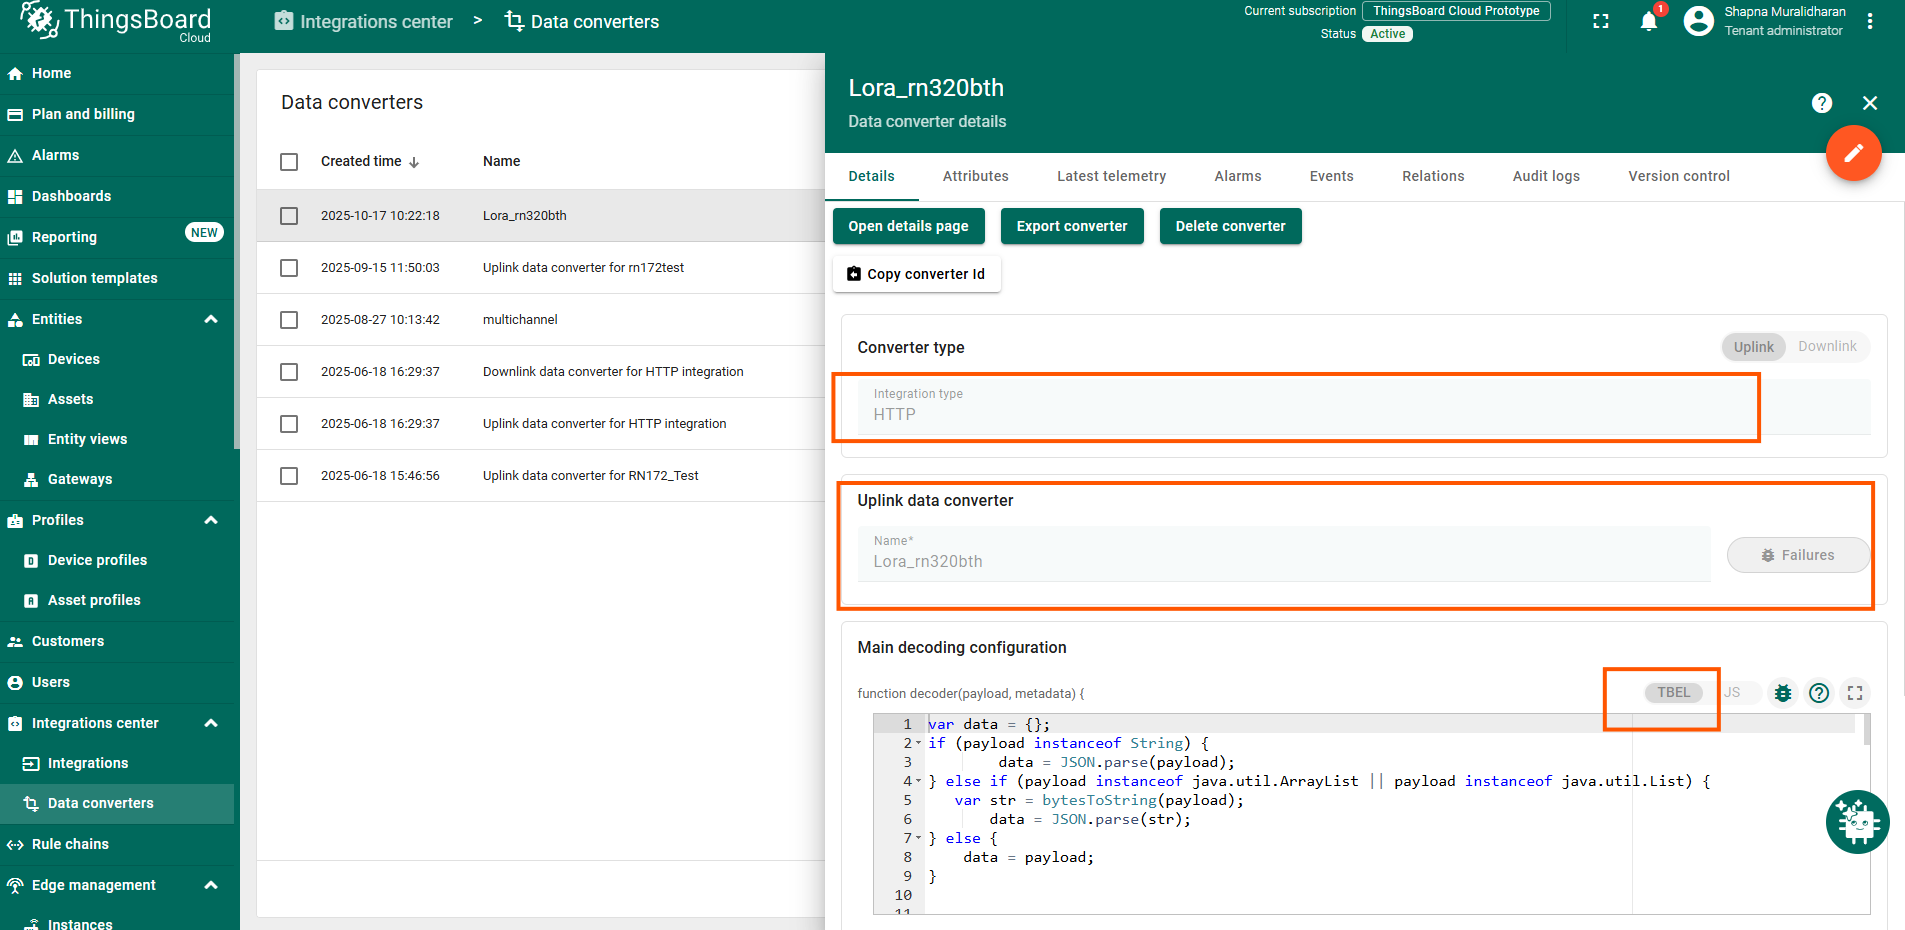
在来自网络服务器消息的payload解码器中,复制并粘贴以下TBEL解码器代码:
1
2
3
4
5
6
7
8
9
10
11
12
13
14
15
16
17
18
19
20
21
22
23
24
25
26
27
28
29
30
31
32
33
34
35
36
37
38
39
40
41
42
43
44
45
46
47
48
49
50
51
52
53
54
55
56
57
58
59
60
61
62
63
64
65
66
67
68
var data = {};
if ( payload instanceof String ) {
data = JSON . parse ( payload );
} else if ( payload instanceof java . util . ArrayList || payload instanceof java . util . List ) {
var str = bytesToString ( payload );
data = JSON . parse ( str );
} else {
data = payload ;
}
var deviceName = data .? end_device_ids .? device_id ;
if ( deviceName == null ){
deviceName = " Unknown_Device " ;
}
var applicationId = data .? end_device_ids .? application_ids .? application_id ;
if ( applicationId == null ) applicationId = " Unknown_App " ;
var uplink = data .? uplink_message ;
var decoded = {};
if ( uplink != null && uplink . decoded_payload != null ) {
decoded = uplink . decoded_payload ;
}
var rx = {};
if ( uplink != null && uplink . rx_metadata != null && uplink . rx_metadata . size () > 0 ) {
rx = uplink . rx_metadata [ 0 ];
}
var telemetry = {};
if ( decoded .? temperature != null ) telemetry . temperature = decoded . temperature ;
if ( decoded .? humidity != null ) telemetry . humidity = decoded . humidity ;
if ( decoded .? model != null ) telemetry . model = decoded . model ;
if ( decoded .? timestamp != null ) telemetry . timestamp = decoded . timestamp ;
if ( rx .? rssi != null ) telemetry . rssi = rx . rssi ;
if ( rx .? snr != null ) telemetry . snr = rx . snr ;
var tsString = uplink .? received_at ;
var tsMillis = new Date (). getTime ();
if ( tsString != null ) {
tsMillis = new Date ( tsString ). getTime ();
}
var attributes = {
" app_id " : applicationId ,
" f_port " : uplink .? f_port ,
" frequency " : uplink .? settings .? frequency ,
" spreading_factor " : uplink .? settings .? data_rate .? lora .? spreading_factor ,
" gateway_id " : rx .? gateway_ids .? gateway_id ,
" dev_eui " : data .? end_device_ids .? dev_eui
};
var result = {
" deviceName " : deviceName ,
" deviceType " : " RN320-BTH " ,
" telemetry " : {
" ts " : tsMillis ,
" values " : telemetry
},
" attributes " : attributes
};
return result ;
复制并保存生成的HTTP端点URL 。
点击添加 创建集成。
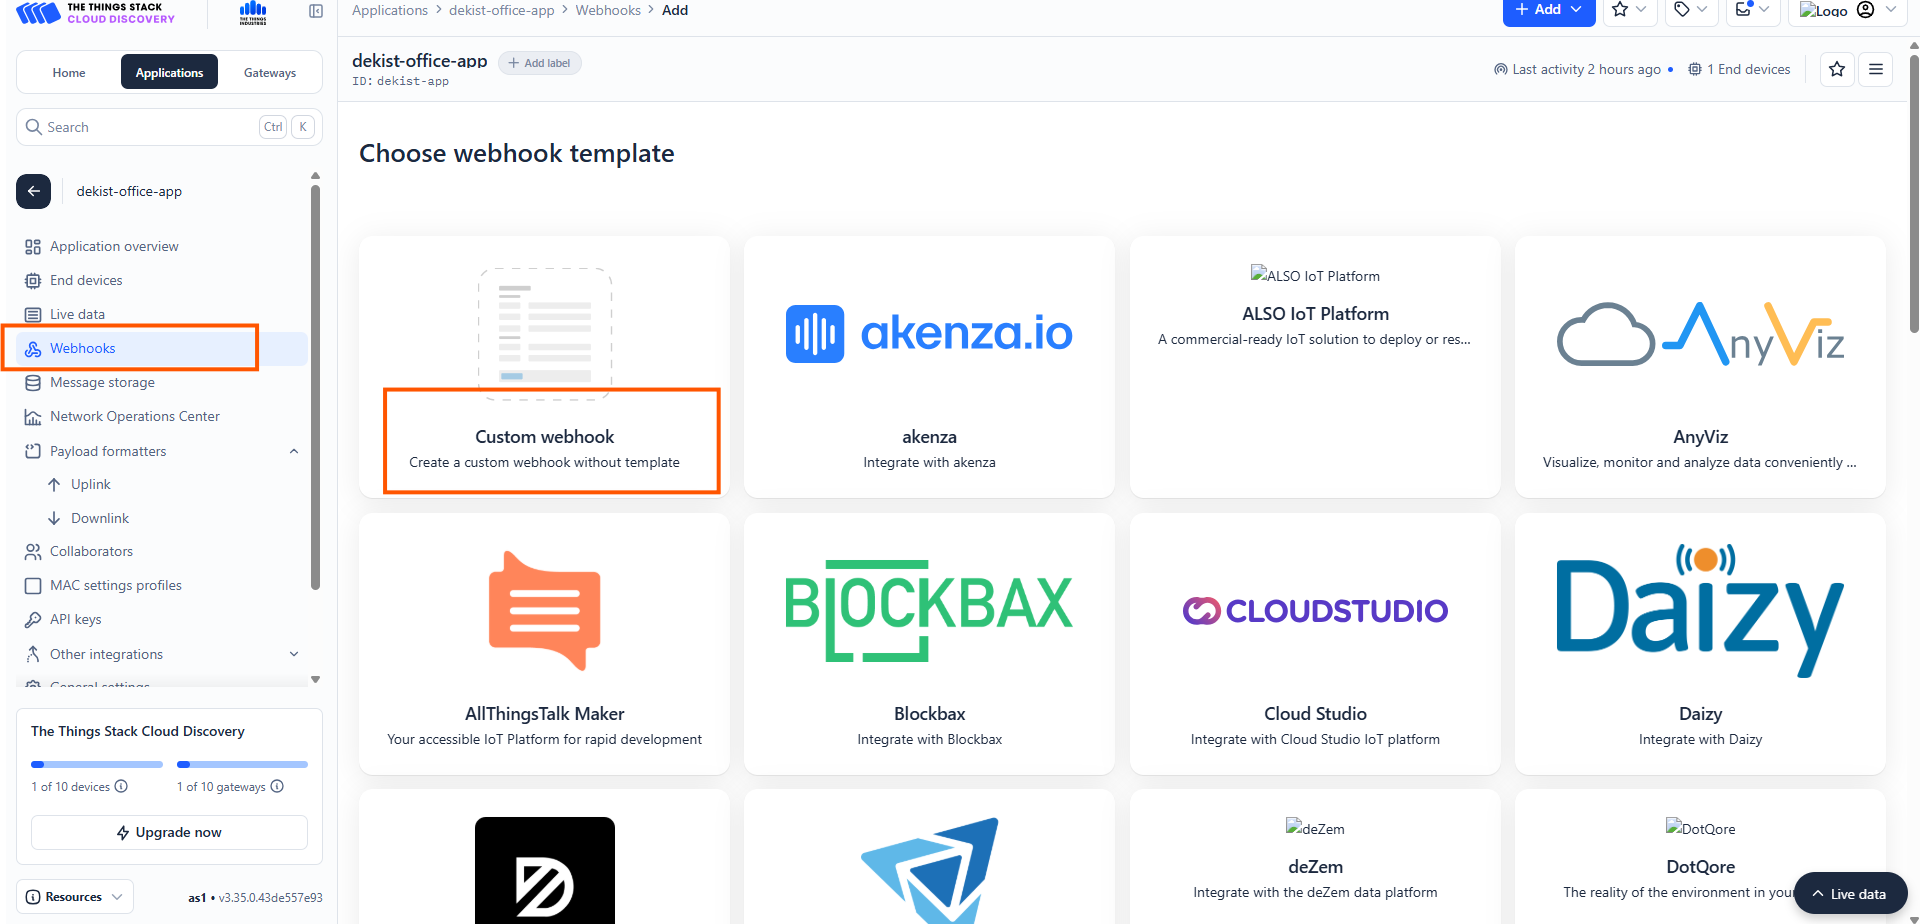
在The Things Stack中创建Webhook
要在TTS平台中创建Webhook:
在TTS中打开您的应用。
导航到Webhooks 。
选择Custom webhook 。
常规设置
添加Webhook ID - 为您的Webhook命名。
在Base URL 中添加您从ThingsBoard平台复制的端点URL 。
在Additional header 选项中添加application/json 。
保存 Webhook。
现在网络服务器与ThingsBoard平台之间的通信将开始,LoRaWAN设备的数据将发送到ThingsBoard。
在ThingsBoard上查看数据
导航到设备 。
确认rn320-bth 设备已自动创建。
查看最新遥测数据中的温度和湿度值。
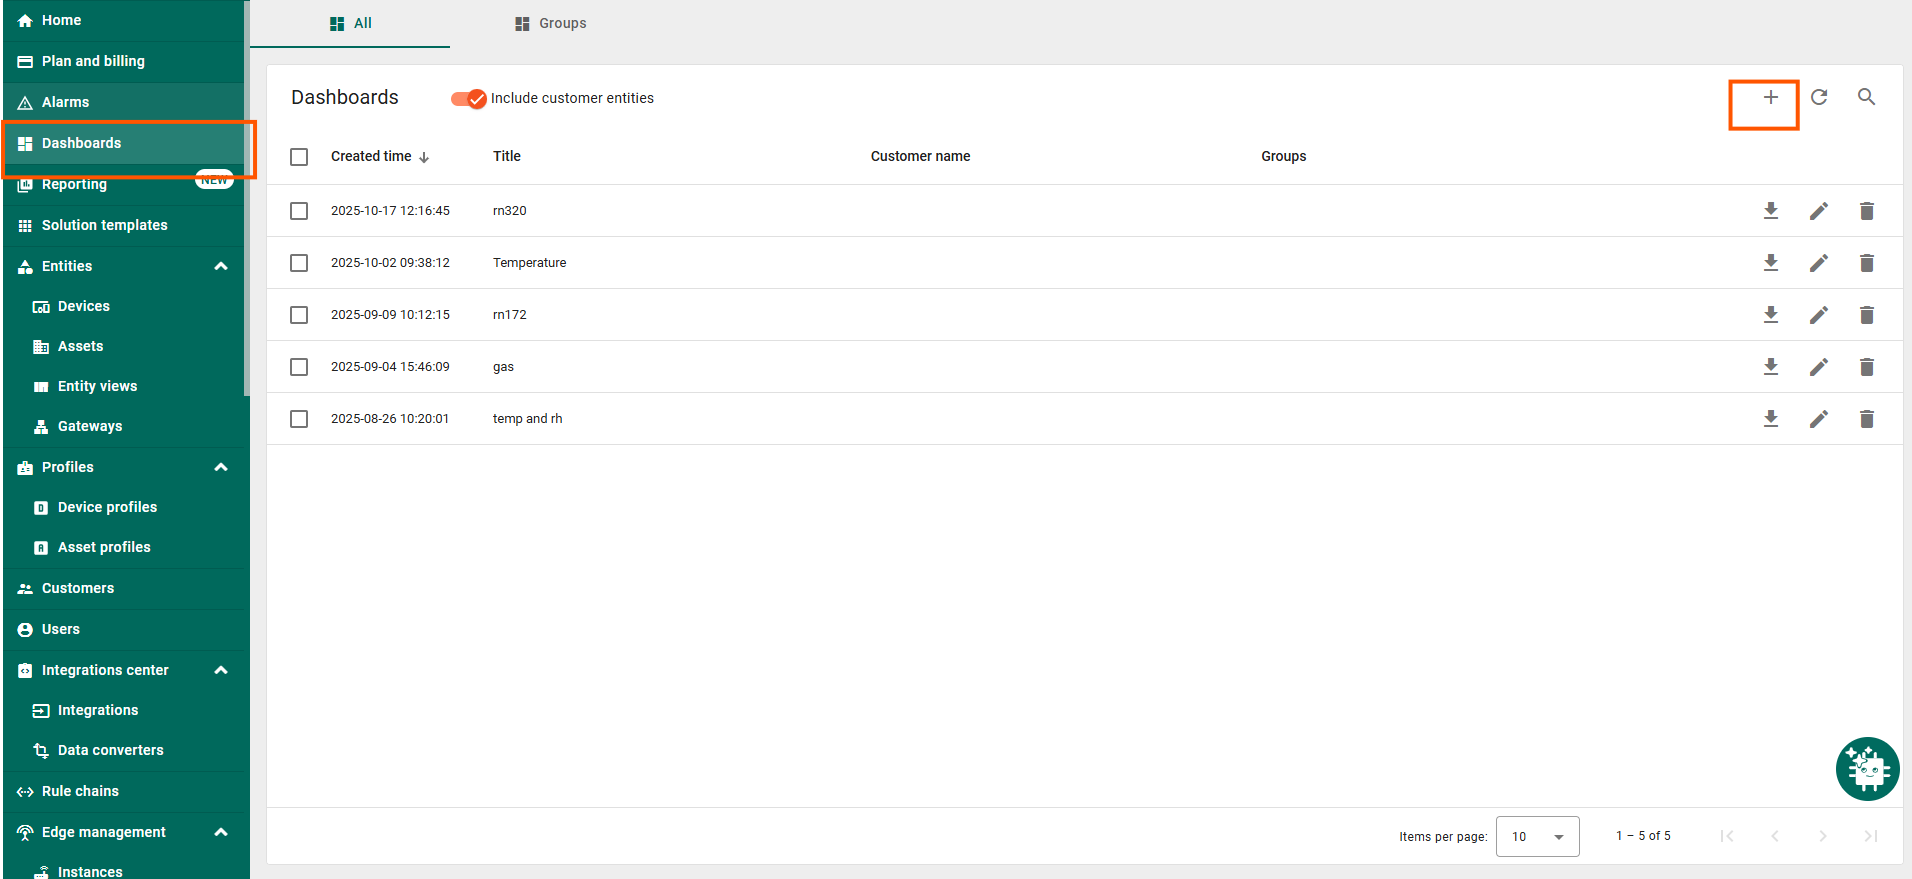
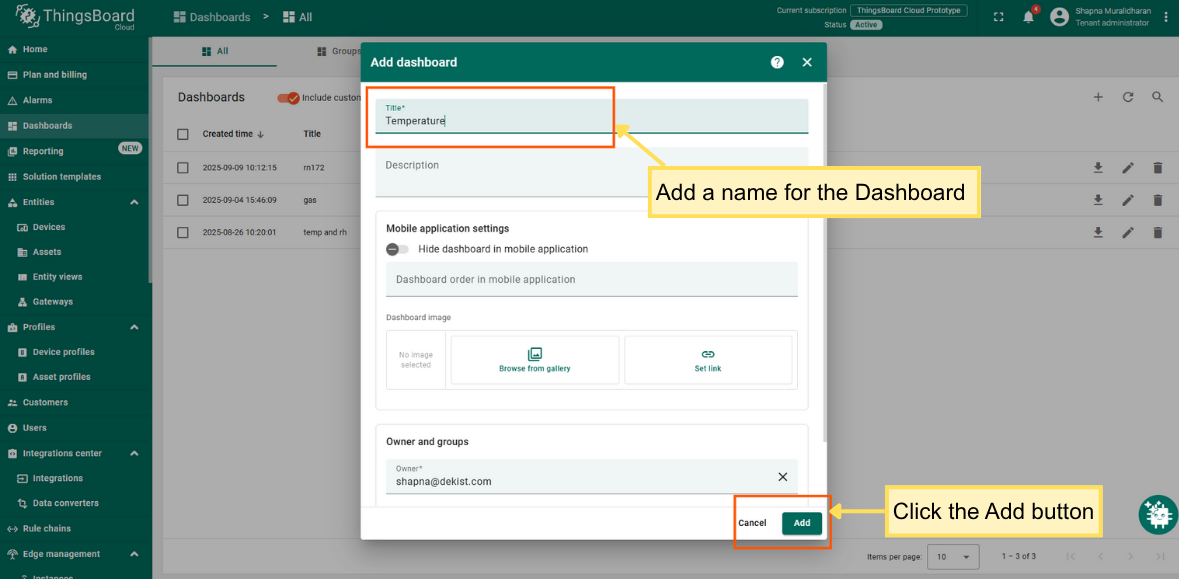
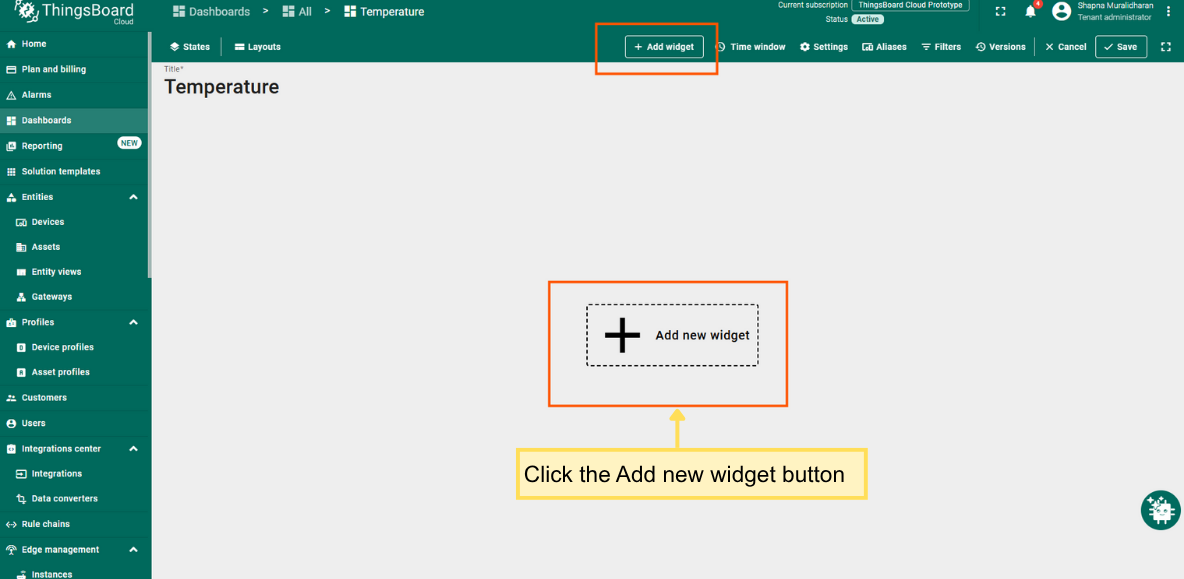
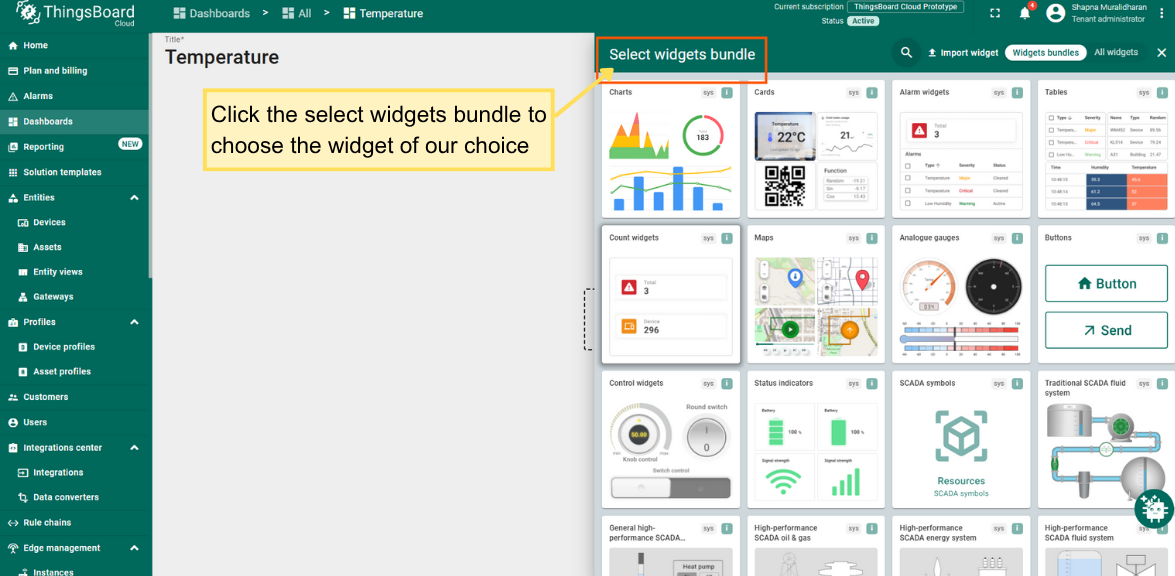
仪表板(可选)
导航到仪表板 → 创建新仪表板。
添加以下部件:
将部件绑定到RN320-BTH设备。
示例仪表板如下图所示。