- Hardware type: Other devices
- Connectivity: HTTP, MQTT, Ethernet, WIFI
- Industry: Transportation & Logistics, Smart Cities
- Use cases: Smart energy, Fleet Tracking
- Platforms: Community Edition, Cloud
概述
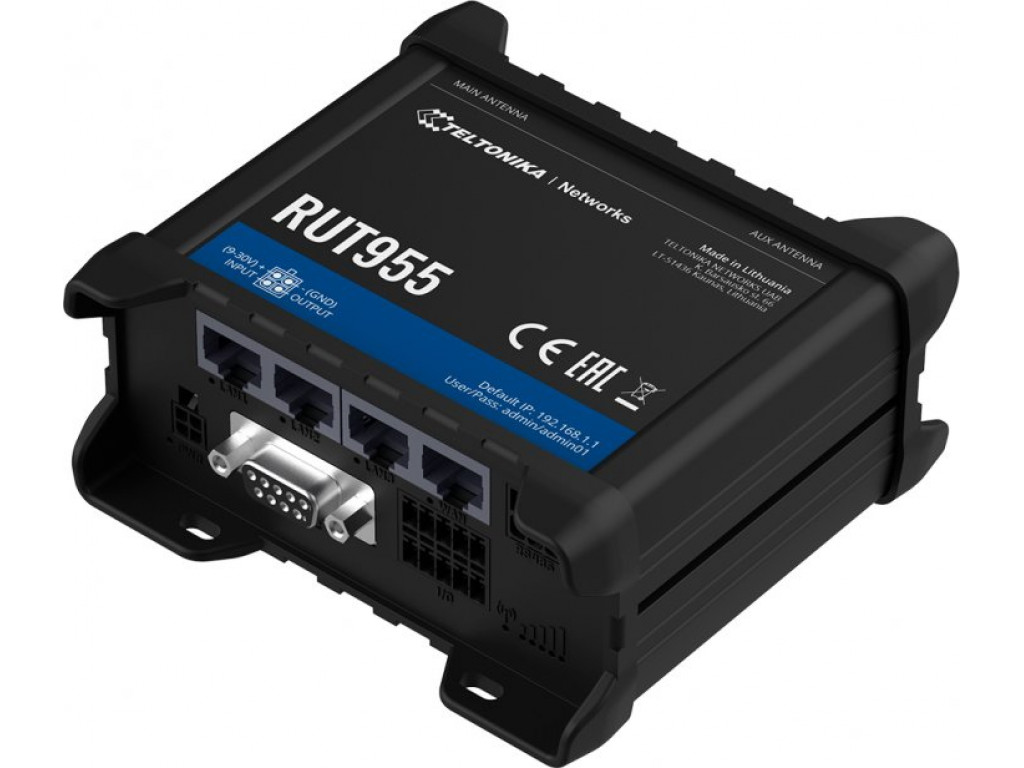
Teltonika RUT955提供双SIM卡蜂窝连接、四个以太网端口和Wi-Fi,结合RS232、RS485、USB接口和I/O,适用于各种专业应用场景。该路由器配备先进的RutOS软件功能,如Modbus、SNMP、TR-069、NTRIP、MQTT协议支持和GNSS追踪功能。
前置条件
继续本指南前,需准备以下内容:
- Teltonika RUT955
- Modbus Controller (in our case Siemens LOGO!)
- ThingsBoard 账户
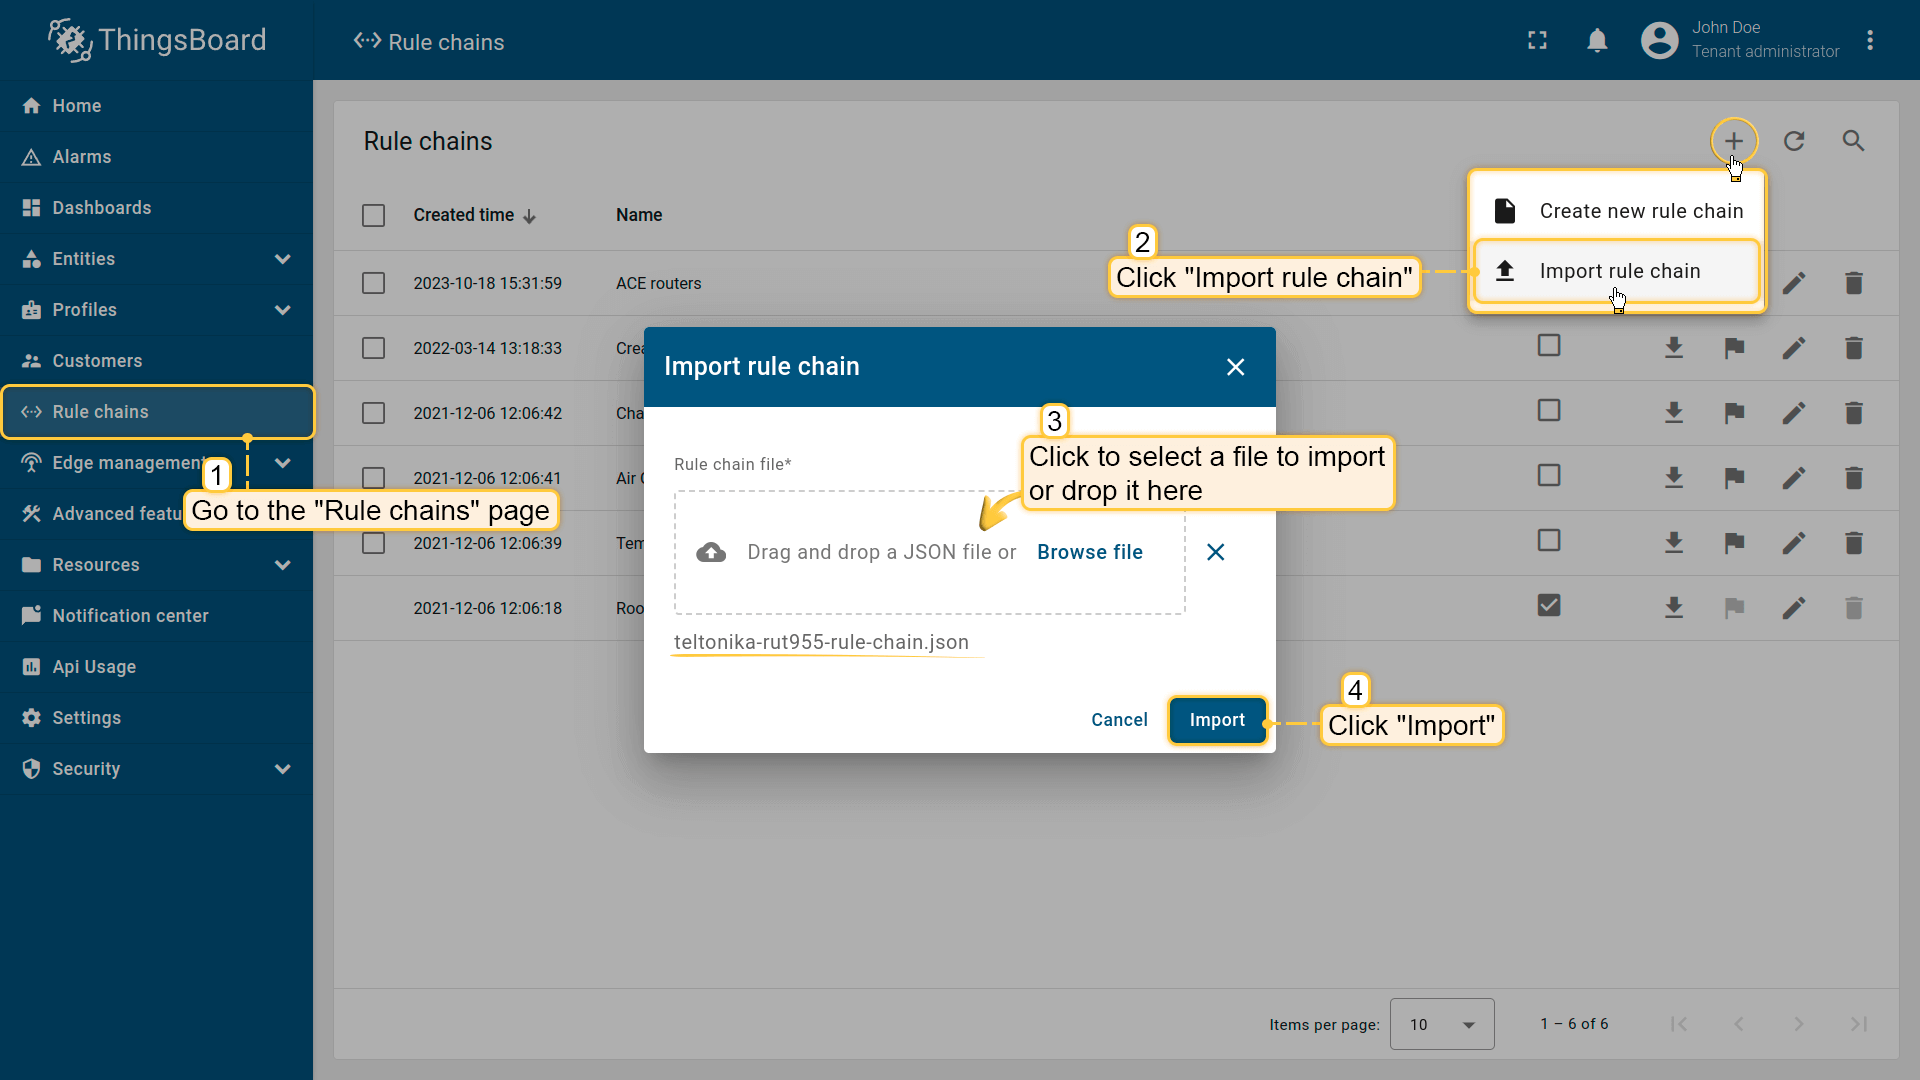
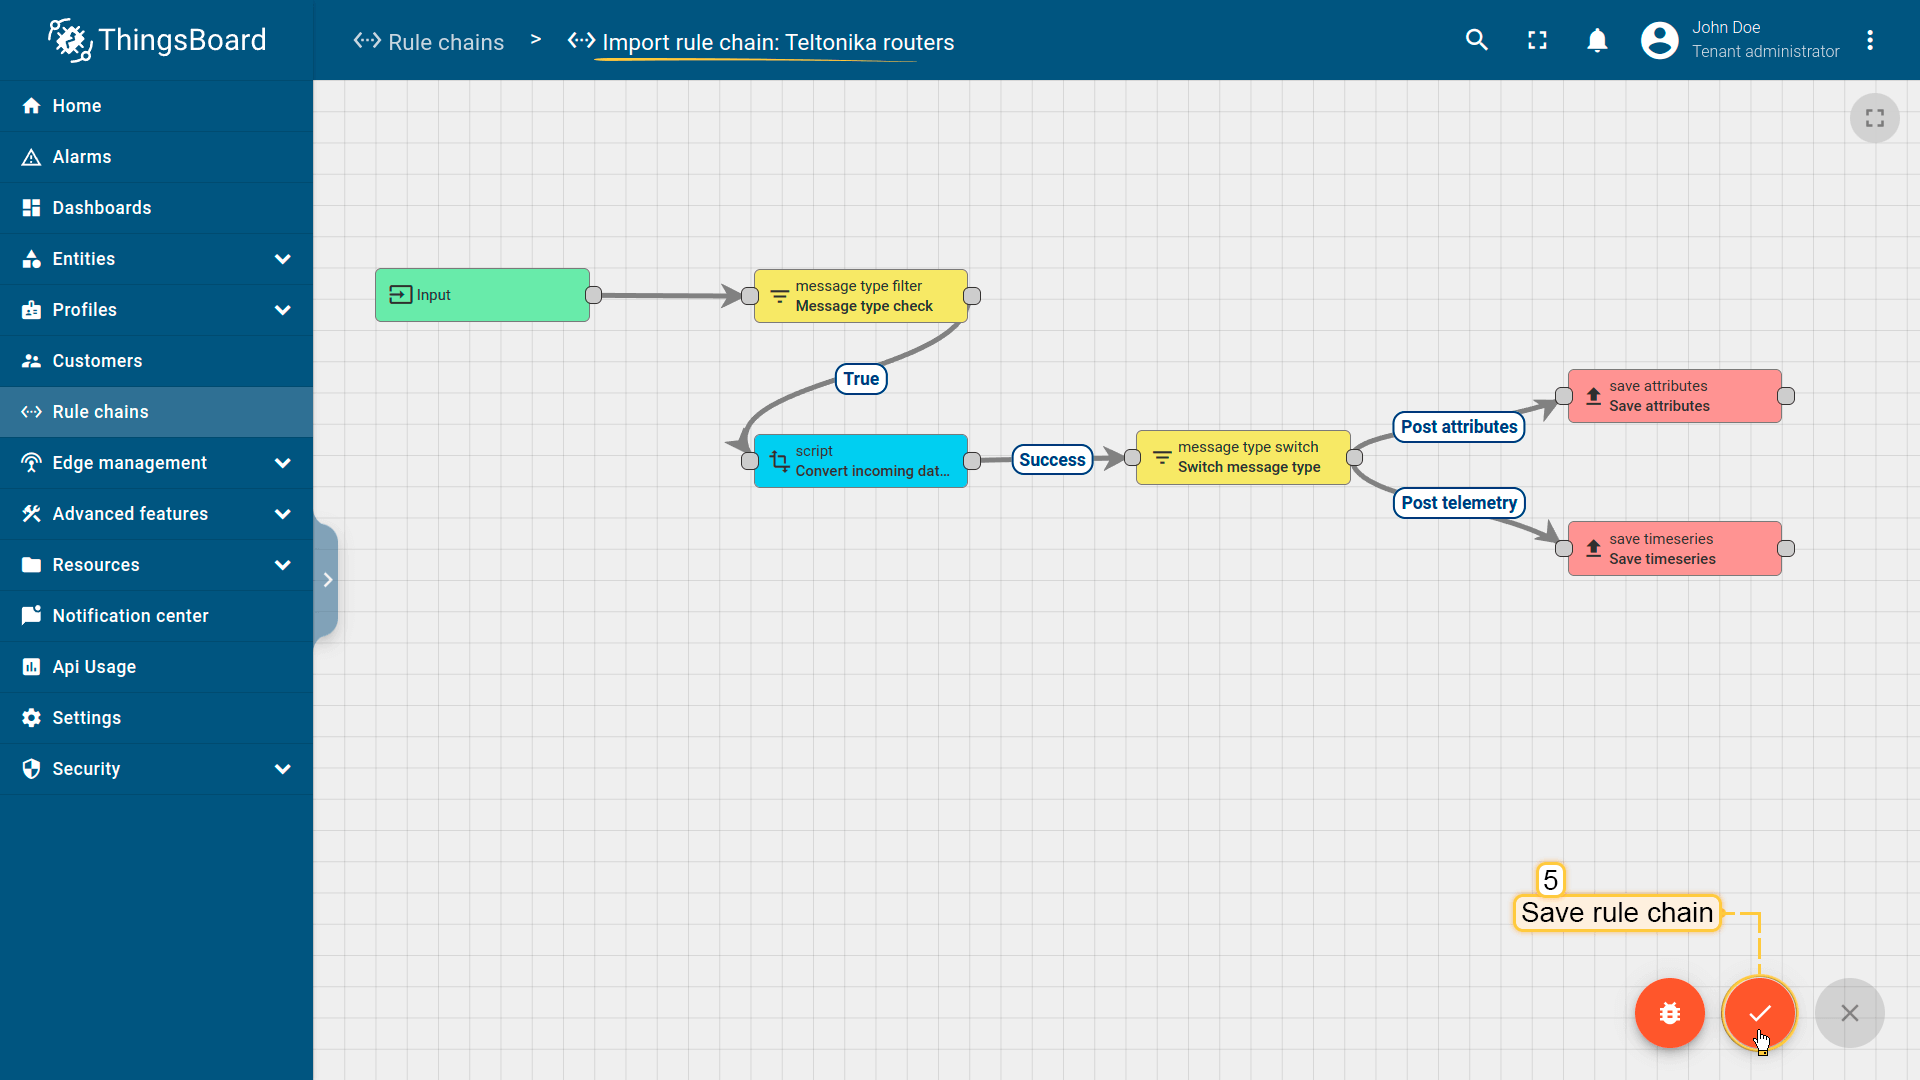
导入规则链
下载 Teltonika规则链并导入。
要从jSON文件导入规则链,请按以下步骤操作:
-
Navigate to the “Rule chains” page and click on the “+” button in the upper right corner of the screen and then choose “Import rule chain” option. The toolbar import popup window will appear. Upload a JSON file and click on the “Import” button;
-
The imported rule chain will open. Click on the “Apply changes” button to save the rule chain. Then, go back to the main “Rule chains” page;
-
Rule chain is imported.
Navigate to the “Rule chains” page and click on the “+” button in the upper right corner of the screen and then choose “Import rule chain” option. The toolbar import popup window will appear. Upload a JSON file and click on the “Import” button;
The imported rule chain will open. Click on the “Apply changes” button to save the rule chain. Then, go back to the main “Rule chains” page;

Rule chain is imported.
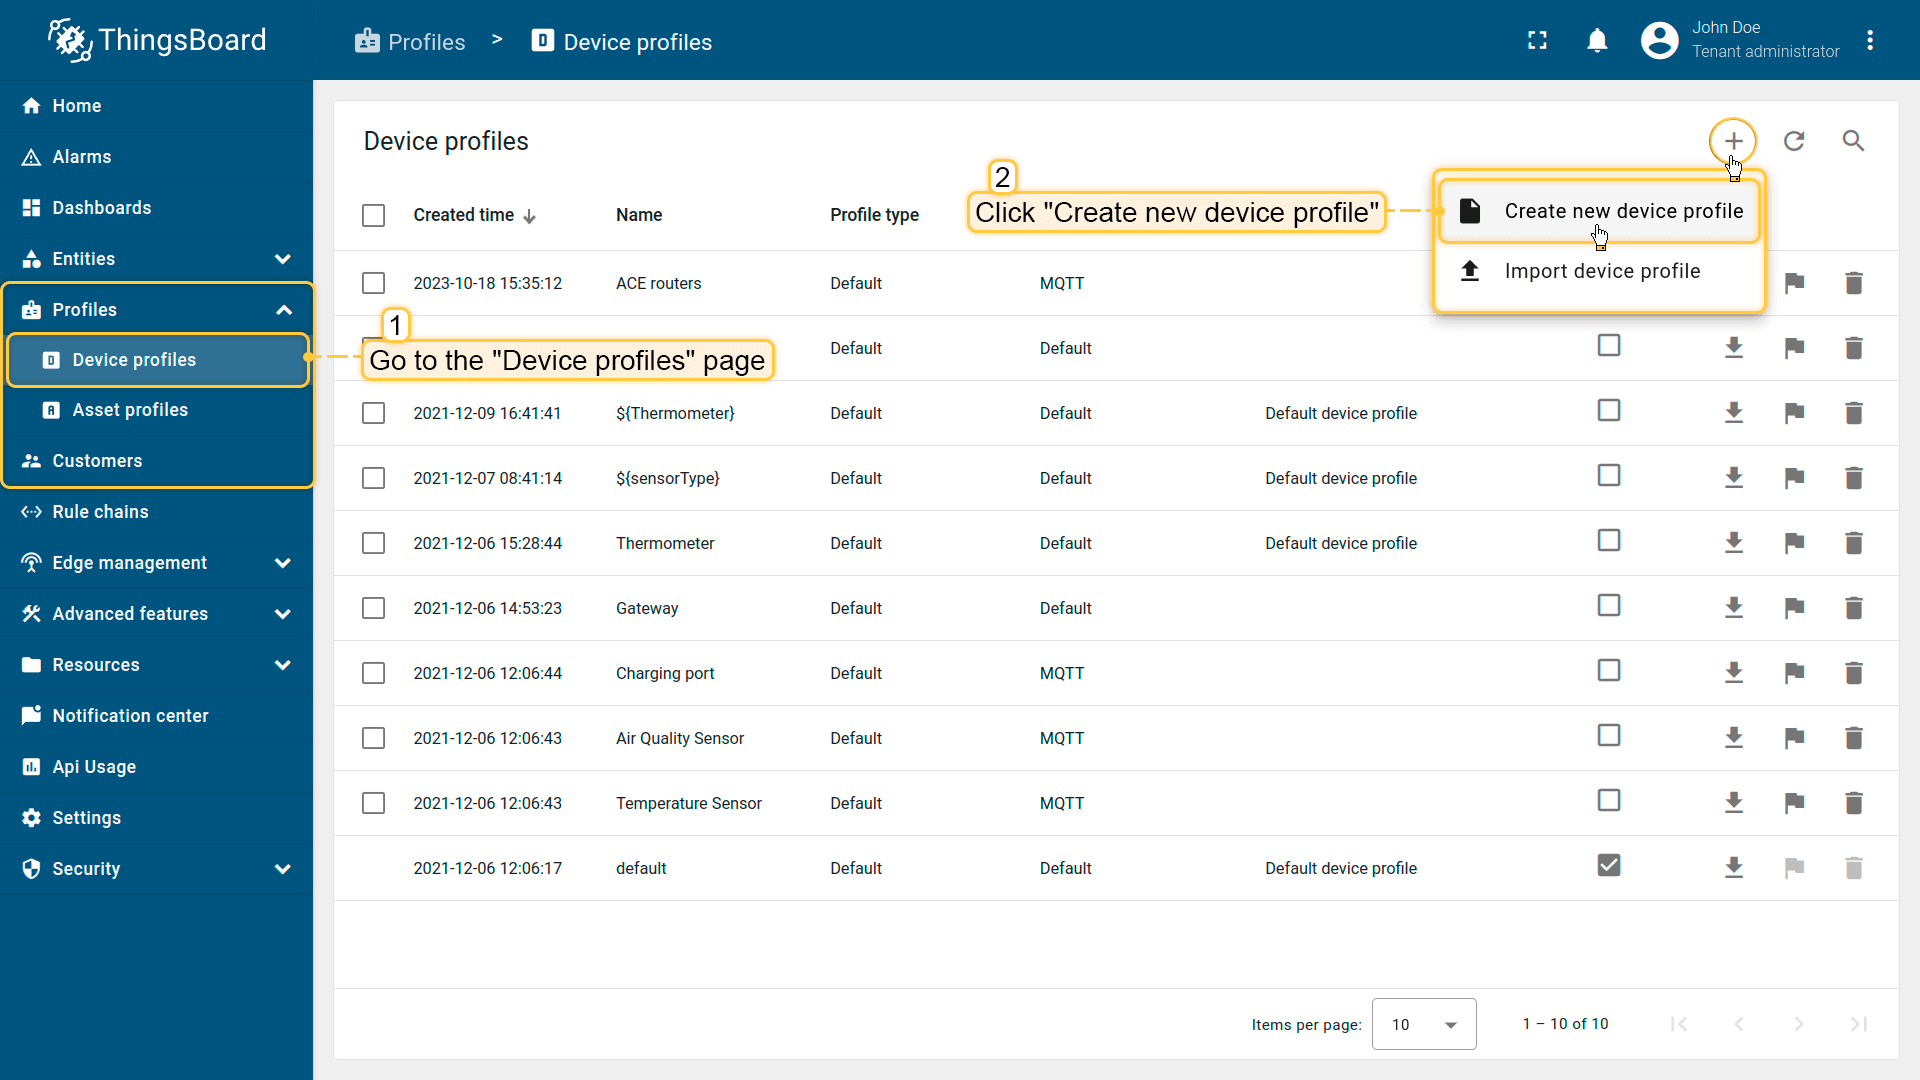
创建设备配置文件
现在可以创建设备配置文件。请按以下步骤操作:
-
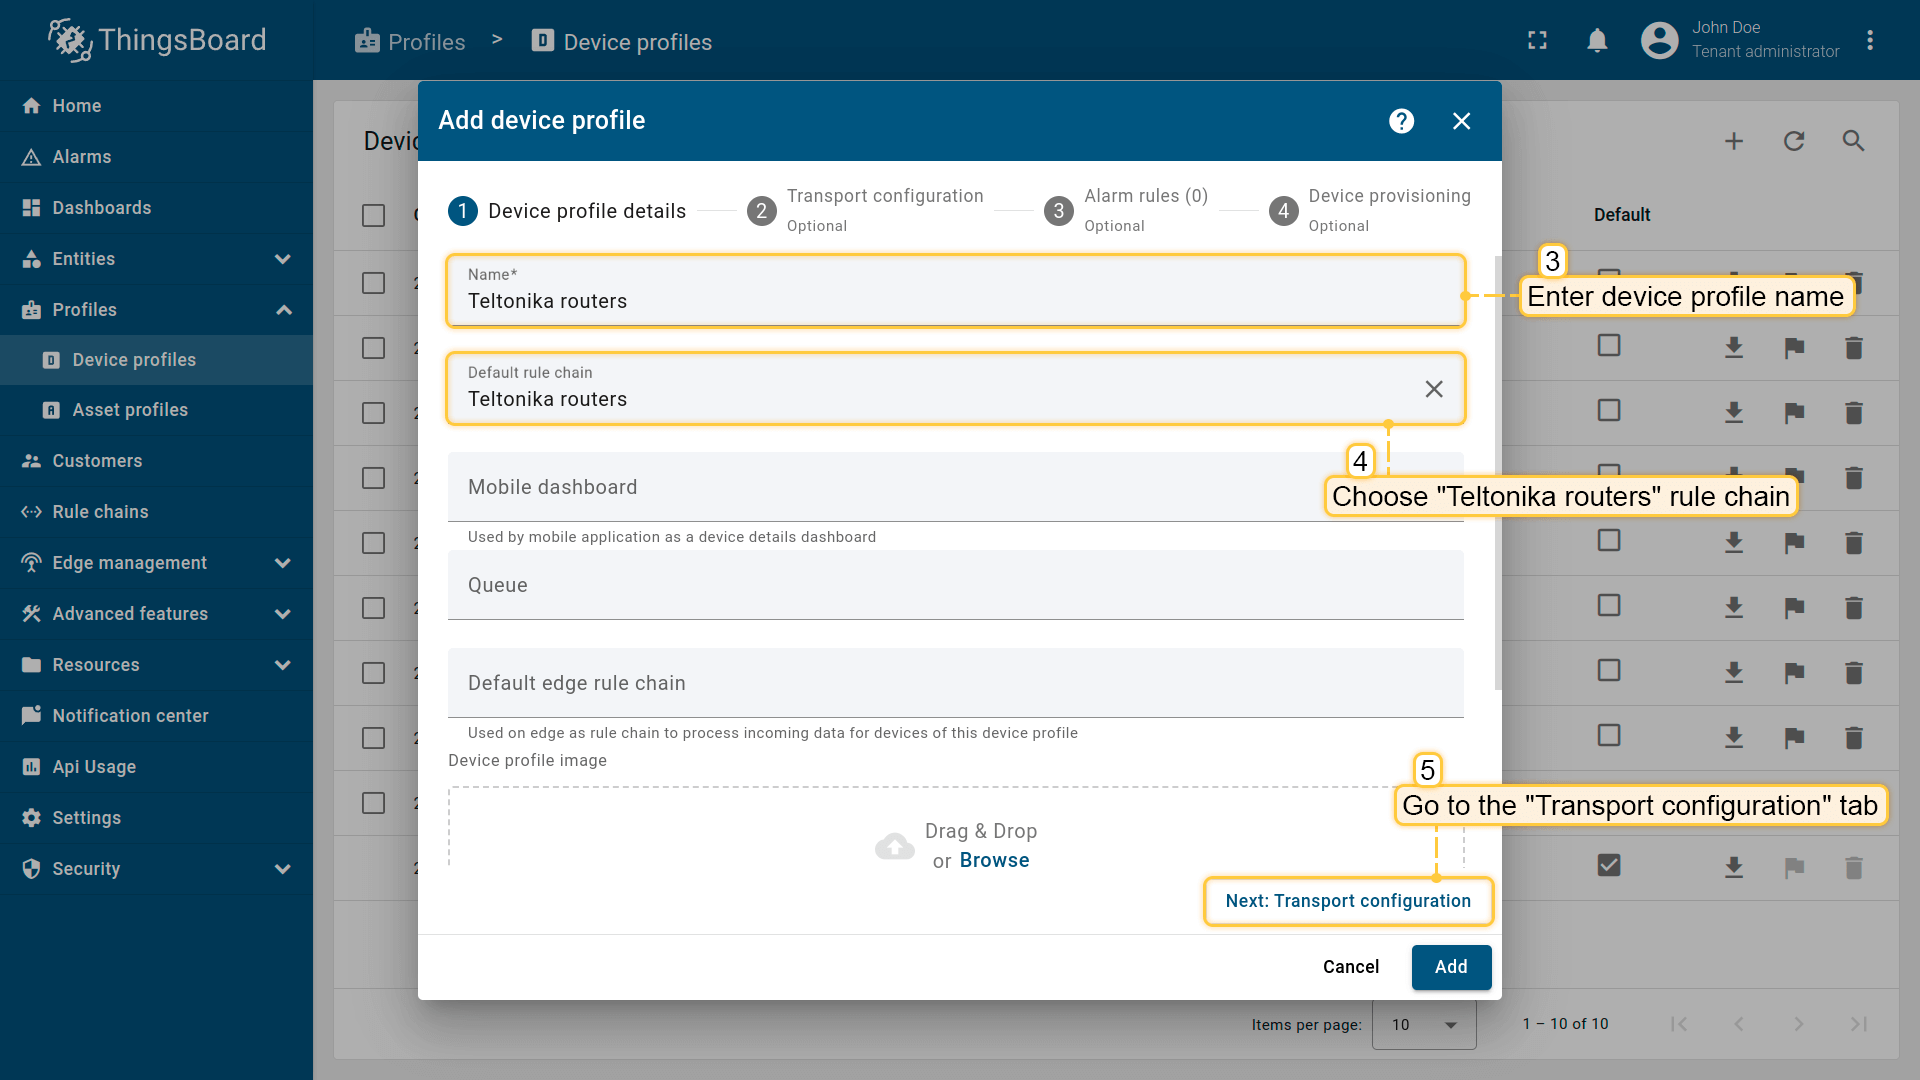
Go to Profiles > Device profiles and click on “Add” button > “Create new device profile”;
-
Input Name field with “Teltonika routers” value. Select “Teltonika routers” imported rule chain from the step above;
-
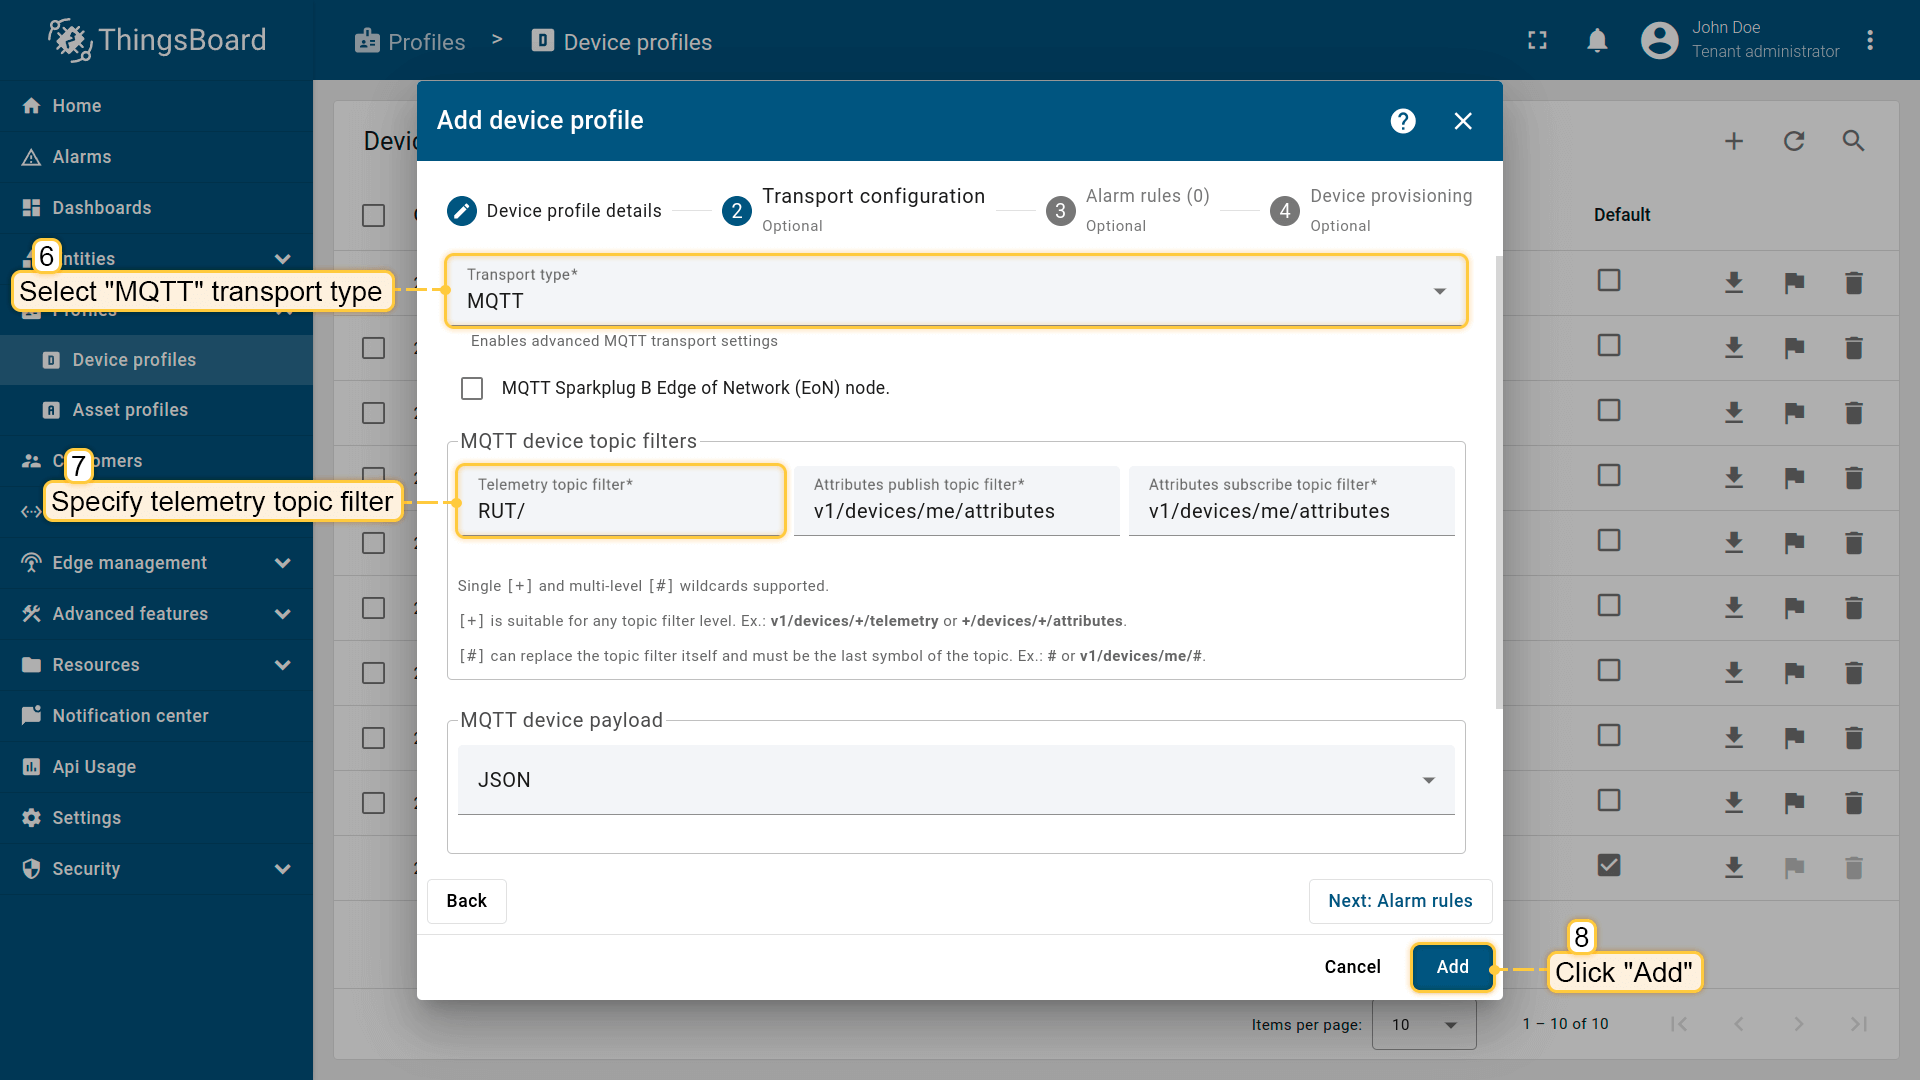
Click on “Transport configuration” tab. Select MQTT transport type and change Telemetry topic filter value from “v1/devices/me/telemetry” to “RUT/”. Click on “Add” button;
-
Device Profile created.
Go to Profiles > Device profiles and click on “Add” button > “Create new device profile”;
Input Name field with “Teltonika routers” value. Select “Teltonika routers” imported rule chain from the step above;
Click on “Transport configuration” tab. Select MQTT transport type and change Telemetry topic filter value from “v1/devices/me/telemetry” to “RUT/”. Click on “Add” button;

Device Profile created.
创建设备
为简单起见,我们将通过UI手动添加设备:
-
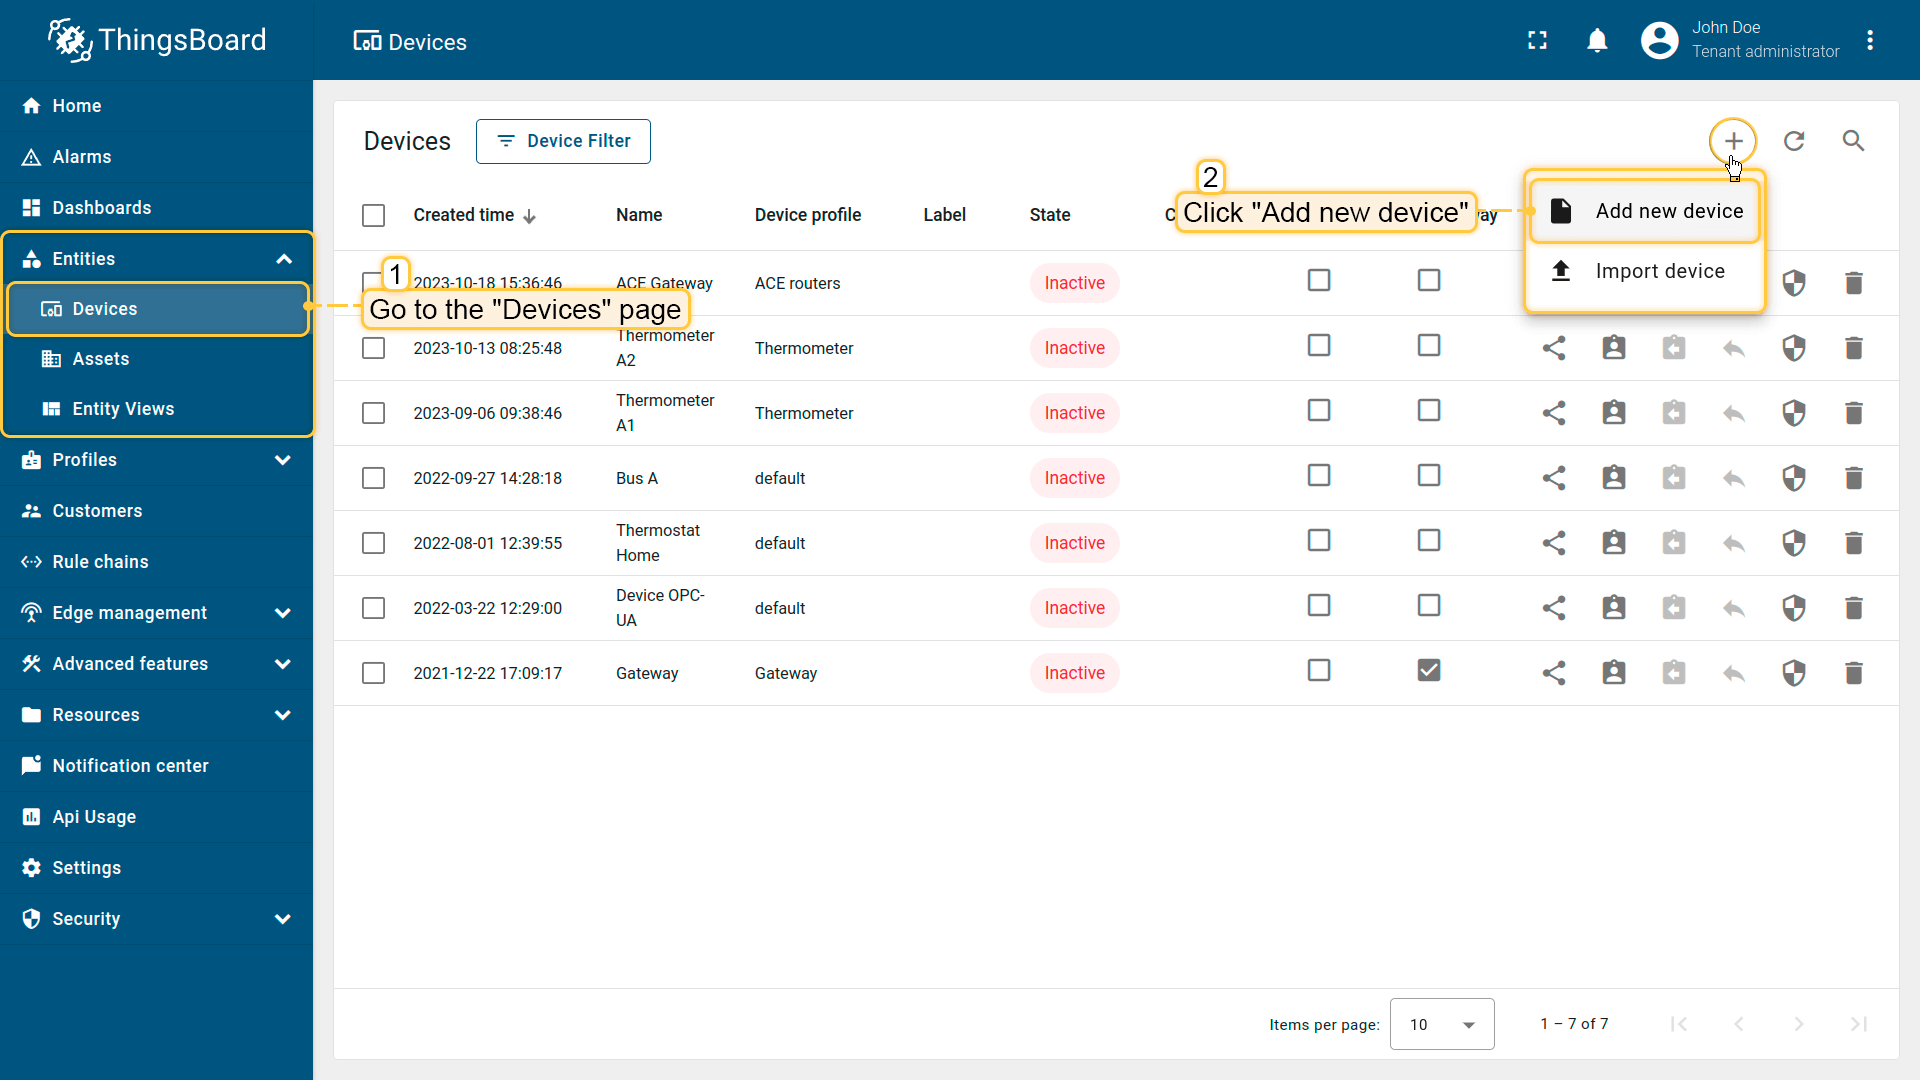
Open the Devices page. By default, you navigate to the device group “All”. Click on the “+” icon in the top right corner of the table and then select “Add new device”;
-
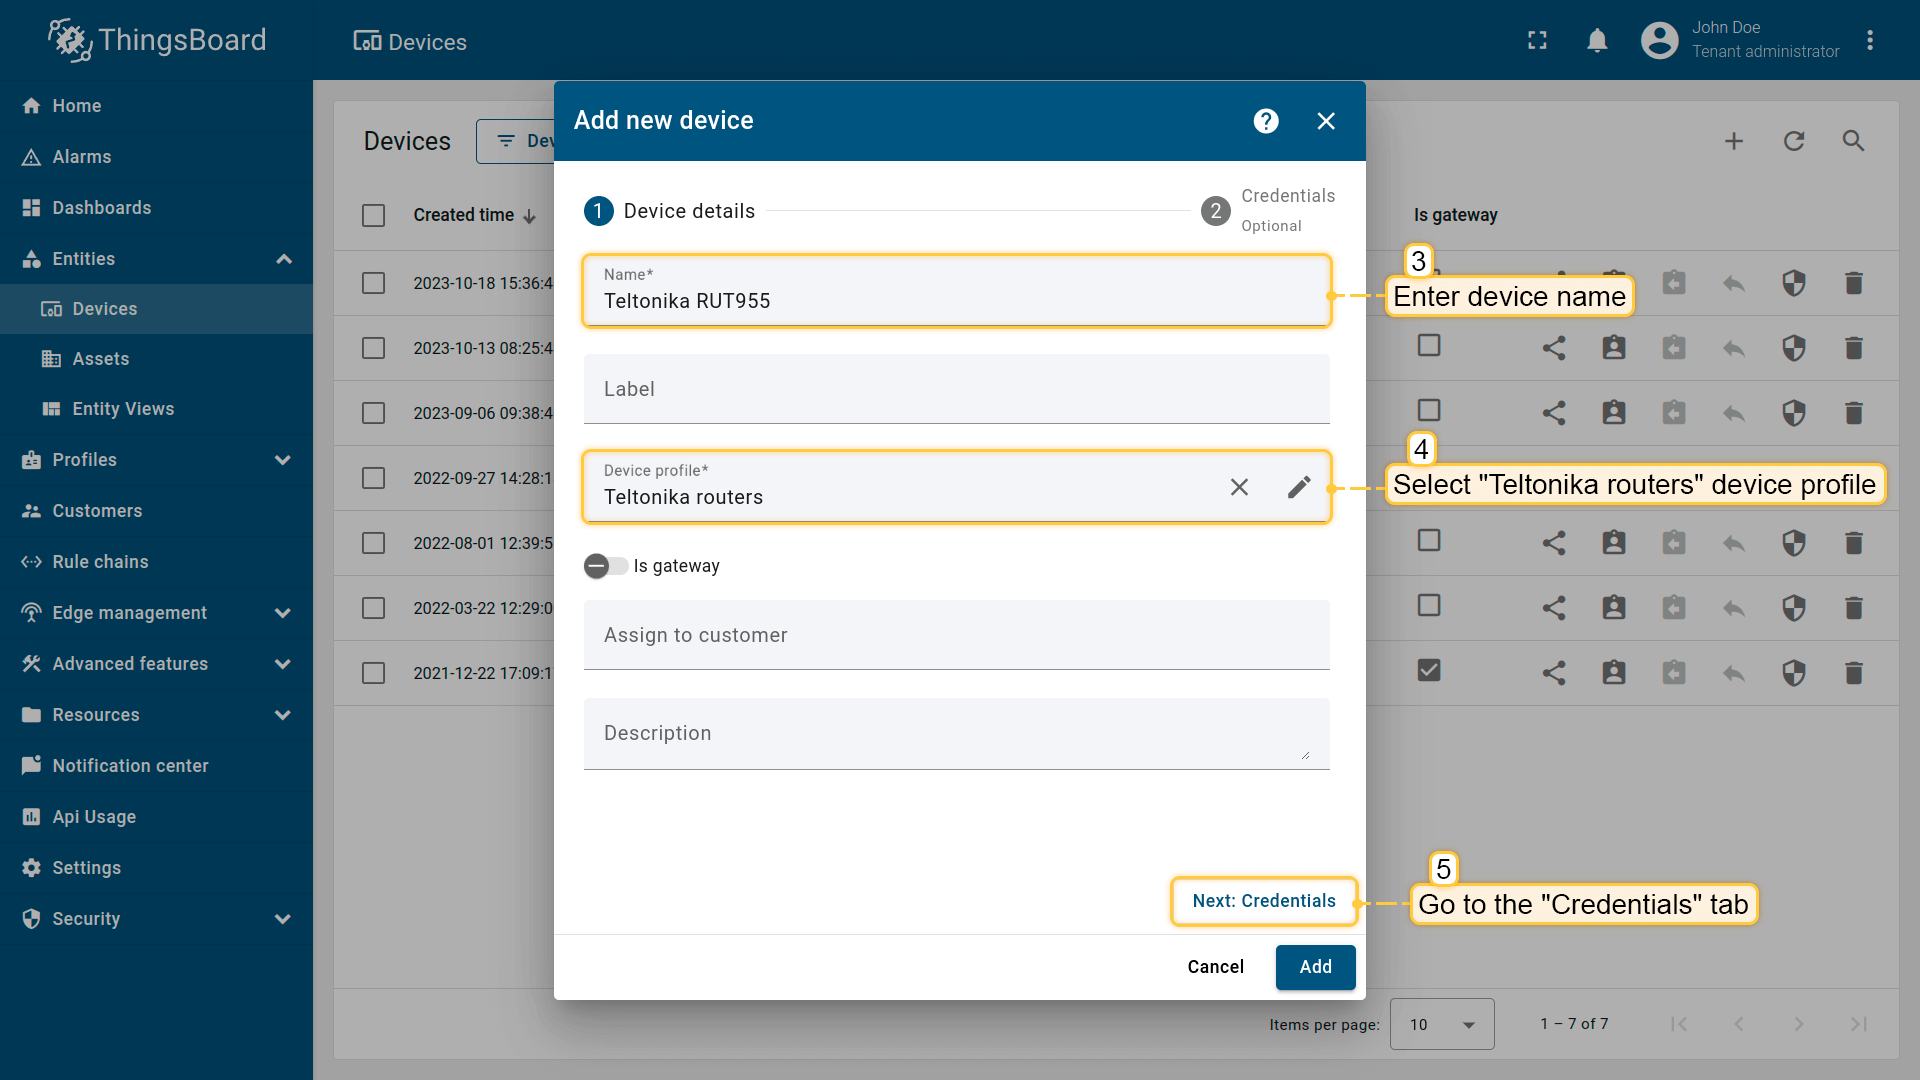
Input device name. For example, “Teltonika RUT955”. Select created device profile from the step above, in our case “Teltonika routers”;
-
Click on “Credentials” tab. Check “Add credentials” and select “MQTT Basic” credentials type. Click on “Generate” button on each field and click “Add” button;
-
Device added.
Open the Devices page. By default, you navigate to the device group “All”. Click on the “+” icon in the top right corner of the table and then select “Add new device”;
Input device name. For example, “Teltonika RUT955”. Select created device profile from the step above, in our case “Teltonika routers”;
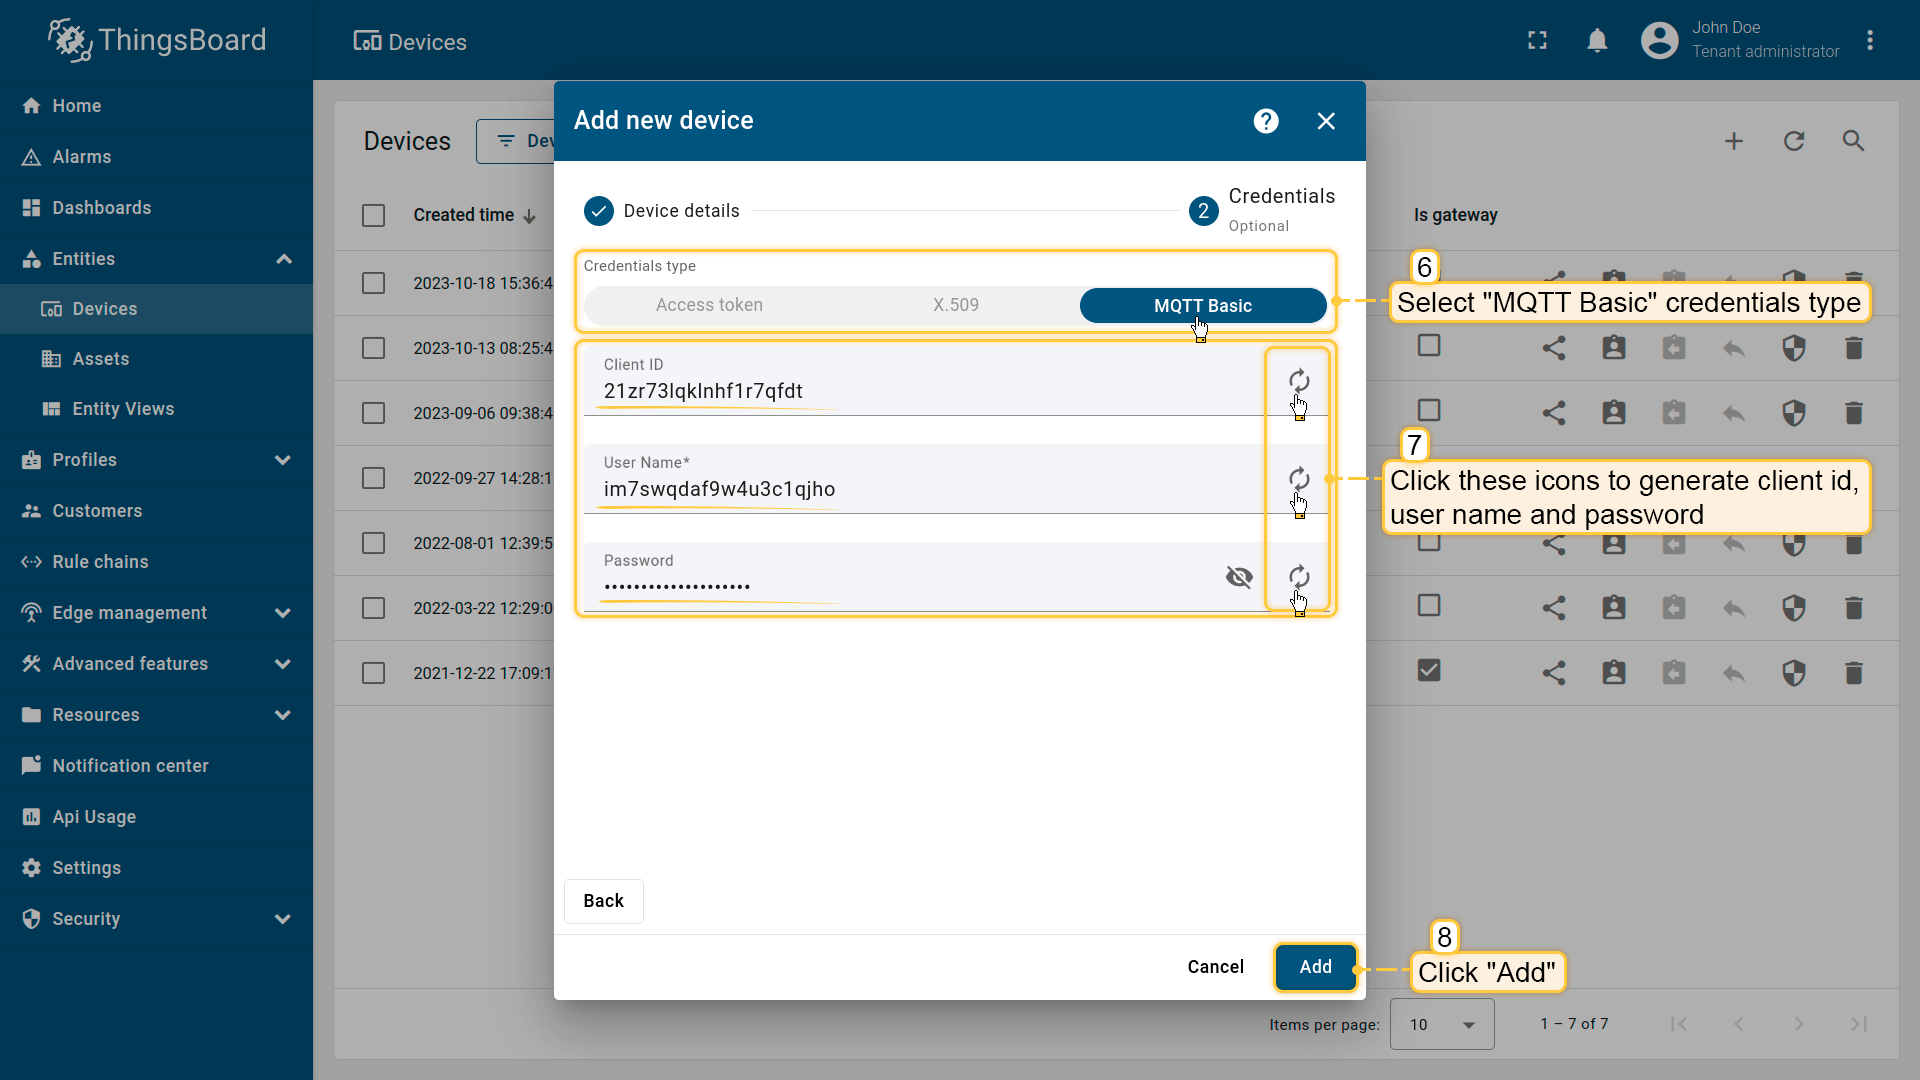
Click on “Credentials” tab. Check “Add credentials” and select “MQTT Basic” credentials type. Click on “Generate” button on each field and click “Add” button;

Device added.
网关连接
确保点击右上角 “Mode” 下的按钮启用 “ADVANCED”(高级) 模式。
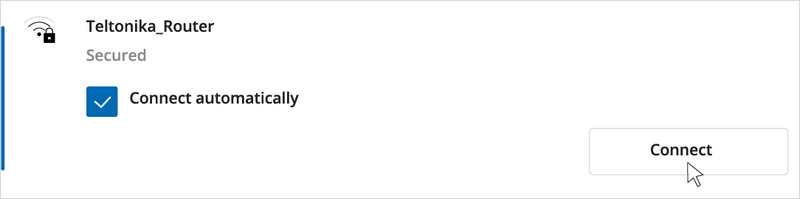
根据官方用户手册和本指南,您可以通过以下两种方式将网关连接到网络并访问WebUI:
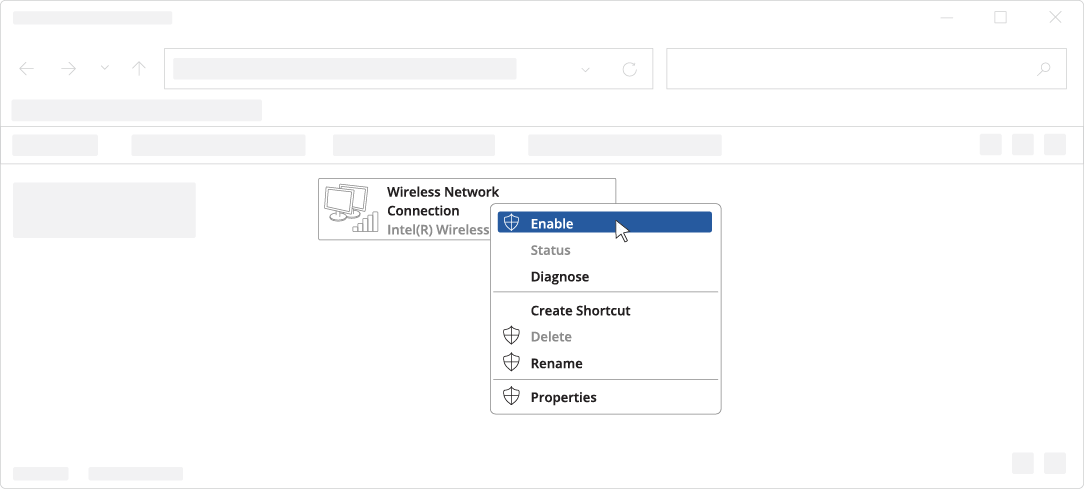 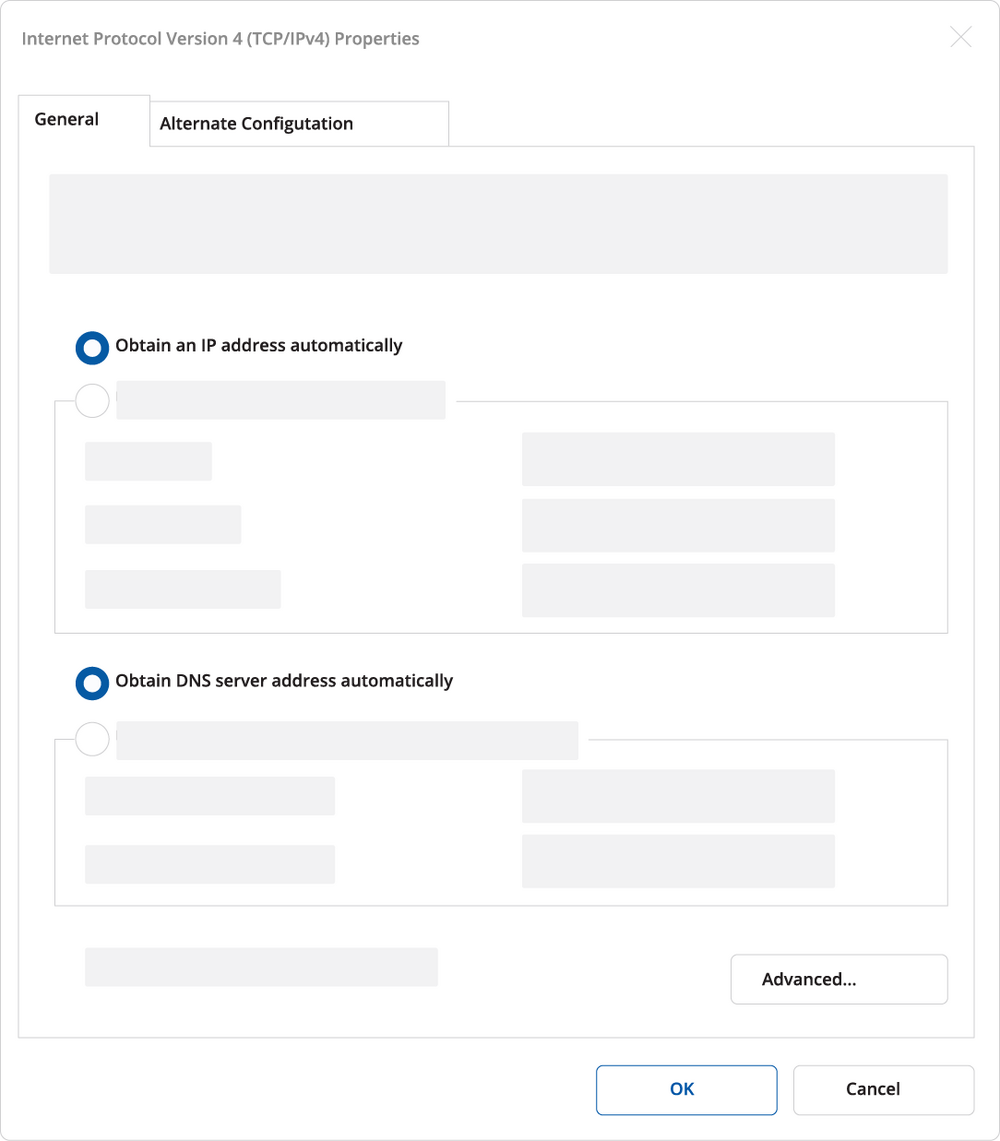 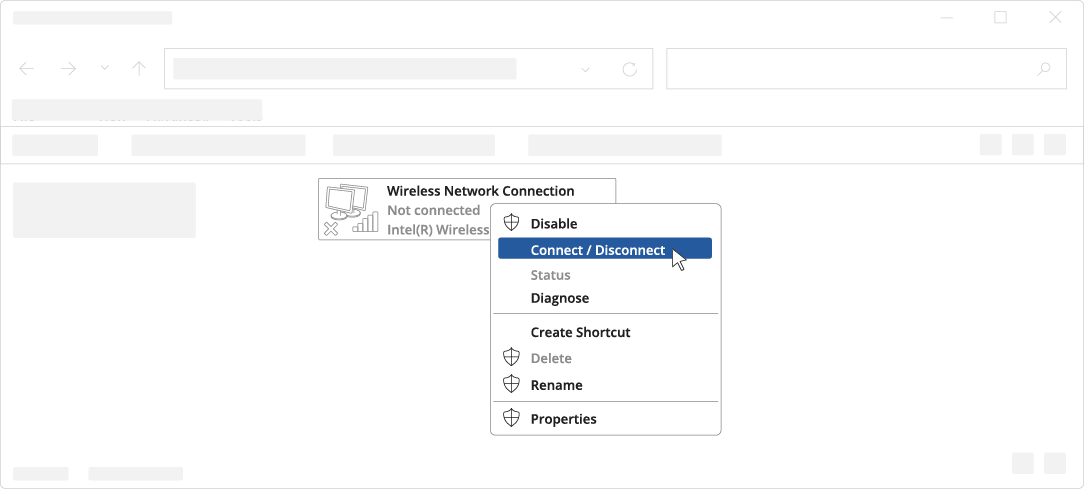  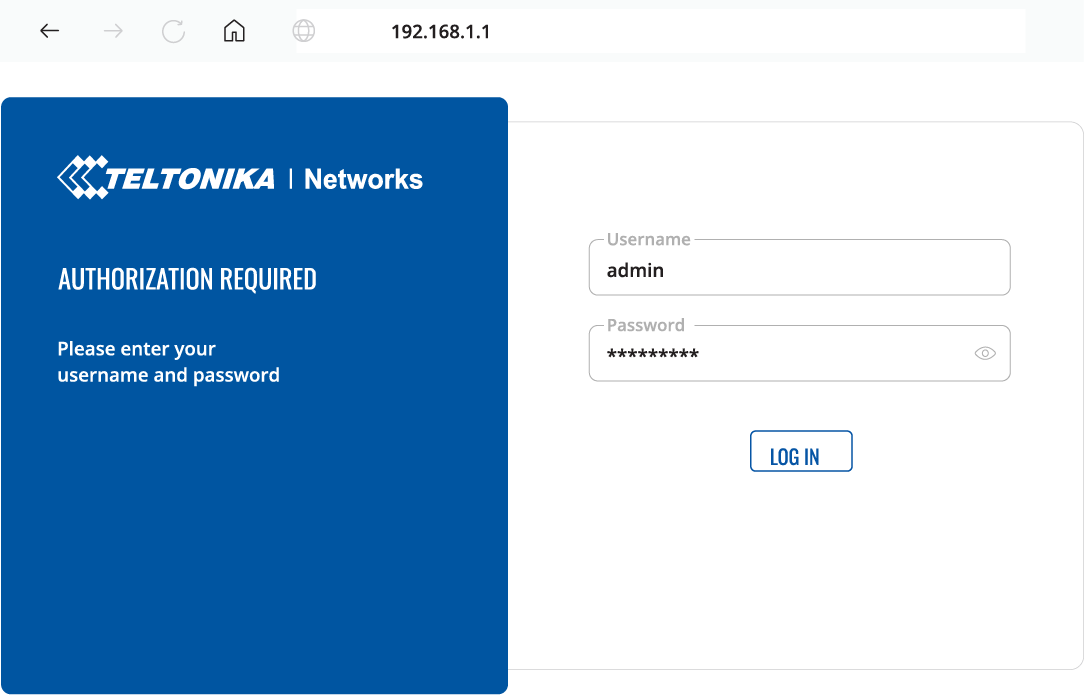 |
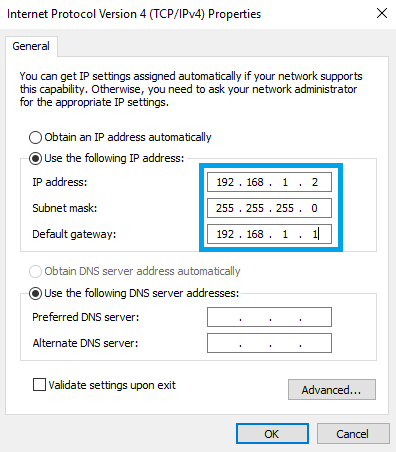
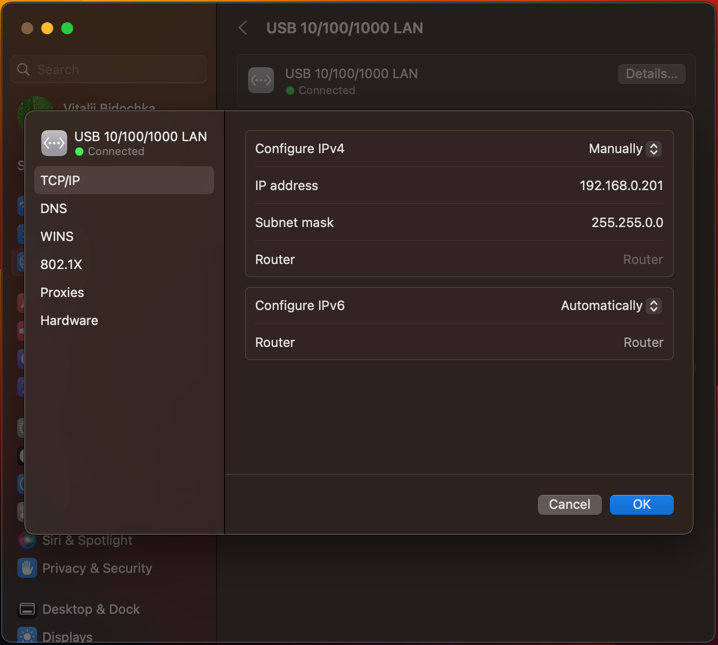
您的 PC 必须与网关处于同一网络:192.168.1.XXX。若非如此,请修改您 PC 的 IP 地址。 警告: 请勿使用您网络中已被其他设备占用的 IP 地址! Windows:
macOS:
Ubuntu Linux:
|
现在可以配置网关。
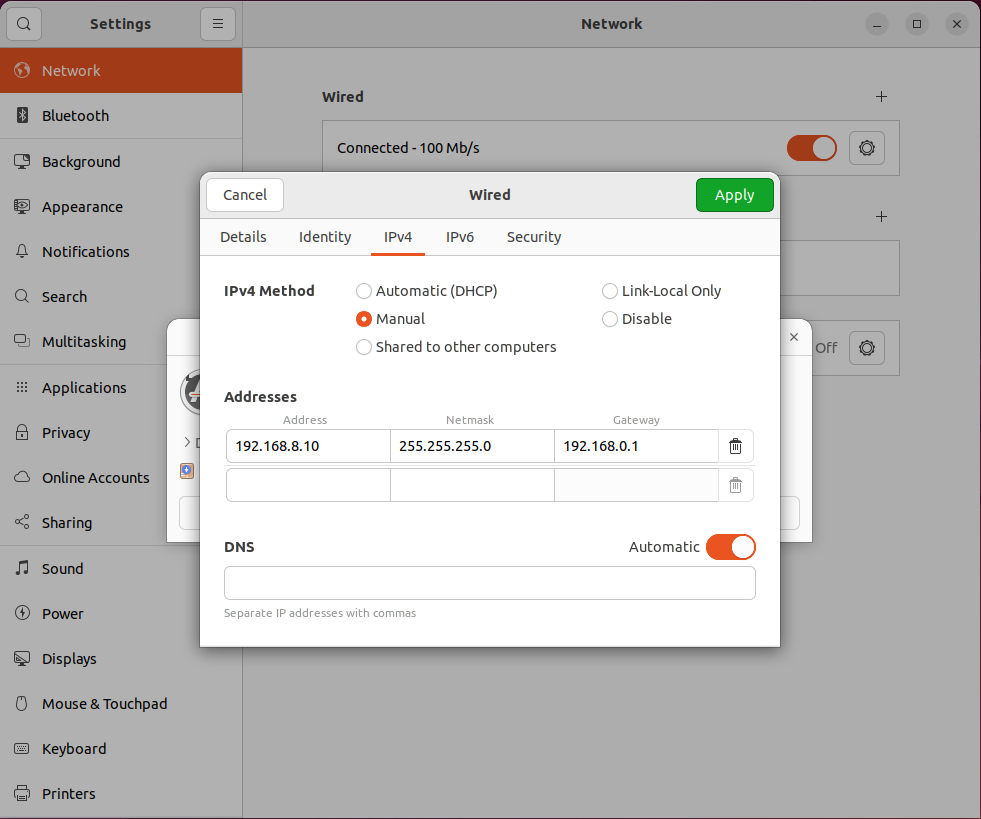
连接到 Teltonika RUT955 后,可以根据需要更改其IP地址:
- 进入 Interfaces > General;
- 点击 “lan” 接口的 “Edit”(编辑) 按钮;
- 输入网络中未被其他设备使用的新IP地址。
现在准备配置MQTT连接和数据收发主题,并建立Modbus连接。
首先配置Modbus连接。如上所述,我们使用带AM2 RTD模块(用于连接PT100)的Siemens LOGO!,它是简单控制和调节任务的快速、便捷、紧凑解决方案。LOGO!作为智能逻辑模块,在小型自动化项目中早已广泛应用。
本例中,以下是在LOGO! Soft Comfort中创建的数据读取和处理图:
![]()
别忘了启用TCP连接。
![]()
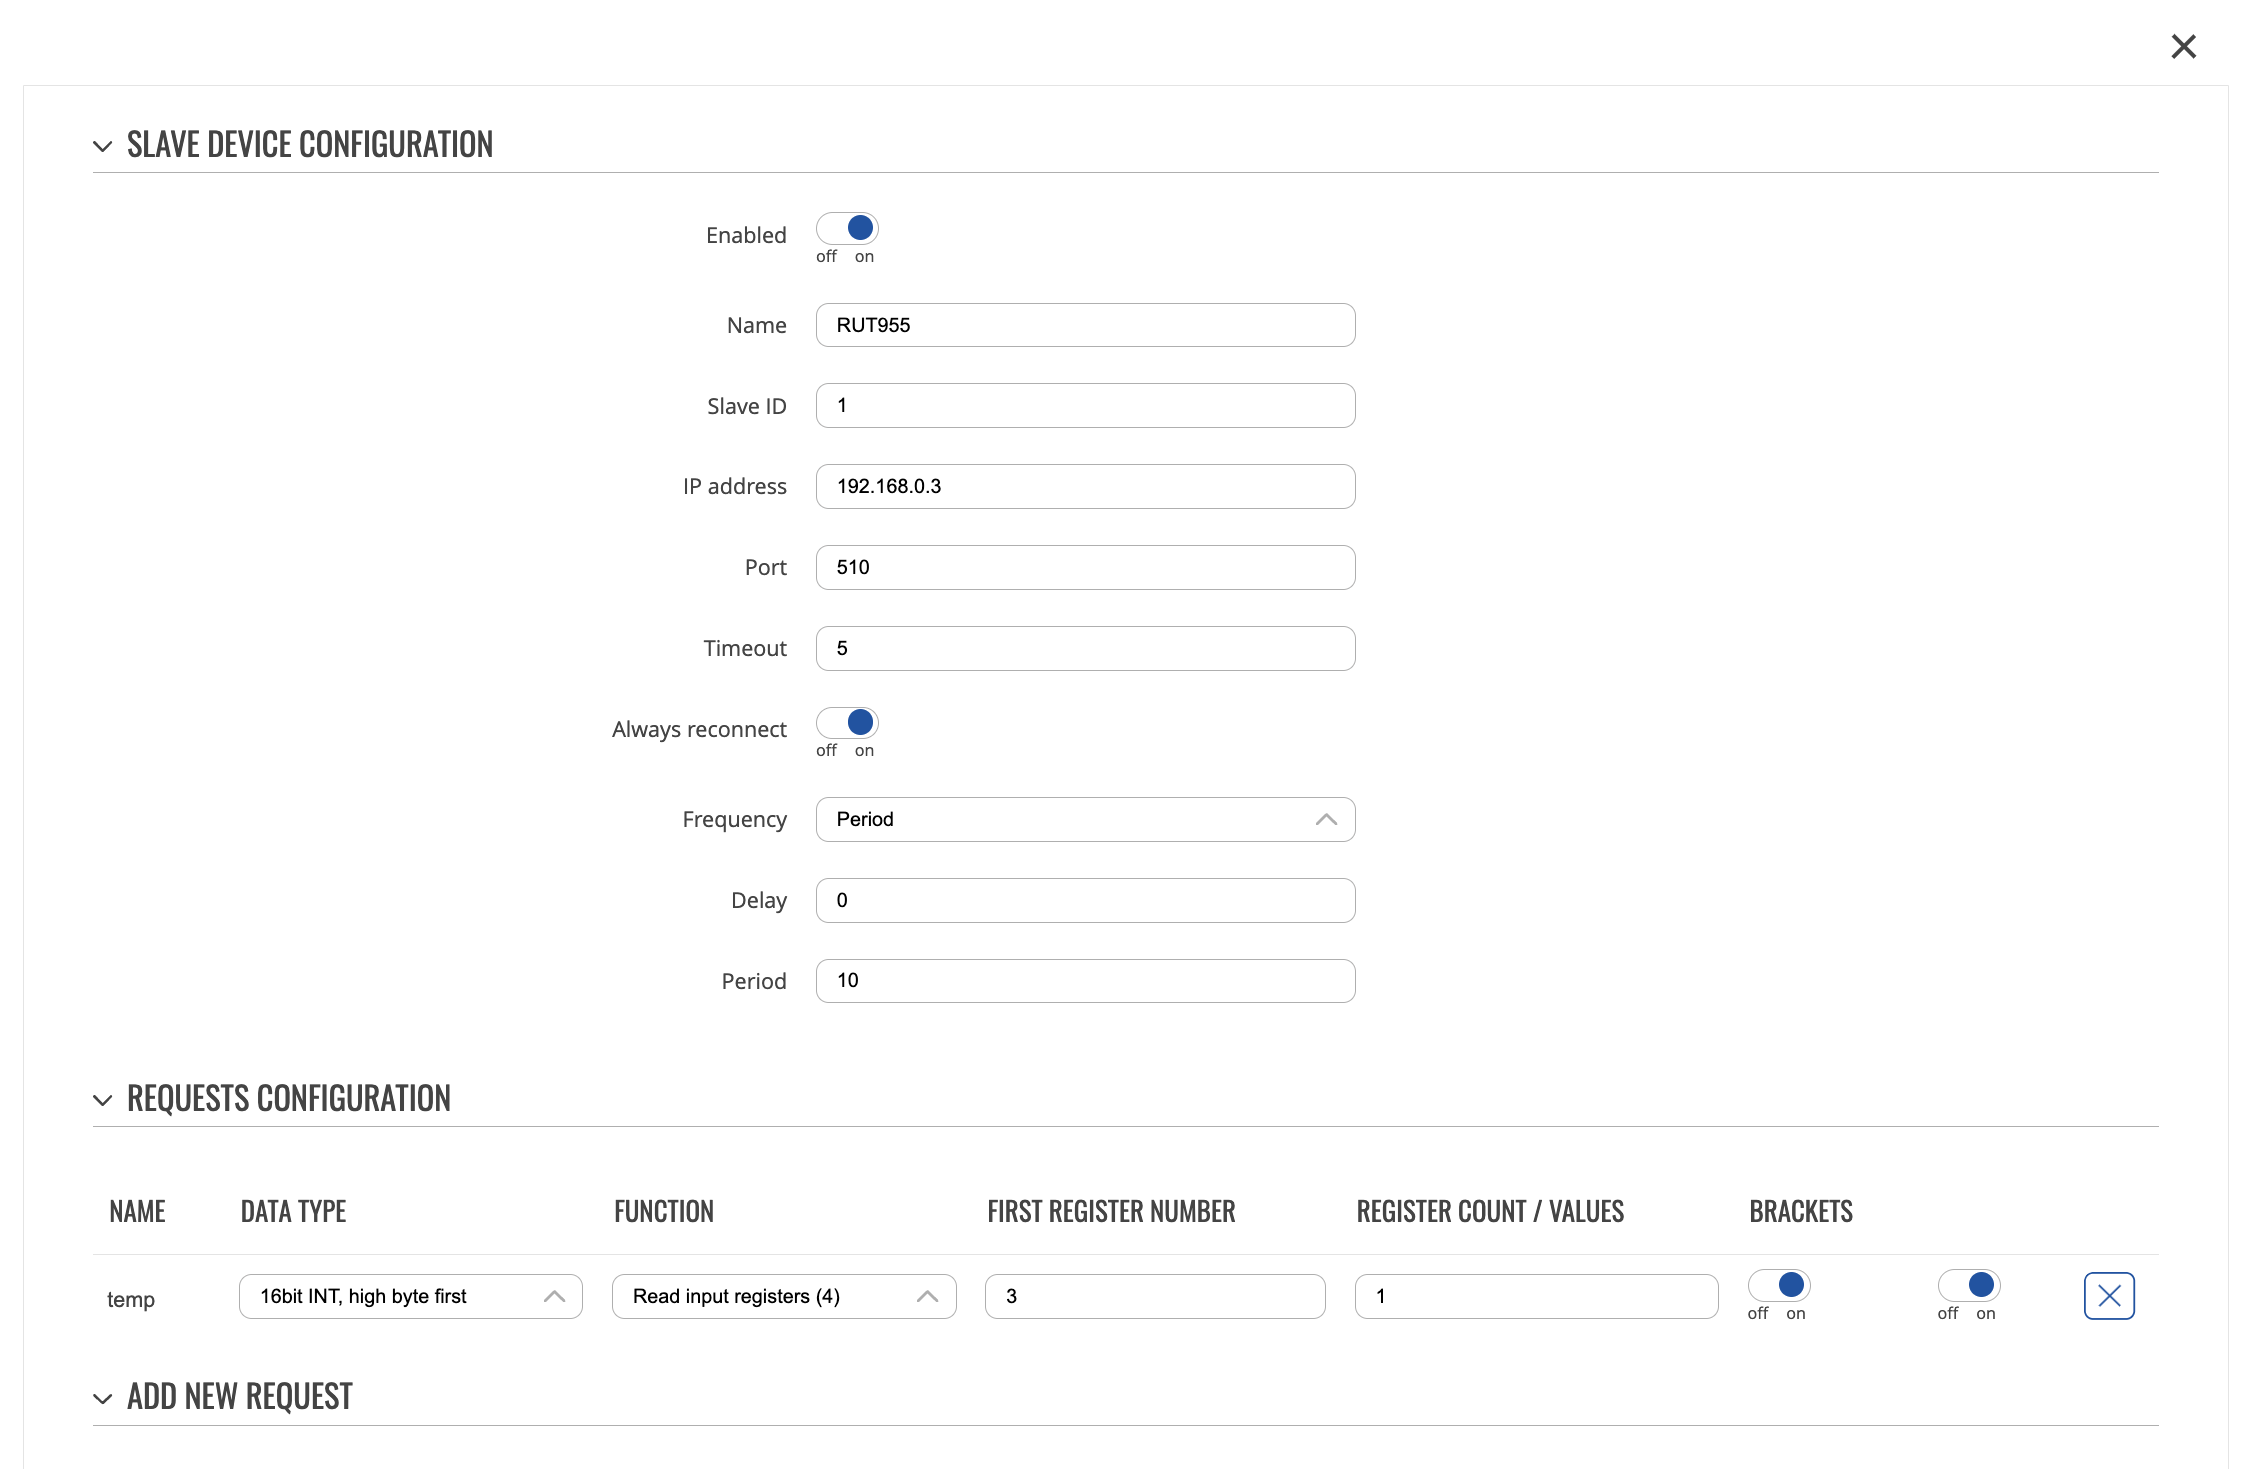
同时,需要添加Modbus从设备配置。请按以下步骤操作:
- 进入 Services > Modbus > Modbus TCP Master;
- 点击 “ADD” 按钮;
- 填写所有必填字段,输入您设备的正确信息;
- 向下滚动到 “REQUESTS CONFIGURATION” 部分;
- 添加您想要读取数据的所有寄存器;
- 点击 “Save & Apply” 按钮。
本例的设置如下:
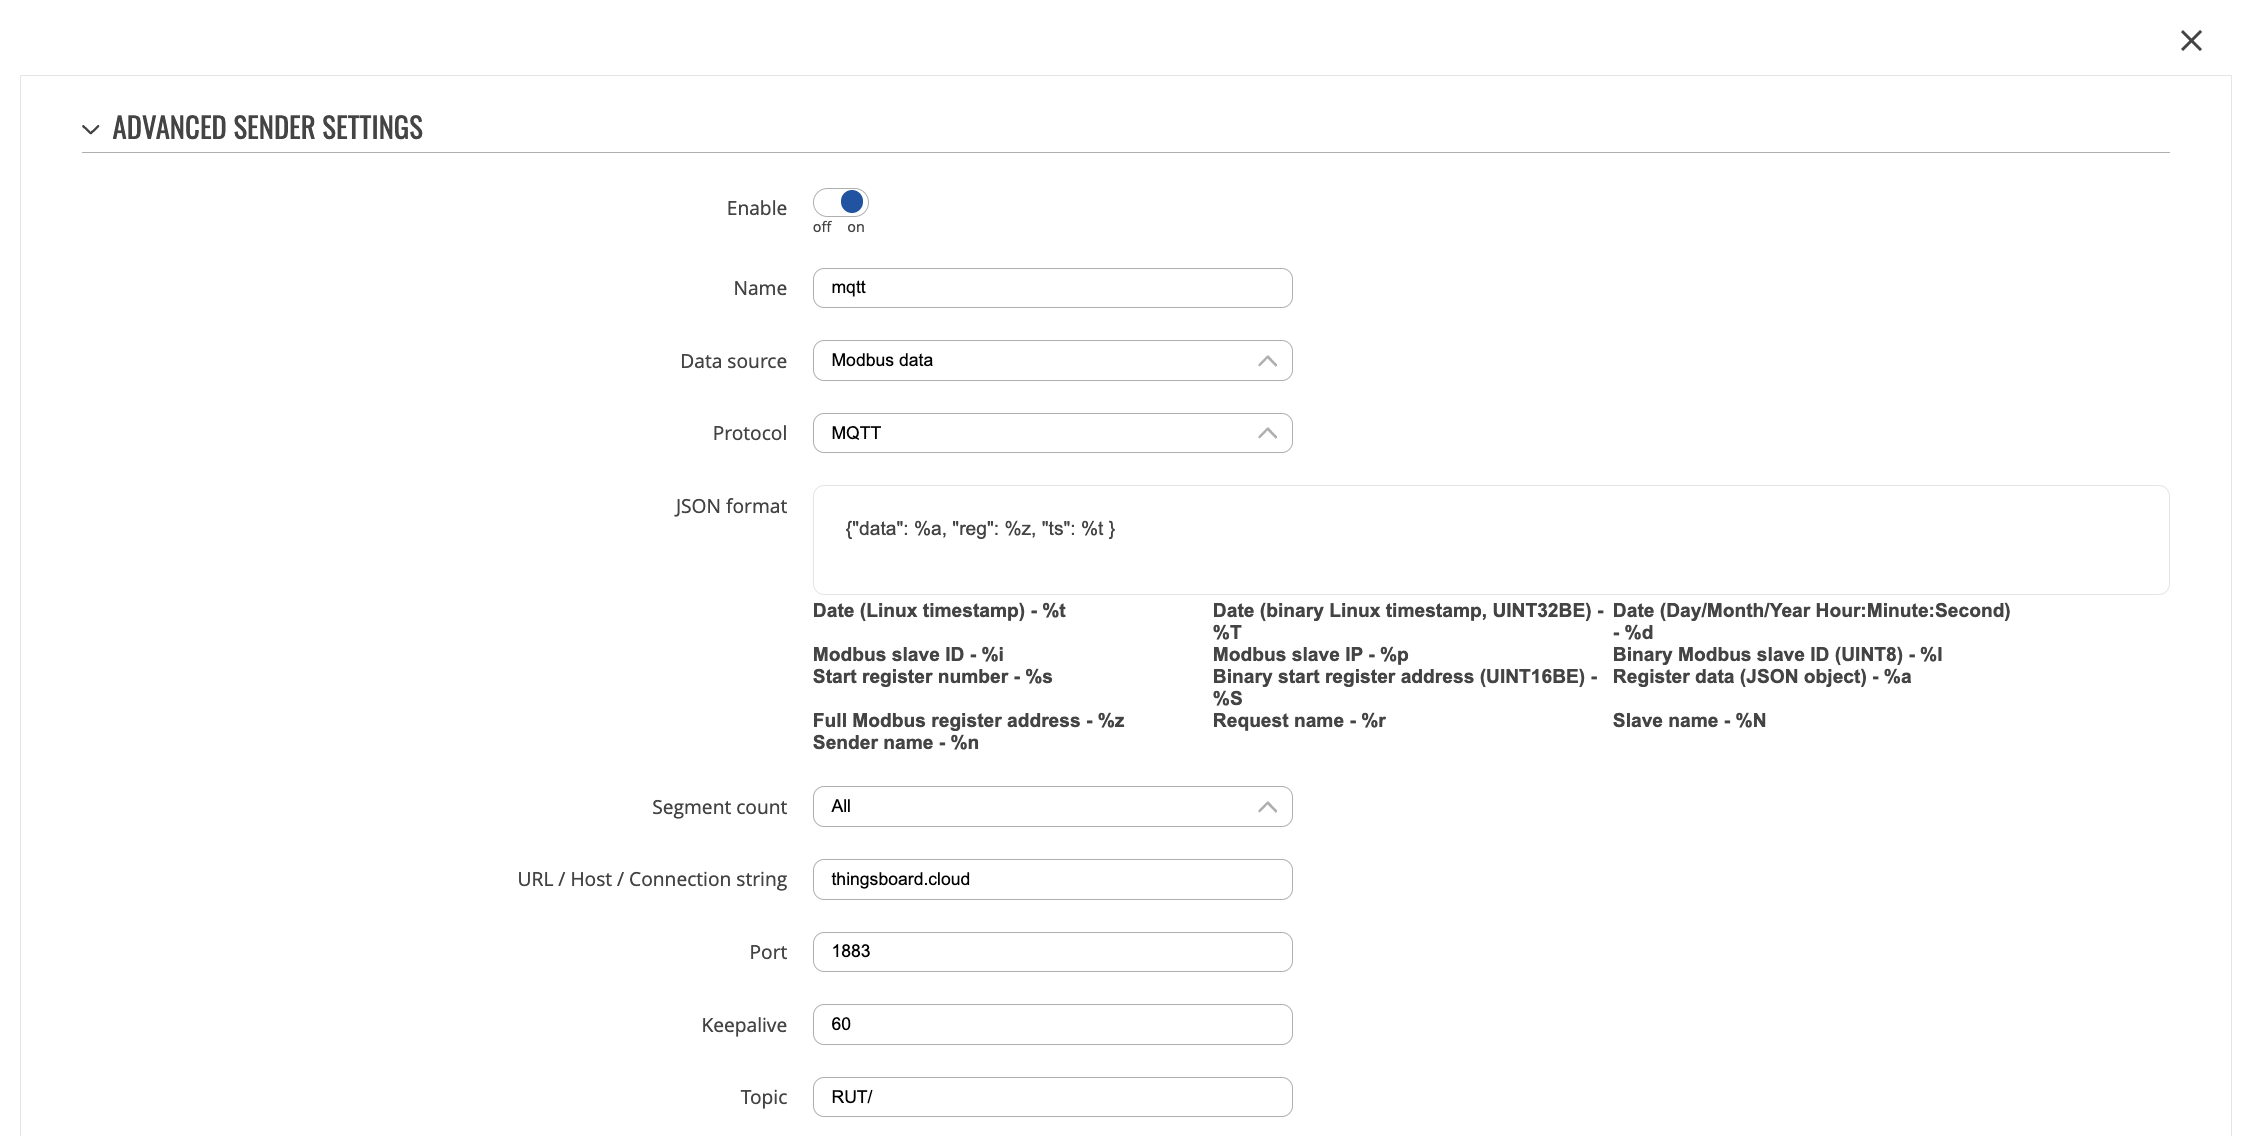
接下来需要配置Data Sender。请按以下步骤操作:
- 进入 Services > Data to Server;
- 点击 “ADD” 按钮;
- 填写所有必填字段,输入正确的broker凭据和其他信息;
- 点击 “Save & Apply” 按钮。
本例的设置如下:
如果一切操作正确,您应该会收到以下MQTT消息:
1
{"data": 299, "reg": 300003, "ts": 1696838802}
在ThingsBoard上查看数据
完成上述步骤且 Teltonika RUT955 已发送数据后,可在设备遥测选项卡中查看:
-
点击表格中的设备行以打开设备详情;
-
导航至遥测选项卡。
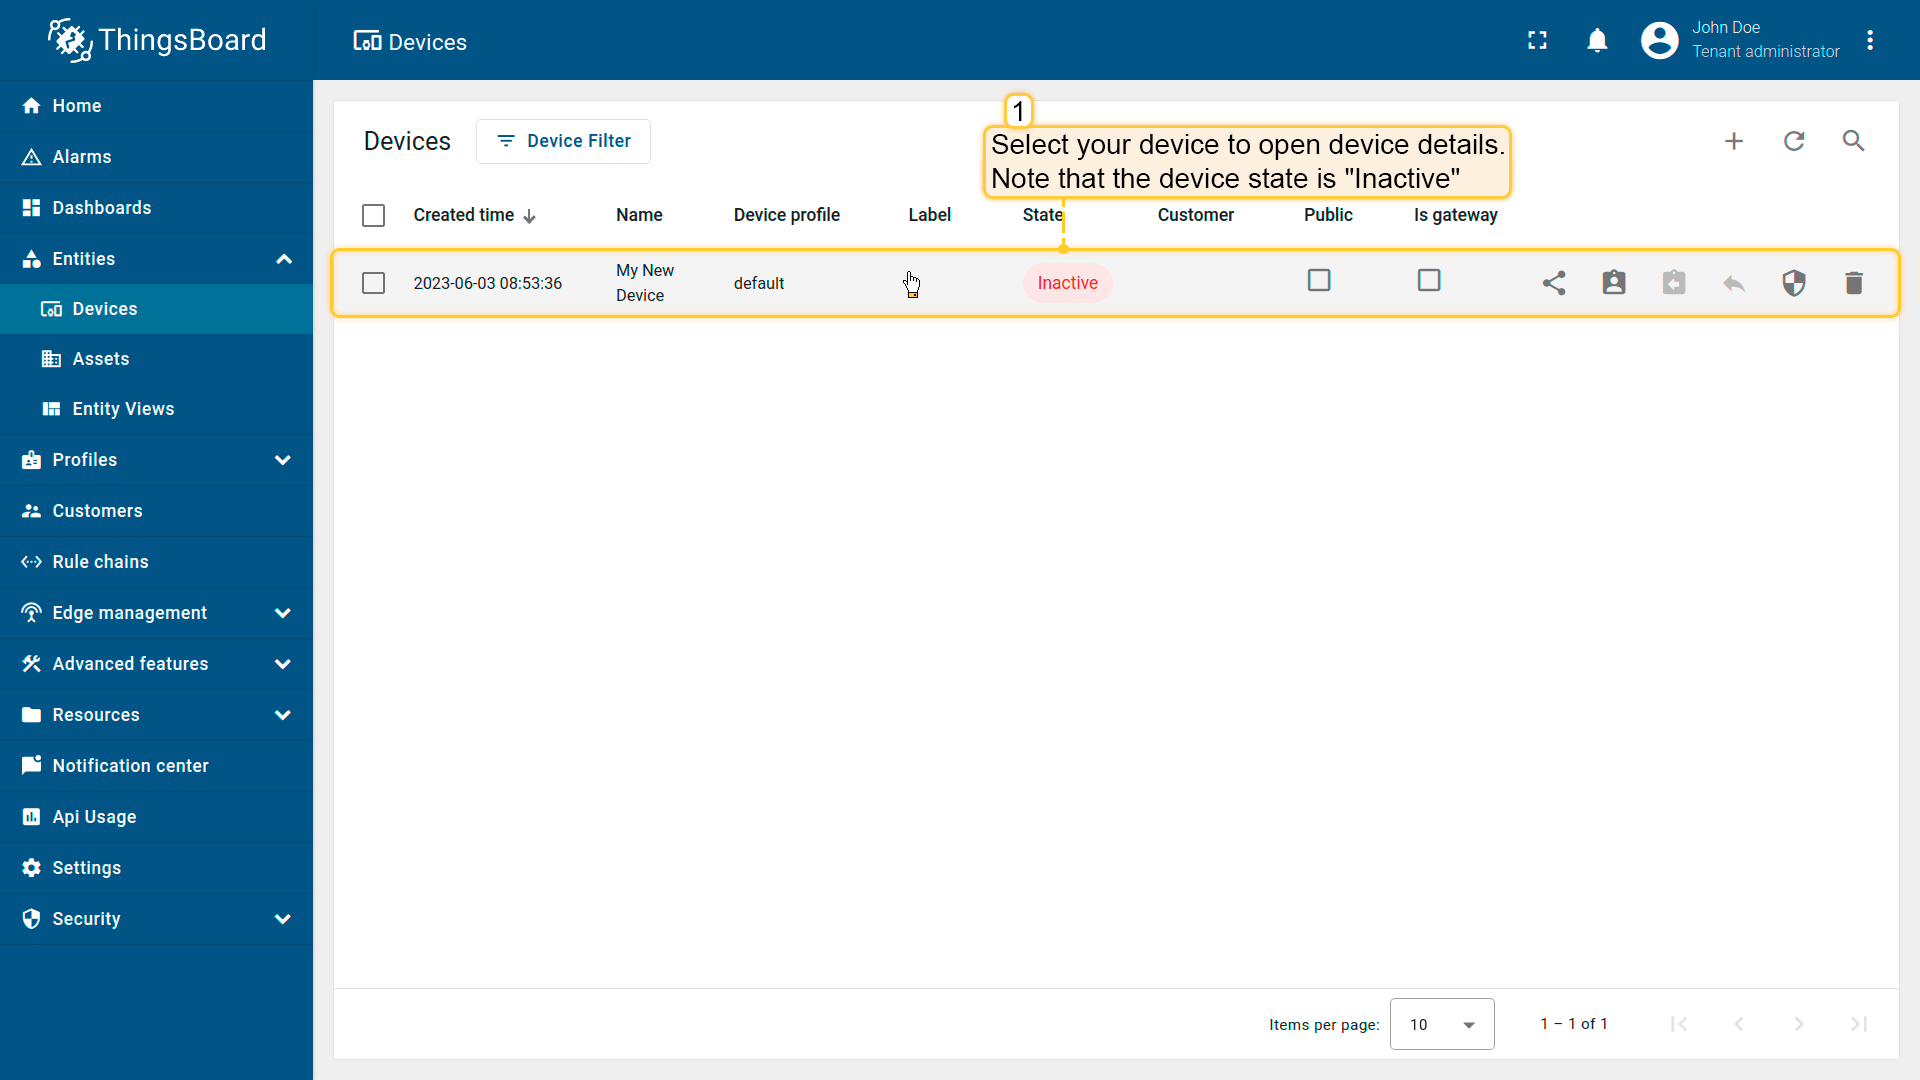
点击表格中的设备行以打开设备详情;
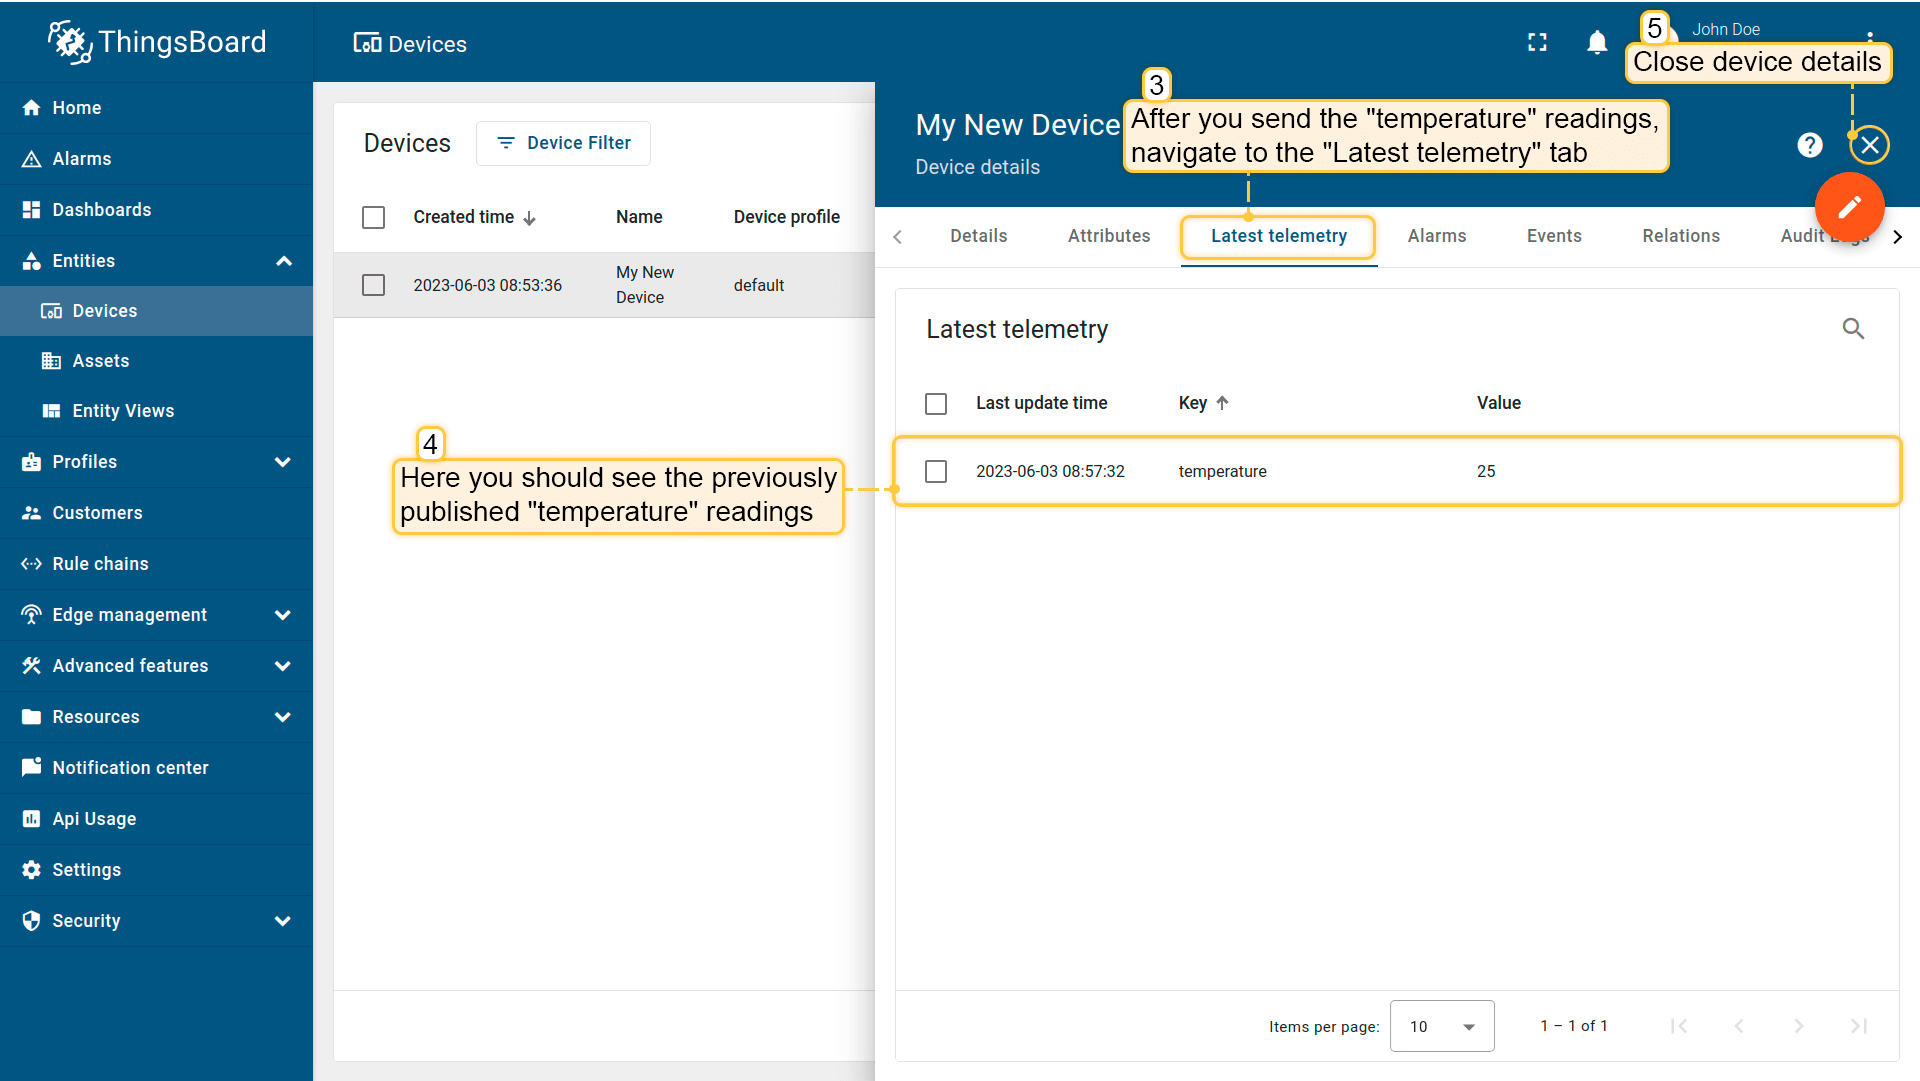
导航至遥测选项卡。
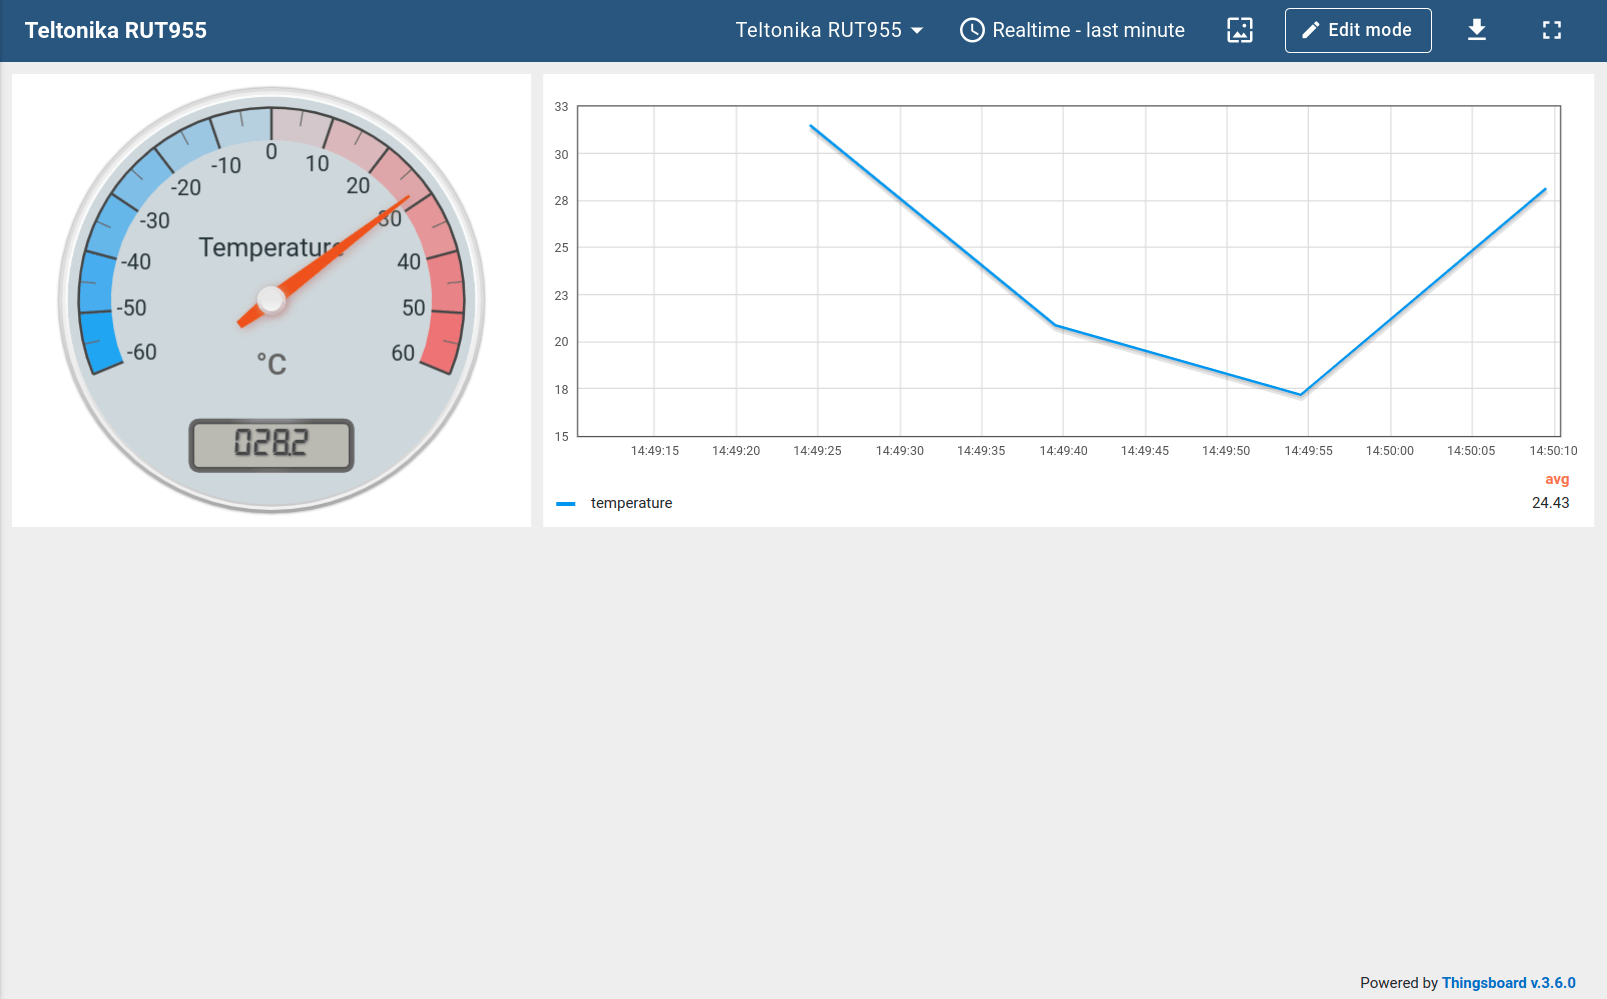
可将 Teltonika RUT955 的属性和遥测显示在仪表板上。您可以使用自定义部件创建自己的仪表板,或导入现成仪表板。
导入仪表盘下载 检查设备数据仪表盘 并导入。 您可导入 JSON 格式的仪表盘。要导入仪表盘,请进入「仪表盘」组,点击页面右上角的 「+」 按钮,选择 「导入仪表盘」。仪表盘导入窗口将弹出,系统会提示您上传 JSON 文件并点击 「导入」。 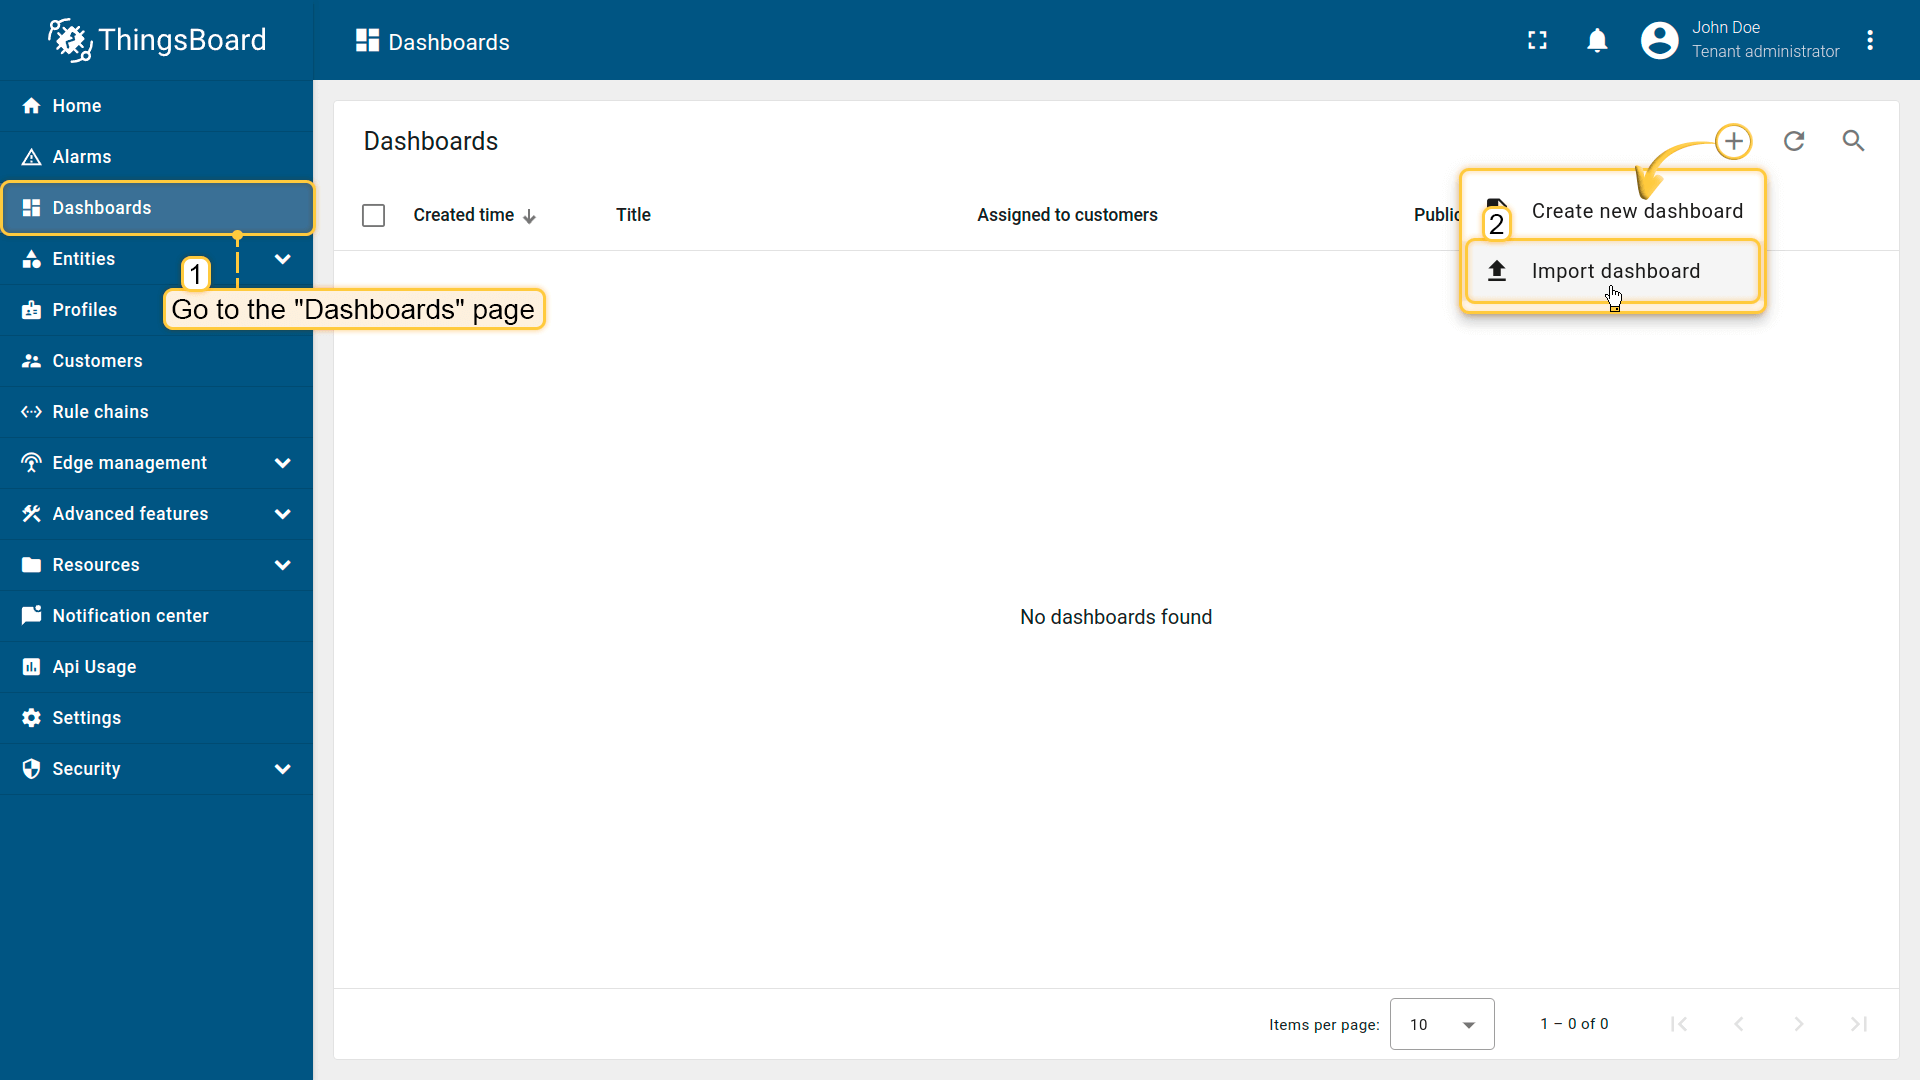 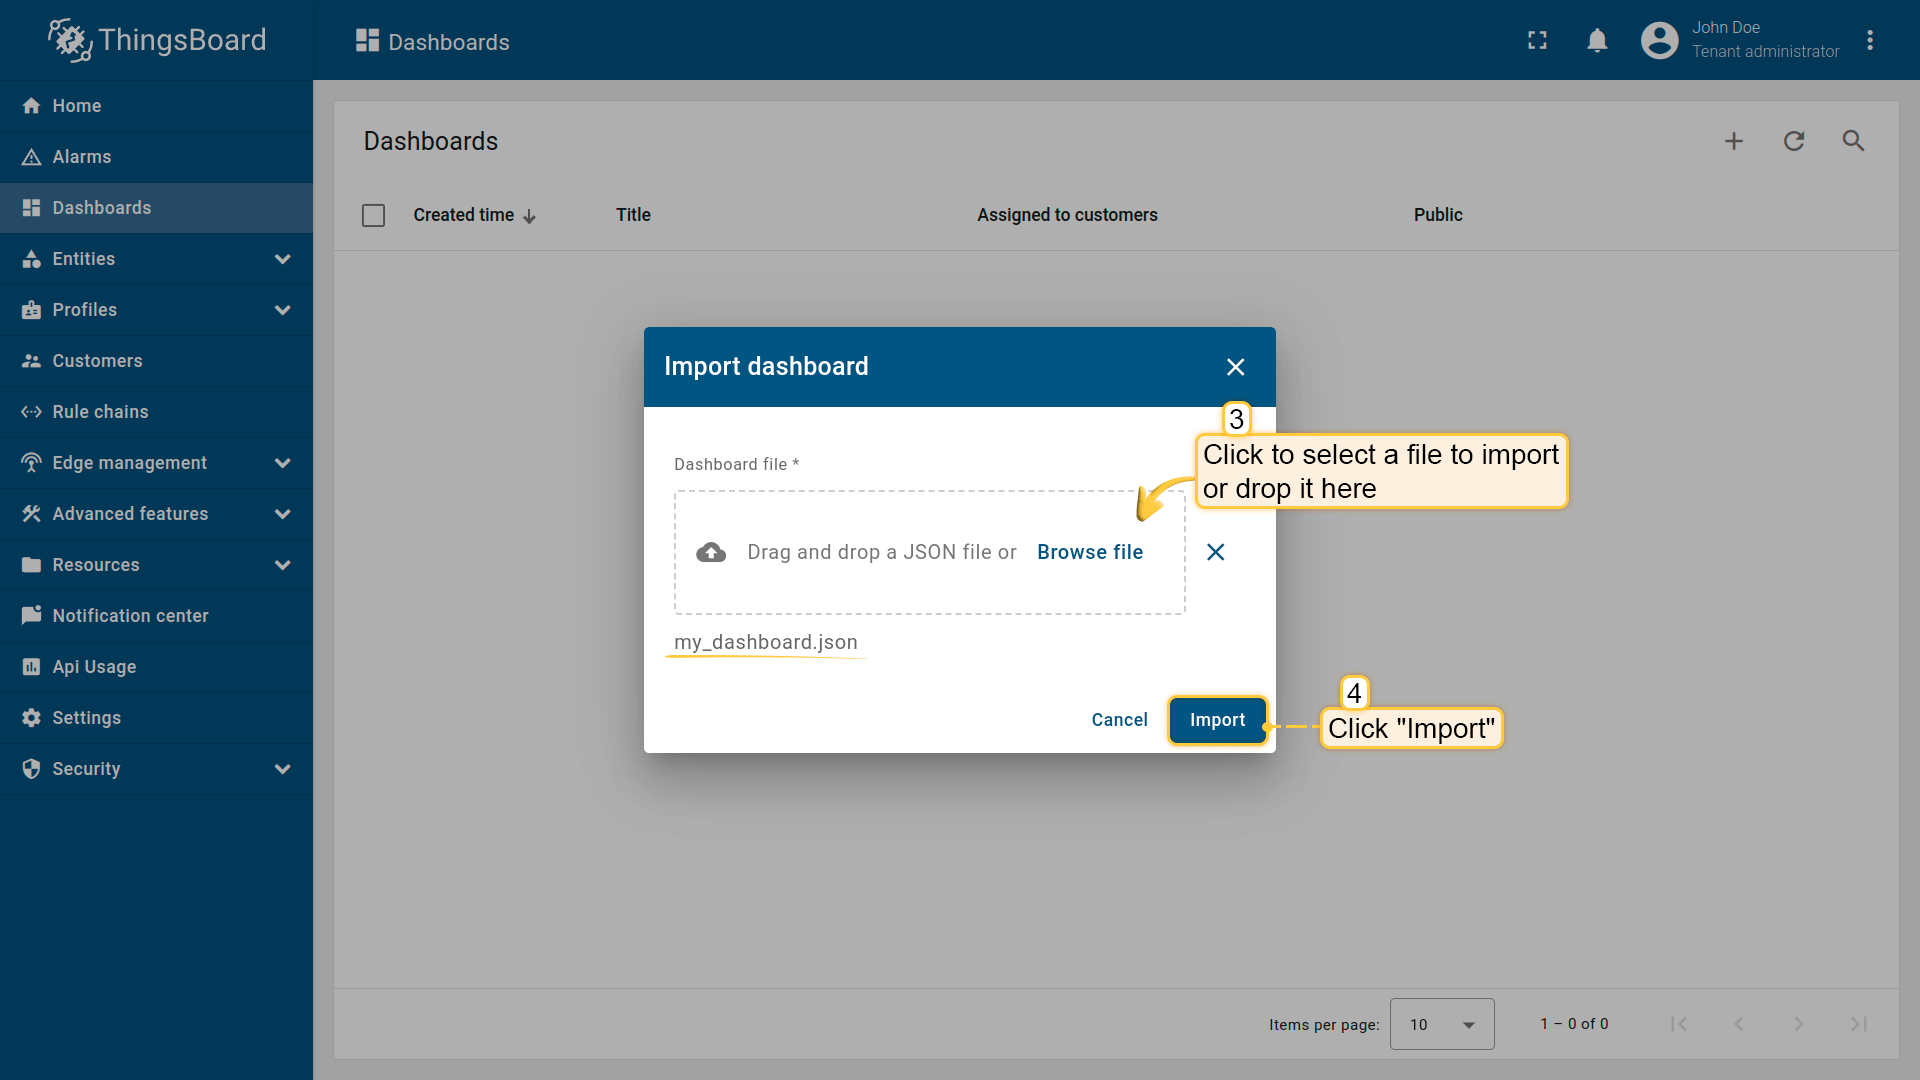 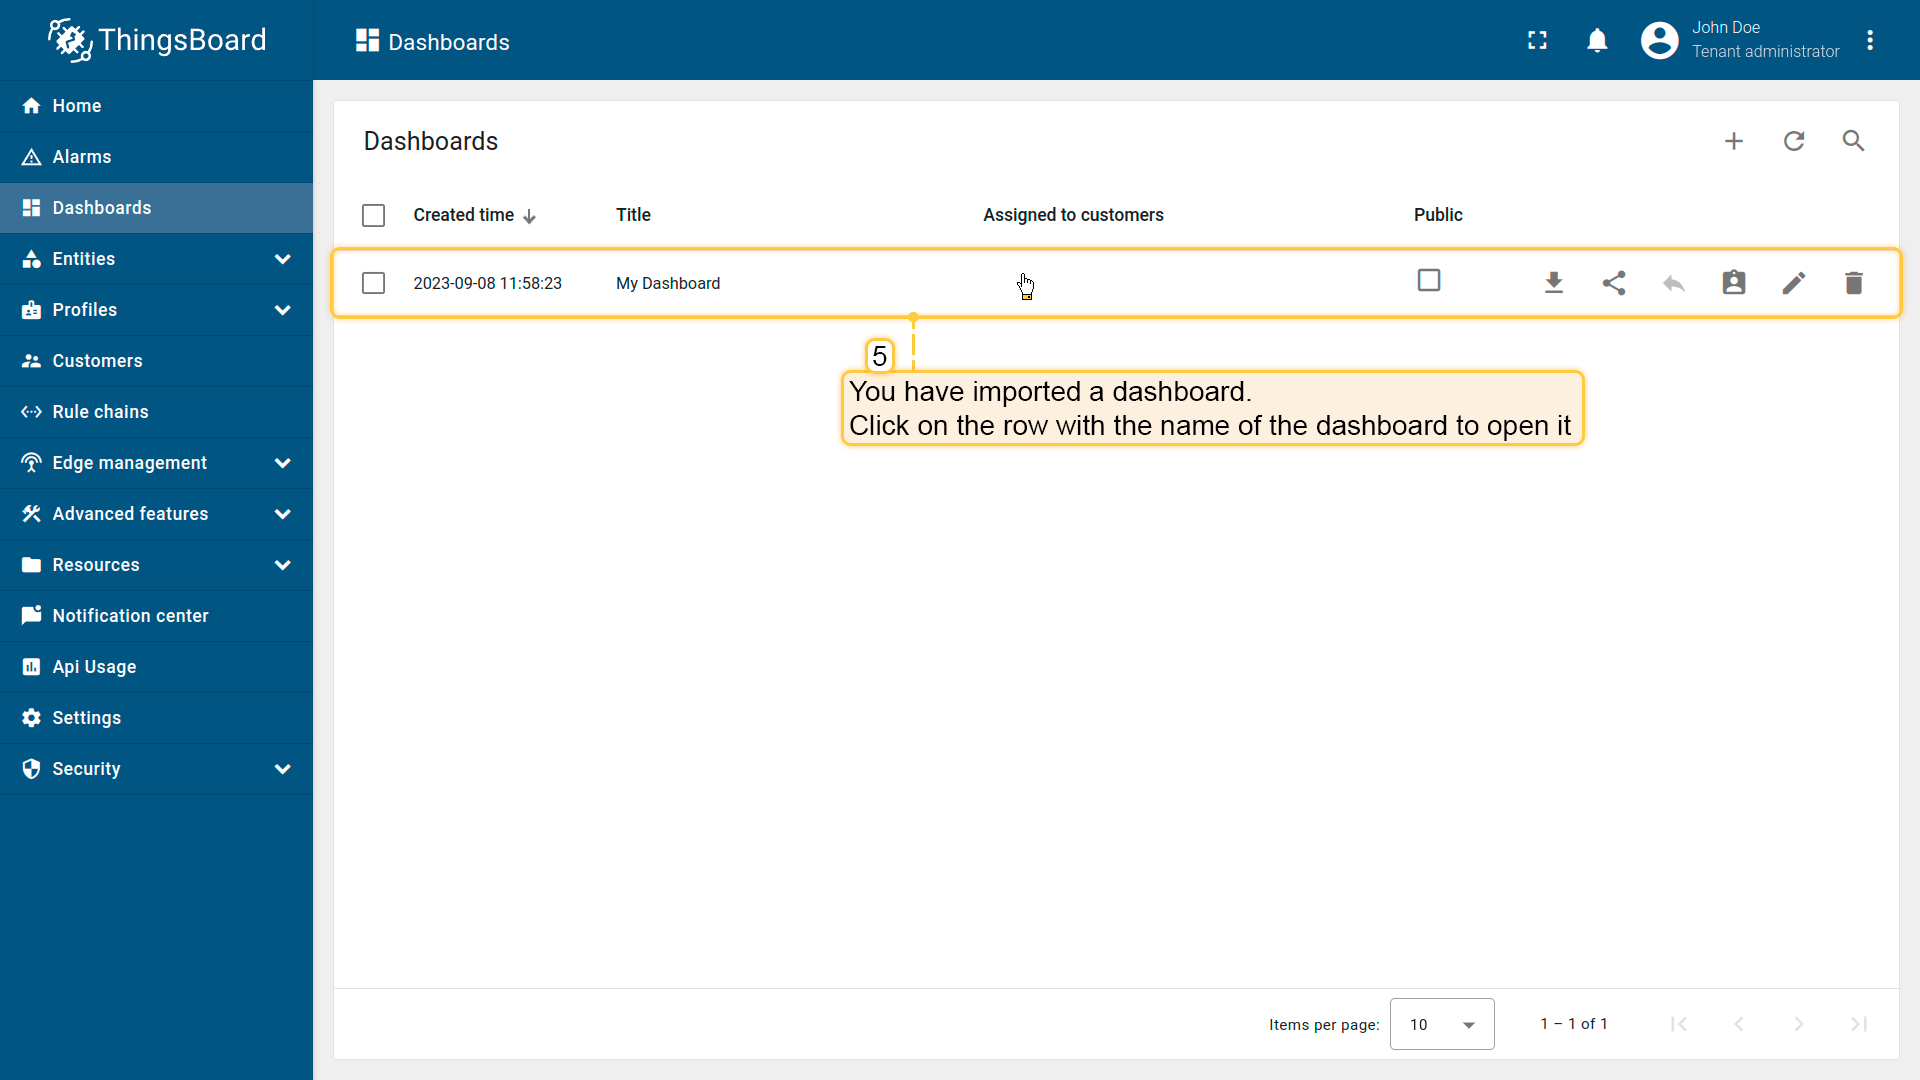 导入后,我们需要为设备选择实体别名。 操作方式:点击铅笔图标并选择实体别名,选择别名 「My device」 并点击铅笔图标打开编辑。 然后,从下拉列表中选择名为 My device 的设备并保存实体别名。完成后即可查看设备数据。 若操作正确,您将看到以下仪表盘:
|
创建新仪表盘我们将创建仪表盘并添加最常用的部件。请参见下方说明。
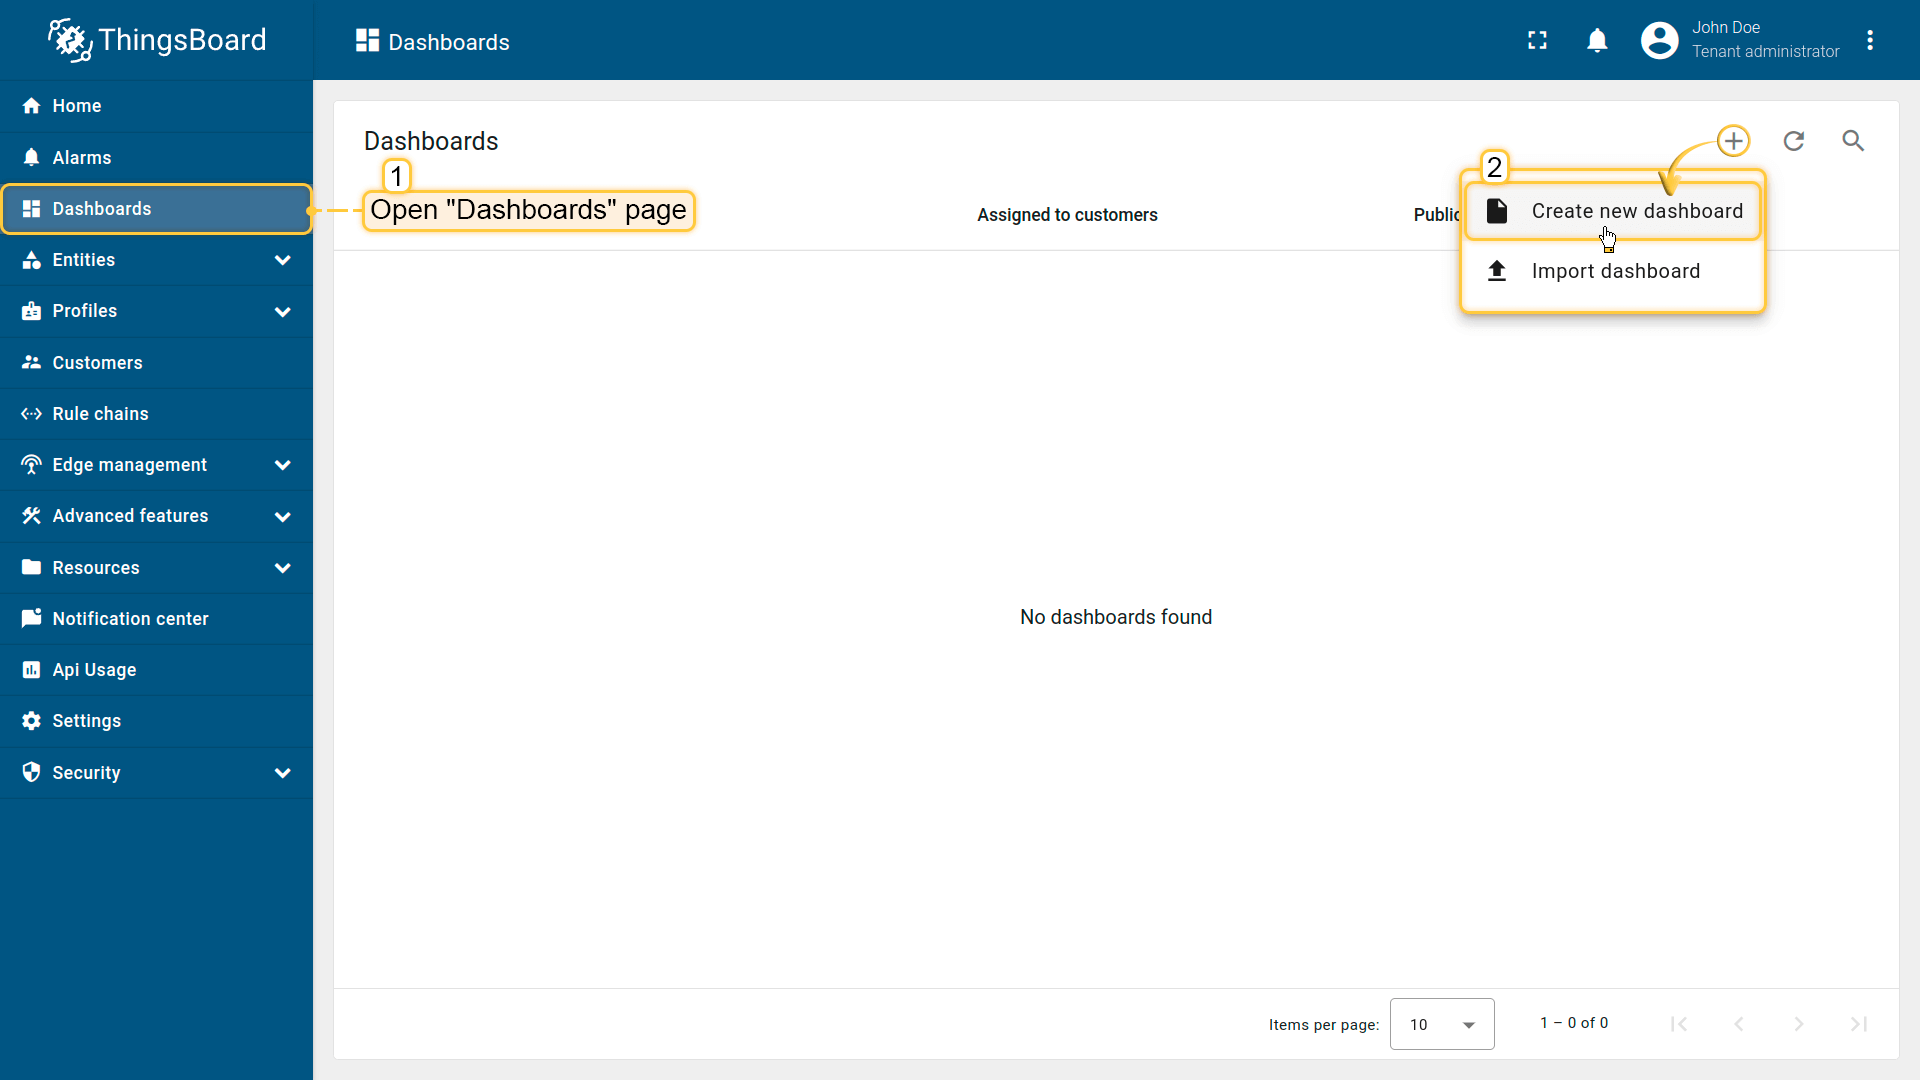 Open the Dashboards page. Click on the “+” icon in the top right corner. Select “Create new dashboard”; 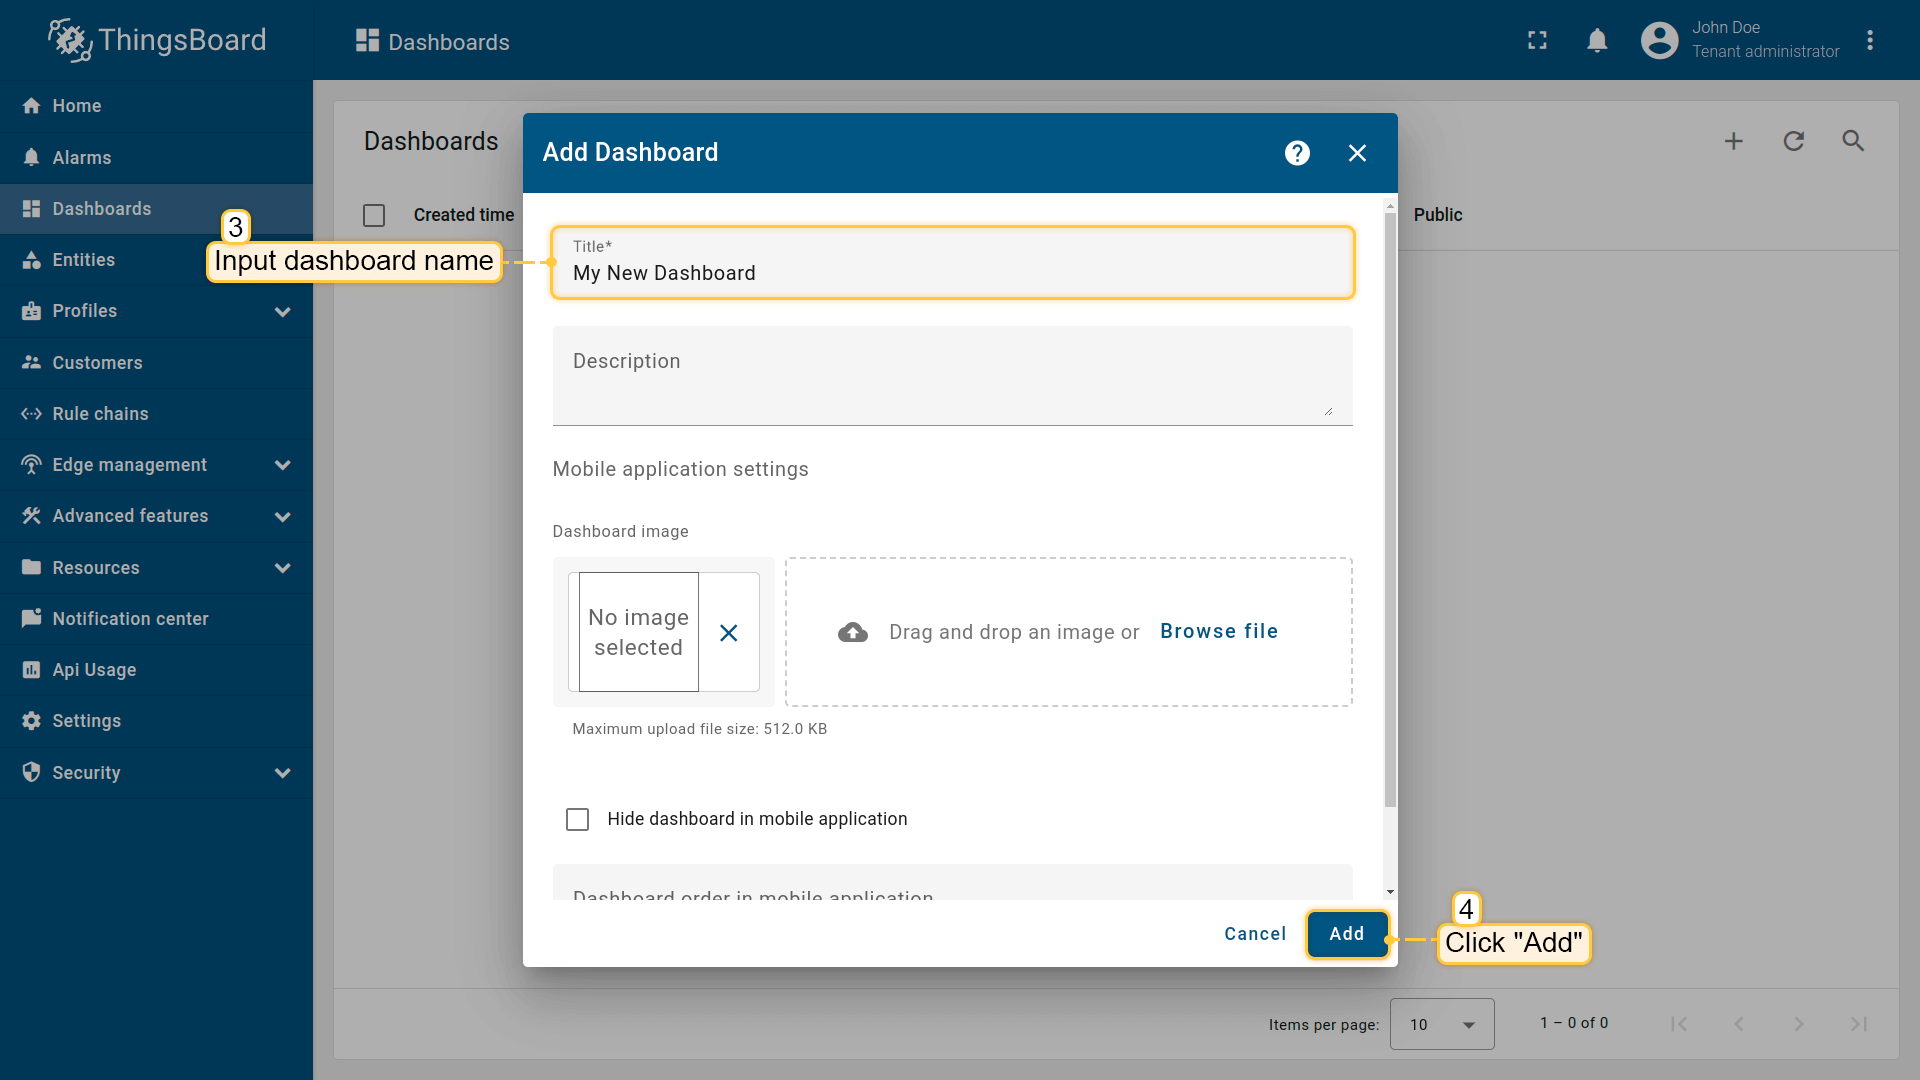 Input dashboard name. For example, “My New Dashboard”. Click “Add” to add the dashboard; 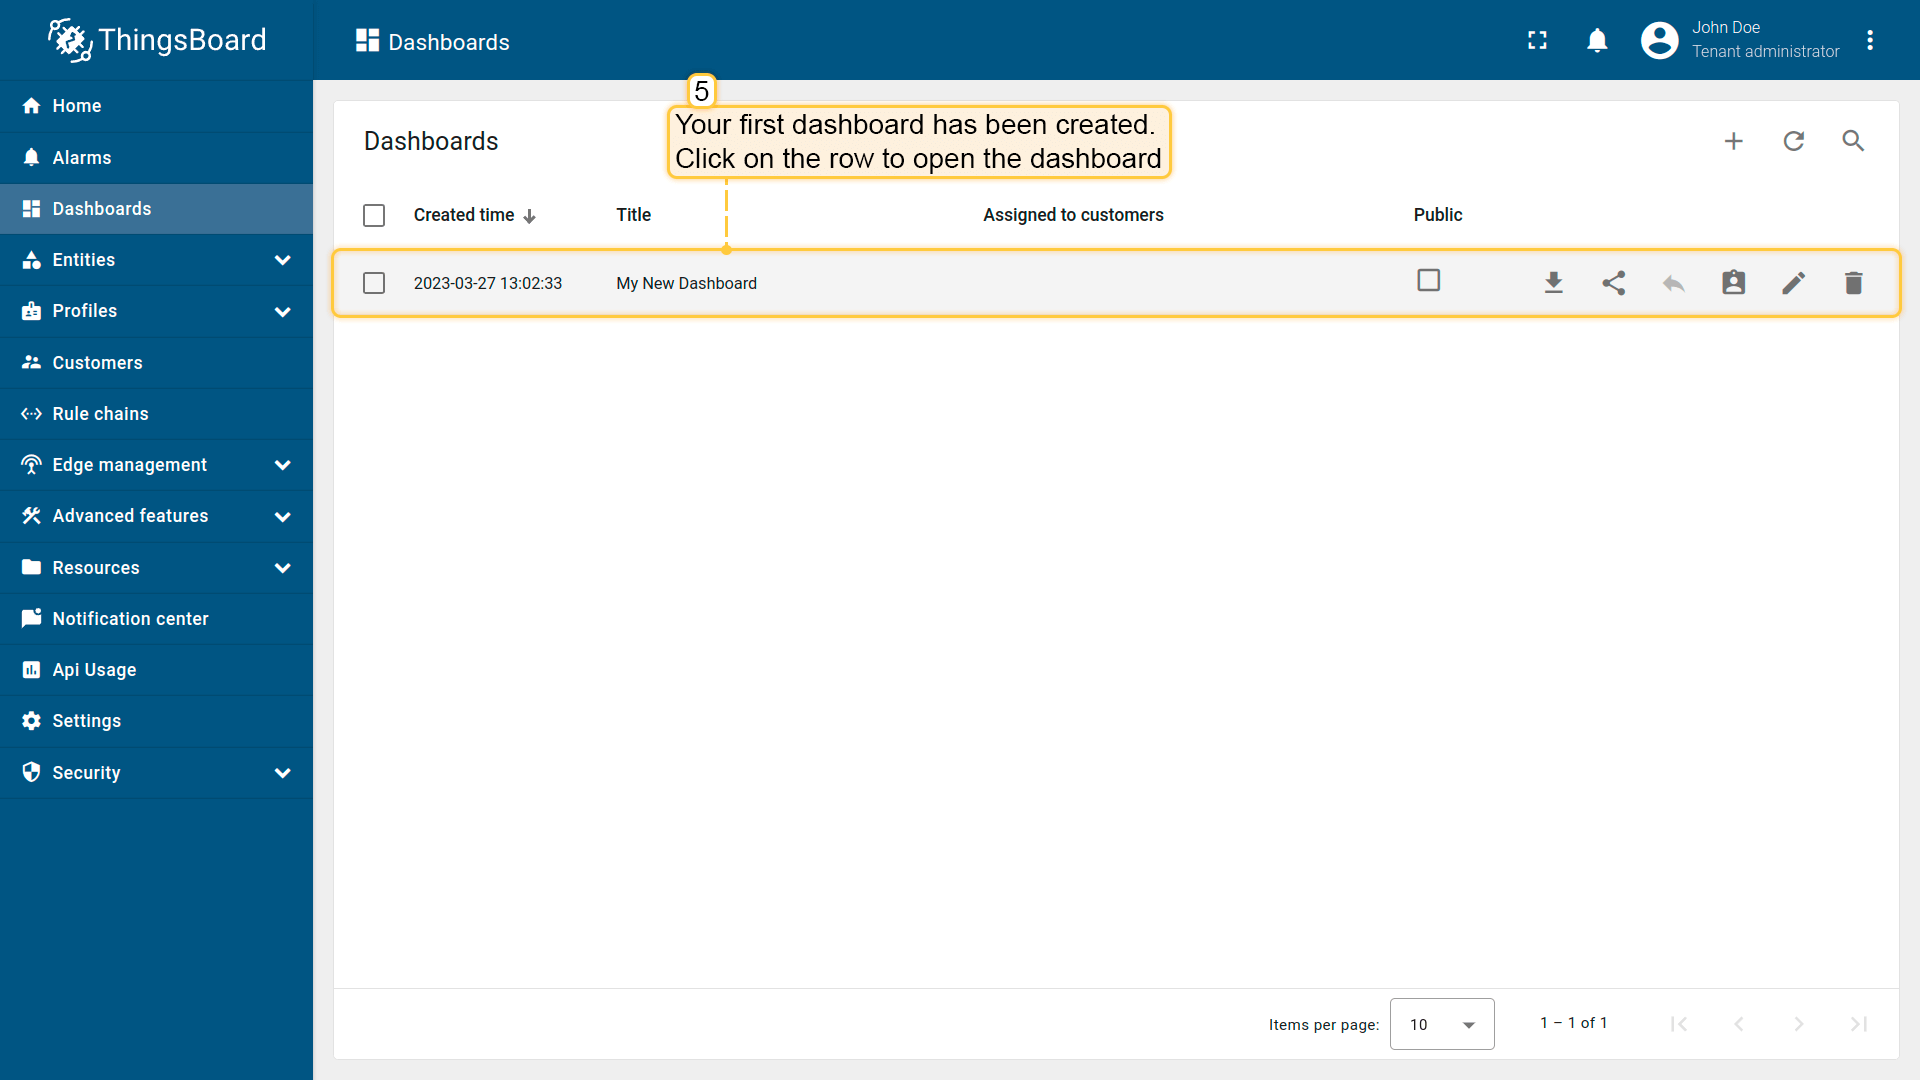 Your dashboard should be listed first since the table sorts dashboards using the creation time by default. Click on the “Open dashboard” icon. 添加实体别名别名是对部件中使用的单个实体或实体组的引用。别名可以是静态或动态的。我们将使用「单个实体」别名,引用单个实体,此处为「Teltonika RUT955」。也可以配置引用多个设备的别名,例如某类型的设备或与某资产相关的设备。您可在此处了解更多关于不同别名的信息。
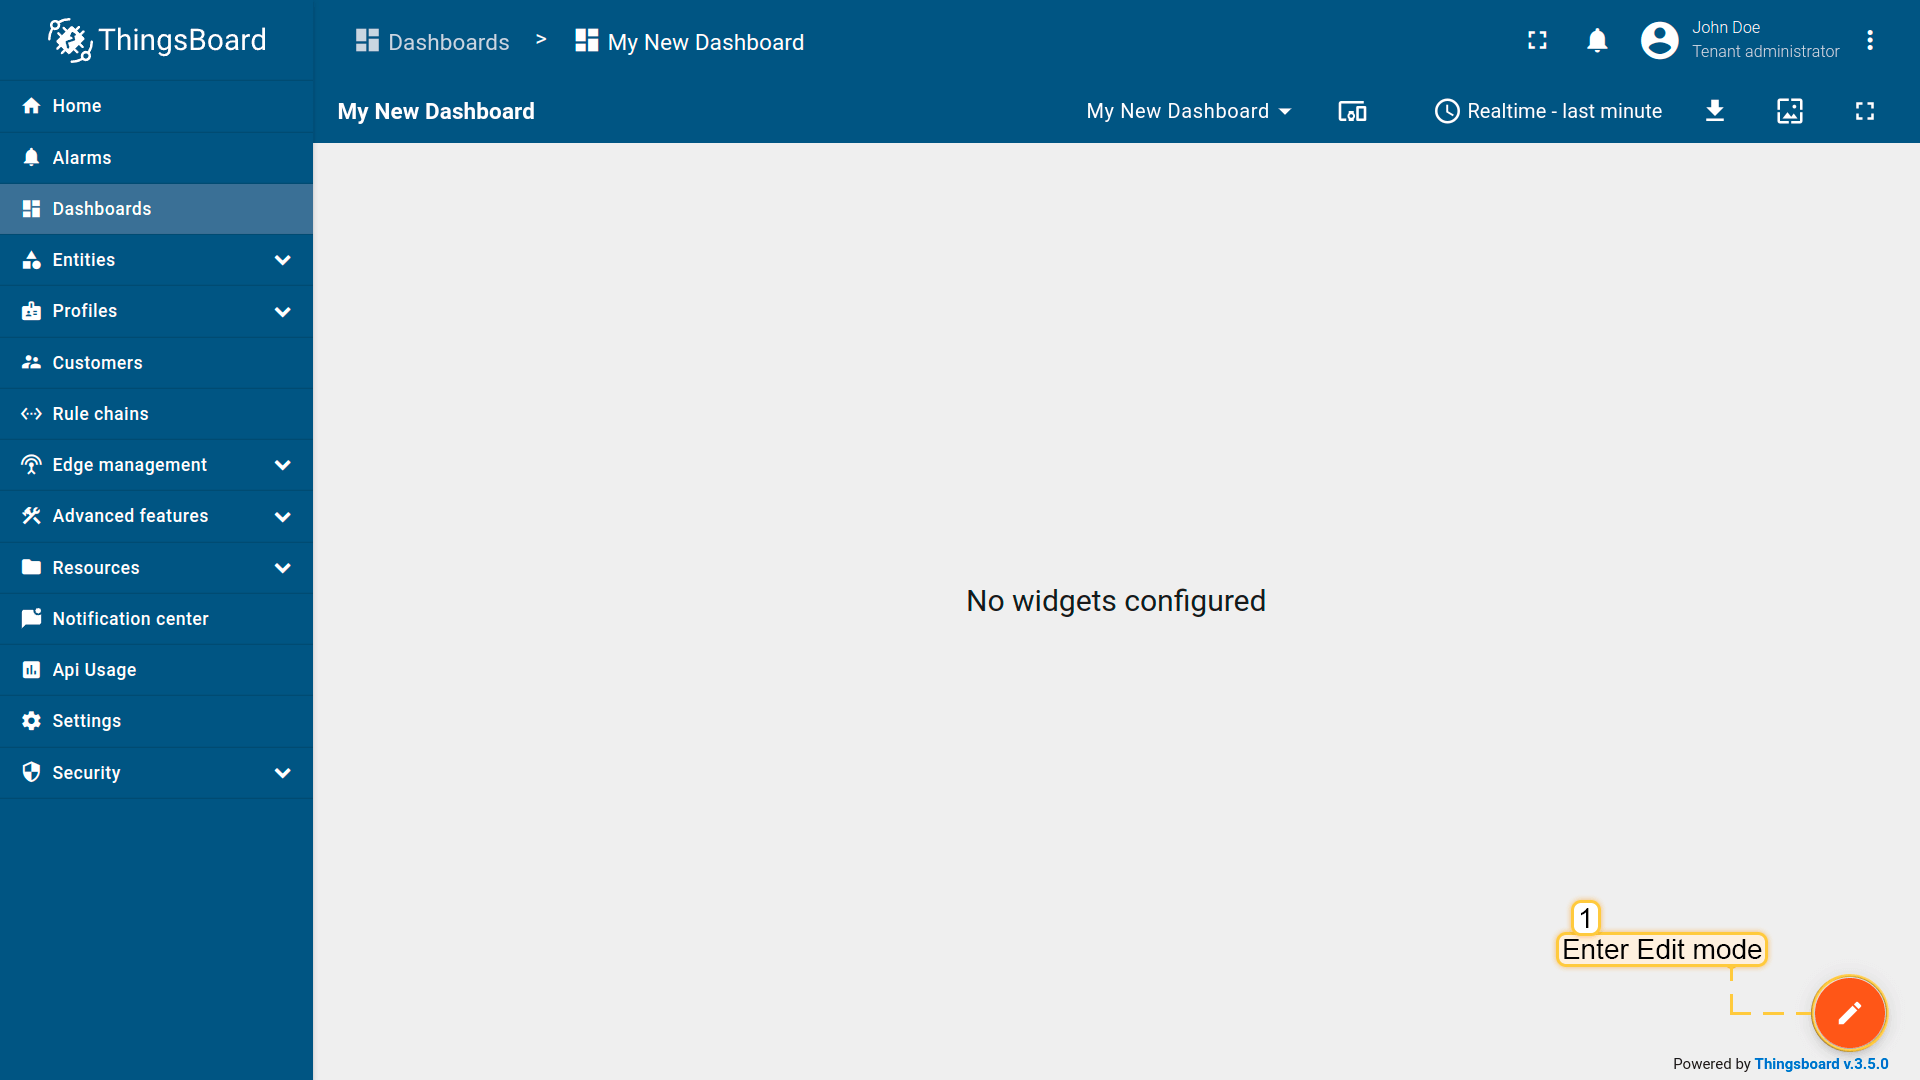 Enter edit mode. Click on the pencil button in the bottom right corner; 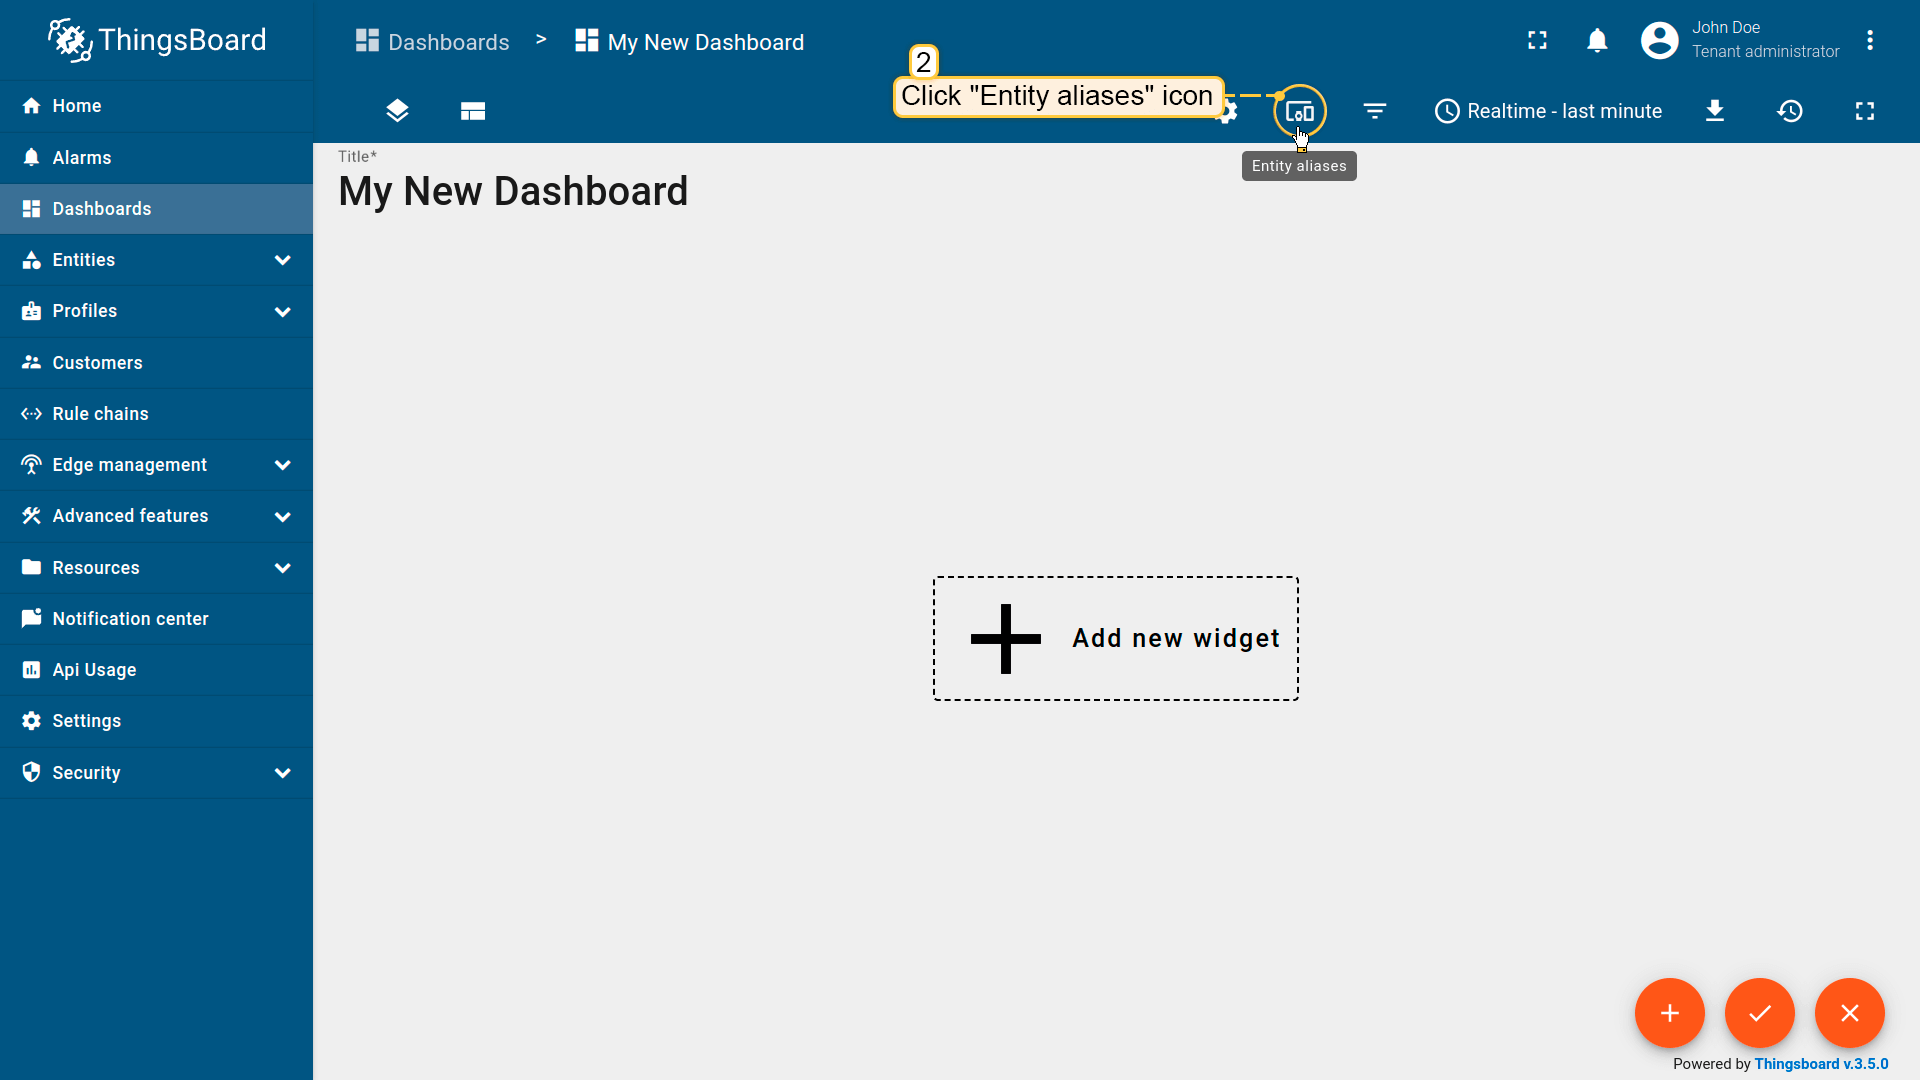 Click the “Entity Aliases” icon in the top right part of the screen. You will see an empty list of Entity aliases; 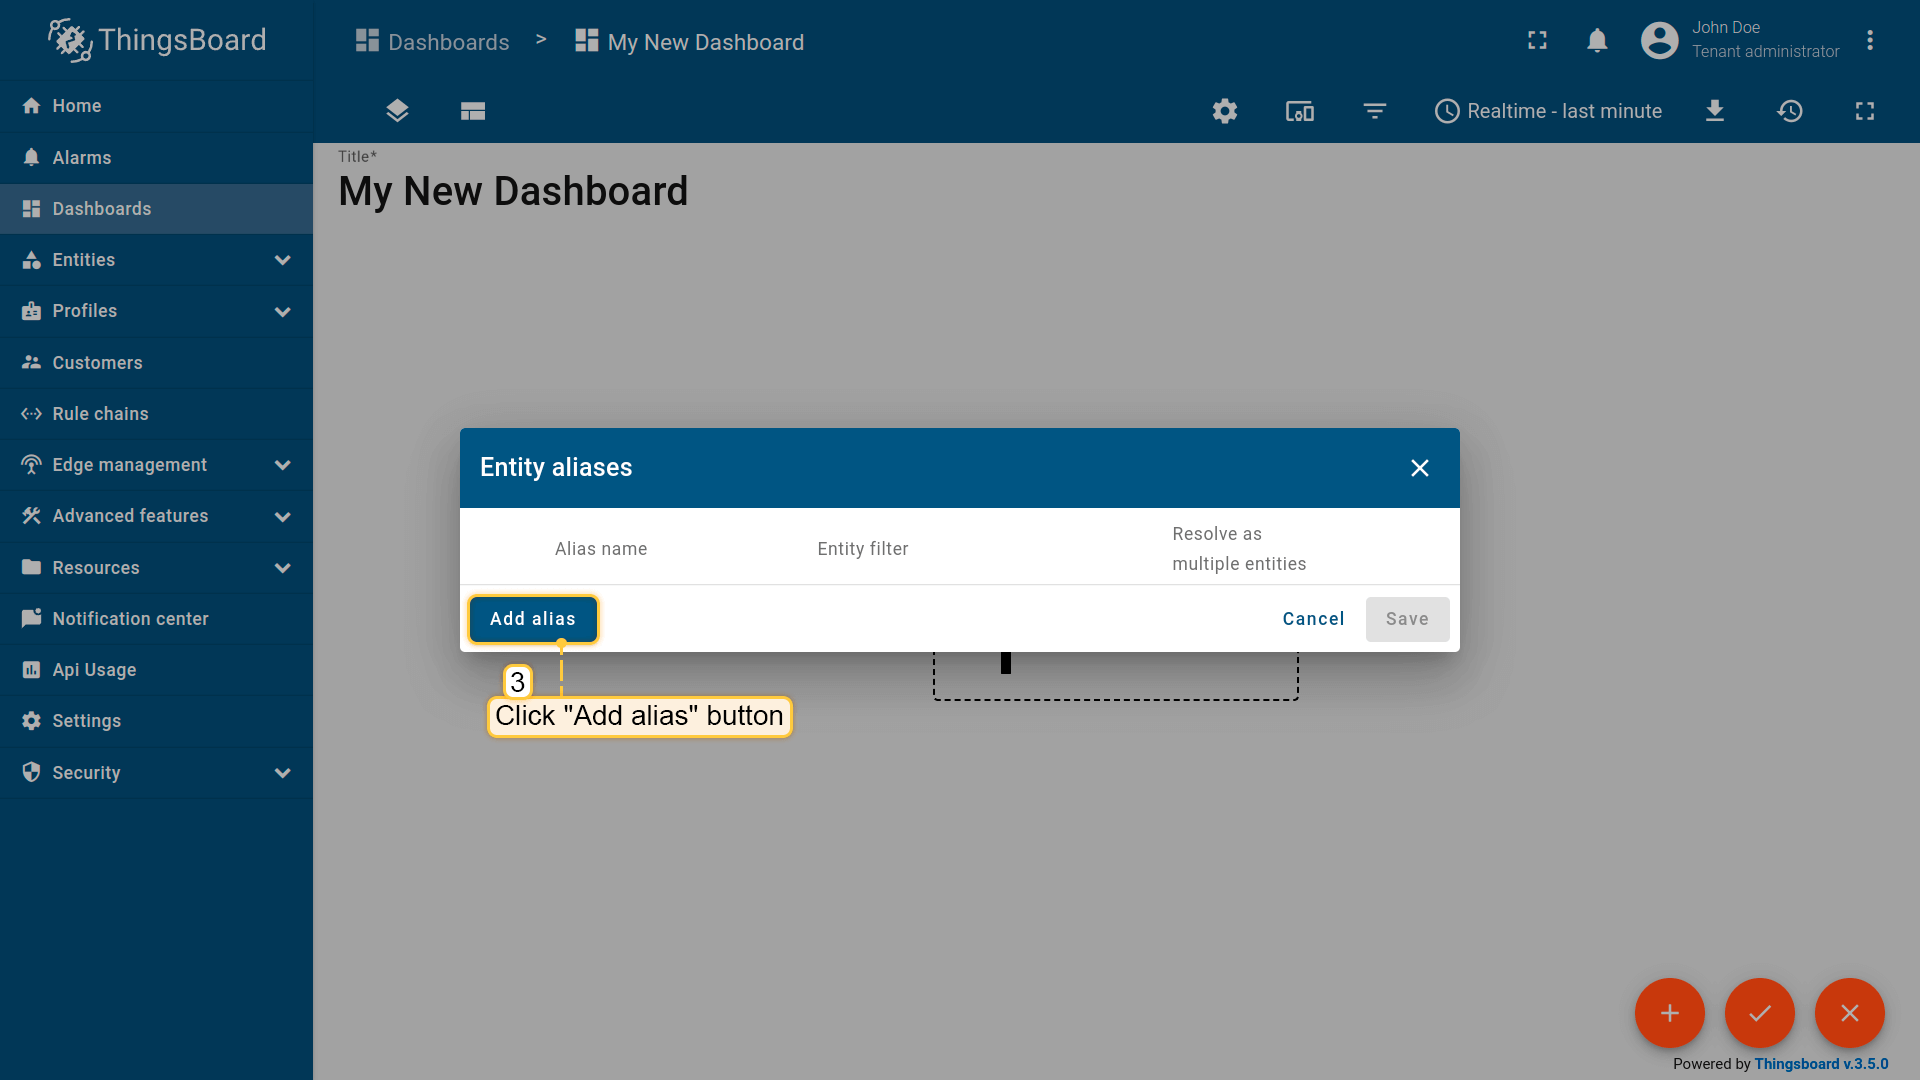 Click “Add alias”;  Enter an alias name. Choose “Single entity” as the Filter type, select “Device” for Type, and begin typing “My New” to trigger autocomplete suggestions; 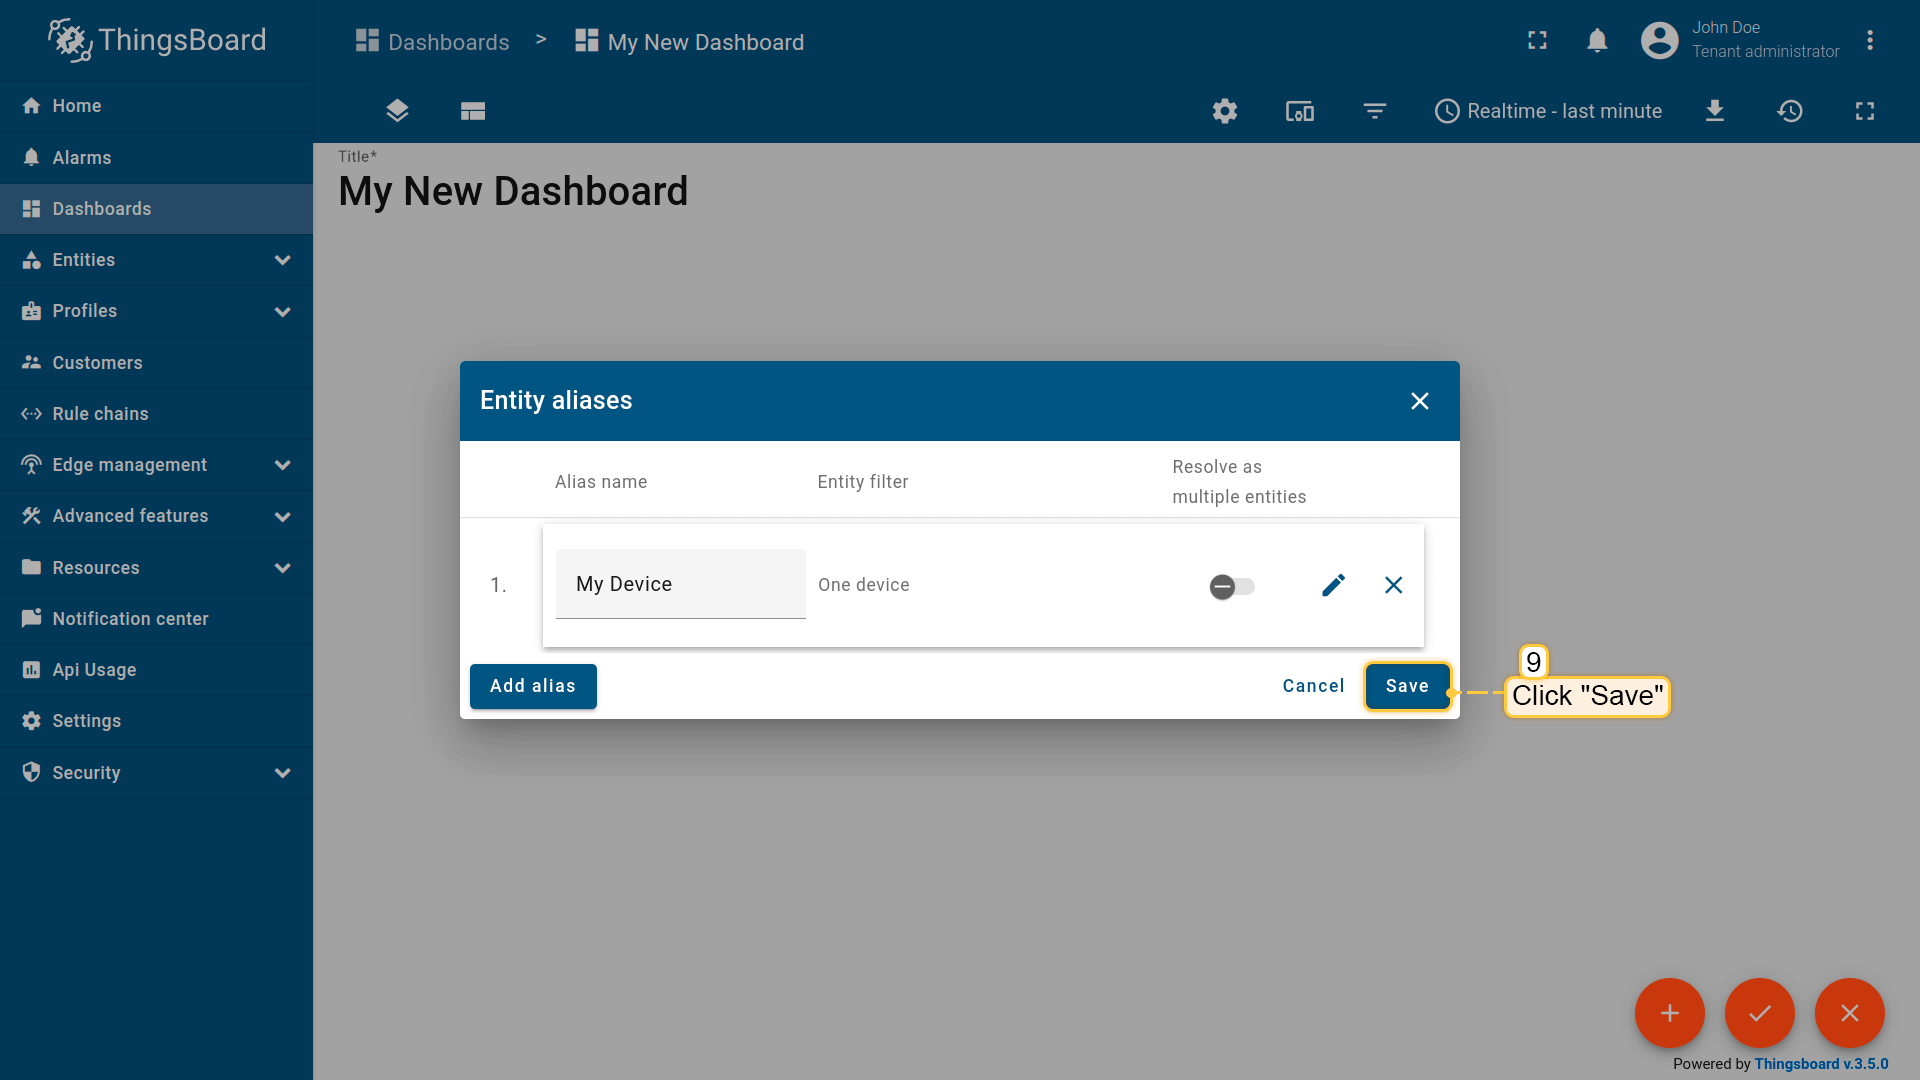 Click “Add” and then “Save”;  Finally, click “Apply changes” in the dashboard editor to save the changes. Then you should enter edit mode again. 要添加新部件,我们需要从部件库中选择。部件按部件包分组。 每个部件都有数据源,数据源决定了部件显示的数据。 |
总结
通过本指南,您可以轻松连接 Teltonika RUT955 并使用其内置集成从连接到 Teltonika RUT955 的设备中获取数据。
将设备连接到网关后,您就可以在ThingsBoard上查看和处理设备发送的数据。
请探索平台文档,了解更多核心概念和功能。