- Hardware type: Single-board computers
- Connectivity: Ethernet, WIFI, Bluetooth
- Chip: NVIDIA CUDA
- Industry: Industrial Manufacturing, Healthcare, Security, Smart Cities, Retail
- Use cases: Smart energy, Environment Monitoring, Smart Office, Smart Retail, Smart Farming, Fleet Tracking, Health Care, Air Quality Monitoring, Waste Management, Tank Level Monitoring
- Platforms: Community Edition, Professional Edition, Cloud, Edge, Edge Professional Edition
- 概述
- 在ThingsBoard中创建设备
- 安装所需库和工具
- 连接设备到ThingsBoard
- 使用客户端和共享属性请求同步设备状态
- 在ThingsBoard上查看数据
- 使用共享属性控制设备
- 使用RPC控制设备
- 总结
概述
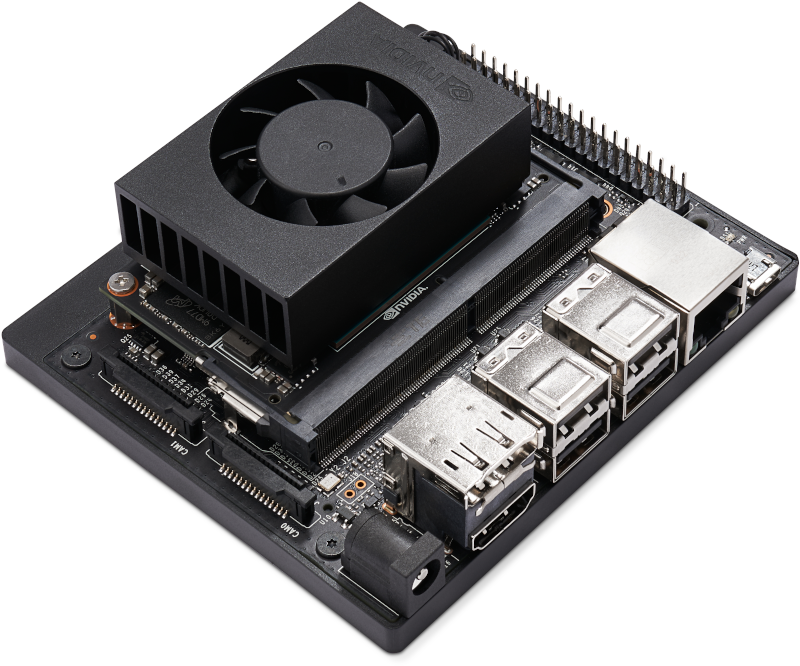
NVIDIA Jetson Xavier NX Developer Kit是一款紧凑型高性能AI计算机,在小尺寸下提供最高21 TOPS加速算力。 面向自主机器、工业机器人及需边缘高性能AI的嵌入式系统。
本指南将介绍如何在ThingsBoard上创建设备、
安装所需库与工具。
随后将修改代码并上传到设备,
并查看运行结果及通过导入的仪表板在ThingsBoard上查看数据。
设备将借助客户端与共享属性请求功能与ThingsBoard保持同步。
同时,我们将使用共享属性或 RPC 请求控制设备。
前置条件
继续本指南前,需具备:
- NVIDIA Jetson Xavier NX Developer Kit
- tb-mqtt-client library
- python ≥ 3.7
- Adafruit-Blinka
- ThingsBoard Cloud账户或已安装的本地服务器
在ThingsBoard中创建设备
为简化流程,我们将在界面中手动创建设备。
-
登录ThingsBoard实例并进入 实体 > 设备 页面。
-
点击右上角 ”+” 按钮并选择 添加新设备。
-
输入设备名称,例如 “My Device”。其他字段可保持默认,点击 添加 创建设备。
-
设备已添加完成。
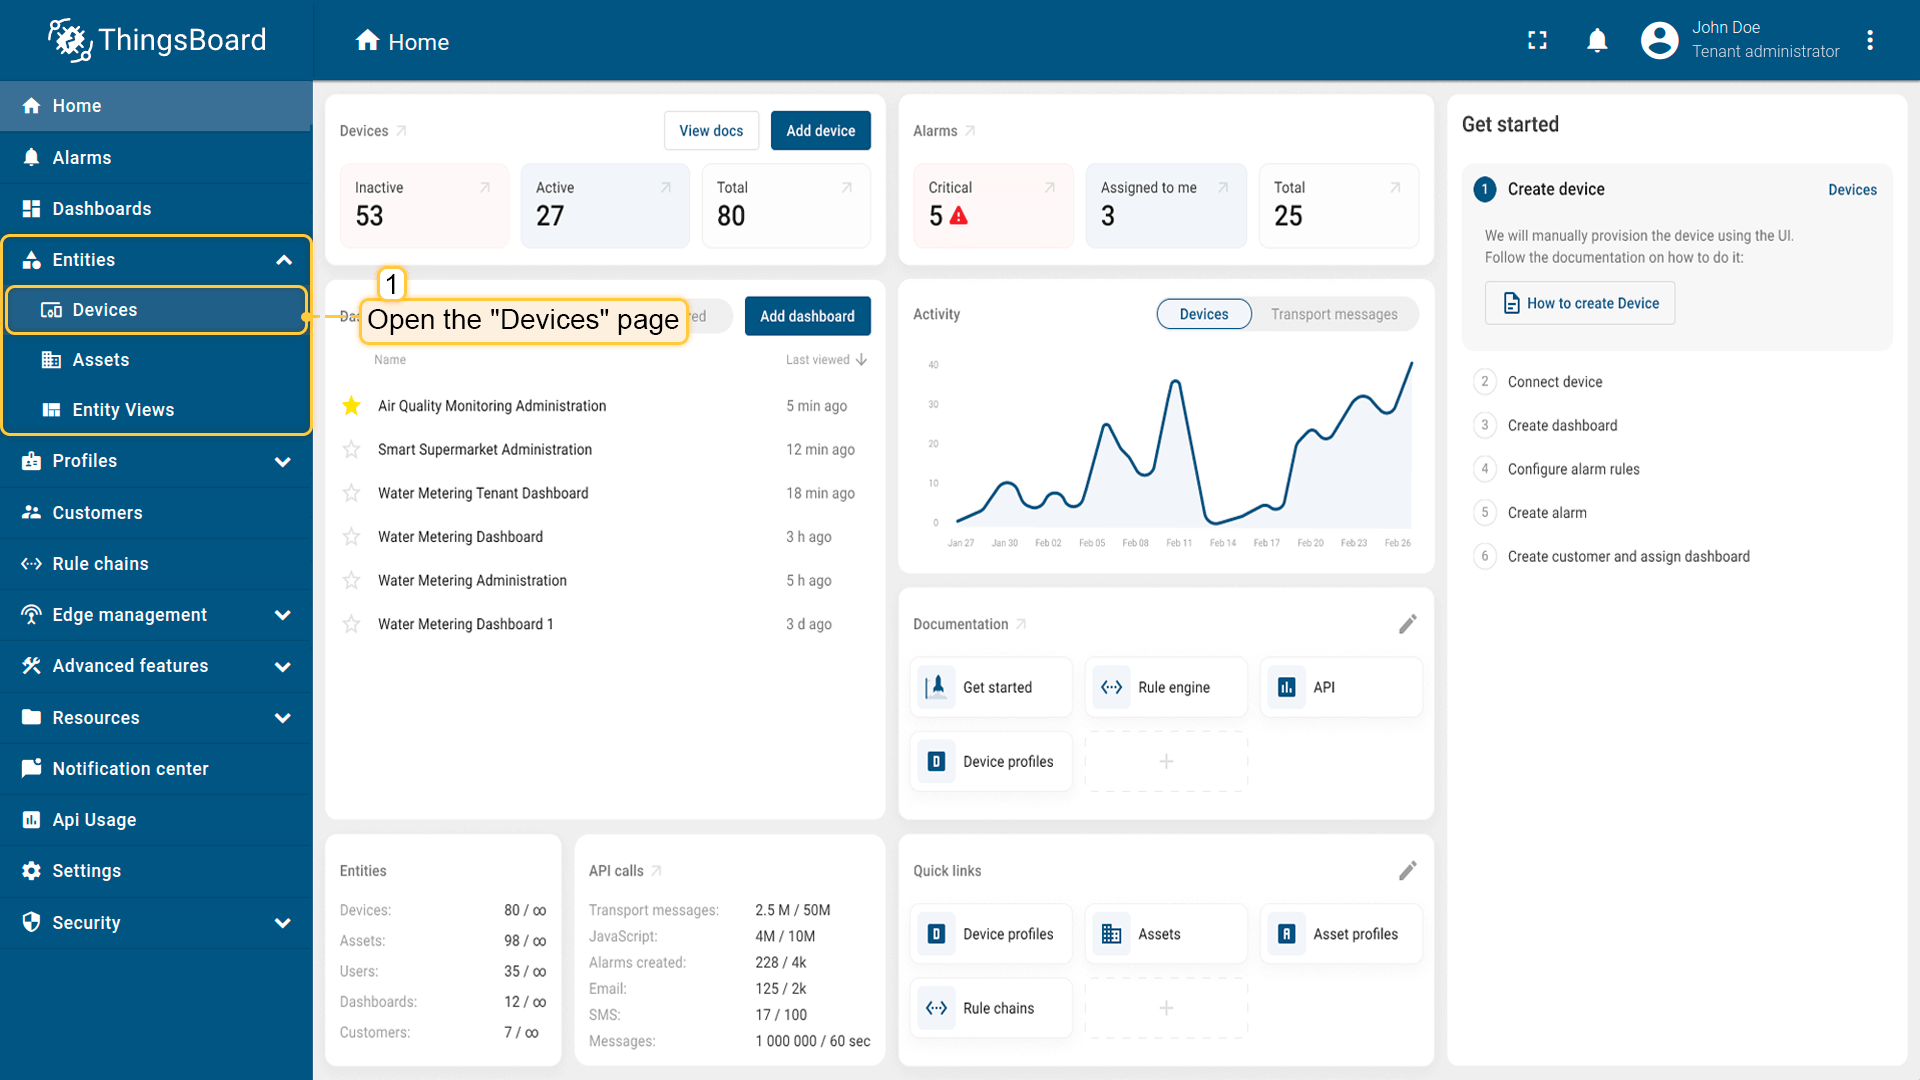
登录ThingsBoard实例并进入 实体 > 设备 页面。
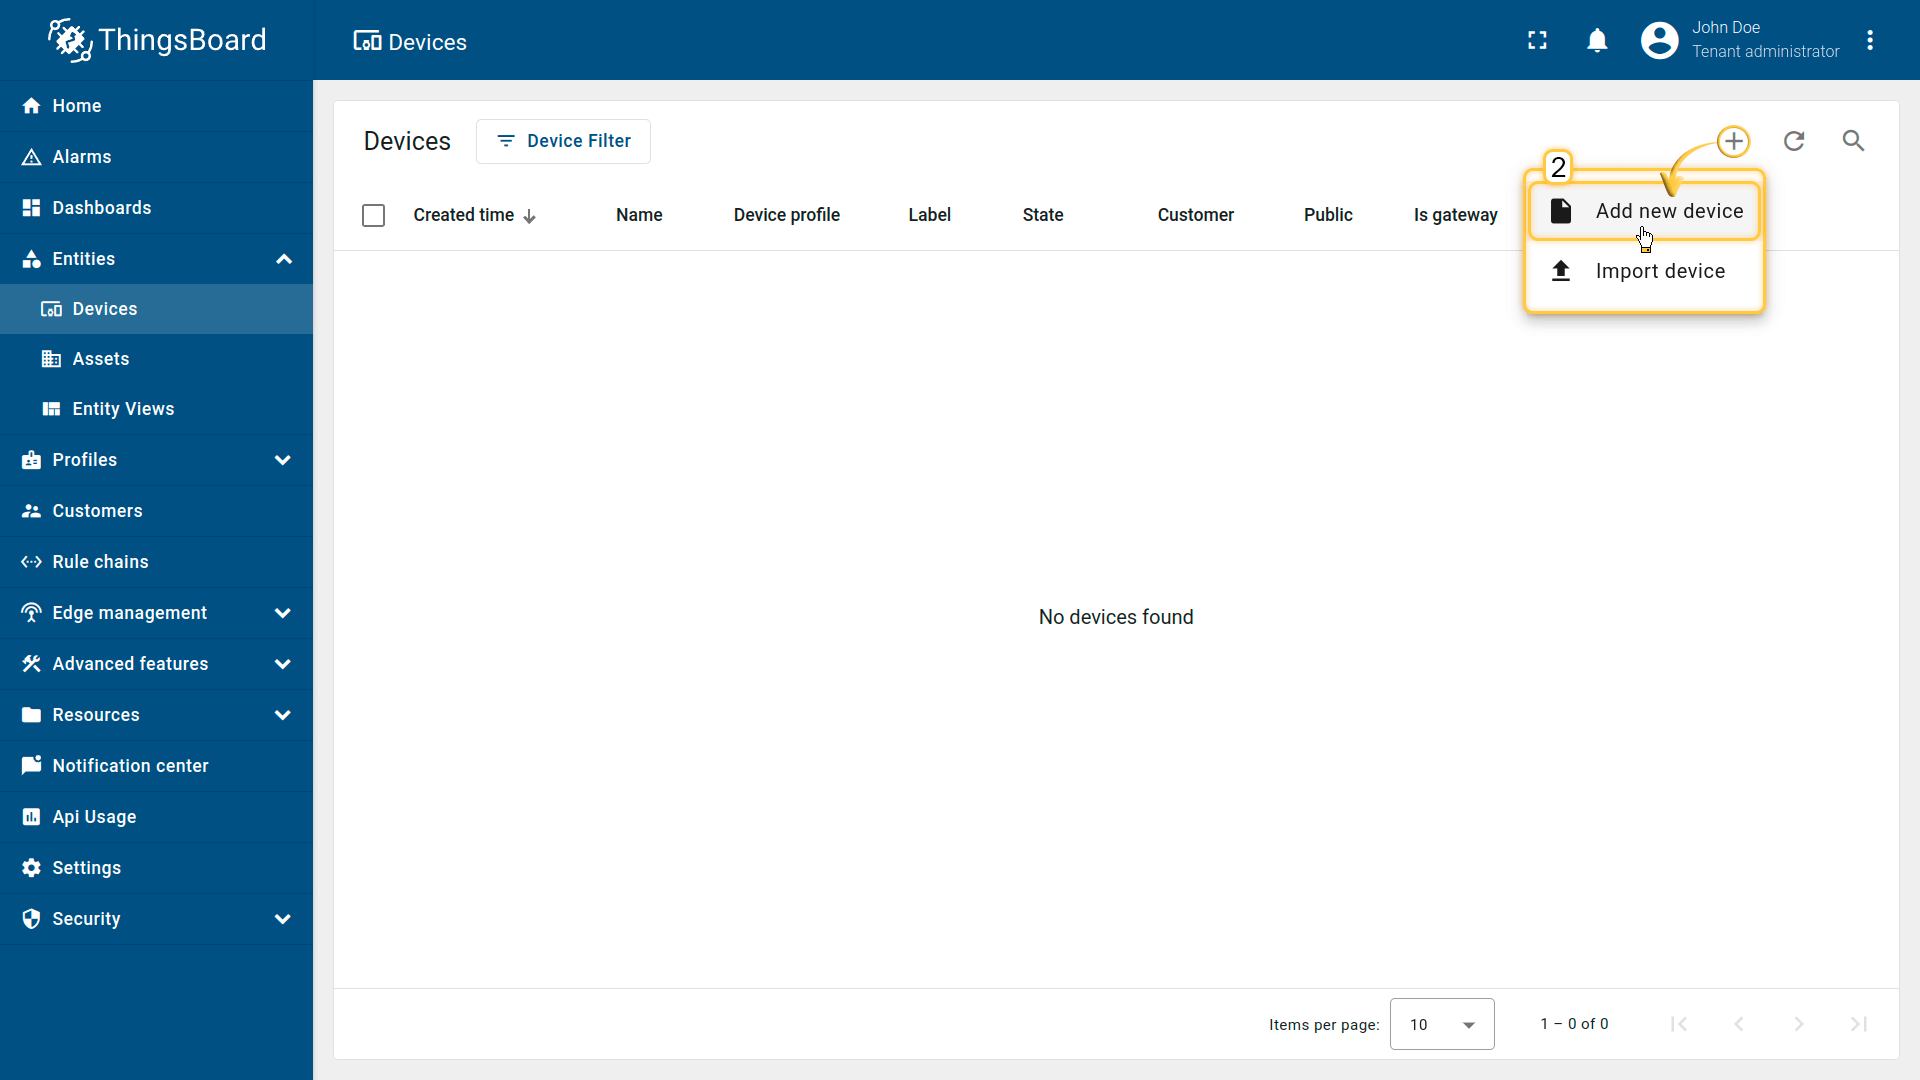
点击右上角 ”+” 按钮并选择 添加新设备。
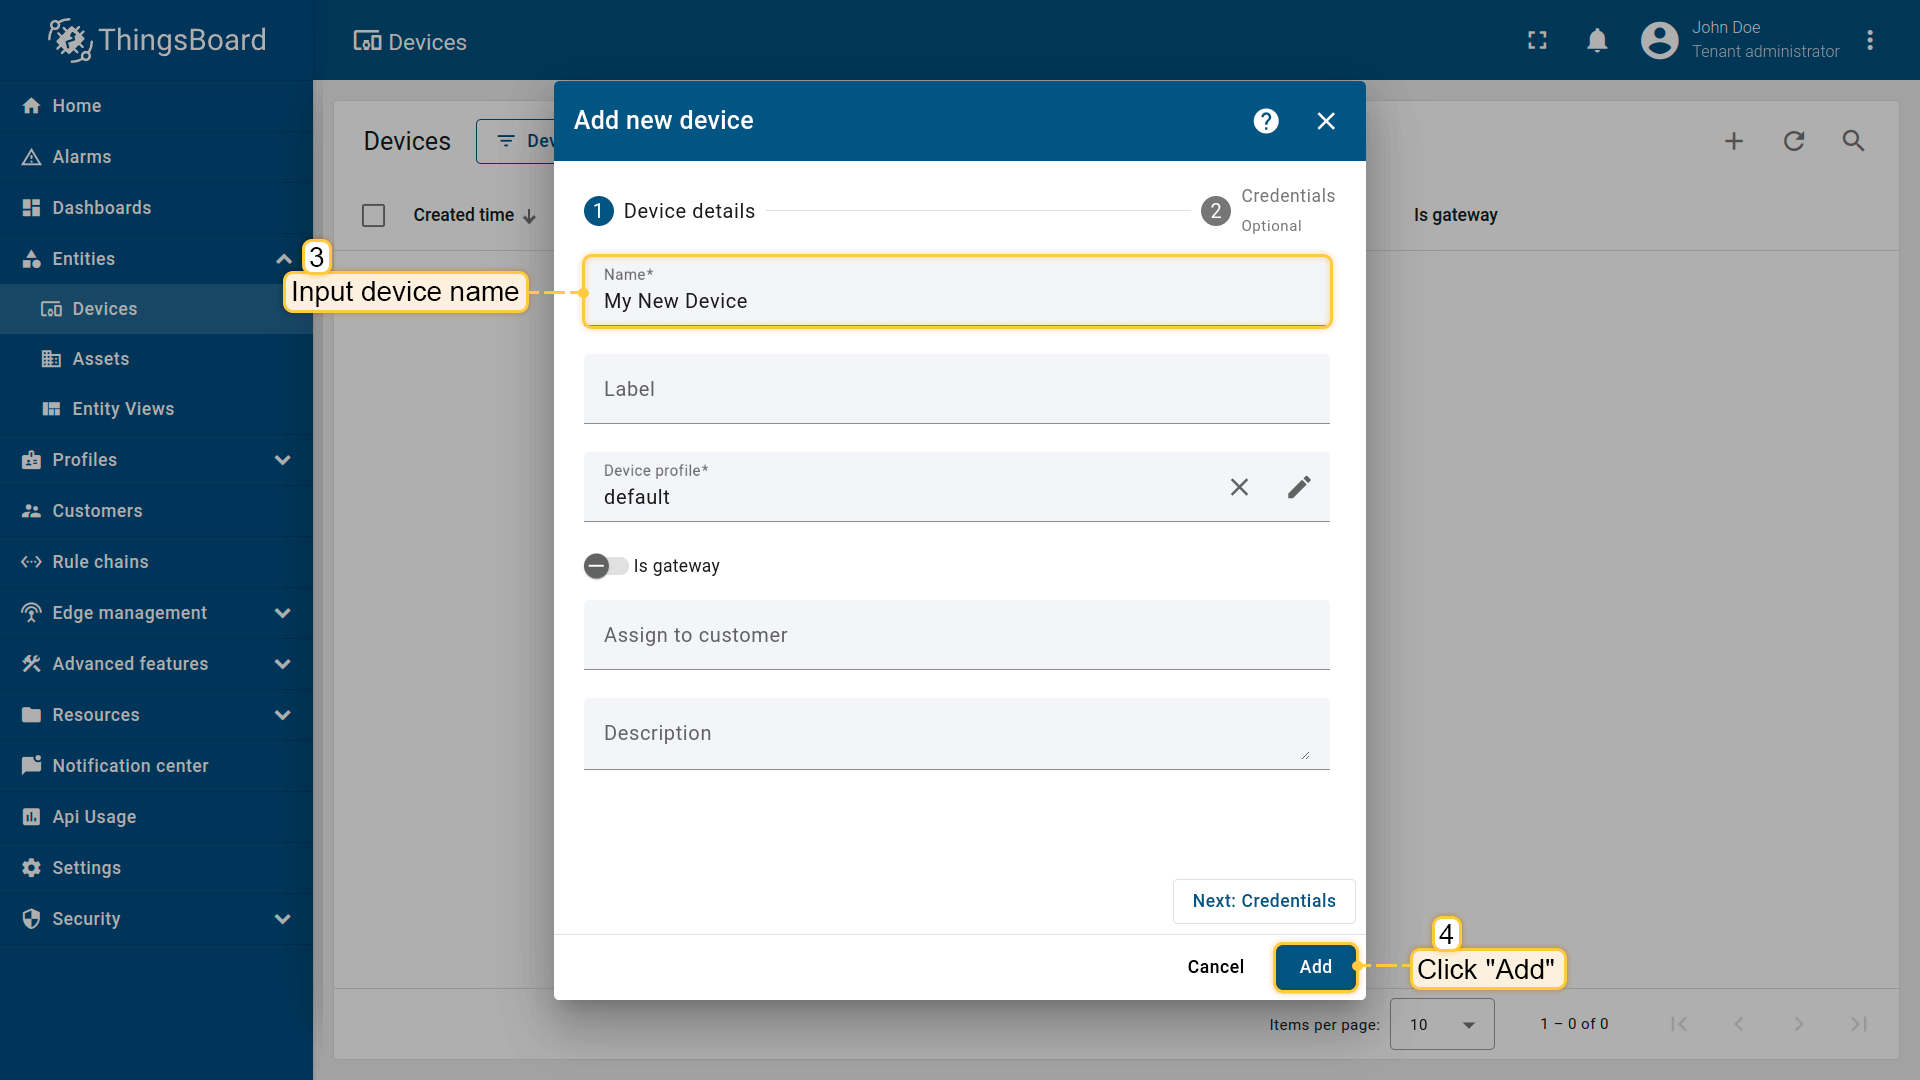
输入设备名称,例如 “My Device”。其他字段可保持默认,点击 添加 创建设备。
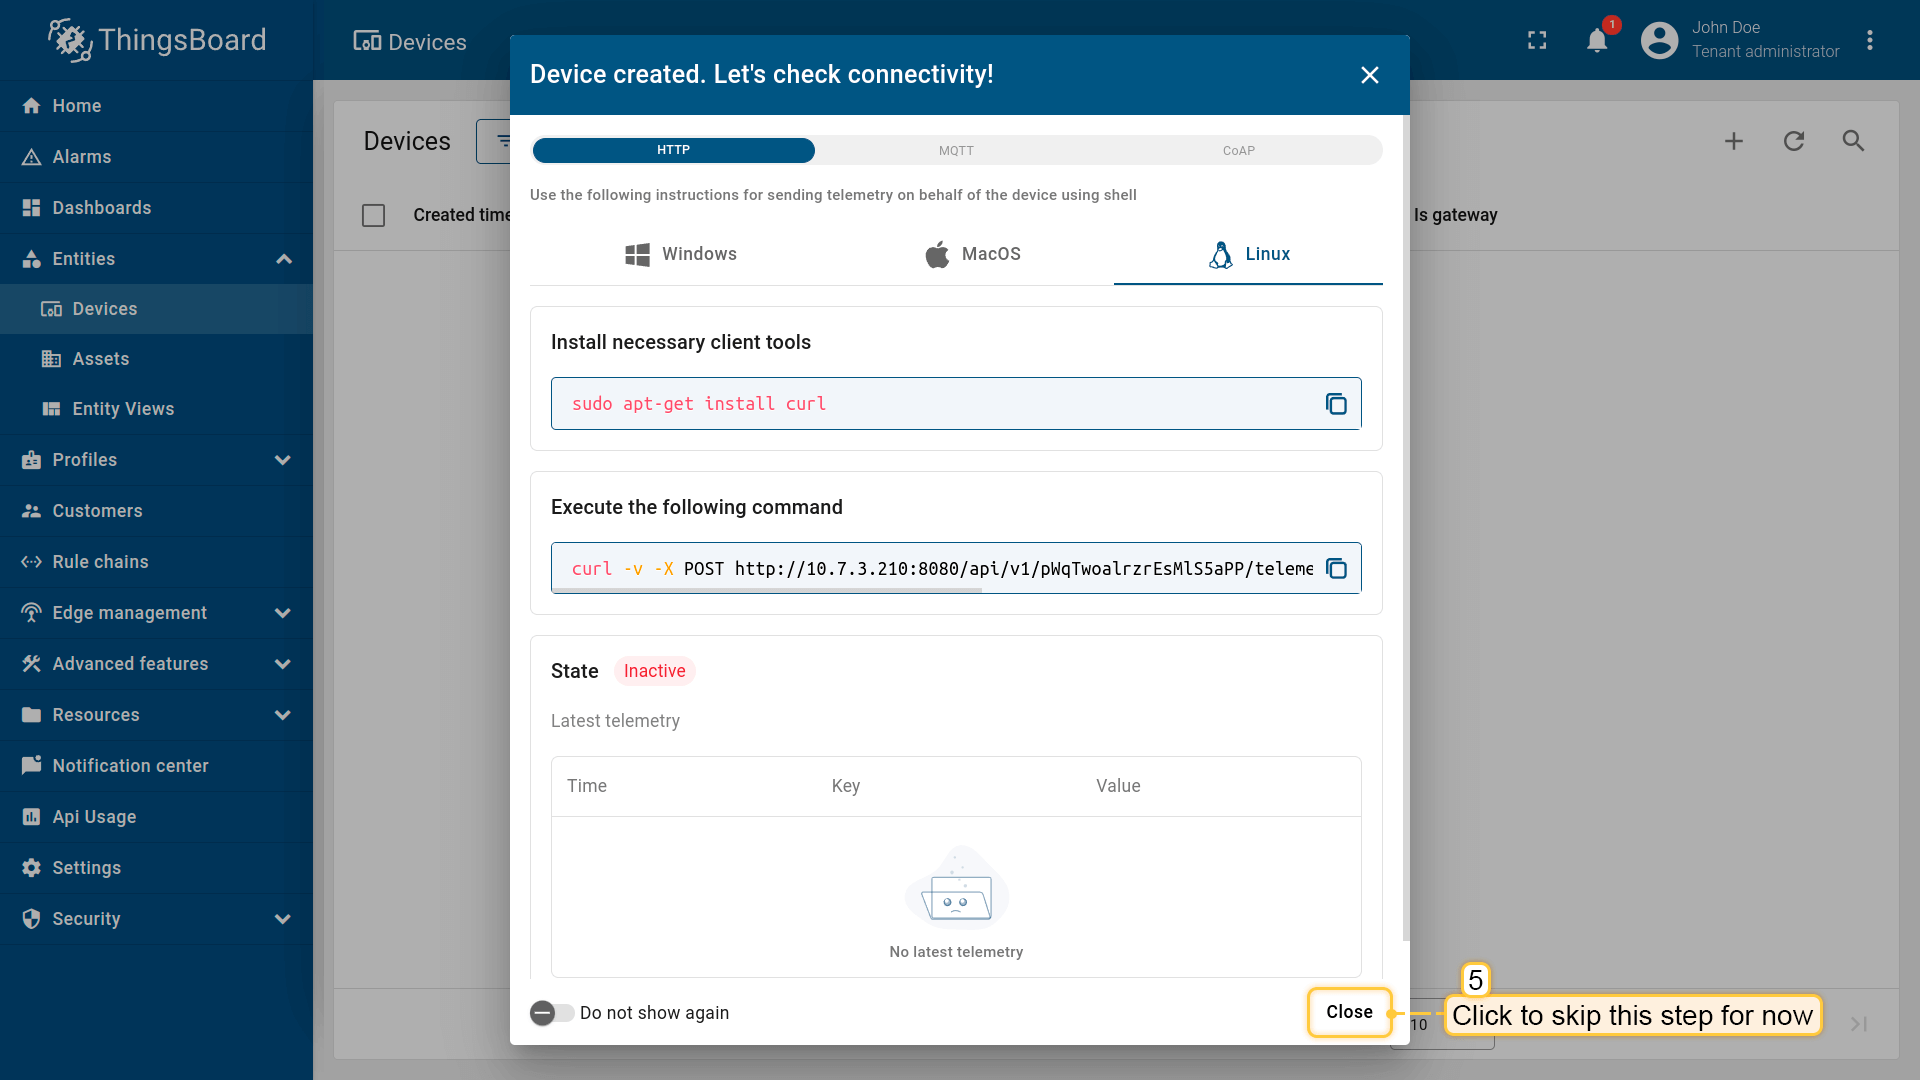
设备已添加完成。
安装所需库和工具
安装 thingsboard-python-client-sdk 可使用以下命令。
建议在全局环境外安装依赖:
1
pip3 install tb-mqtt-client
此外需具备代码编辑工具。 例如可使用预装的Nano编辑器,或安装其它您偏好的编辑器。
连接设备到ThingsBoard
连接设备前,需先获取其凭证。
ThingsBoard 支持多种设备凭证类型,本指南使用默认自动生成的访问令牌(access token)。
-
点击设备列表中的行以打开设备详情。
-
点击“复制访问令牌”。令牌将复制到剪贴板,请妥善保存。
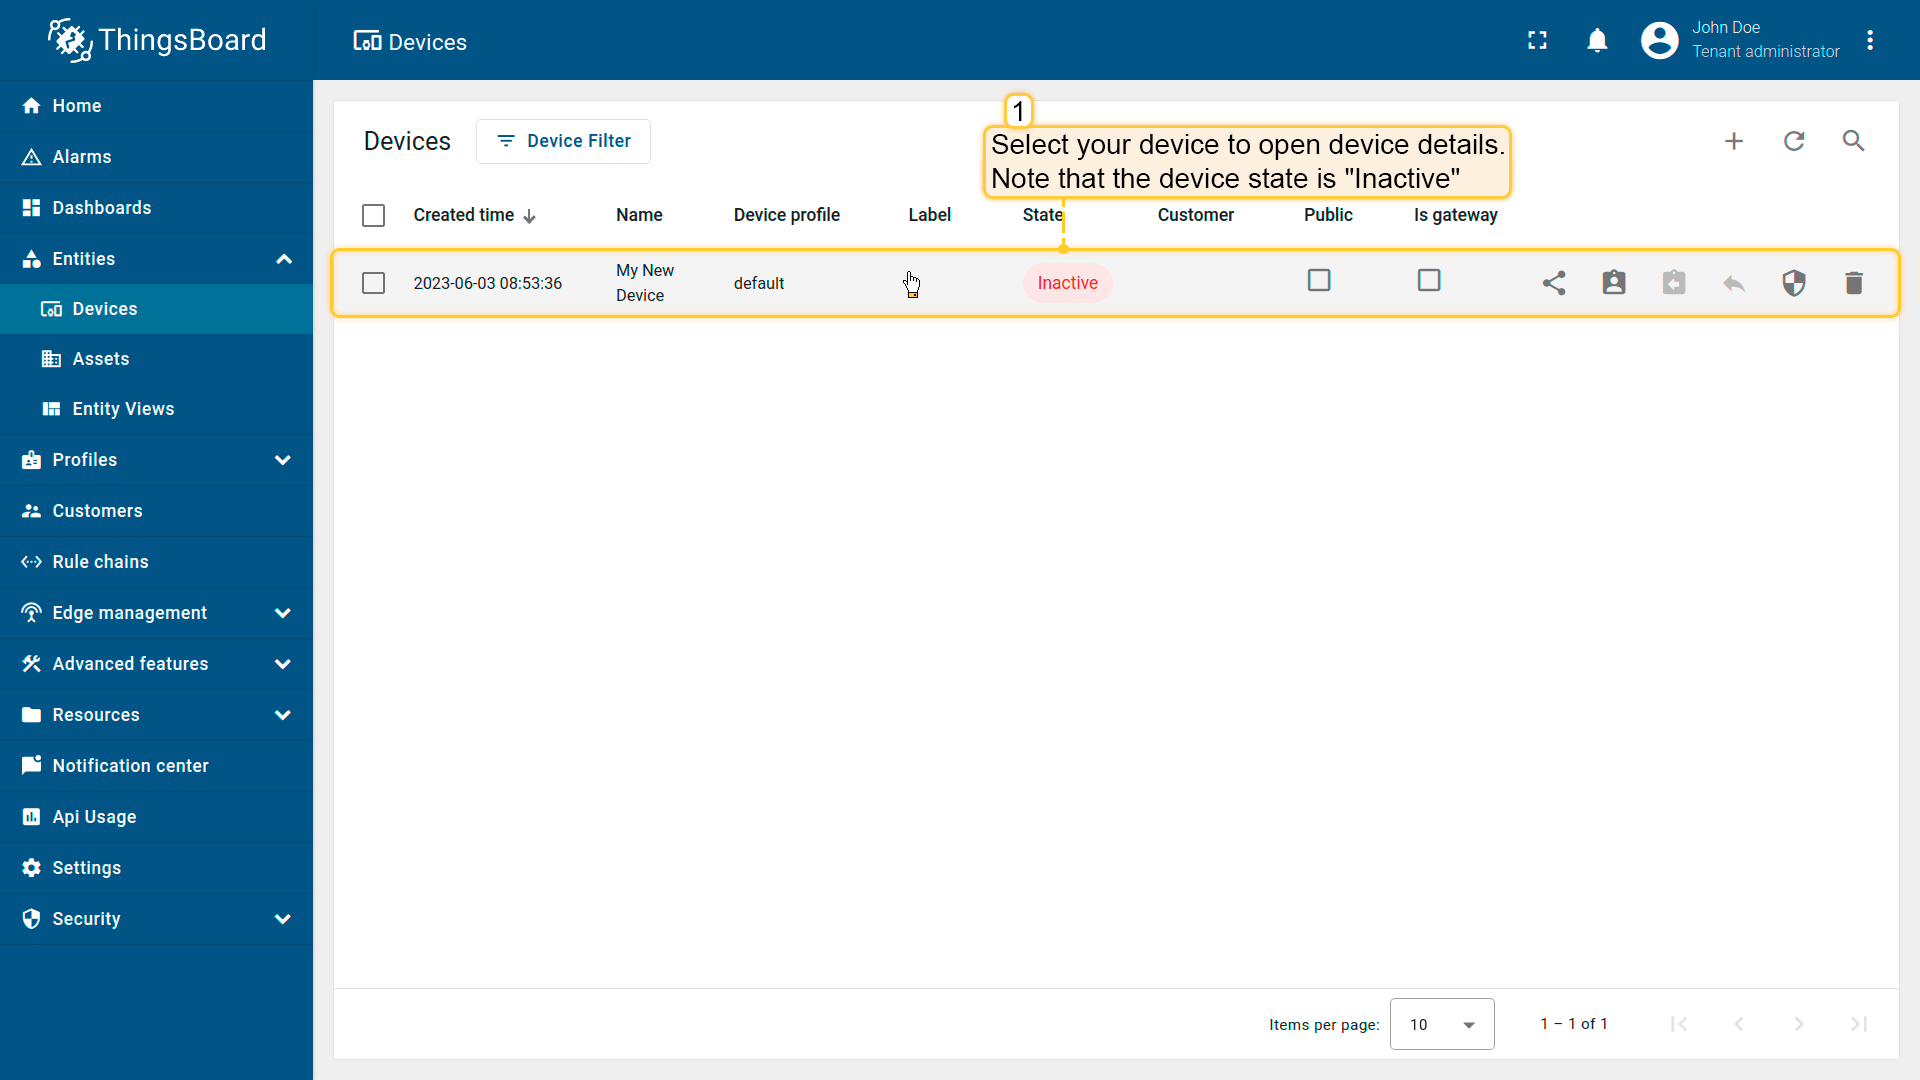
点击设备列表中的行以打开设备详情。
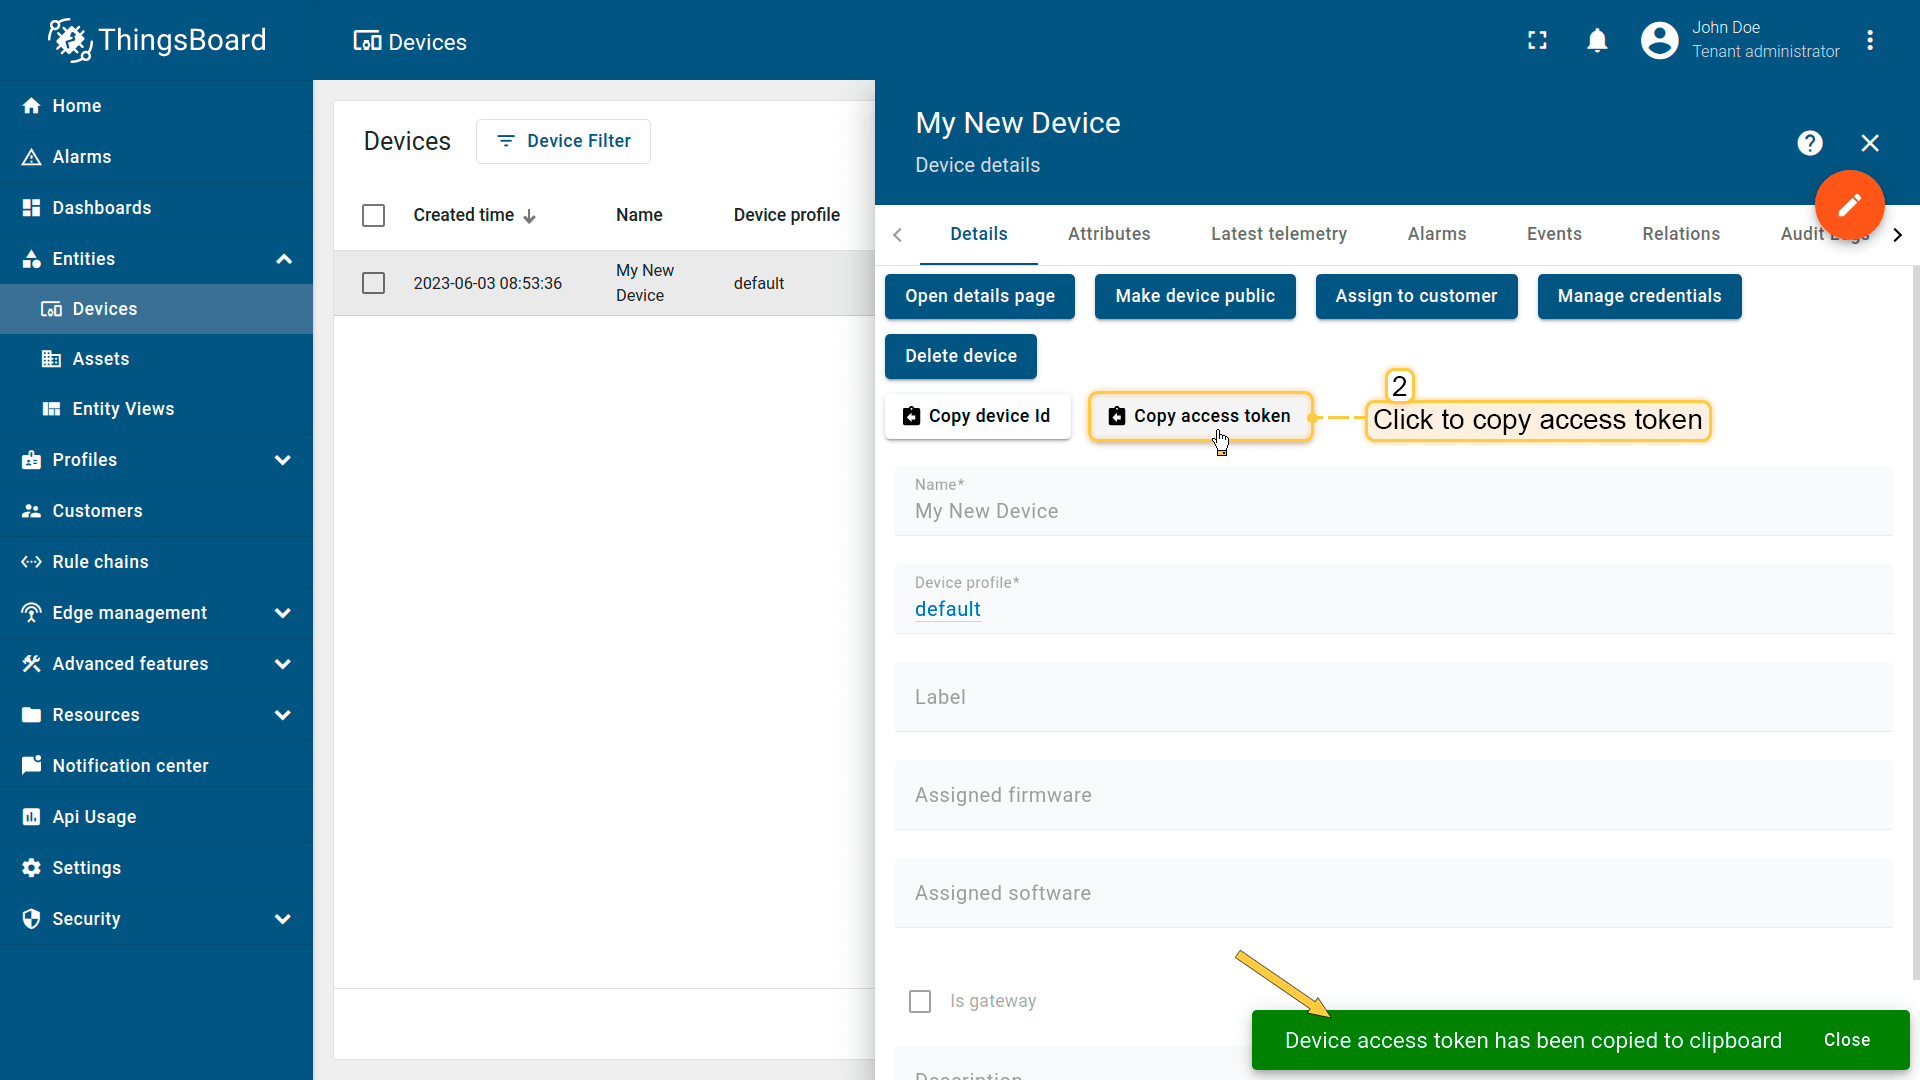
点击“复制访问令牌”。令牌将复制到剪贴板,请妥善保存。
此时已可为设备发布遥测数据。 如前所述,我们将使用 thingsboard-python-client-sdk 库。
开始配置项目:
-
创建项目文件夹:
1
mkdir thingsboard_example && cd thingsboard_example
-
安装依赖:
1
pip3 install tb-mqtt-client -
创建主脚本:
1
nano main.py
-
复制并粘贴以下代码:
将上方代码中的THINGSBOARD_SERVER、ACCESS_TOKEN变量改为您的凭证。
连接所需变量:
| 变量名 | 默认值 | 说明 |
|---|---|---|
| ACCESS_TOKEN | TEST_TOKEN | 设备访问令牌 |
| THINGSBOARD_SERVER | localhost | 您的ThingsBoard主机或IP地址 |
- 按 Ctrl+O 和 Ctrl+X 保存文件。
-
最后,运行脚本:
1
python3 main.py
若操作正确,将看到如下控制台输出:
1
2
3
4
5
> INFO:tb_device_mqtt:connection SUCCESS
>
>
> {'ip_address': '192.168.1.198', 'macaddress': '3c:06:30:44:e0:24'} {'cpu_usage': 6.6, 'processes_count': 8, 'disk_usage': 70.0, 'RAM_usage': 73.9, 'swap_memory_usage': 69.4, 'battery': 29, 'boot_time': 1675154176.0}
>
下面回顾并解释代码。 本步骤关注 get_data 函数。get_data 负责打包并返回数据,如需监控更多指标,可方便地向字典中添加新的遥测或属性:
1
2
3
4
5
6
7
8
9
10
11
12
13
14
15
16
17
18
19
20
21
22
23
24
25
26
27
28
29
...
def get_data():
       cpu_usage = round(float(os.popen('''grep 'cpu ' /proc/stat | awk '{usage=($2+$4)*100/($2+$4+$5)} END {print usage }' ''').readline().replace('\n', '').replace(',', '.')), 2)
       ip_address = os.popen('''hostname -I''').readline().replace('\n', '').replace(',', '.')[:-1]
       mac_address = os.popen('''cat /sys/class/net/*/address''').readline().replace('\n', '').replace(',', '.')
       processes_count = os.popen('''ps -Al | grep -c bash''').readline().replace('\n', '').replace(',', '.')[:-1]
       swap_memory_usage = os.popen("free -m | grep Swap | awk '{print ($3/$2)*100}'").readline().replace('\n', '').replace(',', '.')[:-1]
       ram_usage = float(os.popen("free -m | grep Mem | awk '{print ($3/$2) * 100}'").readline().replace('\n', '').replace(',', '.')[:-1])
       st = os.statvfs('/')
       used = (st.f_blocks - st.f_bfree) * st.f_frsize
       boot_time = os.popen('uptime -p').read()[:-1]
       avg_load = (cpu_usage + ram_usage) / 2

       attributes = {
           'ip_address': ip_address,
           'macaddress': mac_address
       }
       telemetry = {
           'cpu_usage': cpu_usage,
           'processes_count': processes_count,
           'disk_usage': used,
           'RAM_usage': ram_usage,
           'swap_memory_usage': swap_memory_usage,
           'boot_time': boot_time,
           'avg_load': avg_load
       }
       print(attributes, telemetry)
       return attributes, telemetry
...
数据发送部分:如下所示,每60秒发送一次属性和遥测(如需更频繁可自行调整):
1
2
3
4
5
6
7
...
    while not client.stopped:
        attributes, telemetry = get_data()
        client.send_attributes(attributes)
        client.send_telemetry(telemetry)
        time.sleep(60)
...
使用客户端和共享属性请求同步设备状态

请确保在设备上创建共享属性 blinkingPeriod。
示例代码支持在启动时从 ThingsBoard 获取设备状态。相关代码片段如下。
Attribute callback:
1
2
3
4
5
6
def sync_state(result, exception=None):
    global period
    if exception is not None:
        print("Exception: " + str(exception))
    else:
        period = result.get('shared', {'blinkingPeriod': 1.0})['blinkingPeriod']
Attribute request:
1
2
3
4
5
def main():
    client = TBDeviceMqttClient("localhost", username="ACCESS_TOKEN")
    client.connect()
    client.request_attributes(shared_keys=['blinkingPeriod'], callback=sync_state)
    ...
为使回调能从 ThingsBoard 接收共享属性数据, 设备在连接后需显式请求。此功能使设备在重启后能恢复正确的属性值,保持实际状态。
在ThingsBoard上查看数据
成功发布属性和遥测后,数据将立即出现在 “最新遥测” 选项卡中:
-
点击设备以打开 设备详情 页面,并选择 “最新遥测” 选项卡。
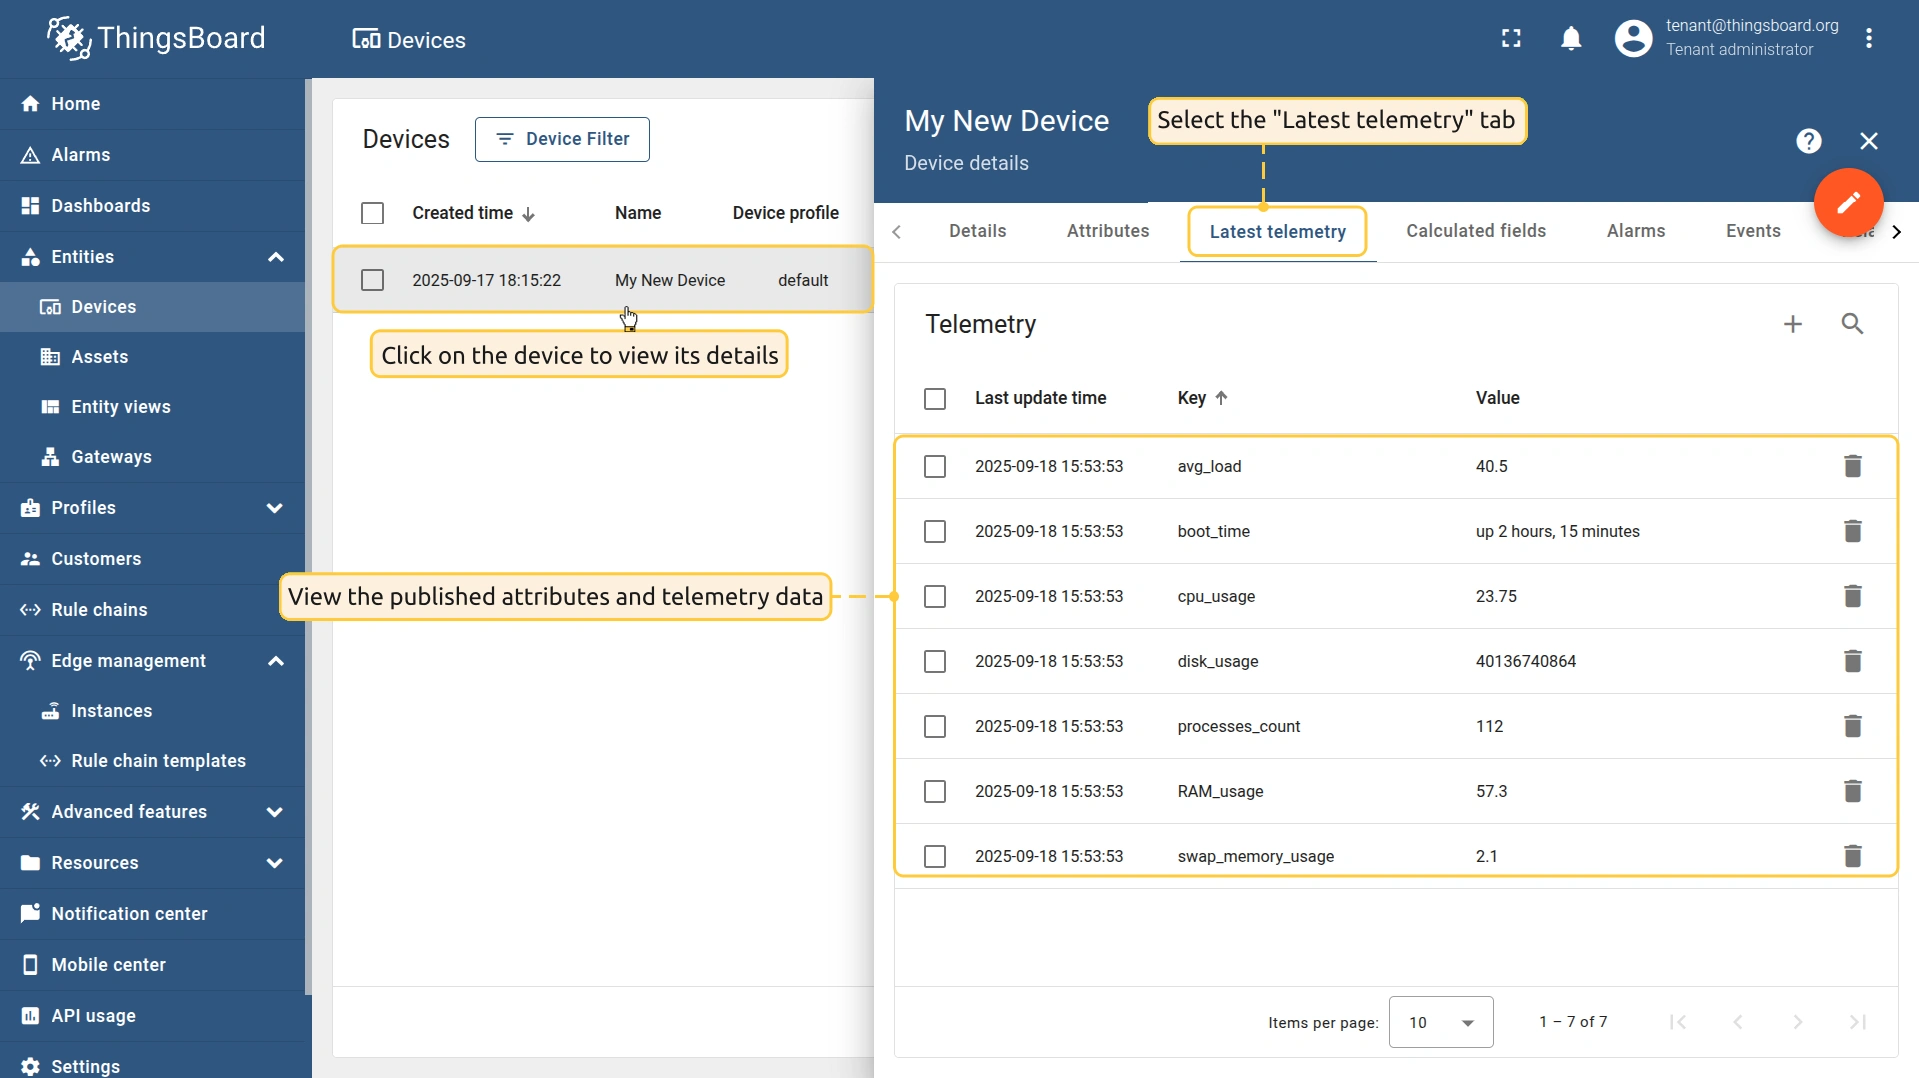
点击设备以打开 设备详情 页面,并选择 “最新遥测” 选项卡。
还可将单板机的属性和遥测显示在仪表板上。 您可以使用自定义部件创建自己的仪表板,或导入现成仪表板。
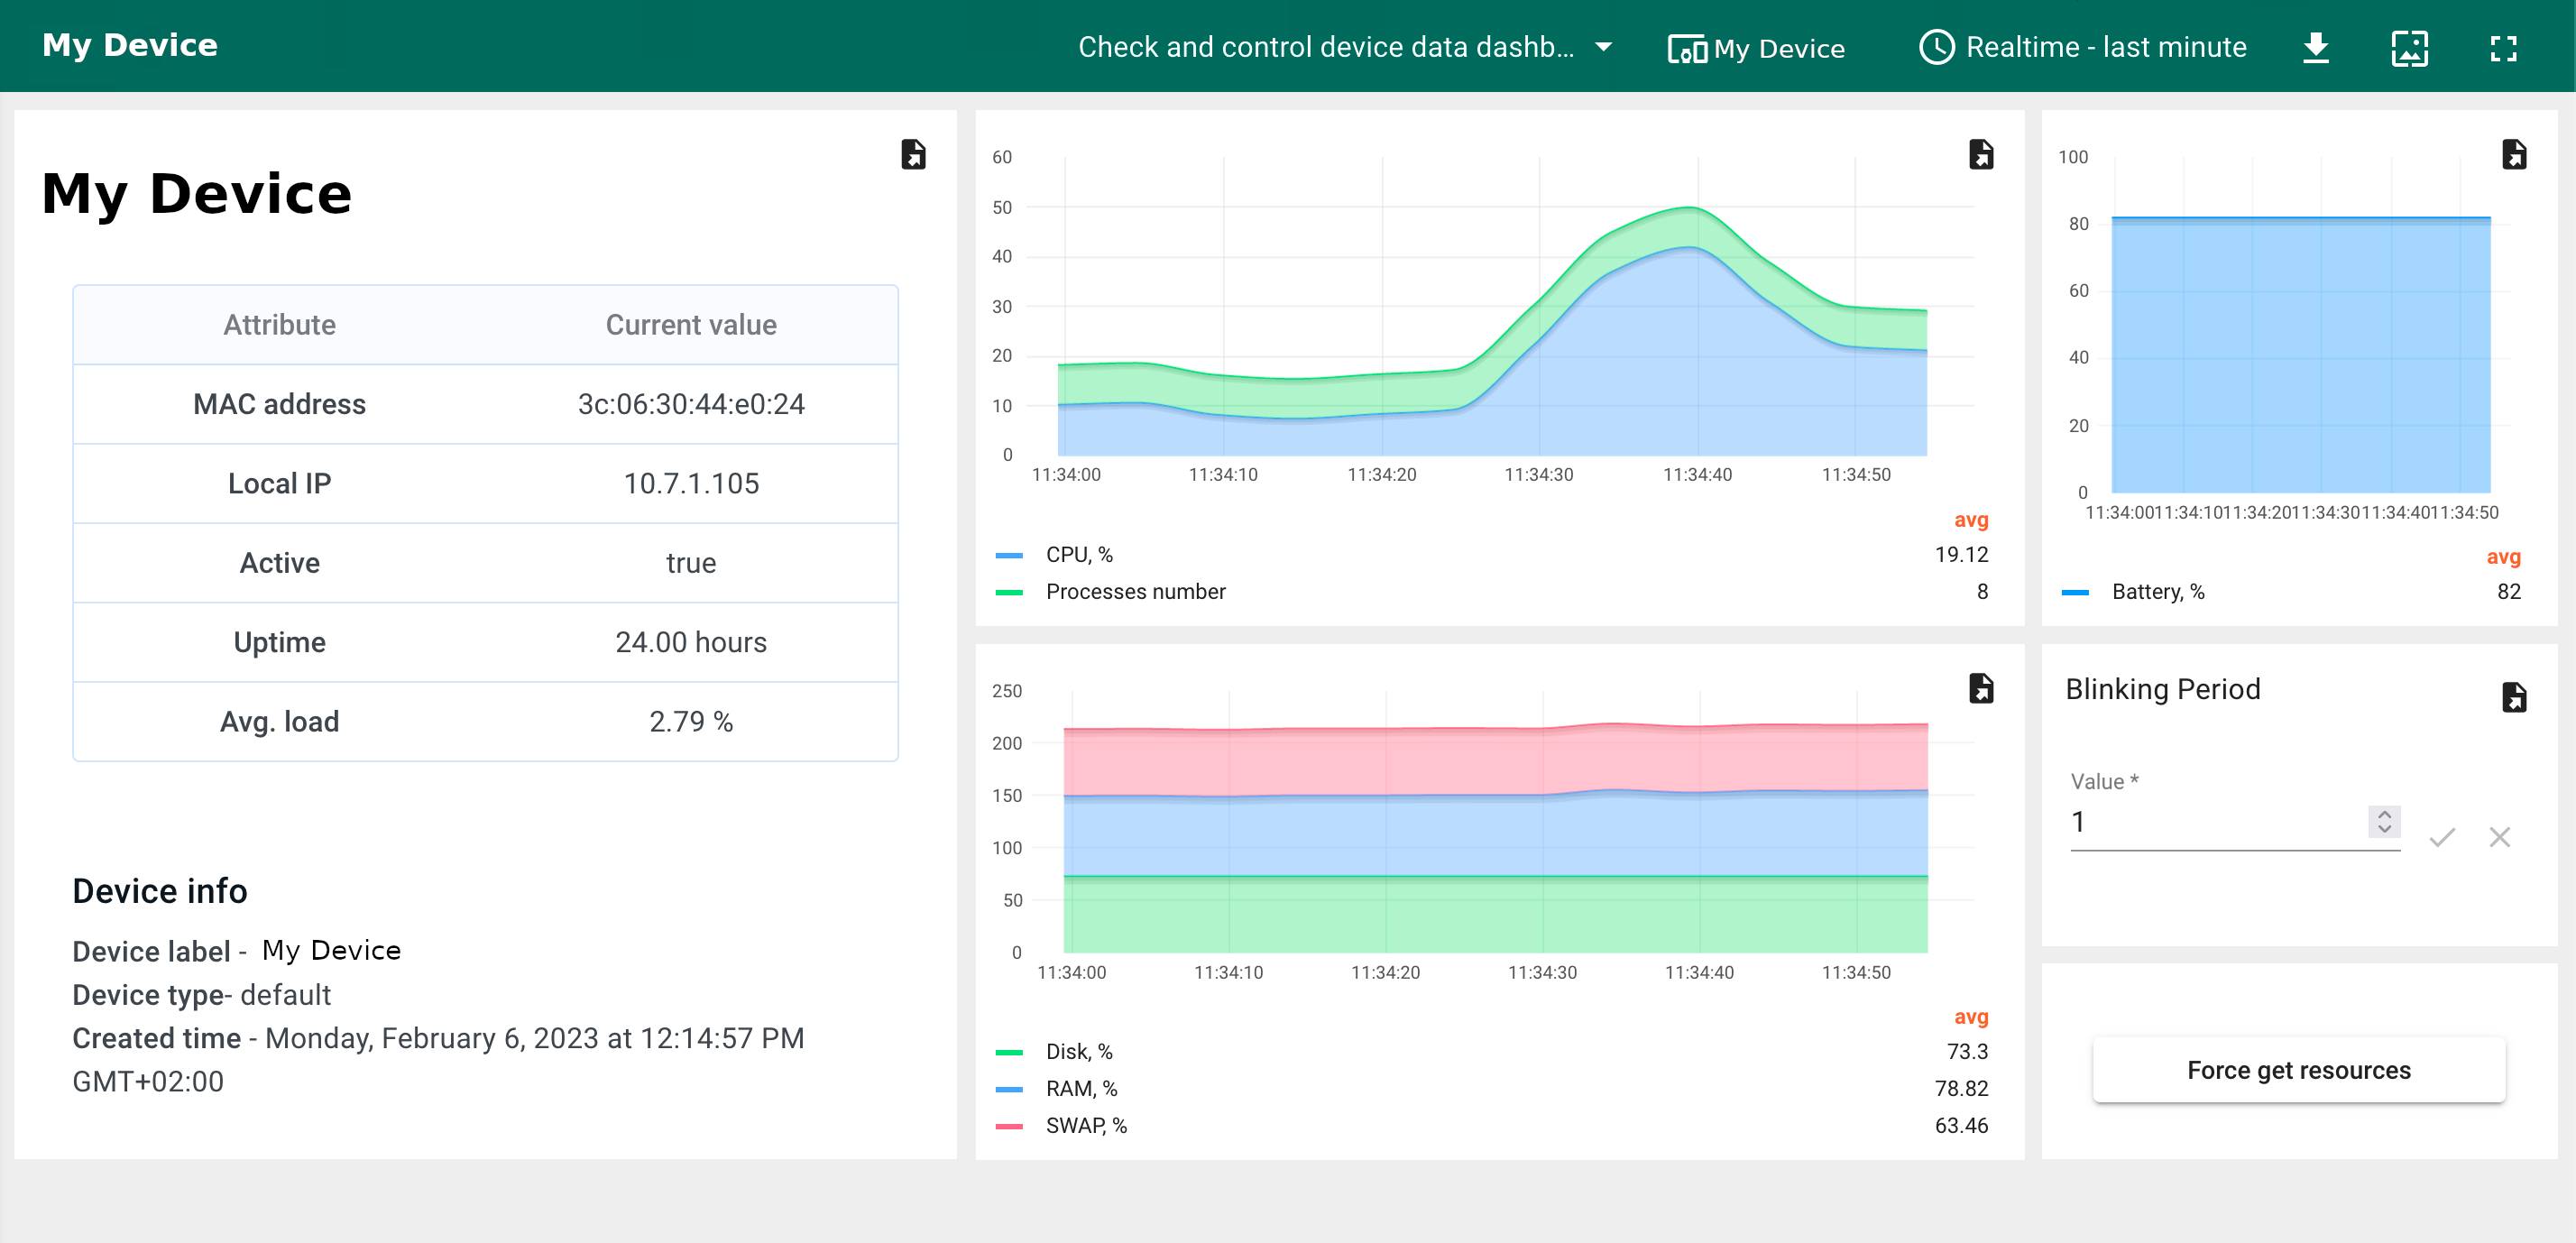
导入仪表盘您可导入 JSON 格式的仪表盘。要导入仪表盘,请进入「仪表盘」组,点击页面右上角的 「+」 按钮,选择 「导入仪表盘」。仪表盘导入窗口将弹出,系统会提示您上传 JSON 文件并点击 「导入」。 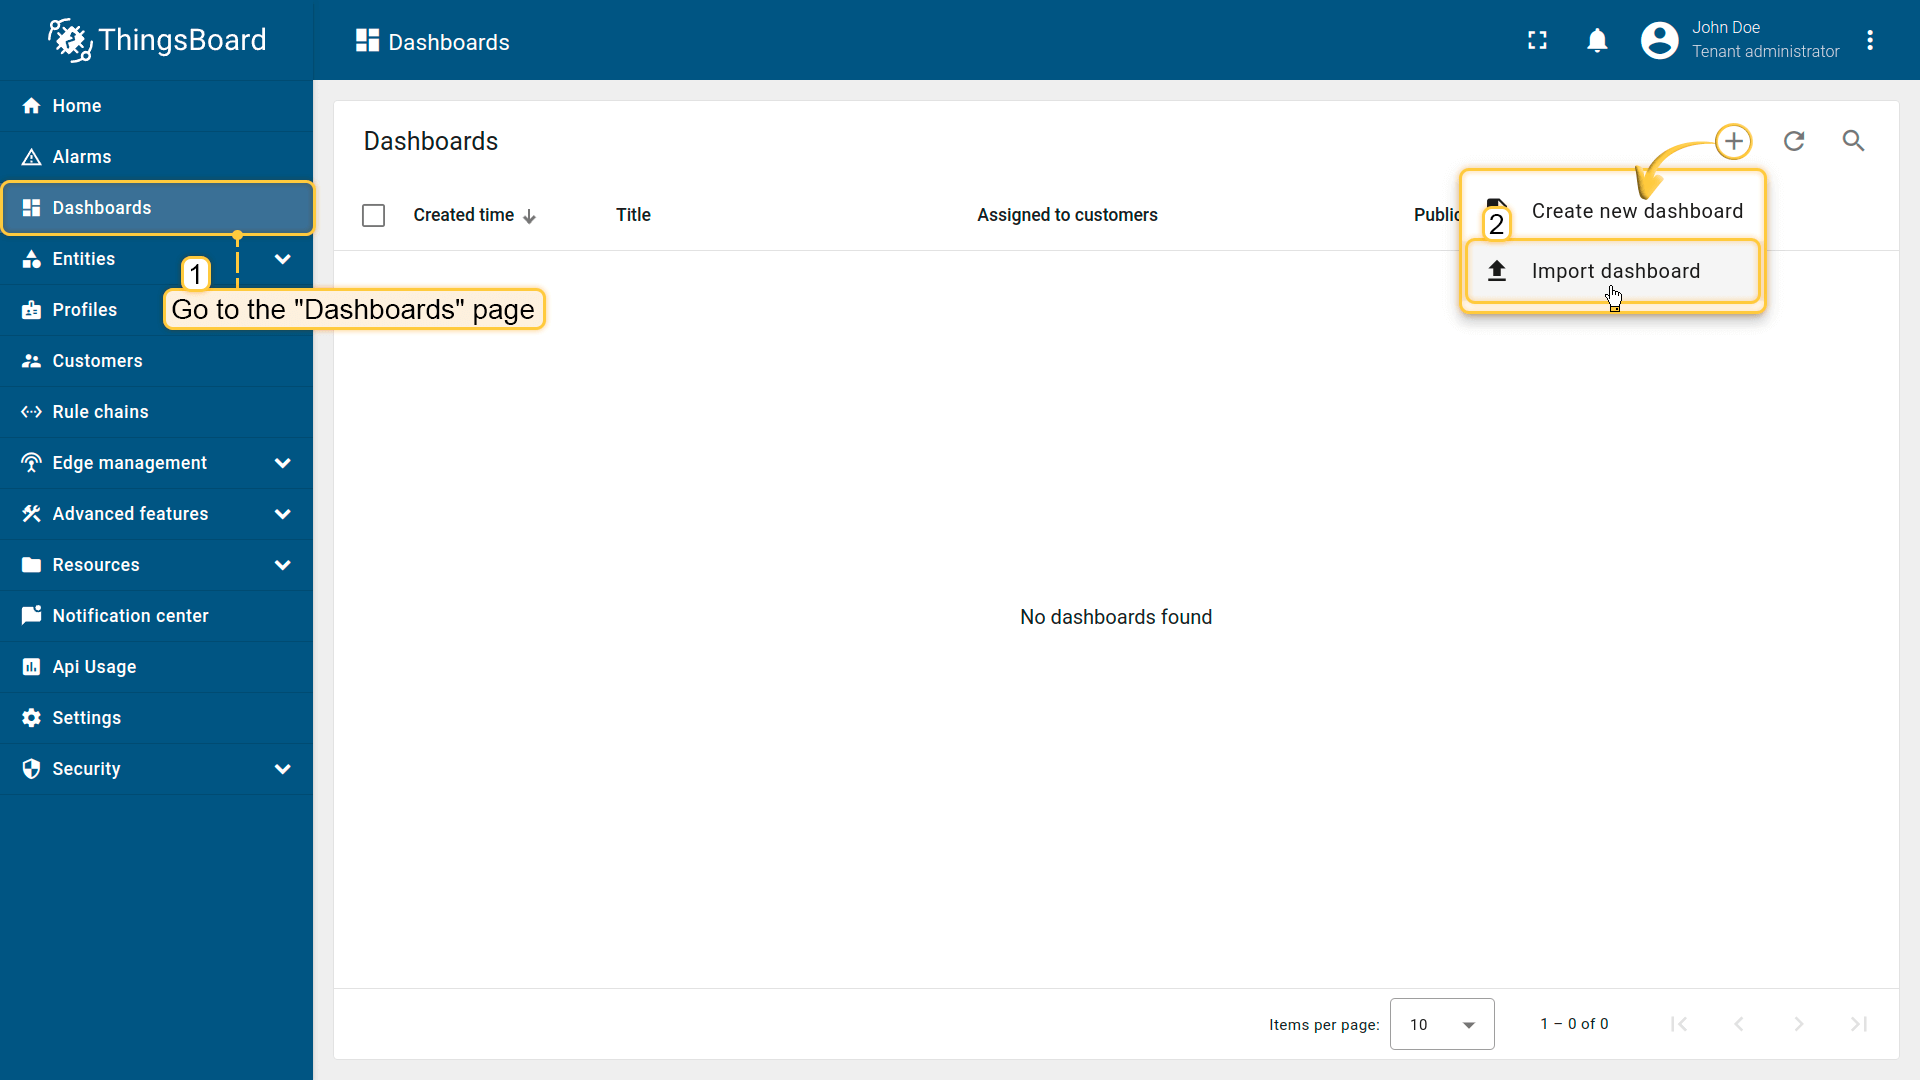 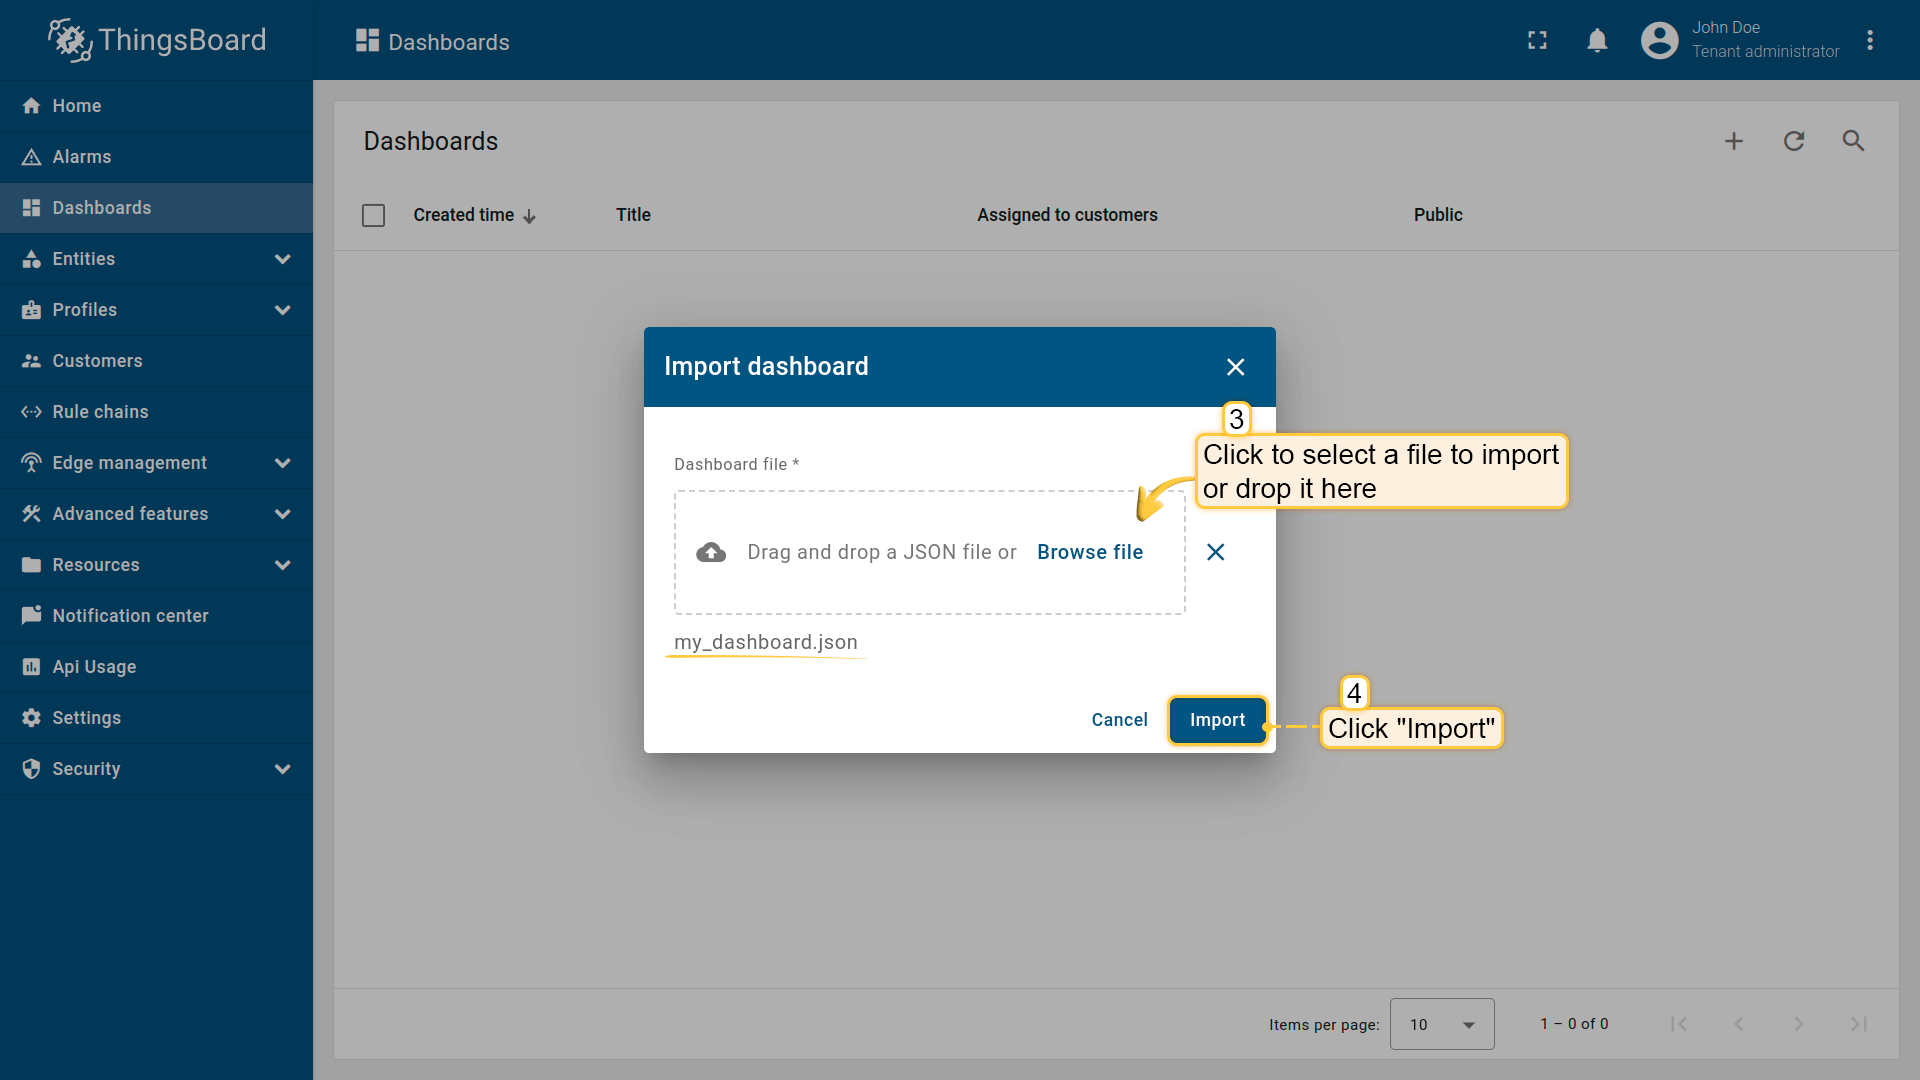 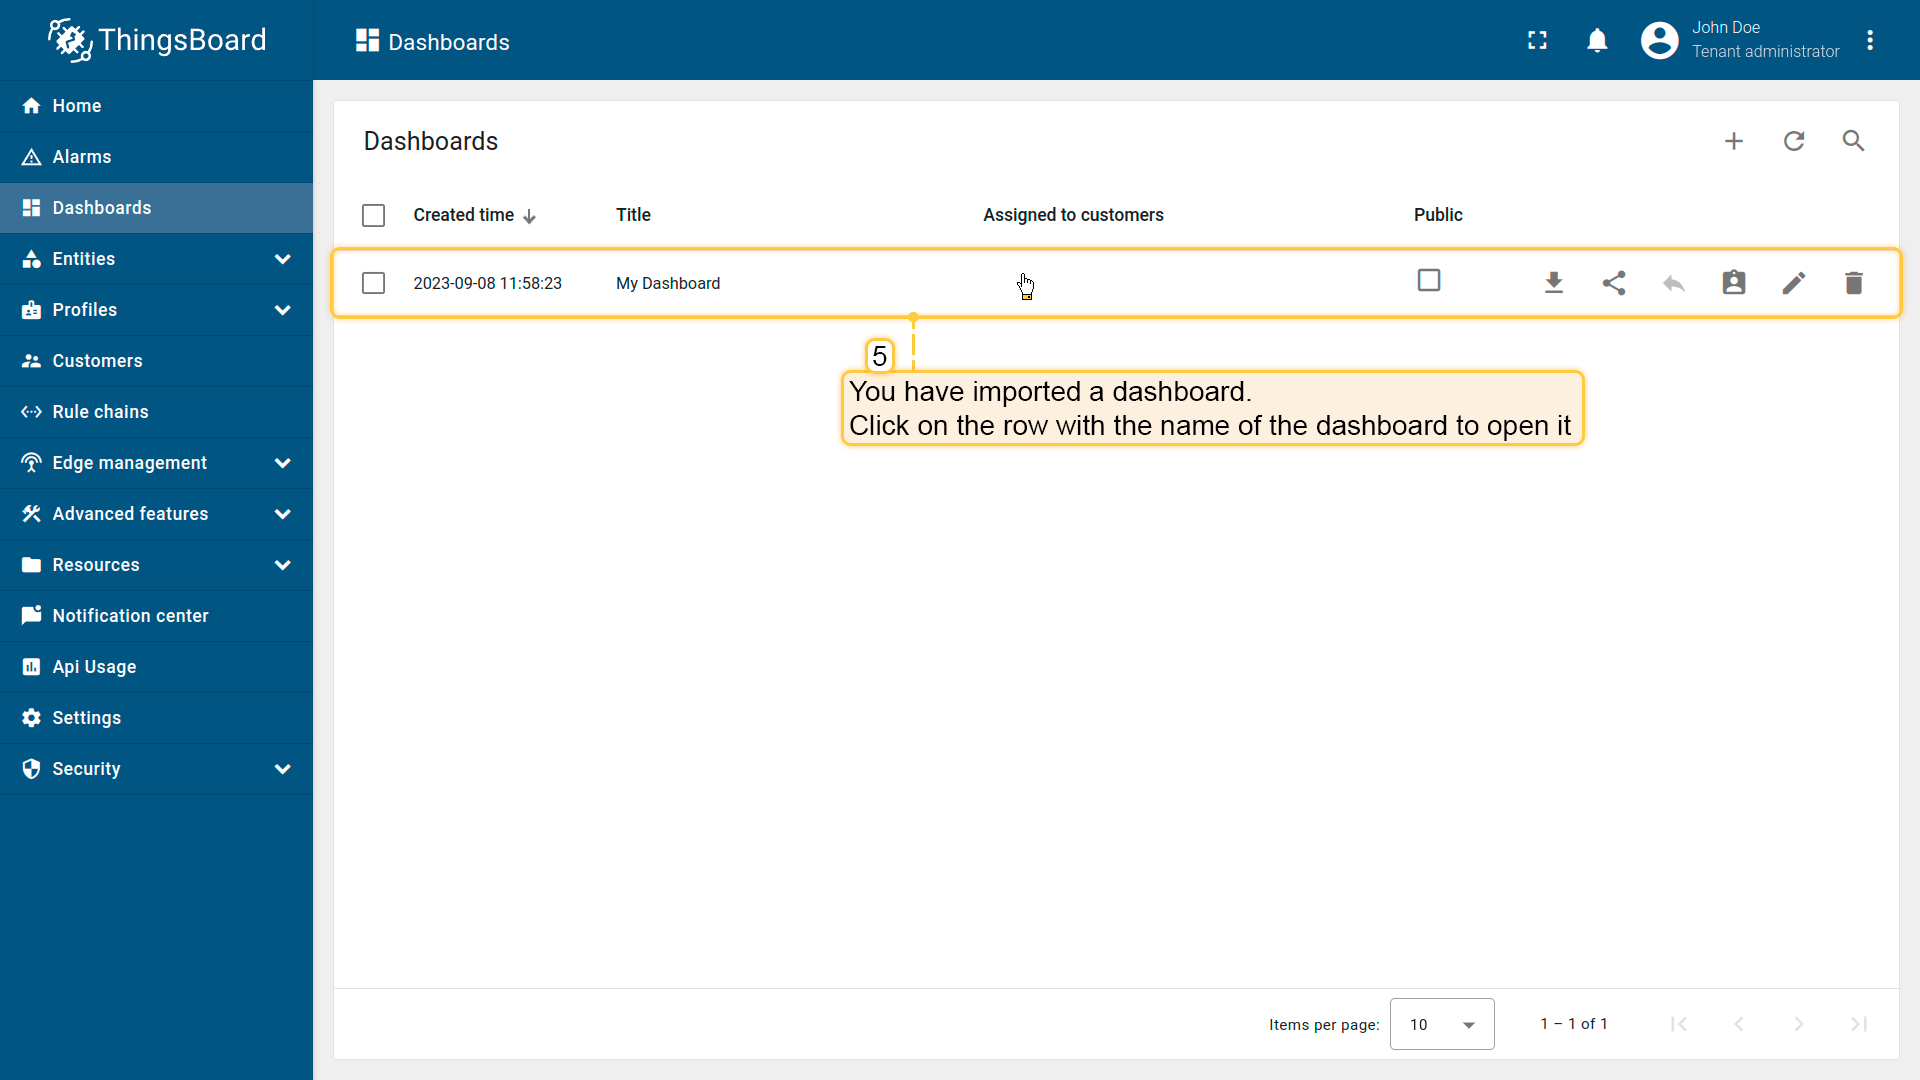 下方可找到仪表盘 JSON 文件: 导入后,我们需要为设备选择实体别名。 操作方式:点击铅笔图标并选择实体别名,选择别名「My device」并点击铅笔图标打开编辑。 然后,从下拉列表中选择名为 My device 的设备并保存实体别名。完成后即可查看设备数据。 若操作正确,您将看到以下仪表盘:
|
创建新仪表盘我们将创建仪表盘并添加最常用的部件。请参见下方说明。
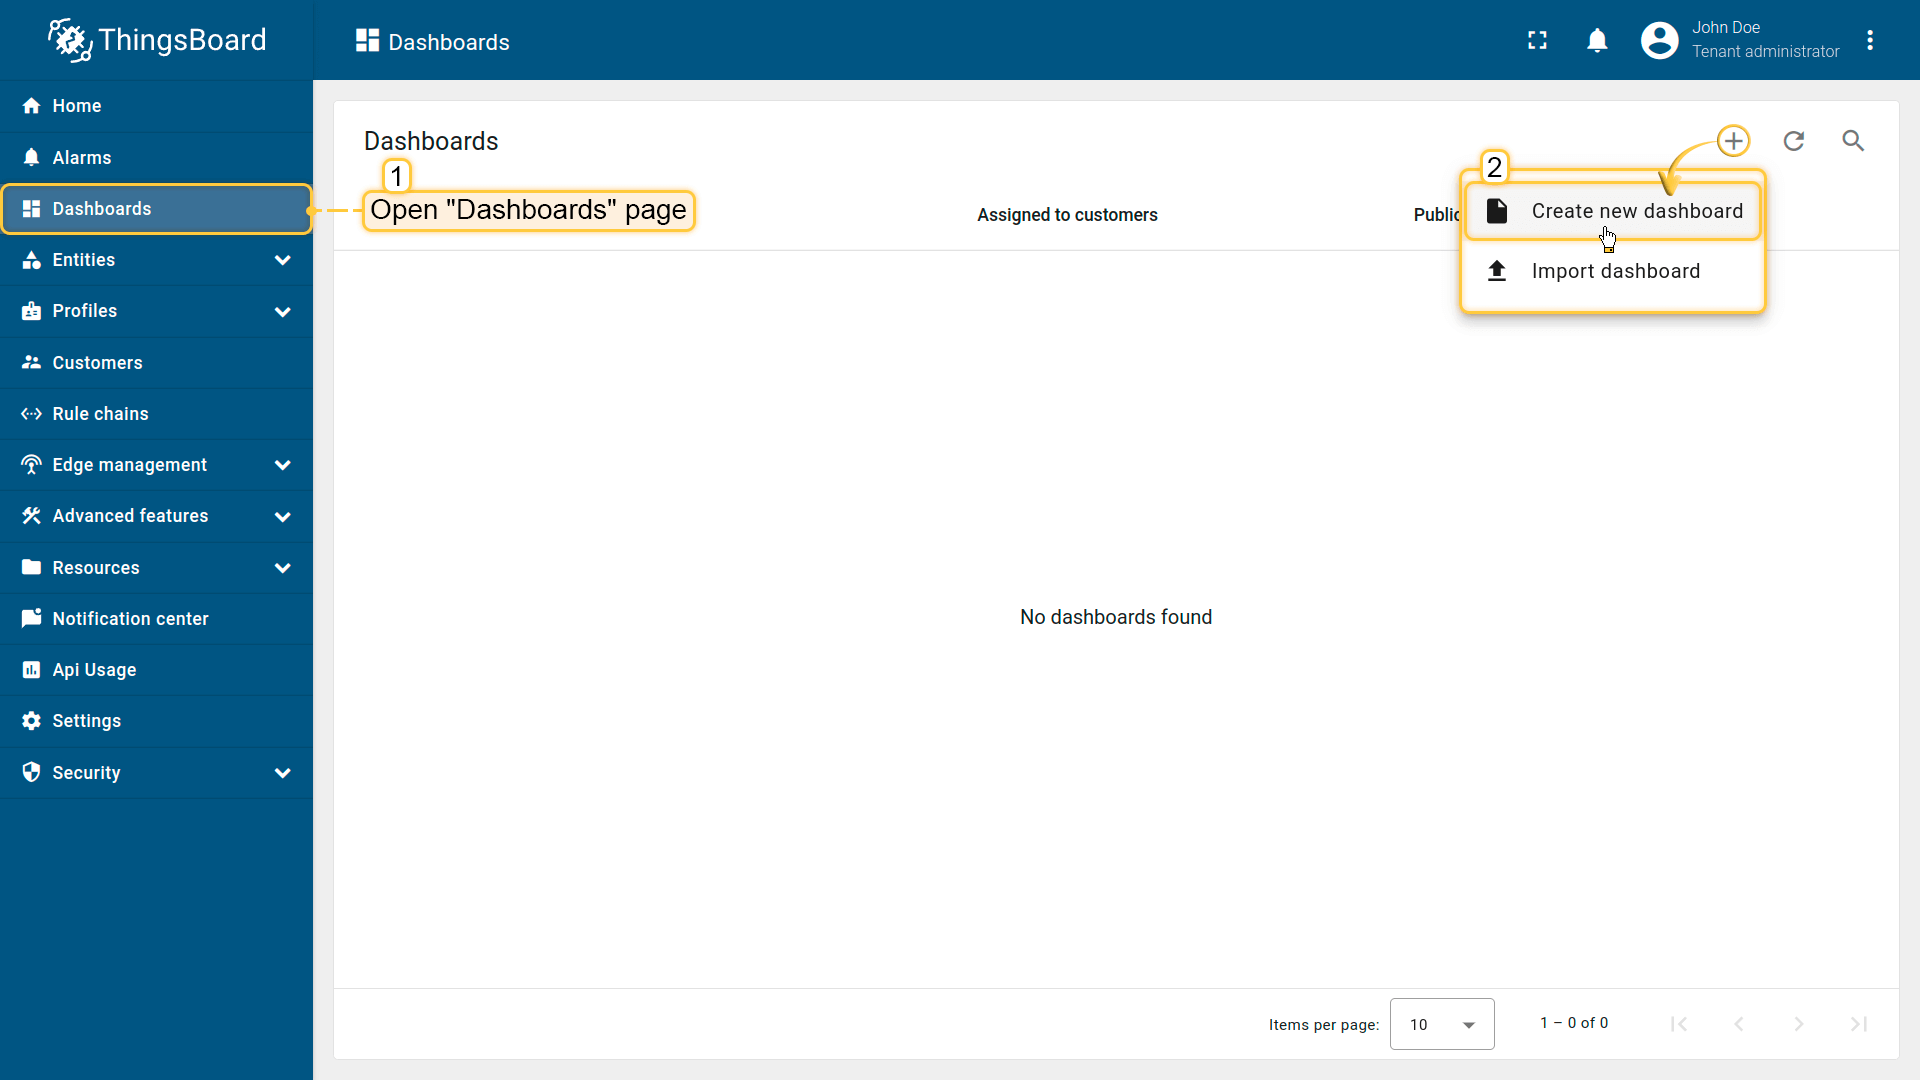 Open the Dashboards page. Click on the ”+” icon in the top right corner. Select “Create new dashboard”; 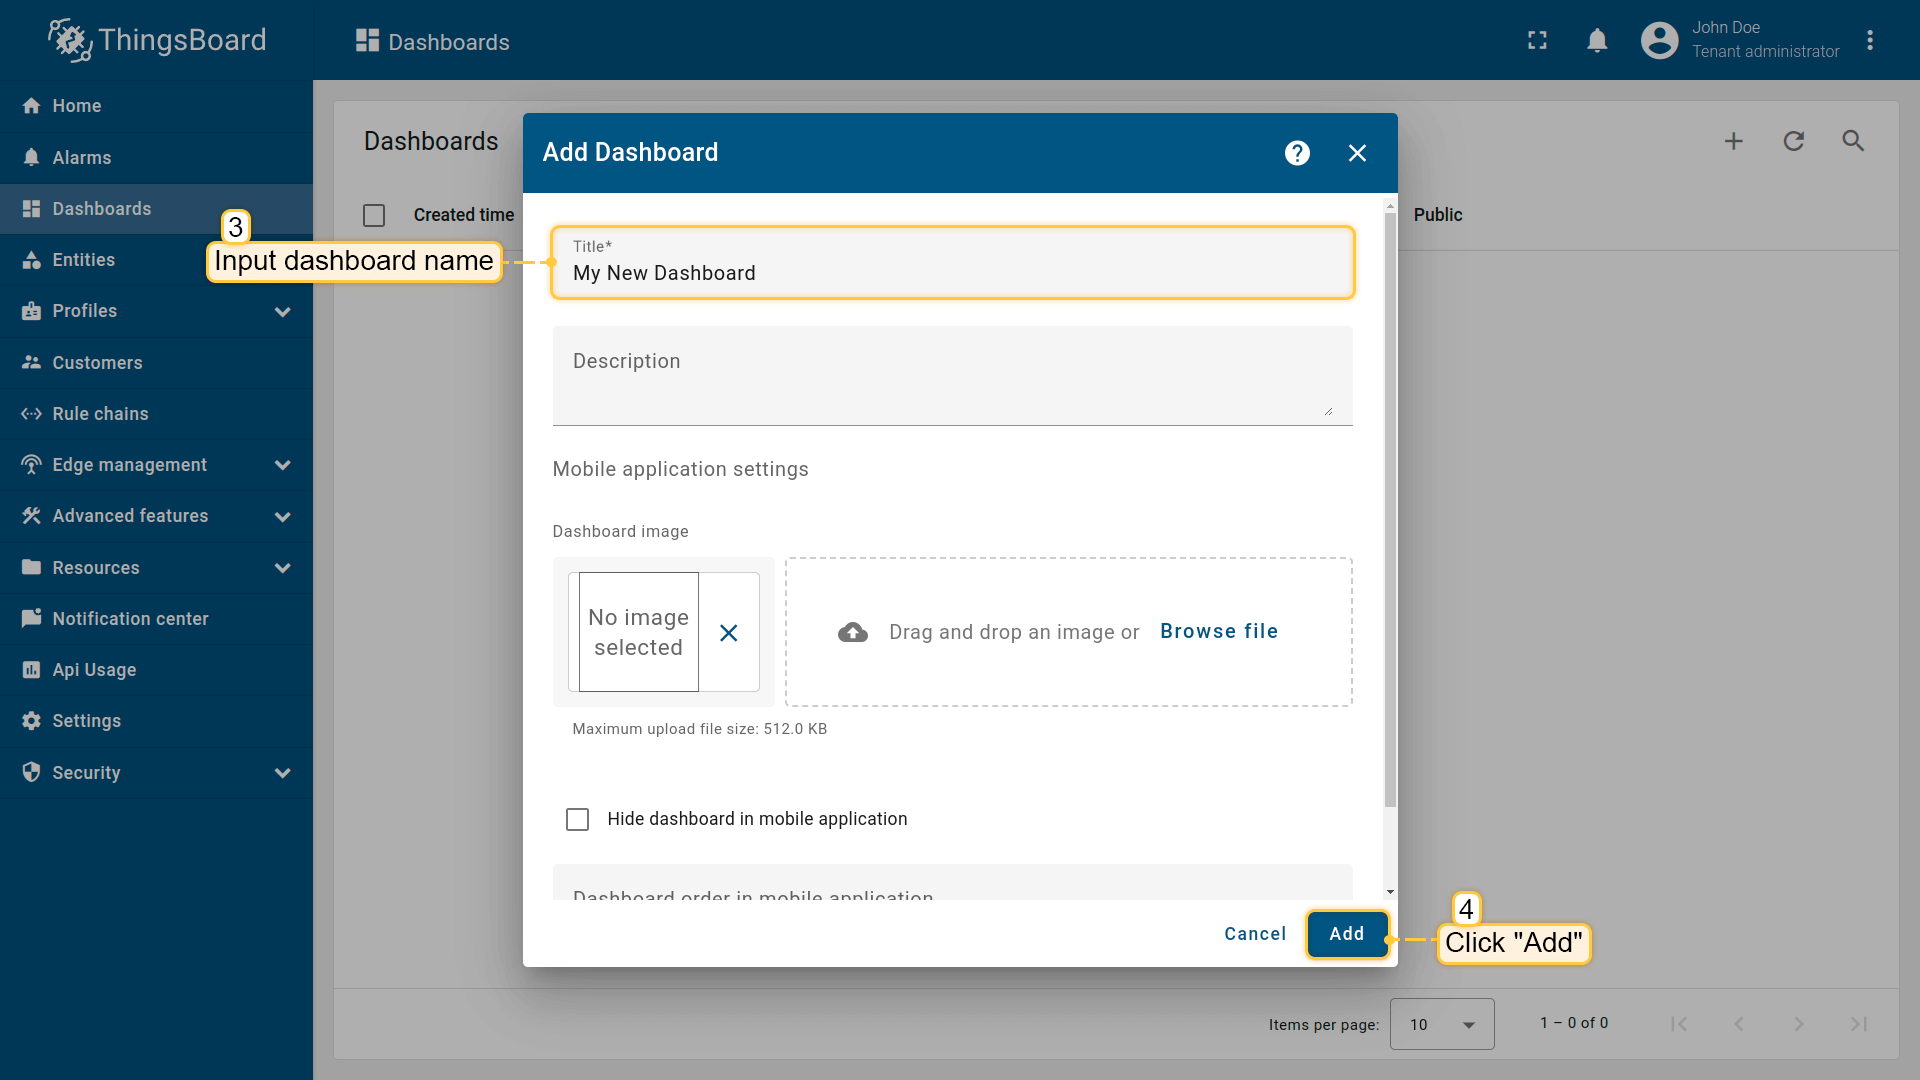 Input dashboard name. For example, “My New Dashboard”. Click “Add” to add the dashboard; 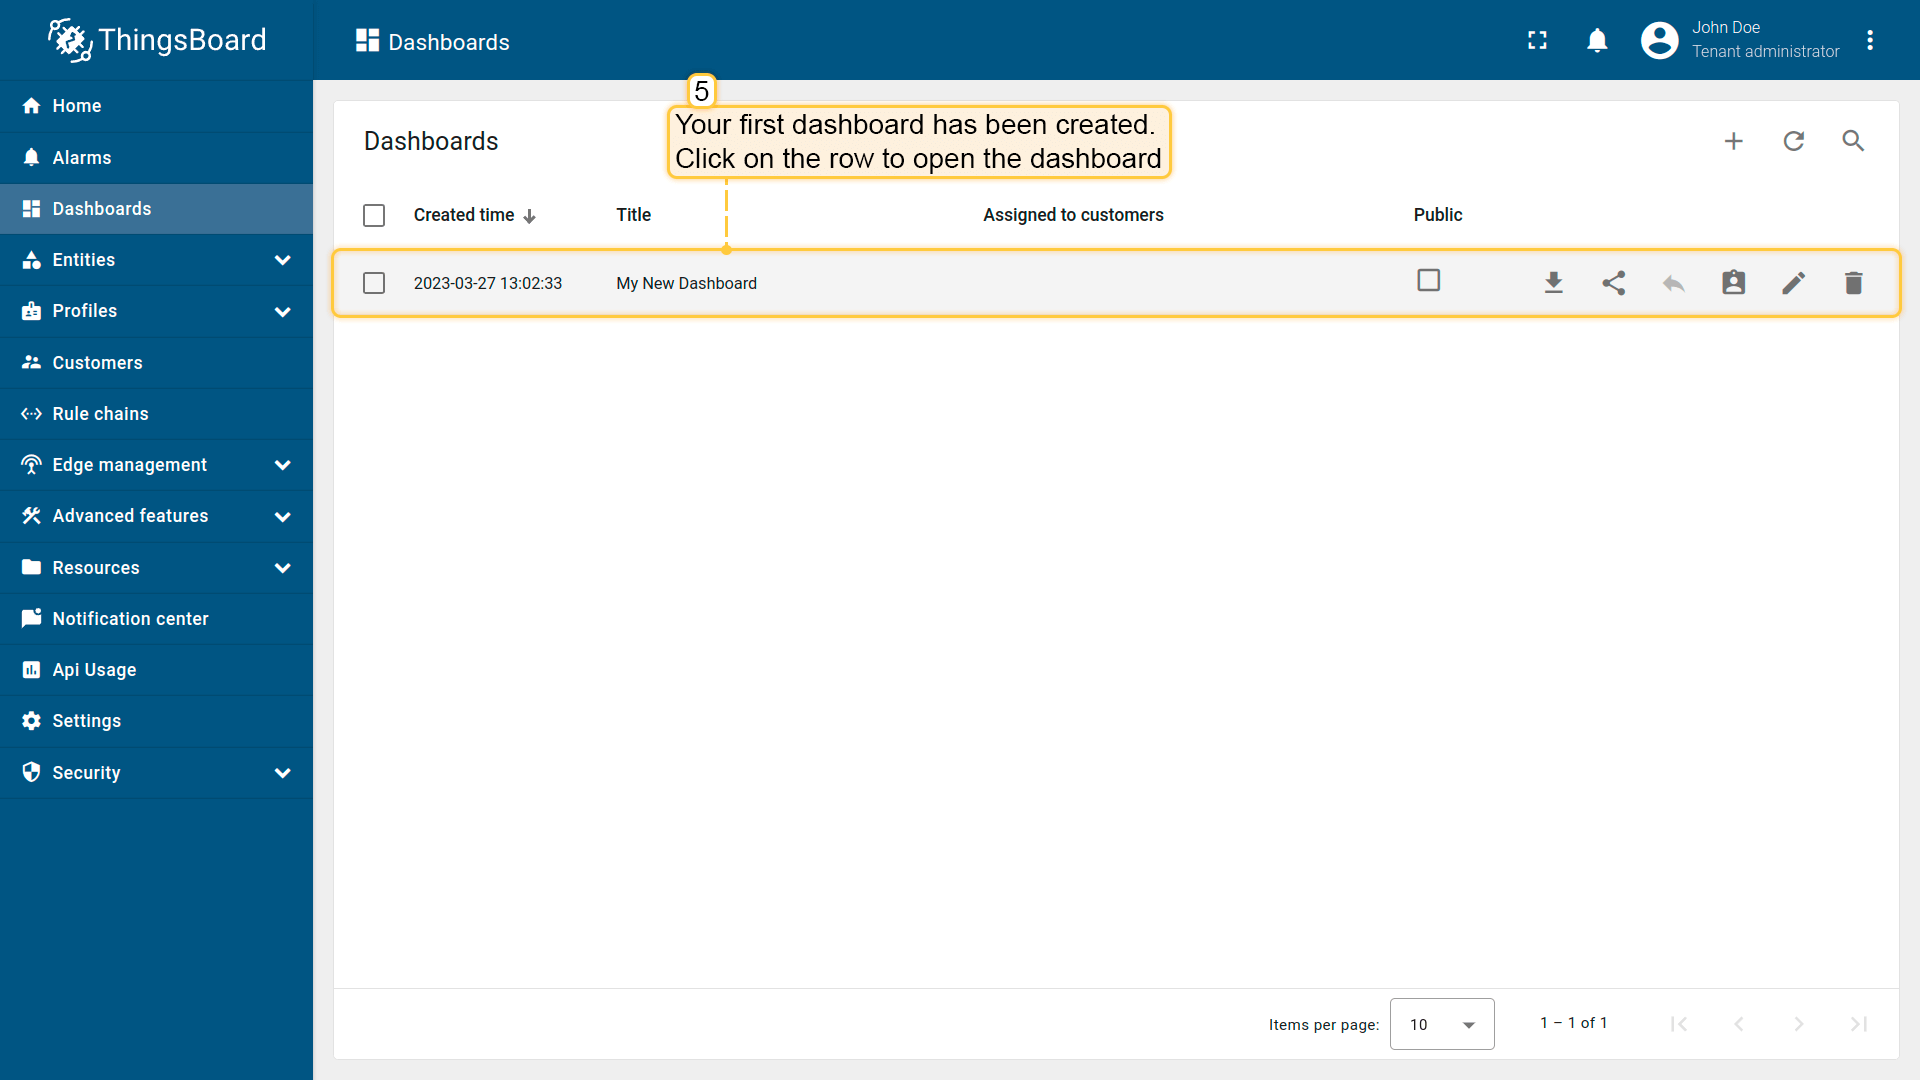 Your dashboard should be listed first since the table sorts dashboards using the creation time of the creation by default. Click on the “Open dashboard” icon. 添加实体别名别名是对部件中使用的单个实体或实体组的引用。别名可以是静态或动态的。我们将使用「单个实体」别名,引用单个实体,此处为「NVIDIA Jetson Xavier NX Developer Kit」。也可以配置引用多个设备的别名,例如某类型的设备或与某资产相关的设备。您可在此处了解更多关于不同别名的信息。
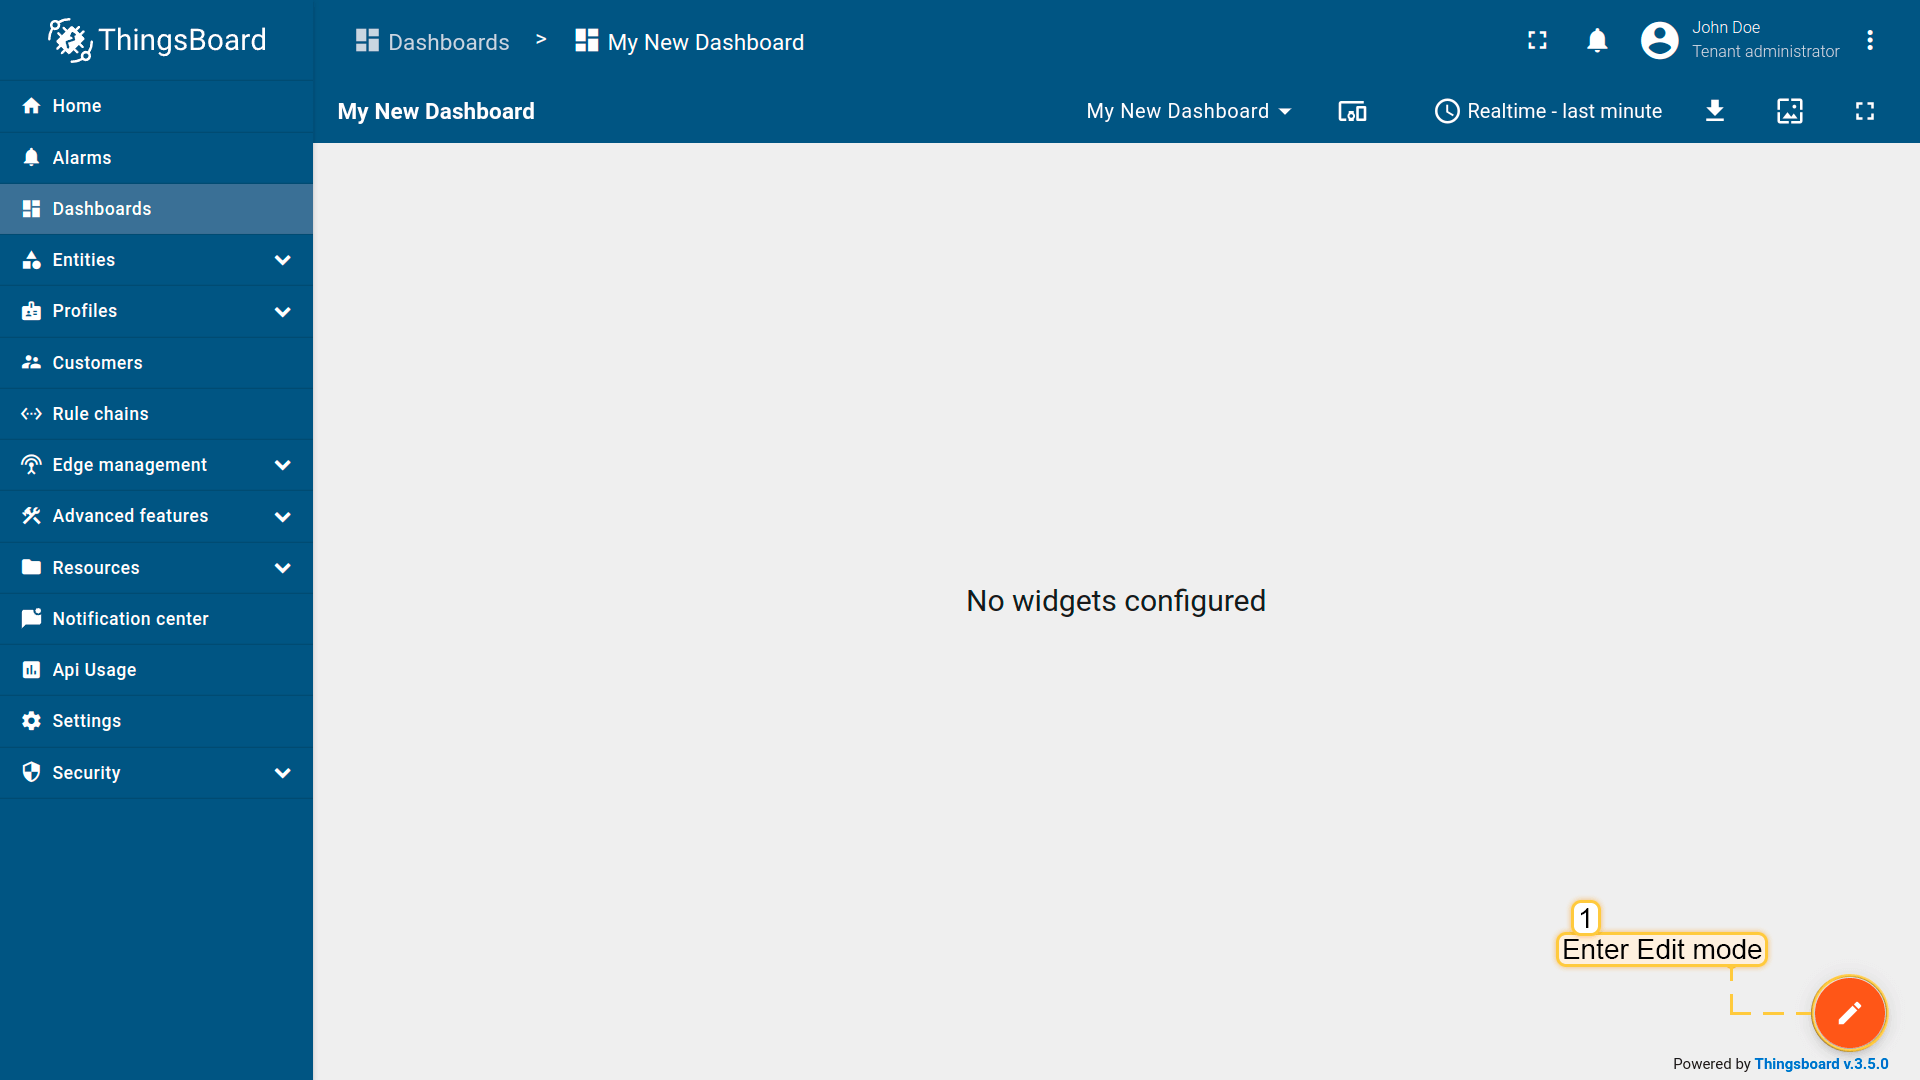 Enter edit mode. Click on the pencil button in the bottom right corner; 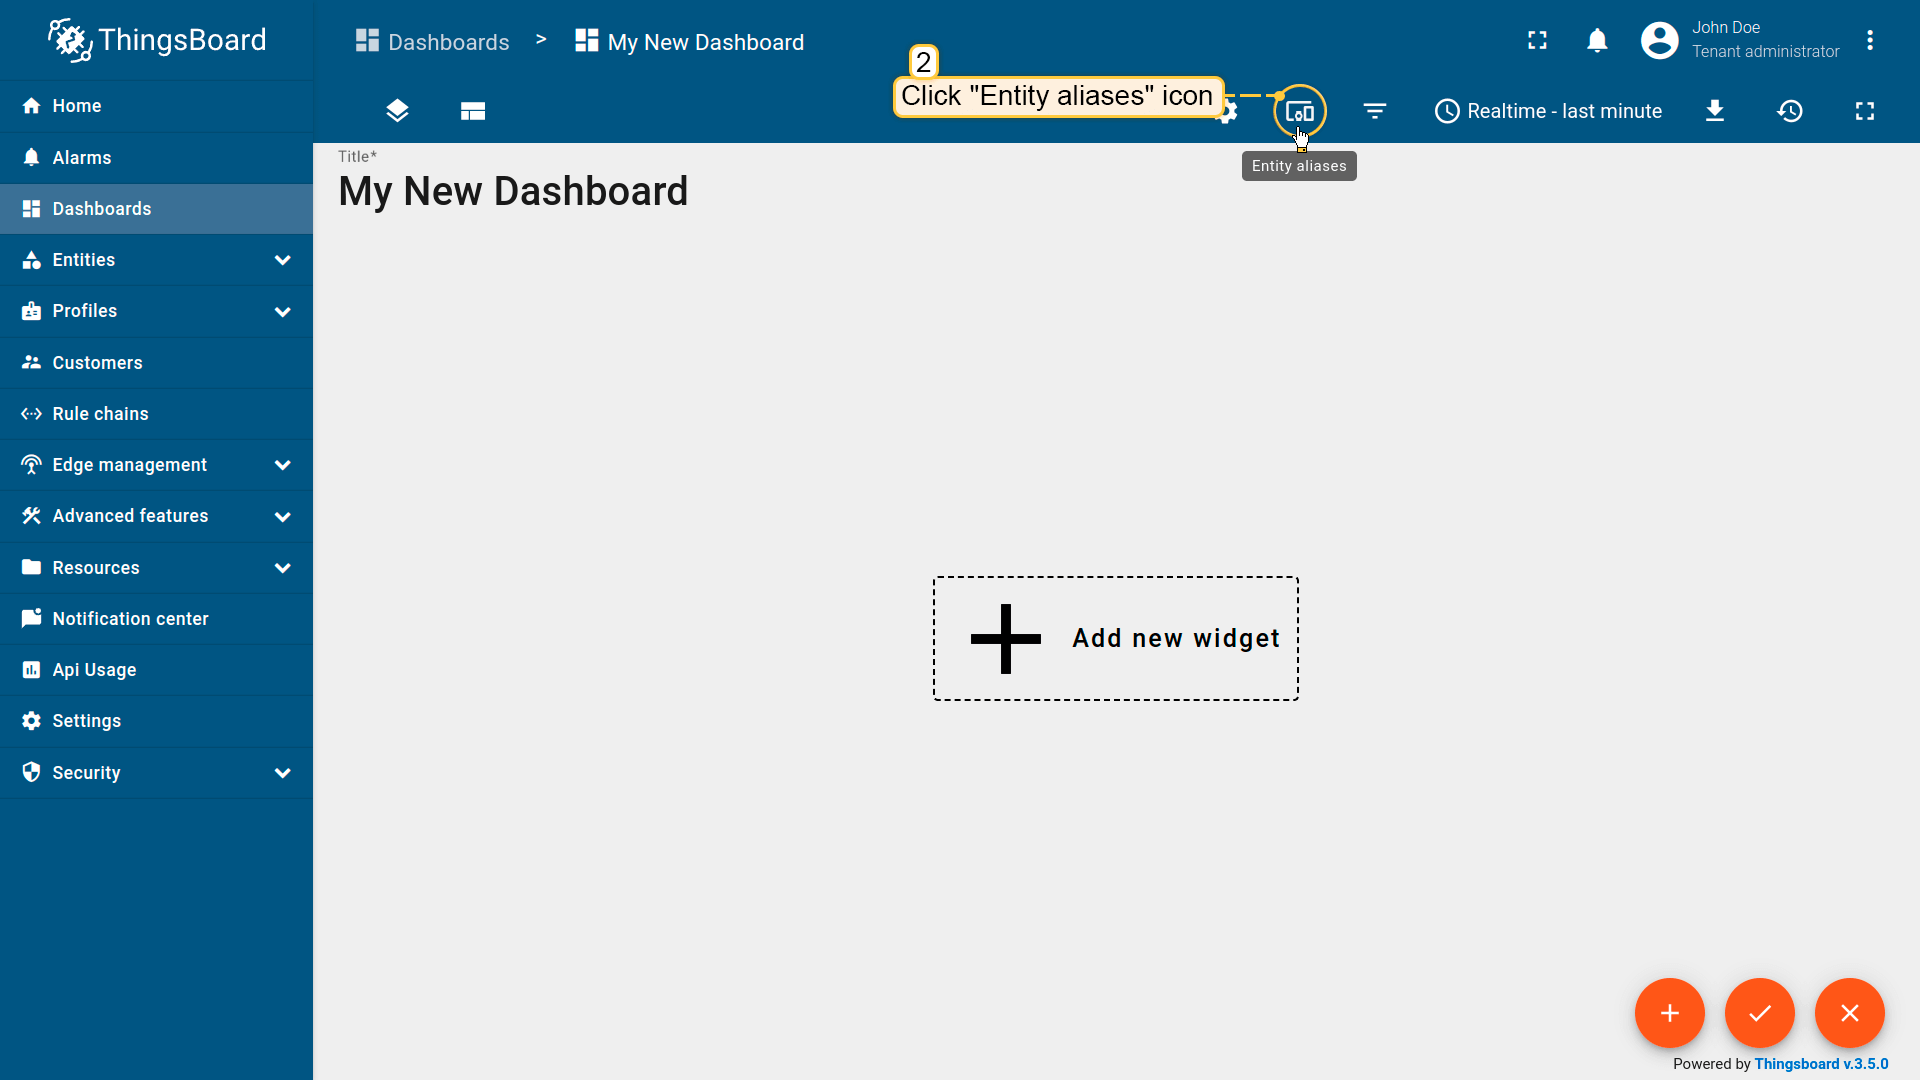 Click the “Entity Aliases” icon in the top right part of the screen. You will see an empty list of Entity aliases; 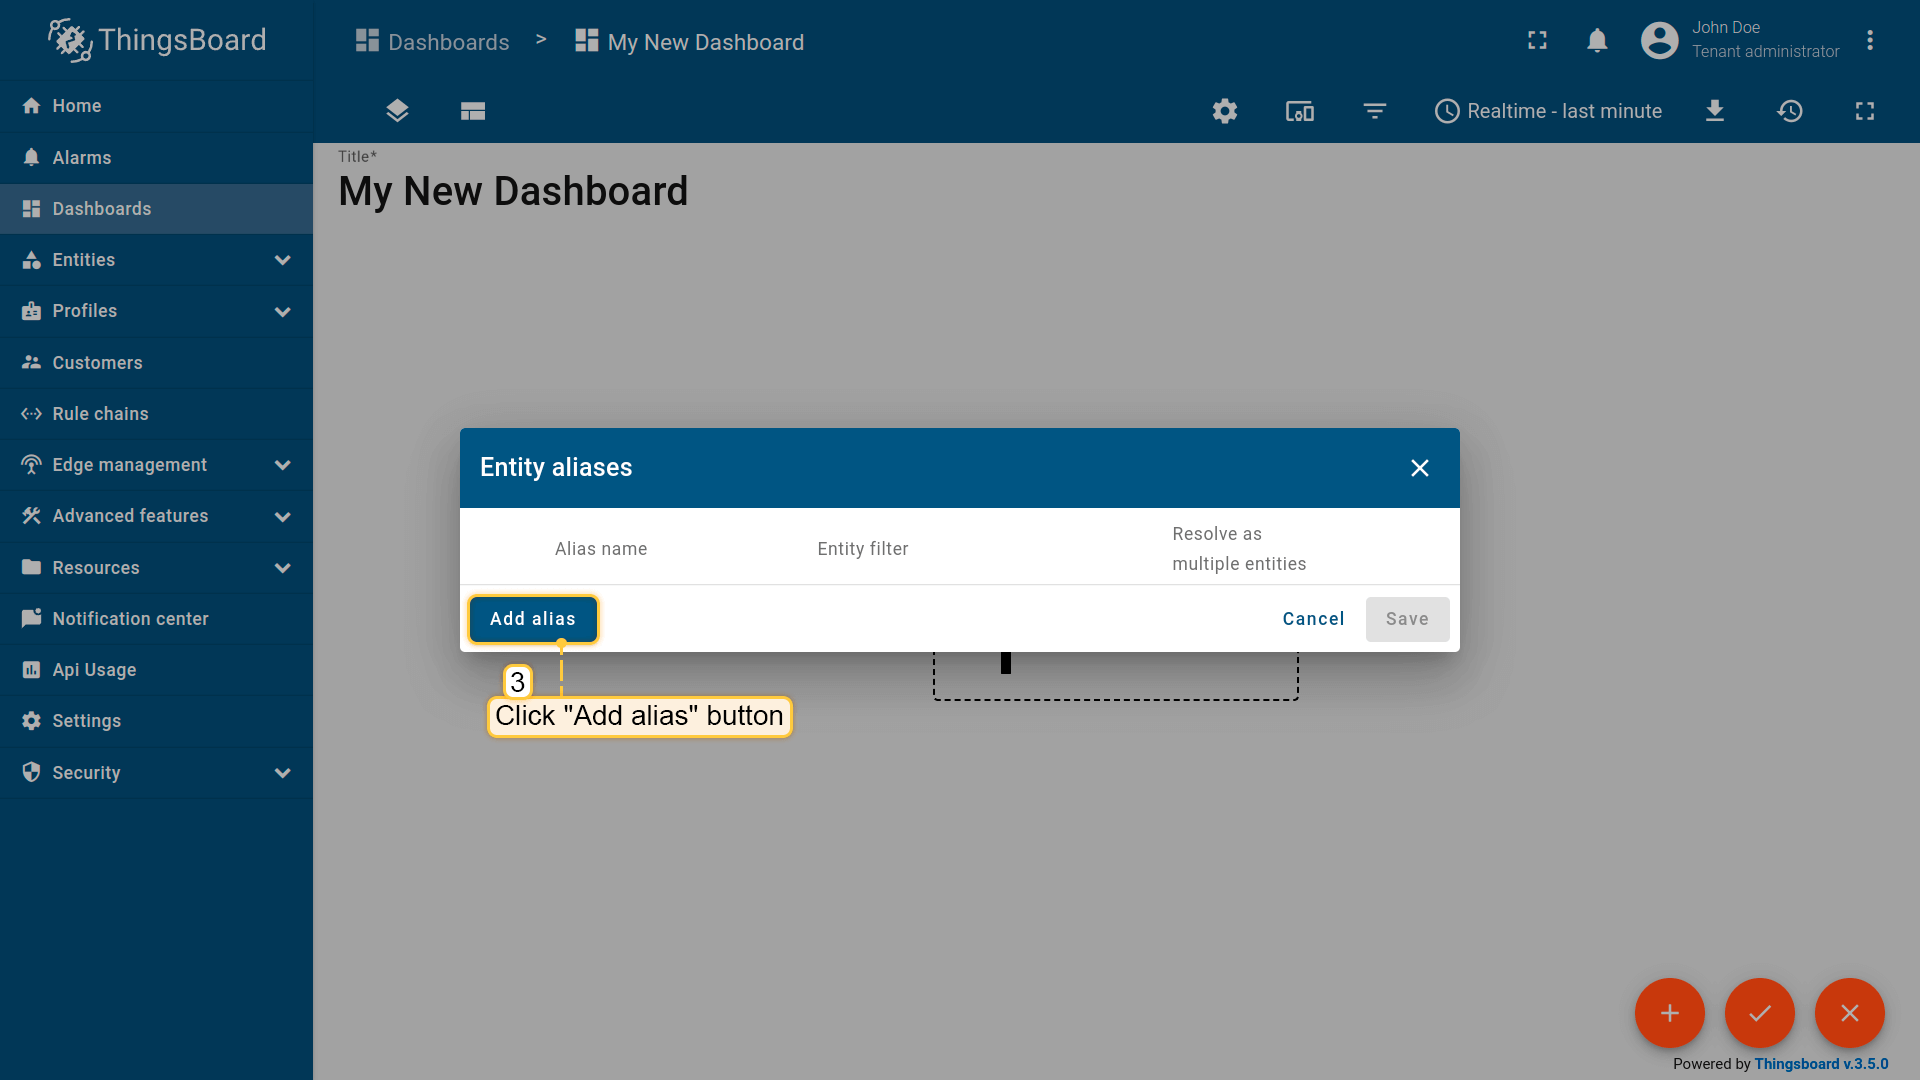 Click “Add alias”; 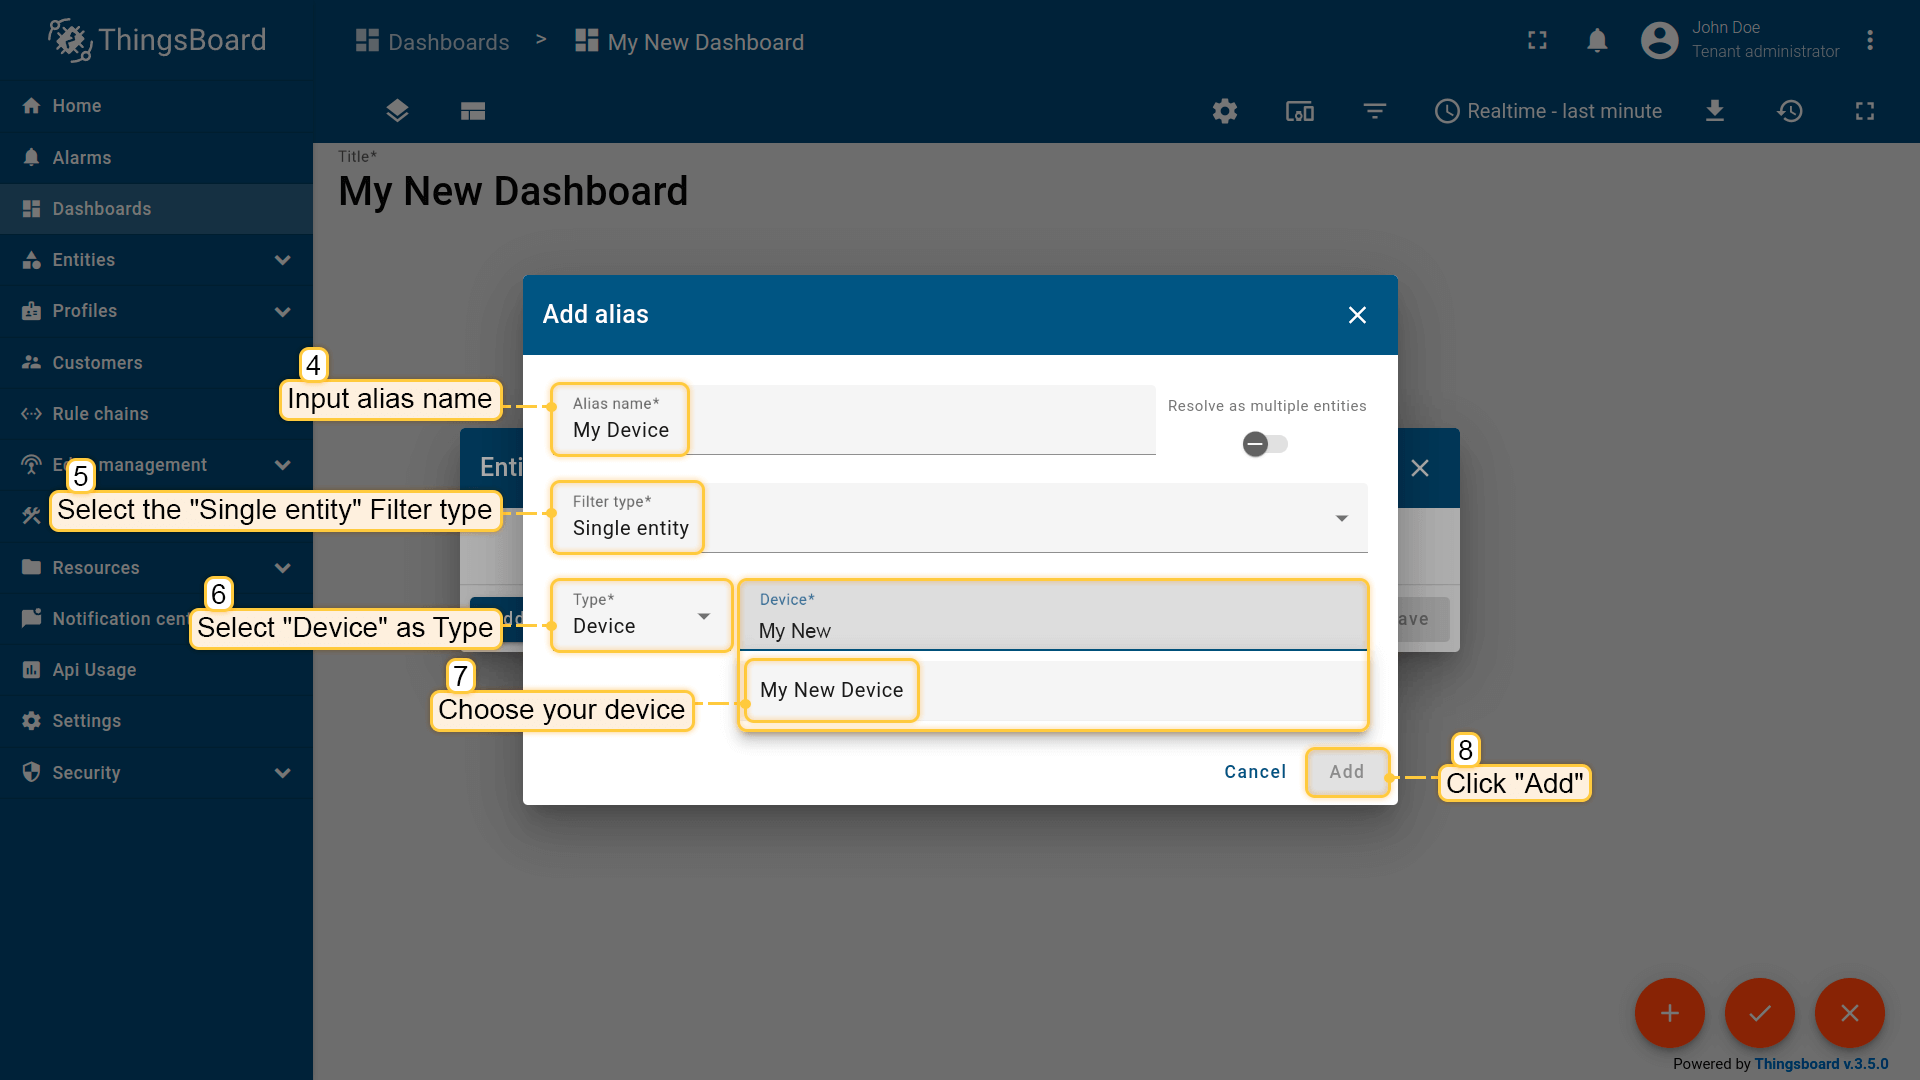 Enter an alias name (for example, “My Device”). Choose “Single entity” as the Filter type, select “Device” for Type, and begin typing “My New” to trigger autocomplete suggestions; 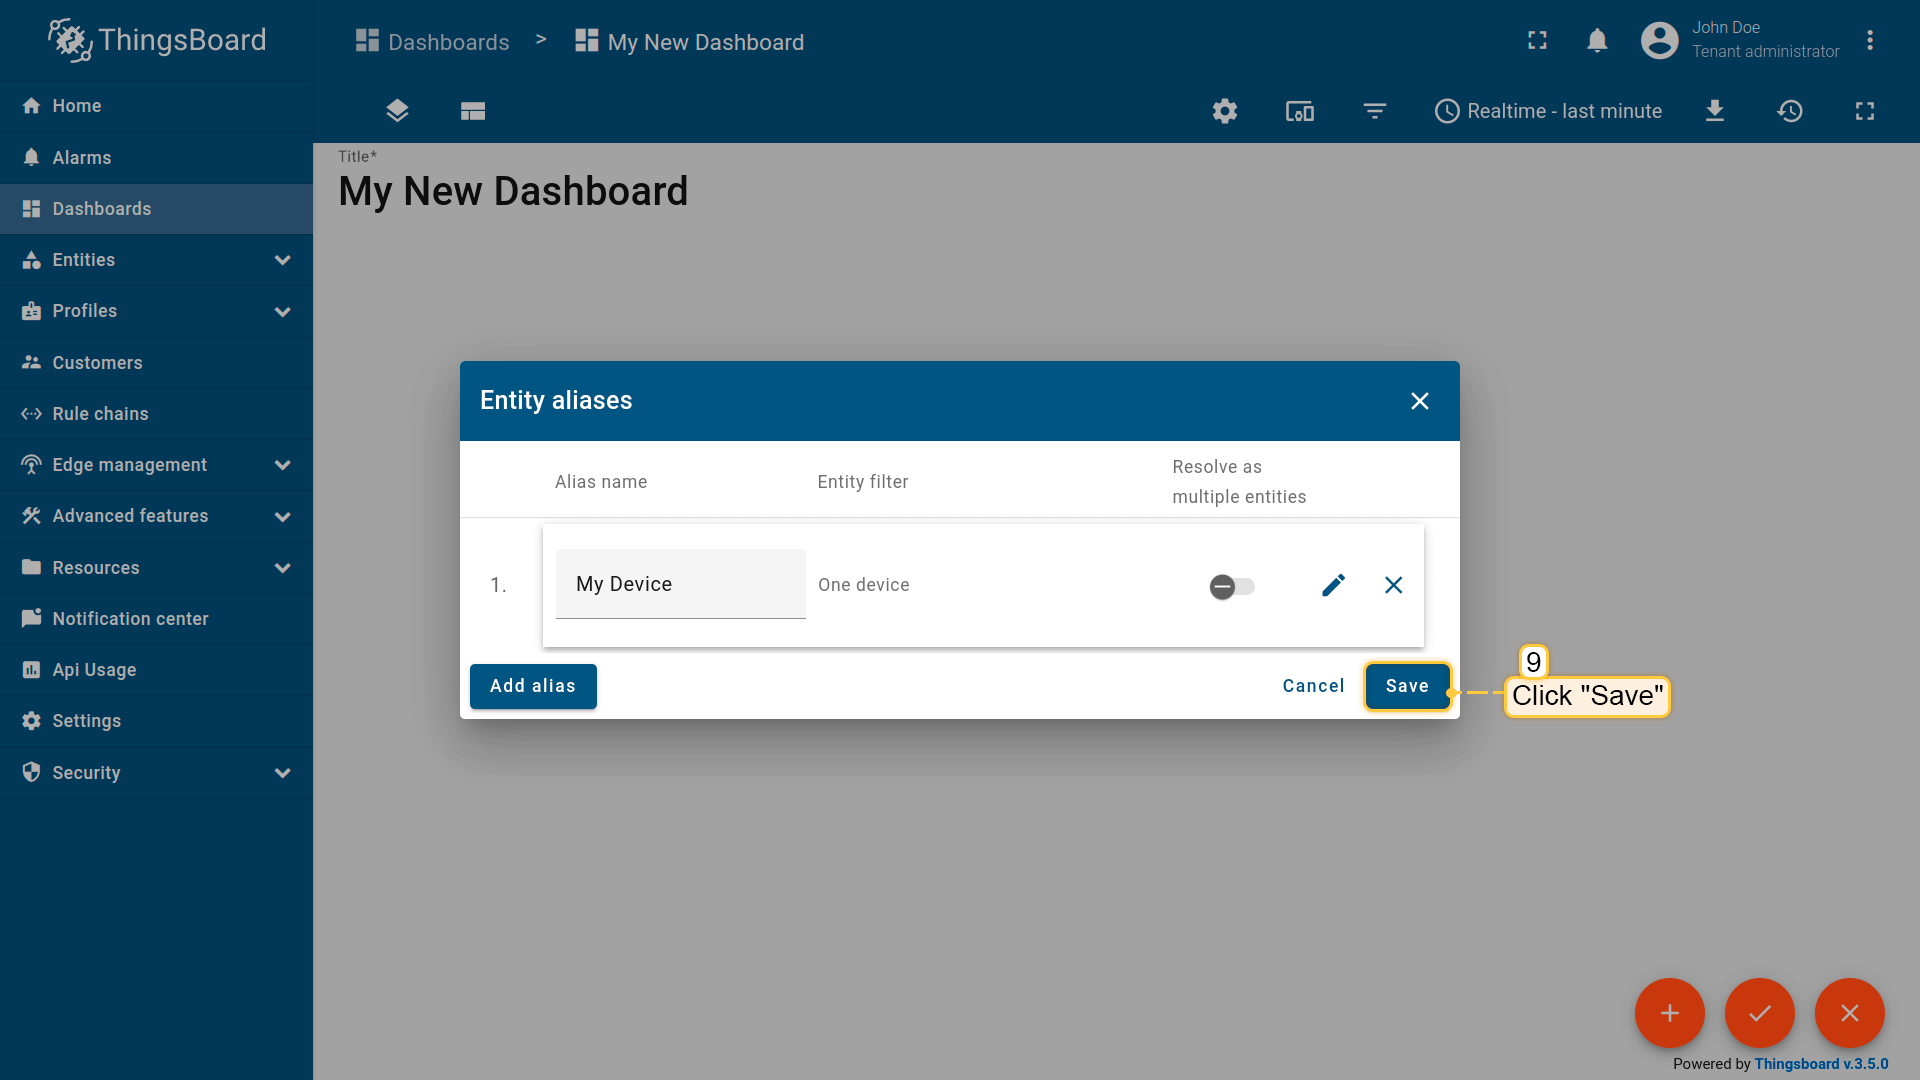 Click “Add” and then “Save”; 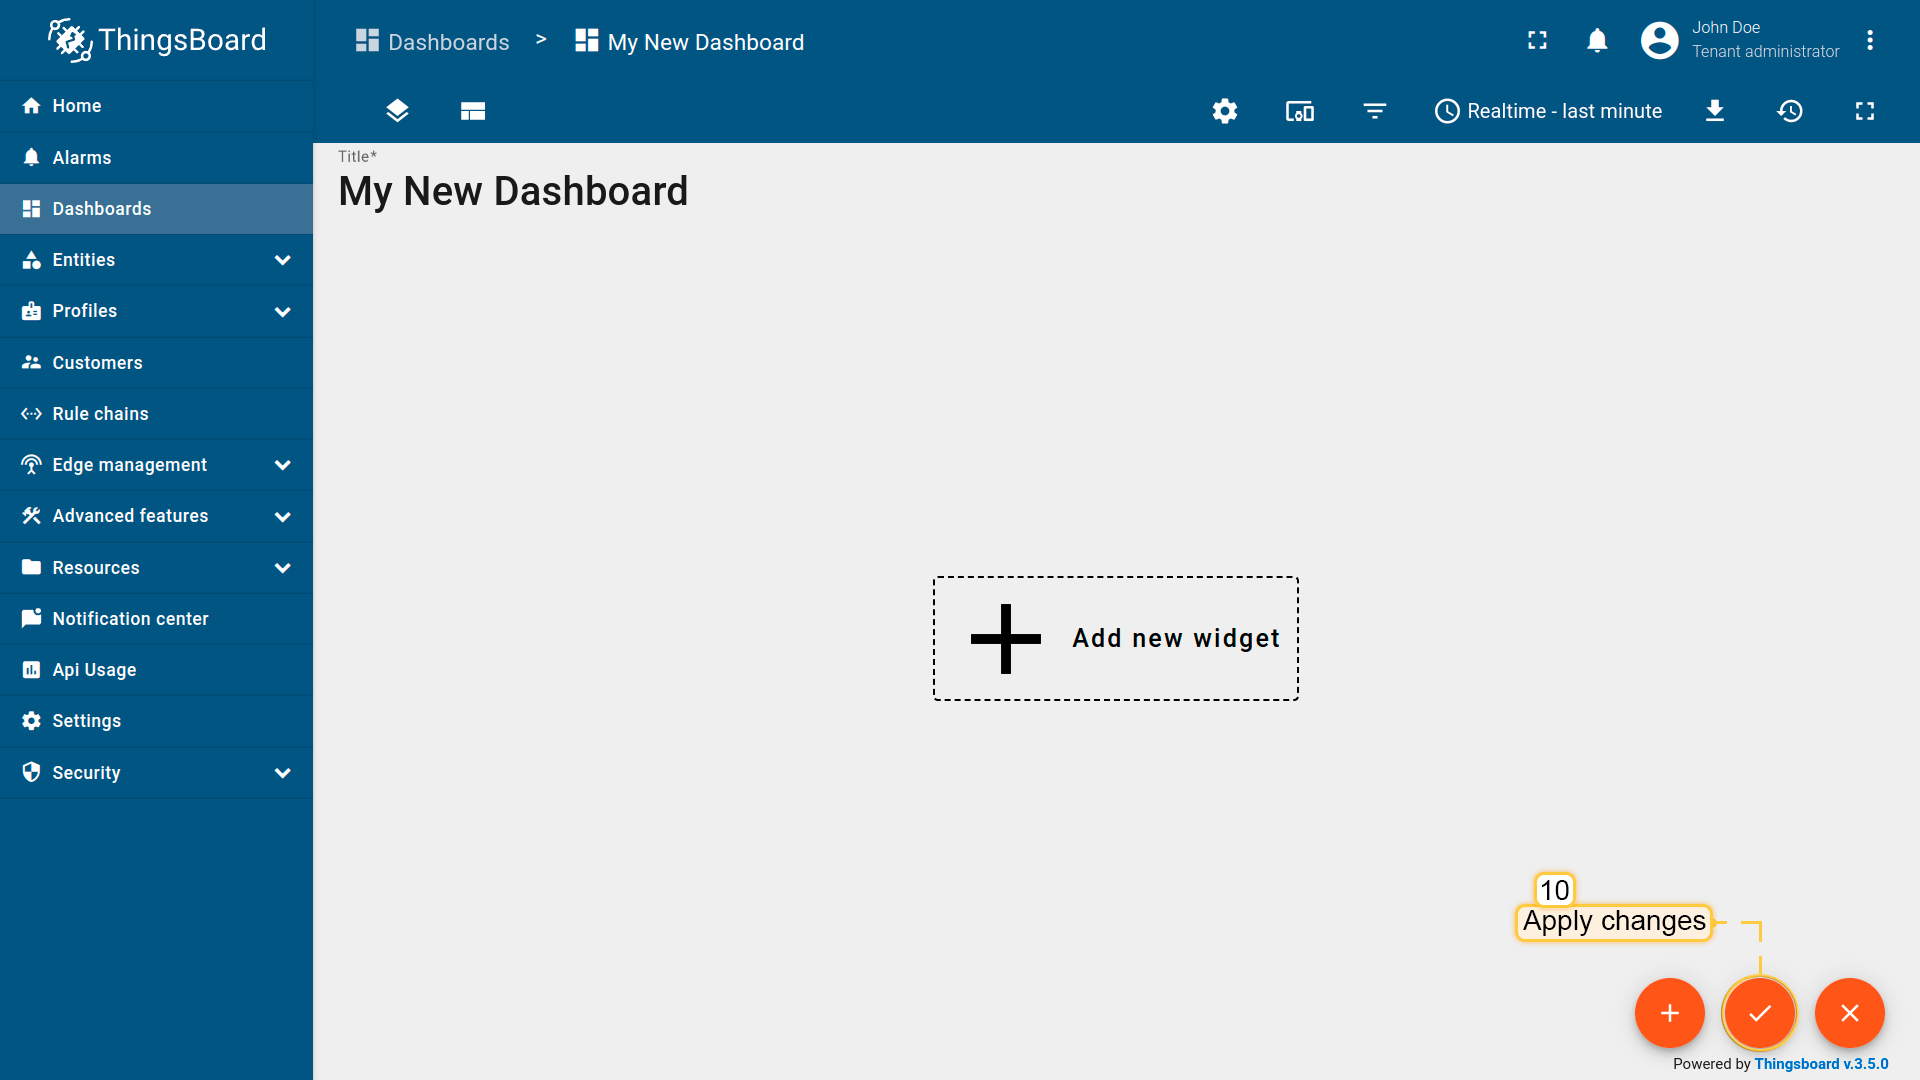 Finally, click “Apply changes” in the dashboard editor to save the changes. Then you should enter edit mode again. 要添加新部件,我们需要从部件库中选择。部件按部件包分组。 每个部件都有数据源,数据源决定了部件显示的数据。以查看在步骤 2 中发送的「cpu_usage」数据的最新值。
|
使用共享属性控制设备
请勿忘记在设备上创建共享属性 blinkingPeriod。
可通过共享属性更新功能修改闪烁周期。
该属性类型仅适用于设备,与服务端属性类似但有关键差异:设备固件/应用可请求共享属性值或订阅其更新。共享属性常用于存储设备配置。
运行本段代码建议使用Python 3.9或更高版本。
若尚未安装Python,请按以下步骤操作:
1
2
sudo apt update
sudo apt install software-properties-common
1
sudo add-apt-repository ppa:deadsnakes/ppa
1
sudo apt install python3.9
1
sudo apt-get install -y python3 git python3-pip
还需安装Adafruit-Blinka库,使用以下命令:
1
pip3 install Adafruit-Blinka
现在可以编写代码。本部分在 blink 函数中使用新包控制LED闪烁,
并通过 attibute_callback 在共享属性变更时被调用,最后在 main 中将其绑定到订阅者。
1
2
3
4
5
6
7
8
9
10
11
12
13
14
15
16
17
18
19
20
21
22
23
24
25
26
import digitalio
import board

...

# default blinking period
period = 1.0

# callback function that will call when we will change value of our Shared Attribute
def attribute_callback(client, result):
    print(client, result)
    # make sure that you paste YOUR shared attribute name
    period = result.get('blinkingPeriod', 1.0)

def main():
    ...
    # make sure that you paste YOUR shared attribute name
    sub_id_1 = client.subscribe_to_attribute("blinkingPeriod", attribute_callback)
    sub_id_2 = client.subscribe_to_all_attributes(attribute_callback)
    led = digitalio.DigitalInOut(board.PD14)
    led.direction = digitalio.Direction.OUTPUT
    ...
    led.value = True
    time.sleep(period)
    led.value = False
    time.sleep(period)
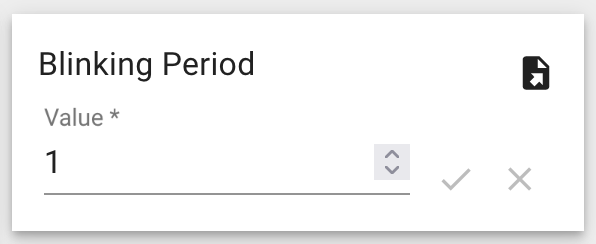
若使用导入的仪表板,可通过仪表板右下角的以下部件调整闪烁周期:
使用RPC控制设备
ThingsBoard 支持发送远程过程调用 (RPC) ,可在服务端应用与设备之间双向通信。 该功能支持向设备发送/接收命令并获取执行结果。
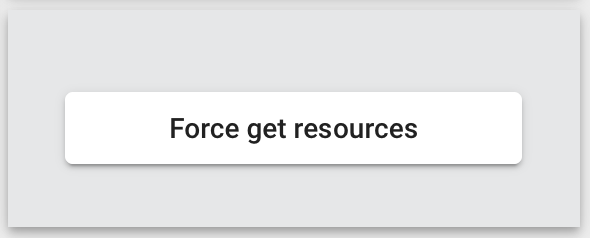
本指南将配置RPC命令以立即从OrangePI获取遥测数据。若使用导入的仪表板,则无需额外配置,仪表板已包含以下部件:
💡 若您创建新仪表板,可使用“RPC按钮”部件进行单向RPC通信,该部件位于“控制部件”组合中。
下面编写代码。 首先创建 rpc_callback 函数,在设备收到服务端RPC请求时触发。与共享属性示例类似,需在 main 中将该回调绑定到订阅者。
1
2
3
4
5
6
7
8
9
10
11
12
13
14
15
16
17
18
19
20
21
22
23
24
25
client = None

...

# callback function that will call when we will send RPC
def rpc_callback(id, request_body):
    # request body contains method and other parameters
    print(request_body)
    method = request_body.get('method')
    if method == 'getTelemetry':
        attributes, telemetry = get_data()
        client.send_attributes(attributes)
        client.send_telemetry(telemetry)
    else:
        print('Unknown method: ' + method)

...

def main():
    ...

    # now rpc_request_response will process rpc requests from server
    client.set_server_side_rpc_request_handler(rpc_callback)

    ...
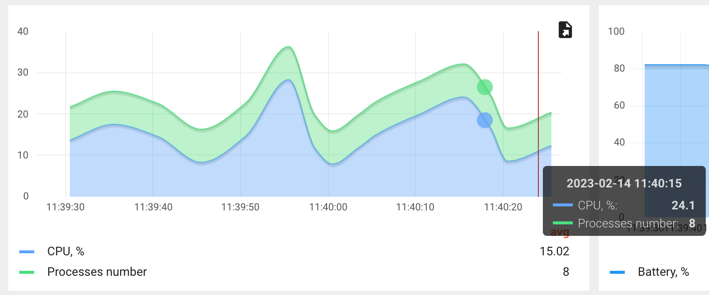
点击 RPC按钮 后,设备将立即发送遥测(CPU占比、进程数等)。 可在仪表板的图表中看到更新。
若操作正确,控制台将输出:
1
{'method': 'getTelemetry', 'params': {}}
总结
现在您可以轻松将NVIDIA Jetson Xavier NX Developer Kit连接到ThingsBoard并开始发送数据。
进一步了解可查阅ThingsBoard文档, 学习创建仪表板可视化遥测、 配置告警规则实时监控设备行为等核心功能。